3D Printing Terminology: All Important 3D Printing Terms

The world of 3D printing is full of acronyms and unusual words. Read on to learn about common 3D printing terminology!
3D printing can be a super fun hobby but also a difficult one to pick up, especially with the pseudo-science-y or industry-specific vocabulary. All those acronyms and terms can be intimidating!
But have no fear, a glossary is here! In this article, we’ll explain over 30 popular terms that you’re very likely to encounter on your 3D printing journey. For each term, we’ve provided a description that should help you understand the word and how it applies to the world of 3D printing.
Now, on to the terms!
Additive Manufacturing: FDM/FFF, SLA, SLS, & More
To start the list, additive manufacturing is the process of building up a three-dimensional object, layer by layer. In other words, it’s a fancier name for 3D printing, but the two terms can be used differently.
Additive manufacturing includes a number of different technologies. Among makers, the most commonly discussed ones are fused deposition modeling (FDM/FFF), stereolithography (SLA) – with LCD being the prominent desktop resin printing choice – and selective laser sintering (SLS). On the other hand, if you’re more interested in industry standards, there are also seven ISO designations.

Bed Leveling
Bed leveling is one of the least-liked yet most important aspects of the FDM workflow, as many printer issues stem from a tilted bed. Bed leveling refers to adjusting a 3D printer’s build plate to make it level relative to the nozzle.
There are a few ways to level a bed, such as manually (with knobs), automatically (e.g. with the CR Touch or BLTouch), and via machine assistance, which includes mesh leveling. In recent years, many 3D printers come with auto-bed leveling.
Bowden Extruder & PTFE Tubes

A Bowden extruder is one of the two extruder types for FDM printers, and it means that the extruder isn’t mounted on the printhead alongside the hot end. To bridge the gap, this setup incorporates a Bowden tube, which is a long sleeve typically made of PTFE (Teflon) material.
The name comes from Bowden cables, which aren’t originally from the 3D printing industry but are responsible for transferring movement in particular mechanical apparatus. They’re used in bicycle breaks, photographic shutter release cables, and even in drum kits, just to name a few.
Bowden tubes are almost always made of PTFE material. However, the term “PTFE tube” needn’t necessarily refer to a Bowden tube. In direct extrusion setups, for example, the short tube inside the hot end is often made of PTFE but is not a Bowden tube.
Although not a guaranteed problem, the probability of issues with flexible filament can be higher with a Bowden setup. This is often because of the wider gap between the tube and the hot end, where flexible filament has been known to bunch up instead of smoothly passing through. Recent models of printers with Bowden setups have addressed this issue by minimizing the gap. Yet, some makers still report worse-than-usual stringing and retraction issues with flexible filaments.
Bridging
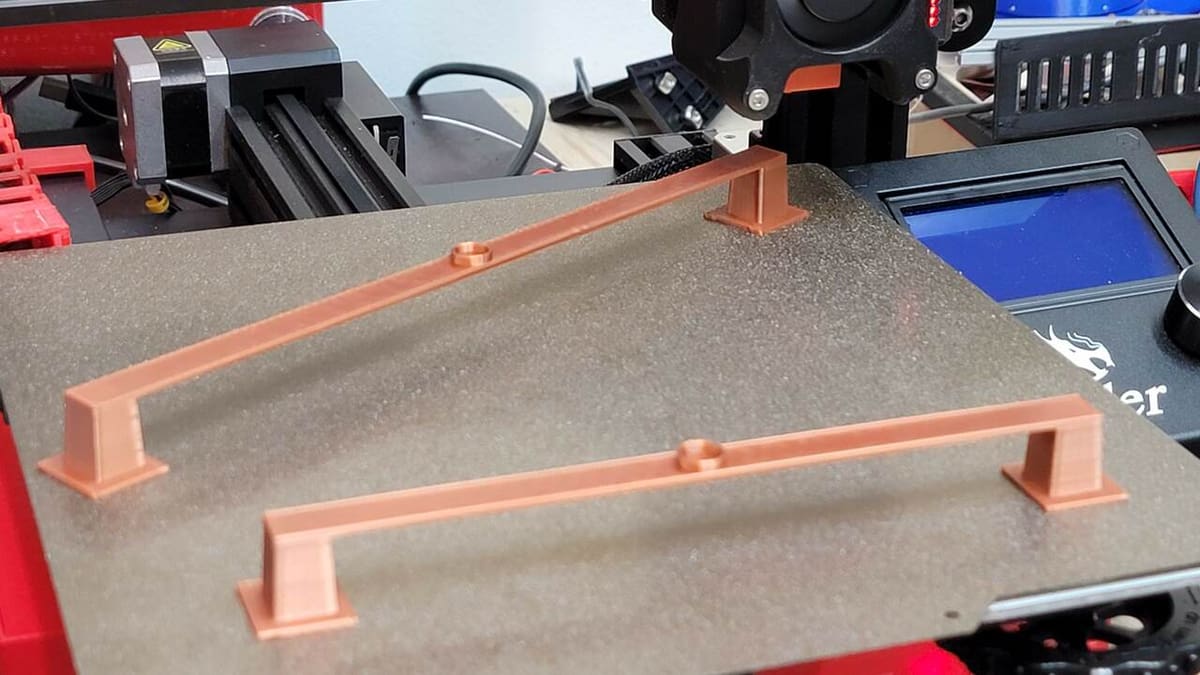
Bridging refers to 3D printing horizontally from one isolated point directly to another with no material supporting it. There are, of course, limits to how far a 3D printer can bridge, but the distance can be improved with adjustments to settings.
Cooling is crucial for bridging, so cooling fan speed should be increased. The exception is materials like PETG, which is weakened by high fan speed values, or materials that are susceptible to warping, like ABS. Additionally, print speed should be reduced and printing temperature lowered so that the plastic can quickly cool once extruded.
The printer itself can also effect bridging performance, especially the cooling fan duct. A duct that is not always reliable, such as the one on the Ender 3, would not cool a part quickly and make bridges sag. Filament that has absorbed moisture will also display poor bridging, so ensuring filament is dry is important for success with bridging.
In order to figure out what length a 3D printer can bridge, a test model can be used. A general rule of thumb is a distance of 5 mm or less will be accurate, and longer than that will droop to an extent. In the end, it’s a good idea to figure out how far your printer can bridge so that you can avoid using unneeded supports, speeding up the printing process.
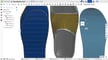
Computer-Aided Design (CAD)
Computer-aided design (CAD) is a technical modeling process that can be used to design parts before 3D printing. CAD is also used in other industries, such as engineering and architecture, among others.
There are two main types of CAD software: 2D and 3D. And within the latter category, there are three further classifications of 3D CAD: wireframe modeling, solid modeling, and surface modeling. Solid modeling is the type of 3D CAD used most often in connection to 3D printing, as it’s ideal for creating real-world functional parts.
Within surfacing modeling, sculpting is popularly used to create organic shapes like animated characters. If you’re looking for a sculpting tool, FreeCAD includes a few, but Blender is also free and more geared for sculpting uses.
There are a variety of different CAD programs out there for all budgets and levels of experience. You can start learning CAD today with free software meant for beginners, such as Tinkercad.
If you’re more of an intermediate-level designer, Fusion 360 is a great option and offers both free and paid packages. More professional CAD programs, such as AutoCAD and SolidWorks, can be costly but usually contain many more features and tools.
Curing
In 3D printing, curing is the process of UV light turning liquid resin into a solid state of matter. When directed at photosensitive resin, UV light causes chemical bonds to form, which hardens the resin. This process mainly takes place during resin printing, like SLA, DLP, and LCD.
Normally, one should also post-cure a model using an alternative UV light source to further strengthen it after printing. Post-curing an SLA, DLP, or LCD printed part involves exposing it to UV light, such as in a cure station or the sun.
Direct Extrusion

In FDM printing, a direct extruder setup is the opposite of a Bowden setup, where the extruder sits on the print head, directly above the hot end. This setup typically results in fewer mechanical issues, but due to the added weight, the carriage can experience more vibrations, leading to minor inaccuracies or artifacts in poorly optimized printers.
Having a direct extruder is also commonly said to be better for flexible materials like TPU. This is because the gap between the extruder and the hot end (or the tube inside the hot end) tends to be smaller, making it less likely for the filament to bunch up.
Dual Extrusion
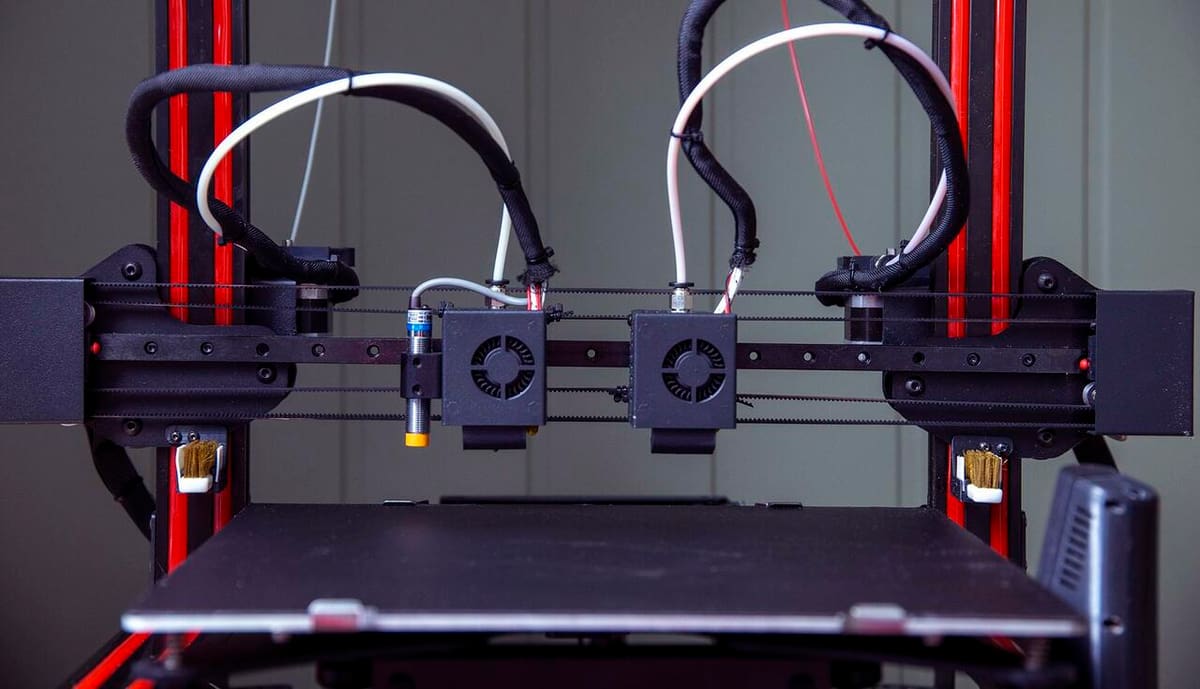
Dual extrusion is a system that allows 3D printers to use two filaments in the same print for applications such as multicolor prints, soluble supports, or multi-material prints.
There are several different kinds of dual extrusion systems, including IDEX, which features two independent printheads on the same gantry. A dual hot end system has two nozzles in the same printhead, while the “mixing” system has two (or potentially more) Bowden tubes leading to the same nozzle.
In addition to 3D printers that come with dual extruders, there are numerous upgrades for single extruder printers. Among these are DIY solutions, and there are also premade units like the Mosaic Palette 3 that allow any printer to print with multiple colors. These dual extrusion systems open new possibilities, such as prints reinforced with stronger materials or display pieces with multiple colors, and prove quite useful.
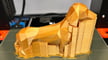
Elephant's Foot
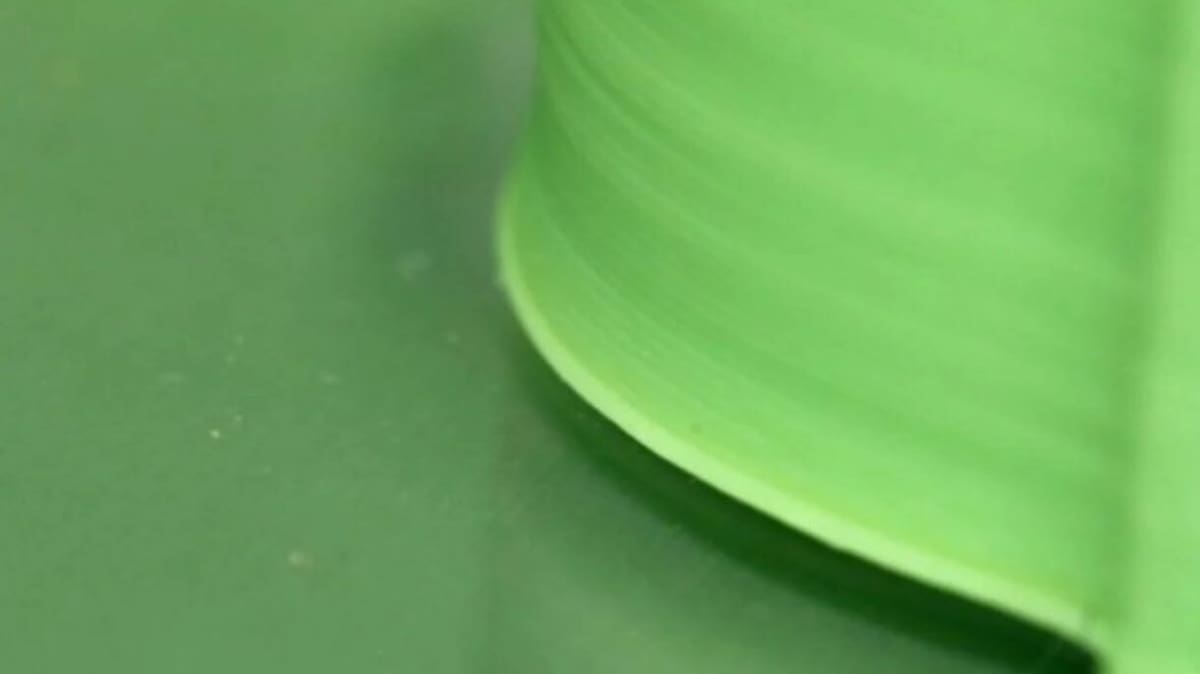
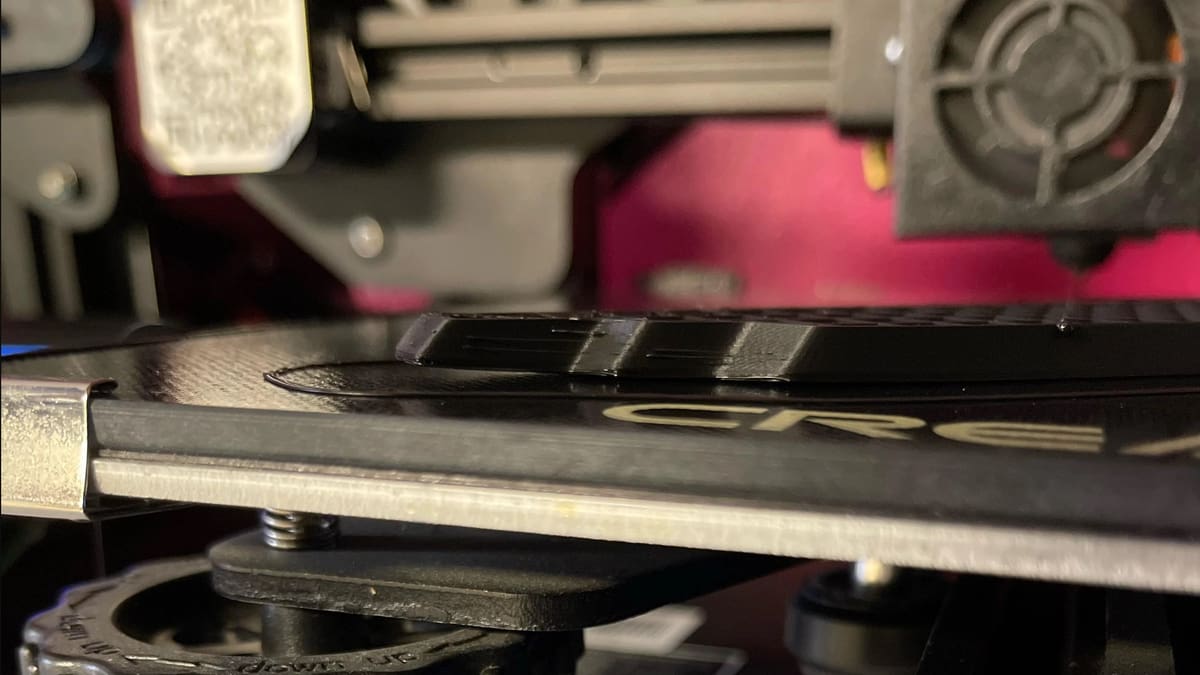
Elephant’s foot is an FDM 3D printing issue that causes the first layer (or the first few layers) to be wider than desired. By this, we mean the region of the part touching the print bed extends past the intended boundaries, as seen in the image above.
There are a few different reasons this problem can arise, but the main one is that the first layers are squished too much, both by the nozzle as it attempts to “stick” the first layer to the bed and by the pressure of the rest of the model.
Releveling the bed (see above) and establishing a good first layer height should fix the issue. In many cases, it can be further reduced by adjusting settings like bed temperature and cooling fan intensity. Otherwise, printing your part on a raft should completely negate the problem.
Enclosure
An enclosure refers to a container that provides a controlled environment in and around a 3D printer. While most FDM hobbyists don’t have or need one, accurately printing with more temperamental materials, like ABS or ASA, requires the use of an enclosure.
Enclosures offer several benefits, but the main one is to stabilize the ambient temperature.
When it comes to resin-based printing, enclosures are a must, but it’s unlikely that you’ll find a printer sold without one.
Extruder, Hot End, & Nozzle
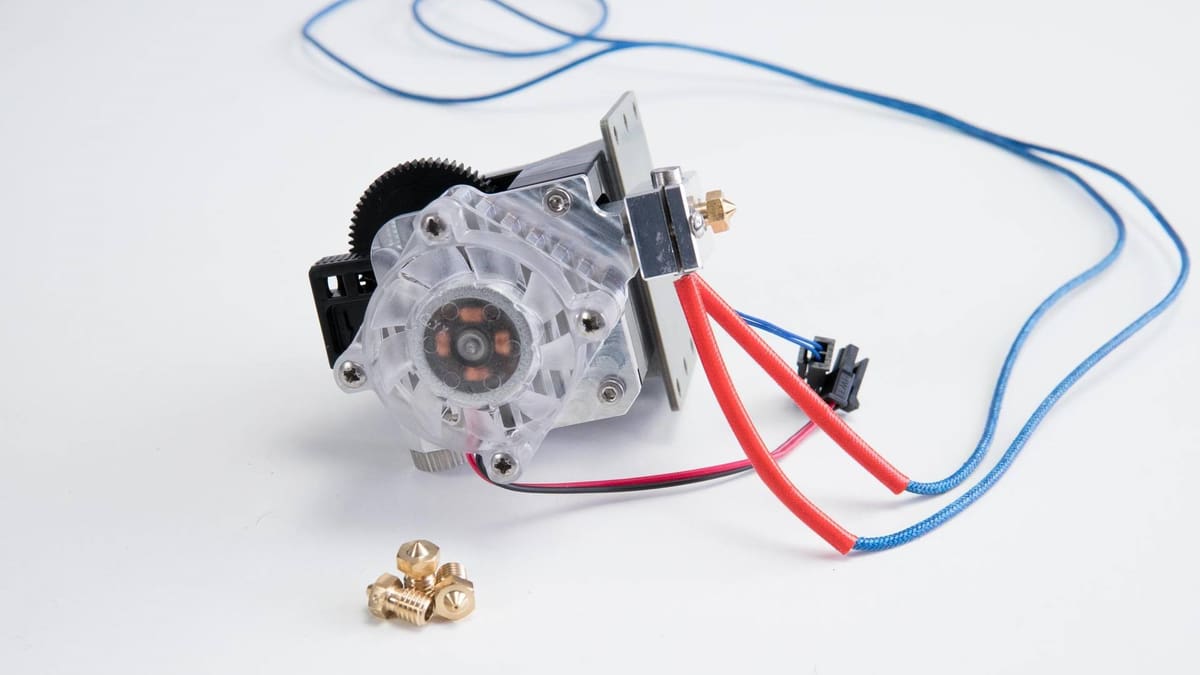
All FDM printers have at least three things in common: an extruder, a hot end, and a nozzle.
An extruder is a motor with gears that pushes filament toward the printer’s hot end.
A hot end consists of a throat, heat break, heat block, and more depending on the specific hot end. The hot end uses a heating cartridge to heat the filament, which travels through the hot end’s throat.
A nozzle is the small piece of hardware that screws into the hot end and is where the filament goes through last. The nozzle reaches high temperatures by absorbing the heat produced by the hot end. Once the filament hits the nozzle, the melted material is pressed through the small hole at the nozzle’s tip and extruded.
The printhead is the assembly of these components, and it moves on all three axes in order to trace layers of extruded plastic. In addition to the hot end, nozzle, and extruder (in the case of a direct extruder), the printhead also includes the part cooling fan, shroud, and hot end fan.
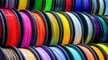
Filament: PLA, PETG, ABS, & More
Filament is the fuel for an FDM 3D printer, and nowadays, there are a plethora of available materials that you can 3D print with. The most popular is polylactic acid (PLA), known for its ease of use but relative lack of strength and resistances.
Other popular materials include acrylonitrile butadiene styrene (ABS) and polyethylene terephthalate glycol-modified (PETG). They yield more durable and robust prints but are harder to print with.
Firmware/Software
Firmware, in the case of 3D printers, can be understood as the step between software and hardware: it reads G-code (see below) and “tells” the machine how to move. There are a few options to choose from if you want to change your printer’s default firmware, with perhaps Klipper and Marlin being the most popular. The main benefit of doing so is to take advantage of newer printing features, which firmware must support. (For example, many older printers’ firmware doesn’t support the code for pausing mid-print.)
Marlin can also be used for CNC machines. When it comes to these, there are also different stages that lead up to the final results, and you can find programs for each step or look for all-in-one options.
G-code
G-code is the language through which a 3D printer (and most CNC machines) is controlled. A G-code script can be described as a list of commands for a machine that instructs it to perform actions like moving components, extruding filament, and so on. While most makers don’t directly interact with G-code, every time you set a temperature, move the nozzle, or start a print, you’re sending G-code commands to your printer.
For an example of a G-code command, “G1” activates linear movement. This means that, when you set a position, the extruder will move directly to that point. Another example is “G92”, which sets the nozzle’s position (e.g. G92 X10 Y10 Z10).
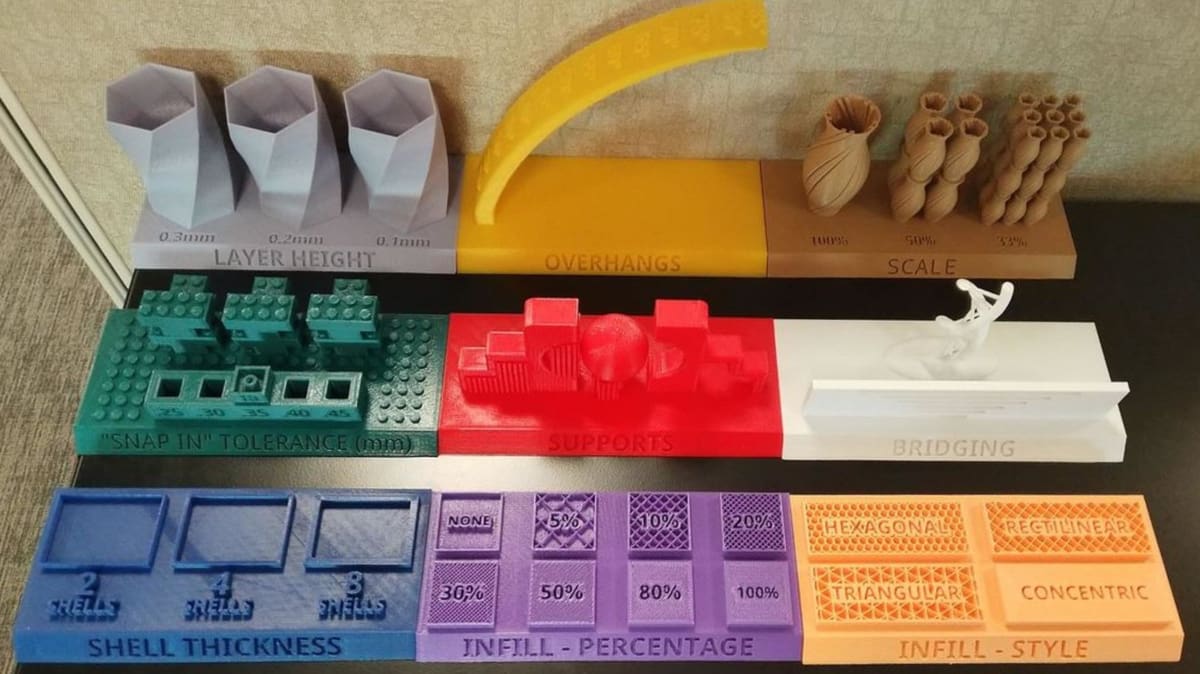
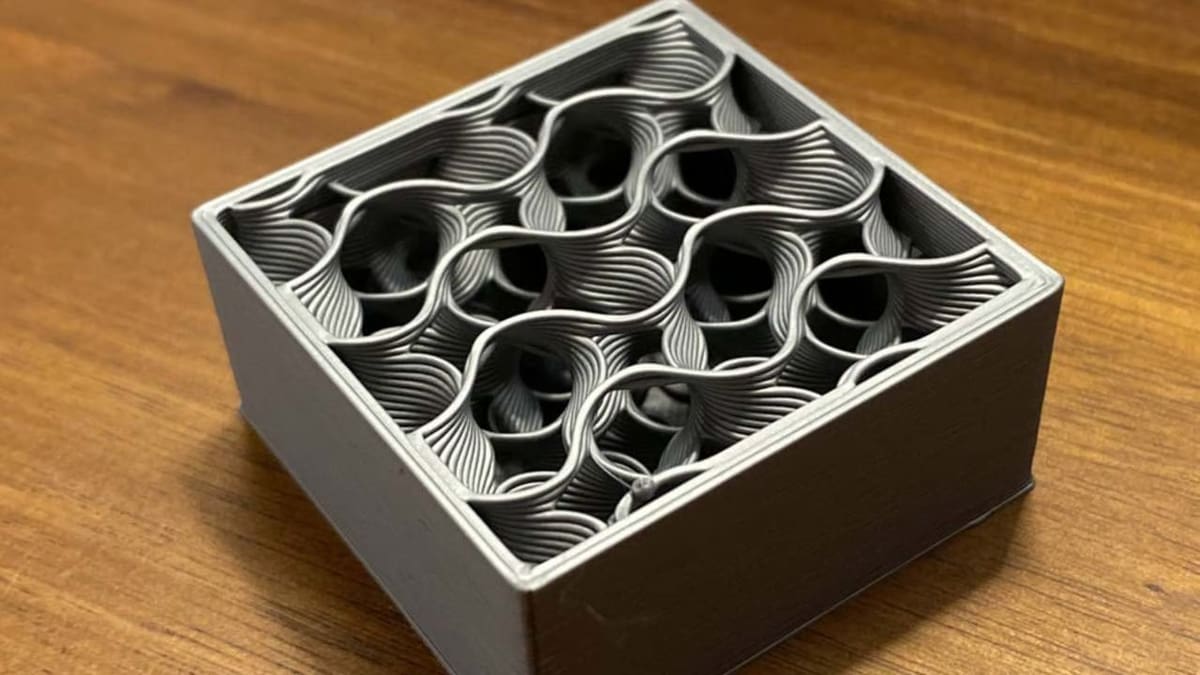
Infill
In contrast to shells or perimeters, which form the outside of a printed part, infill refers to the interior. Infill can be controlled with two main slicer settings: pattern and density.
Pattern refers to the shape and structure of the infill. Depending on your slicer, there can be several different infill patterns, such as lines, zig-zag, honeycomb, cubic, and gyroid. Infill patterns have different advantages and disadvantages concerning time to print, strength, and flexibility.
Density is the percentage of how full a part’s interior is, and ranges from 0% (hollow) to 100% (solid). For the majority of prints, you can use an infill between 15% and 40% to achieve a balance between print time, material usage, and strength.
Interface Layer / FEP Sheet
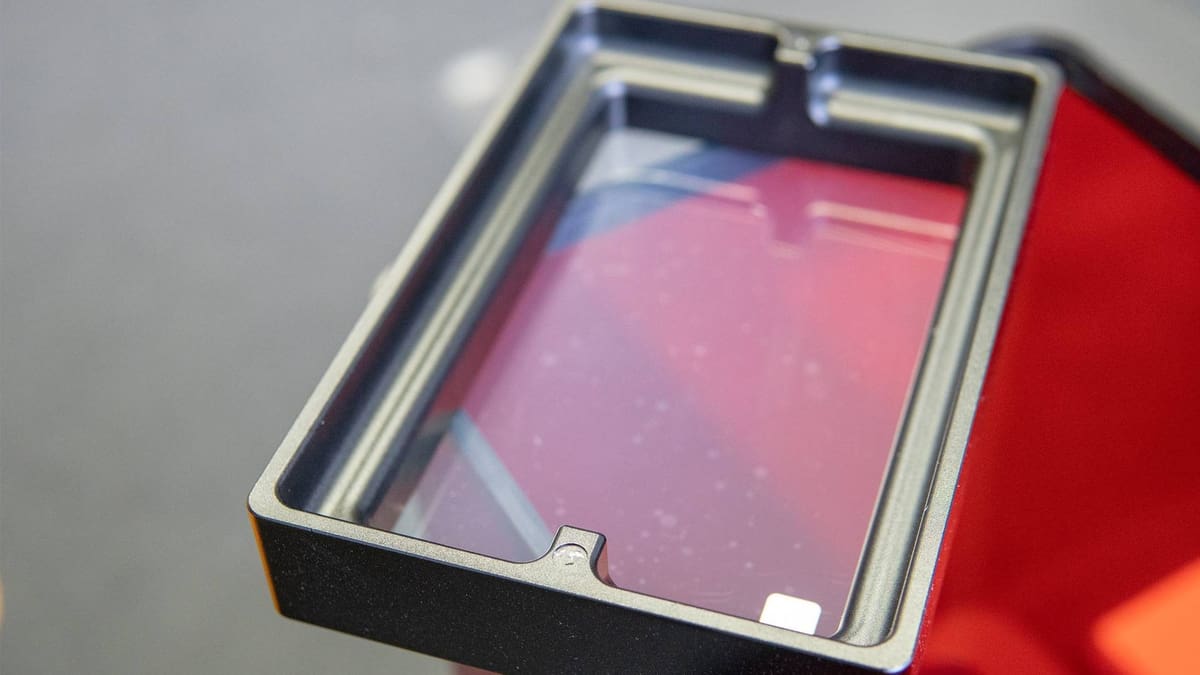
The terms “interface layer” or “FEP sheet” are used in the context of SLA, DLP, and LCD printing. They refer to the double-layered and transparent film lining the bottom of a printer’s vat. An FEP sheet allows the UV light to cure the resin material while printing correctly.
After extended use, you should replace the FEP sheet, as using a deformed film can lead to printing issues or low-quality prints.
Layer
FDM 3D prints are made of many layers built cumulatively that consist of concentric walls filled in with skin or infill. The height of the layer is adjustable, with larger layer heights resulting in faster printing but loss of detail in the form of more visible layers and stepping. This is where adaptive layers come into play, as it uses tall layers on sections of a print with little detail and small layers where larger layers would result in ugly stepping. While not necessary all the time, this setting is great for large aesthetic prints.
There are different kinds of layers in different areas of the print. Initial layers are closest to the print bed and are crucial for the success of the print. Initial layers need to properly adhere to the bed, something that’s reliant on bed leveling and ensuring the nozzle is the proper distance from the bed. Other methods for ensuring an issue-free first layer include increasing initial layer temperature, applying adhesive to the bed, and/or regularly cleaning the build plate. Similarly, adhesion between layers is important, as a weak bond from insufficient hot end temperatures or low flow rates can result in failures such as delamination, making a part unusable.
Generally, the bottom layers as well as the top layers are solid and recommended to be about 0.8 mm thick, so as to seal off the infill and provide strength. Sometimes the amount of the bottom and top layers need to be increased to improve strength or cover artifacts from infill, such as pillowing. Other artifacts on the top layer, such as scarring or bulges, can be fixed with settings such as ironing or monotonic layer, which help create an even top layer.
Layer Cure Time
Layer cure time also has to do with LCD and DLP (but not SLA) processes. It describes the amount of time each layer is exposed to the UV curing light on a printer.
Layer cure time can typically be controlled in your slicer and measured in seconds. A longer layer cure time normally results in a stronger print.

Layer Height

Layer height is – you guessed it – the height of each printed layer. Here, there are many considerations depending on the type of technology you’re using, the material, the corresponding settings, and the object that you want to print.
The higher or taller the layer, the more visible it will be, which may give it a rugged or unpolished look.
Resin printers yield smaller layer heights, measured in microns, which is why they’re often better for more detailed pieces. FDM printers offer a range of layer heights, and depending on the machine itself, the minimum may be 0.05 mm or 0.08 mm. However, the smaller the layer height in FDM prints, the more time the printing process will take.
Overhangs
3D printers are incredibly precise machines, but this doesn’t mean they can print everything. Certain parts on 3D models are angled outward too far beyond to be cleanly printed. These angled parts, which are measured from the Z-axis, are called overhangs. Overhangs aren’t an inherent issue, but extreme angles cause layers to droop as there’s nothing below to support it, causing dimensional and aesthetic problems. These can, however, be improved by changing some settings.
Perhaps one of the most important settings for printing overhangs is cooling fan speed. Except for special cases (such as PETG or materials inclined to warp), the cooling fan should be turned on for printing overhangs, with a higher percentage generally producing better overhangs. Print speed should also be taken into account, as slower speeds will allow plastic to cool quickly once extruded. A lower extrusion temperature will also help with this, as the thermoplastic will take less time to cool to a hardened state. Finally, a thicker layer height will have more rigidity and tend to sag less.
While printing overhangs is necessary, in some cases, 3D models can be designed with shallow angles so that they print better. In order to find what angles can be printed cleanly, a test 3D print can be used. These models have varying angles, demonstrating what overhangs can be printed. Typically, angles below 45° will print best and anything beyond this will need support to produce accurate results, although a well-tuned machine may have a higher threshold. Angles as steep as 90° can even be printed, though this is only possible with experimental Arc Overhangs, which are susceptible to warping and only available on PrusaSlicer.
Post-Processing
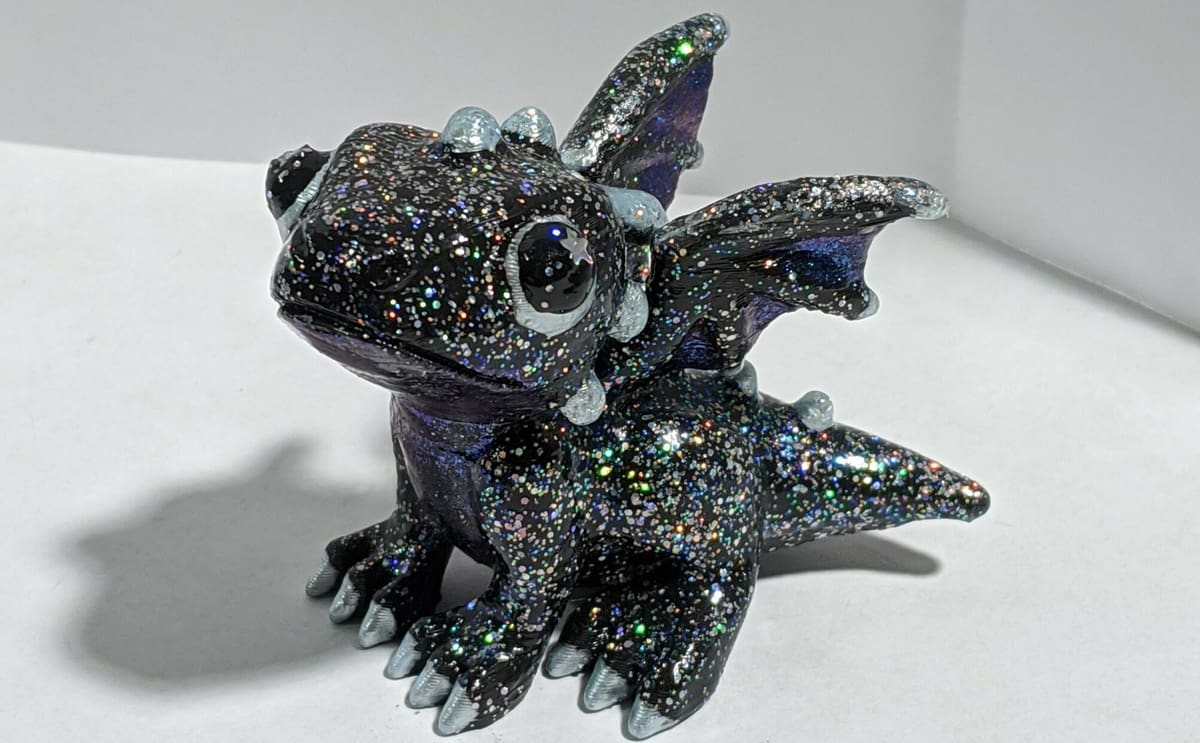
Post-processing, when discussing 3D printing, refers to the modification of prints after they’ve been printed. Importantly, there’s a big difference between post-processing for FDM prints and post-processing for resin prints.
Nevertheless, post-processing can include many different procedures, including sanding, painting, layer smoothing, and more. Many cosplay enthusiasts, for example, use post-processing to make 3D printed parts look like they’re made of other materials, such as metal or wood.
Print Bed / Build Plate
The print bed or build plate is what supports a model while it’s being printed.
FDM print beds are typically multiple-part assemblies, which include movement mechanisms (e.g. linear rail mounts), heating elements, and flat build surfaces. Many enthusiasts like to customize the latter by selecting a specific material (glass, polypropylene), style (smooth, textured), and size. That said, other solutions can also improve the effectiveness of a print bed and therefore the quality of the first layer. Common ones include glue, tape, and hairspray.
Meanwhile, most resin printers employ a single, solid part as the build plate.
RepRap
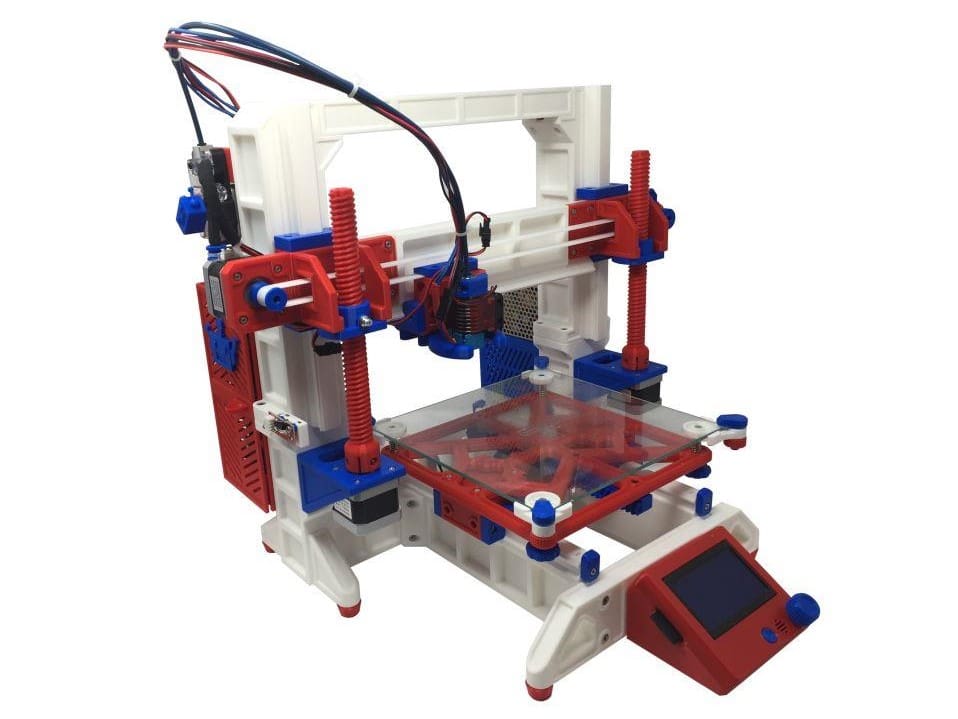
RepRap is an abbreviation for “Replicating Rapid Prototyper”, which is an initiative started in 2005 to make low-cost, open-source, mostly self-replicating 3D printers. The RepRap project was largely successful in its mission, with many of the machines that came out of it seeing further development, like the Prusa i3 and the RepRap Mendel.
Along with completing its goal, the RepRap project directly led to a boom in 3D printing. It helped spread 3D printing worldwide and sparked hope for a new method of manufacturing. Now, RepRap is often used to refer to many different things that the project has inspired and created.
Resin (Photopolymer) & Vats
Photosensitive resin is the raw material used by SLA, DLP, and LCD printers. It’s a gooey liquid substance that’s cured with UV light to form solid parts. As with filaments, there are numerous types of resins. Some popular resins include general-purpose, strong, flexible, and castable.
If resin is the filament of a light-based printer, then the vat is the spool. The vat, or tank, is where the resin is stored.
One of the most annoying tasks for owners of LCD, DLP, and SLA printers is cleaning the vat. After a print is completed, leftover resin can potentially harden if exposed to light. That’s why you should always empty any remaining resin and clean the vat because, once resin hardens, it’s extremely difficult to remove.
Retraction
In FDM 3D printing, retraction is the extruder reversing the direction of the filament (i.e. pulling it away from the hot end). Typically, this is done in short bursts between consecutive instances of extrusion. Among other things, adjusting the retraction setting is a great way to prevent stringing.
Specifically, retraction can be managed in your slicer by changing the retraction distance and speed. Retraction distance controls how far the filament is pulled back, while retraction speed controls how fast.
Retraction differs between printers, but it should be similar depending on the setup of your extruder. If you use a direct extruder, your retraction length and speed should be shorter and slower than what you would use for a Bowden setup.
Skirt, Brim, & Raft
These terms refer to common non-support “extras” that can be printed to improve first layer quality and adhesion. They can be activated and adjusted via a slicer.
A skirt is a detached perimeter that surrounds your model. A skirt provides no benefit to bed adhesion, but it acts to “prime” the nozzle before the actual printing of your model begins and helps confirm that the bed is level.
A brim is a multi-line skirt that extends from the base of the part to be printed (i.e. the two are connected). A brim, which is meant to be removed after printing, provides added adhesion without wasting too much filament or time. It can also be an effective solution against warping.
A raft is a 3D printed platform upon which a part is printed. Its role is to effectively eliminate any problems that might occur between the part and the print bed. Of these three options, a raft uses the most filament and takes the most printing time, but it’s also the most effective.
Slicer
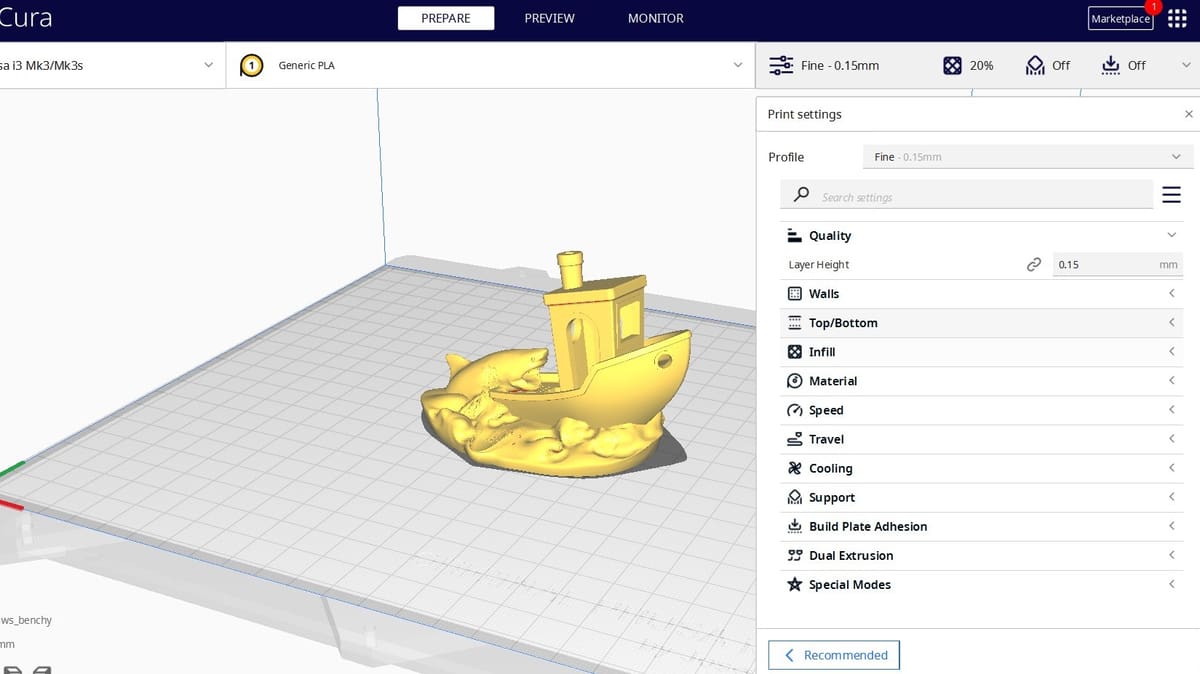
A slicer is a program that turns a 3D design into a list of commands that a printer uses to print a model. Without a slicer, your 3D printer can’t print; it needs instructions in the form of G-code.
There are many different slicer programs that you can use (Cura, PrusaSlicer, and Simplify3D being some of the most popular for FDM, and ChiTuBox and Lychee for resin-based printing), and they each have different adjustable settings.
Slicer settings allow you to control how you want your part printed. You can use and change slicer settings to fix many printing issues, such as warping and stringing.
Once you have dialed in slicer settings, you can save them as a profile. Seeing as there are so many settings, this can be a little difficult, but using profiles simplifies the process as you can switch between filaments or applications without having to change every setting individually, allowing for experimentation.
STL & OBJ Files
STL and OBJ files are two common 3D model file types used to store 3D printable models. When one finds a design on the web, it’s usually best to download it in one of these two file types, as most slicers are able to import them.
Supports
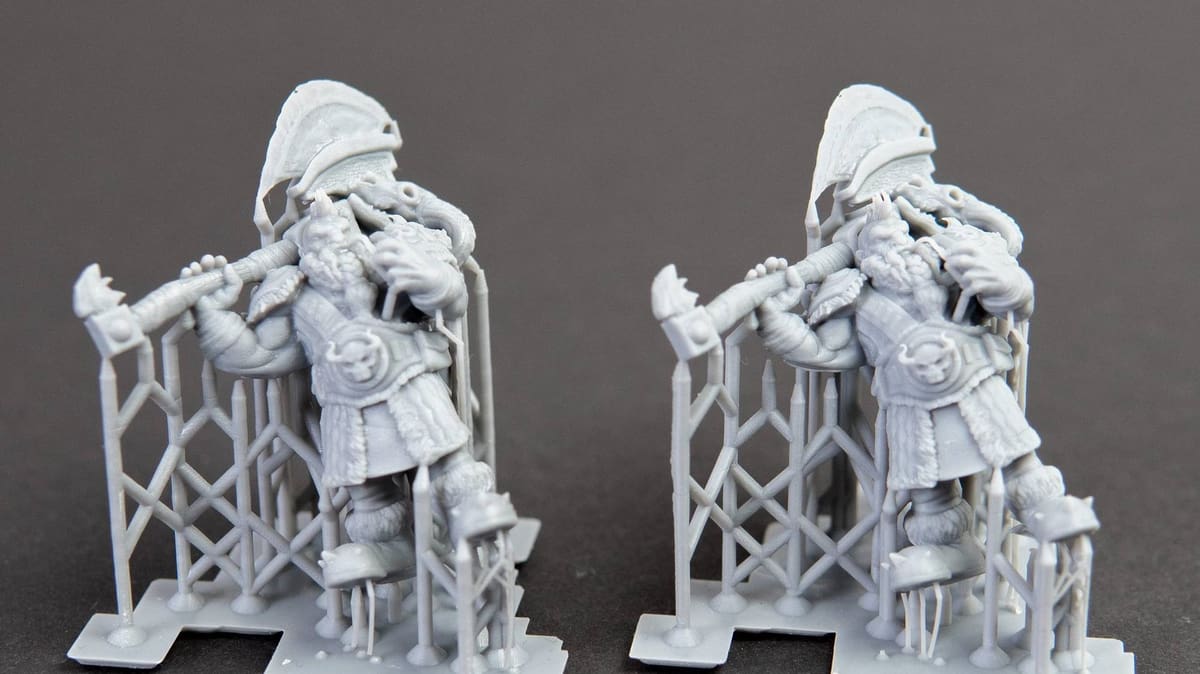
Supports are another option that you can activate in your slicer when choosing how you want a part printed. Supports increase how much material is used, but also allow you to print parts with overhangs. A basic example of when you would need overhangs is if you were printing the letter ‘T’ standing up.
That said, you can also print overhangs without supports. They’re not necessary, but depending on the shape, infill density, and other aspects, they can help ensure that the parts will be printed with no issue.
You can adjust where and how you want supports printed in your slicer by setting a maximum overhang angle, infill, and so on. Supports have a set structure and can be removed by hand or with hand tools such as pliers.
Thingiverse, Printables, & More
Perhaps you want to design a model before printing it. Or perhaps you don’t want any of the hassle and simply want to download, slice, and print. In this latter case, there are plenty of sites that offer free models, with some, like Cults, also listing designs that can be purchased.
Thingiverse, Printables, MyMiniFactory, and Cults are among the most known, but depending on what you’re looking for, it’s good to know where to search. Be it 3D printed dice, action figures, tabletop games, statues, or anime figures, among many others, you’re sure to find a site or two – or five – with models ready to slice and print.
Upgrades & Mods
There’s a wide range of 3D printer models, both in terms of their technology and price point. When you’ve got a hobby setup, chances are you’ll find something that can be improved upon. While this isn’t very common for resin printers, as they usually come with everything you need to cover all the basics, there’s almost always something that you can tinker with on your FDM printer.
Some of these are items that you can purchase to make the actual 3D printing better, like a different bed to improve adhesion, while others can help with the overall experience, like adding OctoPrint.
There are purchasable options, but some upgrades and mods can also be created at home with a few LEDs, bolts and nuts, or some IKEA products. It’s worth noting that not all upgrades and mods work for all printers. For example, certain series of printers can add improvements over previous models, which can be seen in Creality’s Ender 3s.
Warping
Warping is a common FDM issue, where part of a print’s base lifts off the print bed. In other words, warping occurs due to differences in temperatures between layers, but this effect can be worsened due to a number of factors. As such, there are a number of solutions that can help reduce warping. Some of the most common include better controlling the ambient temperature (i.e. with an enclosure), activating a brim or raft, or using an adhesive on the print bed, like glue or hairspray.
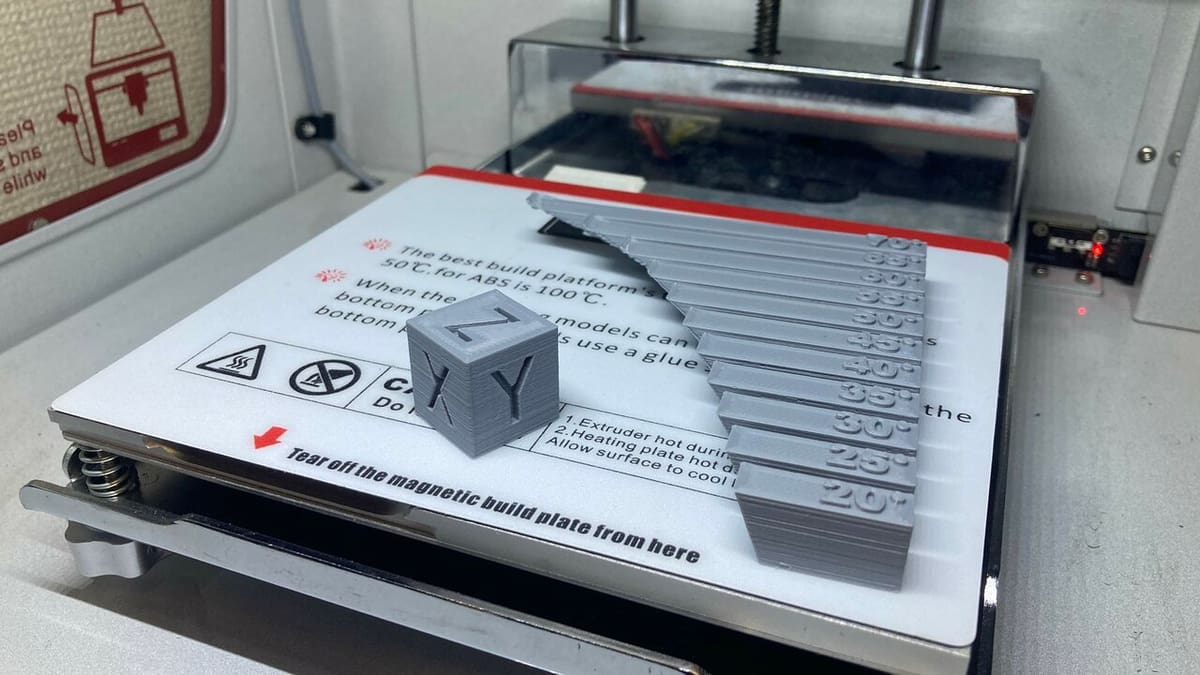
X-, Y-, & Z-Axes
Technically speaking, the X-, Y-, and Z-axes are the dimensions in which a 3D printer prints. That said, the terms are often used to refer to specific movements or components that move in the corresponding directions. They’re also often used in combination with other words, for example, the X-gantry refers to the gantry that moves along the X-axis.
Gantries are the frame assemblies that allow the XY movement that supports the printhead (or printheads). These allow linear movement by utilizing V-extrusions and bearings, linear rails, or sliding rods to achieve this.
Z Offset
Makers know that one of the most common – and irritating – issues when 3D printing on FDM machines has to do with bed adhesion. This may be affected by the type of filament and material of bed, the bed not reaching the appropriate temperature, the print speed, needing to level or clean the bed, or the Z offset, among a few more reasons.
The Z offset is the distance between the nozzle and the Z home position. While it’s not usually necessary to check this, if the bed material is changed for a thicker one (e.g. glass), some adjustments might be necessary.
Adjustments to the Z offset can also be made during a print with Baby Steps, which fix initial layer problems. Through a 3D printer’s user interface, the nozzle can be raised or lowered so that the first layer makes firm contact with and adheres to the print bed, but the nozzle does not scrape it.
Even if it’s not the most common issue that may come up, it’s still a term worth knowing, especially if you need to work on it.
License: The text of "3D Printing Terminology: All Important 3D Printing Terms" by All3DP is licensed under a Creative Commons Attribution 4.0 International License.