3D Printing Overhang: How to 3D Print Overhangs

A necessary evil for makers is 3D printing overhangs. Learn all of our tips and tricks for mastering extreme 3D printing overhangs!
We’ve all been there – scratching our heads at a print with an ugly, drooping overhang. It’s the bane of all designers who work in fused deposition modeling (FDM) 3D printing: the underside of a slope, printed in midair without any direct support.
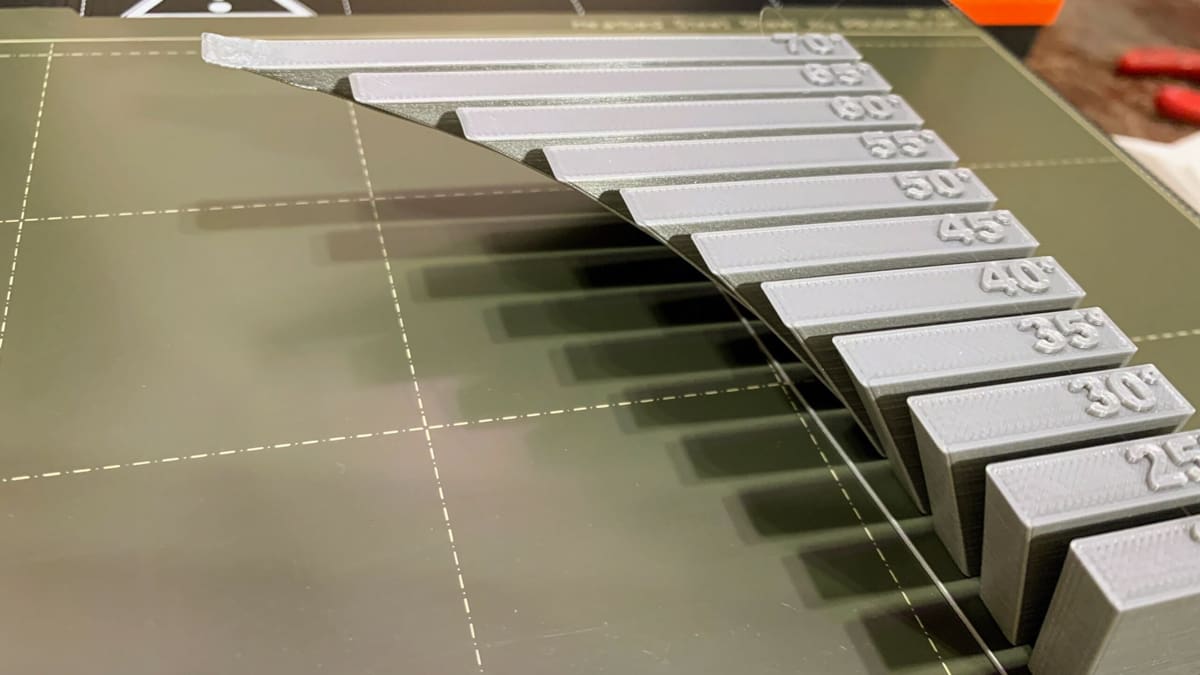
Overhangs arise from the common layer-by-layer approach in 3D printing. When you get to the underside of a slope, each subsequent layer must protrude slightly beyond the layer before it. This is where things can get messy: Some of the plastic extends into thin air, and gravity will start to pull it down. Depending on the angle of the slope being printed, we can characterize the overhang as being printable or extreme.
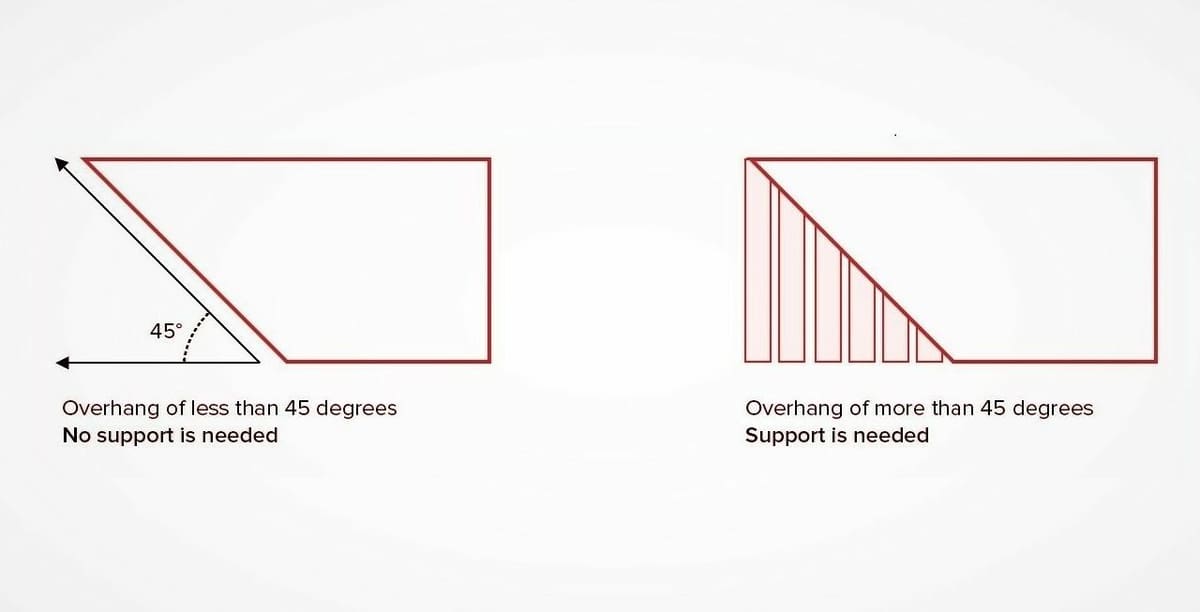
The 45° rule is a handy way of understanding overhangs. This rule states that slopes less than or equal to 45° can be printed cleanly; anything steeper may require supports. Supports aren’t ideal, as they can mar prints, increase hassle, print times, and material consumption, as well as even limit printable geometries (e.g. internal cavities).
In this article, we’ll take a look at how you can avoid potential issues while printing overhangs. As an added bonus, we’ll show you ways to bypass overhangs, if necessary. By the end, you’ll be well-equipped to tackle extreme slopes with confidence.
But let’s get started by going a bit deeper into the problems to avoid.
Drooping & Curling
Of course, the 45-degree rule mentioned is more of a guideline. For most modern printers, it even leans toward the conservative side. As cooling solutions and slicing software have improved, so have our abilities to accurately and cleanly produce steep overhangs.
But what happens when you print an overhang that’s too steep? The result is typically one of two problems:
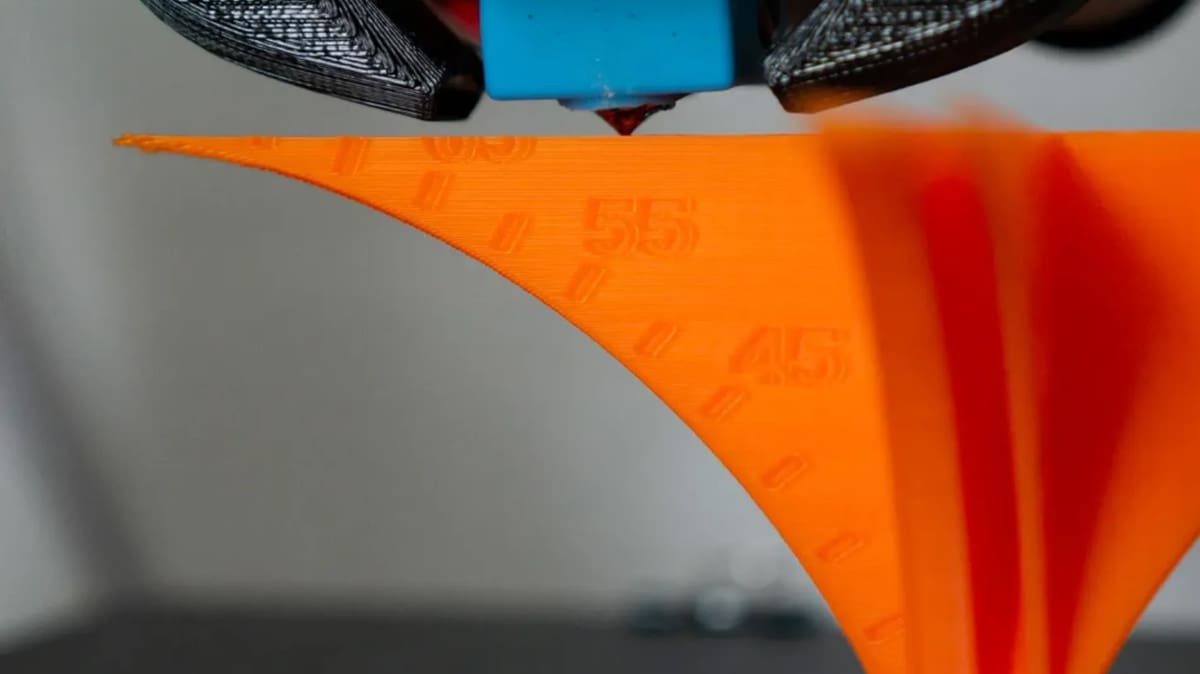
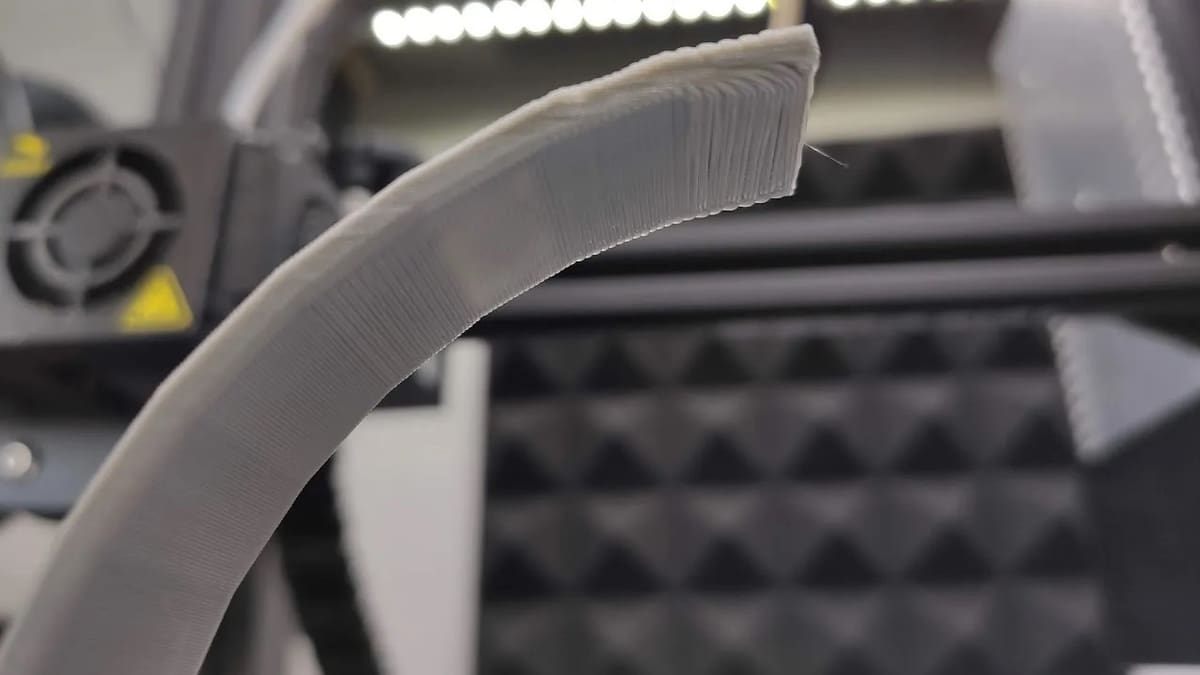
- Drooping: This is where the plastic gets pulled down by gravity before it solidifies. You’ll end up with sagging, drooping strands of plastic that hang below where they’re supposed to be.
- Curling: This is where the plastic is cooled insufficiently and starts to bend upwards. As the model is printing, you’ll notice that some areas of the print have curled above the height of the nozzle. After the print is finished, you’ll have a rough, uneven surface that may look similar to mild drooping.
Now that we’ve covered the basics, let’s see how to avoid potential issues.
Dialing In Your Machine
Before optimizing your overhang settings, you’ll first have to optimize your printer’s operation and print settings. This will give you a reliable foundation from which to get your overhangs right.
For starters, make sure your 3D printer is properly calibrated. You can refer to our dedicated guides on extruder calibration and complete printer calibration.
In the printer calibration guide, you’ll also find steps to adjust basic material settings. We’ll be tweaking these settings to improve your overhangs, so make sure that they’re in the right ballpark to start with; you should be able to get consistent prints with your current settings, even if they’re not perfect.
Once your printer and basic settings are set, we can go ahead and get started!
Tip #1: Dry Your Filament

Wet filament is a notorious cause of many printing imperfections. That’s because most FDM filaments are hygroscopic, so the materials like to absorb moisture, wreaking havoc on filaments. This moisture can even come from ambient humidity that leeches into the plastic and causes a whole slew of problems while printing. For overhangs, in particular, this interference can exacerbate drooping and surface roughness.
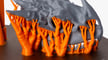
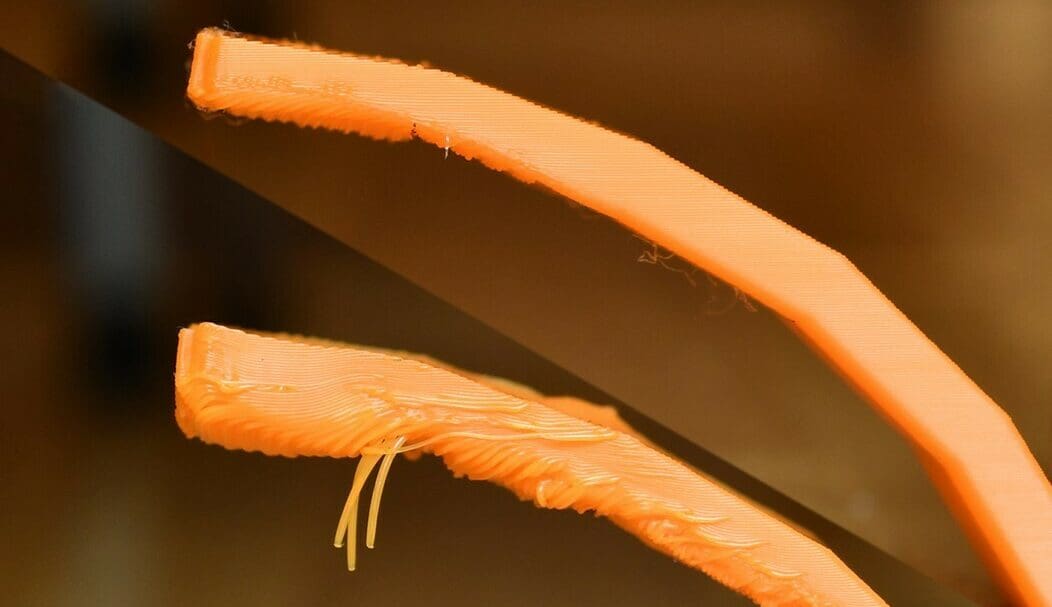
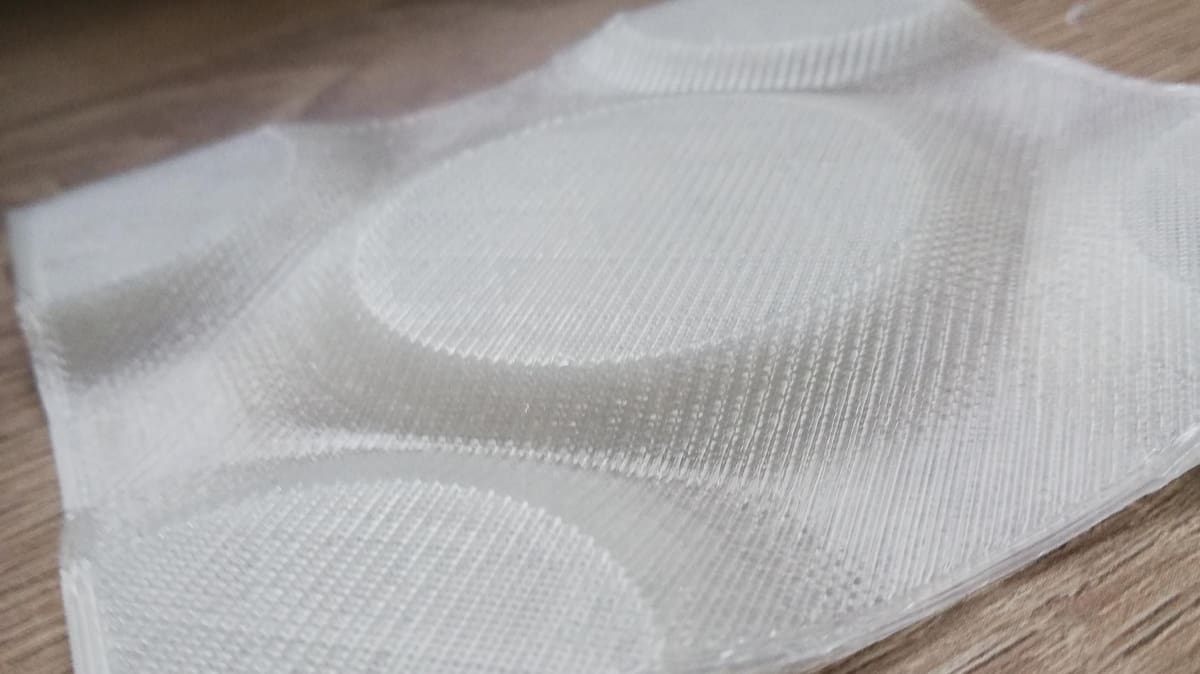
Thankfully, identifying and drying wet filament is a relatively painless process. You can follow our dedicated filament drying guide, which takes you through common symptoms like “fuzzy” surfaces (shown above) and simple ways to get rid of moisture.
You can also check out some great filament dryer and dry box options you might want to incorporate into your 3D printing setup. If you’re already storing your filament in, for example, Polymaker’s PolyBox II, you’ll avoid the hassle of having to dry the material before printing (or of trying – and possibly failing – to get some good prints).
Tip #2: Lower the Nozzle Temperature
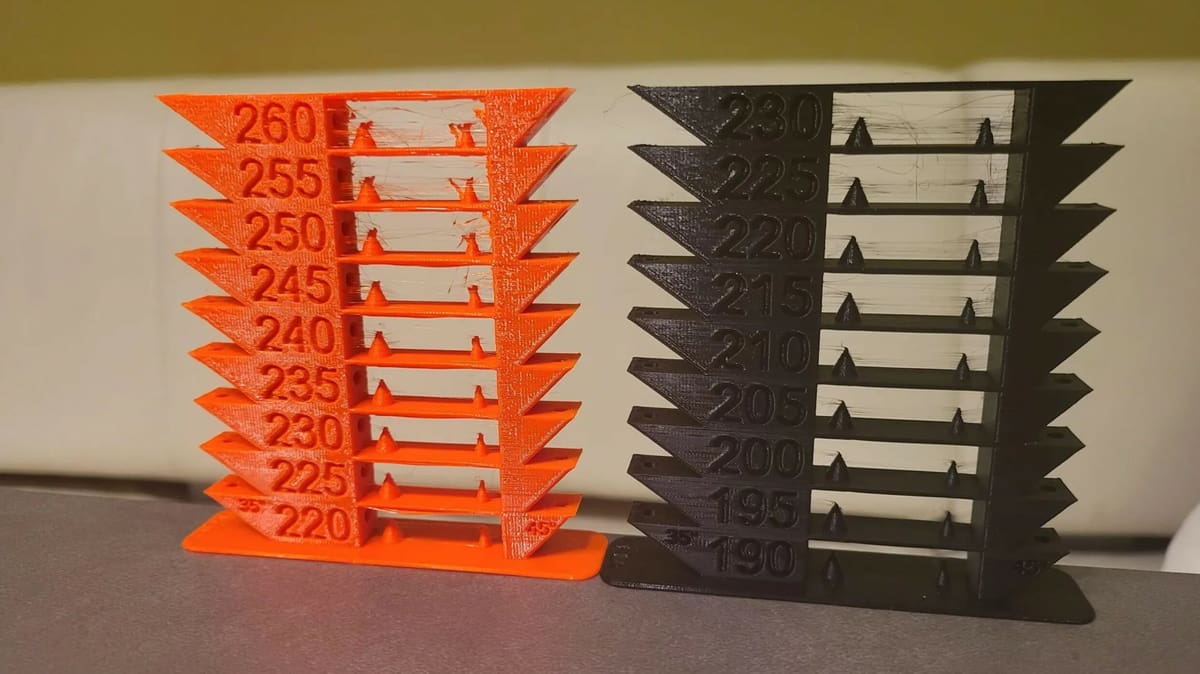
Both drooping and curling (also called warping) are caused by insufficient cooling. To help your printer out, you can try lowering your nozzle temperature.
By lowering the temperature, your printer has to do less work cooling the filament. As such, the plastic will solidify more quickly, resulting in less drooping and curling. However, keep in mind that nozzle temperature is critical for interlayer bonding strength. As it’s preferable to stay on the upper end of printing temperatures to keep high interlayer bonding strength and increase maximum flow rates, make sure to use this tip sparingly.
Here are some suggested nozzle temperatures for common filaments:
- PLA: 190-230 °C
- PETG: 220-260 °C
- ABS: 230-270 °C
- TPU: 200-250 °C
Also note that this is just a general guideline, and that it applies to base materials. Composites or modified filaments can have different properties and hence may call for slightly differing settings. For example, a CF-infused filament may require higher printing temperatures to maintain good layer adhesion, and its increased stiffness can aid with overhang performance even with elevated temperatures.
Tip #3: Decrease the Print Speed
Much like lowering the nozzle temperature, decreasing the print speed provides more time to cool the plastic. Meanwhile, the slower flow rate takes some strain off of your extruder, allowing you to lower the nozzle temperature even further.
If only small overhangs are suffering, consider bumping up the minimum layer time (this only slows down smaller layers). If that doesn’t work, try printing multiple models at once to give each layer more time to cool.
Generally, slower print speeds result in improved print quality. That being said, you have to be careful not to overdo it; printing too slowly, especially on small layers, can cause the hot nozzle to linger for too long, exacerbating overheating artifacts. Play around with your settings to find a happy medium.
Conversely, in certain cases, increasing print speed is the way to go. This causes the material to get stretched, adding tension that helps a print maintain its shape (for example, while bridging). This is especially true if you already have a robust cooling solution (discussed in the next section).
Tip #4: Boost Cooling
For so much talk about cooling, we haven’t looked at your fan speed yet! Here, higher is better for overhangs. Still, you’ll want to find a middle ground before layers start to delaminate. For PLA, there’s almost no such thing as “too much cooling”, while for high-temperature materials like ABS or PC, you’ll have to be more careful. For these materials, too much cooling can significantly lower mechanical properties, such as layer adhesion, or result in more warping tendencies.
If even a 100% fan speed doesn’t help, you can consider swapping out your fans and fan ducts. Either go for higher-power fans that pump more air or upgrade to radial fans. These provide improved pressure output, which goes well with better fan ducts for more focused cooling. Many user-designed ducts are available online.
Then, when your fans can provide powerful cooling across a wide area, consider increasing your print speed. As opposed to the previous strategy, this helps avoid overheating by moving the hot end away, leaving the fans to take care of cooling the plastic.
Tip #5: Adjust the Layer Height
Overhangs are challenging due to how they suspend paths in the air. You can decrease this effect by lowering your layer height.
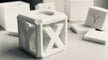
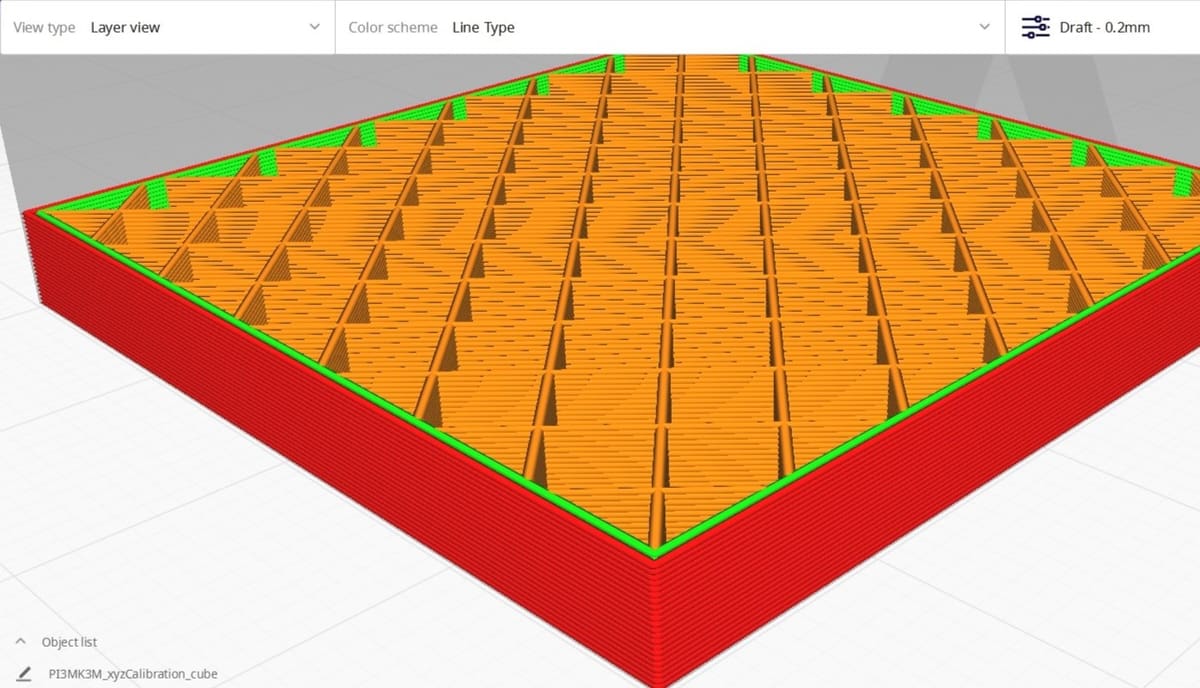
When you print slopes, you’re really printing stair-stepped layers (pictured above). At finer layer heights, you can have more steps cover the same distance, which means that each layer has to protrude less from the one below it. The result is less suspension per layer, correlating to less drooping.
Just imagine two layers alone printing a 45-degree overhang set with a layer width of 0.4 mm:
- For a layer height of 0.2 mm, the upper layer will overhang by approximately 0.2 mm (half of the layer width).
- For a layer height of 0.1 mm, the upper layer will overhang by approximately 0.1 mm (a quarter of the layer width). This results in better adhesion with the layer below it and a lower percentage of the upper layer suspended, resulting in less drooping and better overhang quality.
However, it’s worth considering that lower layer heights generally result in increased print times. Most of the time, overhangs only take up a relatively small section of the print, so the slight improvement in overhang performance might not warrant the much longer print duration. How can we manage this?
Varying Layer Heights
Varying layer heights in a model is a great way to achieve fast print times and great overhang performance. Essentially, the sections of the model without steep overhangs are printed with a larger layer height, while sections of the model with steep overhangs are printed with lower layer heights to reduce or eliminate the need for supports. There are two ways to achieve this:
- Manual: You can change the specific layers where the steep overhang is present; different slicers use different methods. PrusaSlicer and Orca Slicer, for example, have a “Variable layer height” feature in the Plater and Prepare tab respectively, which allows users to select specific layers to change. Other slicers might use a modifier shape; this changes the settings of the parts of the model overlapped by said shape.
- Automatic: Cura, for example, has an Experimental setting called “Use Adaptive Layers“. By enabling it and tweaking its subsettings, the slicer calculates the slope angle of sections of the model and adjusts the height for each layer based on it (within the minimum and maximum layer height set). When the angle (at a certain section of the part) is 0 degrees, the layer height will be the highest; as the slope increases, the layer height will be reduced. This means that the layer height will also be reduced for non-overhanging sections of the part (for example, the upper hemisphere of a circle), making the stair-stepping effect less obvious and making the part smoother. PrusaSlicer and Orca Slicer also have a more automated version, also within the “Variable layer height” feature, which you can access by clicking on the “Adaptive” button after selecting the quality/speed ratio aimed for.
Tip #6: Tune the Shell Settings
The “shell” refers to the walls that surround the infill of your print. To dial in your overhangs, there are a few tweaks you can make:
- Adjust extrusion width: A thicker extrusion width is harder to cool, but it increases overlap with the layer below. Adjust this setting to find a good middle ground. In UltiMaker’s Cura, find it as “Line Width”.
- Optimize wall printing order: Most slicers will allow you to specify how your shell is printed. Ideally, you want to print inside walls before outside ones, so that you aren’t starting layers in midair. This will help the overhanging paths “hold” onto the inside paths. In Cura, you can select from the dropdown menu in “Wall Ordering”, “Inside To Outside”.
- Increase the shell paths: By increasing the number of paths in your shell, you increase the overlap between each layer. Outer paths will also have more inside paths to “hold” onto. Increase the number of walls under “Wall Line Count”.
Alternatives
If none of the above options do the trick, there are a few alternatives you might want to consider.
Non-Planar 3D Printing
Maybe you’ve heard of non-planar 3D printing. In a nutshell, instead of the movements afforded by traditional gantry printers, where the X- and Y-axes move at the same time and the Z-axis only does so when the X- and Y-axes stop, non-planar machines can create curves that aren’t limited to any one axis.
It’s far from an easy alternative – most slicers can’t create the corresponding G-code – and because of the intricacy of printing, you’ll need a printhead design that can achieve it.
It’s still an option, though!

Avoid Overhangs
Another alternative (maybe the easiest one to try to attempt) is avoiding overhangs altogether! This can be done in a number of ways:
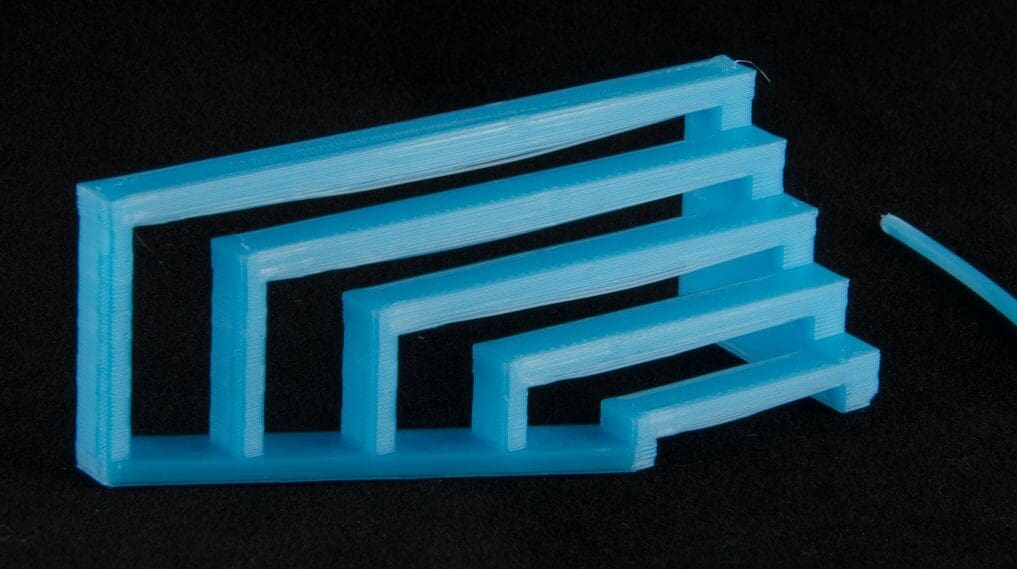
- Design with overhangs in mind: If you’re designing your own model, consider replacing fillets with chamfers or placing structures beneath overhangs to support them. For horizontal holes, try using a teardrop shape to avoid drooping at the top. When you encounter harsh overhangs, you can make them into straight bridges, as bridges are much easier to print.
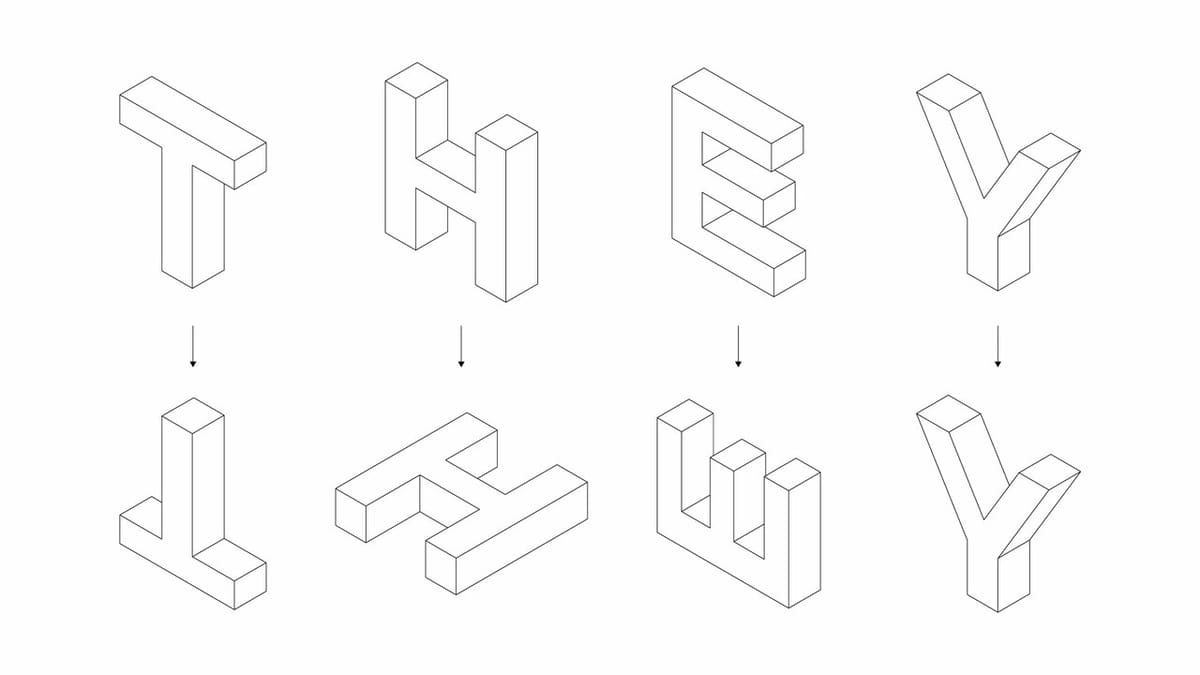
- Switch up the orientation: Not all print orientations are created equal. Depending on your model, certain setups will result in dramatically reduced overhangs. The above picture illustrates this well: The letters ‘T’ and ‘E’, which require supports in their original orientation, can be reoriented to eliminate overhangs outright.
- Split up the model: Sometimes, overhangs are inevitable on a complex model. That’s when you can consider splitting it into multiple files. This can make previously challenging prints a piece of cake, and once printed, you simply glue the pieces back together!
- Use supports: Though it’s best to avoid supports altogether to reduce material waste (a key advantage of additive manufacturing!), reduce post-processing needs, and maintain good surface quality, don’t shy away from using some in certain situations. While some designers predesign supports to be as minimally invasive as possible, you can also opt for tree (or organic) supports, which reduce the amount of material used and ensure optimal ease of removal. If you have a multi-material printer, you could also consider using different materials for the model and the supports, or you could opt for soluble supports for more complex structures that can be washed away, leaving cleaner bottom surfaces.

License: The text of "3D Printing Overhang: How to 3D Print Overhangs" by All3DP is licensed under a Creative Commons Attribution 4.0 International License.