Forget Lithophanes: This Free Tool Creates Hidden Image Print Masterpieces

Spiral Betty is a free tool that lets you turn any image into a spiralized SVG. The images look great, but are even better when 3D printed. Here’s how.
It is a fortunate burden of my job that I am required to be chronically online. Most of my week, every week, week in, week out. Year after year. A consequence of this unhealthy exposure to stuff is that I stumble across a nifty number of useful tools, widgets and doodads for creation that people far more talented than I have made and shared with the world.
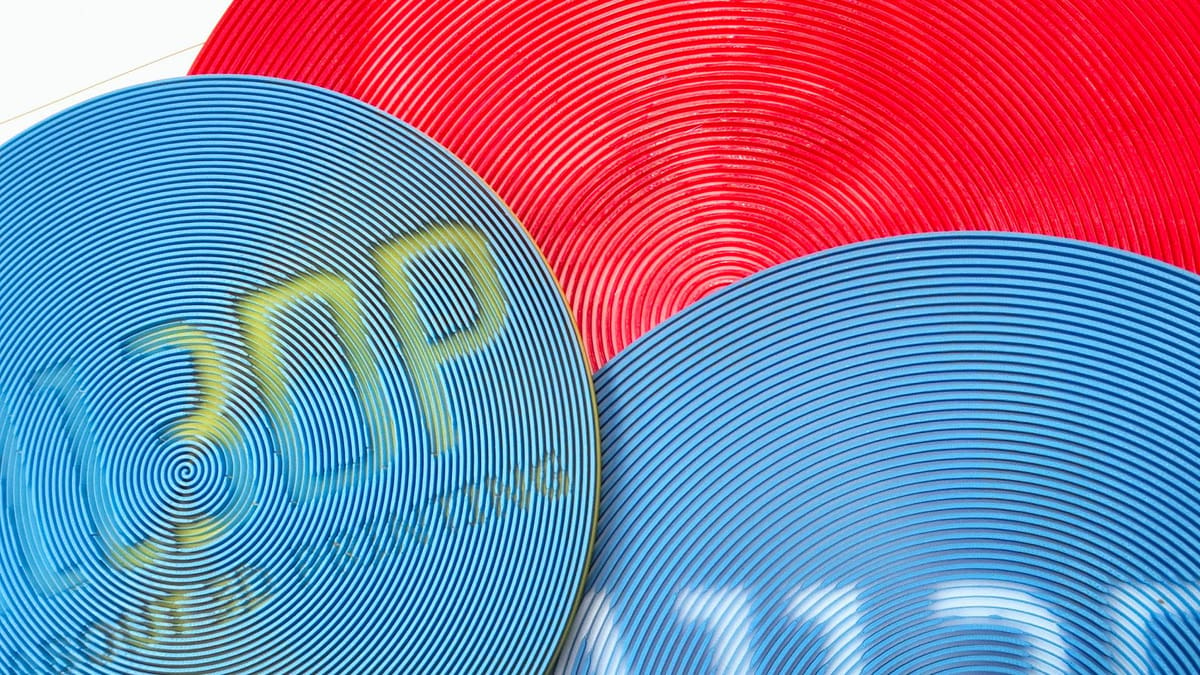
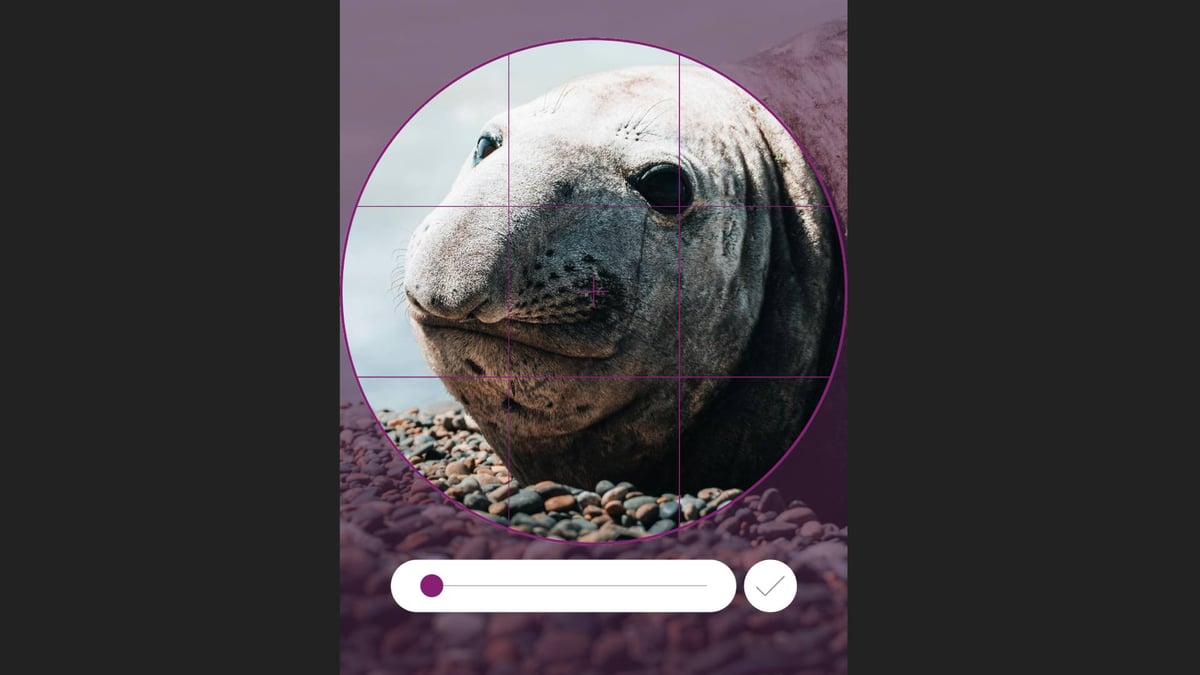
One such tool is Spiral Betty, a simple, single-function website by designer Shalanah Dawson, that launched way back in 2018. On it, you can upload an image which is then spaghettified into a single, continuous strand that unravels from the center out at varying thickness. The image remains, but is transformed by the effect. When it’s 3D printed to add depth, the image remains hidden until you view it from a particular angle.
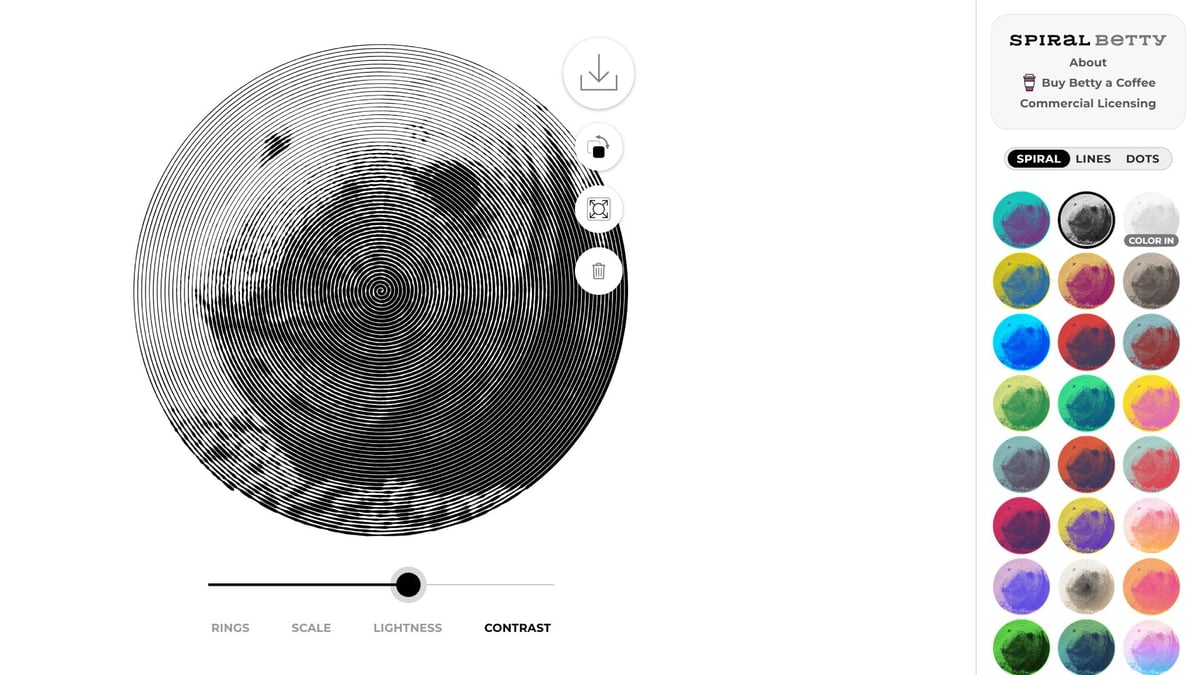
You’re given a variety of controls to adjust the appearance of the effect, or use alternate effects entirely: lines, which switches from the default round, spiral image to a square of parallel unconnected lines; and dots, which creates a halftone-style pattern of different size dots.
Whatever image you configure, you can then download the result as a JPG, PNG, or, crucially for our purposes, an SVG, which is very usable in slicing software for 3D printing.
Spiral Betty recently popped back into my mind, along with the thought: “Why have I never tried to print one before?” I had no good answer to that question, so this article is the conclusion of that thought along with a short guide showing you how to do it, too.
Commercial licenses: The industrious among you who monetize your printing can even buy commercial licenses for the downloads, too, letting you sell on any prints you make from the resulting dotted, lined, or spiralized works.
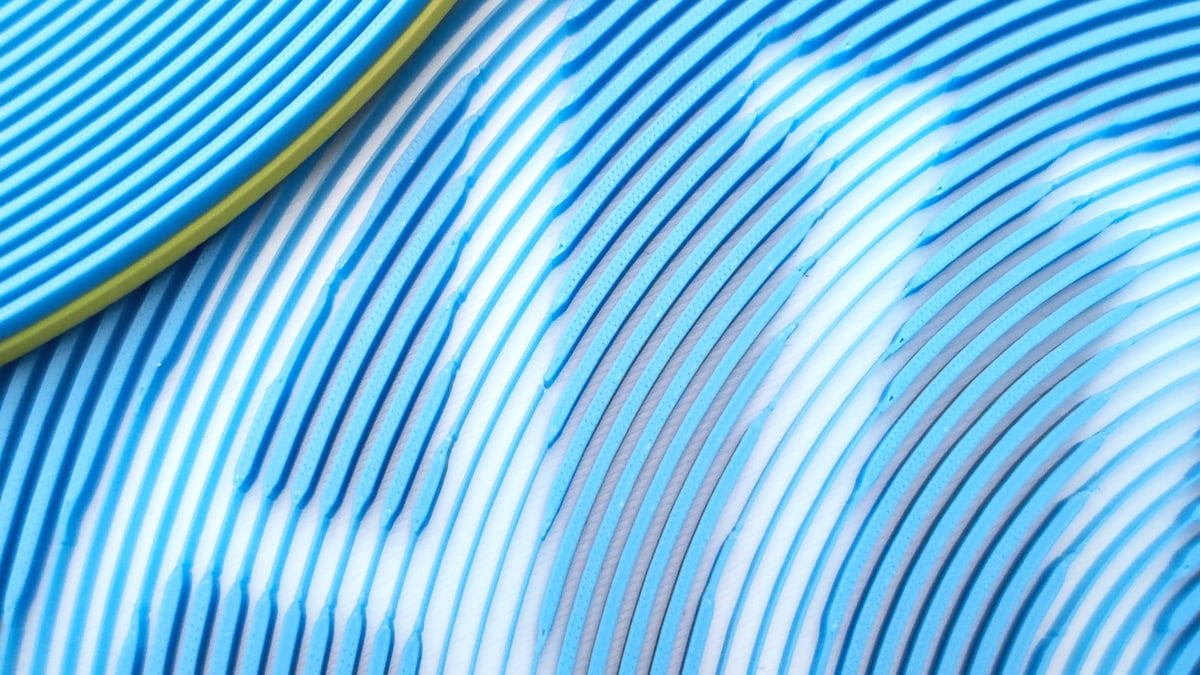
Printing these variable thickness spirals can be achieved with a 0.4 mm nozzle. But note that if you scale the model down, the lines get thinner and you increase the likelihood you’ll need a 0.2 mm nozzle to successfully print them. I pre-empted the issue and just printed with 0.2 mm nozzles anyway, but it may require experimentation on your part to see what your setup can do.
How to 3D Print a Spiralized Image
Generate an image in Spiral Betty
I’m not going to explain the process of using Spiral Betty here because it’s too simple to not achieve anything just from playing with it. You can adapt this guide to whatever image you generate.
All I will say is, the round shape spirals work well, since retractions are somewhat minimized. The technical details get a little messier, but, general rule of thumb, spirals and rounds are good.
With your image set to your liking in Spiral Betty, export it as an SVG file. This is important. Your slicer can interpret the SVG and extrude (or emboss) it, standalone or as a part of another model you already have in the workspace.
Import the SVG Into Your Slicer
For the purposes of this demo I’ll be using Bambu Studio, but the process will be similar for Orca Slicer, and PrusaSlicer, and I should imagine most of the branded derivatives, too.
In a fresh project, hit the import button and select your SVG. Unlike when you add an SVG as sub-part of an existing model in your project, which pulls up additional controls for how it behaves and looks, this way simply drops it full size onto the plate at a default height of 10 mm. This is fine, and we can work with this.
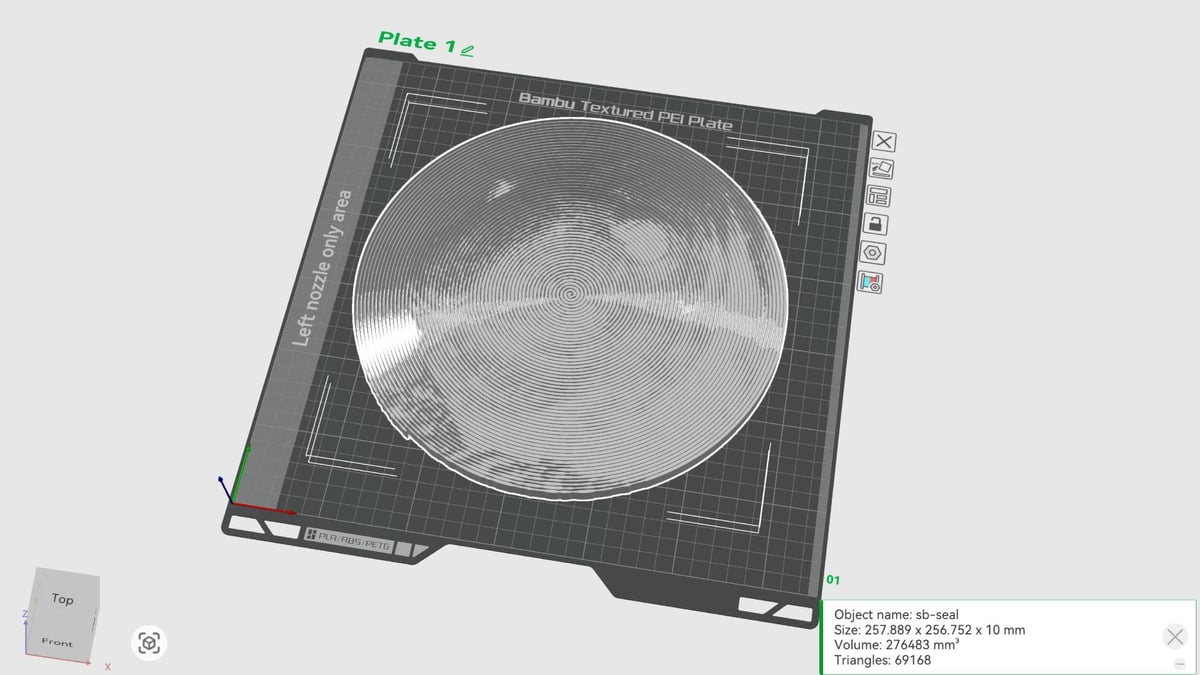

How tall you leave this extruded SVG affects the angle at which you’ll be able to see the embedded image in the final print. Too tall, and you’ll only get the contrast from directly in front of the model. I find 10 mm too much, and have been happy with 5 mm in total, using a 2 mm base to give 3 mm of “depth” for the illusion.
Take note of the size of the SVG model – you’ll need to round up from this when you add a base.
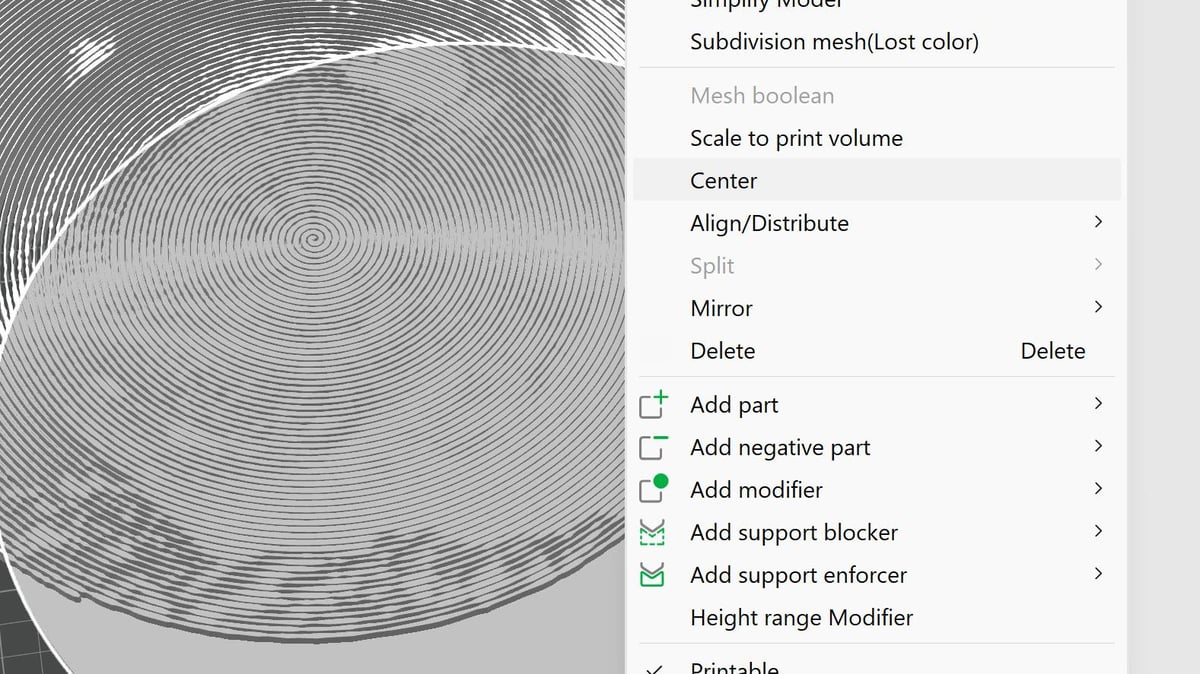
Center the model on the build plate. Right clicking on it brings up various controls, including the “center” command. This lets us align things easily for merging later.
Create the Base
We’ll use a simple primitive to use as the base here. Since I’ve created a round spiral (it’s not actually a perfect circle – the variable line thickness and the spiral having an “end” distorts it slightly) a cylinder primitive works well enough.
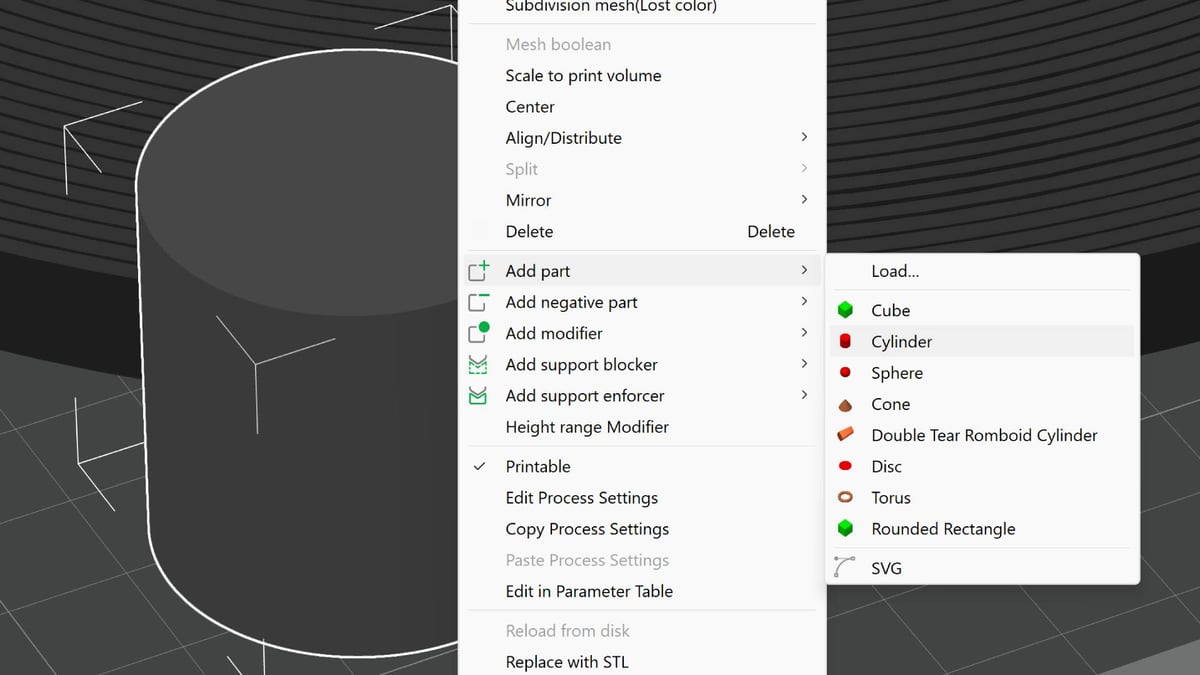
Right click on an empty part of the build plate to open the quick controls and add a cylinder. Once it has dropped onto the build plate, you now have a decision to make about the presentation of your print.
For a clean image-sized disk, round the cylinder up to the next millimeter in the X- and Y- directions (rounding up from the dimensions we noted before, when you imported the SVG). This should give enough padding for the base to cover the whole image closely enough that it looks neat and tidy.
Alternatively, you can size the base to be larger than the image, giving some padding. This might be a better option for framing square images prepared this way.
Resize the base cylinder’s height (Z) to a thickness of your choosing. I used 2 mm, which lets some light through. Going thinner would, of course, let more light through and possibly increase the visibility of the buried image when lit from behind. It depends on the filament you’re using, too. Something to experiment with.
Tip: If you go for a lightbox kind of effect, I've found the spiral effectively scatters any infill you might expect to see shining through.
Like the SVG before, center the base. This takes care of alignment.
The exact order of operation for preparing the spiralized print isn’t too important, since I’ll be treating the SVG as a separate model from the background. Whether you create the primitive base for the background first, or import the SVG first, it doesn’t really matter – though you won’t know the final size of the base without the SVG on the print bed.
Merge the models
Right clicking on an empty part of the build plate brings up the option to “select all”. Do this. It’s quicker than selecting things individually in the objects panel.
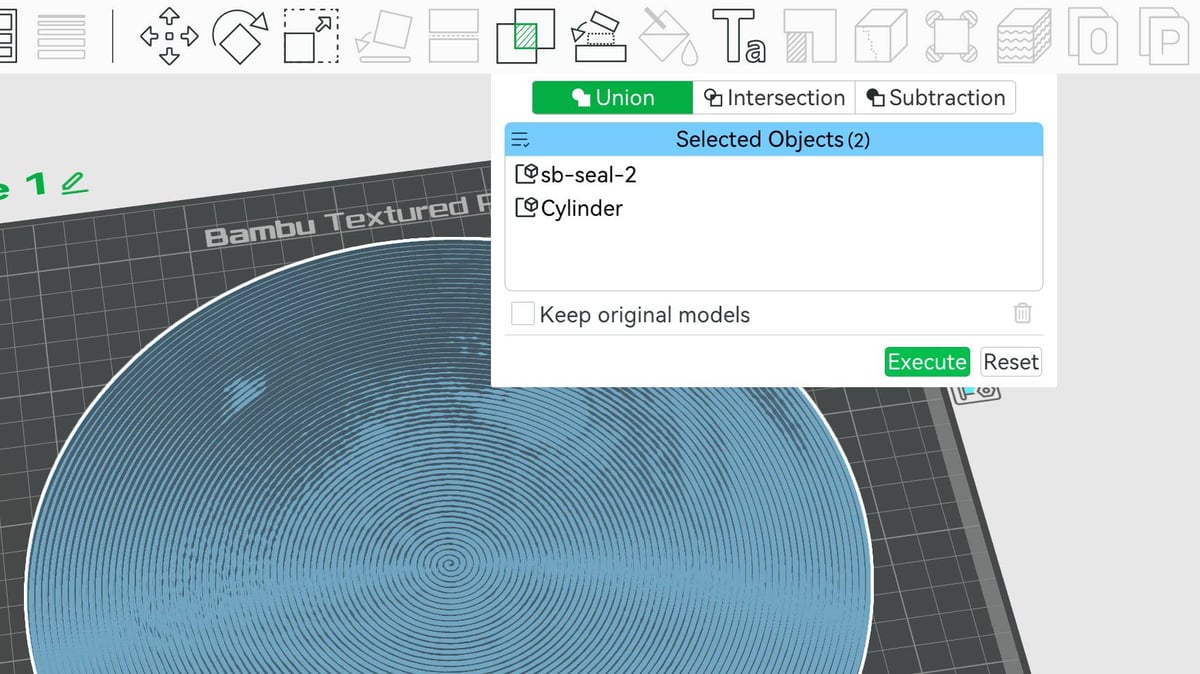
With both models selected you can then perform a Boolean union, which merges your two selected models with into a single object.
Clicking the “Mesh Boolean” tool (the icon is two overlapping squares) brings up additional controls, where you can configure slightly different operations. The default “union” is what we want. It may take a few seconds of processing for it to complete.
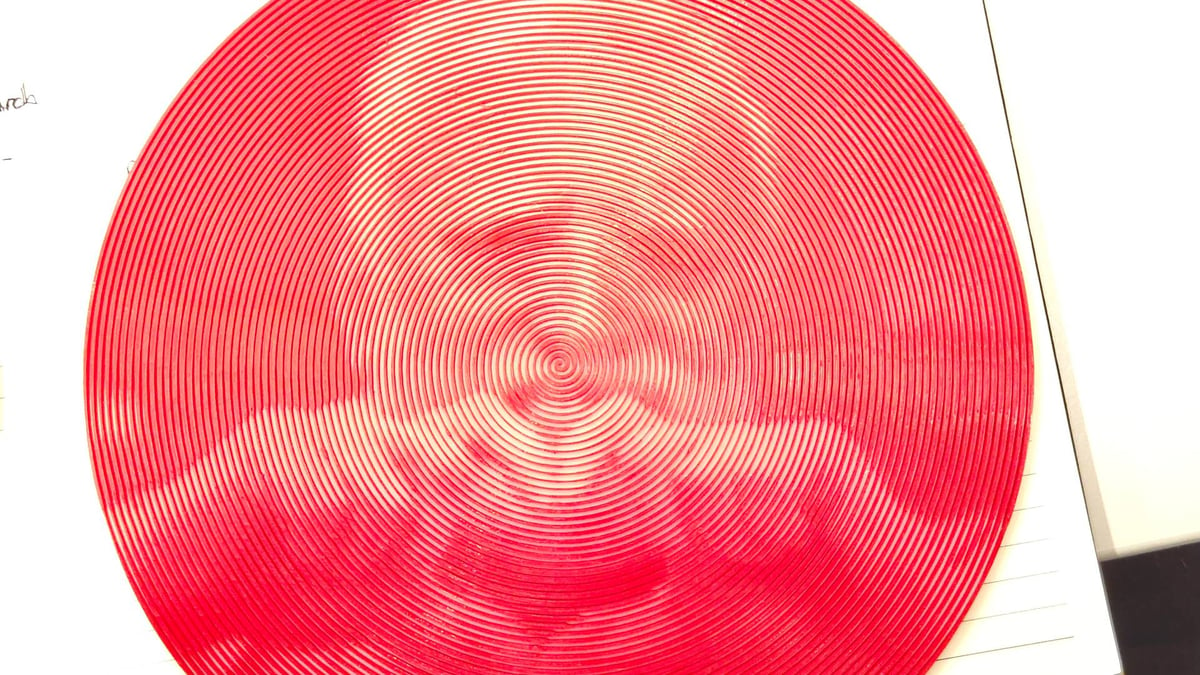
That’s the “difficult” part done. You now have a big, optically intriguing frisbee to print. But it’s not complete yet. Right now it’s only one color. The illusion still works, just not as well as it does with a pop of color for contrast.
Color the model
As with everything about this mini project, preparing the model for color is (drumroll, please) simple.
I know the base is 2 mm high, which tells us all we need to know to set ourselves up for a two-tone print.
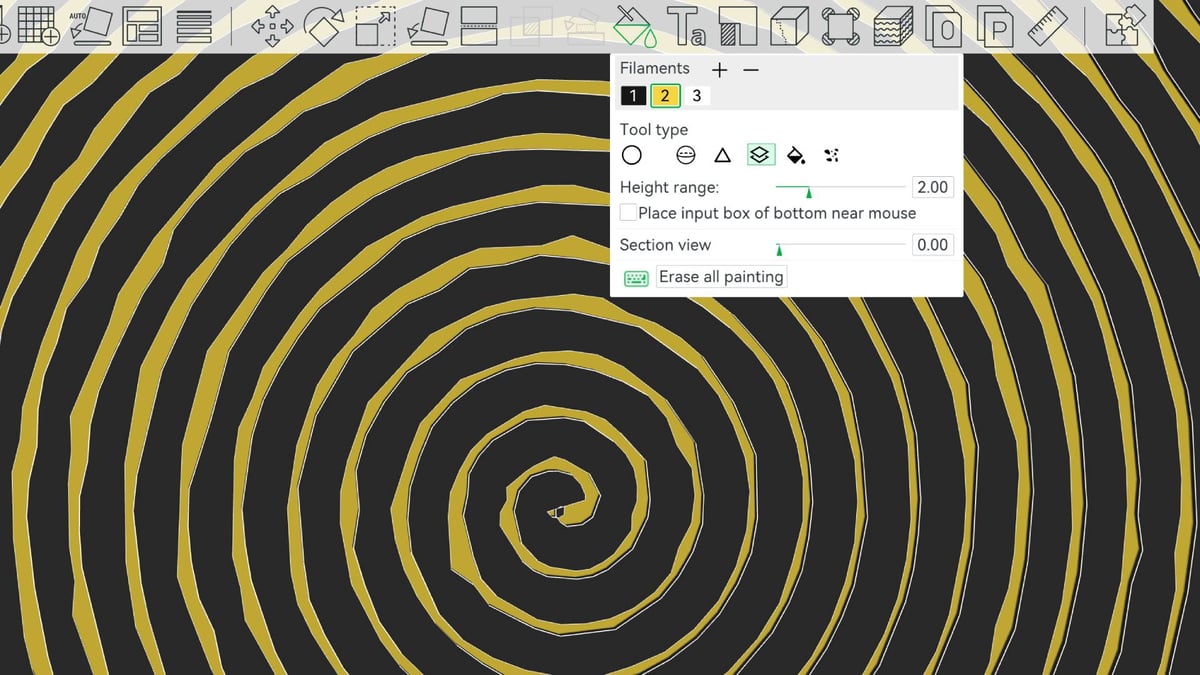
Using an MMU-type device
If you’re using a multicolor system, we’ll do this via the object painting environment. Open it up and select the paint by layer height tool. Punch in 2 mm as the range we’ll be painting, and then zoom in on the base of the model where it meets the print plate. With the correct color for the base selected, click on the model here to change this range. You can, of course, do the inverse of this if your base is already the desired color. Just paint the model using the layer range tool from 2 mm, instead.
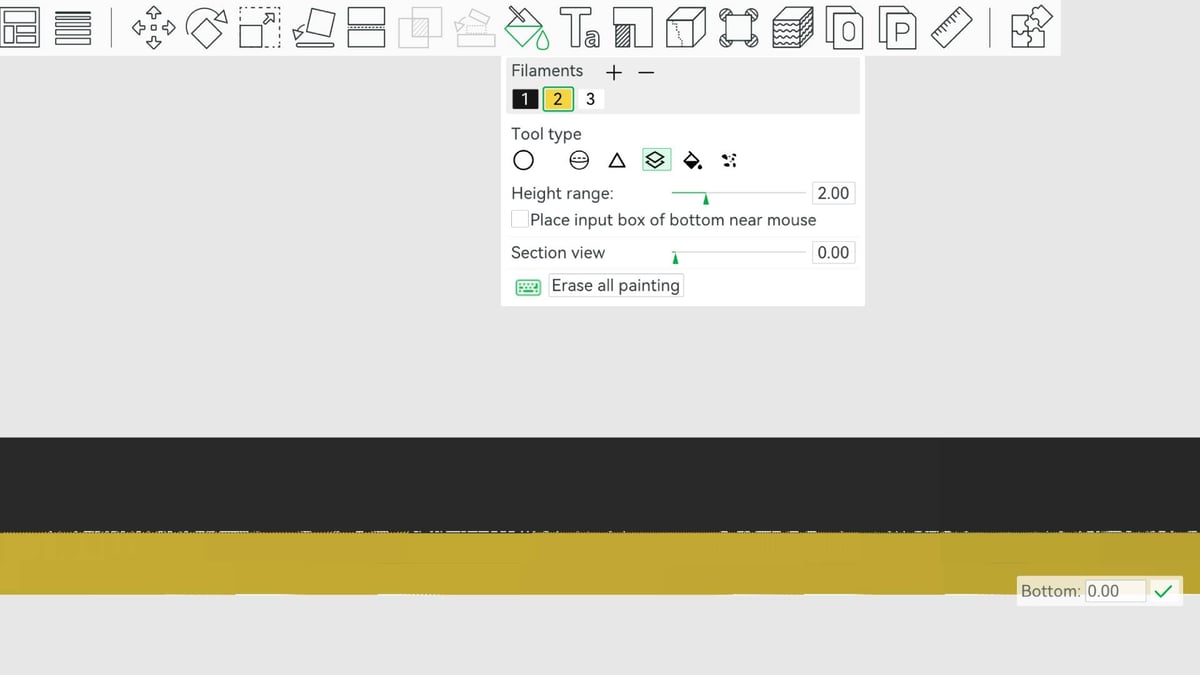
For MMU-enabled systems, that’s it. The coloring is done.
Using a mono-material printer
Non MMU-users will have to program a pause in the print to make the material change manually. This is mercifully simple and performed after you’ve sliced the model. Make sure you check the next section on slicing caveats before pushing on.
To set a pause, slice the print and in the preview of the slice (the view where you can scrub up and down through the layers) find the final full “surface” layer of the model’s base. Now jog one further layer up (“up” on your keyboard’s arrow keys). Right click on the layer slider to bring up the option to add a pause.
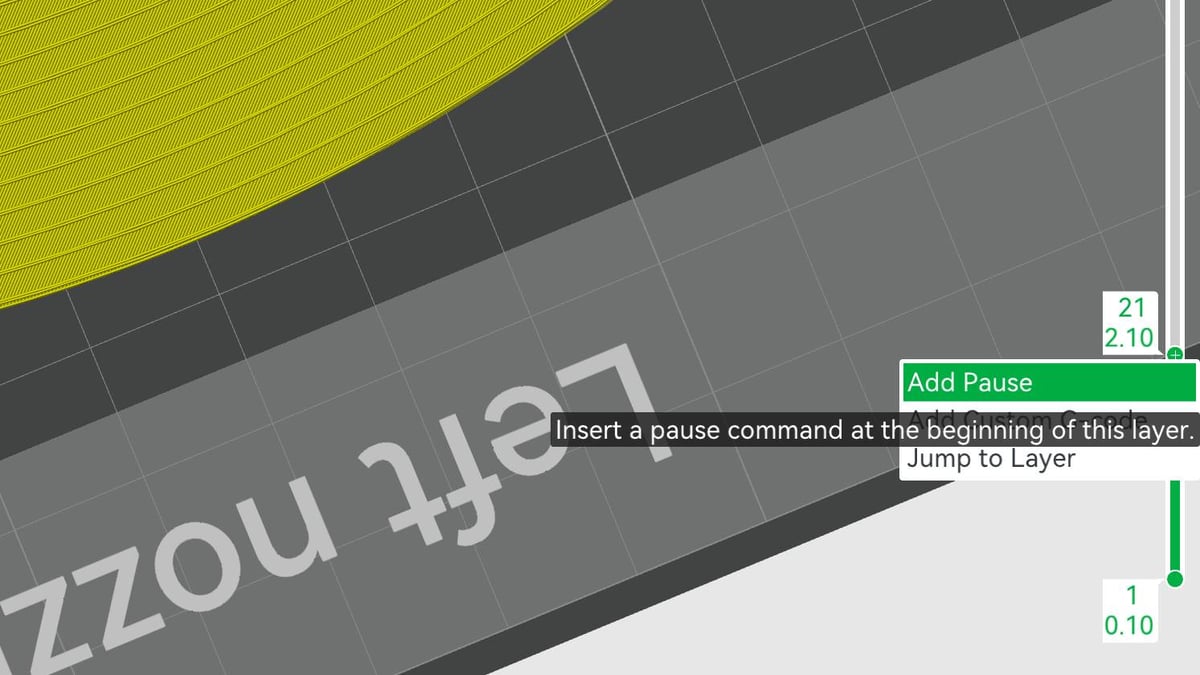
Once the printer reaches this point of the print, it will move the printhead aside and wait, letting you manually change the filament per your printer’s procedure for doing so, before continuing on with your second color.
Print settings
As I said at the top, a 0.2 mm nozzle is useful for this. Unfortunately, going fine also means extending the print time. There’s zero detail in the Z-axis to preserve, so you can opt for the thickest layer height to try to speed things up.
Besides the nozzle, the one essential slicer setting to change is to switch the wall generator from classic to Arachne if it is not already. This changes the slicer’s logic for calculating walls, setting the job to figure out dynamically variable wall thicknesses that can be thinner even than the nozzle diameter, rather than fixed wall widths that would ignore anything finer.
You slicer may have a setting for something called “print thin walls” which sounds like it’d be ideal for this project, but Arachne basically overrides this. You can’t toggle both, and it’d be unnecessary to.
Once you hit slice, go find something else to do. Bambu Studio uses the CPU to process the slicing, and there’s a lot to process in a large spiral like this. Don’t be disparaged if it looks like it’s hanging. As long as your computer isn’t telling you the program has stopped responding, it’s working. If you’re slicing on a laptop not connected to the mains, it’d probably be a good idea to plug in.
Tip: Use dry filament that's in good printing condition. There's little tolerance here for bad filament or an out-of-shape printer.
What Else Can You Do?
What I’ve printed, as you’ve probably guessed, is just a simple example of what’s possible with stylized SVGs of the kind Spiral Betty outputs. As for taking it further, a few things I’ve thought of already that would, should, and probably are possible include:
- Thinning the base and adding a light source to create a lightbox.
- Embedding a music playlist on an NFC tag and embedding it in a solid core modifier to create a “playable” disk that looks like a vinyl record.
- Printing a single-layer spiral image onto a t-shirt.
If you know of any other design tools or processors that give you unusual and unique projects to 3D print, let me know at: matthew@all3dp.com. I’m keen to surface more projects like this and am all ears for things you’d like to see covered.
Read more recent news:
- Creality Swaps Purge 'Poop' for Sticks with New CFS-C for K1-series Printers
- New AI Image-to-Model Generator Promises Perfect STL Files, We Put It to the Test
- Snapmaker U1, Reviewed: Make Haste, Not Waste
Tired of Reading? Try Listening
License: The text of "Forget Lithophanes: This Free Tool Creates Hidden Image Print Masterpieces" by All3DP is licensed under a Creative Commons Attribution 4.0 International License.