When Good Prints Go Bad: Troubleshooting Mid-Print Failures

First layer problems get a lot of attention, but failures mid-print – when you aren’t watching – are more frustrating. What do you do when they strike? We’ve got you covered.
Mercifully, modern machines do a lot of the heavy lifting to mitigate what used to be common troubles with past generations of desktop 3D printer. That being said, there are simply too many variables and convergence points that can cause trouble – it’s almost inevitable when you’re first starting out that you’ll run into something that causes a print failure.
Here are a few common mid-print fails, what causes them, and how you can address them.
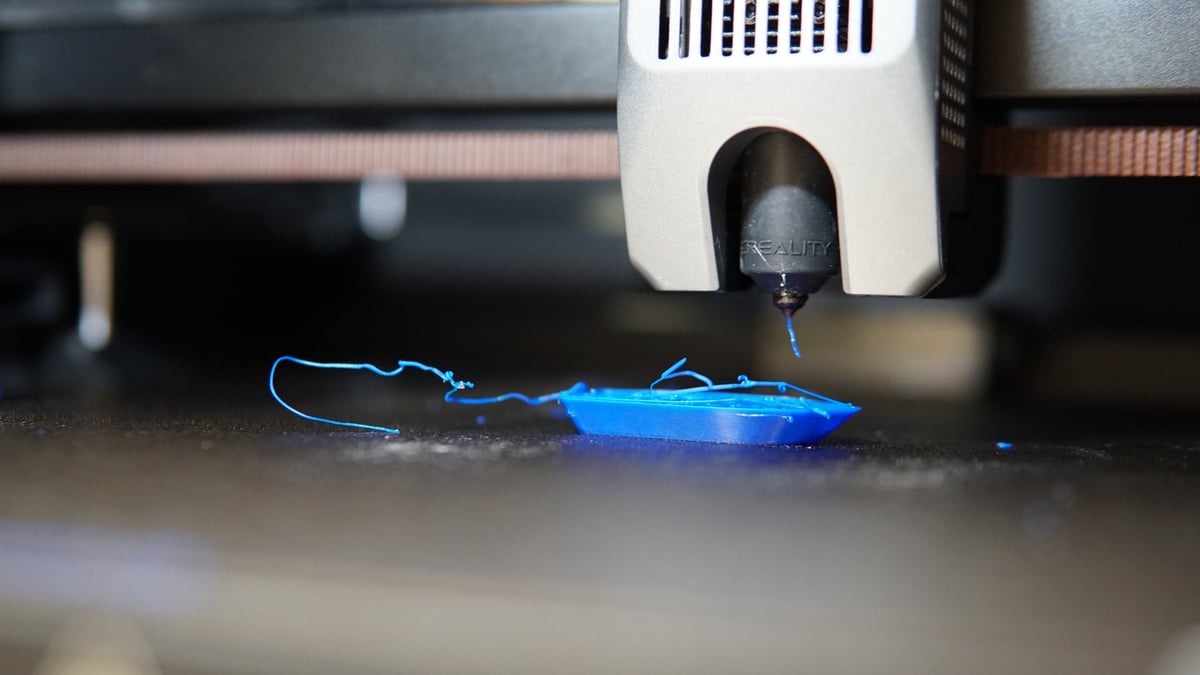
The Printer Stopped Extruding (“Air Printing”)
It is a confusing sight: the toolhead is moving through the geometry of the model, but nothing is coming out of the nozzle. The printer thinks it is working, but somewhere along the line, the flow of plastic has been severed. There are a few culprits for this, mainly falling into two possible scenarios: the printer cannot feel the filament to the hot end to extrude, or it can, but the filament cannot make it through the nozzle to be deposited on the print bed.
To save yourself a little time and potential mess, there’s an order of operations for determining the source. Considering the possibility the filament can’t feed, check the filament path. It’s possible to accidentally tangle the filament spool before you load it into the printer – all it takes is a momentary lapse in concentration. Check that the spool can spin freely and there are no apparent knots or tangles.
After this, a quick check of the filament guide tube – the semi-transparent tube between the filament spool and the printhead – to see that there is filament present confirms that the filament is one in-tact piece. Snaps can happen, and depending on your model of printer, it might not know that it’s printed the downstream portion of a snapped spool of filament.
The next, and unfortunately more annoying, thing to check is for a nozzle clog. Carbonized plastic and debris – particularly if using a particulate-filled filament – can block the teeny tiny orifice at the tip of your printers nozzle, partially halting extrusion or stopping the show entirely. This is typically soundtracked by your printer’s extruder motor stalling – that is to say, gently clicking – as it fails to advance the filament it’s gripping.
If you’re feeling lazy, your printer allows for it, and you can afford to bring a spare off the bench, swap the nozzle out for a fresh one and deal with the nozzle later when you’re not itching to complete a print. Double check the sliced settings are correct for the material and hardware before trying the print again. We’ll cover things you can do to try to unblock the nozzle below, That’s a luxurious solution to the issue, of course, but there are things you can do to unblock the nozzle and salvage the situation.
- Stab it: Your printer may have (at the time confusingly) come with an acupuncture needle as a part of its toolkit. This is its moment. They are perfectly sized to work their way into the nozzle from its tip, scrambling the inner channels and dislodging any debris that blocks it. Further advice for needle-based unblocking can be found in our full troubleshooting guide.
- Plug it: One potential solution is to give the hot end a manual purge of sorts. Referred to by some as an “Atomic Pull”, you withdraw the blocked filament and use a different material to partially melt as far as it’ll go into the hot end, before sharply withdrawing it and any loose bits of crud that stick to it. Not every printer is suitable for this, now that printheads come packed with tech that complicate the filament path. Read more about the process in it’s section in our troubleshooting guide.
The Print Looks “Off” or Has Shifted
Sometimes the print finishes, but the result is dimensionally inaccurate, warped, or shifted. If your circles look like ovals, squares like rectangles, or the top half of the print is stepped to the side, the issue lies in the motion system.
In short, the printer isn’t moving exactly where the software is telling it to go. If it looks like the print is stretching in a particular direction the most likely cause is loose belts. Belts need to be tight enough to transmit movement instantly; if they are loose, you get “backlash” of a sort or skipped teeth on the pulleys, resulting in layer shifts and lost dimensional accuracy.
It is also worth checking for physical obstructions. Debris caught in the rails or loose parts in the chassis can interrupt the smooth travel of the printhead. If the printer tries to move beyond its physical limits due to a setup mismatch, it will skip steps and lose its positioning entirely, so check that the correct hardware is selected in your slicing software.
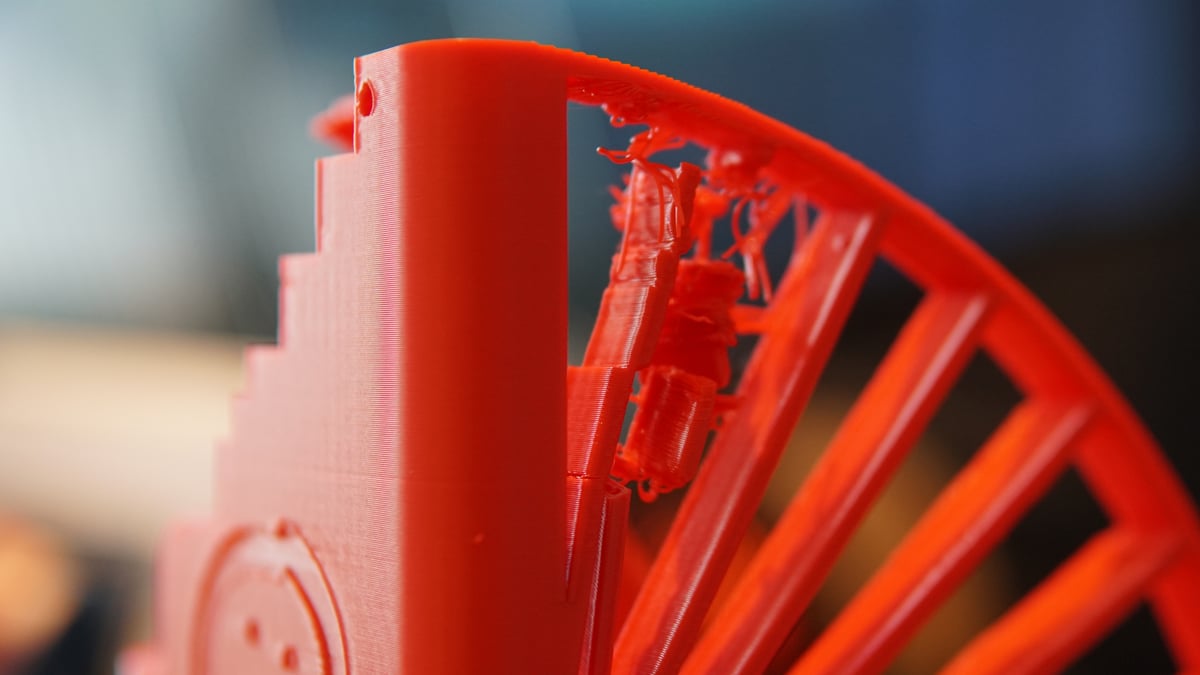
Sometimes as parts of a print cool faster than others, they can curl up into the path of the printhead, causing collisions and shifts. In the case of the image above, it can even snap off parts of the print, only for them to reattach elsewhere. It’s a multivariate problem.
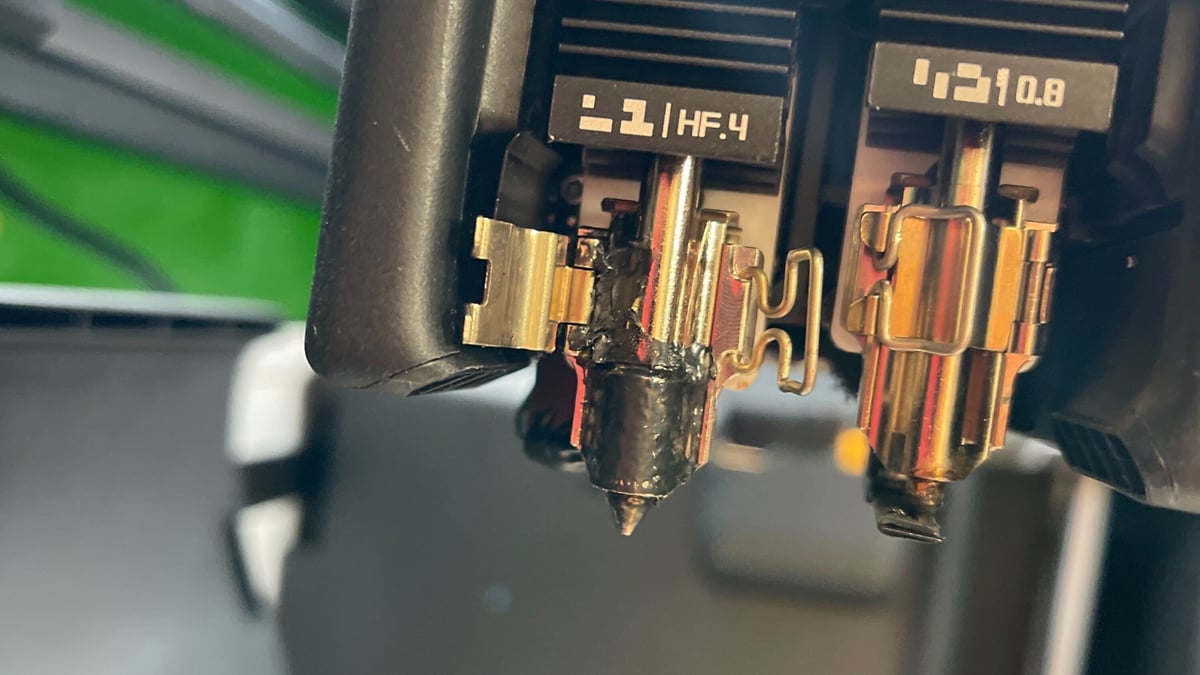
The “Blob of Death”
The big one. The scenario that keeps 3D printerers up at night. A print detaches from the bed mid-job, sticks to the moving nozzle, and accumulates into a solid mass of plastic around the hot end and wires. Recovering from this requires buckets of patience. Observe how badly the blob encases things around the hot end. If you’re reasonably confident it can be removed, heat the nozzle to half recommended printing temperature of the filament (for PLA this would be around 100°C) and let the blob warm up. You don’t want it at printing temperatures since prolonged heating at that temperature can char the material and is unnecessarily dangerous for you to wok in close quarters to the nozzle.
With the blob softened, gently pull and tease at it with pliers to work it free. Clean the nozzle gently, as best you can – ideally you should aim to remove all of the solid block of plastic. Thin layers or scraps shouldn’t affect performance, as long as the metal of the nozzle is clean enough to not leave charred residue on subsequent prints.
The effort and risk of dealing with a blob may not be worth it, though. Leaning when to cut your losses, particularly with delicate components that get hot. Better to sacrifice a replaceable component like a nozzle or hot end assembly than risk greater damage or a longer term issue from an undetected problem caused by the blob or removing the blob.
Preventing the blob from happening again is a matter of printing hygiene – keep the bed clean for dependable first-layers that stick. Many of these mid-print headaches come down to routine maintenance, so taking five minutes to check belt tension and clear debris is usually worth the effort, too.
If none of these align with your experience, our full troubleshooting guide may have what you’re looking for.
Get our bi-weekly newsletter for the latest 3D printing news, deals, and guides.
We do not share your information! You can unsubscribe at any time.
By subscribing you agree to our Privacy Policy.
Read more recent news:
- Ugly Prints Are Inevitable: Here is How to Learn From Them
- Why Your 3D Print Isn’t Sticking (And the 5-Minute Fix)
- Just Unboxed a 3D Printer? The Honest Guide to Avoiding 'Hobby Burnout'
Tired of Reading? Try Listening
License: The text of "When Good Prints Go Bad: Troubleshooting Mid-Print Failures" by All3DP is licensed under a Creative Commons Attribution 4.0 International License.