Make 3D Prints Feel Premium with Simple Fabric Inlays

3D printing is a deeply satisfying process, but the mono-material prints can be a little dull. If you’re printing a self designed gift for someone this Christmas, considering being a bit extra and add some tactility with fabrics and other flexible materials.
I print a lot at home and work, but the prints are often from a single material, and, yeah, they’re functional, but otherwise pretty dull. It strikes me that in all the excitement 3D printing inspires, it’s easy to fall into the trap of having the design be all 3D printed, despite the limitations of the materials we use. PLA prints great and is easy to work with, but is it really any competition for the softness of suede or faux leather? It isn’t.
Inspired by others I’ve seen put fabrics to use in their prints, I’ve pushed myself to experiment a little, and here’s what I’ve found. Hopefully you’ll find it useful or inspiring.
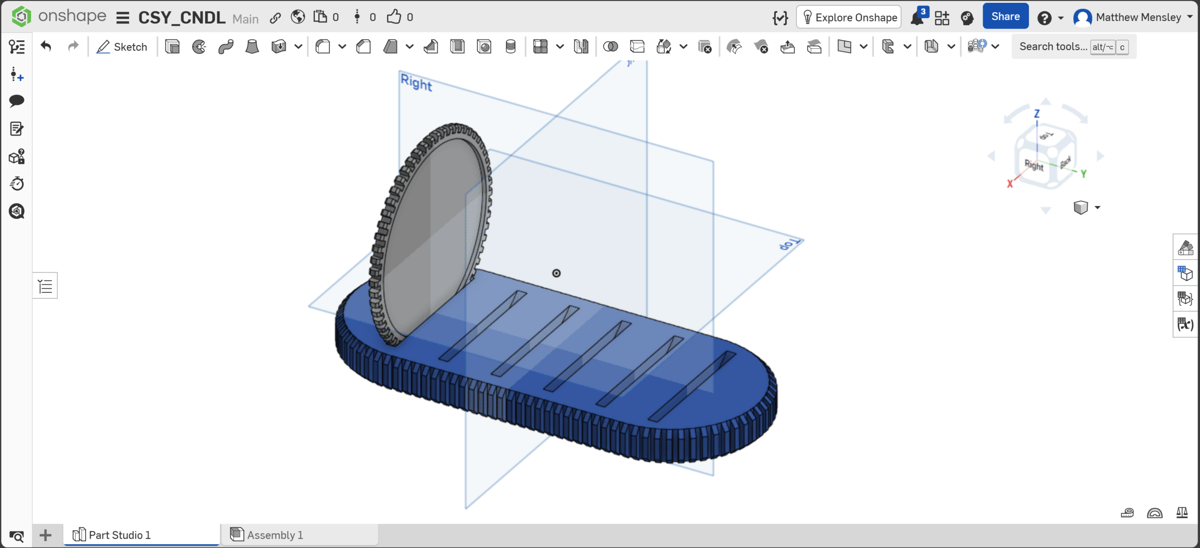
Many of the objects I print, I design in Onshape. It’s completely free for personal use, provided you don’t mind your designs becoming part of the “public library” – a fair trade, in my opinion. It runs in your browser, with all the heavy lifting done on their servers, so all you really need is an internet connection. It’s a great place to experiment and toy with the full-fat CAD experience without any of the bloat you get with full desktop programs.
Useful for the purposes of this article, Onshape has the tools to let you export vectors of sketches and specific faces of your models. That translates to a simple workflow for cutting them using digital fab machines, or by hand if all you have is a sharp pair of scissors to work with.
From 3D Model, to Cuttable Vector, to Pinpoint Perfect Cut-outs
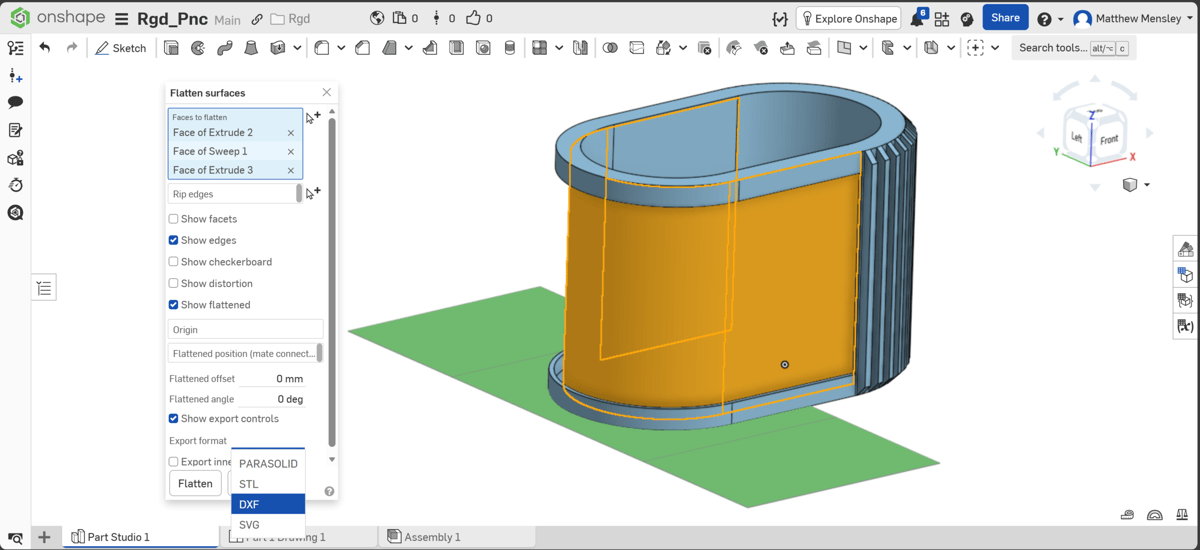
The two methods I’ve been using are to either directly export the sketch or face (basically, a flat, enclosed surface or drawing) that I want to cover with fabric as a DXF file or, if it’s a curved face, to use Onshape’s flatten tool. Flatten lets you select a curved face, along with any contiguous faces, and flatten them into a 2D outline which can then be exported directly from the tool’s controls.
With 2D outlines in hand (on computer) your options open up. If you only have a pair of scissors to hand, you can print the vectors on paper to use as templates. It may be necessary to convert the vector files to something more printable like a PDF. Free online tools are available for this. Cut them out neatly and temporarily fix them to your material for an easy to follow pattern.
Alternatively, I’ve found an able 2D cutting partner in the xTool M1 Ultra ($999). It’s a pricey solution to a job you could tackle with a pair of scissors, true, but the benefit of using a laser or blade cutting tool is pinpoint precision (and self-justification for having made the purchase in the first place). Other machines are available to do this kind of work; Bambu Lab’s entire H-series can be outfitted with a blade tools or laser to the same effect. The “cheapest” is the H2S, at $2,099.
xTool’s software can read the DXF and SVG vector files directly. This kind of interoperability minimizes the friction in this workflow – between my models and all of the possible pieces of hardware I can use to fabricate them.
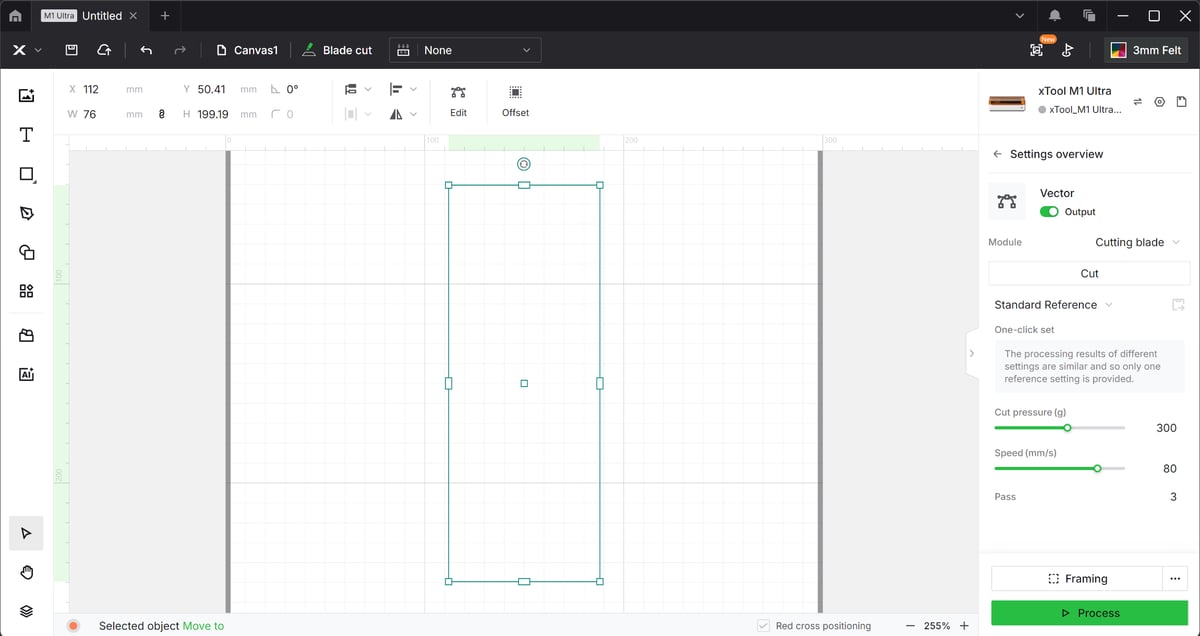
Taking the xTool as an example, importing a vector into a project in XCS (xTool Creative Space) is a simple case of drag and drop. Provided the sketch’s dimensions don’t exceed the work area of the M1 Ultra, no scaling is necessary and the dimensions are correct for the model. I know that what I cut will fit the print.
Immediate Quality Upgrade for Your Prints
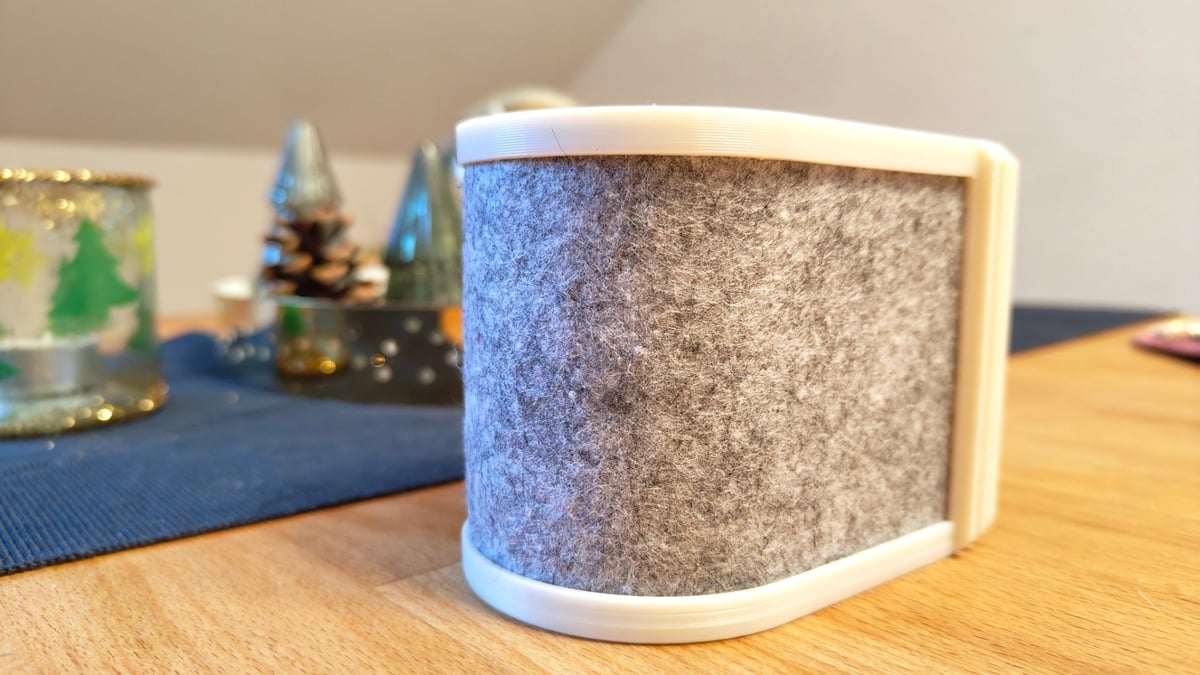
Don’t underestimate the effect of adding fabrics of other soft-touch materials to parts of your 3D prints. If you’re printing out something like a smartphone holder, pen pots, Gridfinity storage bins, anything that sits on a surface or has other objects resting casually on them – this small, additional step improve those objects’ feeling and tactility. It can provide impact absorption, soften the base, or add a premium look and feel not achievable with 3D printing alone.
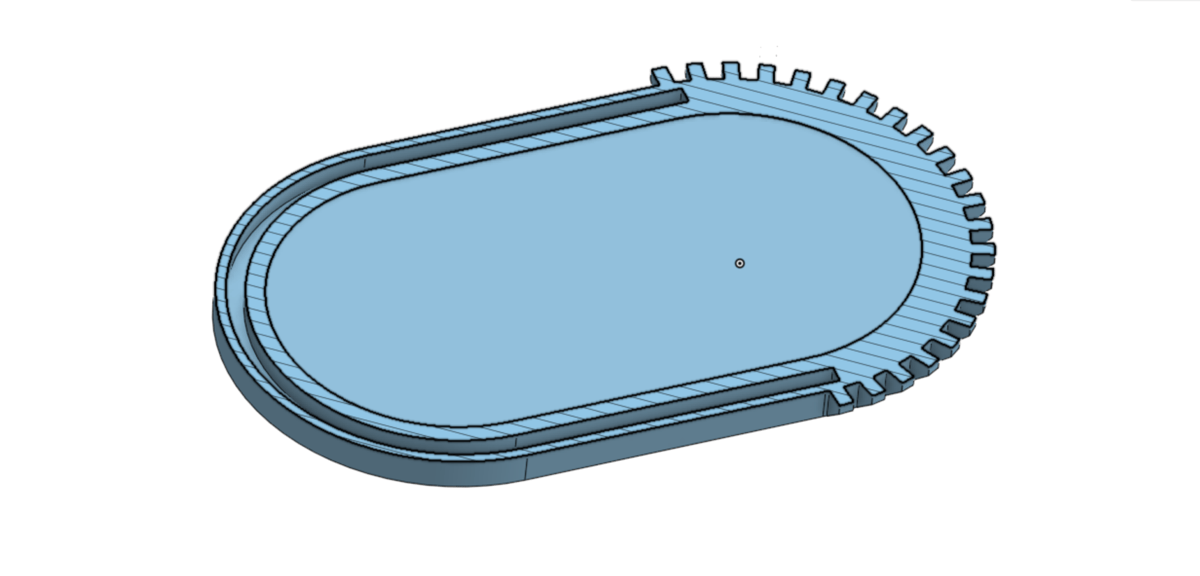
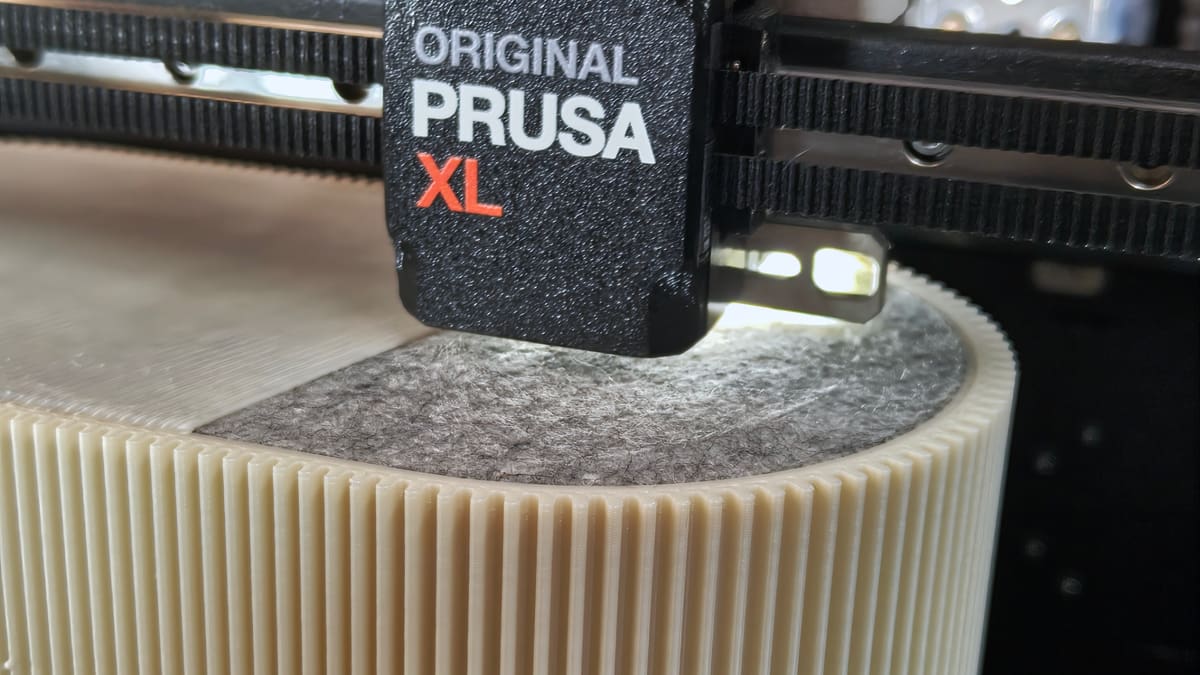
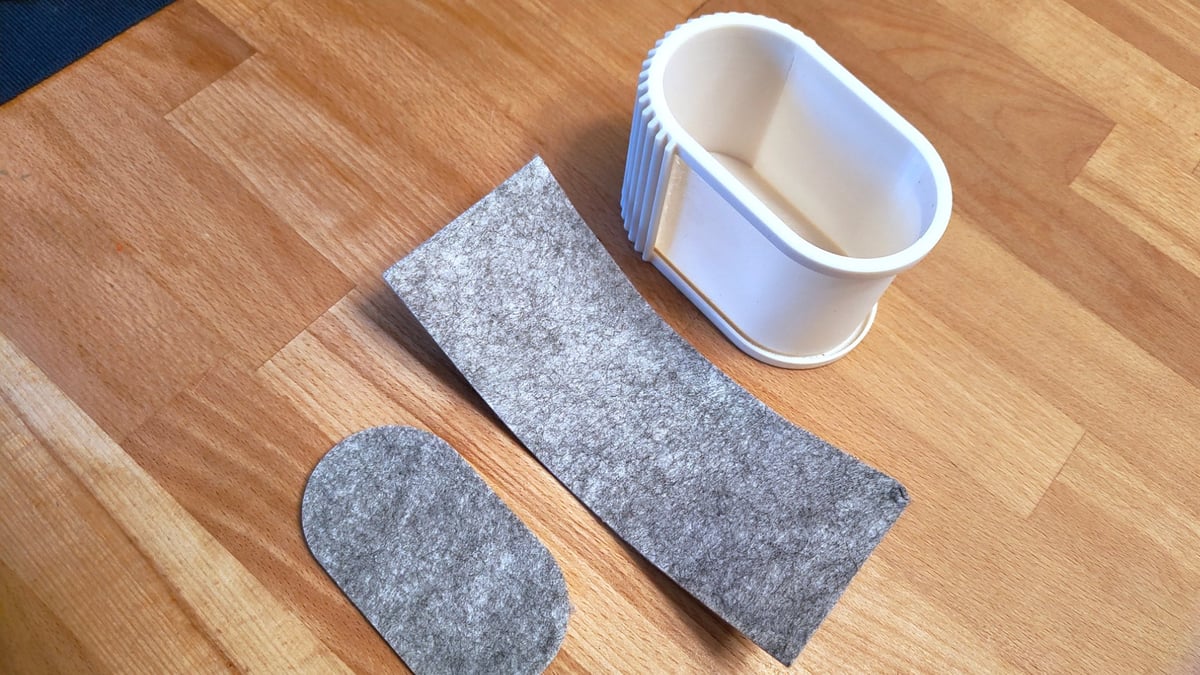
Depending on the intended effect, you may need to design features to accommodate the fabric. This pen pot example I designed includes a pocket I sized to the thickness of the felt I had. It fully encloses fabric without the need for glue.
Much of what I’ve done is with felt, foam sheets, and faux leather, as single layers or in combination to achieve different levels of padding or stiffness behind the surface.
Material inspiration: While the likes of Bambu Lab and xTool stock sheets of material for laser and blade processing, any good crafts store will also be a treasure trove of materials you can cut out for your prints. You're not limited to cork and felt; the following are all suitable for this sort of work.
-EVA foam
-Tyvek
-Faux-leather
-Neoprene
-Laminated burlap
-Flexible magnetic sheets
-Wood veneer
I’ve found that cut-outs for object bases look bad when they sit flush with the edge of the printed object. Offsetting them slightly or modeling a pocket for them to partially nestle in hides the base-softening material while keeping full coverage for that satisfying softness when you set them down – it’s not a difference you see, but you certainly feel it when interacting with the prints.
Beyond the tactility and sound, adding fabric gives you new opportunities with the look of your prints. Pairing your favorite filament colors and styles with matching or contrasting fabrics and soft materials is way less wasteful than using a multicolor printing setup to add blocks of contrast to your models.
Adhesive Apprehension
Designing for this new obsession of mine taught me a couple of lessons early on.
Fabrics compress and bunch up, so think twice about how exactly you want the fabric to join your print. Interference can work, but often result in the fabric bulging if it’s not rigid enough. The force required can damage the fabric too.
Transition fit, where you leave enough space for the thickness of the fabric but not enough for it to move freely about once in place, works well, particularly if you want to give yourself the flexibility of changing the fabric (and the look of your print) later.
You can also plan some permanence for fabrics in your designs, pausing the prints at a particular height with space for the inlay, trapping it in place.
The other big consideration concerns glue. If you plan to use adhesive to stick the fabric to the print, consider the type of glue and check whether it is compatible with both the fabric you want to stick, and the printed material. Solvent based glues (which is to say many quick or instant glues – if it stinks, it’s probably a solvent glue) may not mix well with your flexible cut-out, particularly if its a synthetic material. It’s not always obvious what exactly they’re made from.
Take it from someone who knows someone (that definitely isn’t me, no siree) who accidentally used acetone in an mostly injection-molded ABS vapor-smoothing chamber. It melted from the inside out – lessons were learned.
Read more recent news:
- 3D Printing with PEBA: The "Super Bounce" Alternative to Standard TPU
- The $4 Billion Shift: Why Construction Giants Are Betting on 3D Concrete Printing
- It’s Not Over Yet: Cyber Week & Holiday 3D Printer Deals
Tired of Reading? Try Listening
License: The text of "Make 3D Prints Feel Premium with Simple Fabric Inlays" by All3DP is licensed under a Creative Commons Attribution 4.0 International License.