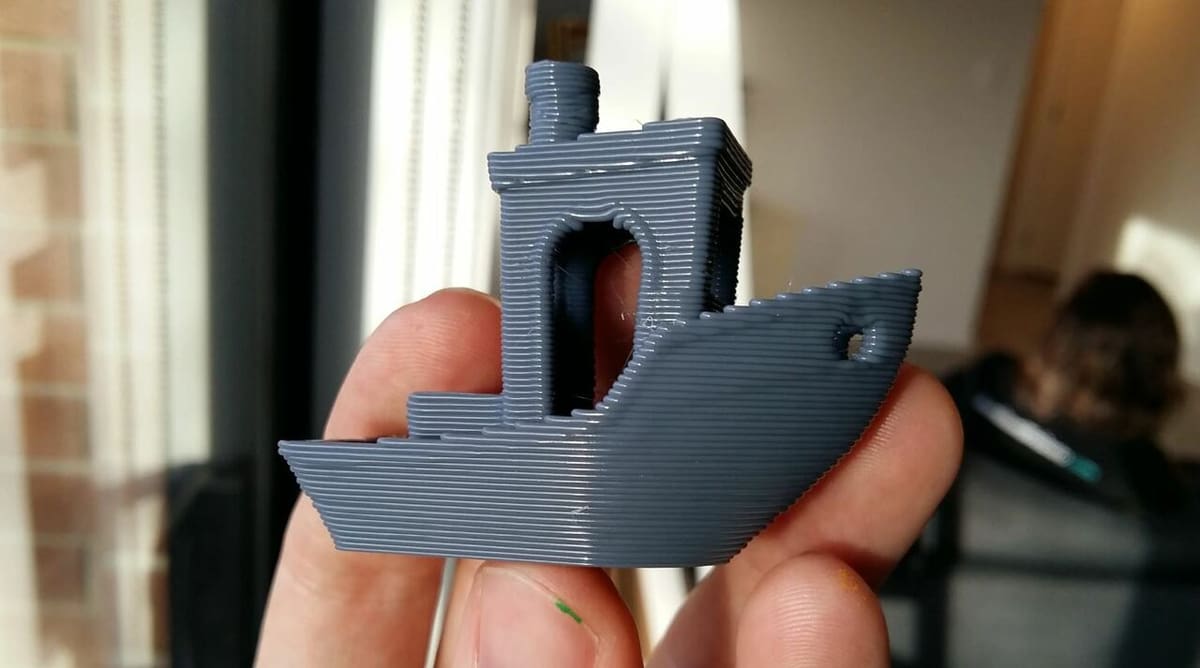
How to 3D Print Faster: Tips to Speed Up 3D Printing

3D printing speed is a key consideration, as some parts can take hours, even days to print. Read on to learn how to 3D print faster!
If you’ve ever worked with an FDM 3D printer, you probably know how slow it can be to print anything big or dense. Indeed, there are many limiting factors to obtaining quick prints without compromising on quality.
To achieve even close to the quality of a traditionally manufactured part, like an injection-molded Lego brick, you normally have to print with slower speeds and other time-increasing settings to maintain detail. That’s because, at the most basic level, print quality and print speed are inversely correlated, meaning that when one goes up, the other goes down.
But this is only part of the story. There are many ways to reduce printing time without causing the results to suffer, but it can take some work to identify and tune the right settings to balance low print time and high print quality. This tuning process is repetitive and tedious, involving tweaking settings and printing tests until you achieve the print time you’re looking for without significant quality defects.
Many settings affect speed, and in this article, we’ll go over what you can do to reduce printing time. We’ll first look at motion systems suitable for high speed printing. Then, we’ll dive into speed settings for the printhead as well as other settings that need to be adjusted to balance faster speeds. After that, we’ll review other important print settings that can help reduce printing time, using Cura as the example slicer. Enjoy!

Motion System
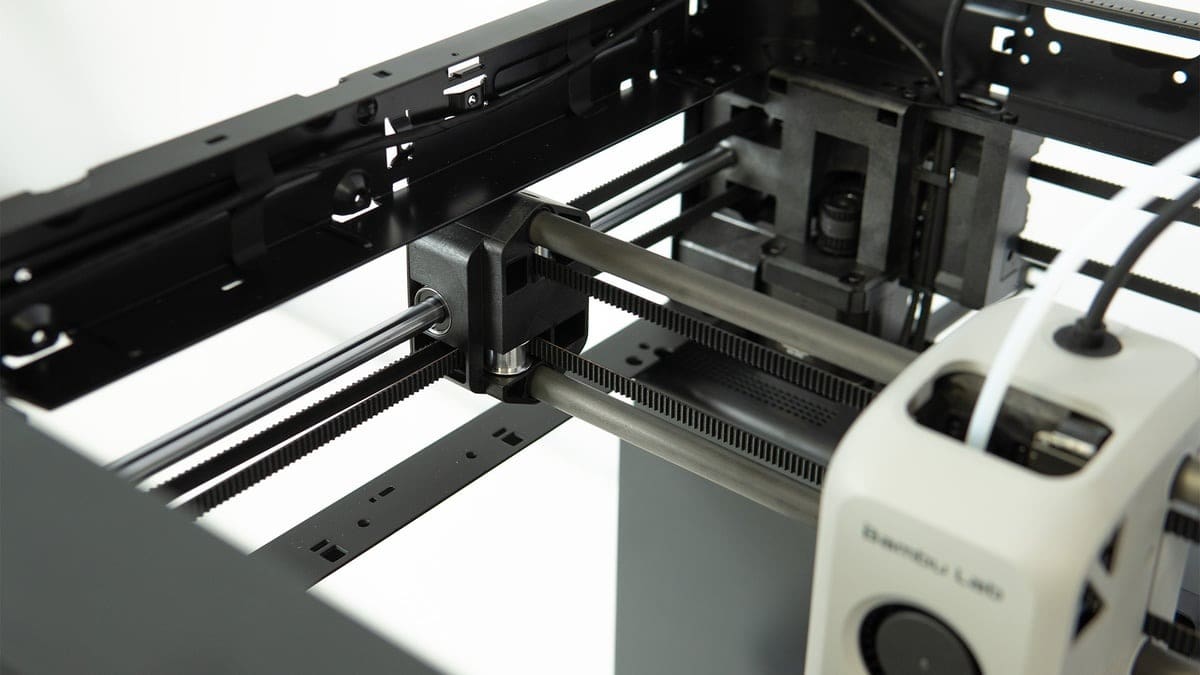
Not all 3D printers are built the same, and we aren’t just talking about the components, but rather the motion system they use in their design. Some 3D printers are faster than others simply because they use a motion system that allows for faster movements, such as delta or CoreXY printers.
Delta printers are usually quite tall and have a fixed bed with a printhead that’s moved by three vertically mounted stepper motors. On the other hand, CoreXY printers have a printhead that moves along the X- and Y-axes while the bed moves up and down. Both of these motion systems benefit from not having to move the bed on the Y-axis, unlike bed slingers. This slows things down, as print beds are usually heavy.
The motion system, together with the quality of the components, will ultimately determine the printing speed possible for your printer. It’s important to know what type of printer you’re working with and look at speed values from fellow makers using stock or modded printers.
Print Speed
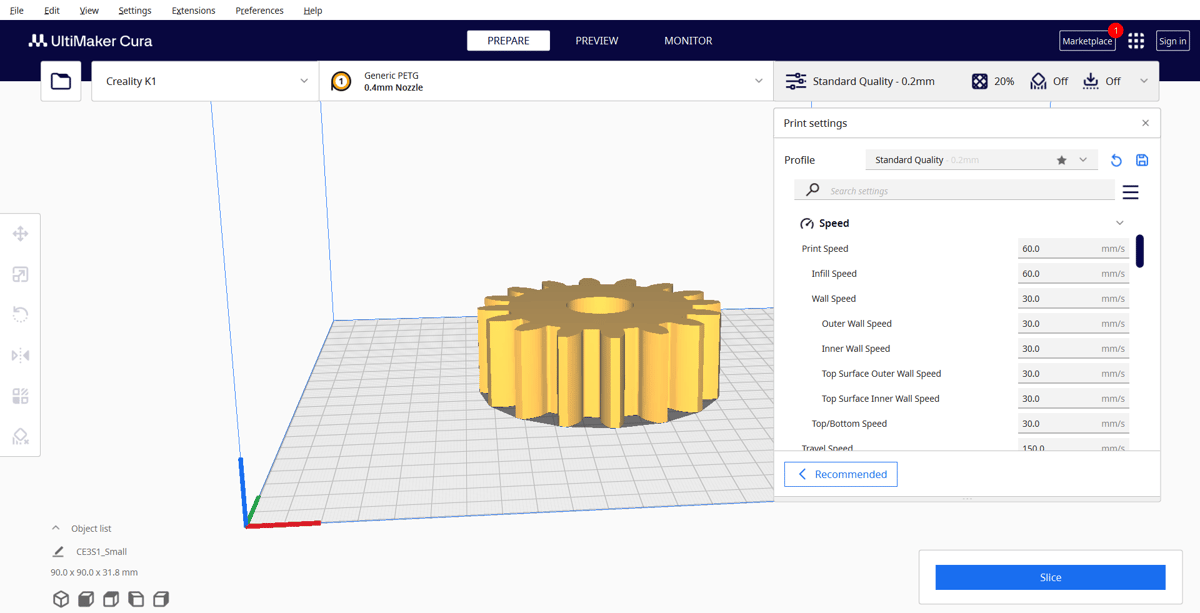
Your print speed settings contain the different speed values for your printer when it’s doing specific actions (infill, walls, top and bottom layers, and other printing actions). The first thing you should do is open up your slicer, head over to the speed settings section, and make sure all the adjustable settings are visible so you have a complete picture of your options.
For the print speeds that are set slower by default, you can start by increasing these to be equal to the other values. Exceptions include if the part you’re printing is meant for display, in which case you may want to set the “Wall” speed slightly lower than your other print speeds. At the same time, make sure to increase the “Skirt/Brim Speed” if you’re using one, as this speed is slower by default but won’t affect the quality of the final print.
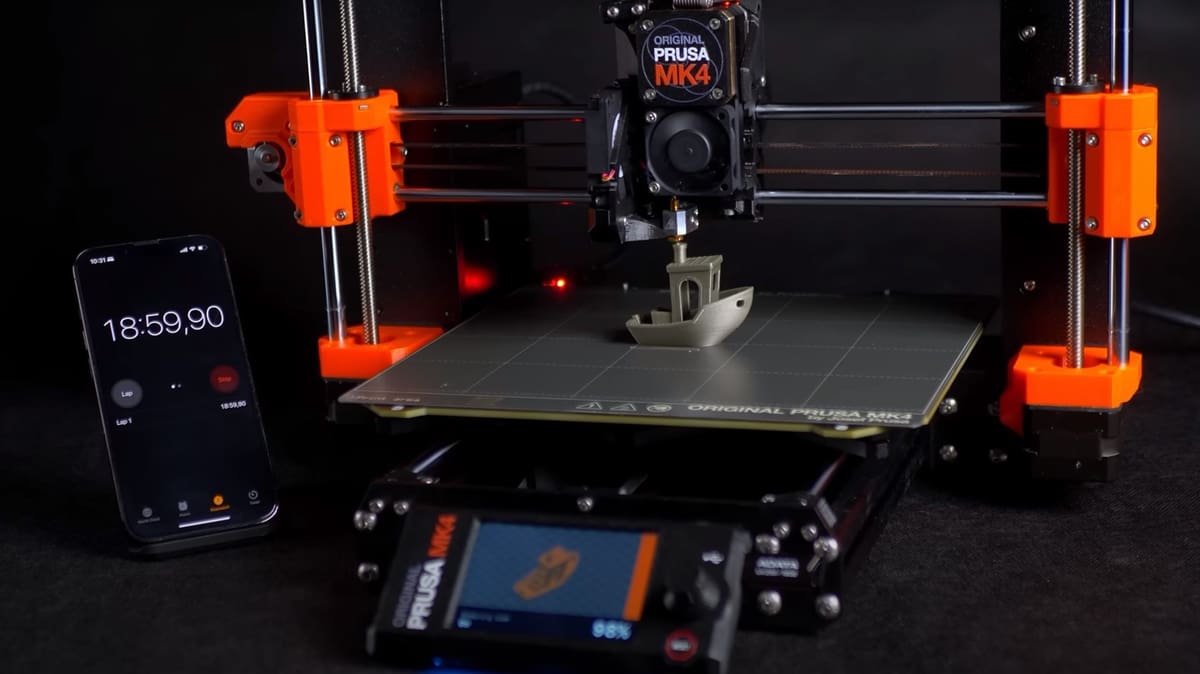
For PLA and ABS, some typical speeds are 40-60 mm/s, but you might like to try even faster. When increasing print speed, do so in intervals of 5 mm/s, as too large a change can present many problems at once. It’s better to solve print quality issues one by one and in increments, rather than attack them all at once.

Temperature
Temperature is the number one slicer setting that needs to be adjusted when increasing your print speed. Increasing the print speed gives the filament less time to melt in the nozzle or “melt zone”, leading to under-extrusion. If you increase print speed without increasing temperature, you may experience extrusion issues or filament grinding because the hot end can’t melt the filament fast enough. This is especially true if you’re trying to reach SpeedBoatRace challenge speeds.
So, if you’ve increased your print speed and are seeing signs of under-extrusion, try raising your nozzle temperature in intervals of around 5 °C for every 5-10 mm/s increase in speed. Every printer’s temperature-to-speed ratio will be different, so feel free to play around and try your own combinations.
You may, however, run into a bottleneck if your hot end setup isn’t built for speed. For instance, the heater in your hot end may not be capable of delivering enough power, in which case, you’ll want to upgrade the heater block.
In some cases, you may need to a more capable hot end setup altogether, preferrably one that’s compatible with high flow nozzles such as E3D’s Revo High Flow, Volcano, or SuperVolcano. This will allow your filament enough time in the “melt zone” to absorb heat and melt. This means that when it reaches the nozzle, it will have a viscosity low enough to be properly extruded.

Acceleration
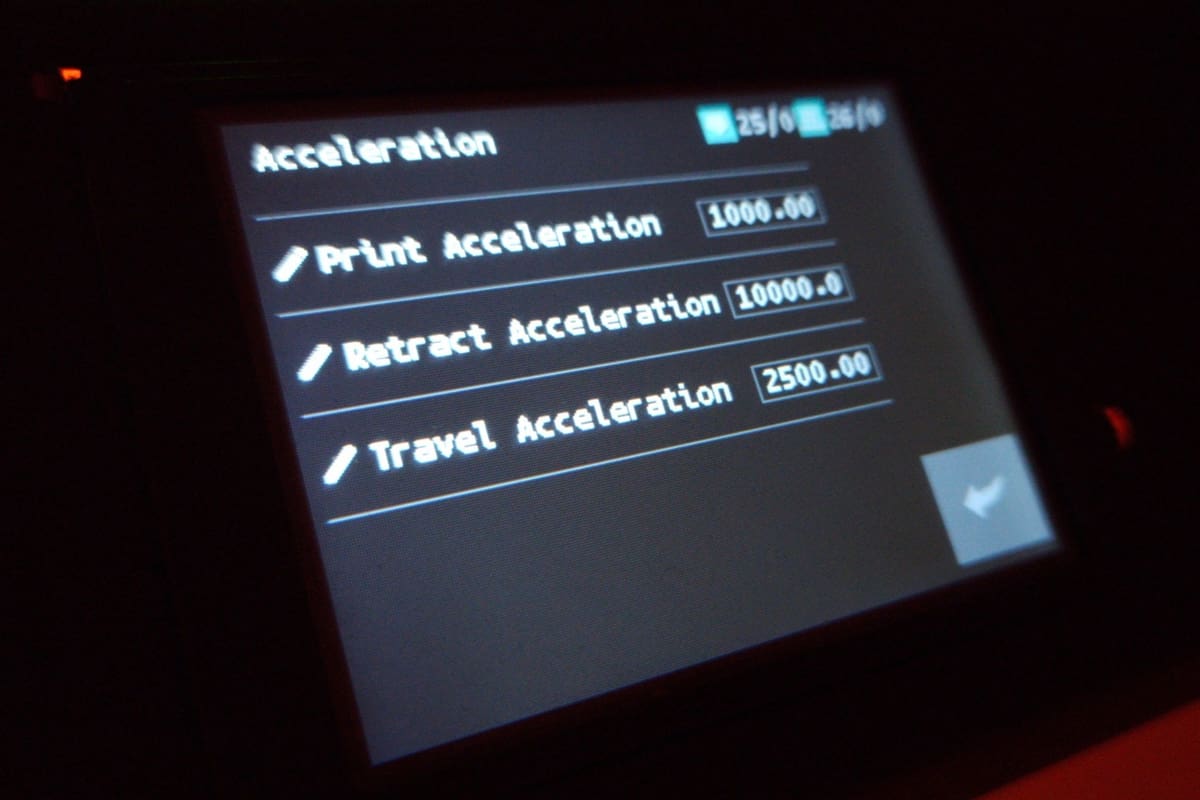
We’ve mentioned how increasing the print speed can result in faster prints, but something many users forget about is acceleration. This setting can have just as big, if not bigger, of an impact on your speed.
An easy way to understand the difference between the two settings is knowing that printing speed determines the maximum speed at which the printer moves while acceleration dictates how fast it reaches this maximum print speed.
Setting higher accelerations (either in the slicer or directly in the printer itself) means that the stepper motors will accelerate faster and therefore reach their maximum printing speed in a shorter amount of time, resulting in lower print times. This is especially true with smaller, more complex prints where there are lots of direction changes and the printer is constantly changing direction by slowing down and accelerating again.
Similar to print speed, high acceleration speeds can decrease print quality and make ghosting more noticeable on your prints. In addition, it can be a bit tricky to determine the optimal values for acceleration, as they’re highly dependent on your printer and its specifications. However, here are some generalized values to refer to:
- 500-2,000 mm/s for rectilinear printers
- 2,000-3,000 mm/s for CoreXY printers
Again, these are only general values, and they vary greatly depending on the printer. Some 3D printers, such as the Bambu Lab X1 Carbon, can reach accelerations of up to 20,000 mm/s.
Travel Speed
Another speed you may want to adjust is the travel speed, which is how fast your printhead moves when it’s not extruding material. Especially if you’re printing multiple parts at once, increasing travel speed can decrease print time. In Cura, the default travel speed is 150 mm/s, but you can raise this value in intervals of 10-20 mm/s to reduce printing time.
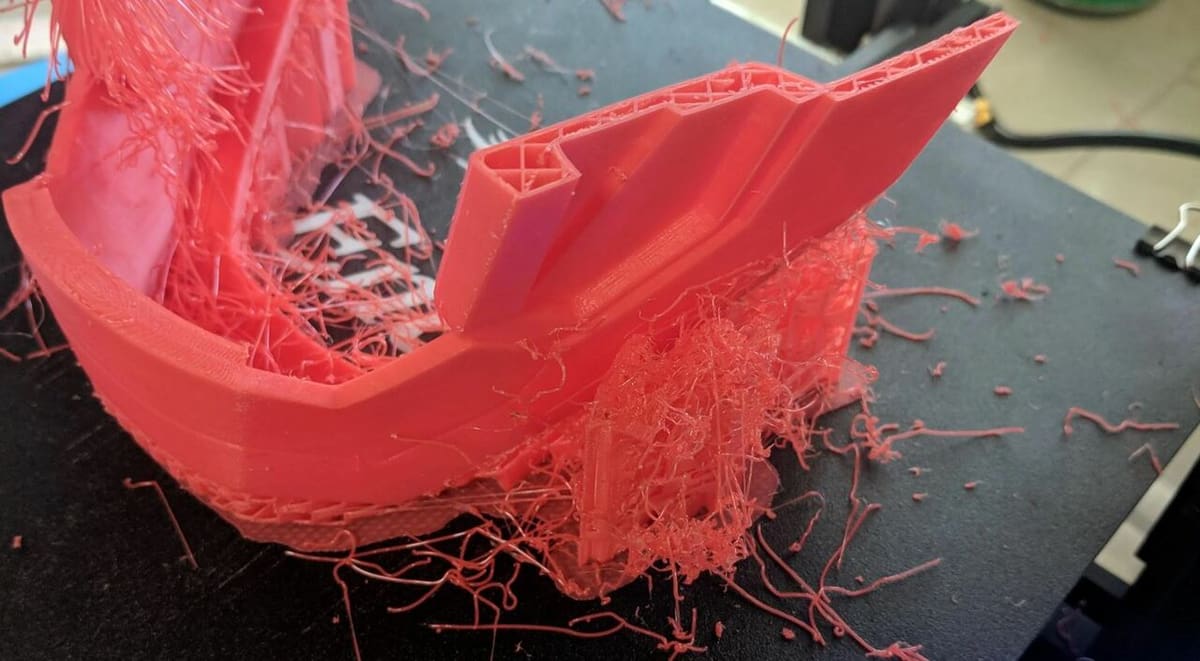
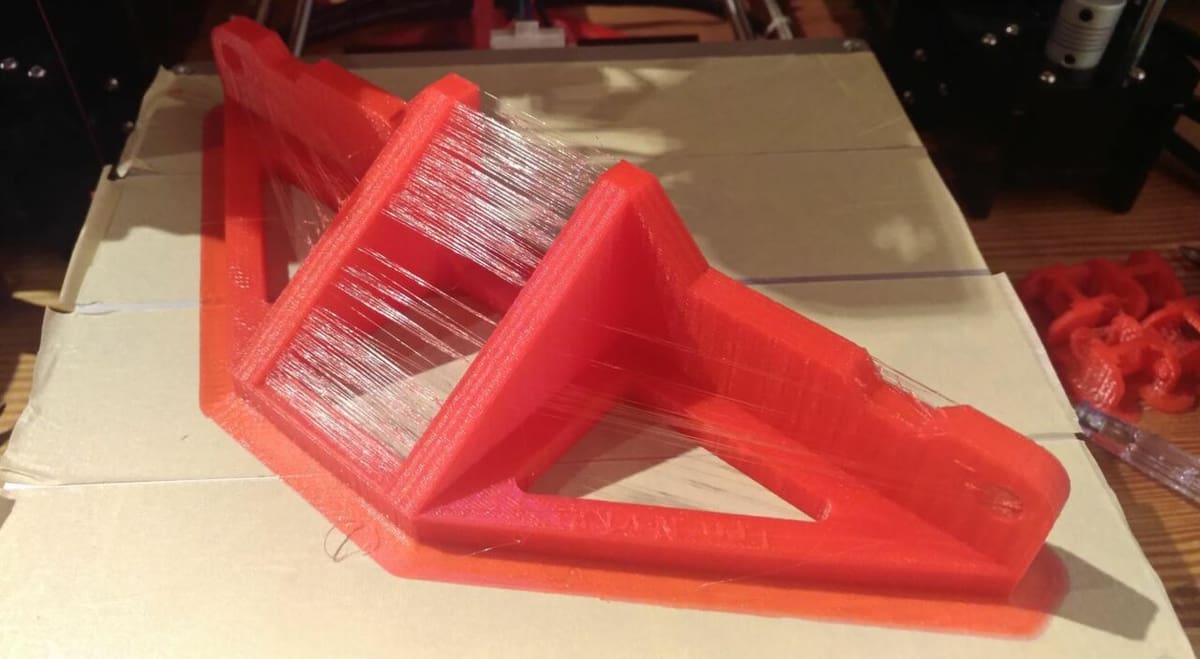
Pressure builds up in the hot end after filament is extruded, causing additional material to ooze out of the nozzle. This material can stick to other parts of the print, causing quality defects. In addition to reducing print time, increasing the travel speed can avoid any extra material from oozing out of the nozzle, which is an added bonus in terms of print quality.
But be warned: Raising the travel speed also increases the chance that the nozzle could collide with another part of the print when moving. It’s important to balance any increase in the travel speed with other settings like Z hop and combing mode. It’s a good idea to check out your printer’s specific recommended travel speed.
Z Hop
Just like increasing the temperature balances an increase in printing speed, activating the “Z Hop” setting balances an increase in travel speed. It moves your printhead slightly up the Z-axis when making a travel move, which will avoid any potential collisions.
Anything with fine details or skinny support structures is at risk of being damaged or even knocked over if the printhead hits it. The default Z hop distance in Cura is 0.2 mm, which works well, but if that’s not enough, you can raise this distance in intervals of 0.05 mm.
Activating this setting may increase print time slightly, as your printer has to make one extra jump for every retraction movement. However, in most instances, the small increase is more than outweighed by the time saved by increasing the travel speed.
Combing Mode
Another setting you can use to prevent the nozzle from running into parts of your print is “Combing Mode”, which regulates the path your printhead takes. In Cura, the settings are detailed as “Avoid Printed Parts When Travelling”, and “Avoid Supports When Travelling”.
Like activating Z hop, combing mode will also increase print time slightly as a trade-off for a faster travel speed. If you’re not worried about supports or other small features being collided with, you can turn combing mode off entirely. This will reduce the print time a fair amount because it results in a shorter travel route, but it may also cause a lot more stringing.
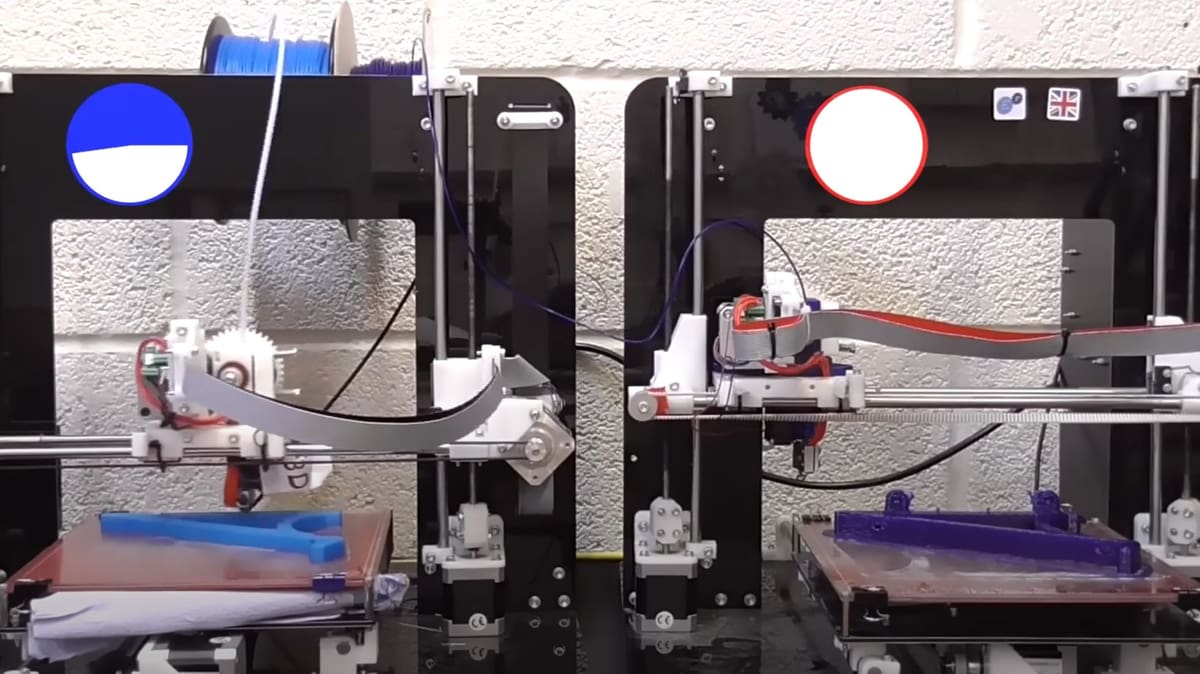
Input Shaping
Input shaping has become increasingly popular, and nowadays, most 3D printers make use of this technology. In a nutshell, input shaping reduces vibrations while printing to improve overall print quality and reduce ringing. This allows you to print at slightly higher speeds than would have previously been possible.
It’s built into the firmware itself, and if enabled in the code, can be tweaked from the printer or through the slicer. Some slicers, such as Cura, will need an add-on for this to be possible.
Both Marlin 2.0 and Klipper support input shaping. Although the setup process varies between the two, it fundamentally works the same way. In Klipper, you can automatically set the best values using an accelerometer. This attaches to the printer and goes through a series of movements to automatically determine the best value. In Marlin, you have to do so manually, trying different values and observing the print results to determine the best one.
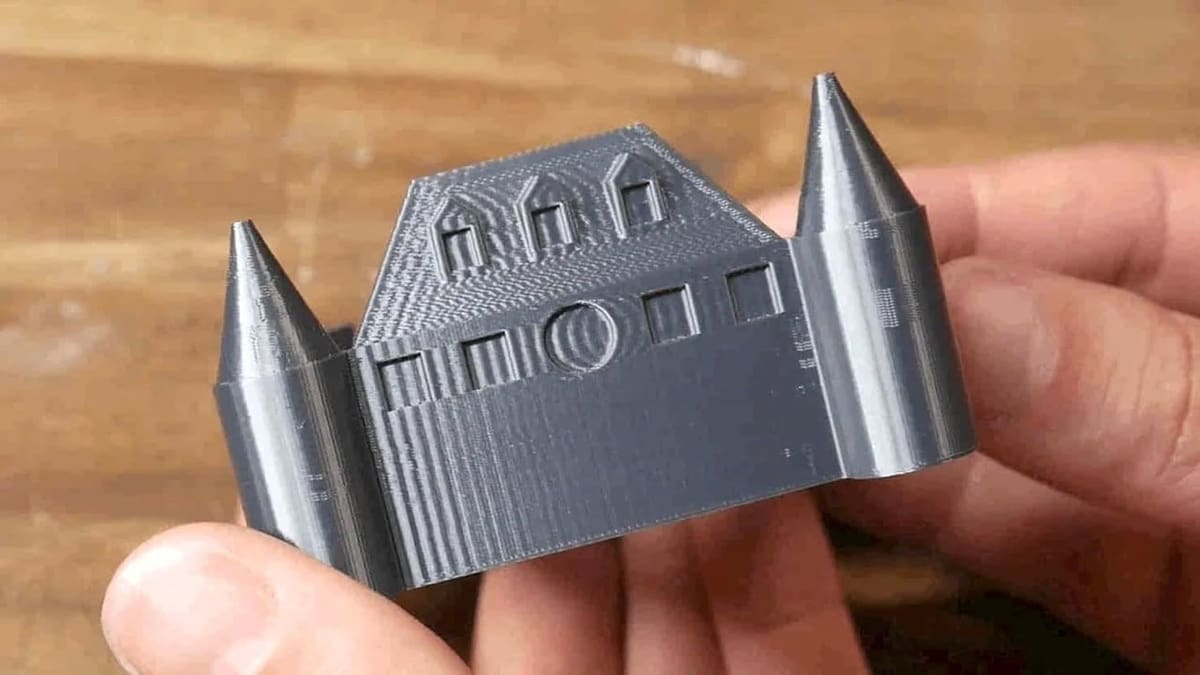
Layer Height
Layer height is one of the most significant settings, if not the most significant, when it comes to reducing printing time. Layer height, also known as resolution, is the distance between the nozzle and the previous layer of a 3D print. As it gets larger, parts get stronger and are quicker to print because fewer layers are required to achieve the same height. However, increasing layer height comes with its own downsides: The larger you go, the less detailed prints will be.
The standard layer height on consumer FDM 3D printers is about 0.2 mm, so to print faster, you can try increasing this value to around 0.24 or even 0.28 mm. This will significantly cut your printing time and increase part strength.
However, keep in mind that the recommended layer height range depends on your nozzle diameter. Generally, the maximum layer height values should not exceed 80% of the nozzle diameter. If you’re using the standard 0.4-mm nozzle, the maximal layer height is about 0.32 mm. Larger nozzles will extrude more material through thicker layer heights and widths. In order to further increase layer height and reduce print time, you can invest in a larger nozzle. These can be found in many sizes, ranging to 1 mm and beyond.

Infill
Infill is the internal filling of parts and an element of manufacturing unique to 3D printing. It can be adjusted in a few ways, but the two most impactful settings are density and pattern.
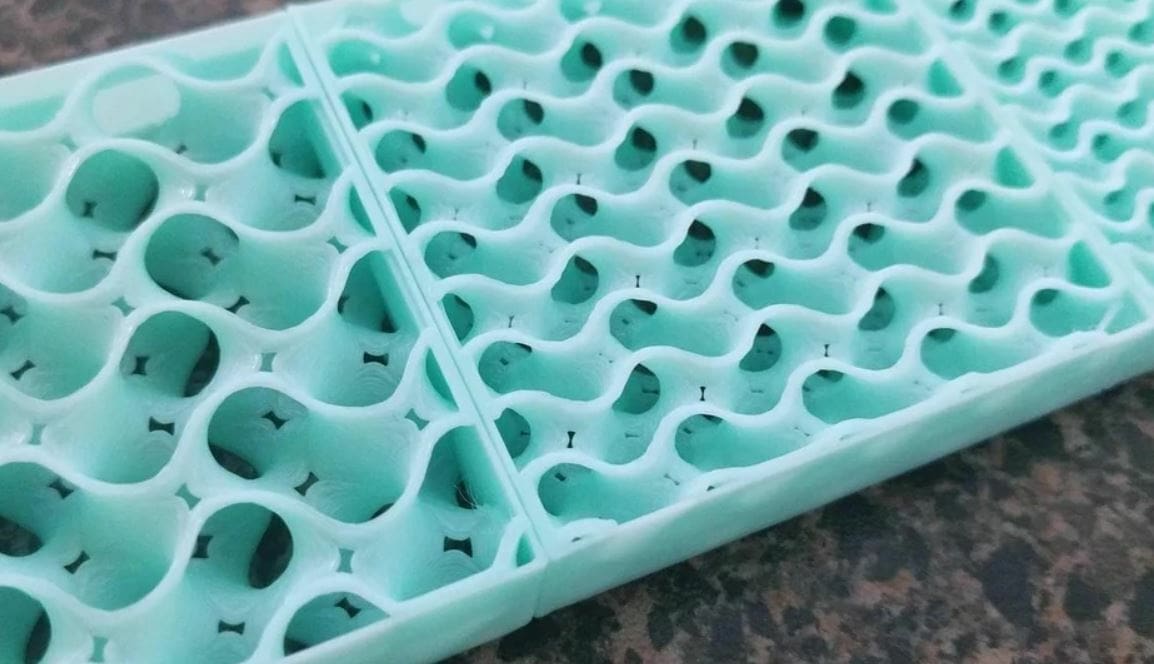
Infill density is the solidity of the inner filling of prints, and the larger this percentage is, the more full (and heavy) a part is. Infill pattern is the design or shape that the infill is printed in. You can choose from a wide range of options (depending on your slicer) including lines, zig-zag, gyroid, hexagon, and more.
For the infill density, as you might expect, a lower value or percentage means the printer has to extrude less material, so the time it takes to finish prints can be greatly affected. To reduce printing time, you can go as low as 0%, which is hollow, but you may want to stick between 5-15% for at least some internal strength.
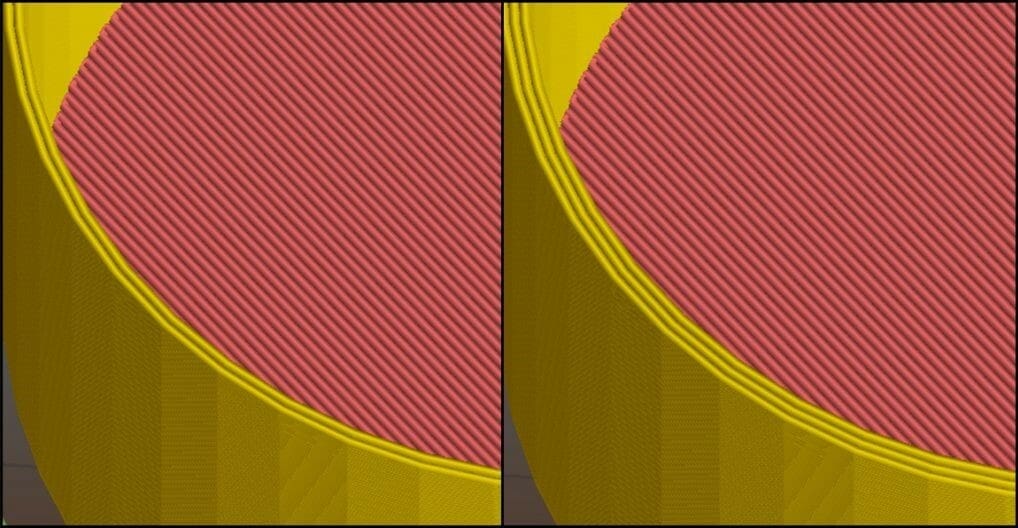
Infill pattern is different from density and other slicer settings because it doesn’t vary by a decimal, percentage, or integer. Instead, you can choose between a range of patterns that are different in their repeated structure and offer different benefits. Most slicers offer at least a few patterns, but a few of the best for lowering printing time are the lines or zig-zag patterns because they are simpler to create.
Shells
Shells are the outer perimeter of 3D prints that divide the external layers of a model from the infill, consisting of the walls and top and bottom layers of a model. Shells are printed as individual lines around a print, and they have no infill. This print element is typically measured in a distance (of the walls and top and bottom layers) or a number of layers.
The more shells you select, the more complete layers and walls your machine has to print. If your shells were so thick that they captured the entire model, it would be the same as printing with a 100% infill density. Accordingly, the more shells you have, the stronger a part is, but the longer it takes to print.
Try lowering your shells to under a 0.8-mm distance (2 layers using a 0.4-mm diameter nozzle) to print faster. Your slicer’s default settings are likely to be higher than this, so this should provide a decent print time reduction. For even quicker prints, you may even want to go all the way down to a 0.4-mm distance, which is only 1 layer on a standard 0.4-mm diameter nozzle. Just be aware that infill can start to be visible when the walls get too thin.
Additional Printed Parts
The extra parts your slicer adds to a model to aid in the printing process, like supports and rafts, can be another important consideration in how to cut down on print times.
Supports
Supports are the additional material and structures used to hold up steep overhangs or bridges. When activated in your slicer, supports usually have a default minimum overhang angle of around 45 degrees, so they won’t show up unless the overhang angle meets or surpasses this minimum.
Too low of an angle makes the slicer sensitive to overhangs, creating too many support structures, which will increase the time it takes to print a part (and post-process it, too). That’s why it’s important to make this angle as high as you can. See if you can raise it to 50° or 55°, using this overhang test to experiment with different angles.
Once your overhang angle is set, orient your model to have the least amount of overhangs possible, which will further minimize the number of support structures. If you’re using Cura, you can try out the Auto-Orientation Cura plug-in, which automatically orients your model to require the least aount of support. Finding the right orientation without this plug-in involves rotating your model until the support structures and print time are at their lowest points.
Adhesion Assistants
Adhesion assistants are base-level supports that enhance a part’s adhesion to the build plate and come in three forms: rafts, brims, and skirts.
A raft provides the best bed adhesion and creates an entire multi-layer-thick platform under a part. On the flipside, this can consume a lot of material and time. A brim is a single-layer-thick platform that expands out from the base of a print, while a skirt is a single layer perimeter set apart from and surrounding a model’s base. Skirts don’t actually help models adhere to the print bed; rather, they help users check for any extrusion and bed adhesion problems before the actual print begins.
If your model requires adhesion assistance, try to use a brim instead of a raft. Printing a skirt and monitoring how well it prints may save you time and material in the long run, especially if you’re able to catch problems before your main print begins.

Other Settings & Calibration
Besides some of the balancing settings mentioned above, like temperature, Z hop, and combing mode, there are other settings you can adjust to further balance your print speed and print quality. Two important ones are E-steps and flow. When either or both are poorly tuned, they can lead to dimensionally-inaccurate parts and over- or under-extrusion. Below, we’ll tell you a bit more about both of them.
E-Steps
The E-steps setting determines the number of “steps” or partial motor rotations that your extruder axis (E-axis) stepper motor spins every time you tell it to move a certain amount. This setting can be set and adjusted on your printer’s LCD interface, firmware, or through a G-code terminal.
Generally speaking, there are only two occassons when you’ll need to calibrate the E-steps: when you’re first setting up your printer or after any changes to your extruder. That being said, you may also want to confirm the E-steps are correct if you’ve made any changes to your firmware.
Flow
Flow refers to how much filament is fed through your machine’s hot end, and it’s sometimes known as the extrusion multiplier. This slicer setting determines what percentage of the original amount of material used for printing (set by slicer) should actually be pushed through the hot end. You can set or adjust your extrusion multiplier in your slicer.
You’ll definitely want to retune this setting if you upgrade to a high flow nozzle – and, if necessary, a compatible hot end assembly. Some makers recommend tuning the flow rate with every new spool of filament, but it also makes sense to revisit the setting every time you make substantial changes to your print speed or temperature. As mentioned earlier, it’s best to only change one setting at a time, so you know which changes have had what effects.
Regular Calibration
Even if you tune all your slicer settings for the perfect balance between print time and print quality, none of it will mean anything if your printer itself isn’t in the best possible condition. Regular calibration will help you get the most out of those carefully-tweaked slicer settings, including checking the bed leveling, belt tension, extruder tension, carriage weight, that the nozzle is clean and unclogged, and more. Even without trying to print more quickly, a well-calibrated machine will result in fewer print failures, so what do you have to lose?

License: The text of "How to 3D Print Faster: Tips to Speed Up 3D Printing" by All3DP is licensed under a Creative Commons Attribution 4.0 International License.