The Best Creality Ender 5 Plus Upgrades & Mods

Even though it's a community favorite, the Ender 5 Plus has room for improvement. Read on for a breakdown of the best Ender 5 Plus upgrades!
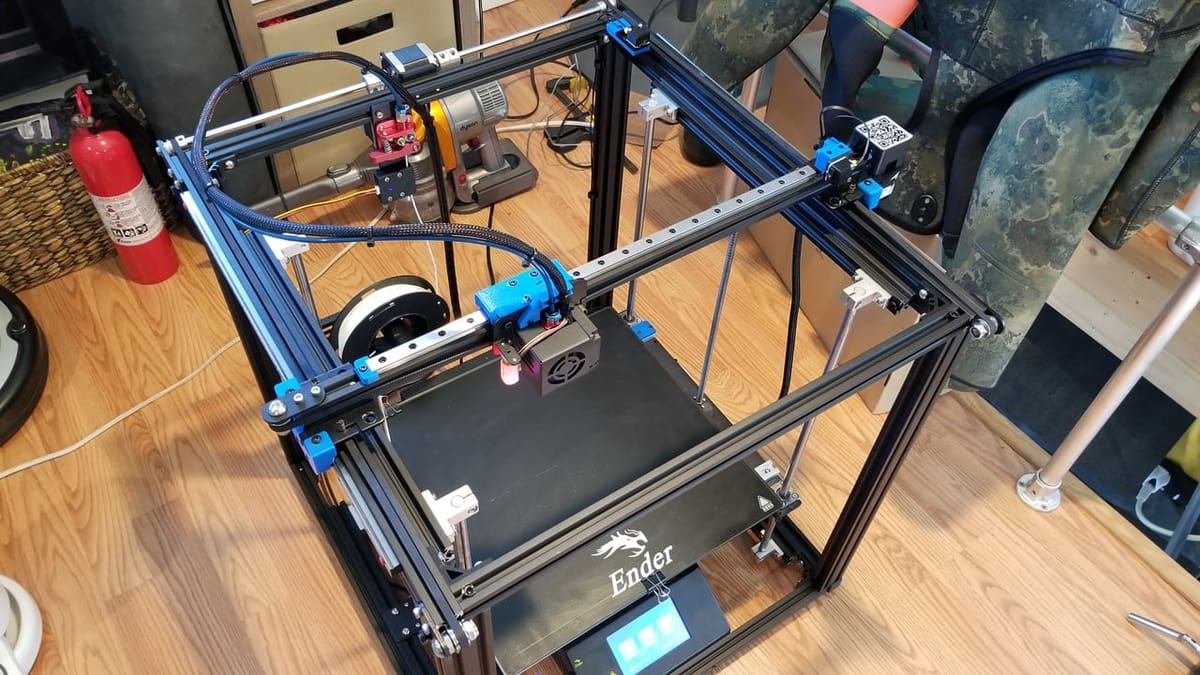
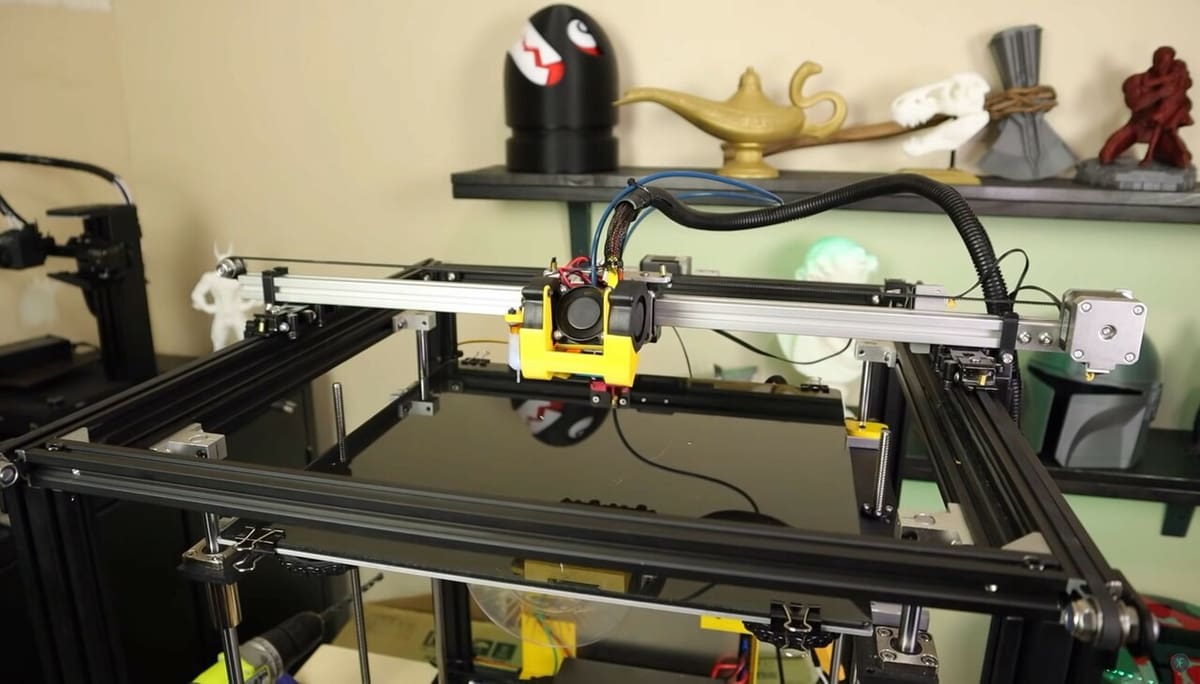
The Ender 5 Plus is one of the successors of the famed and reliable Ender 5 and Ender 5 Pro. Boasting a larger build volume of 350 x 350 x 400 mm and priced at around $550, it’s not surprising it has become a community favorite.
With this popularity, many people have discovered issues and designed improvements for the Ender 5 Plus. We’ve divided our picks of the most useful upgrades and modifications into two categories, To Buy or DIY. Let’s take a look!
To Buy
The following are all upgrades and modifications that you’ll need to purchase, ranging from simple to a bit more involved. Either way, a little money can go a long way to improve your Ender 5 Plus.
BigTreeTech SKR 2 Mainboard
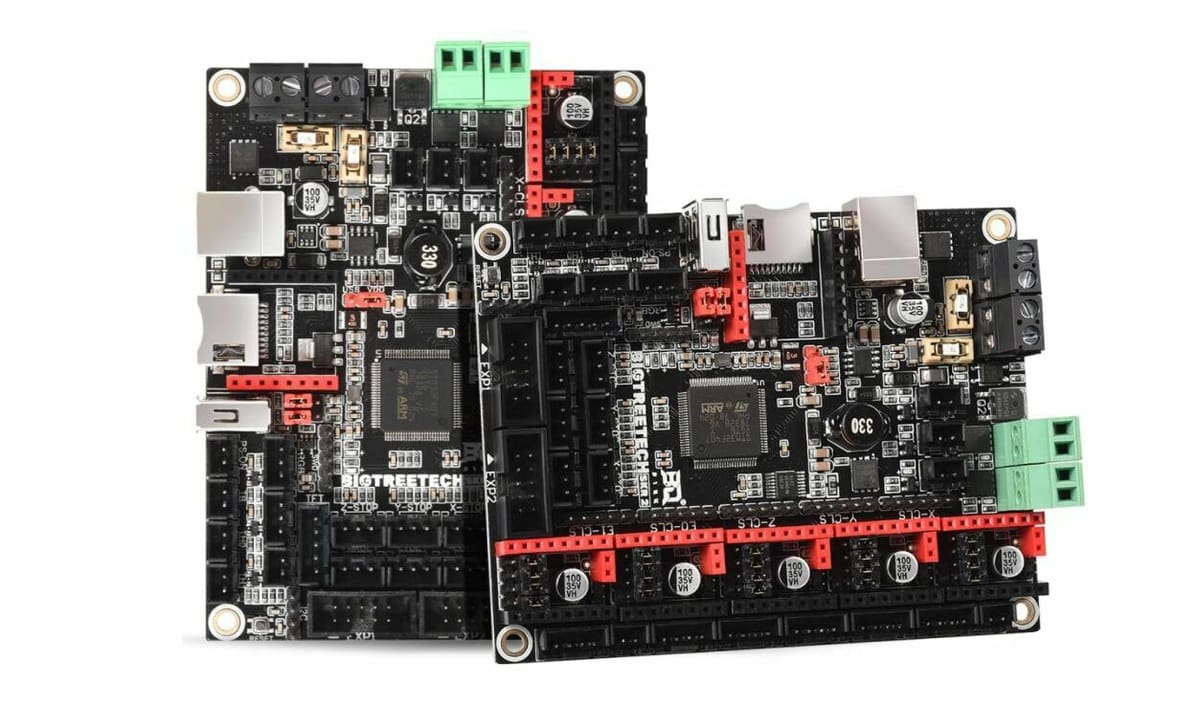
One of the main complaints about the Ender 5 Plus is that the stepper motor drivers on the stock mainboard cause the motors to be very loud. If you want a quieter experience, you can upgrade your printer with the BigTreeTech SKR 2 mainboard, which will only set you back about $40.
The SKR 2, the update to the SKR V1.4 Turbo, is a powerful motherboard with five stepper motor ports and swappable stepper motor drivers. This allows you to purchase and insert higher-end drivers, such as TMC2209 drivers, which are known to keep the motors quiet. This is something you can’t do on Creality’s “Silent” Board.
Besides customizable stepper motor drivers and five motor ports, the SKR 2 has five fan ports, a 32-bit controller, a super fast 168-MHz processor, and a USB Type-B interface. You can also easily update the firmware on this mainboard through its MicroSD card slot.
Some makers have also opted for the latest version, the SKR 3, although it’s a bit pricier.
- What does it improve? Makes the Ender 5 Plus quieter, offers more ports, allows for firmware updates through the MicroSD card slot
- How much does it cost? ~$40

Upgraded Hot End
The stock hot end on the Ender 5 Plus can reach 260 °C, which is suitable for printing most filament materials like PLA, ABS, and PETG. However, if you’re looking to print more advanced filament materials, like PC or nylon, you’ll need a hot end with better heating capabilities. Luckily, there are many high-temperature hot ends that are compatible with the Ender 5 Plus, such as the MicroSwiss All-Metal, Creality Spider, or the E3D Revo Creality hot end.
Depending on the specific hot end you choose, this Ender 5 Plus upgrade can be a bit intensive. As such, we suggest following a guide or tutorial if you’ve never made this type of 3D printer upgrade before. A few great video tutorial options can be found for the Creality Spider, MicroSwiss All-Metal hot end, and generic upgraded hot ends on YouTube.
Additionally, if you’re using a hot end like the E3D V6 that isn’t a drop-in replacement, you’ll need a 3D printed mount, such as this V6 option. You also might need to adjust your printer’s firmware and maybe even reconfigure the wiring depending on the thermistor and heating cables on your new hot end.
But if you’re successful, an upgraded hot end on your Ender 5 Plus will allow you to print with a wider range of filaments. And, many high-temperature hot ends, such as those we mentioned, also have terrific build quality, which could contribute to improved filament extrusion on your Ender 5 Plus.
- What does it improve? Makes the Ender 5 Plus capable of printing more filament materials such as nylon and PC, improves extrusion
- How much does it cost? ~$40
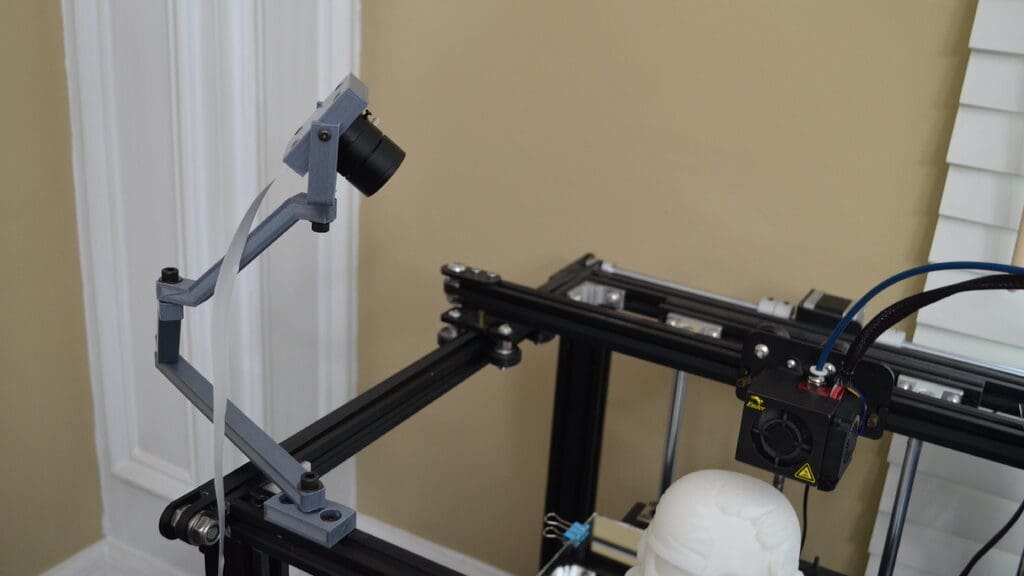
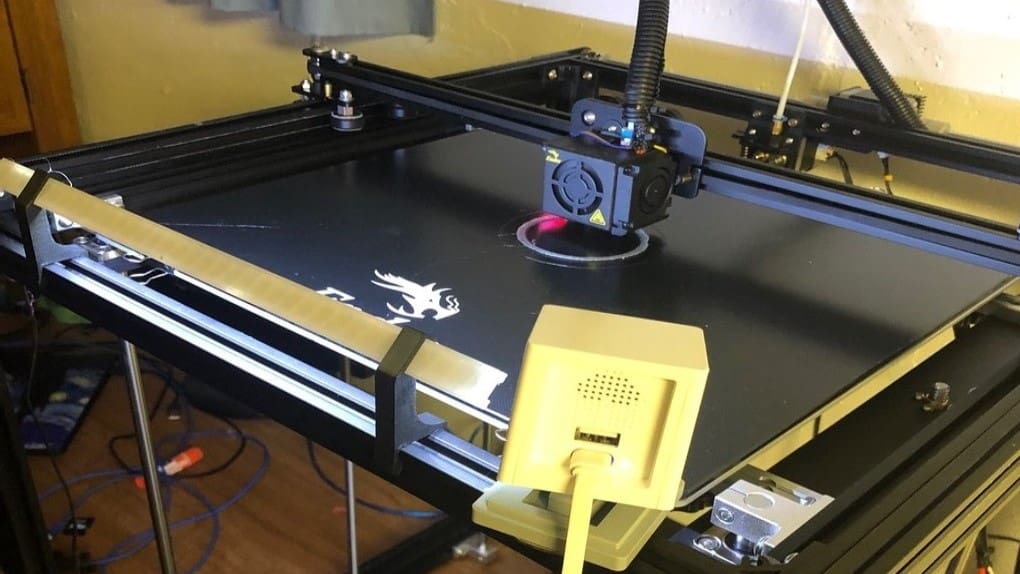
Camera
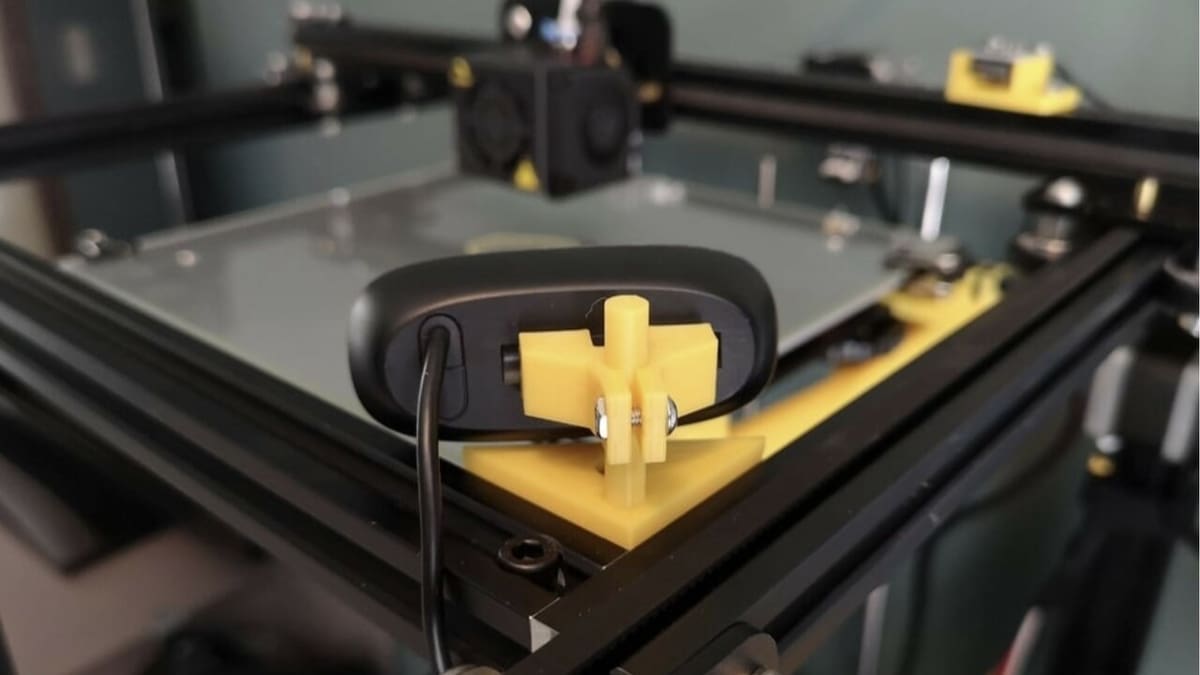
Worried about your Ender 5 Plus failing, especially on those larger print jobs? Adding a camera to your 3D printer will allow you to remotely monitor your 3D printer’s status so you aren’t left in suspense while away.
The most popular type of camera for monitoring your 3D printer is a USB webcam, like the Logitech C270, as these cameras are widely compatible and generally offer decent video quality.
To access a live video stream, though, you’ll need to connect your camera to some form of server. OctoPrint, AstroPrint, and Repetier Server are all great options that are specific to 3D printing and work with many types of cameras. You can check out our guide to the best 3D printer cameras to learn more about the options and different configurations.
On top of a camera and a server platform, you should also consider getting a mount to attach the device to your Ender 5 Plus. There are many 3D printable mounts that you can choose from online, depending on the camera you’re using and your desired viewing angle. The mount seen in the image above is a great option that can be found on Thingiverse.
- What does it improve? Enables remote printer monitoring, allows you to more easily detect print failures
- How much does it cost? $20-$50
Metal Feeder Extruder
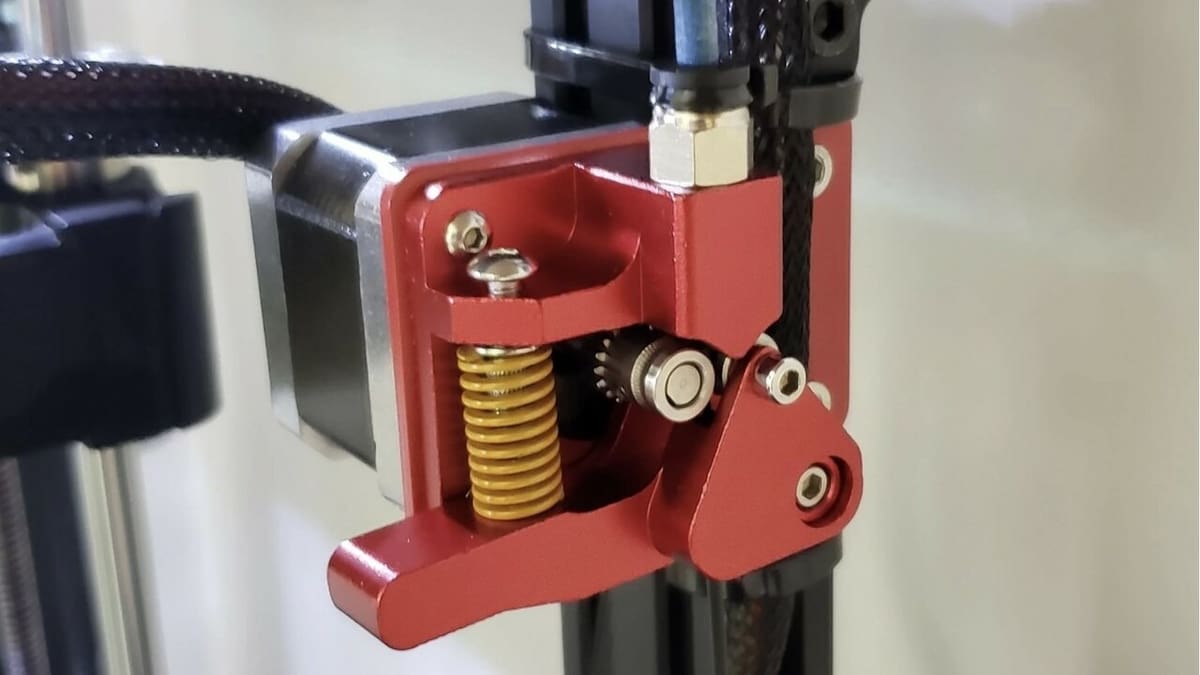
The plastic extruder housing that comes with Creality printers is known for wearing out fairly quickly. The filament tends to rub against the entry hole in the feeder arm, gradually eroding the plastic and increasing drag. This issue has caused a metal feeder extruder to become a standard upgrade for any Creality printer, the Ender 5 Plus included.
These metal extruder upgrades are more durable and robust. This means there is no more drag on the filament, and the filament can no longer erode the feeder arm. They’re also quite cheap (around $20), making this an easy modification.
When removing the old extruder, make sure you have a good grip on the stepper motor. The screws are the only fasteners keeping the stepper motor in place, so ensure you’re supporting it when you remove them. Otherwise, it’s likely to fall and damage itself or other parts of your printer. The Tomb of 3D Printed Horrors channel on YouTube has a great tutorial on how to do this on Creality machines.
- What does it improve? Keeps the filament from wearing down the feeder arm, reduces resistance on the filament, improves the extruder’s rigidity
- How much does it cost? ~$25 (some kits include Capricorn tubing)
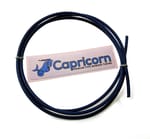
Capricorn Tubing

The Bowden tubing on a Creality Ender 5 Plus can be a bit too large for the filament. This can cause it to bend on itself and, in some cases, jam (especially with more flexible filaments).
Capricorn XS tubing has a more accurate internal diameter than the stock tubing, which creates a more constrained path for the filament. It’s also non-stick, which decreases the likelihood of jams. Due to its low cost of around $10, much like the metal extruder upgrade, it’s become a standard recommendation for Ender 5 Plus owners.
- What does it improve? Reduces the likelihood of filament jams, creates a more constrained filament path
- How much does it cost? ~$10
Enclosure
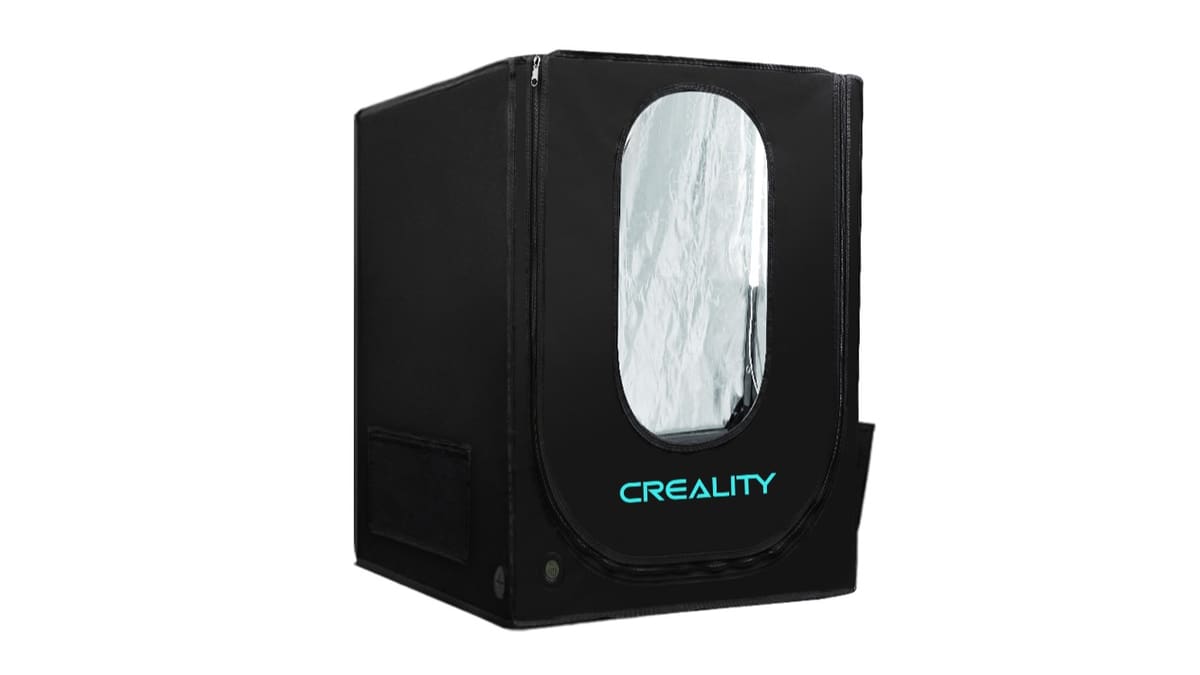
Most printers have an open design, including the Ender 5 Plus, which can limit your options of materials to print with. The issue with an open design is that the ambient temperature around the print can be inconsistent or too low for certain materials. Often, this is not a problem when printing with PLA, PETG, and TPU. However, other materials such as nylon, ABS, and ASA require higher and more stable temperatures. This is where Creality’s enclosure comes in.
The 3D printer enclosure traps heat inside, prevents dust from accumulating on your printer, keeps fumes in, and acts as a sound damper. Additionally, this enclosure is made up of fire retardant material, which, in the event of your printer catching fire, won’t ignite and should stop the fire from spreading.
- What does it improve? Provides the ability to print with materials that require higher ambient temperatures, prevents a printer fire from spreading
- How much does it cost? ~$110

PEI Build Plate
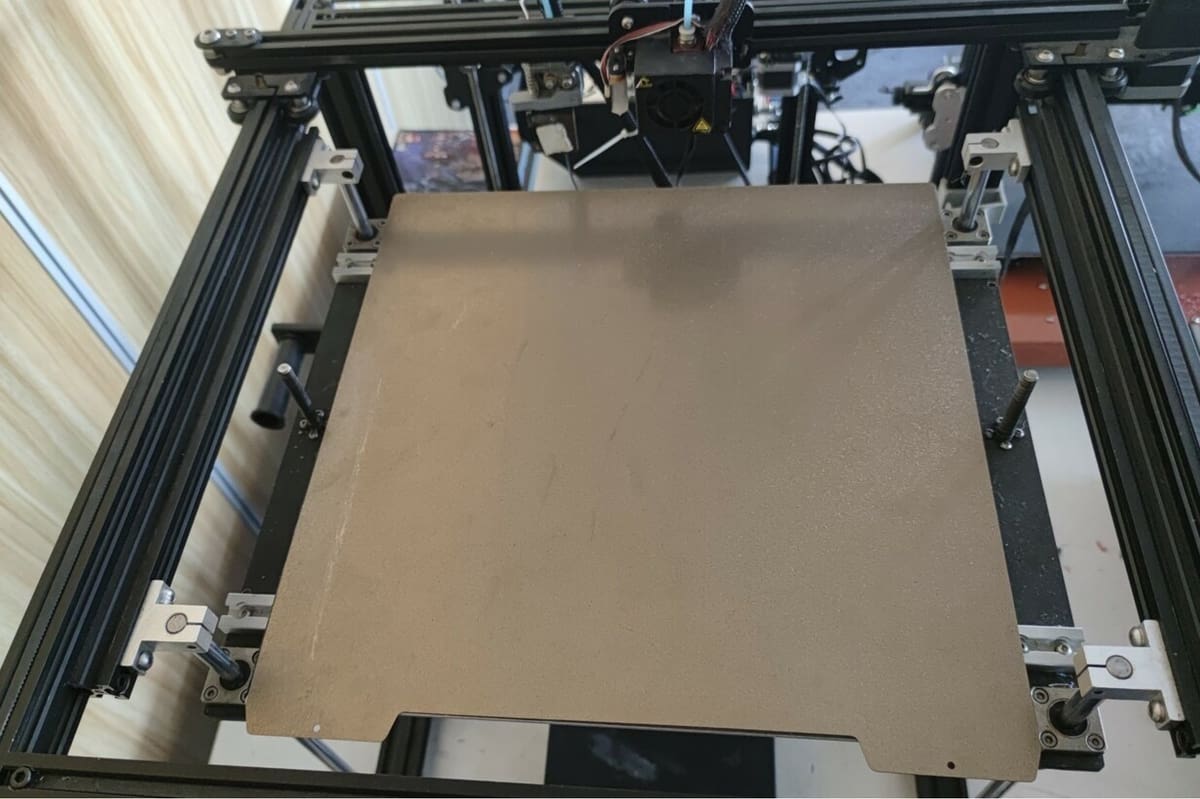
The Ender 5 Plus comes with a stock Creality tempered glass build plate, which is known to be pretty effective for bed adhesion if you have some glue or hairspray nearby. While glass is a great choice, some users prefer a PEI bed. PEI build plates cost about the same as glass ones, but they usually don’t require any additional adhesive to ensure the first layer sticks.
Unlike glass beds, PEI build plates are also flexible, meaning you can easily flex the bed to pop off 3D prints after they’re done. In addition to Creality’s PEI build plate, many others, such as this Ender 5 Plus-compatible option from FYSETC, are also magnetic, meaning you don’t have to sacrifice build space with clips to secure the build plate to the machine.
- What does it improve? Reduces the chances of warping and improves adhesion, helps to keep the first layer down
- How much does it cost? $20-$50
Silicone Bed Spacers
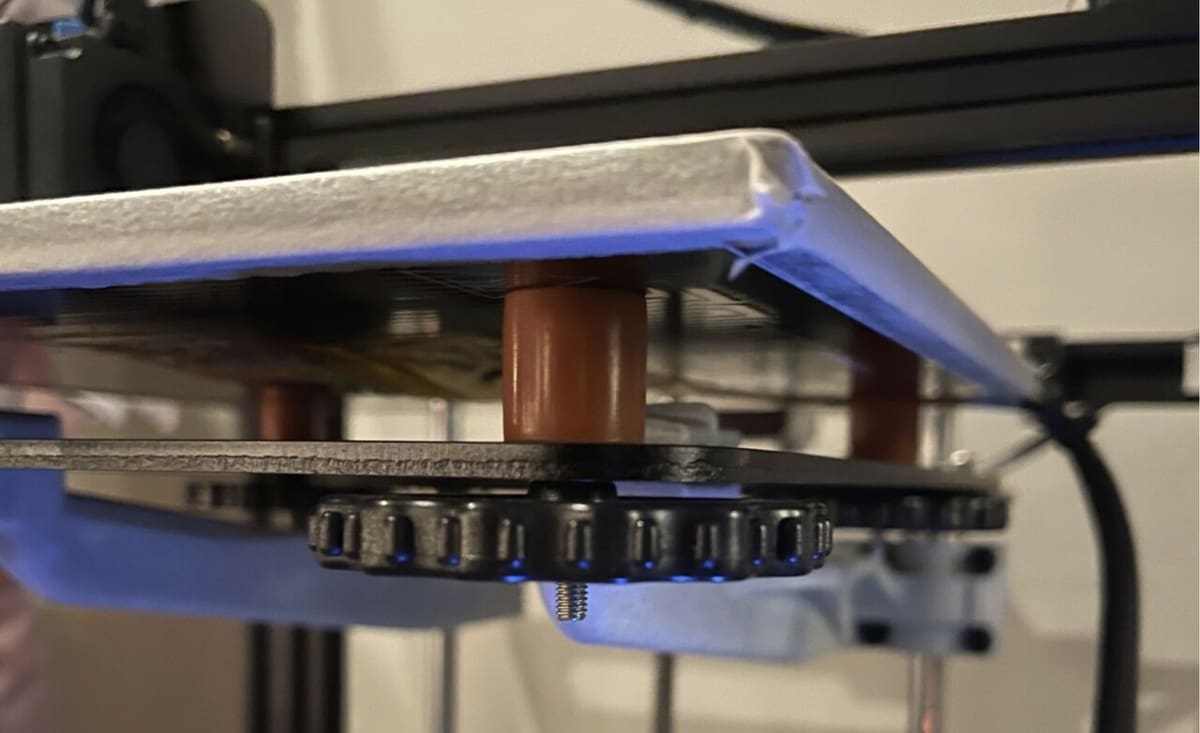
Even when you spend hours precisely leveling your print bed or use an ABL device, your print bed will eventually unlevel itself, which can cause a lot of frustration. And this problem is only exacerbated by the gigantic bed area on the Ender 5 Plus. Adding silicone spacers between the print bed and the leveling screws on your Ender 5 Plus will help keep the print bed in its level position, even after a handful of prints.
Silicone bed spacers are super affordable, and a 4-pack won’t set you back more than $10. To install this upgrade, simply remove the leveling screws beneath the printer’s build plate, replace the springs with the silicone spacers, and reattach the leveling screws. After that, level the bed as you normally would, and you’re good to go!
- What does it improve? Stabilizes the print bed, reduces the frequency of bed leveling
- How much does it cost? $8-$10
Extra & Better Nozzles
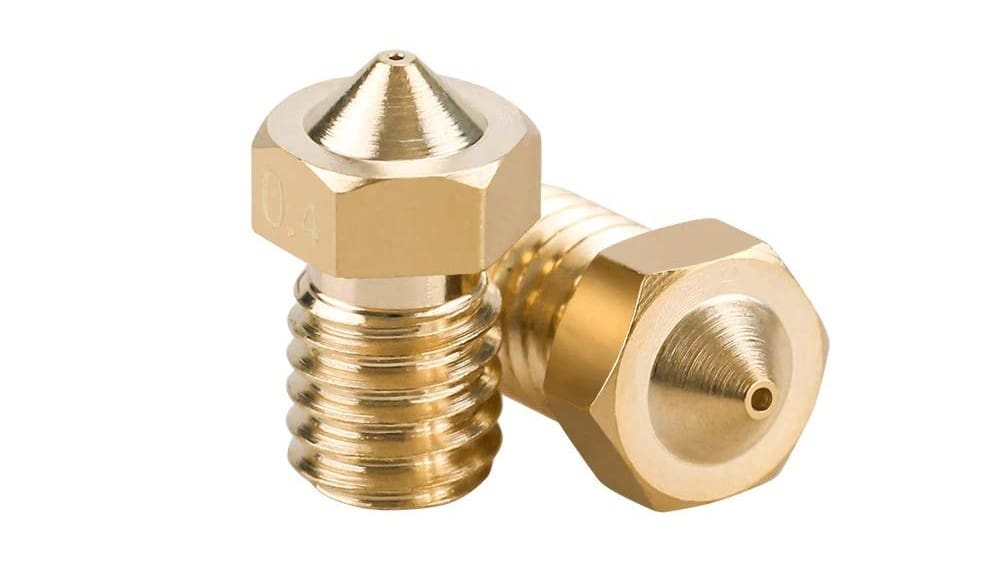
The nozzle is the part that the filament is extruded through to be deposited onto the build plate. The nozzle included on the Ender 5 Plus is a cheap brass one, which is worth replacing. Not only can this improve the quality of your prints, but you can also increase the number of materials you can print with.
Check out our comprehensive nozzle guide to determine which is best for you. For the Ender 5 Plus, you’ll need an MK8 nozzle if you stay with the stock hot end.
- What does it improve? Helps print quality, allows you to print with abrasive materials
- How much does it cost? Depends on material and quantity
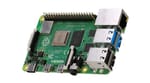
Raspberry Pi (with OctoPrint)
OctoPrint is an open-source application that allows you to remotely control your 3D printer. You can run OctoPrint on a Raspberry Pi single-board computer, such as a Raspberry Pi 3B+ that uses OctoPi, an OctoPrint-specific operating system for Raspberry Pi boards.
After you connect your OctoPrint server to Wi-Fi, you can start and stop prints, send G-code commands, use special plug-ins (e.g. to control a BLTouch device), and perform other actions remotely. You can also connect a Raspberry Pi camera or USB webcam (like the ones mentioned earlier) to your Pi board to remotely monitor your 3D printer through OctoPrint. You can follow our OctoPrint guides to set up an OctoPrint server for your Ender 5 Plus with a Raspberry Pi board.
- What does it improve? Allows you to remotely monitor and control your Ender 5 Plus
- How much does it cost? $35-$60
Linear Rails
Linear rails are a slightly more complicated upgrade for a 3D printer, but they can make your printhead’s motion much smoother, producing better 3D prints. Linear rails are stiff metal tracks with carriages that contain a series of rolling balls that create fluid and smooth motion for moving parts on the carriage (usually the printhead).
Linear rails replace the stock bearing-wheel carriages on the Ender 5 Plus, which are known to yield not-so-smooth motion due to inconsistencies on the bearing wheels. Although this upgrade can be a little on the pricey side, you can expect smoother curved prints, reduced ringing, and even the ability to print faster. There are also a few DIY options if you want to try them out. To install linear rails on your Ender 5 Plus, follow a guide such as Kersey Fabrications’ video tutorial.
- What does it improve? Provides smoother motion for the printhead, yields higher-quality prints
- How much does it cost? ~$100
Lights
Whether fixing, modifying, or simply watching your 3D printer, adding lights to your Ender 5 Plus is a terrific upgrade. A light system on the printer makes it easier to see all of the nooks and crannies of your machine that you may need to look at to identify a problem or install a new part. You’ll also be able to see ongoing prints better to ensure your Ender 5 Plus isn’t messing up.
There are many ways you can illuminate your Ender 5 Plus, but the simplest method is using an external light such as a battery-powered cabinet light bar or a USB plug-in light strip. As seen in the image above, if you use LED strips, you can position them in the divets of your Ender 5 Plus’ aluminum extrusions. You can also 3D print a mount for your lights of choice or if you want a different lighting position.
- What does it improve? Illuminates your printer or printed parts, either for better images or to make diagnosing problems easier
- How much does it cost? ~$10
To DIY
Now that you know all the best upgrades to go and purchase, check out these that you can print with your own Ender 5 Plus. Or, if you need a complex piece or tricky material, leave the printing to the pros and try Craftcloud for an immediate quote and delivery to your door!
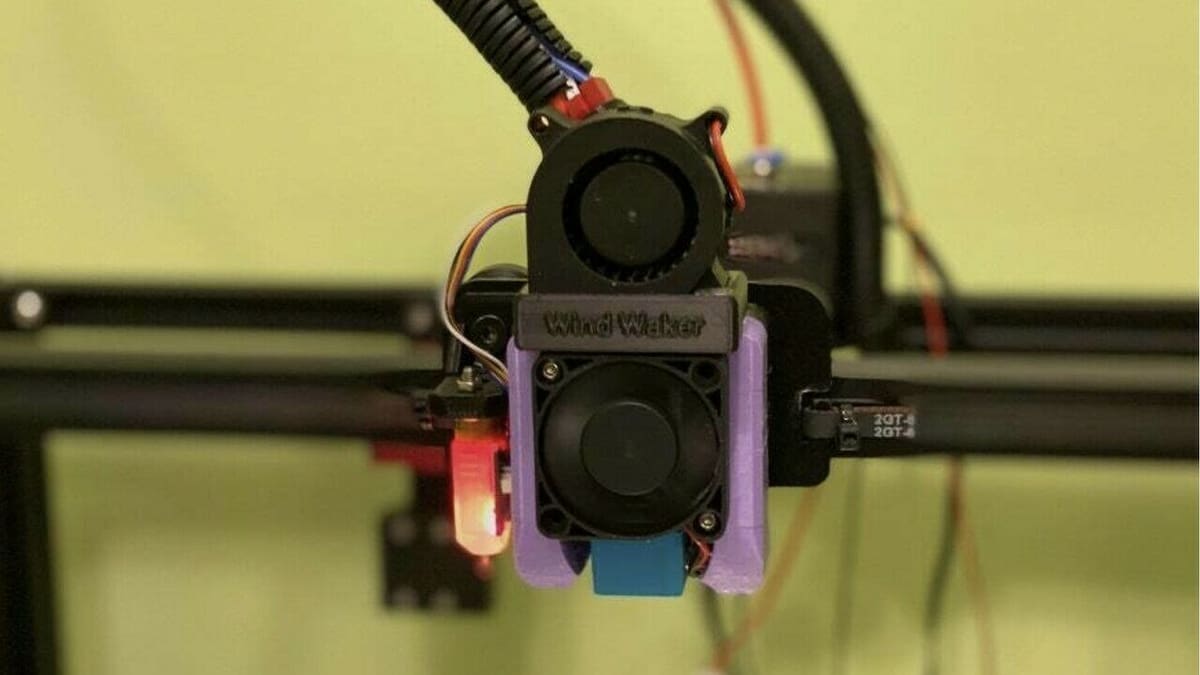
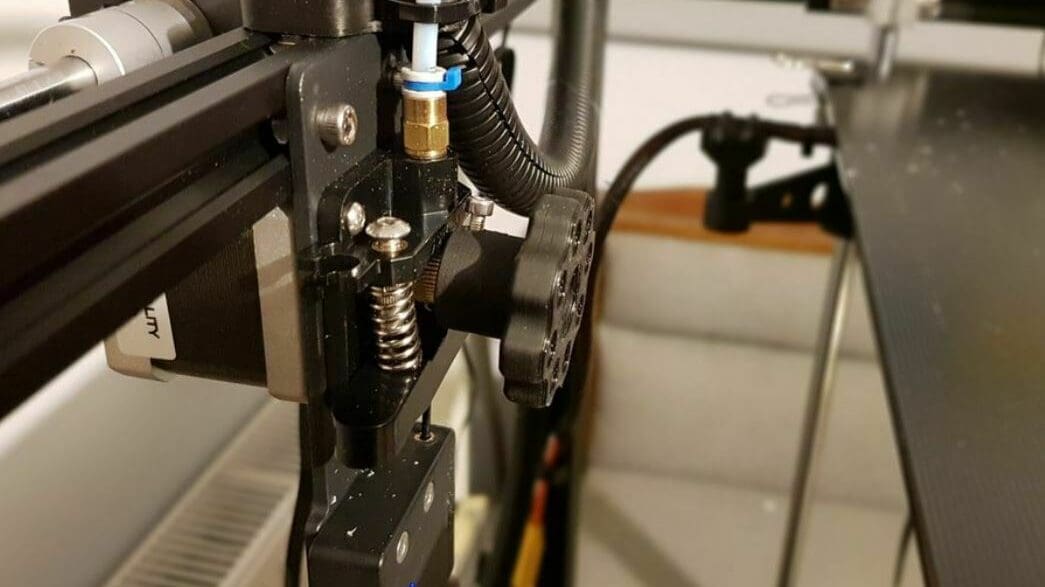
Hot End Cooling Shroud
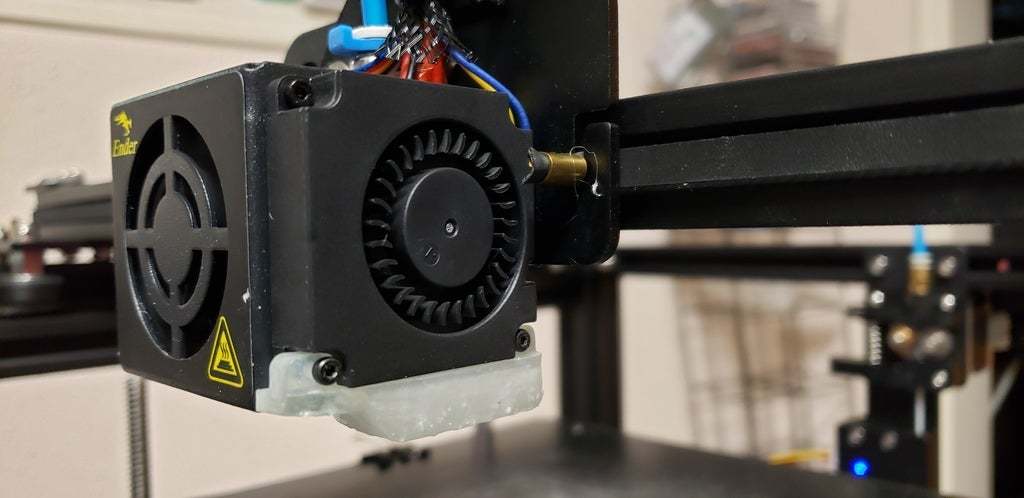
Having good airflow and cooling is instrumental for successful 3D printing. On the Ender 5 Plus, the stock cooling shroud’s design doesn’t direct the air very well around the nozzle or onto what you’re printing. This can increase stringing and disallow the plastic from retaining its shape.
To resolve this, a Thingiverse user designed a replacement shroud that directs the air to better cool the print material. This mod doesn’t require any additional hardware or tools to install.
- What does it improve? Cools parts and improves airflow around the nozzle
- What does it cost? Nothing, you just need the filament
- Who designed it? fpikus
- Where to find it? Thingiverse
Marlin Firmware
Like all other Creality printers, the Ender 5 Plus ships with Creality-specific, Marlin-based firmware. However, because the Ender 5 Plus is equipped with a Creality 32-bit motherboard, you can easily flash a new firmware program with just a MicroSD card. Updating your printer to the latest version of Marlin (or a fork like SuperSlicer) can help you in a handful of ways.
First, using official Marlin firmware will make adjusting the configuration files much easier. This is necessary when swapping or adding certain components to the printer, like the hot end, thermistor cable, or a bed leveling sensor.
Second, unlike Creality’s stock firmware, Marlin firmware is open-source and is constantly being developed by the community. As such, upgrading your printer’s firmware allows you to take advantage of the latest digital innovations in the 3D printing space, like input shaping and linear advance. These features, when properly set up in the firmware, can significantly improve the quality of prints.
- What does it improve? Allows for further hardware customization, expands firmware features (e.g. linear advance) to improve print quality
- How much does it cost? Free
- Who designed it? N/A (open source)
- Where to find it? Marlin
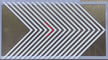
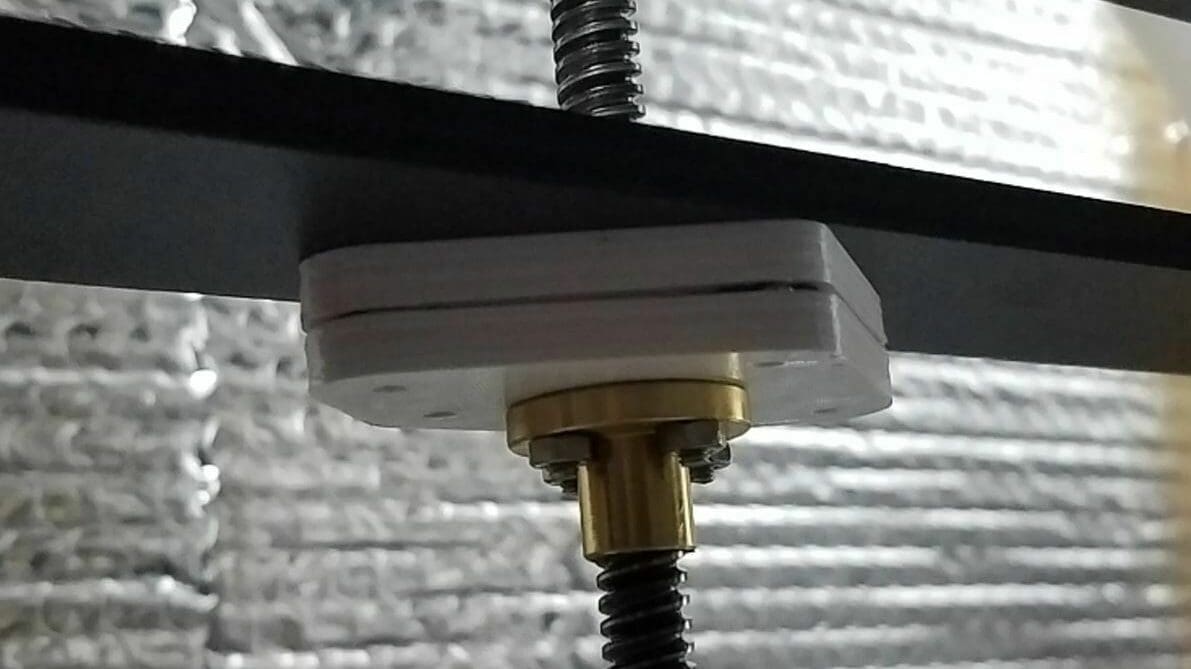
Belt Tensioner
If you’ve ever experienced layer shifting on your Ender 5 Plus, then it was likely a result of too much slack on the belts. This 3D printable belt tensioner is a terrific upgrade for anyone dealing with belt tension issues, and it allows you to easily adjust the tension by rotating a screw. Plus, this project was designed for all versions of the Ender 5, including the Plus, so compatibility shouldn’t be an issue.
Making this belt tensioner should be fairly simple. To build it, all you’ll need is three 3D printed parts, the stock bearings, and a handful of screws and nuts, listed on the project page. Also on the project page is detailed documentation about orienting the models, printing them, and putting the pieces together.
- What does it improve? Allows you to adjust the belt tension, helps prevent layer shifting and belt wear
- How much does it cost? $1-$2
- Who designed it? George
- Where to find it? Printables
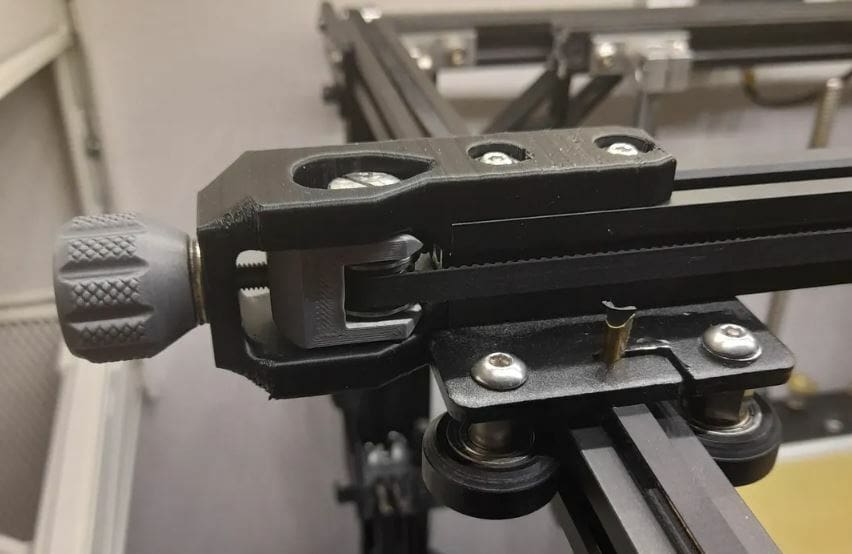
Comprehensive Cooling System
If the hot end cooling shroud upgrade doesn’t seem sufficient for you, check out the impressive Hero Me Gen6 cooling system by Thingiverse user mediaman. It offers cooling from both sides of the nozzle, along with compatibility with a variety of ABL sensors and hot ends.
As a bonus, you can mix and match components to suit anything from a stock Ender 5 Plus to a fully modified one. Depending on your configuration, it just requires a few extra screws and nuts. As one of the most versatile and compatible cooling systems around, it’s definitely worth it. You can also check out previous iterations of the suite of files, although the sixth version, according to the designer, requires fewer bits and bobs and is meant to be easier to implement.
When it comes to further updates, the content’s only available for makers who support the creator.
- What does it improve? Cools parts to increase print quality, helps you print at faster speeds
- How much does it cost? ~$5 for hardware
- Who designed it? mediaman
- Where to find it? Printables
Direct Extruder
The extruder on the Creality Ender 5 Plus is a Bowden setup, which can lead to stringing and make printing parts with filaments such as TPU difficult. You can overcome this by upgrading to a direct extruder, but usually that means buying completely new components. Thankfully, Thingiverse user paydayxray has created a DIY option that uses only one extra non-printed part: a 400-mm stepper motor extension cable.
- What does it improve? Reduces stringing, improves performance with flexible filaments such as TPU
- How much does it cost? ~$10
- Who designed it? paydayxray
- Where to find it? Thingiverse
Print Bed Cable Relief
A heated bed is one of the key components of a 3D printer, as almost all materials require one to print successfully or achieve the best results. One of the issues with heated beds is that the cables are frequently not supported, which causes the connections to weaken over time. Unfortunately, this is an issue present in the Ender 5 Plus.
Fear not, as a Cults user has created a bracket that supports the heated bed’s cable. You will need some additional nuts and screws to install this, but they’ll cost less than $5, which is a steal compared to the cost of fixing a heated bed.
- What does it improve? Reduces strain on heated bed cable, making it less likely to break
- How much does it cost? ~$5 for hardware
- Who designed it? BigDog3DCreations
- Where to find it? Cults
SD Card Adapter Housing
Although the Creality Ender 5 Plus’ mainboard has a MicroSD card slot, some users prefer to add an adapter cable (under $10) to their printer so they can use full-size SD cards as they’re easier to see and cost less. The downside of this upgrade is that you no longer have the stability of the original card slot on the mainboard, and your SD card is very exposed. You can 3D print this SD card adapter housing to mount your adapter to the Ender 5 Plus’ frame and keep your adapter and SD card out of the way.
The one-piece 3D printable upgrade can be screwed into the aluminum extrusion on the Ender 5 Plus’ frame (with screws and T-slot nuts). The model features a tunnel to the mainboard’s MicroSD card slot, where you can run your adapter wire through, protecting it from accidental damage. Lastly, the creator of this design listed that they printed the part with a 0.2-mm layer height, a 25% infill density, and used supports but no raft.
- What does it improve? Allows you to use an SD card to store 3D print files
- What does it cost? ~$1 (an extra $10 if you include the cable)
- Who designed it? Blueprinted_Bulletproof
- Where to find it? Thingiverse
Extruder Knob
An extruder knob is a popular upgrade for Creality printers, including the Ender 5 Plus, which allows you to manually push and pull filament through the Bowden-driven extruder. The knob attaches to the top of the drive gear of the Ender 5 Plus’ stock extruder and has a circular outline with grips to easily allow you to rotate the gear and extrude or retract filament.
Although the creator of this design didn’t provide any printing suggestions, one recorded maker posted a great print of a similar knob and listed a few of the settings they used. These include a 0.2-mm layer height and a 10% infill density with no supports or raft.
- What does it improve? Allows you to manually extrude and retract material
- What does it cost? ~$1
- Who designed it? Hans_3d
- Where to find it? Thingiverse
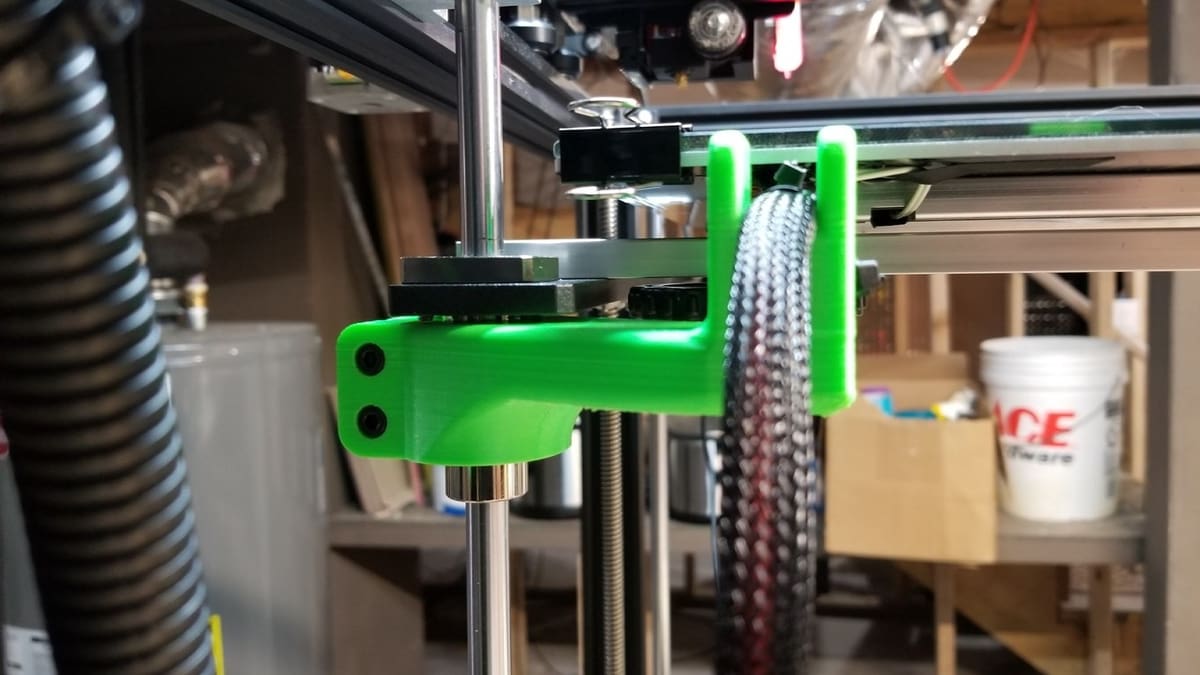
Z-axis Stabilizer
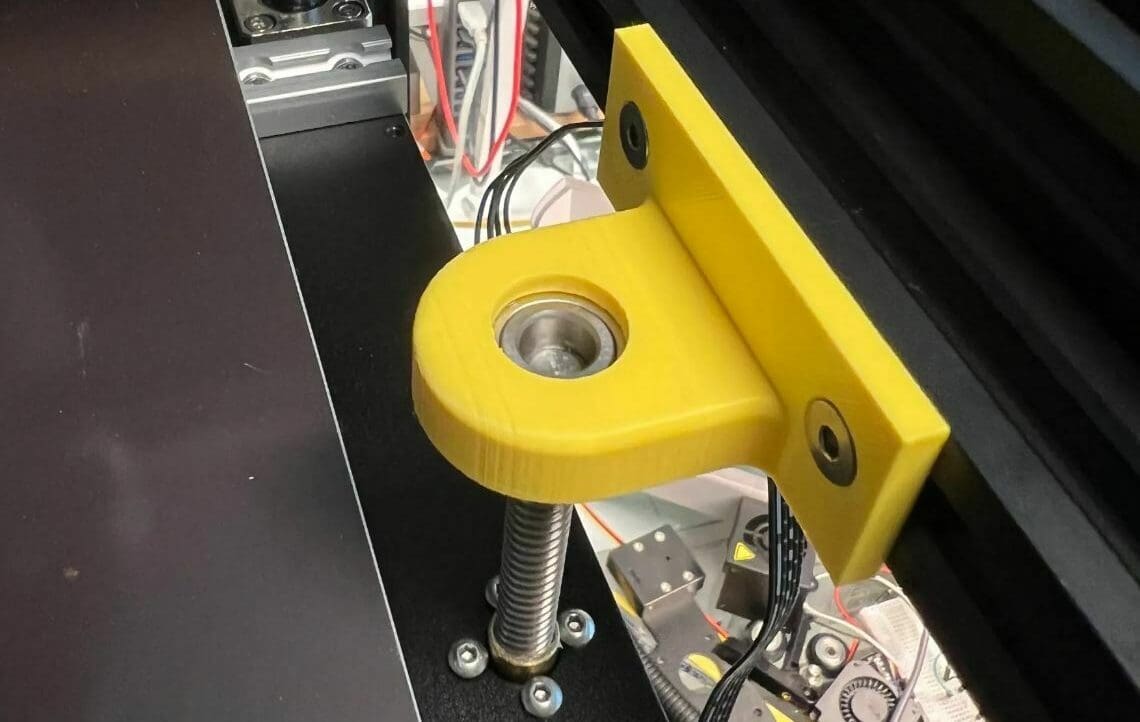
With any 3D printer, including the Ender 5 Plus, movement along each of the three axes (X, Y, Z) must be stable. Otherwise, prints will have issues such as layer shifting. While the Ender 5 Plus has dual Z-axis motors and uses conduit rails to stabilize the Z-axis movement of the bed, the actual Z-axis lead screws are only secured by the motors on the bottom.
Adding a Z-axis lead screw stabilizer will ensure that the lead screws stay straight over time, ensuring proper frame stabilization to prevent print quality issues like Z banding. This specific Z-axis stabilizer was designed for the Ender 5 Plus and attaches to an aluminum extrusion (the frame) with two T-nut screws. It also has a gap for placing a standard 22-mm ball bearing, which would act to reduce the resistance from the stabilizer.
- What does it improve? Keeps the Z-axis lead screw straight, reduces the chances of Z banding
- How much does it cost? ~$4
- Who designed it? davorin
- Where to find it? Printables (it’s one of the three files)
Cable Cover
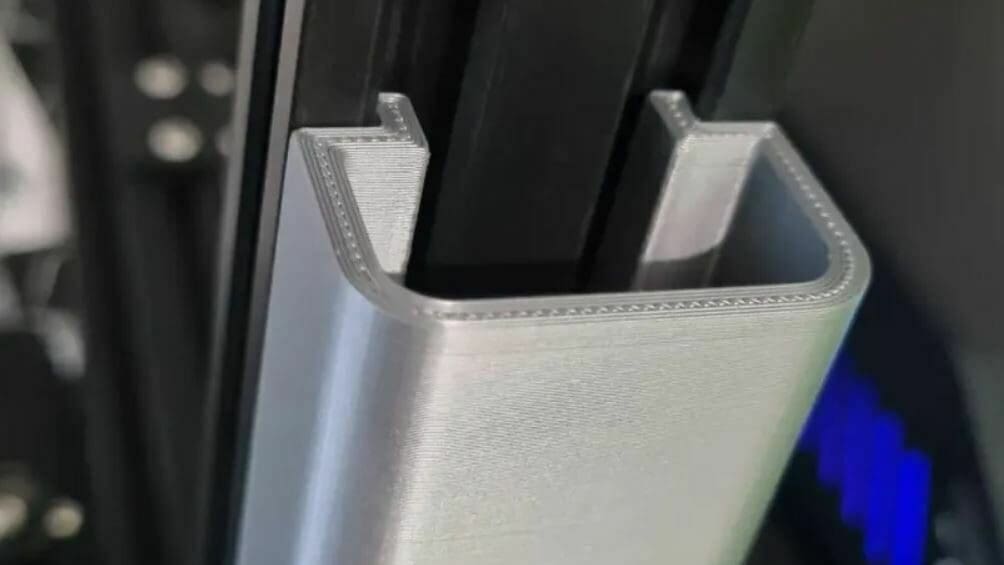
While Creality stepped up its game with the cable organization on the Ender 5 Plus (compared to its earlier printers), there’s still room for improvement. This 3D printable cable cover is a single print that attaches to the V-slots of the 2040 frame aluminum extrusions on the Ender 5 Plus without any screws or nuts.
The Ender 5 Plus comes with wiring mesh for the printhead, but you can further clean up the printer’s appearance by keeping the mesh tucked inside this cable cover. It’s also good for hiding other wires, such as BLTouch wires, if you’ve added this upgrade to your Ender 5 Plus. Since the model doesn’t feature any overhangs, you shouldn’t need supports to print this cable cover.
- What does it improve? Organizes the wires on the 3D printer to make the machine look cleaner
- How much does it cost? ~$1
- Who designed it? Knuffelrups
- Where to find it? Printables
Anti-Z Wobble Wing
One of the biggest critiques about 3D prints is the layer lines that appear along the Z-axis of a model. While layer lines are basically unavoidable, you can decrease how obvious they are by installing this anti-Z wobble wing attachment.
The anti-Z wobble wing attaches to the Z-axis lead screw nuts and separates them from the gantry that holds up the bed on the Ender 5 Plus. The result is less wobbling for Z-axis movements on the printer, making layer lines less visually noticeable on prints.
All you need for this attachment are the 4 3D printable parts, 20 10-mm neodymium magnets (5 per 3D print), some 3-mm bearing balls (the individual balls), and the stock screws for the Z-axis lead screw nut. Sadly, the designer of this project didn’t provide direct instructions for assembling the attachment, but the pictures make it pretty clear.
- What does it improve? Reduces Z-axis wobble, making layer lines less visible on prints
- How much does it cost? ~$5
- Who designed it? EB3D_Printing
- Where to find it? Printables
Corner Support Bracket
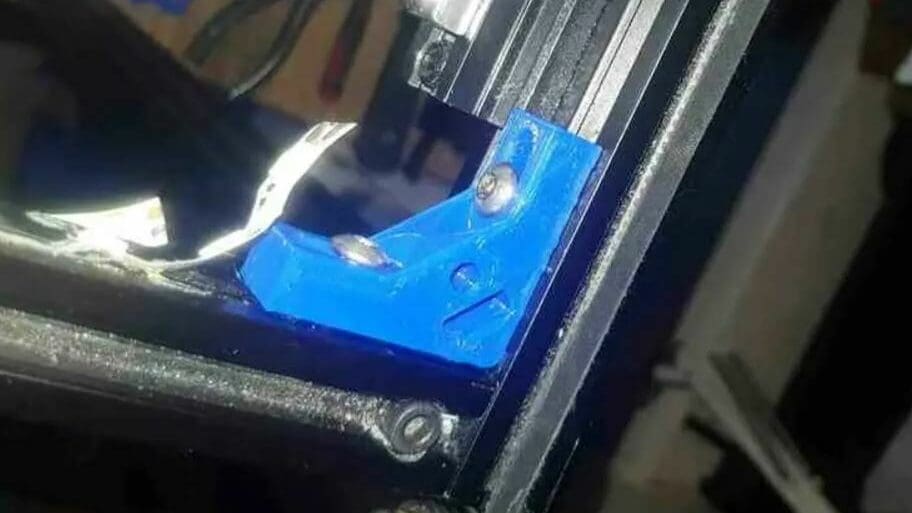
One of the biggest concerns for the Ender 5 Plus, and similar large-format 3D printers, is that their large size compromises the stability of the machine. This 3D printable corner bracket reinforces the aluminum extrusions that make up the cube frame design on the Ender 5 Plus by properly securing them to each other. With a more stable frame, print quality issues related to movement, such as layer shifting and poor dimensional accuracy, should be less likely to occur.
This corner bracket fits in the 90° angles on the printer’s frame design, and features two screw holes (one at 0° and one at 90°), so you can properly secure the two aluminum extrusions together. While the designer didn’t mention what screw size the holes on the model are for, based on the provided images, we suspect an M3 or M4 screw with a T-nut should work. The creator of this support bracket also mentions that they printed the model with a 0.2-mm layer height and a 100% infill density for maximum strength.
- What does it improve? Stabilizes the Ender 5 Plus’ frame
- How much does it cost? ~$1
- Who designed it? 3D Try Outs
- Where to find it? Printables
Tool Holder

Any Creality 3D printer, including the Ender 5 Plus, comes with a handful of tools, including wrenches, Allen Keys, and pliers, that come in handy when setting up the machine and fixing it. However, a common problem is organizing these tools next to the printer without making the machine look too messy. This 3D printable tool holder was designed to fit on the frame of the Ender 5 Plus without any additional hardware, and it can hold all of the tools that come with the printer in an organized fashion.
To attach this tool holder, all you have to do is slide it on any one of the 2040 aluminum extrusions that make up the Z-axis section of the frame of the Ender 5 Plus. You can also slide the tool holder along the 2040 extrusion to make sure the model doesn’t get in the way of any other attachments to your printer. Since the model has no overhangs, you won’t need to activate supports in your slicer to achieve a successful print.
- What does it improve? Organizes the tools included with the Ender 5 Plus
- How much does it cost? ~$1
- Who designed it? Steve
- Where to find it? Printables
License: The text of "The Best Creality Ender 5 Plus Upgrades & Mods" by All3DP is licensed under a Creative Commons Attribution 4.0 International License.
CERTAIN CONTENT THAT APPEARS ON THIS SITE COMES FROM AMAZON. THIS CONTENT IS PROVIDED ‘AS IS’ AND IS SUBJECT TO CHANGE OR REMOVAL AT ANY TIME.