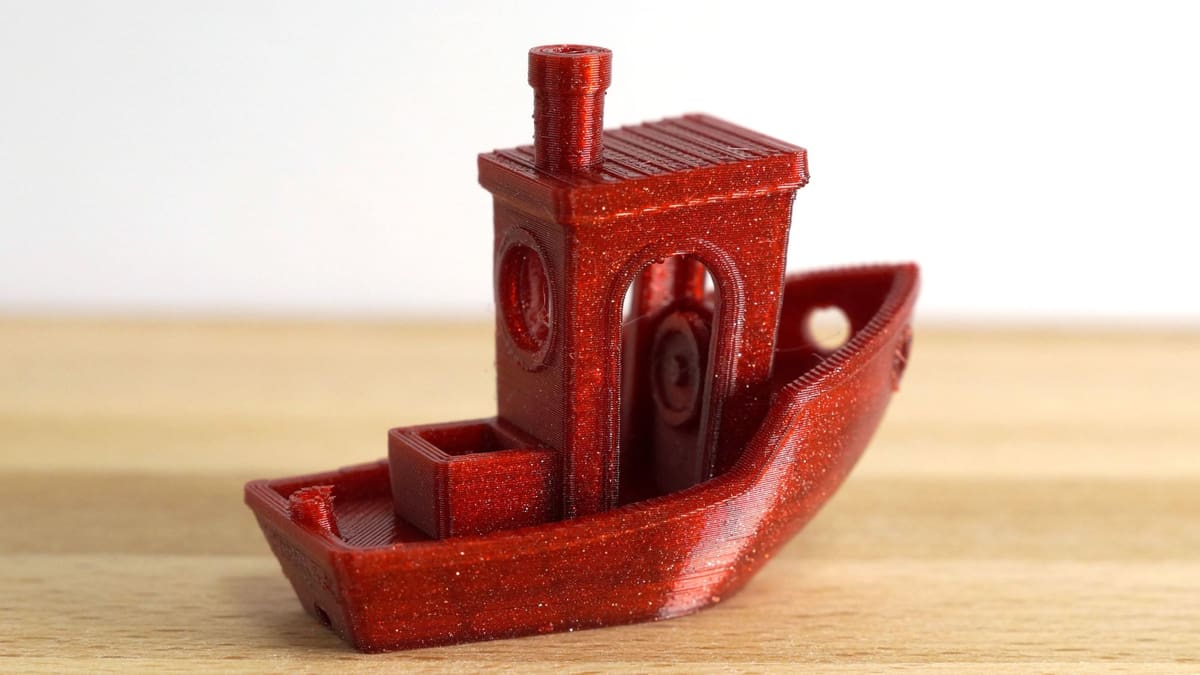
13 3D Printer Problems a Benchy Can Reveal (and How to Fix Them)

This tiny tugboat has been one of 3D printing’s favorite benchmark prints. Here’s how to read a Benchy, identify common print problems, and decide what to troubleshoot next.
A Benchy can tell you a surprising amount about your 3D printer. From poor bridging and stringing to dimensional inaccuracies and surface defects, it packs a range of printing challenges into one small model.
That makes a Benchy especially useful for troubleshooting 3D print quality, which is what it was created to do. The location and appearance of a defect can help point you toward likely causes, whether that’s a slicer setting, filament issue, calibration problem, or something mechanical on the printer.
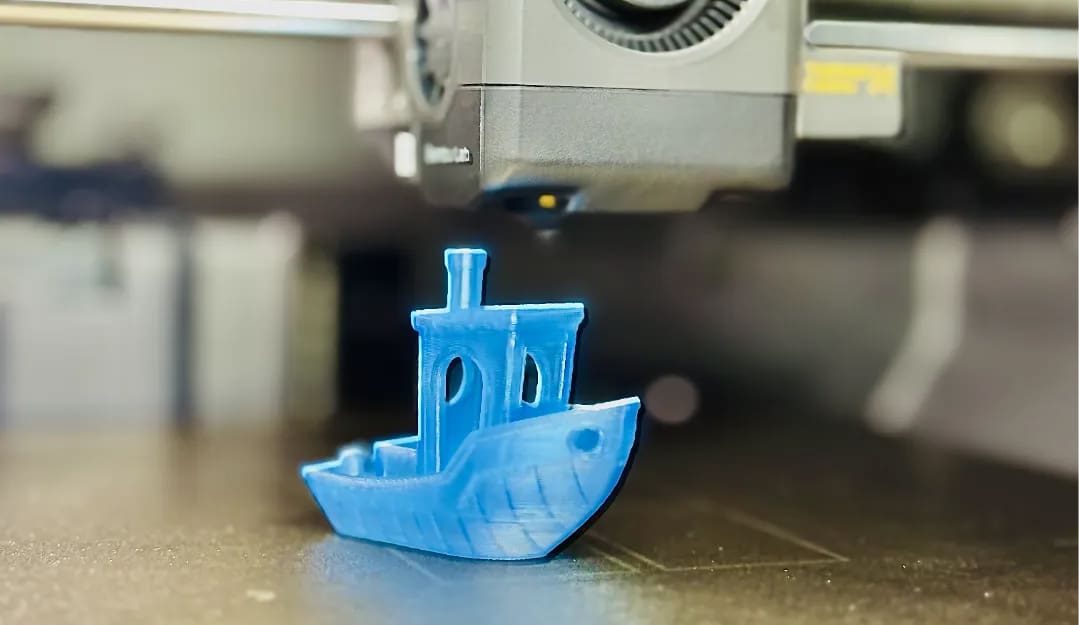
But Benchy isn’t a magic calibration tool. While it can show you that something isn’t right, the boat alone won’t always tell you exactly which setting needs changing. In this guide, we’ll look at the different parts of a Benchy, the defects they can reveal, what commonly causes them, and what to check next.
We’ll also look at how Benchy troubleshooting has evolved with today’s faster printers and multicolor systems.
How (& Why) Benchy Was Born
3DBenchy dates back to 2015, when Daniel Norée was working at Creative Tools in Sweden. Testing 3D printers often meant printing several different models, each designed to expose a particular weakness. Norée set out to combine many of those challenges into one compact print instead.
The resulting model deliberately incorporates features such as steep overhangs, bridges, smooth curved surfaces, unsupported openings, small details, and sharp changes in geometry. Paulo Kiefe gave the model its now-famous “3DBenchy” name and helped establish its online identity.
Released on April 9, 2015, as “the jolly 3D printing torture-test,” Benchy quickly became a familiar way to compare print quality. Its appeal wasn’t simply that it was challenging: because so many users were printing the same recognizable geometry, defects became relatively easy to spot and compare.
A Benchy can therefore give you a quick overview of how your printer, filament, and slicer profile are working together. The key is knowing how to interpret those clues.
Start With the Standard 3DBenchy Settings
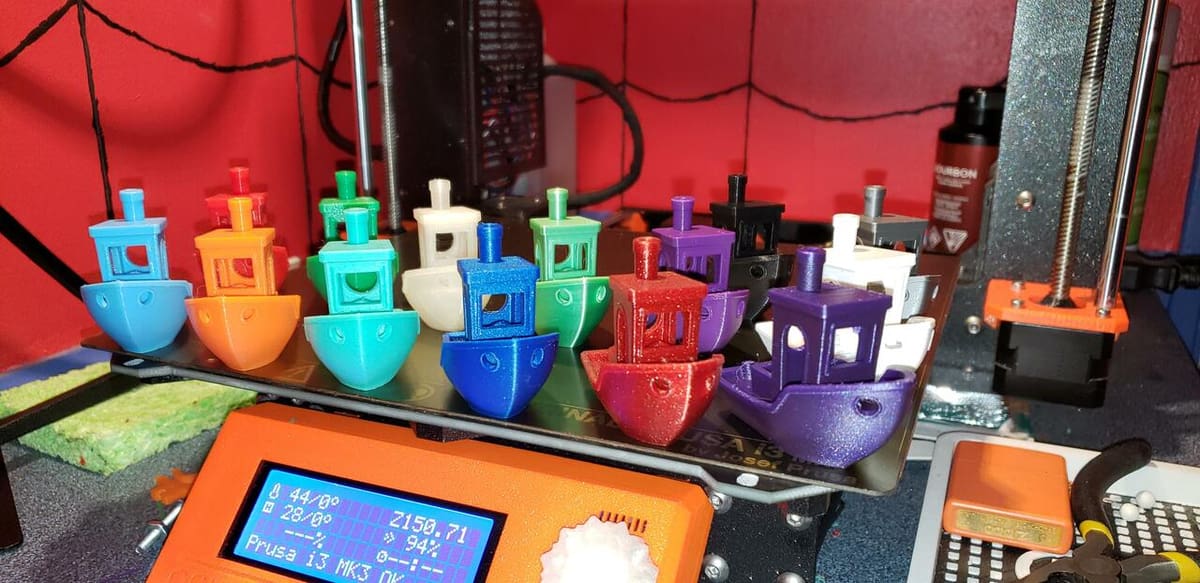
Before diagnosing your Benchy, consider what you want the print to tell you. There are two useful approaches: print it using the original benchmark settings for a more standardized comparison, or print it using your everyday profile to troubleshoot the settings you actually use.
The genius of Benchy lies in its simplicity. At first glance, it’s merely a 60mm boat that prints in roughly an hour using standard settings:
- Scale: 1:1 (60 mm from bow to stern)
- Layer height: 0.2 mm
- Infill: 10%
- Print speed: Up to 50 mm/s
- Travel speed: Up to 150 mm/s
- Nozzle diameter: 0.4 mm
- Supports: None
These settings date back to Benchy’s original use as a standardized test print. Using them makes it easier to compare your result with reference prints and with Benchys produced on other machines.
That doesn’t mean every Benchy needs to be printed at 50 mm/s. Today’s printers can run considerably faster. If you’re troubleshooting the profile you normally use, print Benchy with that profile instead. A defect that appears at 200 mm/s but disappears at 50 mm/s is still useful information; it tells you the problem is related to the conditions you’re actually trying to print at.
Whichever approach you choose, keep the conditions consistent when comparing prints. Use the same filament, slicer profile, nozzle, layer height, and other relevant settings, and change one variable at a time. That makes it much easier to tell whether an adjustment actually improved the result.
Benchy is designed to print at its original 1:1 scale without support material. Avoid adding supports if you’re testing overhangs and bridging, as they would remove some of the challenges the model was designed to expose. A raft can likewise hide the underside and first-layer details that are useful for troubleshooting.
Once the Benchy is printed, it’s time to inspect it, starting with the overall print before moving on to individual features.
Quick 3DBenchy Troubleshooting Guide
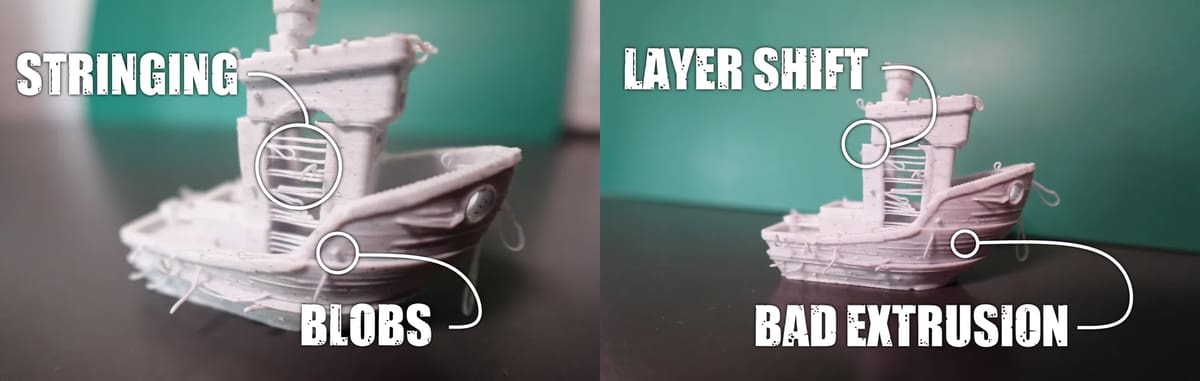
Once you’ve printed your Benchy, use the table below as a quick first check. Match the most obvious defect to its likely causes and the first things worth investigating, then use the detailed sections that follow to narrow the problem down further.
Remember that a single defect can have more than one cause, so avoid changing several settings at once. Start with the most likely check, make one adjustment, and compare the next print under the same conditions.
Check the Overall Print Quality
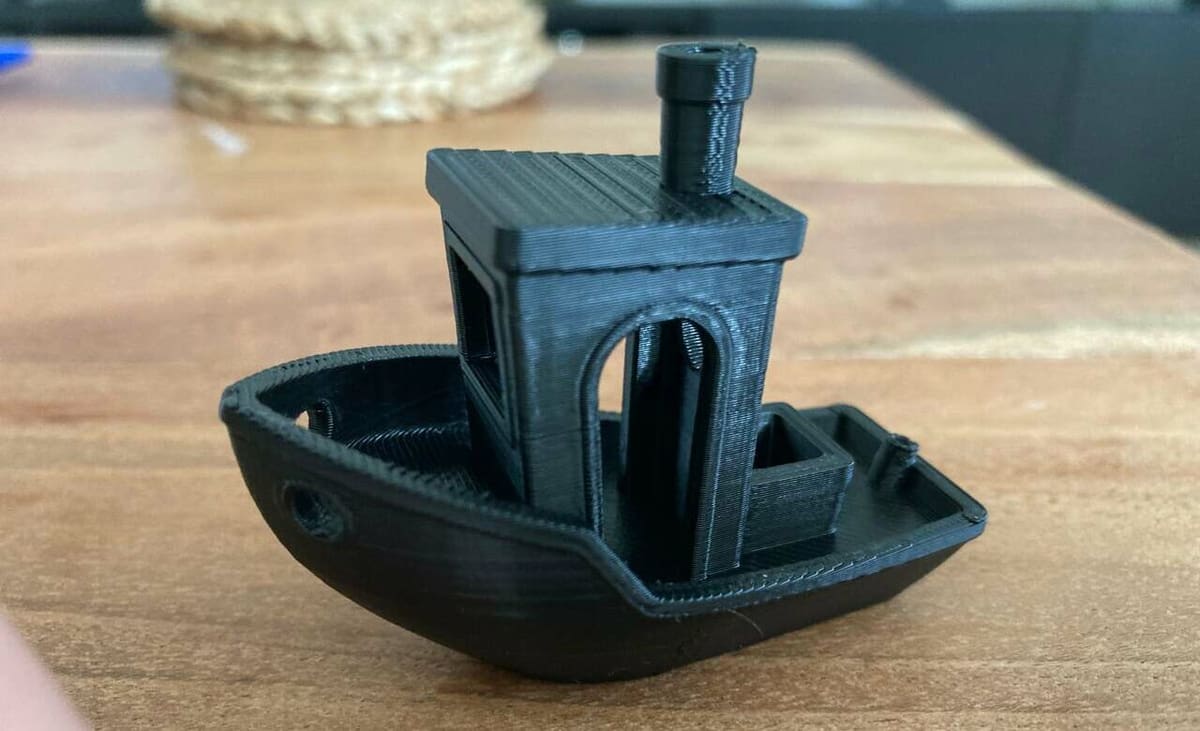
Before reaching for the calipers or changing any settings, take a step back and look at your newly printed tugboat. First question: Does it actually look like a boat?
Did the print complete successfully? Does the hull sit flat, the cabin stand straight, and the chimney and other small features look intact?
Don’t expect an injection-molded finish. Some visible layer lines are normal. Instead, look for obvious defects such as stringing, shifted layers, warping, rough patches, gaps, or visibly deformed features.
You don’t need to diagnose the exact cause yet. The aim is simply to identify where the most obvious problem appears. From there, you can inspect the individual areas of Benchy more closely.
Start with the hull, where its long, curved surfaces make many print-quality problems particularly easy to spot.
Inspect the Hull
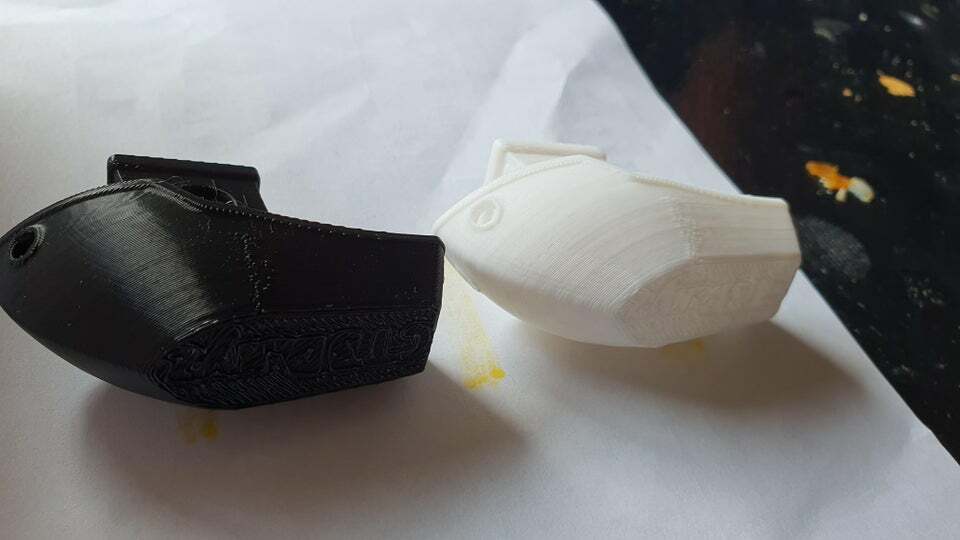
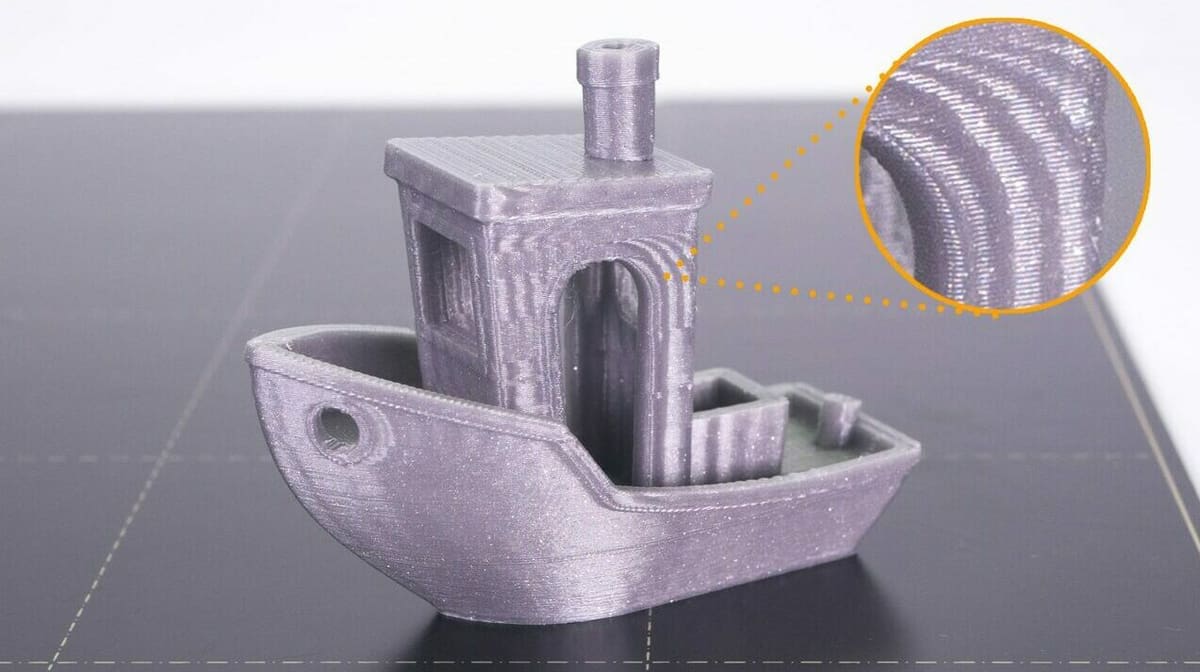
The hull is one of the best places to judge your printer’s overall surface quality. Its long, smooth curves should look and feel consistently rounded, without prominent ridges, gaps, blobs, or repeating surface patterns. Run a finger lightly along the sides and inspect the surface under good lighting. Keep in mind that identical printer settings can produce noticeably different results with different filament materials (and sometimes even different colors of the same material) so compare prints made under similar conditions where possible.
Look for these common defects:
- Blobs, zits, or raised dots: Random deposits of excess material can come from oozing, wet filament, inconsistent extrusion, or excessive flow. If the imperfections form a regular vertical line rather than appearing randomly, you’re more likely looking at the Z seam, where each perimeter starts and stops. Adjusting seam placement can make it less conspicuous, while persistent 3D print zits and blobs may warrant checking temperature, retraction, flow, and filament condition.
- Gaps or unusually thin layers: Missing material or visible spaces between extrusion lines point toward under-extrusion. Possible causes include a partially clogged nozzle, unsuitable temperature, filament slipping in the extruder, excessive print speed for the filament’s available flow, or resistance somewhere along the filament path. If you’re unsure whether the extruder itself is feeding the commanded amount of filament, calibrating the extruder’s E-steps or rotation distance can help rule that out. If the value is already correct, look instead at flow, temperature, nozzle condition, and maximum volumetric flow.
- Ringing or ghosting: Repeated ripples following features such as the bow, portholes, or other changes in direction usually come from vibration in the printer’s motion system. Start by checking belts, pulleys, the frame, and other moving components. Printing more slowly or reducing acceleration can help, while printers that support input shaping can use resonance calibration to compensate for remaining vibration. Modern ringing and ghosting troubleshooting therefore includes both mechanical checks and motion-compensation settings.
- Fine repeating vertical patterns: Subtle vertical ripples across an otherwise smooth hull are often referred to as vertical fine artifacts (VFA). These can be related to stepper-motor resonance, belts, pulleys, or particular print-speed ranges. Some slicers now include dedicated VFA tests that vary speed to identify where the artifacts become stronger or disappear.
If you notice a horizontal line around deck height, don’t diagnose it yet.
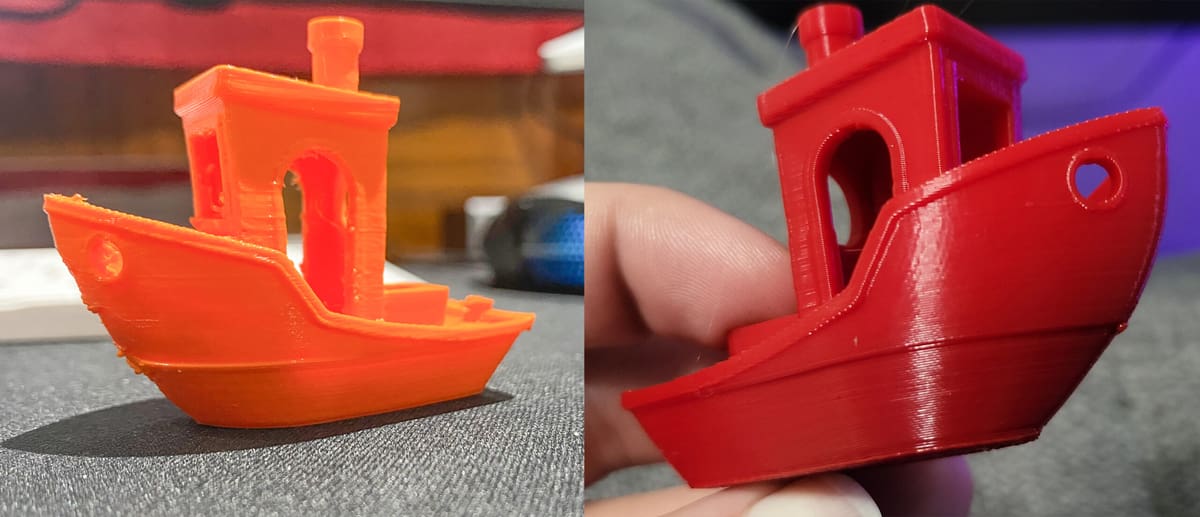
The Infamous Benchy Hull Line
Benchy has a well-known hull line, and its position is the key clue. A single thicker line (or a couple of thin ones) right around deck height, with the rest of the layers staying consistent, points to Benchy’s geometry rather than a hardware problem; uneven horizontal bands running from the bottom of the hull to the top of the chimney suggest something else entirely.
Prusa’s detailed investigation into the Benchy hull line traces it to the abrupt change in how the model prints around this height. At roughly 8 mm, depending on layer height and slicer settings, the hull transitions from relatively sparse infill to the solid layers that form the deck. The amount of material being deposited and the time each layer takes to print change suddenly, then change again once the deck is complete.
How noticeable the line becomes depends on the filament, cooling, print environment, and other material properties. The plastic is heating, cooling, and contracting while the structure of the print changes, so even identical G-code can produce a more or less obvious hull line under different conditions.
That means there isn’t necessarily one setting to “fix.” If the line is subtle and appears only around the deck, treat it as a known Benchy artifact rather than immediately adjusting belts or the Z axis. Improving cooling or changing slicer behavior around the solid deck layers may reduce it, but eliminating it completely can require more involved changes to how those layers are sliced.
Prusa’s detailed investigation into the Benchy hull line points to the abrupt change in how the model is printed around this height. At roughly 8 mm, depending on layer height and slicer settings, the hull transitions from relatively sparse infill to the solid layers that form the deck. The amount of material being deposited and the time each layer takes to print change suddenly, then change again once the deck is complete.
How noticeable the line becomes can depend on the filament, cooling, print environment, and other material properties. The plastic is heating, cooling, and contracting while the structure of the print changes, so even the same G-code can produce a more or less obvious hull line under different conditions.
That means there isn’t necessarily one printer setting you need to “fix.” If the line is subtle and appears only around the deck, treat it as a known Benchy artifact rather than immediately adjusting belts or the Z axis. Improving cooling or changing slicer behavior around the solid deck layers may reduce it, but eliminating it completely can require more involved changes to how those layers are sliced.
More importantly for troubleshooting, learn to distinguish the hull line from a problem that appears repeatedly throughout the model. A single line at deck height is characteristic of Benchy’s geometry; regular horizontal bands from the bottom of the hull to the top of the chimney point toward something else.
Examine the Underside
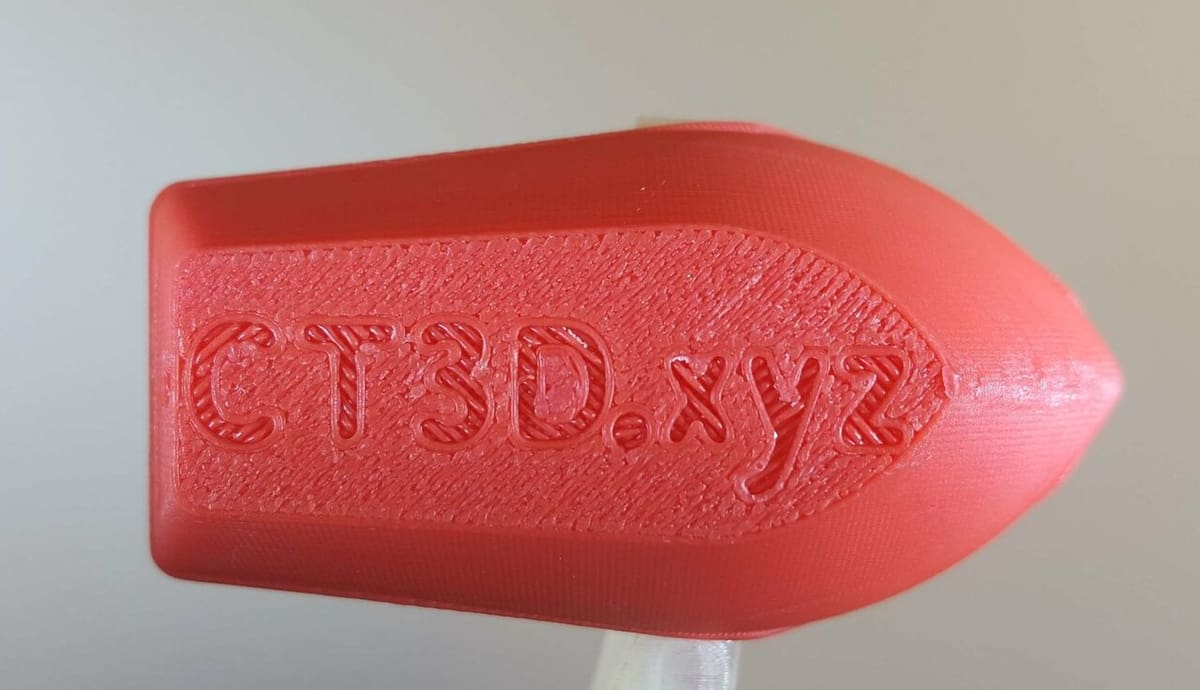
Flip Benchy over and take a close look at the bottom of the hull. This is one of the easiest places to judge the quality of your first layer.
The embossed “CT3D.xyz” lettering should remain recognizable against an otherwise even surface, although the finish will also reflect the texture of your build plate. A smooth plate may leave the underside glossy, while a textured plate will transfer some of that texture to the print.
Look for these common first-layer problems
- Visible lines with gaps between them: If neighboring extrusion lines don’t fully meet, the nozzle may be too far from the build plate. Low first-layer flow, an unsuitable nozzle temperature, or incorrect first-layer settings can produce a similar result. Working through the basics of getting a good first layer, like bed leveling or mesh calibration, Z offset, build-plate cleanliness, and first-layer settings, can help narrow down the cause.
- Crushed or difficult-to-read lettering: If the text looks smeared together and the extrusion lines are heavily flattened, the nozzle may be too close to the bed or the first layer may be receiving too much material. Check the printer’s first-layer or Z-offset calibration where this is user-adjustable, as well as the first-layer flow and line-width settings in the slicer.
- Elephant’s foot: If the bottom edge of the hull flares outward beyond the layers above it, you’re seeing elephant’s foot. This commonly happens when the first layer is compressed too heavily against the build plate, while an excessively hot bed can make the effect worse by keeping the lower layers soft for longer. Correct the first-layer setup before relying on slicer compensation. If the first layer is otherwise good but a small flare remains, slicers such as PrusaSlicer, OrcaSlicer, and Cura provide settings that compensate for the extra width at the bottom of the print.
- Uneven first-layer quality: If one side of the underside is heavily squished while the other shows gaps, the nozzle-to-bed distance isn’t consistent across the print area. Depending on the printer, this can point to bed tramming, an inaccurate or outdated bed mesh, an improperly seated build plate, or another mechanical alignment issue.
- Lifted or curled edges: The bottom of Benchy’s hull should remain flat. If one edge has pulled away from the build plate, check bed adhesion, build-plate cleanliness, bed temperature, drafts, and the first-layer setup. Materials with greater shrinkage are generally more sensitive to these conditions.
The important distinction is that a first layer needs enough squish for the extrusion lines to join and adhere, but not so much that fine details disappear or the bottom of the hull spreads outward.
Once the underside looks even and the lettering remains legible, turn Benchy upright again and move on to the deck house, windows, roof, and chimney.
Check the Deck House & Deck Details
Next, move up to the deck house, where Benchy tests how well your printer handles small details, sharp corners, overhangs, bridging, and short layers that have very little time to cool.
Start with the windows. The front square window should have a relatively straight, flat upper edge, while the side windows should form clean arches without excessive drooping or roughness.
- Sagging window tops or rough undersides: These point to poor bridging or overhang performance. The filament needs to span unsupported areas and solidify quickly enough to hold its shape, so nozzle temperature, part cooling, bridge speed, flow, and filament condition can all play a role. Working through the main 3D printing bridging settings (particularly cooling, temperature, flow, and speed) can help determine which one is limiting the print. Different materials also behave differently here, so settings that bridge well with PLA may not produce the same result with PETG or ABS.
- Drooping overhangs: Inspect the edges of the cabin roof and other surfaces that gradually extend beyond the layer underneath. Poor 3D printing overhangs can improve with better part cooling, a suitable nozzle temperature, lower print speed, or a different layer height. If Benchy is being used as a benchmark, don’t add supports to compensate, those unsupported features are part of the test.
- Rounded or bulging corners: These can come from excessive speed or acceleration, as well as poor control of nozzle pressure during direction changes. If your printer supports pressure advance or linear advance, a dedicated calibration can help improve corner definition.
- Poorly formed circular features: The chimney opening and other round details should look circular rather than obviously oval or distorted. However, don’t immediately change X or Y steps if they don’t. Small holes are affected by extrusion, cooling, shrinkage, and slicer dimensional compensation as well as mechanical geometry. Compare several features and measurements before deciding whether the problem is dimensional, mechanical, or extrusion-related.
- Soft or deformed chimney: The chimney is made from small layers that are printed in rapid succession. If each layer doesn’t have enough time to cool before the next one arrives, the upper section can become soft, rough, or distorted. Increasing part cooling can help where the material allows it, as can reducing nozzle temperature or using a slicer’s minimum-layer-time setting, which slows very short layers to give them more time to cool.

Finally, inspect the small lettering and details around the deck house and stern. They won’t be perfectly sharp at every layer height, but the characters should remain distinguishable. If fine details merge together or look swollen, excessive flow, high temperature, inadequate cooling, or simply printing too fast for features of that size may be contributing.
The deck house concentrates several different challenges into a small area, so don’t assume that every defect has the same cause. A sagging bridge, a rounded corner, and a softened chimney may appear only centimeters apart while pointing to three different parts of the print profile.
Once these features look reasonably clean, it’s worth getting out the calipers and checking whether Benchy’s dimensions tell the same story.
Measure & Check Dimensional Accuracy
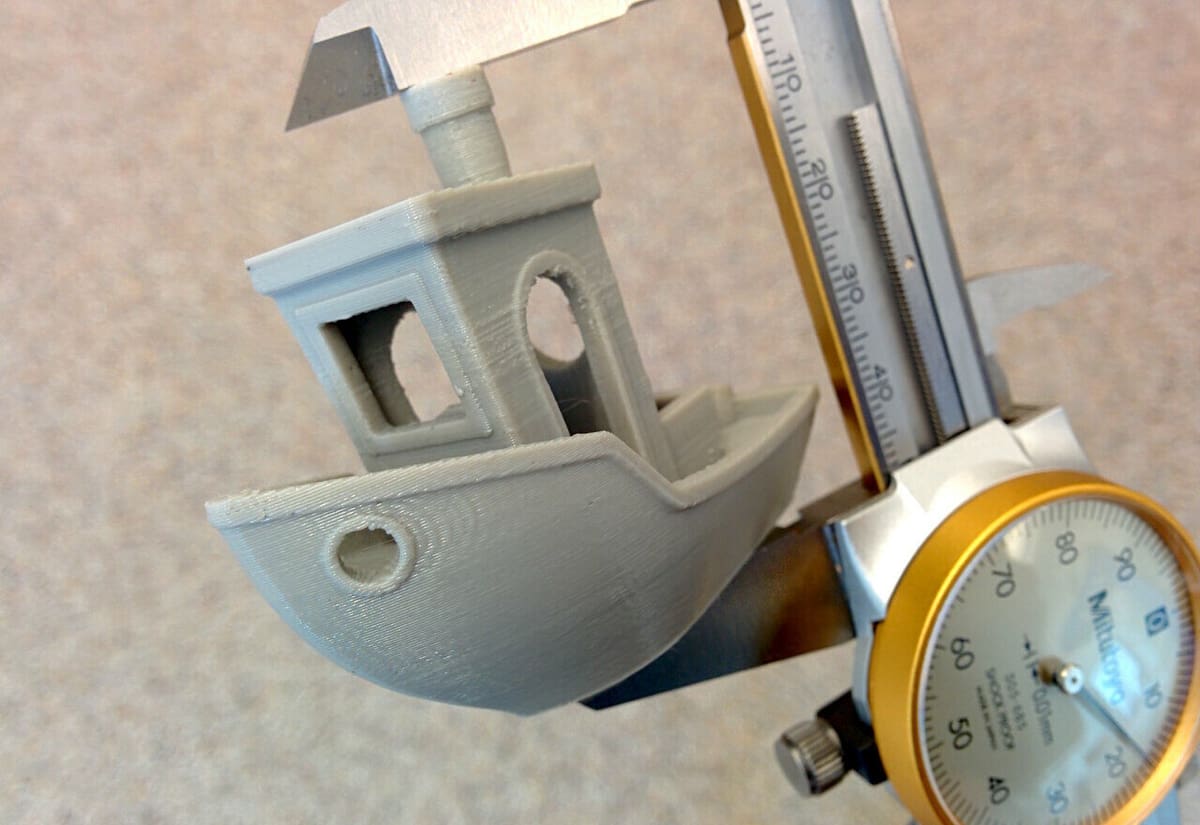
Visual inspection can reveal a lot, but Benchy also contains a number of precisely defined dimensions that you can check with a digital caliper. At its original 1:1 scale, the model should measure 60 mm from bow to stern, 31 mm from side to side, and 48 mm from the bottom to the top of the chimney.
The official 3DBenchy measure and calibrate chart includes additional reference dimensions for the windows, chimney, deck box, and other features.
Don’t expect every measurement to land perfectly on the nominal value. Printed dimensions can be influenced by material shrinkage, extrusion, first-layer compression, temperature, cooling, and slicer compensation, as well as the printer’s mechanical accuracy. Small features and holes can also be more difficult to measure consistently than the overall length and width.
If the measurements are noticeably off, look at the pattern rather than immediately changing the printer’s X, Y, or Z steps:
- The whole Benchy is proportionally too large or small: Check that the model is at 100% scale, then consider material shrinkage or slicer scaling/compensation.
- Outside dimensions and holes don’t match in the same way: Use separate hole and contour compensation where available rather than scaling the whole model.
The overall height is too short: Check first-layer squish and whether the chimney or upper layers have deformed.
If Benchy reveals a persistent dimensional problem, treat the measurement as a clue rather than trying to calibrate everything from the boat itself. Check the likely cause first – such as model scale, filament shrinkage, flow, or first-layer compression – and use a dedicated dimensional or tolerance test if you need to investigate further. Some modern slicers can also compensate separately for external dimensions and holes, which is useful when one measures correctly but the other doesn’t.
Once you’ve made an adjustment, print Benchy again under the same conditions and compare the measurements. The goal isn’t necessarily a mathematically perfect boat, but dimensions that are consistent and accurate enough for the type of parts you intend to print.
Try a Multicolor Benchy
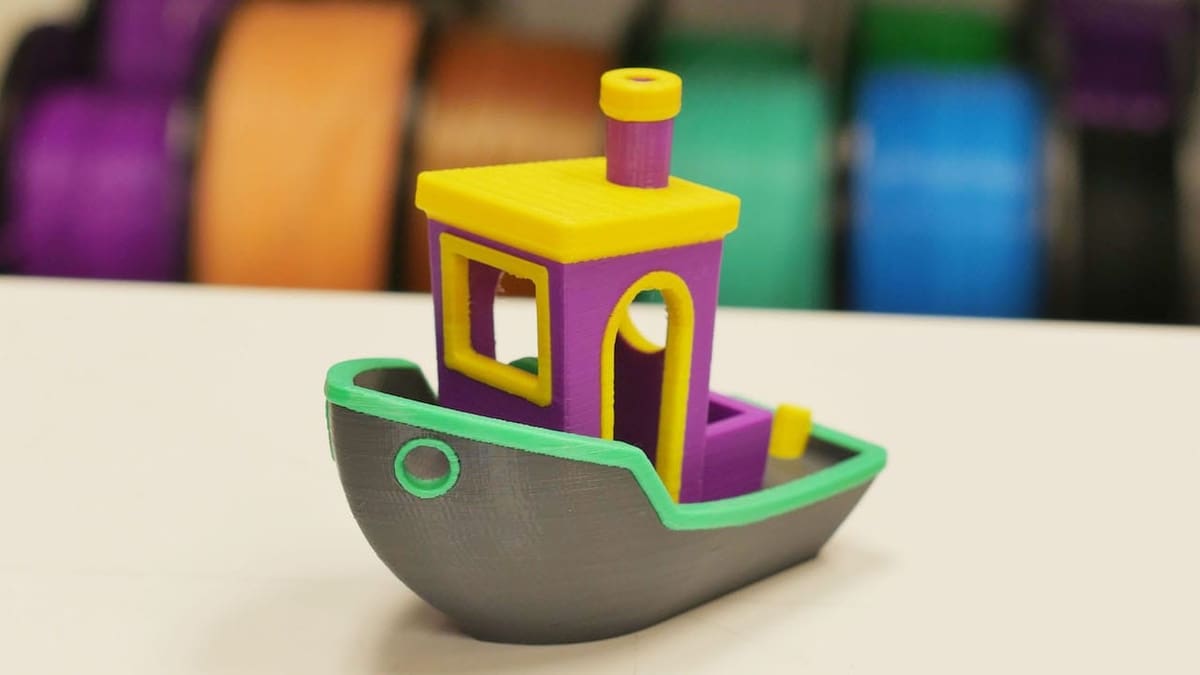
The original Benchy was designed as a single-material test, but today’s increasingly common multicolor systems give the little boat another job.
For a useful test, don’t simply change color once at a particular layer. Instead, assign different colors to features such as the hull, deck house, roof, chimney, or lettering so that the printer has to perform multiple filament changes during the print. If you’re new to multicolor 3D printing, using different colors of the same material, such as several PLA filaments, makes troubleshooting easier because you’re not also introducing different material properties.
Once printed, look closely at the areas immediately following each color change:
- One color bleeding into the next: Some of the previous filament is still in the nozzle. Increasing the purge or flushing volume can produce a cleaner transition, particularly when changing from a dark filament to a light one. The amount required can differ depending on the direction of the color change.
- Blobs, strings, or rough spots after a change: Check whether the nozzle is oozing during the filament swap and whether the purge or prime process is leaving the nozzle ready to resume printing. Multicolor slicers may provide settings for a prime or wipe tower, wiping, and ooze prevention to help stabilize extrusion between changes.
- Gaps or under-extrusion immediately after a change: The new filament may not be fully loaded or the nozzle may not be sufficiently primed before printing resumes. If the rest of the Benchy prints normally and the gaps consistently follow filament changes, investigate the loading and priming process rather than changing the overall flow setting.
- Failed or unreliable filament changes: If the printer repeatedly struggles to load or unload one particular filament, check the spool, filament path, and multicolor unit as well as the filament itself. A successful multicolor print depends on each filament moving reliably through the system.
The purge or wipe tower can provide clues of its own. It should remain stable throughout the print and allow each new filament to flow consistently before printing resumes on Benchy. It also gives you a clear sense of how much material is being wasted on color changes: if the tower and flushed filament rival or exceed the amount used for the boat itself, it may be worth reducing purge volumes or using slicer options that flush into infill or support where appropriate.
A multicolor Benchy isn’t a replacement for the standard single-color benchmark. Instead, think of it as an additional test for printers equipped with an AMS, MMU, or similar filament-changing system. If a single-color Benchy prints cleanly but the multicolor version develops contamination, gaps, or blobs around filament changes, you’ve already narrowed the problem down considerably.

The Future of Benchy
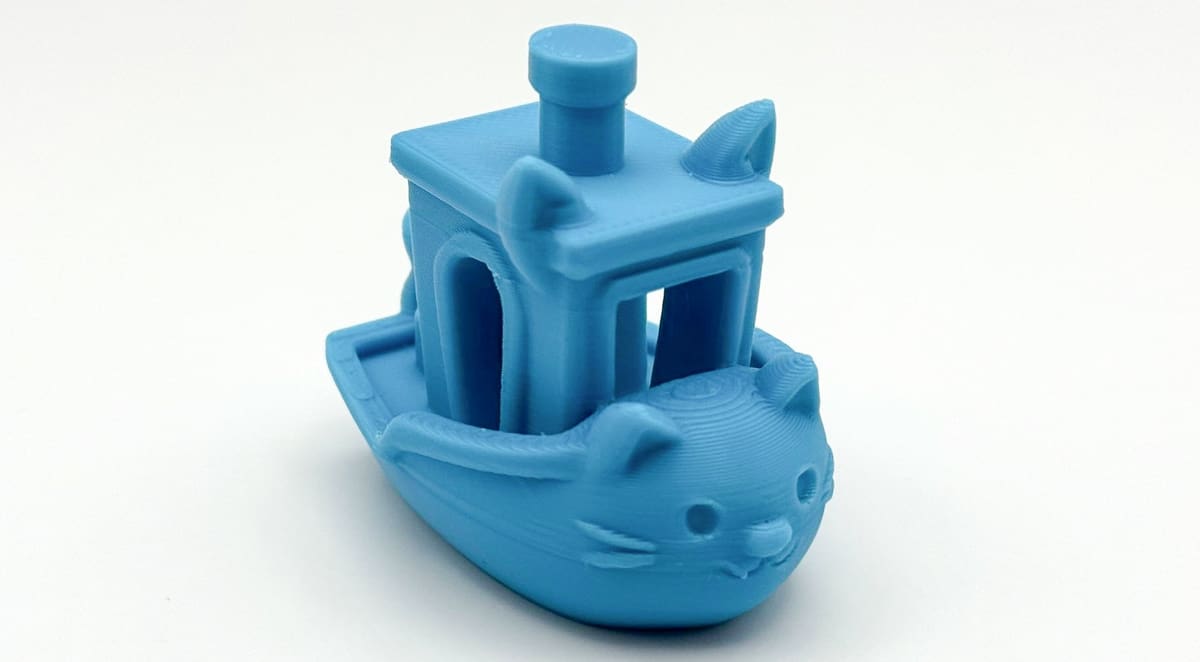
Benchy’s role has expanded far beyond its original purpose as a compact printer test. In 2025, the model was released into the public domain under CC0, making it free to use, modify, and remix. The original CAD model was also released in the editable STEP format, making it much easier for makers to modify the design.
A quick look through 3D model sharing sites also shows just how widely the design has been adapted and remixed. The unmodified original, however, remains the most useful version when dimensional accuracy and direct comparison matter, since its geometry and reference measurements are well established.
The unmodified original remains the most useful version when dimensional accuracy and direct comparison matter, since its geometry and reference measurements are well established.
The technology around it will continue to change, but that familiarity is precisely why Benchy remains useful. When everyone recognizes what the little tugboat is supposed to look like, even small printing problems are much easier to spot.
You May Also Like:


License: The text of "13 3D Printer Problems a Benchy Can Reveal (and How to Fix Them)" by All3DP is licensed under a Creative Commons Attribution 4.0 International License.