I 3D Printed My Own Office Shoes with Bambu Lab — Here’s Why I’m Not Ready to Commit

Bambu Lab’s TPU capabilities put to the test creating a custom-sized pair of office clogs. From the first digital layer to a final duct-tape fix, here is what it’s actually like to wear your own 3D prints.
Since moving to Germany from the U.S. several years ago, I’ve fully embraced the concept of indoor shoes versus outdoor shoes. Sure, your street shoes come off the moment you step into your house, but I’ve also gotten used to swapping footwear at the office. I rarely spend a full workday in my outdoor shoes; instead, I’ll slip into something more comfortable, sometimes even just socks.
So when Bambu Lab began heavily promoting the “improved” TPU printability of its H2C and the idea that you could casually print your own footwear, my curiosity was officially piqued.
After a mix of testing, experimentation, spectacular failures, stubborn determination, printer mods, and the invaluable help of my very patient expert colleague, I now — at least for the moment — have a pretty cute pair of super-comfortable 3D-printed office clogs. Here’s how that journey unfolded.
The Custom-Sizable Shoe Digital File
I have zero interest in designing my own shoe from scratch, and honestly, I don’t even want to fiddle around with sizing one to my foot. That’s why today’s new generation of “one-click sizing” digital shoe files is a much bigger breakthrough than it might first appear.
Instead of measuring your foot in millimeters, adjusting individual parameters, and praying it fits, these models intelligently scale all the important dimensions of the shoe, not just length and width. In theory, that means a reliable, comfortable fit whether you’re printing for a child or an adult, simply by entering a standard shoe size.
The model I chose is the Formism Arc Clog by SCRY, which has already been downloaded more than 500 times on Bambu Lab’s MakerWorld. It’s described as an official collaboration between Formism and Bambu Lab and billed as “a comprehensive FDM-based framework for personal footwear manufacturing” — which is a very fancy way of saying: serious 3D printed shoes.
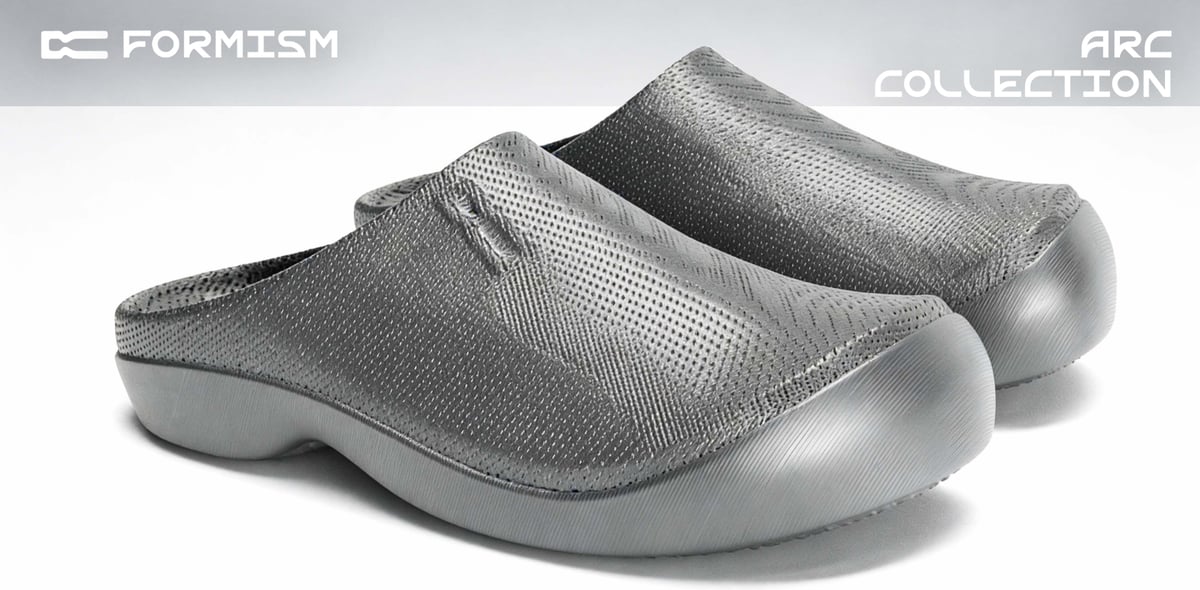
At first glance, the design looks like a modern reinterpretation of a Dutch wooden clog — but unlike a traditional clog carved from a single block of wood, this shoe is far more sophisticated. It’s engineered with distinct hard zones, flexible zones, and cushioned areas exactly where you’d expect them in a commercially made shoe. The sole even includes a textured, grippy bottom. According to Formism, there’s also an optimized toolpath strategy built into the model to make printing smoother and more reliable behind the scenes.
Calling it just a “digital file” almost undersells it. When you click the “Customize” button, what actually opens is a small interactive app. On a clean, simple screen, you select your printer. A dual-extruder Bambu Lab machine is recommended, but you can use you P- or A-series machines, too. Select your shoe size or enter custom length and width if you prefer.
After about a minute of processing, your customized 3MF file (roughly 11 MB) is ready for download. From here, it’s a matter of preference in the slicing and tailoring (cobbling) the shoes to your setup and desired effect.
From File to Print Bed
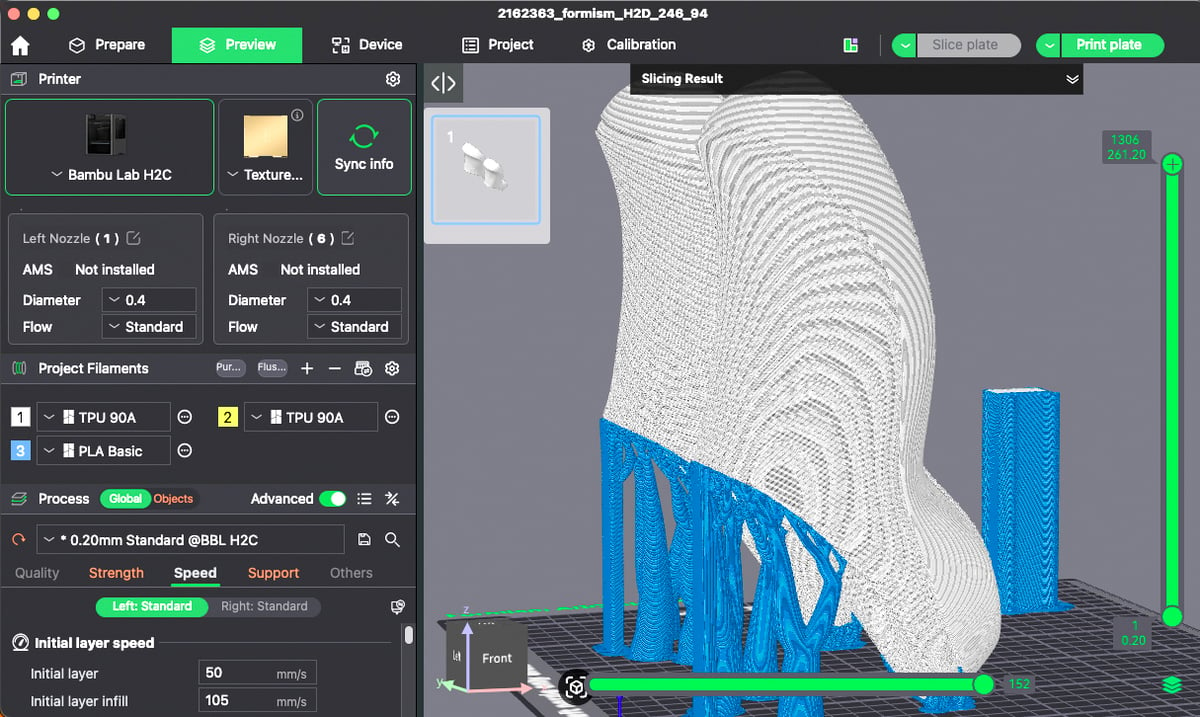
Open your customized shoe file in the Bambu Studio slicer. There, you are presented with the models already “optimally” oriented. The project’s creators can be found on the MakerWorld page admitting that actually, with this clog model, the orientation can be flipped 180° to reduce the amount of support needed, so keep that in mind as you proceed.
Each shoe comprises four distinct parts, positioned to print as one object, but individually selectable and customizable, giving you the opportunity to better customize the feel of the shoe, toying with the infill densities and the like.
Honestly, a lot of the appeal of an ecosystem like Bambu Lab’s is that you can simply pull the models into the slicer, and send them to the printer (or even bypass all that and send them directly to print from your smartphone). For these shoes, I let it all ride and printed the model as imported.
If you’re not using Bambu Strudio, you may find your mileage varies with the compatibility of the 3MF file. At the time of writing, Prusa Slicer 2.9.4 could not import the file (it would have been something to combine multiple soft flexibles on the Prusa XL). OrcaSlicer could import it, but with warnings about incompatibilities with some aspects of the 3MF file.
Formism says that the shoe’s zoned, modular design opens the door to real multi-material creativity. In theory, you could use a filament-switching system to assign different colors or material properties to specific parts of the shoe — for example, a softer sole, a firmer upper, or contrasting connectors allowing for truly personalized aesthetics and performance.
In practice, though, that flexibility comes with some caveats. If you want to print multiple TPUs in a single job, you need Bambu Lab’s specific “TPU for AMS,” which is currently the only TPU the company officially certifies as compatible with its AMS (Automatic Material System). It’s not as soft as Bambu Lab’s 85A/90A filaments, though, which defeats the point of soft printed shoes that are comfortably wearable.
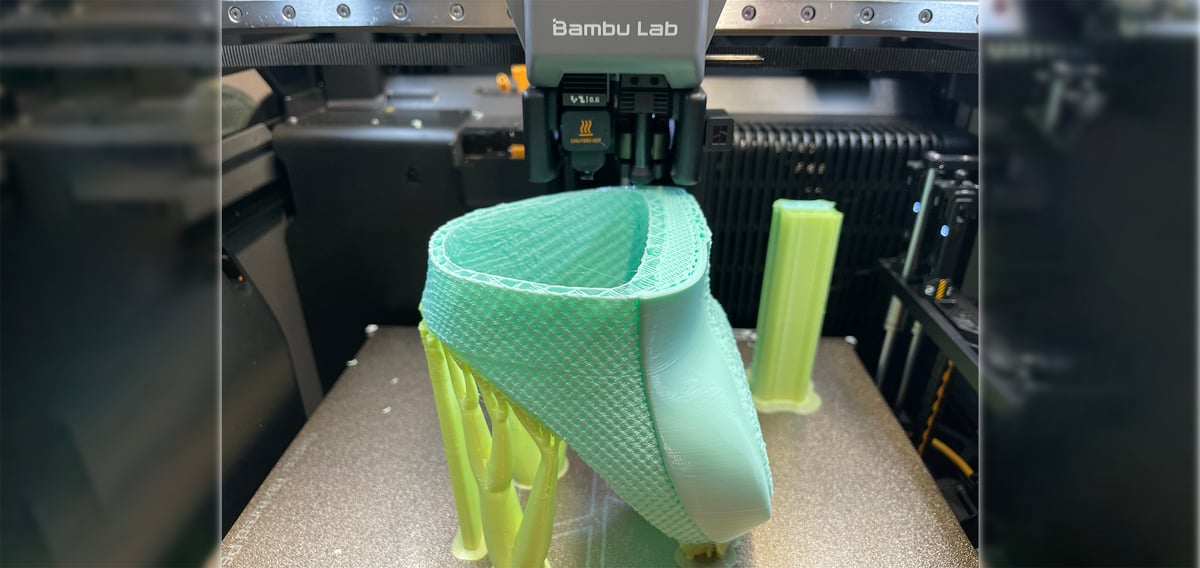
We used Bambu Lab TPU 90A, one of the softest, squishiest options in the company’s lineup — and while it can print beautifully, it is explicitly not compatible with the AMS. It’s not even that printable from the H-series’ external spool holders, either. Official guidance impractically recommends finding a way to feed the filament level with the flexibles inlet on the rear of the machine, but we skipped this entirely and fed the material from above, as we detail below.
These soft filaments are allergic to any tension or friction in the filament path, translating even the gentlest resistance into under-extrusion. This limitation quickly sent us down a path of trial, error, and creative workarounds.
From a Spool of Material to a Shoe
For this particular shoe, both Bambu Lab and Formism repeatedly stress that you should read the printing instructions carefully and follow them to the letter. They are not exaggerating. Like the H2D, the H2C is certainly a capable multi-material machine, but it does still require effort on your part to ensure things are set just so. It’s not yet the effortless, hit-print-and-walk-away experience you get with materials like PLA or PETG.
TPU itself isn’t difficult because of how it prints, it’s difficult because of how you have to feed it into the machine. Feeding the softer TPU from the external holder and it stretches like taffy instead, messing with the expected volume of plastic through the nozzle and resulting in chronic under-extrusion.
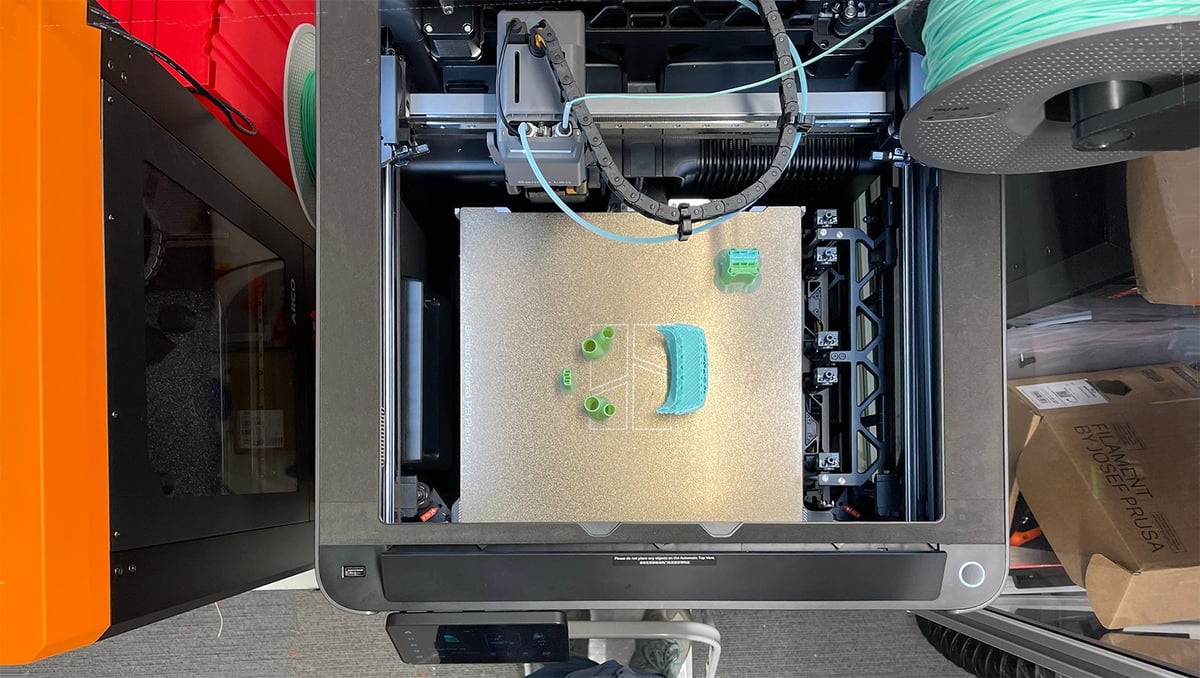
Since our material wasn’t AMS-compatible, we ended up having to gently guide the filament straight down into the extruder from above, a bit like a patient angler feeding fishing line into a slow-moving stream. Effective, but hardly elegant.
To make this workable, we needed a modification. Thankfully, the community has already come to the rescue: there’s no shortage of free, printable TPU feeder guides and filament routing aids available online, including the Flexible Filament Top-feed Rack, by none other than Bambu Lab itself.

One complication to keep in mind with these kinds of TPU setups is that you typically want to drip-feed the TPU while also printing with a separate support material. Using something like PLA for supports is far easier to remove than trying to use TPU itself, which tends to fuse stubbornly to the part.
In our case, we fed the support material from the standard side spool holder while guiding the TPU through our custom top-feed mod. We designed our mod to slot neatly into the aluminum frame of an enclosure right beside the H2C — simple, functional, and very “lab DIY.”
The right-foot shoe ended up being our trial run and, frankly, a learning experience. By the time we printed the left shoe, a redesigned holder did its job in providing a smooth flow of filament.
The Fit — and the Value
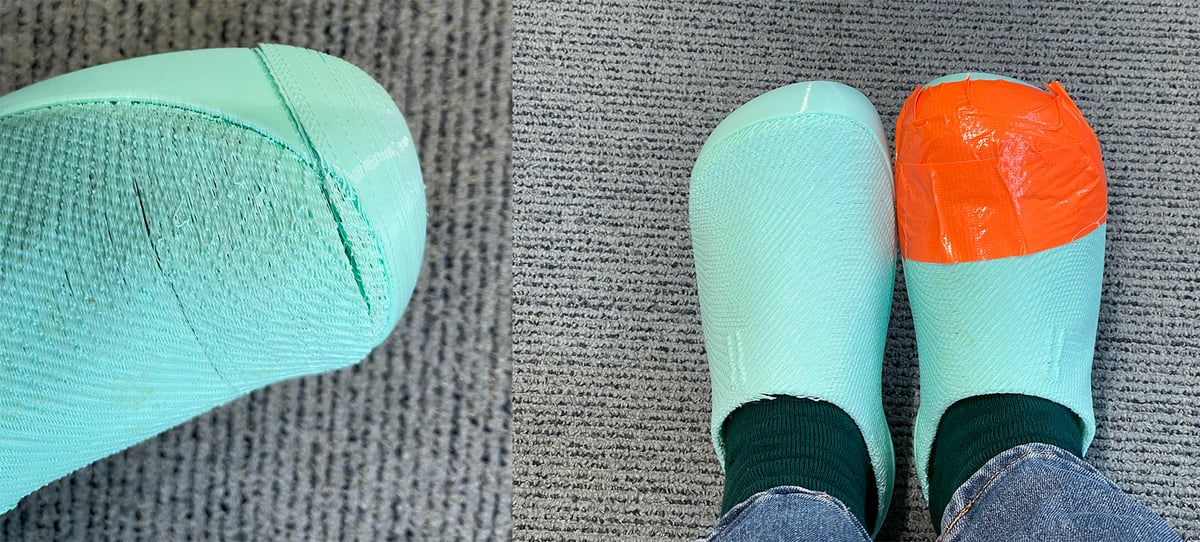
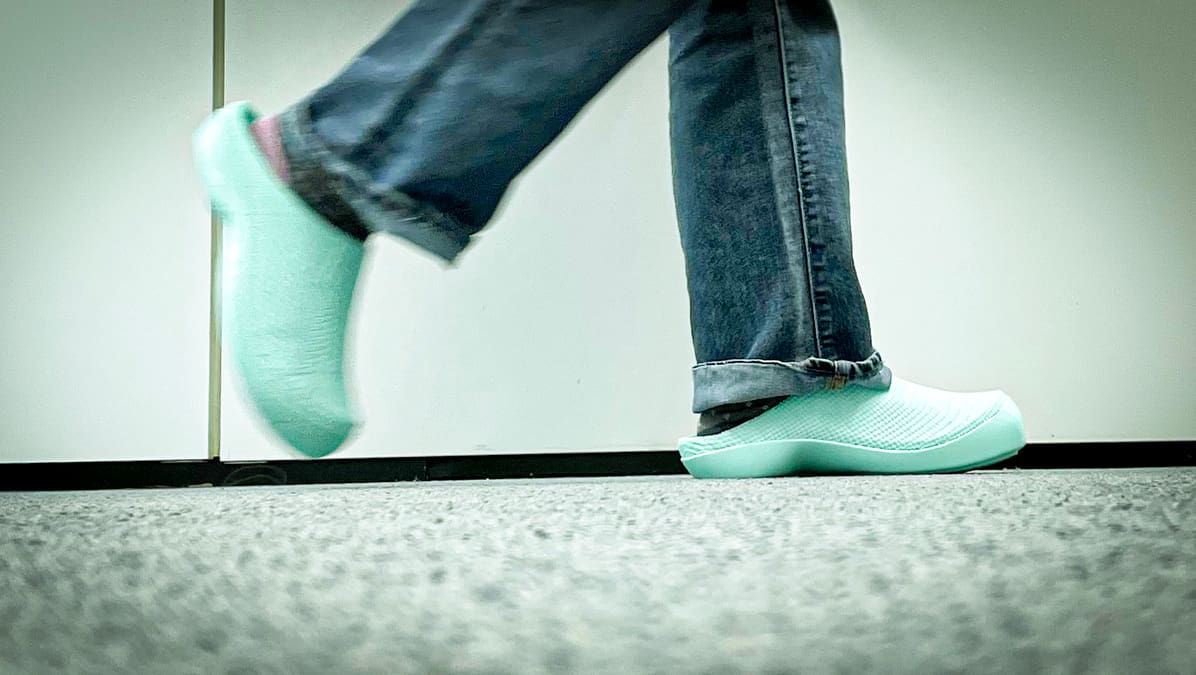
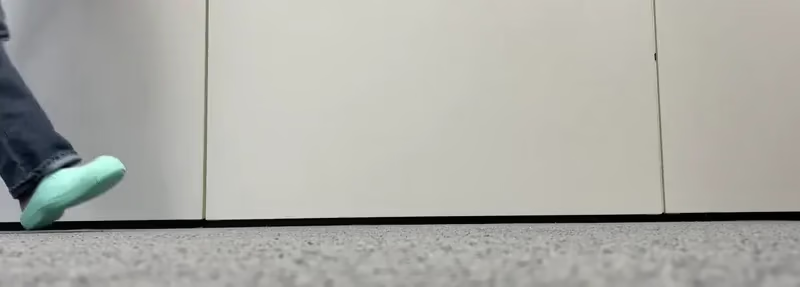
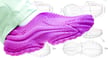
Slipping on my custom 3D printed clogs for the first time was immediately satisfying. They were surprisingly comfortable, genuinely stylish, and felt sturdier than I had expected. On top of that was the quiet pride of wearing something I had effectively “made” — a bit like rocking a scarf you knitted yourself or a necklace you strung by hand.
In terms of fit… well, they’re clogs. I can’t run in them (and never intended to), but for office use they hit the sweet spot: cozy, warm, and professional enough that my coworkers no longer feel compelled to comment on my sock choices.
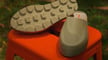
After wearing them for about a week, however, reality set in. The TPU has stretched more than I’d hoped, and I’ve found myself shuffling a bit more to keep them securely on my feet compared to those first few days. The right shoe — our “learning curve” print — is already showing signs of layer delamination, and I’m not confident it has much life left but I’ve tried to save it with some duct tape. The left shoe, thankfully, still feels solid.
As for value? Let’s just say this was not a budget project — at least not on the first try. Including misfires, this endeavor consumed nearly an entire spool of TPU, which retails for about $45, plus a couple of dollars’ worth of support material. That puts this pair at roughly twice the cost of Crocs and just shy of a pair of Birkenstocks.
The silver lining is that the expensive part was the learning curve. Having the process dialed in means being able to squeeze out full value from the filament. At around 300 g of material per shoe, a single 1 kg spool should produce one and a half pairs plus change, which changes the economics quite a bit.
It should be noted that as far as sustainability is concerned, 3D printed footwear like this is not a win. Not yet, at least. Footwear is rarely recycled no matter what it’s made of. Even monomaterial footwear like this, which is often championed as the model for recyclability and circularity, will end up on the trash heap without services and solutions for recycling them, which for the most part do not locally exist.
Although I could make the argument that my Birkenstocks are made of cork and leather, all the pairs I’ve ever owned are in a landfill somewhere. Still, those materials weren’t derived from fossil fuels and the lifespan of Birkenstocks is about 10 years for me, whereas my TPU clogs may make it to the Summer at best. (One material that could persuade me to try again is the new plant-based TPU from Ecogenesis Biopolymers, yet it is not widely available.)
Still, as fun and fascinating as this experiment was, I’m not yet ready to fully commit to 3D printing my everyday office footwear. The design clearly works, and the printer is capable — but right now, the material feels like the weak link.
There are certainly other TPUs out there from companies like Colorfabb, Siraya Tech, Recreus filling the void with foaming TPUs that offer the kind of weight, feel, and performance you associate with footwear. As with so many things in 3D printing, the real breakthrough comes when the right material meets the right technology — it seems like we’re tantalizingly close.
You May Also Like:
Listen to All3DP’s News Podcast:
License: The text of "I 3D Printed My Own Office Shoes with Bambu Lab — Here’s Why I’m Not Ready to Commit" by All3DP is licensed under a Creative Commons Attribution 4.0 International License.