Just How Transparent Are Transparent Filaments? We Tested Three

Transparent filaments are beautiful and allow us to create awesome prints that really stand out, but how transparent can we print? Let's find out!
Achieving clear, glass-like 3D prints is an enviable feat of 3D printing craft. The applications are varied and include functional as well as decorative end uses. Unfortunately, obtaining transparent prints isn’t as easy as loading any old transparent filament and sending a file with default settings to your printer. There are many things to consider and tweak if you’re trying to obtain maximum transparency.
This summer, we’re putting in the work to compile much of the guidance floating around the community, test out various techniques, and report what worked for us. The first stop: filament!
Filament selection is crucial because the transparency of the final print heavily depends on the material used. Many manufacturers now offer transparent filament, even in colored versions, across a variety of materials. Looking through community forums, makes, and customer reviews, we opted for PETG. It’s among the common filaments and is relatively easy-to-print – plus there’s a lot of evidence in the community pointing to great results.
For our testing, we went with a popular brand (Sunlu), a less well-known brand that I’ve tried and personally like (GratKit), as well as a favorite for clear 3D printing in the community (Overture). Let’s see how they fared.
A Note on Testing

Besides the filament, achieving higher levels of transparency requires some attention to your hardware, the right print settings, and post processing. We’ll give more details about our methodology later. Here, it suffices to say that we printed each filament at the highest temperature recommended by the manufacturers – the filament needs to melt as much as possible to achieve the maximum transparency. For one of the test prints, we also spent some time sanding and polishing.
We ran several prints for each filament and used the following two models:
- 25.6 x 25.6 x 5 mm squares: These are favorites for transparency testing. They’re quick to print and useful for tweaking slicing parameters as well as testing post-processing techniques. As they’re solid and require infill, we can use them to gauge the transparency of models that aren’t going to be printed in vase mode.
- Storage boxes: We also wanted to test a functional print, and clear containers are a great application for transparent filaments. We chose a Gridfinity design from Printables user GlennovitS3D and printed versions with a single wall and two walls. The model is not as thick as the square, so we anticipated more transparency with this model.
For more details about our test protocol, see the “Test Setup” section below.
The Contenders
Sunlu
Sunlu is a well-known 3D printing material manufacturer whose assortment includes both resins and filaments. They produce a transparent PETG filament, and based on the reviews, it seems like a great option. At Amazon, it has 4.3 stars out of over 2,000 ratings as well as many positive reviews from makers. So, we put it to the test.
Squares
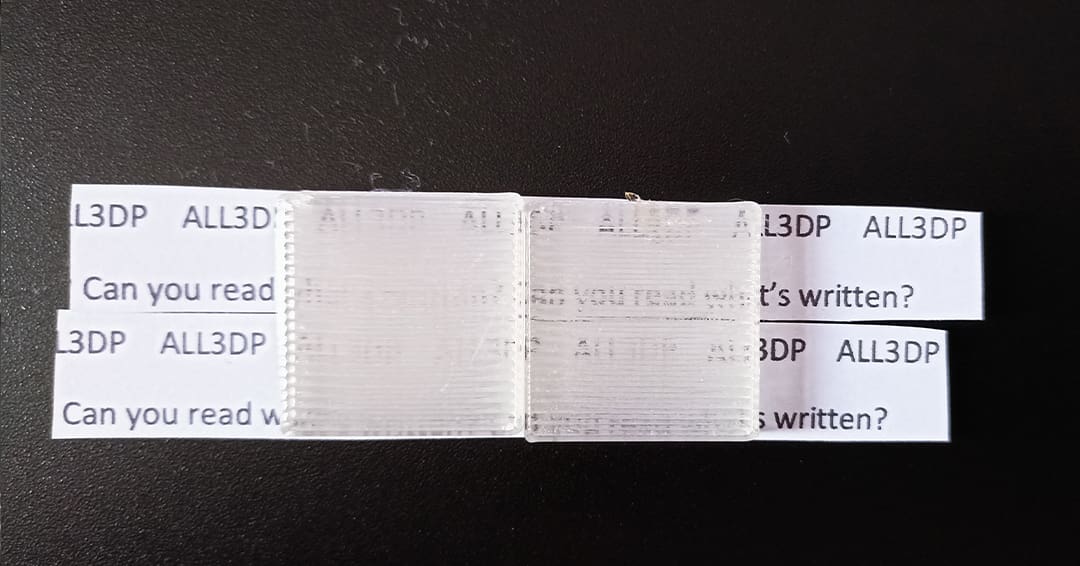
Sunlu suggests two different temperature ranges depending on the speed you set. Although we used 20 mm/s as our printing speed, we set the hot end temperature to the maximum the filament can handle (260 °C) with a bed temperature of 70 °C.
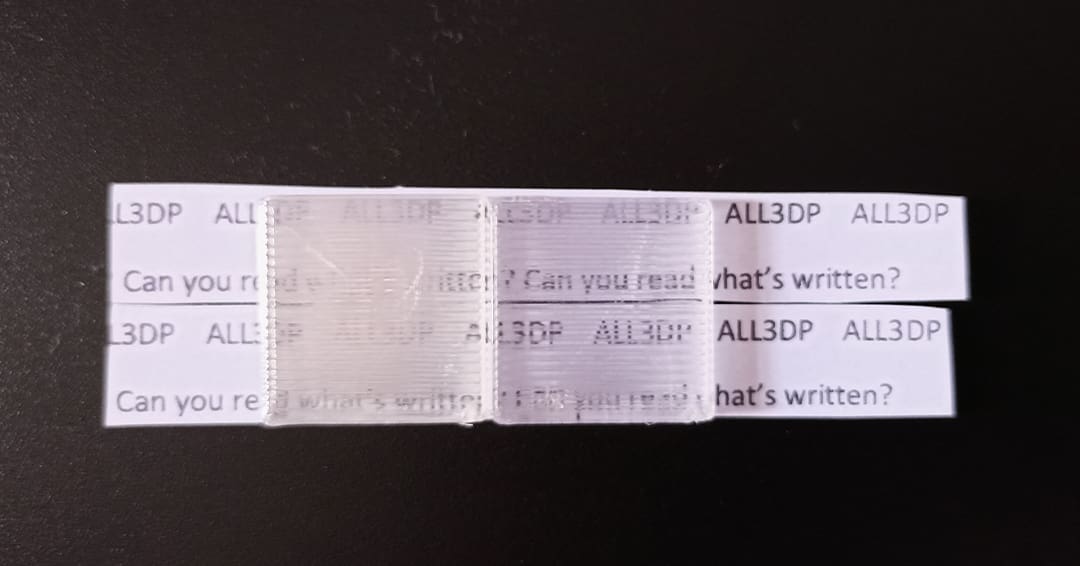
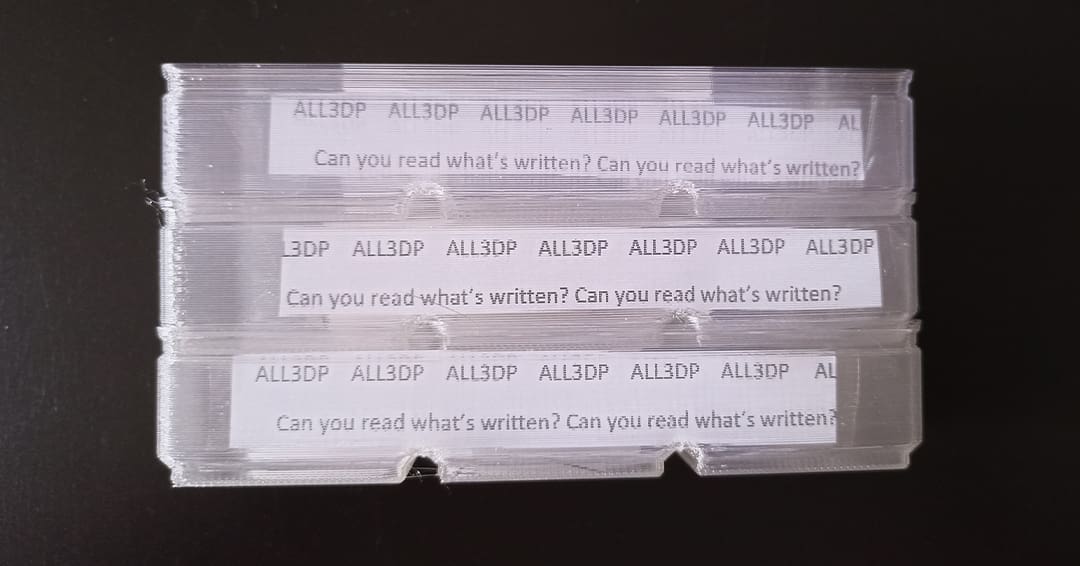
Right off the plate, the square came out a bit opaque (left square in the above image). You can see hints of text behind it, but the surface is frosted. After the post-processing, we achieved more transparency; the next is more legible (right square in the image).
Gridfinity
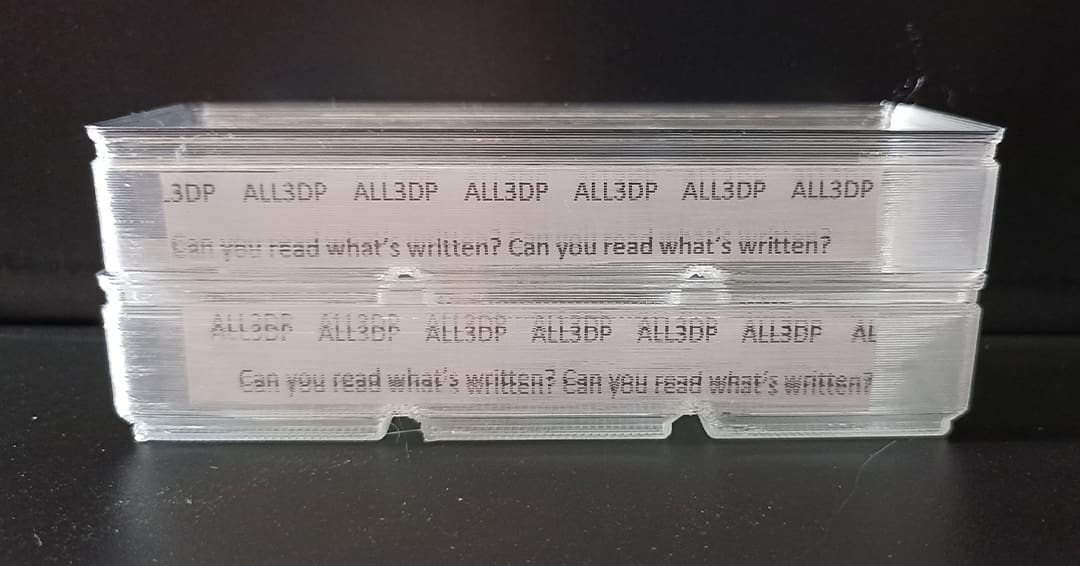
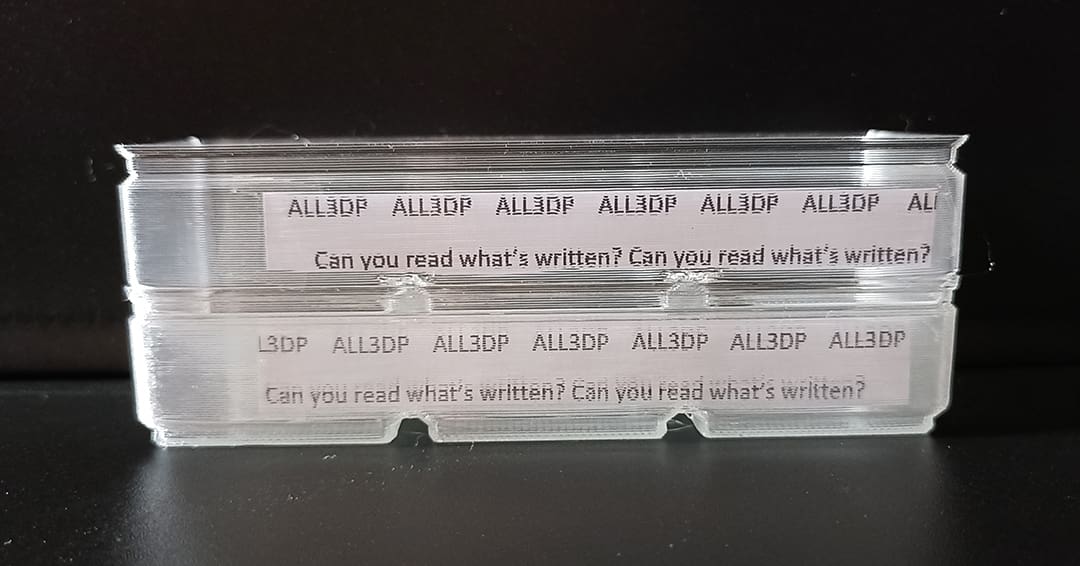
Thanks to the thinness of the model, you can clearly read the text. The top print, which was printed with a single wall, allows for seeing the text without issues. The bottom bin has two walls. It’s still possible to read through the walls, but the text is a bit distorted. The overhangs on both prints looked pretty good even though cooling was switched off.
GratKit
GratKit isn’t as well known as Sunlu, and its catalog of materials is smaller. While they produce both resin and filament, their offering for the latter is at the time of writing restricted to PLA and PETG. I’ve tried out their filament before and had positive experiences. Their transparent PETG has a 4.3-star rating at Amazon, and one reviewer shared some good-looking translucent prints. Can we make it transparent?
Squares
Every GratKit print has been done with a bed temperature of 70 °C and a hot end temperature of 240 °C, the maximum value suggested by the manufacturer.
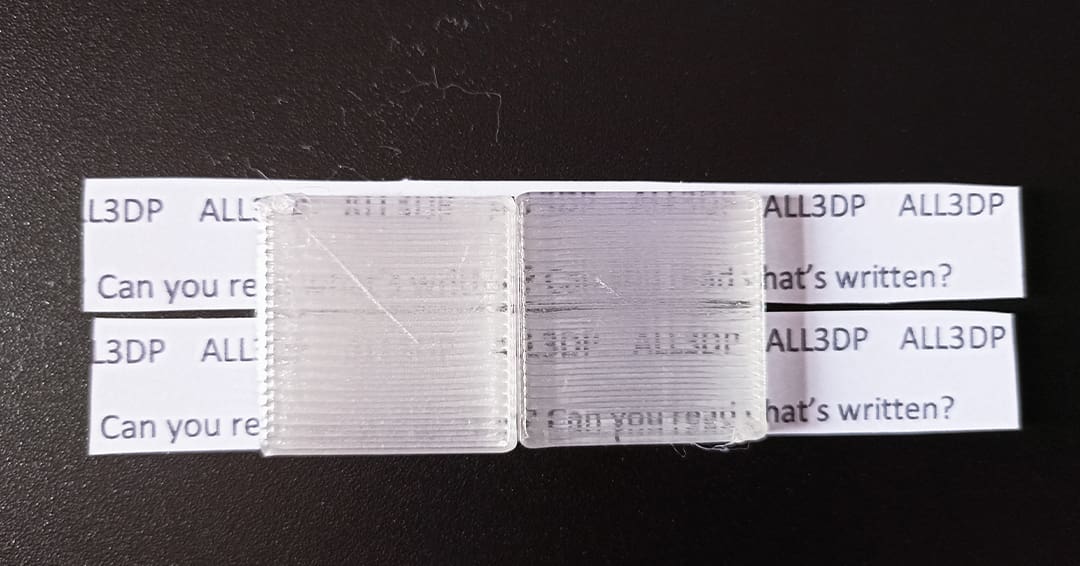
Similarly to Sunlu, the print right off the plate came out a bit frosted (left square pictured above). The text behind the square is barely legible. On the other hand, after a little post-processing, the text is clearer and some letters are clearly distinguishable.
Gridfinity

The top bin, printed with a single wall, allows for clear reading of the text. The surface of the part is really transparent, but the overhangs are problematic due to the lack of cooling.
The bottom print with two walls is still pretty transparent, although the surface is a little frosty.
Overture
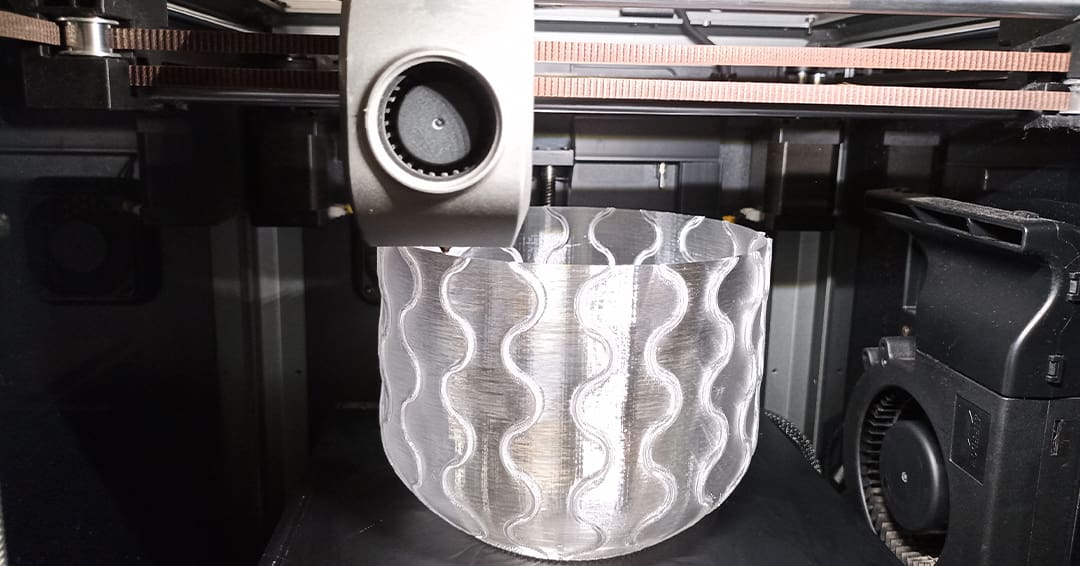
Although not as well known as Sunlu, Overture’s name comes up time and time again when it comes to transparency. At Amazon, it has a whopping 14,460 ratings, averaging 4.3 stars. Many makers have shared their prints and are happy with the results, but I’m still mesmerized by the clarity of Printable user Rygar1432’s turbine fan case.
Squares
The max temperatures for this PETG included 250 °C for the hot end and 90 °C for the bed. Although we used the maximum bed temperature suggested, you should have no problem with the minimum indicated value, which is 80 °C.
The squares came out great. Before post-processing, you couldn’t clearly read the text behind the print, but the shapes of the letters were legible. After the post-processing, you can read the phrase behind the part easily.
Gridfinity
Both bins look great! Even with two walls, the text is clearly legible. The surface, however, is slightly more frosty than the single-wall print. Similar to Sunlu’s PETG, the overhangs printed well even without cooling.
Verdict

The results are pretty clear: Overture was the most transparent of the three – no wonder it has such a large fan base among makers. When models require some thickness, Overture’s Clear PETG is the way to go.
Our test squares were 5 mm thick, and we’re exploring just how thick we can go and preserve transparency. We’ll let you know what we find out.
What we do know is, the thinner the model, the more transparent it will be. This is apparent in the Gridfinity bins with one wall.
All three brands produced sufficiently transparent bins. So, if you’re printing a model in vase model or with thin walls, you can’t wrong with any one of them.
Just in keep in mind, though, that it’s probably not a good idea to post-process models with such thin walls. They’re too flimsy, and the model will not likely survive the sanding and polishing process.
Test Setup
To ensure a fair comparison between the three brands, we followed a nearly identical process for each filament. We deferred to the manufacturer’s recommended temperature settings, which introduced some variation between filaments. However, all of the other settings, the hardware used, and the post-processing method remained the same for each test print.
Hardware
We decided to print every model on a slightly modified Creality K1. Although the machine is built for speed, you need to print really slowly with transparent filaments. So, an older machine would also do the trick.
The extruder has been swapped for the new DXC extruder by Phaetus. The hot end remains stock and is outfitted with a 0.6-mm hardened steel nozzle.
A smooth built plate is quite important for transparency, so we printed everything on the stock Creality Smooth Plate.
Another piece of hardware required is the dryer. Since PETG absorbs moisture, the spool needs to be dried before printing. For this test, we have used Sunlu E2 FilaDryer set at 55 °C for 5 hours.
Printer Settings
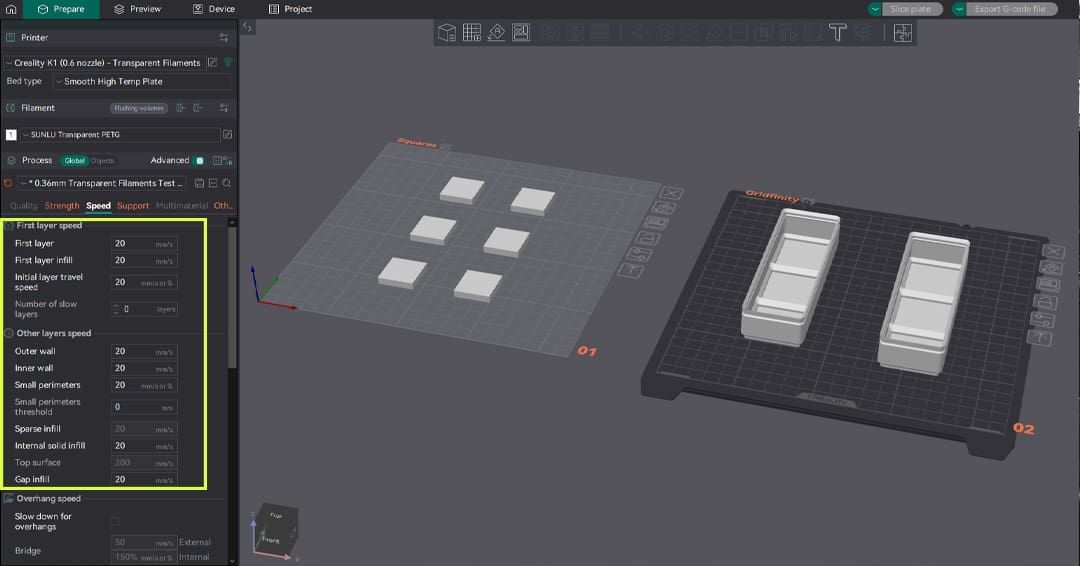
The transparency of the final part is highly impacted by slicing settings. Creating an appropriate slicing profile is key to obtaining the desired effect. There are many parameters that can be tweaked for this purpose. We’ll dive deeper into them in a forthcoming article, but let’s talk about the main ones:
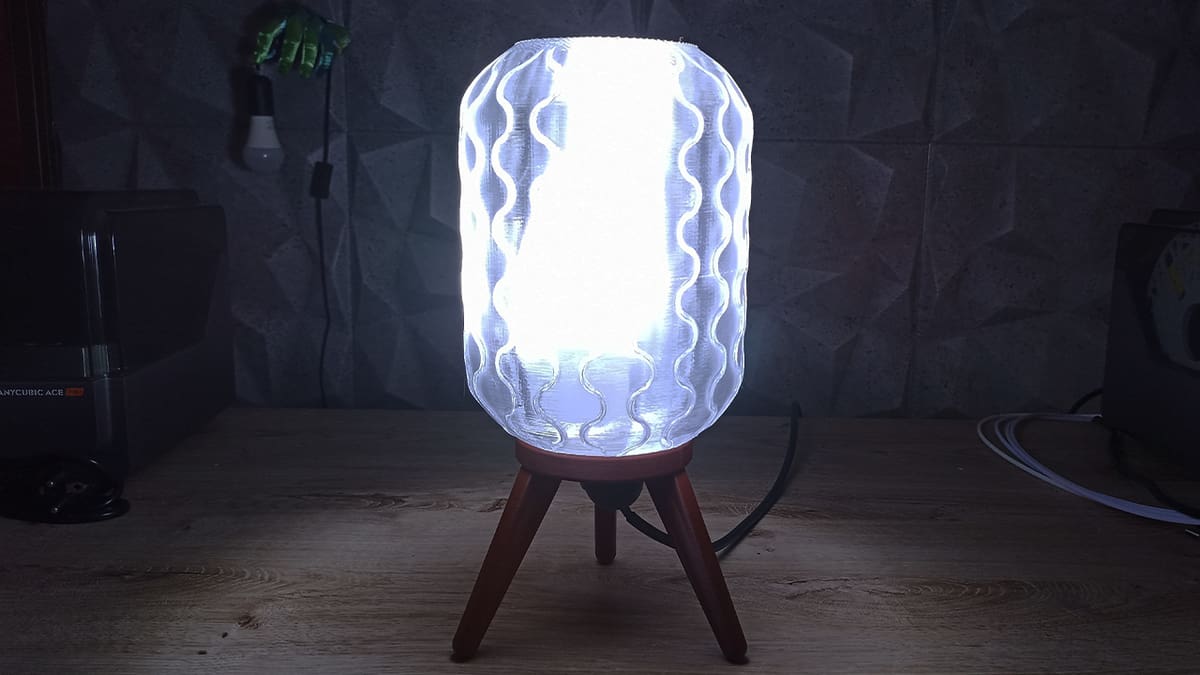
- Larger nozzle and thicker layers: Usually, you’ll need transparency in the X- and Y-axes for models such as lamps, boxes, and similar functional or decorative pieces. To achieve this goal, it’s better to use a larger nozzle with a thicker layer height. For this test, we’ll use a 0.6-mm nozzle with a 0.36-mm layer to maximize the quantity of light passing through the layers, while also maintaining a level of detail.
- Temperature and cooling: To achieve the maximum transparency, transparent filament needs to melt as much as possible. For this reason, we used the maximum temperature indicated by the filament manufacturer for each spool. For the same reason, we’ll turn off cooling to avoid altering the transparency of the print.
- Speed: As per the previous point, to give the filament all the time to properly melt, you’ll need to decrease the print speed. Although many manufacturers suggest a speed range between 30 and 50 mm/s, we’ll set to 20 mm/s after noticing better results during the initial trials.
- Infill: You need to set infill density to 100% and select a rectilinear pattern to create the structure that most similar to glass.
Now that we have talked about our setup, let’s briefly take a look at the post-processing.
Post-Processing
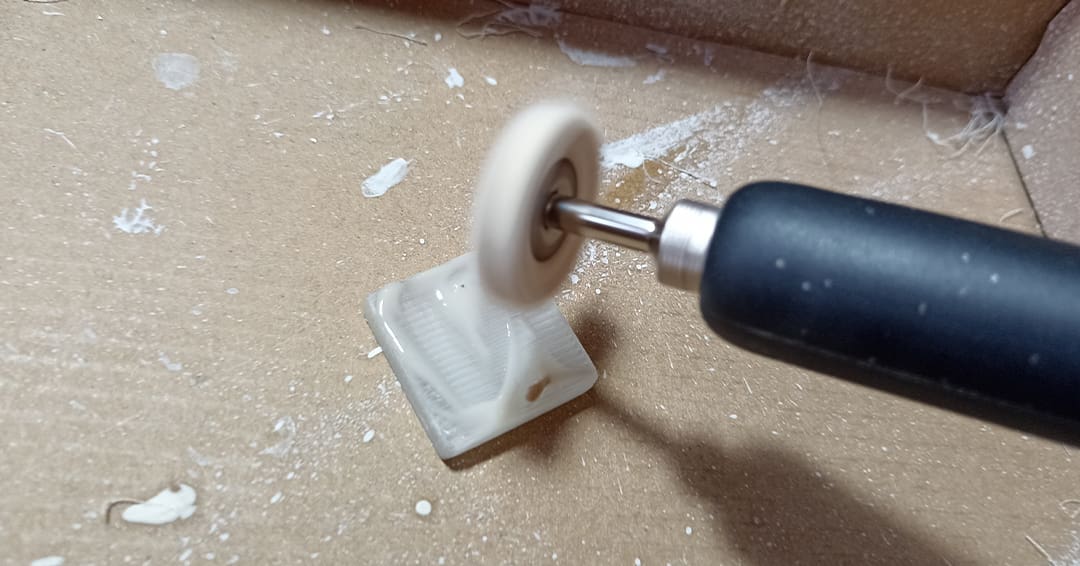
Post-processing can dramatically increase the transparency of your prints. It’s a step that can be done in many different ways with different instruments. The most common workflow is sanding and either polishing or applying some coats of spray or resin.
Depending on your level of experience and the tools you own, you might prefer one method over the other. For this article, we sanded our pieces starting from a 400 grit and going up to 1500, passing through 800, 1000, and 1200.
To complete the process, we applied a plastic polish compound and polished the pieces using a Dremel. Speed and consistency are key to this process. Alternatively, you can polish the parts using a polish compound spread with a piece of cloth.
License: The text of "Just How Transparent Are Transparent Filaments? We Tested Three" by All3DP is licensed under a Creative Commons Attribution 4.0 International License.
CERTAIN CONTENT THAT APPEARS ON THIS SITE COMES FROM AMAZON. THIS CONTENT IS PROVIDED ‘AS IS’ AND IS SUBJECT TO CHANGE OR REMOVAL AT ANY TIME.