PETG Stringing: 3 Simple Solutions

PETG is a great material to 3D print with, even if it is a little stringy. Read on for three easy ways to fix PETG stringing!
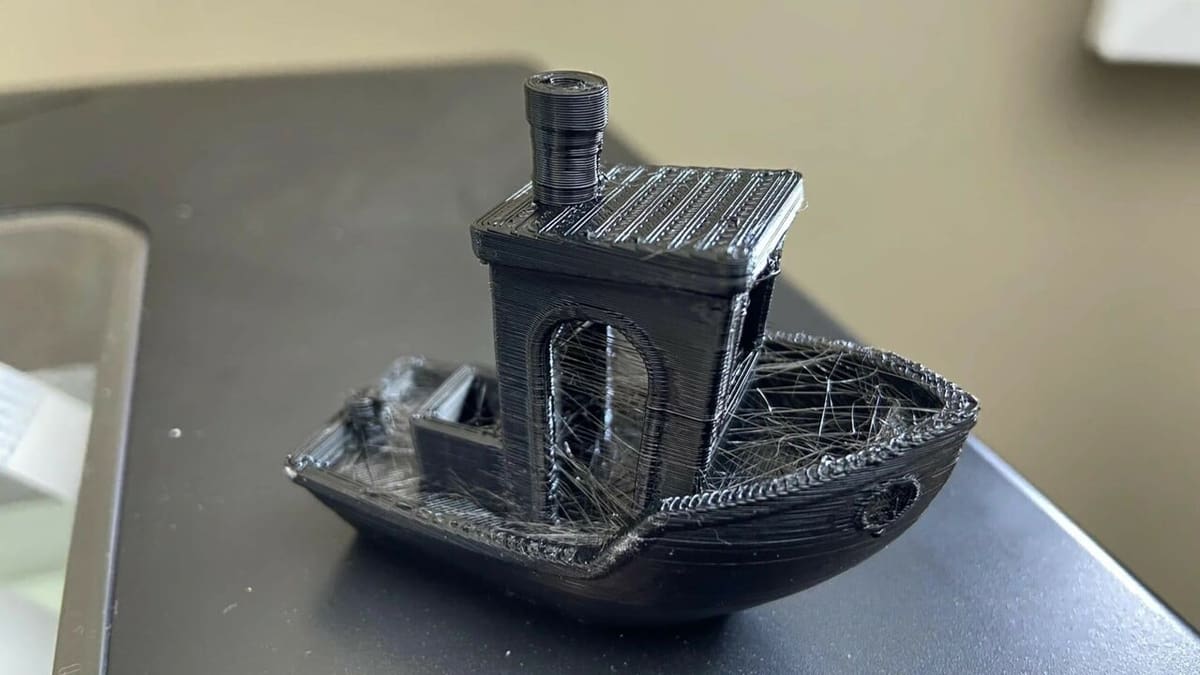
If you’ve spent any amount of time exploring the world of fused deposition modeling (FDM) 3D printing, you’ve likely come across PETG filament. It’s a favorite among many due to its fantastic mechanical properties and relative ease of printing. But, like any material, it has its quirks. One of the most annoying aspects of printing with PETG is stringing.
Stringing occurs when the melting filament oozes while the nozzle is traveling between two points. This problem gives prints annoying hairs that can be difficult to remove or cause aesthetic imperfections after removing them. PETG is especially notorious for stringing because it requires a relatively high temperature to ensure good flow. This increased temperature can encourage strings, allowing the filament to freely flow while traveling.
In this article, we’ll examine several tips to help you print PETG without those pesky strings. We’ll start by exploring how to tune your extrusion settings, before moving on to retraction speeds and distances. From there, we’ll look at temperature and cooling before finally taking a peek at travel speeds.
Let’s get started!
Best Practices

Before we dive into our tips, there are a few general things to keep in mind when printing PETG.
The first point is proper storage. As PETG is hygroscopic, it absorbs moisture easily from the air. This moisture can cause the material and its mechanical properties to deteriorate, leading to stringing and low-quality printed parts. To prevent this from happening, it’s best to store your PETG in a dry environment, such as a dry box or in an airtight bag with desiccant packs.
Another point worth mentioning is printer maintenance. By keeping your nozzle and print bed clean, you can avoid stringing.
It’s important to keep your nozzle clean, as filament residue can build up inside it and stick to your print’s surface. Start by cleaning the exterior of your nozzle with a damp cloth while it’s still warm. From there, you can clean the inside of the nozzle by inserting a small needle to break up dirt and clear the nozzle. If you’re dealing with significant buildup, consider a cleaning filament or doing a cold pull.
A clean print bed also contributes to successful, high-quality prints as left-behind residue can get on your nozzle and cause issues. To keep it in tip-top shape, give it a wipe-down with a microfiber cloth between prints. If it’s noticeably dirty, you can use a scraper tool to remove chunks of material as long as you don’t have tape on your print bed. Run some warm water on the build plate and then gently scrape the surface until it’s clean. Acetone, isopropyl alcohol, and window cleaner are also popular cleaning techniques to consider.
Tip #1: Tuning Extrusion
In the world of 3D printing, extrusion is one of the big players. It’s the process where the filament gets pushed through the hot end, melted, and laid down layer by layer to create your amazing 3D objects. But it can be a bit of a diva – a perfect balance is necessary to avoid under- and over-extrusion, both of which can lead to a stringy mess, especially with PETG.
Under-extrusion is like trying to ice a cake with too little frosting: you end up with weak, incomplete layers that just don’t look or feel right. Over-extrusion, on the other hand, is like using too much frosting, causing it to squish out the sides and ruin your masterpiece. Both issues can contribute to stringing, and PETG, being more ooze-prone than its cousin PLA, can be particularly susceptible.
But don’t worry, taming stringing in PETG prints is all about finding the right balance between different settings. The first one to tackle is extrusion. There are three handy tests you can carry out to see how your printer is extruding, and if it passes the first, you get to skip the rest!
It’s worth noting that extrusion tests can also help you catch underlying problems that are not only due to PETG stringing.
So, how can you check and tune your machine?
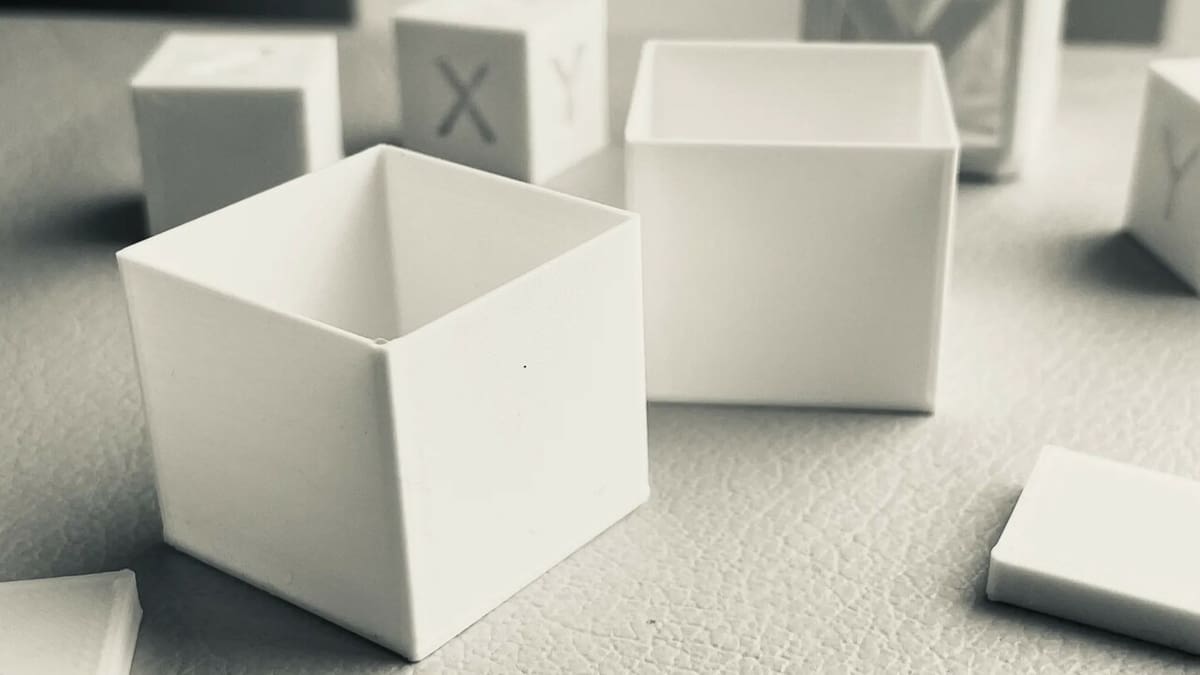
Cube Wall Test
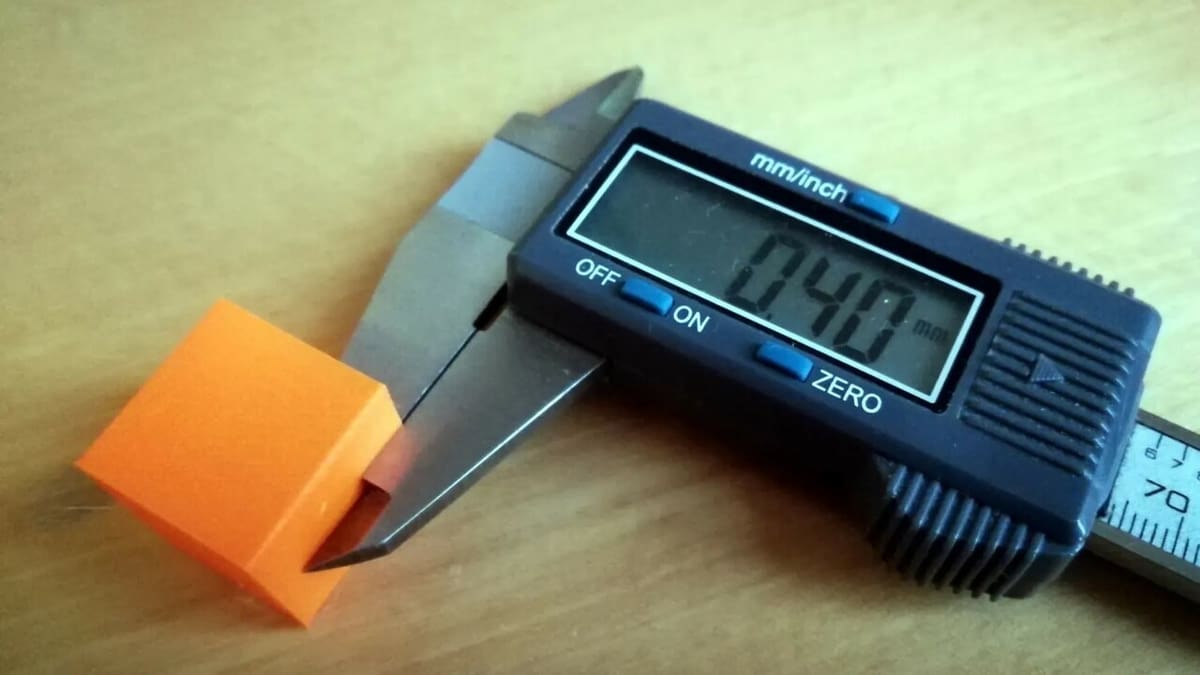
Print a simple open cube with skinny walls (e.g. 0.4 mm for a 0.4-mm nozzle) to see if your extrusion settings are on point. Check the cube walls for gaps (under-extrusion) or excess material (over-extrusion), and adjust your settings as needed. TeachingTech also has a great tutorial to generate this test file and guide you through the process.
Manual Extrusion Test
Heat up your hot end to your desired printing temperature (for PETG, typically 220-250 °C), give it a quick wipe, and manually extrude a bit of filament. Watch the filament as it exits the nozzle – it should flow like a dream, without any signs of bubbling, curling, or excessive stringing. It should flow directly downwards.
If it’s coming out at a tilted angle or nearly horizontal, then it could be a sign that you’ve got bigger extrusion issues like a slight block, so hop onto the next test. If it’s not quite perfect, don’t worry – just adjust your settings, increasing the temperature 2-5 °C at a time (if you’re at the lower end of the suitable range for that filament), and try again.
Flow Calibration
This may seem like a big escalation but it’s surprising how different filaments, even different PETG variants, can sometimes have subtly different flow settings. That said, if you’ve made it this far with uninterrupted stringing and the two previous tests haven’t helped at all, then you might have bigger extrusion issues. To work on this, we advise following our handy guide on tuning E-steps.
Tip #2: Tuning Retraction
Retraction refers to when your printer briefly pulls the filament back into the extruder during a non-printing move. Think of it as your printer taking a short, well-deserved break from extruding while it hops from one point to another. This quick pause helps prevent any oozing or dribbling of filament during those non-printing moves, keeping your print looking sharp and tidy.
How quick it pulls back the filament and how far plays a critical role in printing PETG because of how much tackier it is than other filaments. If your retraction settings aren’t dialed in right, then stringing can quickly start to appear…
Retraction Speed
Most users will typically find that a retraction speed of around 35-40 mm/s works well, but if you’re experiencing stringing, it may be best to start from 25 mm/s for both Bowden and direct extrusion setups and increase the speed 5 mm/s at a time until the flow is just perfect.
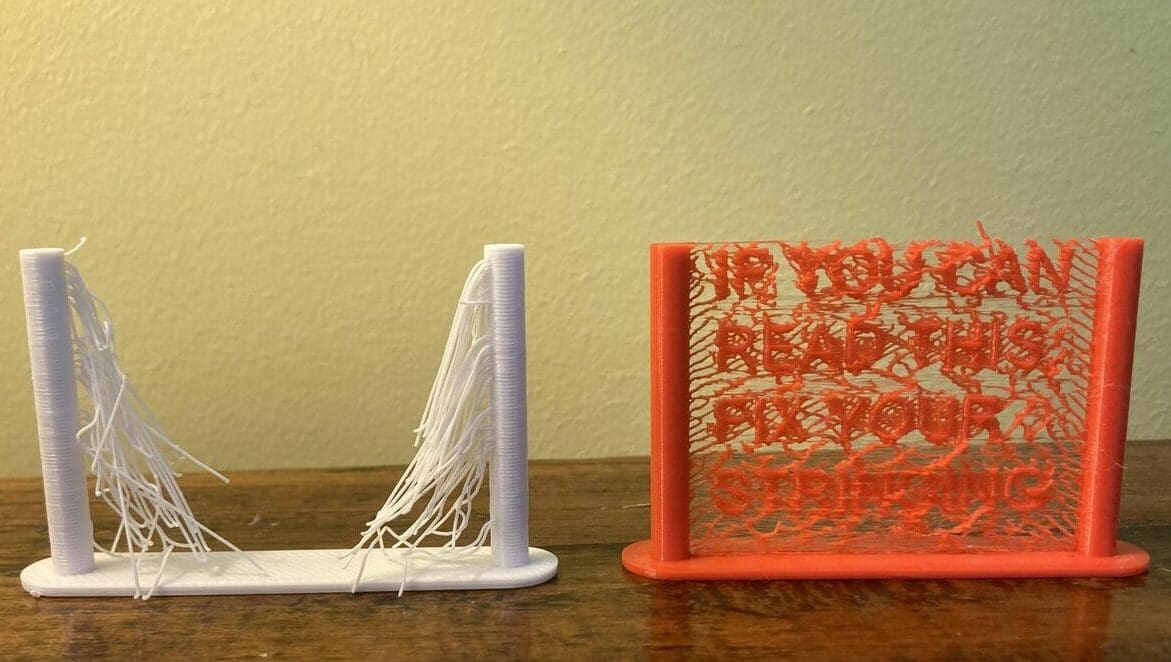
To figure out the best distance for your print, a Retraction Speed Test can be the way to go. You’ll only need a model that you’ll have to print a few times while tweaking the retraction speed settings until you find the settings that work best. While certain standard numbers are usually a good starting point, checking subreddits can also help.
Retraction Distance
If speed has helped reduce stringing but there’s still some, you can go onto distance. Distance varies depending on if you’ve got a Bowden or direct extrusion setup. A systematic approach would be to follow a standard retraction test, although there’s also another option if this doesn’t offer significant improvements.
If you’re really struggling with PETG prints, you can set retraction to zero from your usual 5-7 mm (Bowden) or 0.5-3 mm (direct extrusion). Normally you wouldn’t dream of turning it off, but it can help stop stringing that’s caused by the filament sticking to your print and then being stretched when it retracts, especially on Bowden setups where the control isn’t necessarily very good.
Tip #3: Tuning Temperature
If fixing your settings for retraction doesn’t work, it’s time to chill out – literally. In other words, decrease your printer’s temperature settings. Obviously, if your filament is getting too hot, it will freely ooze regardless of retraction or travel settings.
Temperature is a funny one. It can be a very easy quick fix, something you may want to try before even looking at extrusion, but if it doesn’t immediately solve stringing, return it to normal and go through tips 1 and 2. This is because some filaments vary slightly in chemical makeup, so a lower temperature can help reduce stringing – but if this doesn’t immediately eradicate it, then you’ve likely got a bigger problem, be it retraction, or worse, extrusion.
Nozzle Temperature
As a starting point, you’ll likely want to aim around 240 °C for a nozzle temperature. It’s always worth checking this in accordance with the manufacturer’s documentation, especially if your PETG contains carbon fiber or glow-in-the-dark (aluminum bromide) particles.
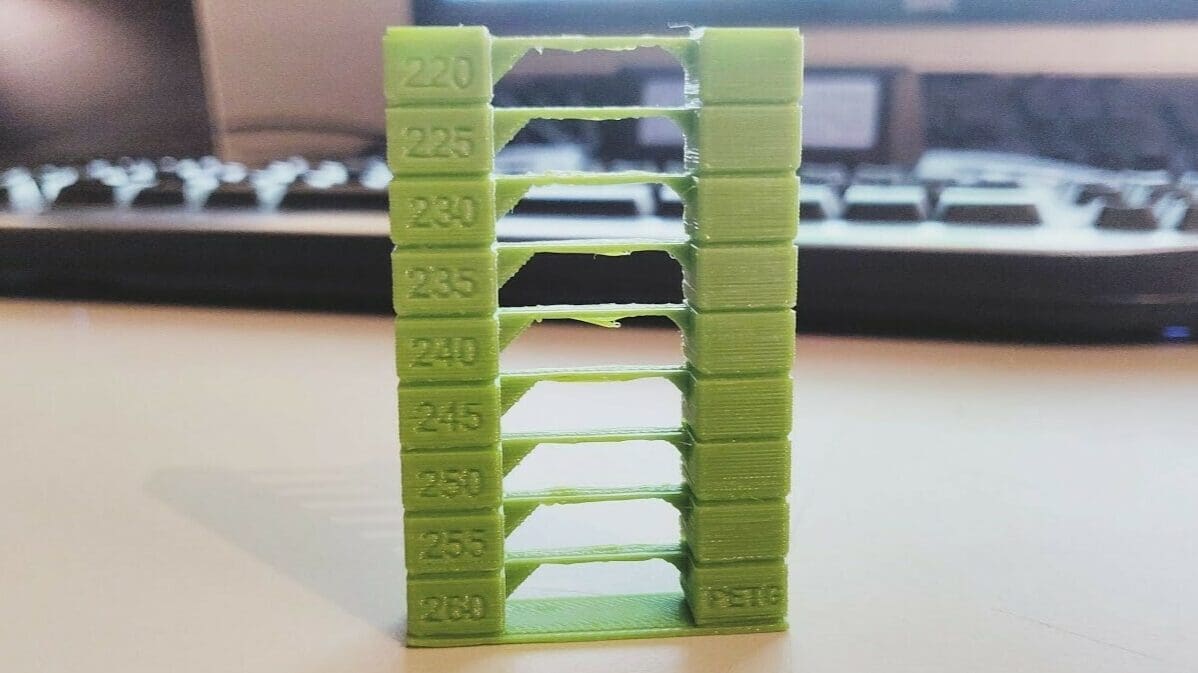
If you need to tweak your nozzle temperature, try printing a temperature calibration block or a temperature tower. Most come with instructions to find the perfect nozzle temperature in a single test!
Be careful as you work to find the perfect temperature: some filaments print worse at colder temperatures and might impact your strength or surface finish, so it’s useful to check the manufacturer’s recommendations. While 220 °C can be a good starting point to increase 5 °C from, it may not be hot enough for some types of PETG.
Parts Cooling Fan
Another thing that you can consider if you’ve tried everything mentioned and stringing is still an issue, while it may seem counter-intuitive, can be to turn down your cooling fans. PETG flows really easily but also goes tacky when you try to cool it too fast.
If you’re printing a small region, the fans will pass very close to the same spot several times. As such, it may actually be cooler in that area and there’ll be a higher chance of the filament being tackier. Because of this, try setting your fan speed to 30-50% speed at most if it’s a really small region (under 2 in2). Meanwhile, for larger open parts, you might not need any cooling at all.
Bonus Tip: Optimizing Travel
If none of the above have worked to eradicate your stringing, hope is not yet lost. There are a couple of sneaky things you can do to still reduce it, but we didn’t mention these earlier because they can impact your print time considerably and they don’t fix the problem as much as hide it.
There are two parameters to optimize for travel in your slicer. One is speed, which is how fast the hot end moves between points on a printer when not printing, and the other is the distance it travels without crossing a perimeter.
Print Speed
If you’re noticing really thin wisps on your print with little dots where they’re attached to the print, then the PETG is probably sticking to the model and stretching, which means you’re moving too fast. Alternatively, if your stringing is slightly thicker and shorter, then you might be going too slow and it’s just oozing out.
There isn’t an exact guide to tune speed, but as with most printing settings, it’s more trial and error, starting with the minimum in the general range (120 mm/s) and then increasing (or decreasing) by 5 mm/s. You can find this setting under “Print Settings > Speed > Speed” for Print Moves in PrusaSlicer, and other slicers shouldn’t differ much in terms of setting names or how to find them.
Print Head Path
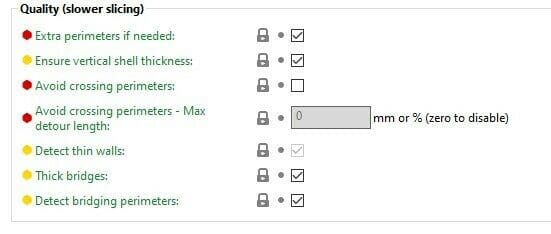
Another trick that can be of great use to stop your oozing problems (or hide them) in PrusaSlicer is to enable the setting “Avoid Crossing Perimeters”. With it, you can get the nozzle to always traverse along your print, which will stop you from seeing stringing almost entirely. It does add time to your print, so it’s best to tune the “Max Detour Length” setting just below “Avoid Crossing Perimeters” to trade off time and stringing.
Cura’s alternatives to these settings are called Combing and Coasting. These stop stringing nearly entirely because there is always something below the nozzle to stop anything from dribbling out. And if a small amount does dribble out, it’ll go into any micro-gaps in your print or infill as it goes along.
Finding the right settings is an art, not a science sadly, so, while there are a few things you can try, keep in mind you’ll also need some patience to get things just perfect.
License: The text of "PETG Stringing: 3 Simple Solutions" by All3DP is licensed under a Creative Commons Attribution 4.0 International License.