The Settings Your PETG Prints Need to Get a Whole Lot Better

Find the perfect PETG print settings for your needs by adjusting temperature, stringing, print speed, and retraction settings!
If you’ve only ever printed with PLA, you’re missing out on the vast benefits of PETG filament. Not only is PETG less brittle, tougher, and a little bit more flexible that your average PLA leading to more durable less breakable prints, but PETG shrugs off humidity, sunlight, and even things like oils or alcohols that might damage PLA.
PETG opens up more practical uses for your 3D printing — stronger parts, outdoor projects, and anything that needs to last longer. However, it does take a little bit of tweaking to dial in the print settings, which is what we cover below, but once you get it tuned, you’ll probably find it’s just as reliable as PLA, only more versatile.
In this article, we’ll cover everything you need to know to have the best possible PETG prints. From your printer settings to slicing tips, we’ve got you covered.
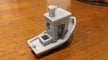
PETG's Problematic Print Settings
Despite being a pretty popular material, it can be hard to print, especially if you’re a beginner. Our readers ask us all the time about the contradictory advice out there on PETG and we usually say that the truth is: settings for one printer or for one brand of PETG don’t necessarily carry over to others. This is why so many makers have their favorite brand of PETG and stick with it.
Plus, there are so many type of PETG, from translucent to carbon-fiber filled that they might as well be completely different polymers, practically speaking, when it comes to printing with them.
Very often, PETG print setting are more like guidelines; you’ll have to adjust some printing parameters to find the best settings for your printer. The tweaks you’ll make range from nozzle temp to bed temp, printing speed to fan speed.
Just take a look at the print setting for these popular PETG filaments.
Setting Up the Bed
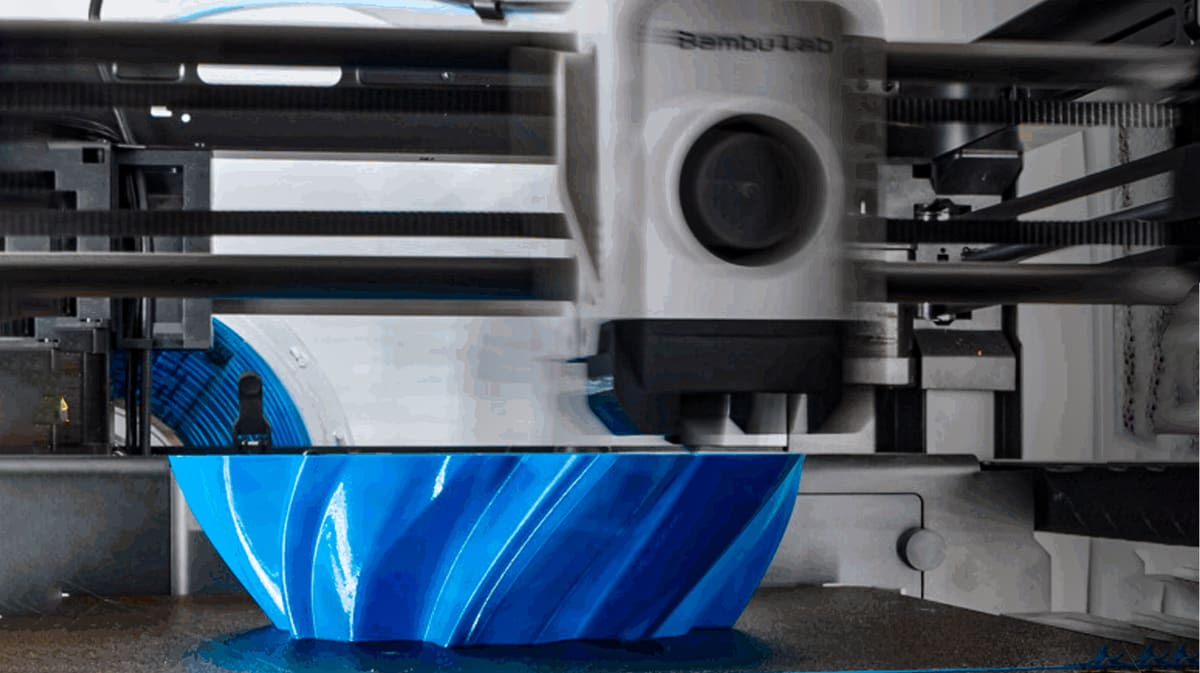
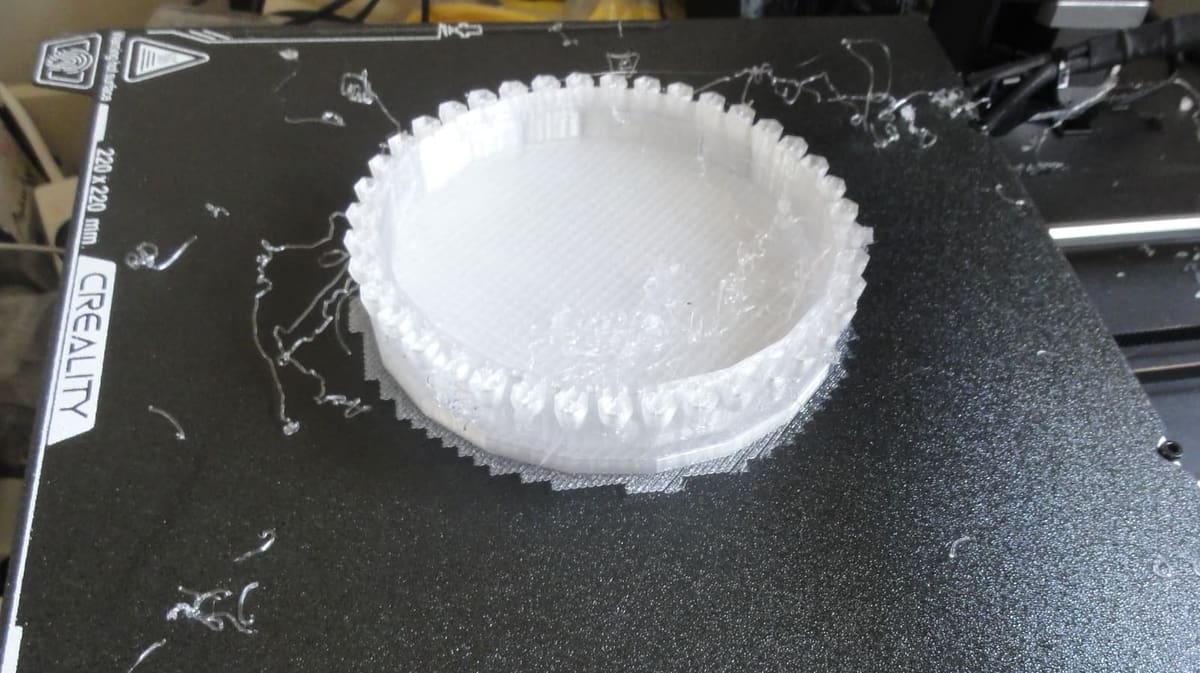
Printing with PETG is a little different from working with PLA, mostly because it sticks like crazy. If you don’t prep your bed properly, the print can grab onto the surface so hard that it tears chunks out of a PEI sheet or even fuses to bare glass.
The trick is to give it something to stick to without welding itself down. A thin layer of glue stick, Magigoo, or even hairspray does the job. Think of it less as glue and more as a protective barrier — it makes sure the print stays put while you’re printing but still comes off cleanly afterward.
Keeping the bed clean is just as important. Warm water and a little dish soap usually work better than isopropyl alcohol, which can smear residues around instead of removing them. You’ll also want to raise your nozzle a touch compared to PLA. PETG doesn’t like being squished into the bed; if the first layer is too tight, it’ll bond far too strongly.
As for surfaces, a textured PEI sheet is usually the easiest and safest choice. Parts grip well during printing and then pop off nicely once the bed cools. Smooth PEI or glass can also work, but only if you lay down a release layer first—never print PETG directly on them or you’ll risk permanent bonding. Glass will give you that glossy bottom finish, but it’s unforgiving if you forget the glue stick. Garolite (FR-4) also holds PETG nicely, though it can sometimes hold a little too well.
Dry Your PETG
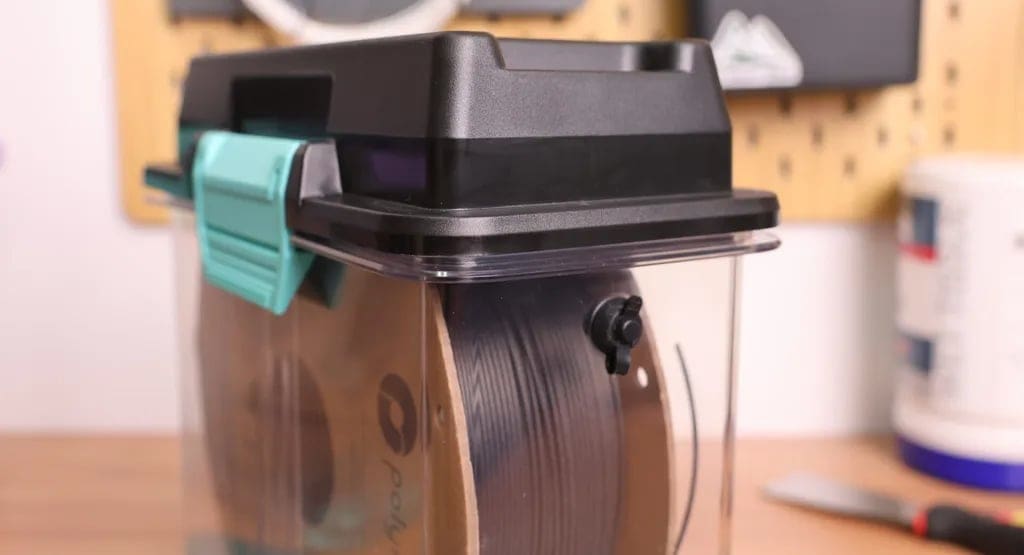
PETG is one of those filaments that will happily soak up moisture from the air if you give it the chance. You don’t always notice it right away, but once it’s absorbed enough water, the problems start showing up in your prints. You’ll hear popping and crackling at the nozzle, see little bubbles in the extrusion, or end up with stringy, weak layers that don’t bond well. Even a spool that looks fine on the outside can be holding onto enough moisture to ruin a big print.
For that reason, it’s usually a good idea to dry PETG before use, especially if the spool has been sitting out for more than a few days in a humid room. The easiest way is with a filament dryer or a food dehydrator that can hold a steady temperature around 65 to 70 °C. If you don’t have one, a regular oven can work too, but you’ll want to be very careful with the temperature and make sure it doesn’t overshoot. A few hours of drying is usually enough to bring the filament back to good condition.
Once you’ve dried it, the next step is to keep it dry. Storing PETG in a sealed container with desiccant is the best way to avoid having to constantly re-dry your spools. Some people even print directly from a dry box to keep things consistent. While you can sometimes get away with printing PETG straight from a fresh, unopened spool, treating it as a material that likes to be kept dry will save you a lot of frustration in the long run.
Temperatures, Retraction & Stringing
Temperature and retraction settings for printing PETG are closely related. Let’s take a closer look at each of them:
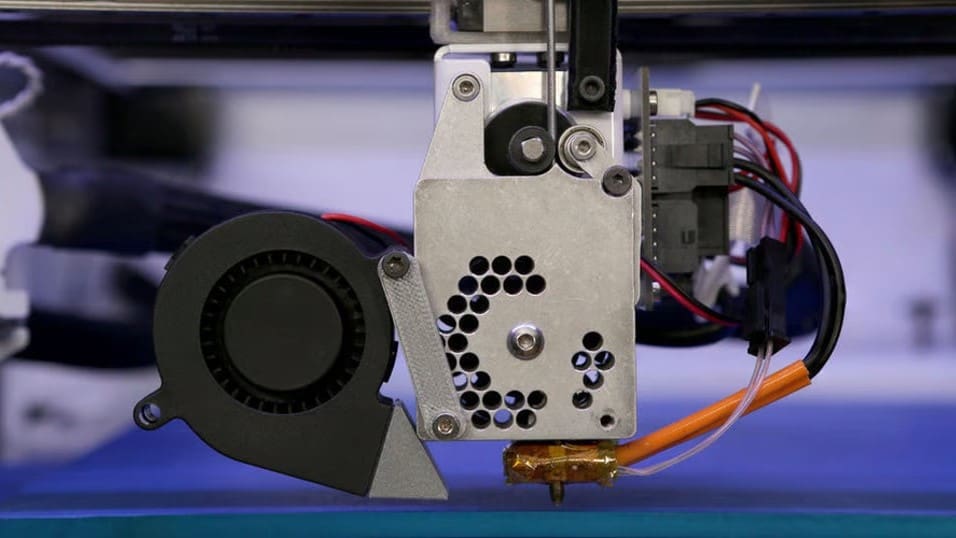
Nozzle Temperature & Type
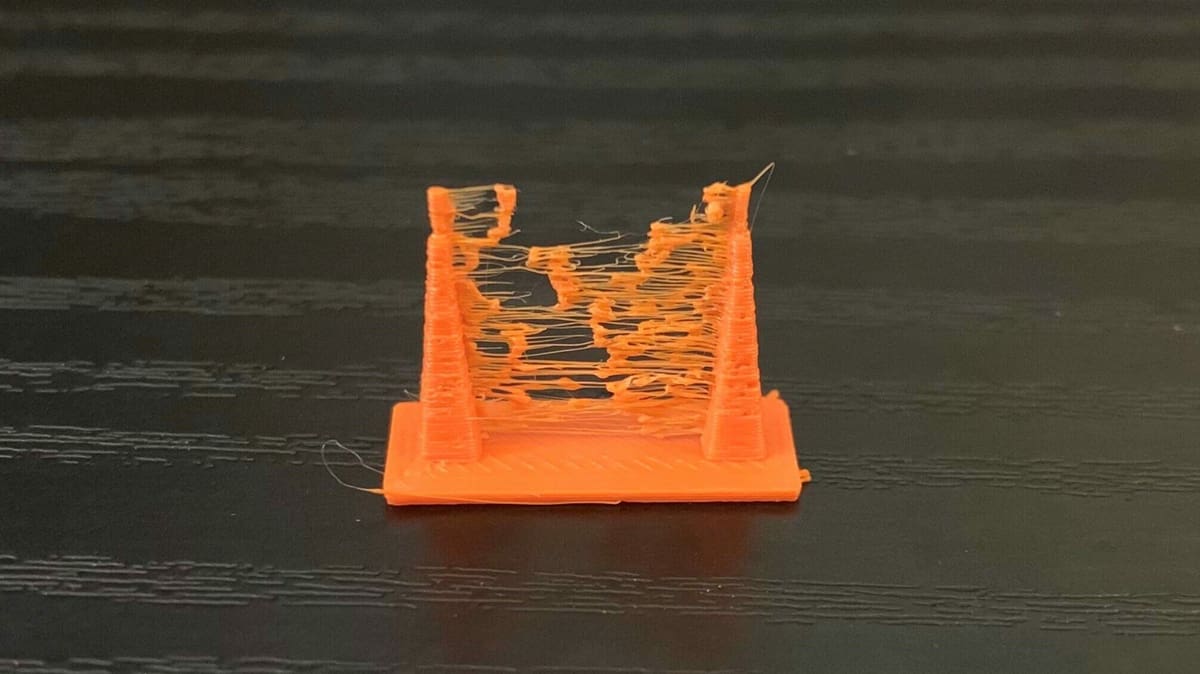
Nozzle temperature plays a major role in print quality of PETG parts. Too high a temperature and you end up with lots of stringing and oozing, but too low a temperature and your extruder will start skipping.
As we already mentioned, print temp. is a range. Start with a temperature as low as 220 °C and do some test prints. If you hear a knocking noise during printing, your extruder is skipping, and you should increase the nozzle temperature by 5 °C. Repeat the test until the extruder doesn’t skip.
As mentioned, when printing at high temperatures, there’s a risk of stringing and oozing. And since PETG is a very strong and elastic material, strings are hard to remove. If you are at the lowest temperature without extruder-skipping and still have stringing, try adjusting your retraction settings.
When printing with PETG, the hot end has to work a bit harder than with PLA. You’ll usually be running between 230 and 260 °C, so a stable all-metal hot end is the safest choice. PTFE-lined setups can degrade if you push them too hot for too long, and PETG really benefits from a reliable melt zone with good heat break cooling to prevent jams.
Brass nozzles are fine for plain PETG, but if you’re using carbon-fiber, glow, or metallic blends, you’ll want a hardened or coated nozzle to handle the extra abrasion. If you plan to print fast, a slightly larger nozzle, like 0.6 mm, can make life easier by letting the filament flow without overloading the hot end. And since PETG can be a little sticky, it helps to keep your nozzle clean with the occasional cold pull so buildup doesn’t mess with extrusion.
The Right Retraction for PETG
Don’t go with high speeds here (unless your PETG filament is specially formulated for high speed); it may work with ABS and PLA, but it won’t work with most PETGs. Set the retraction speed to around 25 mm/s for both Bowden and direct drive extruders. Retraction distance should be set at about 6 or 7 millimeters for Bowden extruders and 3 or 4 millimeters for direct drive extruders. With PETG, retraction speed is more important than distance. If you still have oozing and stringing, try lowering the retraction speed.
If you’re still experiencing retraction issues after adjusting the settings repeatedly, you can also check the filament tension and that your extruder gear is properly tightened. You shouldn’t be able to pull out filament too easily.
One more parameter that will help reduce oozing is the travel speed. PETG tends to drip from the tip of the nozzle, especially if the nozzle temperature is high. To combat this, try increasing the travel speed as high as possible.
Enclosures, Fan Speeds & Cooling
PETG doesn’t really need an enclosure the way ABS or nylon do. One of its big advantages is that it’s much less prone to warping and splitting, so you can get solid prints on an open-frame machine without worrying about drafts ruining your layers. In fact, a fully enclosed printer can sometimes make PETG a little trickier, because the extra heat buildup may soften the filament path or cause stringing if the chamber gets too warm.
That said, an enclosure isn’t completely useless. If you’re printing in a cold or drafty space, keeping the air around the printer stable can help improve surface finish and layer adhesion. It also keeps dust off the print and reduces noise, which some people like. But strictly speaking, PETG prints just fine without one, and for most hobbyists, leaving the printer open is actually the safer, more forgiving choice.
Most PETG will print quite nicely without fans. Unlike other materials that require fans during printing, PETG can actually do better without them, but again …. it depends on your type and brand of PETG. If you notice cracks and delamination in your prints, turn off the fans because printing without them increases layer adhesion.
That said, models with short layer times may benefit from some cooling. Try setting the fan between 20% and 50% to help the layers cool. Fans can also be useful if you want more details in your print or if you’re printing bridges.
Supports for PETG

When printing with PETG, deciding whether or not to use supports is all about weighing the trade-offs. PETG is strong and durable, but it has a tendency to string and fuse to itself, which means supports can sometimes bond more tightly than you’d like. If your model truly needs them—say, for steep overhangs or bridging that your printer can’t handle cleanly—it’s better to add supports than risk a failed print. That said, if the design allows you to re-orient the part or split it into multiple pieces, it’s often worth doing so just to avoid supports altogether. PETG doesn’t always release cleanly, and removing supports can leave scars on the surface.
If you do need to use them, it helps to make them as easy to remove as possible. Increasing the support Z-distance slightly gives a tiny gap between the supports and the actual model, which reduces the chance of them fusing solidly. You can also experiment with support patterns; grid or zig-zag styles tend to break away more easily than denser structures. Lowering support density helps too, since PETG is strong enough that it usually doesn’t need heavily reinforced scaffolding.
If you’re lucky enough to have a dual extruder 3D printer, your best option is to use soluble filaments, such as PVA or HIPS.
Once the print is finished, it’s best to remove supports after the part has cooled down, because PETG is still slightly pliable when warm and that can make it tear or warp where the supports attach. Using pliers or flush cutters gives you more control than simply snapping them off by hand. If some small bits of support remain stuck, gentle sanding or trimming with a sharp knife will clean up the surface. It’s normal to see a bit of roughness where supports touched the model, but careful slicing settings and patient removal can minimize the damage.

Speed & High-Speed PETG
As we mentioned, PETG is very sensitive to print speed. Print too fast, and you’ll have poor layer adhesion, extruder skipping, and low print quality, but print too slow, and you’ll end up with deformed parts, stringing, and oozing.
You’ll have to find the sweet spot with the printer and filament you’re using. It’s best to start with a low print speed. We suggest starting at 15 mm/s and gradually increasing the speed. Travel moves should be as fast as possible, at least 120 mm/s, to avoid oozing.
What Is High-Speed PETG
There is a growing variety of high-speed PETG filament from makers including Bambu Lab, Flashforge, eSun, and others. “High-speed PETG” (sometimes called PETG HS, PETG HF, PETG High Flow etc.) refers to PETG formulas that are optimized for faster printing. That means modifications (in polymer mix, additives, possibly tightening tolerances) so that the filament can melt, flow, cool, and bond properly even at higher print speeds or volumetric flow rates. The goal is to get more parts printed in less time without major loss of strength, surface quality, or reliability.
Using high-speed PETG can be great, but there are a few caveats:
Using high-speed PETG can deliver excellent results, but there are some important caveats to keep in mind. Even with an optimized filament, your printer must be able to keep up. The hot end needs to melt and push the material quickly and consistently, which means it requires strong heating and a smooth flow path. The extruder also has to be capable of feeding filament at high rates without slipping or grinding. On top of that, your cooling system—whether it’s part fans or chamber cooling—must solidify layers fast enough to prevent sagging or deformed overhangs.
Another consideration is print quality. At very high speeds, surface finish may not be as crisp as with slower prints. Fine details, small features, and outer walls are especially vulnerable to banding, ringing, or slight blurring. Retraction settings become more sensitive as well. Stringing and oozing are more likely, and profiles that worked at lower speeds often need fresh tuning. Adjustments to retraction length and speed, or features like coasting and wiping, may be necessary to keep prints clean.
The higher volumetric flow of fast printing also increases the risk of under-extrusion if the nozzle is too small or the filament cannot melt quickly enough. This added stress can accelerate nozzle wear, especially with softer metals. For long-term reliability, hardened or coated nozzles are often a better choice. Along with this comes the challenge of heat creep. The hot end must remain stable, keeping the cold side cool and the melt zone hot, so the filament doesn’t soften too early on its way through.
Finally, cooling and warping remain constant balancing acts. Layers must set quickly enough to maintain shape but also evenly enough to preserve good adhesion and prevent warping. Managing airflow and temperature carefully is key to getting high-speed PETG prints that are both strong and dimensionally accurate.
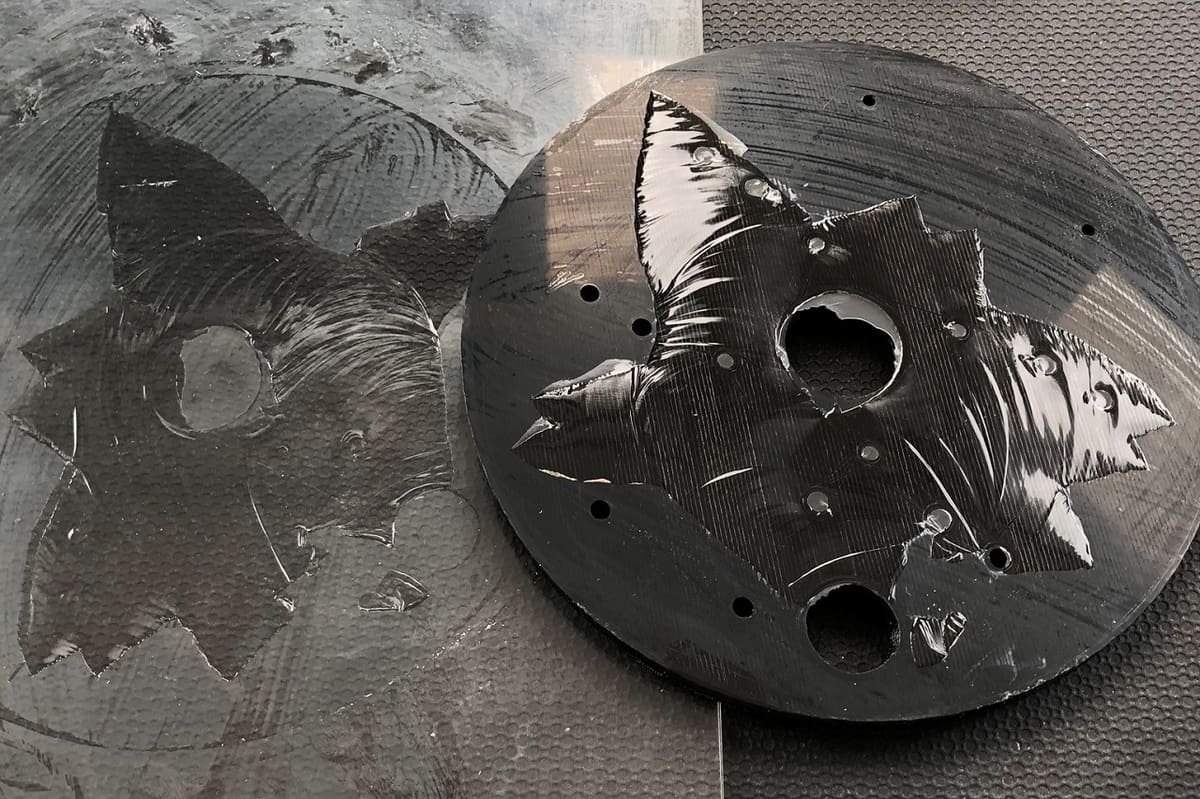
Carbon-Fiber and Composite PETG

Carbon-fiber PETG is basically regular PETG with chopped carbon fibers mixed in. The fibers make it stiffer, stronger, and less prone to warping, which is great if you want accurate, rigid parts. The flip side is that it’s usually more brittle, so instead of flexing like plain PETG, it can snap under enough stress.
The biggest thing to watch out for is nozzle wear. Those fibers are abrasive and will grind down a brass nozzle fast. A hardened steel or coated nozzle is the way to go, and a 0.6 mm size helps avoid clogs since the fibers don’t always play nicely with tiny openings.

Other blends exist too. Glass-fiber PETG is similar to carbon fiber but a little less abrasive. Wood-filled PETG is mostly for looks and texture, while glow or metallic PETGs can be fun but will also wear nozzles faster. Across the board, these composites often need a bit more heat, sometimes slower speeds, and a quick re-calibration of flow, since the additives change how the plastic moves through the hot end.
The nice bonus is that many of them string less than regular PETG, which makes cleanup easier. Overall, composite PETGs are tougher to dial in but give you stronger, stiffer, or just cooler-looking prints once you’ve got the right setup.
Carbon-fiber PETG prints a lot like regular PETG, but the profile has a few key tweaks. You’ll usually run it a bit hotter for better flow, keep speeds slower for consistency, and back off the cooling to favor strength. Retraction can be shorter since CF doesn’t string as much, and the first layer should sit a little higher so it doesn’t fuse too hard to the bed. The biggest change is hardware: a hardened nozzle, ideally 0.6 mm, is a must because the fibers will chew through brass fast.
License: The text of "The Settings Your PETG Prints Need to Get a Whole Lot Better" by All3DP is licensed under a Creative Commons Attribution 4.0 International License.