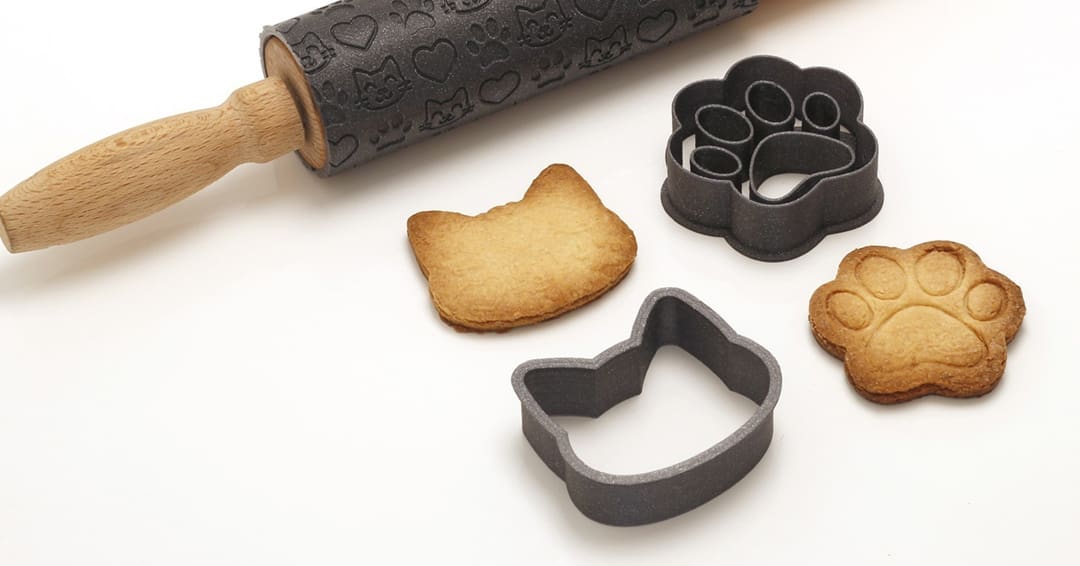
It’s Surprisingly Easy to Make Cookie Cutters!

If you're wondering how to 3D print cookie cutters, read on to discover how to design, customize, and 3D print some delicious ideas!
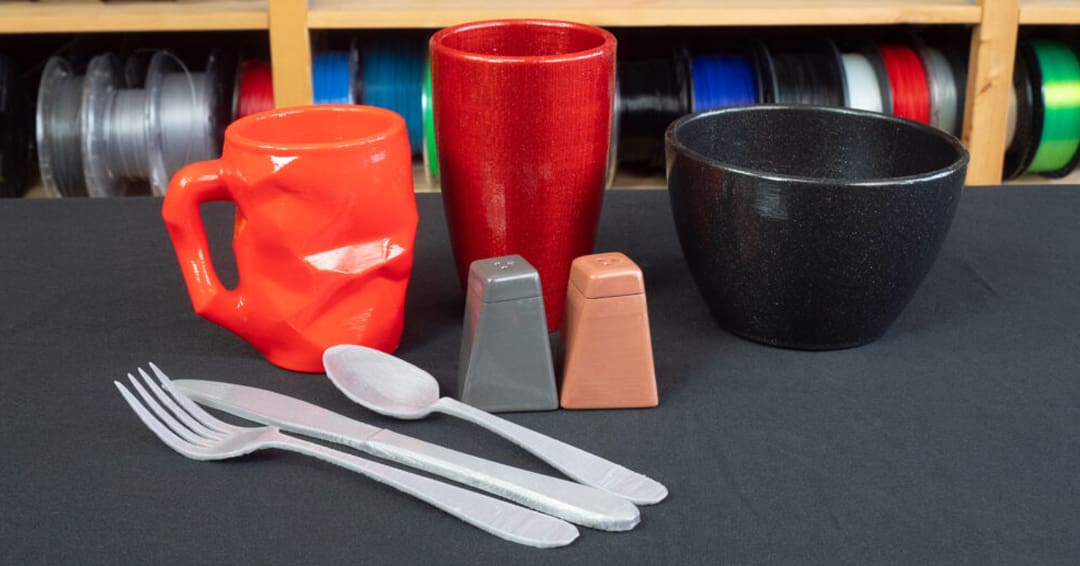
3D printing is magical. It allows you to print all kinds of things, ranging from everyday small items, such as keychains and desk organizers, to home decor and even art! You can 3D print pretty much everything, including kitchen tools. In this article, we’re going to dive deeper into the world of cookie cutters, where 3D printing shines thanks to its customization possibilities.
We’ll take a look at the process of creating some beautiful personalized cookie cutters with beginner-friendly online software. We’ll also discuss what you should consider when creating 3D printed parts that come in contact with food. If you want to skip the creative part and head straight into the 3D printing, take a look at our top picks of cookie cutter models!
And if you don’t own a 3D printer but want a custom cookie cutter, you can take advantage of a professional online 3D printing service, such as those that can be found at Craftcloud. You can choose between a wide variety of 3D printing technologies and materials to get your cookie cutter exactly how you want it and delivered to your doorstep.
Let’s get to baking!
Food Safety
Before diving deeper into the workflow of designing and 3D printing cookie cutters, there are some important aspects to cover. The food safety of 3D printed parts is a notorious concern and a key element to keep in mind when engaging in such kitchen projects. In addition to the material of choice, two main problems are bacteria growth and material toxicity.
As we know, 3D printing creates a final object layer by layer. The problems that arise with food safety are the spaces between these layers: These areas can allow bacteria to grow once the part gets in contact with food.
But there’s more: Your 3D printing setup is extremely important as well. The nozzle and the bed of the machine need to be cleaned meticulously, and, for example, when it comes to the nozzle, you’ll want to skip the brass kind. Whether you’ve used your printer for many projects or your machine is brand-new and you’ve just taken it out of the box, you’ll need to make sure to sanitize your equipment and to use food-safe methods as well. We’ll take a look at some of these aspects further below.
Material Considerations
As we said, the material is another key factor that can make or break your cookie cutters. The filaments you’ll use will have a high impact on the food safety of your part. There are some official criteria that your product should respect to be considered food safe; for example, the part must not transfer harmful substances to the food. So, it’s important to make sure that the material you’re planning to use doesn’t infuse toxins.
PLA and PETG are materials that you can consider when looking to print items in contact with food – but not all filaments are food-safe and most importantly, not all brands are equal. You need to purchase some spools that fit this project by looking at filaments with the “food-safe” label. You can take a look at our article about the best food-safe PLAs as well as the best food-safe filaments.
From Imagination to Design
Now that we’ve covered all the important information you need to make food-safe cookie cutters, let’s dive into the fun part: How to create your own! There are many different ways in which you can model your cookie cutter, such as using CAD software or an online generator. For this guide, we’ll use the super simple Cookiecad Designer. Let’s dive into the process!
Software
Cookiecad Designer is a web app for generating and customizing cookie cutters. It’s developed by Cookiecad, a company that also produces filaments and CAD software.
Cookiecad is free, but the paid version, either $14.99/month or $150/year, offers premium features, such as access to the Cookiecad Library and the possibility of saving your settings. You can find a short official guide, as well as a forum, if you have a problem or want to request a feature.
This online generator is extremely easy to use. In a few clicks, you’ll be able to generate your customized cookie cutter, so let’s get to the fun part!
Design
The first thing you need to create your cookie cutter is a design. What will be the shape? This is the best part, because 3D printing allows you to create custom cookie cutters that you can’t find at stores!
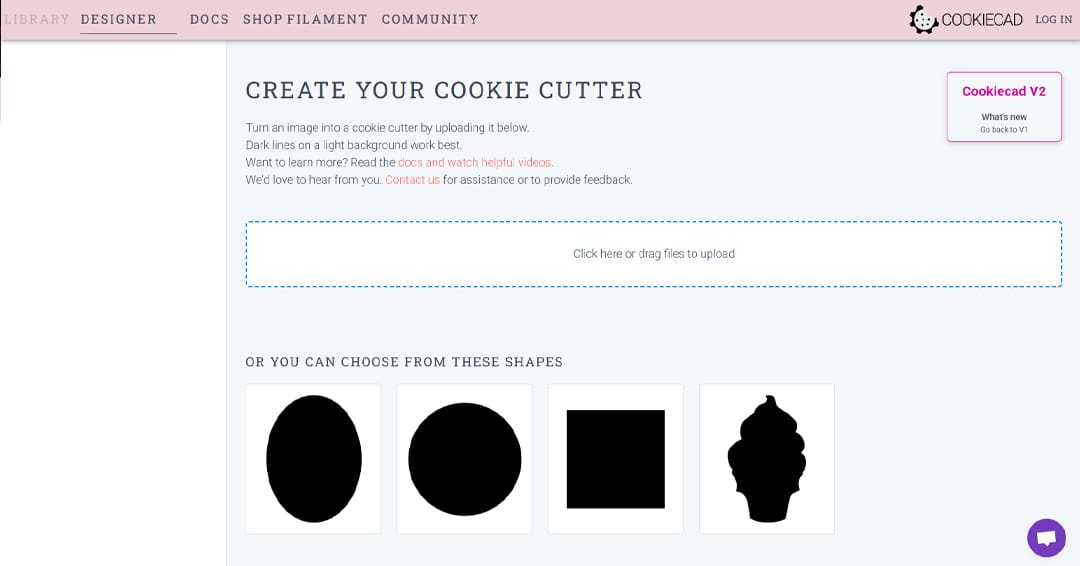
When preparing your design, you need to keep in mind that Cookiecad Designer will only accept JPEG and PNG files. If your picture has a different format, you can use an online converter to obtain a JPEG or PNG image, such as FreeConvert. Once you have the desired image in the right format, you can drag it to the appropriate space in the Cookiecad interface.
To experiment with the settings the first time you use this software, you can also choose one of the available templates on the home page, and once you’ve gotten your bearings, move on to a design of your own.
Once you select a premade design or upload your own, the software will process it and move to the next interface: The customizer. Now you should be able to see a preview of what your cookie cutter will look like.
Types of Cookie Cutters
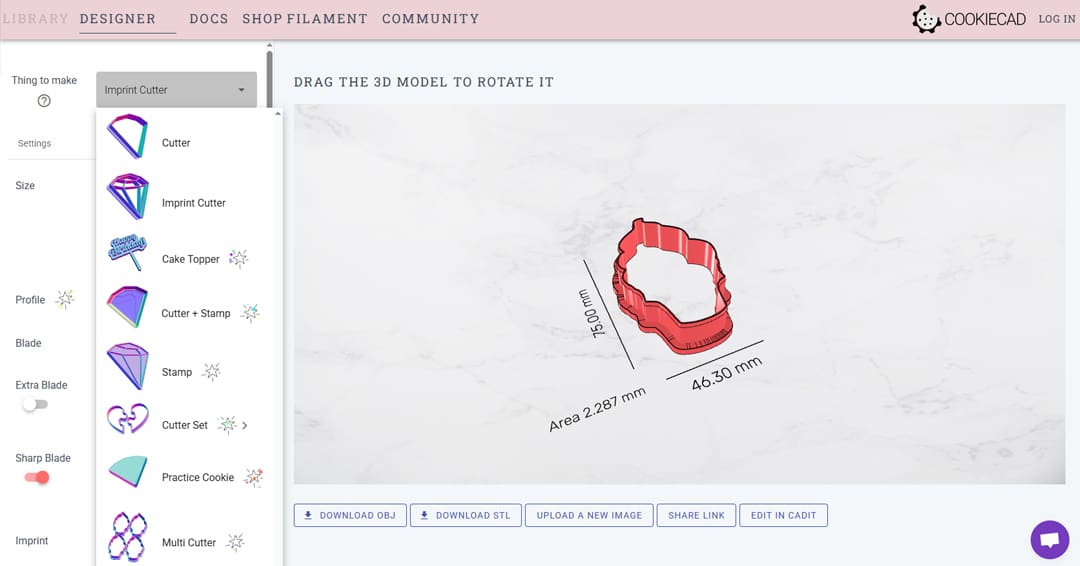
With a design, it’s time to choose the type of cookie cutter. There are four options. The “Cutter” and “Imprint Cutter” are available with the free version of the program, while the “Cutter + Stamp” and “Stamp” are part of the premium subscription.
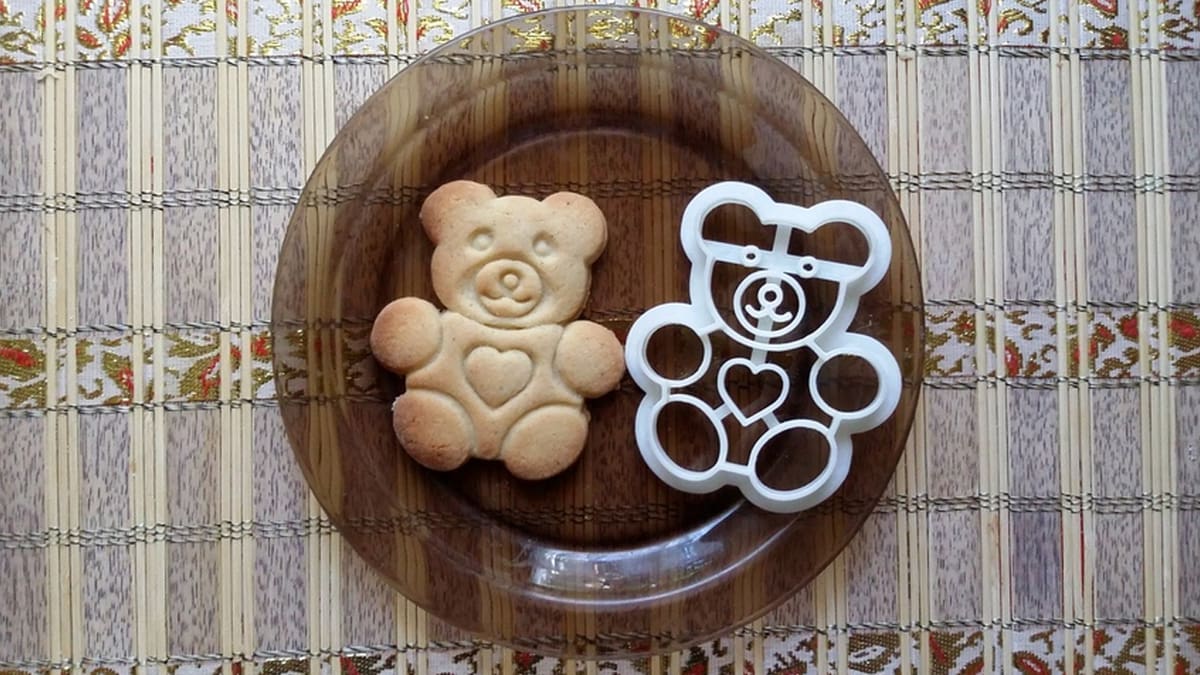
The Cutter is the simplest one, so it might be a good idea to start experimenting with this the first time you try generating your cookie cutter. This kind of design will generate your cutter based only on the external outline of the image you’ve selected.
The Imprint Cutter also generates the internal shape. This allows you to generate more detailed cookie cutters. The Cutter + Stamp is similar, but the inner silhouette in this option won’t feature the same depth as the external blade, so it won’t cut the dough but rather leave a stamp on it. Finally, the Stamp will only leave a stamp on the dough.
There are also other premium options, such as the “Cutter Set” that allows you to generate a set of cutters starting from a single shape, or the “Multi Cutter” to generate a batch of cutters at once.
Customization
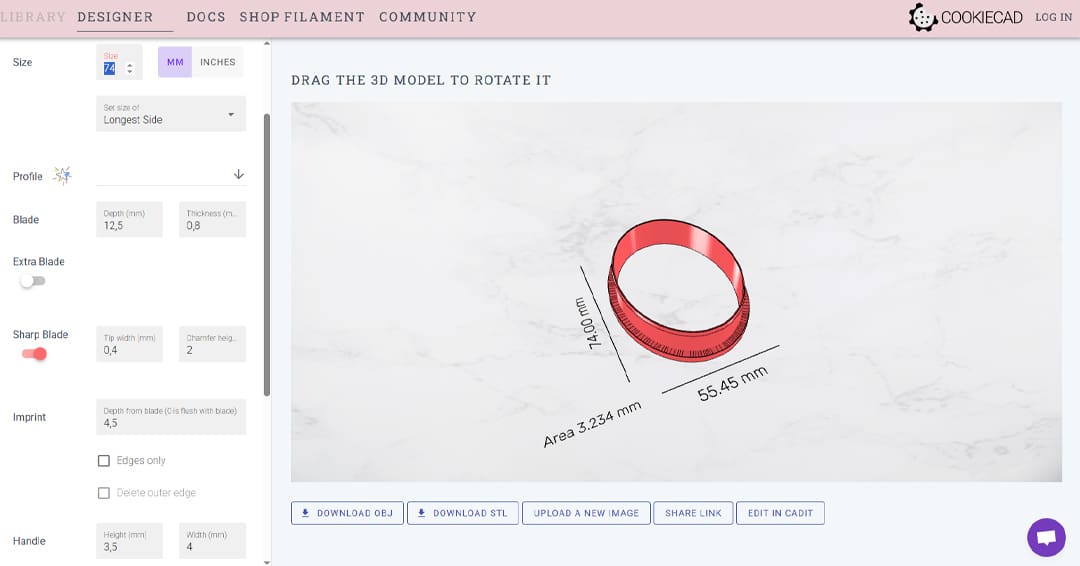
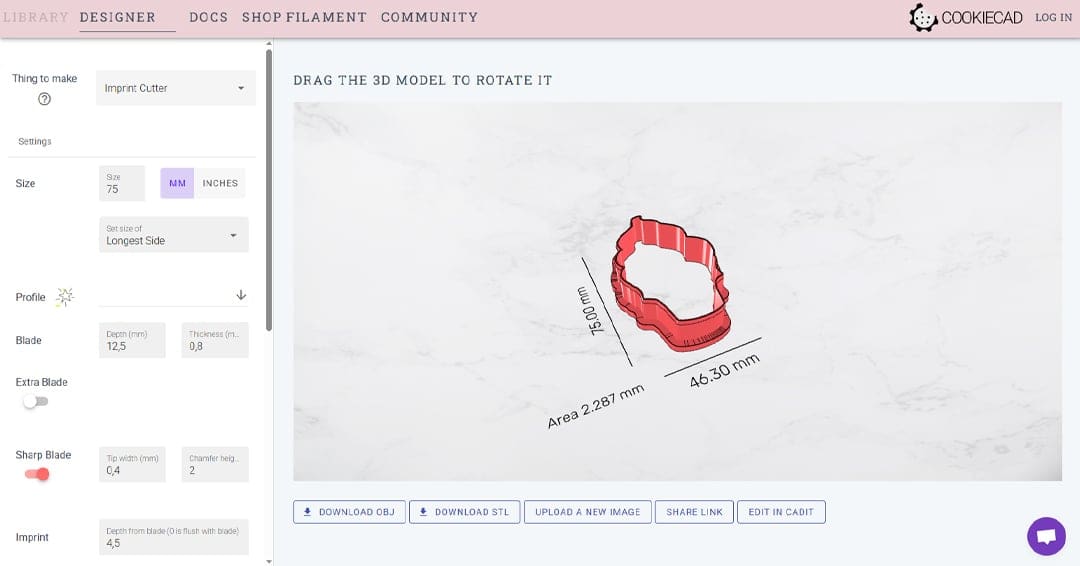
At this point, you should see a 3D preview of the cookie cutter in the Cookiecad interface. From this page, you can also customize other aspects of the model, such as the size of the shape and the thickness and depth of the blade that will cut into the dough.
The settings are really straightforward: You can modify the dimensions of the cutter from the “Size” section and specify if you want to use millimeters or inches. Under this section, there’s the “Blade” menu to set its depth and thickness. These couple of settings are super important to generate a functional cookie cutter that doesn’t break easily. You can also add a center bar by toggling the “Center bar” switch to strengthen your part.
You should have a 3D model ready to be downloaded, but if you need to tweak it further, you can take a look at the “Experimental Settings” menu. Here you can find additional options, such as mirroring or the resolution of the part to make the shape more true to the original.
Design Considerations
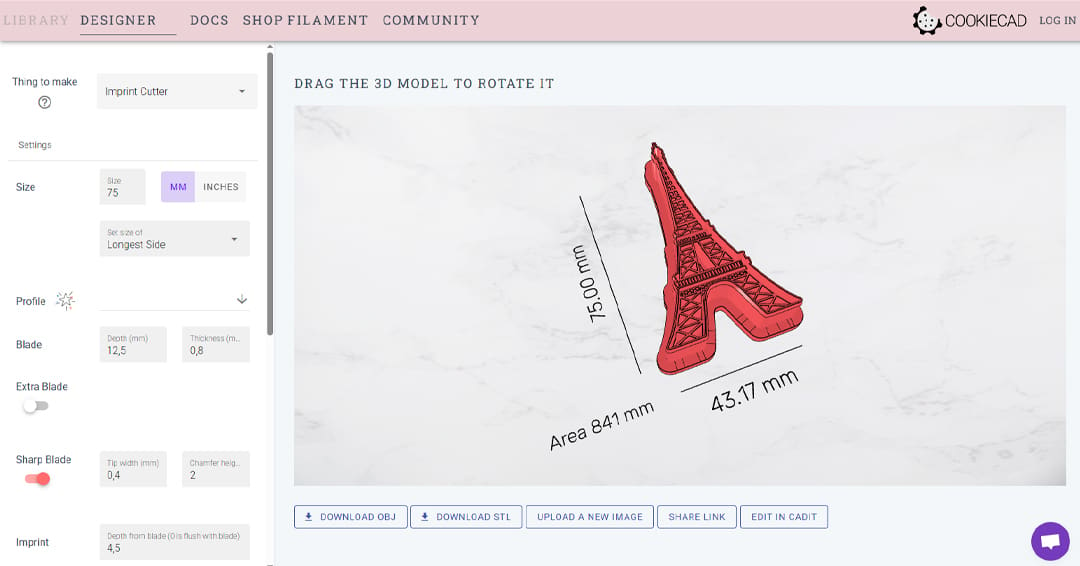
Now you should have a cookie cutter that’s ready to be 3D printed. You only need to click on “Download STL” to get the file and prepare the G-code for your machine. But before sending the file to your 3D printer, there are some things you should watch out for.
- Details: Since the cookie cutter needs to cut into the dough, the parts need to have the right resistance to withstand the force applied during this process. If your image has many small details, there’s a high chance of parts breaking from the print and contaminating your food. For this reason, avoid complicated pictures and opt for simple silhouettes that Cookiecad can easily process.
- Floating islands: Similarly, you should watch out for floating islands, such as details that are connected to the cookie cutter with a thin string of material that can break with use. These could easily snap and contaminate your dough with plastic particles that aren’t that yummy.
- Blade: The blade is the part that will be subjected to the greatest stress, so it’s important that it can withstand it. Try making it at least 0.8 mm thick, possibly 1.2 or 1.6 mm to be even safer. Additionally, the deeper the blade, the more prone it will be to break, so use the appropriate height for your dough to be cut but for the blade to be resistant. As anticipated before, you can also leverage a center bar to make the cookie cutter stiffer.
3D Printing
As mentioned above, 3D printing food-safe items is a combination of material and 3D printing setup.
Preparing Your Machine
Before printing your cookie cutters, you should clean your machine carefully. The safest bet would be changing the entire hot end with a new one that has never been used, as well as a new build plate cleaned meticulously. But if you want to use your actual setup, you can consider cleaning the hot end with a cleaning filament that should remove the previous plastic particles.
Check out also our article on how to clean your print bed. For this kind of application, glass beds are ideal because they are easy to clean and don’t have a textured surface, which can be trickier to clean, like most PEI build plates. Additionally, you should use a nozzle that isn’t made out of brass to avoid potential lead contamination. If you want to dive deeper into nozzles, you can read our article about the best 3D printer nozzles.
Slicer Settings
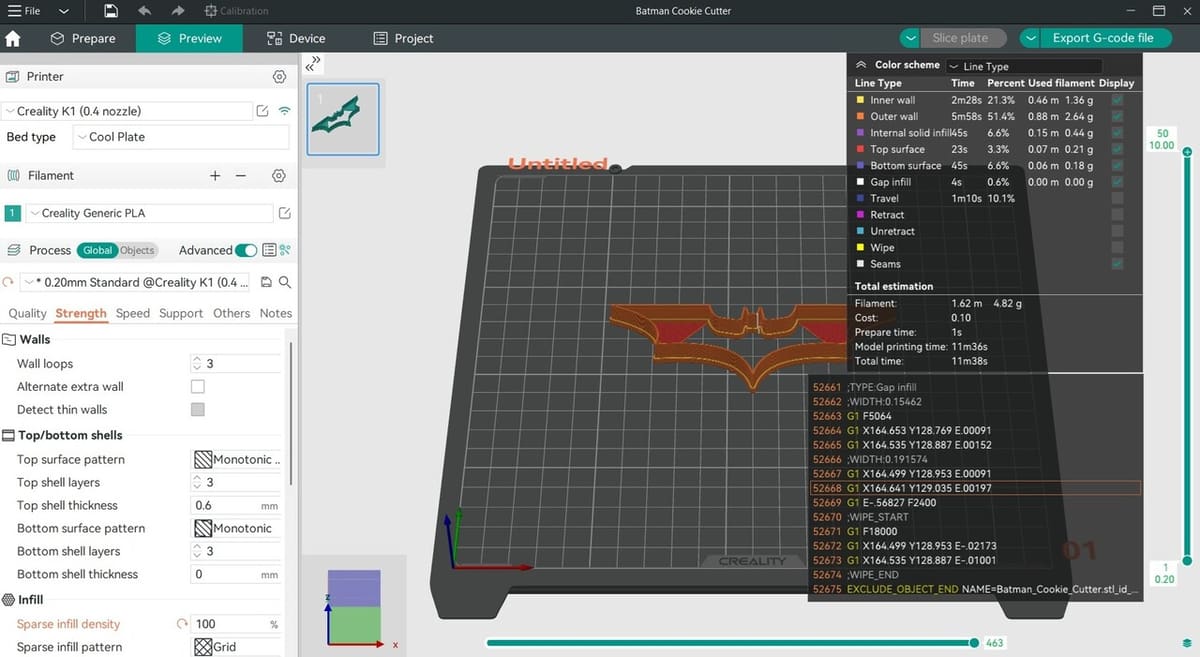
When it comes to preparing the model for printing, arguably the most important settings will be those regarding strength. Use 3 to 4 walls with a 0.4-mm nozzle and increase the infill to 100%. This will ensure that the blade is as strong as possible and that the base of the cookie cutter is resistant.
You can also increase the layer width to increase the adhesion between the different layers and walls. You might want to consider a bigger nozzle, such as 0.6 mm, for more resistant parts.
You shouldn’t need to tweak much more. Cookie cutters tend to be simple shapes and their geometry doesn’t require supports. It’s important that your machine is properly calibrated to increase the chances of success for food-safe cookie cutters. If you’re not sure how to do that, you can follow our step-by-step guide.
Tips for Best Results
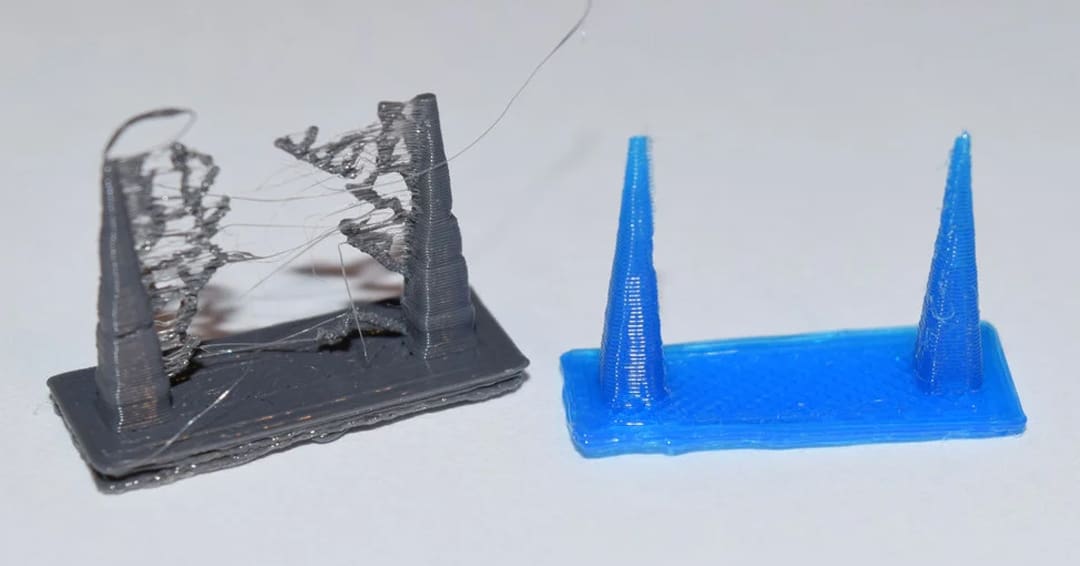
There are a couple more tips that we want to share with you to get the best possible results. Before printing cookie cutters, it’s highly recommended that you properly tune your retraction settings to avoid stringing in the internal part. Although a lighter can help deal with stringing, it decreases the part’s food safety.
For the same reason, it’s better to paint the seam so it’s on the external wall. This should create a light seam that doesn’t create an additional space for bacteria to grow. In this case, the seam isn’t an aesthetic concern, but a functional one. Different software provide different customization possibilities in that regard, so make sure you look into what your slicer offers.
Post-Processing
Although you might have followed all the tips we’ve mentioned, you might want to play it even safer and use a post-processing method to ensure your part can get in contact with food safely. You can use this method to make food-safe prints that haven’t been printed in a food-safe material or without needing to take all the precautions mentioned above.
The technique consists of covering the whole print with food-safe resin. This will enclose the print in a food-safe material and will create a uniform surface, eliminating the risk of bacteria growing between the layers. If you pursue this path, start by slightly sanding your 3D print. This will create a rough surface that resin will adhere well to.
After that, you can coat your part. Based on what finish you use, you might need more than one coat. Make sure to wait for the layer to be fully cured before applying another coat.
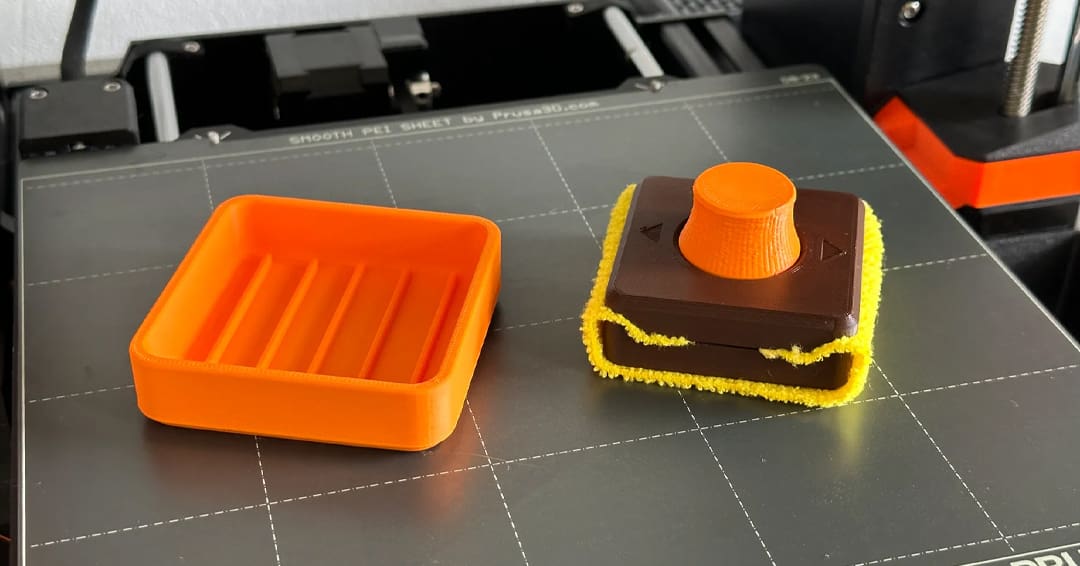
Use
If you don’t want to go through the trouble of post-processing the print, a cheap and quick alternative to using your 3D printed cookie cutters safely is covering them in plastic wrap so that the print doesn’t come in contact with food. Cut a patch that’s a little bigger than the cookie cutter and cover the 3D print with it. To obtain a clean cut, make sure the plastic doesn’t interfere with the blade.
If your 3D printed cookie cutter comes in contact with the dough, it needs to be washed. While you can use dish soap to clean it manually, you should avoid the dishwasher because the drying stage could melt your parts. For the same reason, when washing it manually don’t use hot water because it might weaken the part in the long run; instead, opt for slightly warm water.
Additionally, when using your 3D printed cookie cutter, try to apply gentle – rather than strong – pressure to avoid damaging the structure. The blade is still made out of plastic, not metal, so pay attention when using your print. Obviously, the thinner the layer of dough, the more easily the cookie will cut through.
License: The text of "It’s Surprisingly Easy to Make Cookie Cutters!" by All3DP is licensed under a Creative Commons Attribution 4.0 International License.