The Best Anycubic Kobra Neo Cura Profile / Settings

Looking for the perfect Anycubic Kobra Neo Cura profile? Read on for settings that will help ensure perfect prints, every time!
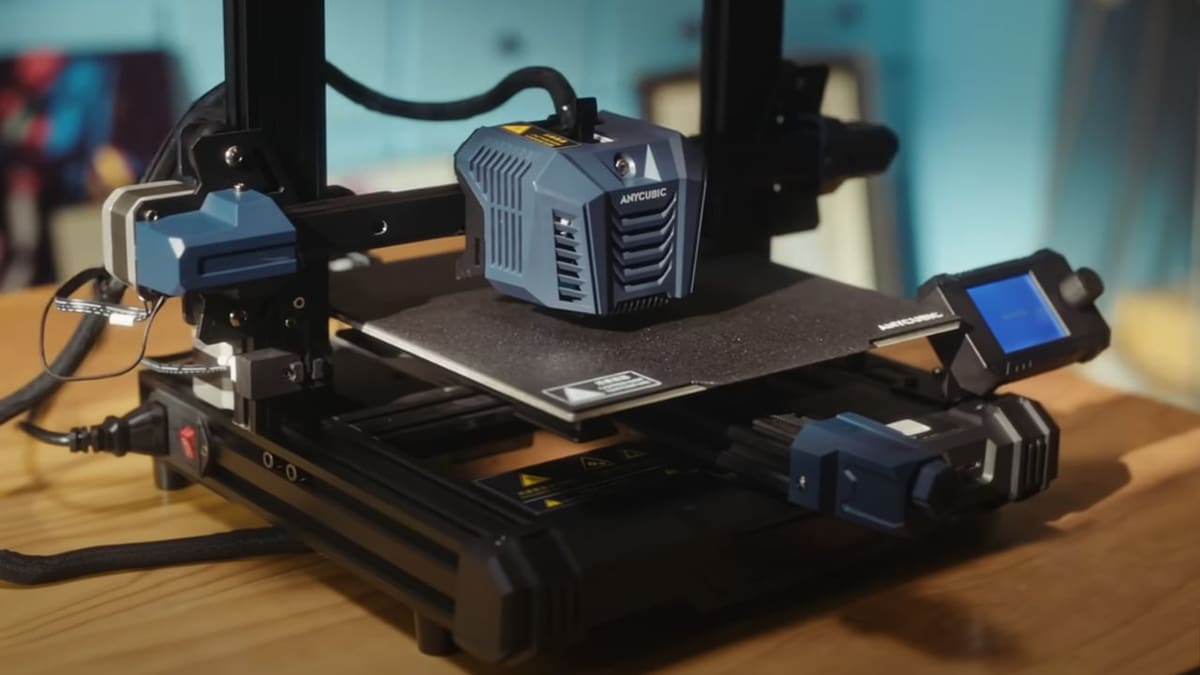
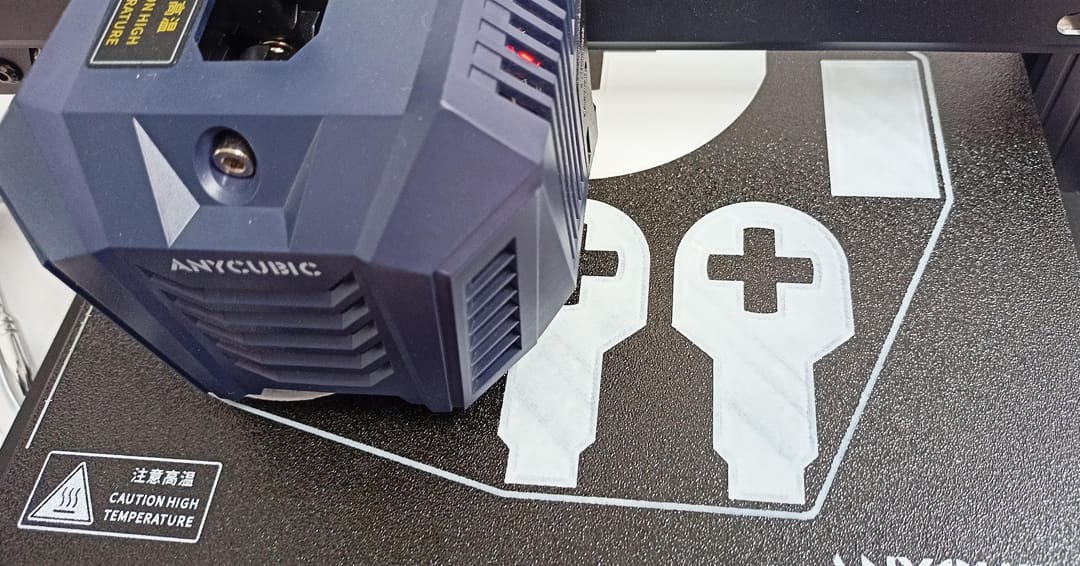
The Anycubic Kobra Neo is a worthy addition in the Anycubic fused deposition modeling (FDM) family. Designed to be easy to use and affordable, this is one of the best machines for a beginner who wants to enter the 3D printing world.
The Anycubic Kobra Neo offers some interesting features at a low price, giving it a good value for the investment it represents. At 220 x 220 x 250 mm, the build volume is more than sufficient. When you receive the machine, thanks to the modular design you should be able to easily assemble it in under 30 minutes. You can then switch on your printer and let it complete the auto-bed leveling, another nice feature. Once done, you can try printing the famous Benchy with the machine’s direct extrusion setup.
However, you’ll surely want to print something else, maybe a useful gadget or a decor piece for your home. To do this, you’ll need to create a profile in a slicer, the software that converts a 3D model into G-code that your printer can read. One of the most well-known slicers is Cura, from the 3D printer company UltiMaker. Popular for the wide variety of available profiles and the beginner-friendly interface, Cura is a great option for beginners and more advanced users alike.
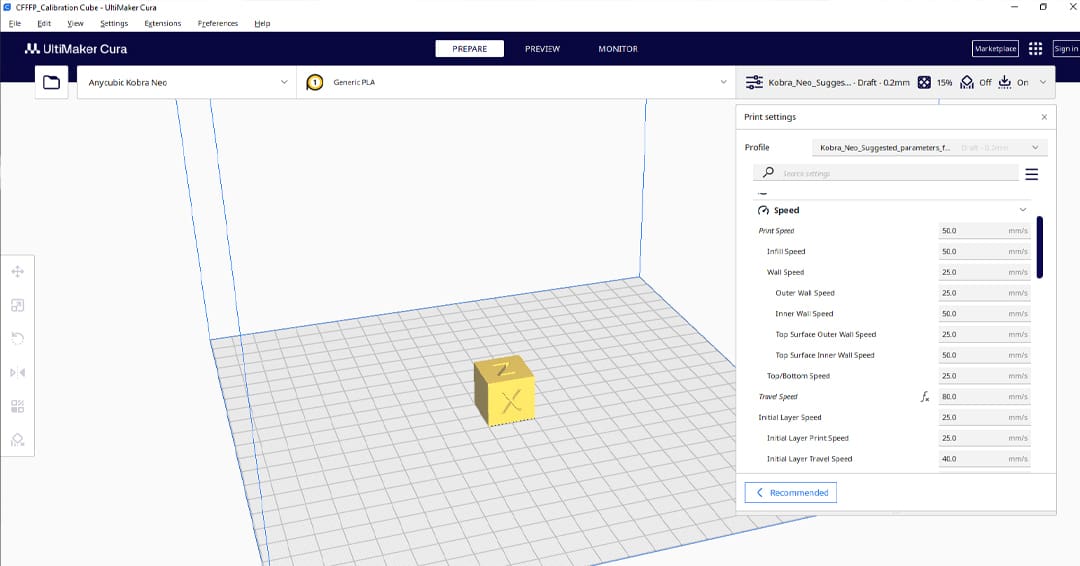
Now, let’s see how to create the best profile for your Anycubic Kobra Neo using Cura 5.6.0, the latest version available at time of writing. Let’s get started!
Getting Started
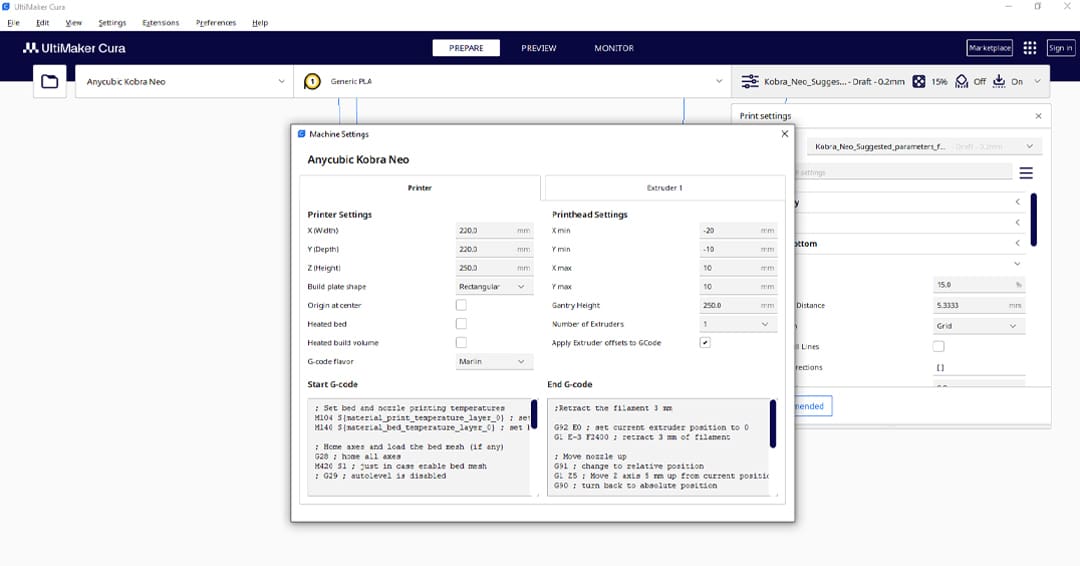
Since there isn’t an Anycubic Kobra Neo profile built into Cura, we’ll need to create a custom printer profile. Here’s how to get started setting up your Anycubic Kobra Neo in Cura:
- Go to “Settings > Printer > Add Printer…”.
- Select “Non-UltiMaker printer”, then “Add a non-networked printer”.
- Select “Custom > Custom FFF printer” from the options.
- Name the profile “Anycubic Kobra Neo”, then click “Add”.
- Set the build area of your printer. The X (Width) and Y (Depth) should be set to 220 mm and Z (Height) to 250 mm.
- Tick “Heated bed”.
- Next, you’ll have to enter the start and end G-code for your printer. We recommend using the code provided by a user on GitHub for these fields.
- Finally, open the “Extruder 1” tab and change the “Compatible material diameter” value to 1.75 mm, then click “Close”.
From here, you’ll have default settings that you can adjust to build your perfect profile. We recommend always checking your filament manufacturer settings. We’ll focus on PLA for this profile, but will also include settings for PETG, TPU, and ABS.
Here is a summary of the PLA profile we recommend, before going into a more detailed overview in the sections below.
Perfect Anycubic Kobra PLA Profile
- Printing temperature: 205 °C
- Bed temperature: 60 °C
- Speed: 50 mm/s
- Layer height: 0.2 mm
- Retraction: 1 mm at 45 mm/s
- Infill: 20%
- Initial layer speed: 25 mm/s
- Initial fan speed: 0%
Hot End Temperature

FDM machines work by fusing plastic into the hot end and depositing it in layers by moving the toolhead. For this reason, the hot end temperature is crucial to obtain a good print. The right temperature allows the material to be extruded and cooled correctly. Low temperatures can lead to under-extrusion, which consists of areas of the part where you can see that some material is missing. On the other hand, high temperatures can lead to over-extrusion, which results in blobs and excess material, ruining the details of the model.
The maximum nozzle temperature that the Anycubic Kobra Neo can reach is 260 °C. This machine isn’t designed to print specialized materials, but it does let makers work with a good variety of materials, including PLA, PETG, TPU, and ABS.
Since we’ve learned how important it is to use the right hot end temperature, let’s talk about the values that will provide you with good results on your Kobra Neo. PLA is the most common material used in 3D printing thanks to its ease of use. Usually, it’s printed with a hot end temperature between 200 °C and 215 °C, reaching up to 230 °C for high-speed printing. Since 50 mm/s is the suggested speed for this machine, lower hot end temperatures between 200 °C and 215 °C will do the trick.
Once you have experience printing with PLA, you can move on to more advanced materials, such as PETG. PETG requires slightly higher temperatures than PLA, starting from 215 °C and going up to 240 °C for high speed, so we’ll set it at 220 °C. You can use the same temperature for TPU, which is a flexible material you can have some fun with. Finally, if you want to try a more technical material, you can print ABS at 240 °C.
Although these are good values to start from, if you want to obtain the best results possible, consider using a temperature tower to perfectly dial in your filament. Keep in mind that different filament brands require slightly different settings for optimal prints, so it’s always a good idea to check the manufacturer settings.
- PLA: 205 °C
- ABS: 240 °C
- PETG: 220 °C
- TPU: 220 °C
Bed Temperature
Now that we’ve dialed in the hot end temperature, let’s talk about the bed temperature, another important setting. Using the right bed temperature can save you a lot of headaches. An appropriate bed temperature is necessary to avoid warping, which is a common issue, especially with more technical materials. Warping occurs when the material is cooled too fast. It’s usually visible, as the angles of the print don’t stick to the bed. Setting the right bed temperature will help your print stick securely to the bed for a perfect first layer.
The Anycubic Kobra Neo comes with a flexible PEI plate. This is a popular choice nowadays, thanks to its ease of use. Prints stick well to this surface and can be easily removed by slightly flexing the plate. Under the PEI plate, the Neo features a bed that can reach temperatures up to 110 °C, a pretty standard value for this kind of printer.
So, what are the best bed temperatures you can use with the Kobra Neo? First of all, although PLA can be printed without a heated bed, setting the temperature between 55 °C and 65 °C will help ensure parts stick to the plate. The same temperature can be used for TPU, which tends to stick almost too well to the build plate. If this is the case, you can apply a thin layer of glue on the plate to help release the print.
On the other hand, for PETG and ABS, you’ll need higher bed temperatures. For PETG, 70-85 °C is a good range, while ABS needs to max out the bed temperature with 100-110 °C. Since the Anycubic Kobra Neo isn’t enclosed, ABS can be tricky to work with on this machine, so you may need to use some glue on the plate. If that doesn’t help, consider building an enclosure for your machine.
- PLA: 55-65 °C
- ABS: 100-110 °C
- PETG: 70-85 °C
- TPU: 55-65 °C
Speed
The Anycubic Kobra Neo has a rigid structure that helps maintain quality when speeding up prints. Together with the direct extruder, it allows the machine to reach a print speed of 100 mm/s, as stated by Anycubic. Since this machine runs Marlin, to avoid artifacts on your prints and obtain good part quality, we recommend using lower speed values.
The typical speed should be set to 50-60 mm/s for PLA and ABS. PETG can be printed at 40 mm/s. TPU, which requires a slower speed due to its elasticity, can be printed at 25 mm/s. If you want to obtain good quality, these are appropriate values. However, if you don’t care about the finish of your part, you can increase the speed by about 10 mm/s for all of the mentioned materials, except for TPU.
As mentioned, you can dial in your filament even further by printing a speed test to get the best settings for your exact filament!
- PLA: 60 mm/s
- ABS: 60 mm/s
- PETG: 40 mm/s
- TPU: 25 mm/s
Layer Height
As mentioned, FDM machines work by depositing layers of fused plastic on top of each other. The layer height determines how much the Z-axis will move up when a layer is finished and another one needs to start. The layer height is basically the unit in which the part is divided. If you’re printing an object that is 10 mm tall and use a 0.2-mm layer height, you can simply find the number of layers by dividing the total height of the object by the layer height. In that case, we’ll need 50 layers to complete the model. However, if we’re using a 0.1-mm height, we’ll double the layers to 100.
As a good rule of thumb, you should use a layer height between 25% and 75% of your nozzle diameter. Smaller layer heights ensure a better print quality, but also a longer print time. On the other hand, a larger layer height can be useful when you need to save some time and don’t care much about the appearance of the print. Usually for aesthetic prints, a layer height between 0.12 mm and 0.16 mm is optimal. For functional prints, you can start with 0.2 mm, the standard layer height that’s also suggested by Anycubic. You can go as high as 0.32 mm with a 0.4-mm nozzle, which is standard on most 3D printers.
- Fine detail: 0.12-0.16 mm
- Coarse detail: 0.2-0.32 mm
Retraction
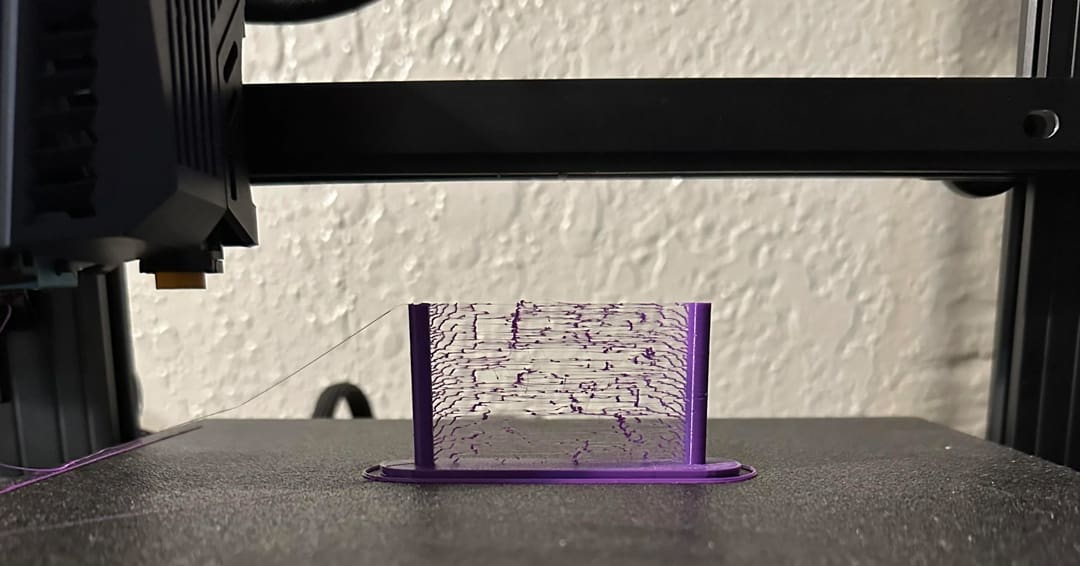
Retraction is one of the most important values when it comes to printing high-quality models. This movement consists of a fast and small unload of filament between movements, and it’s necessary for avoiding stringing and artifacts on parts. Dialing in your retraction values allows you to avoid blobs, stringing, and under-extrusion. High values lead to areas with a lack of material, while low values lead to stringing and blobs.
The Kobra Neo comes with a direct extruder that can handle retraction well, helping you with materials that tend to string, such as TPU. A direct extruder, as opposed to a Bowden setup, positions the motor directly on the toolhead. This allows you to reduce the amount of retraction distance, speeding up your prints.
As noted by Kobra Neo users, the default retraction provided for Cura is a bit high for a direct extruder, at 6 mm/s. For better results, users set their retraction settings (distance and speed respectively) for PLA and PETG to 1 mm at 45 mm/s. On the other hand, ABS and TPU require a lower retraction speed of about 25 mm/s. To tune in these values correctly, use a retraction test to help.
- PLA: 1 mm at 45 mm/s
- ABS: 1 mm at 25 mm/s
- PETG: 1 mm at 45 mm/s
- TPU: 1 mm at 25 mm/s
Infill
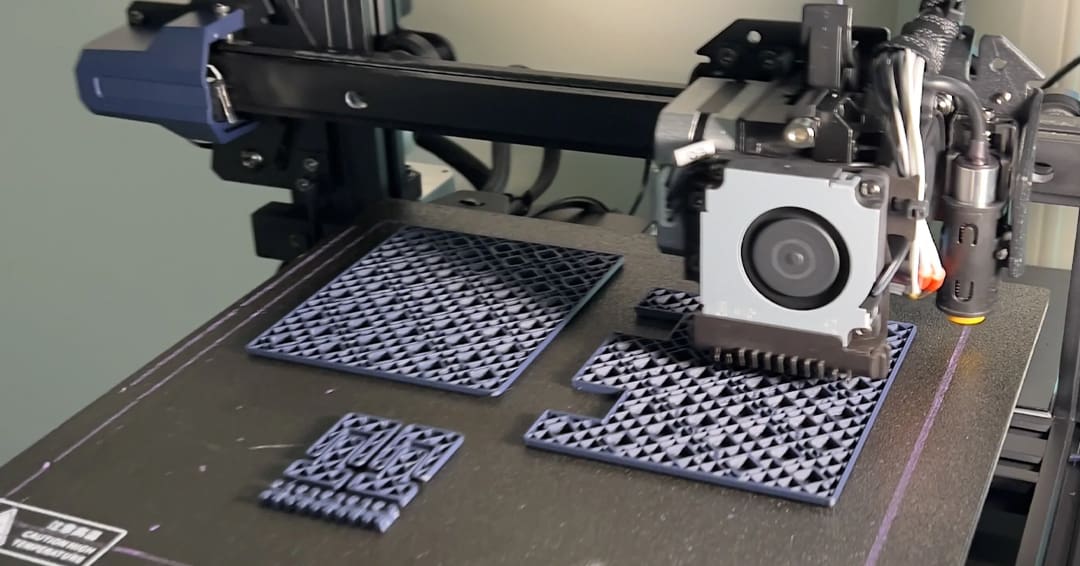
The infill is the interior part of a model, enclosed within the walls of the print. For this reason, the infill is an important part of a print because it can affect print time as well as the overall strength and aesthetics.
Based on the model, you can vary the amount of infill. For example, if you’re printing a functional model, such as a tool or doorstop, increasing the infill will improve the rigidity of the part. For an aesthetic print, you can leave the infill value between the standard 10% and 20%, as it won’t need to do any heavy lifting.
Nowadays, slicers offer plenty of different infill patterns to choose from. These patterns vary based on their structure, and different infills offer different properties, such as strength. The most common infill type is the grid, and this is no exception for the Anycubic Kobra Neo. One of the first infill patterns created, the grid is the simplest one, offering a great balance between strength and print time.
You can also experiment with other types of infill, such as lighting. This pattern allows you to save material and print time by supporting only the areas that require additional strength. For this reason, it’s more suited to aesthetic prints than functional ones.
- Decorative prints: 0-15%
- Standard prints: 15-50%
- Functional prints: 50-100%
Initial Layer
To have a print stick well to the bed, setting the right bed temperature isn’t sufficient. You’ll also need a properly leveled bed and an appropriate initial layer speed. The Anycubic Kobra Neo helps users with the leveling process with its LeviQ auto-bed leveling system that probes 25 points to get an accurate overview of the bed.
For flawless first layers, decrease the speed to around 25 mm/s. Together with the speed, you’ll also need to adjust the number of initial layers. A good value is 3-5 initial layers. These can be printed with a slightly higher hot end and bed temperature to further improve adhesion to the print bed.
Finally, set the initial fan speed to 0%, so that the material will cool naturally and stick well to the bed. Excessively cooling the first layers too quickly can lead to warping and delamination of prints.
- Initial layer height: 0.2 mm
- Initial layer speed: 20-25 mm/s
- Initial fan speed: 0%
- Number of initial layers: 3-5
License: The text of "The Best Anycubic Kobra Neo Cura Profile / Settings" by All3DP is licensed under a Creative Commons Attribution 4.0 International License.