Want Flawless Prints? Simple Tricks to Eliminate Zits and Blobs

Don’t let those unsightly zits and blobs ruin another print. A smooth finish is easier to achieve than you think. We’ll show you how.
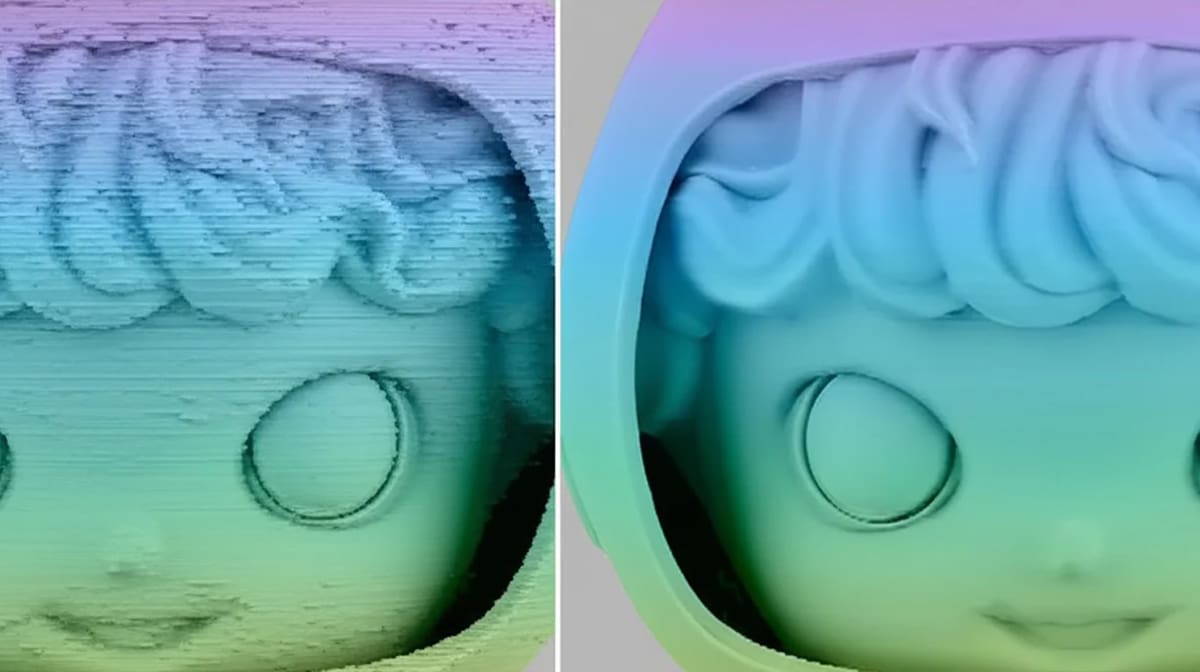
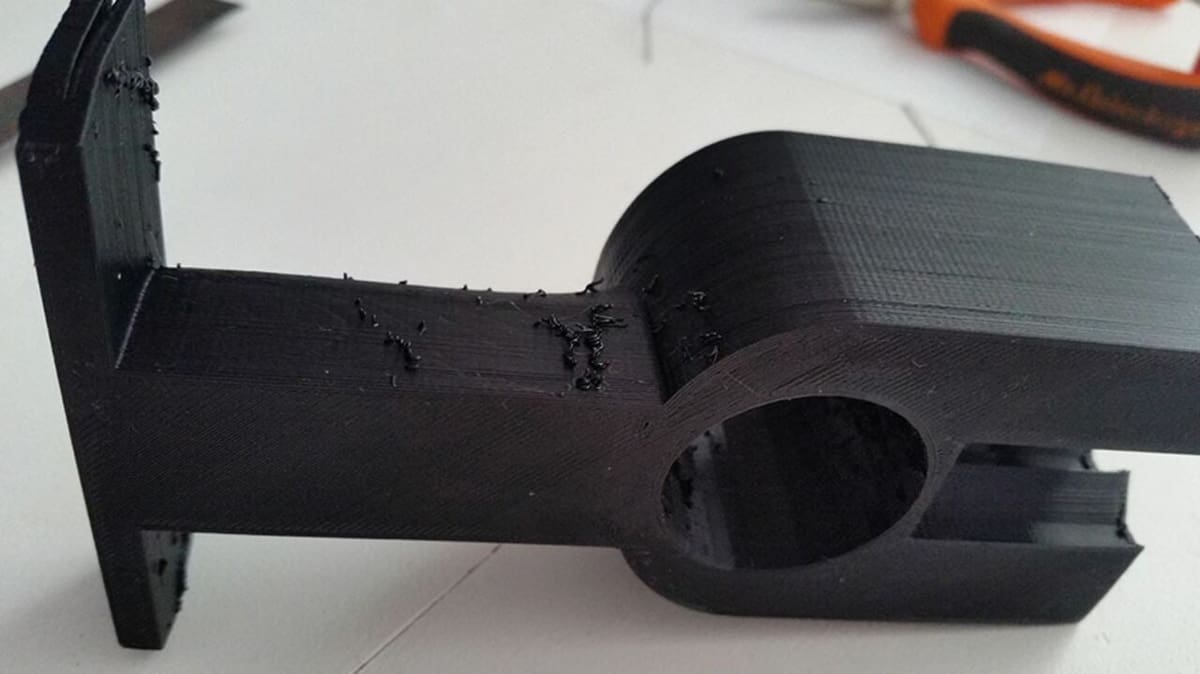
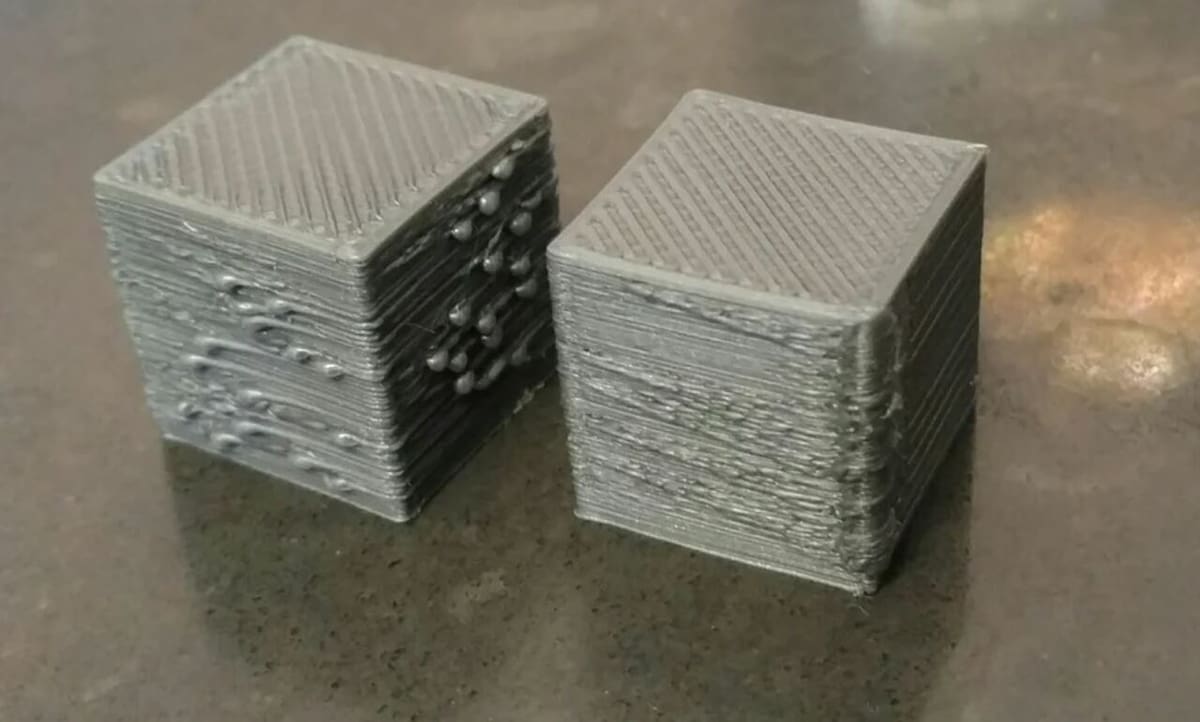
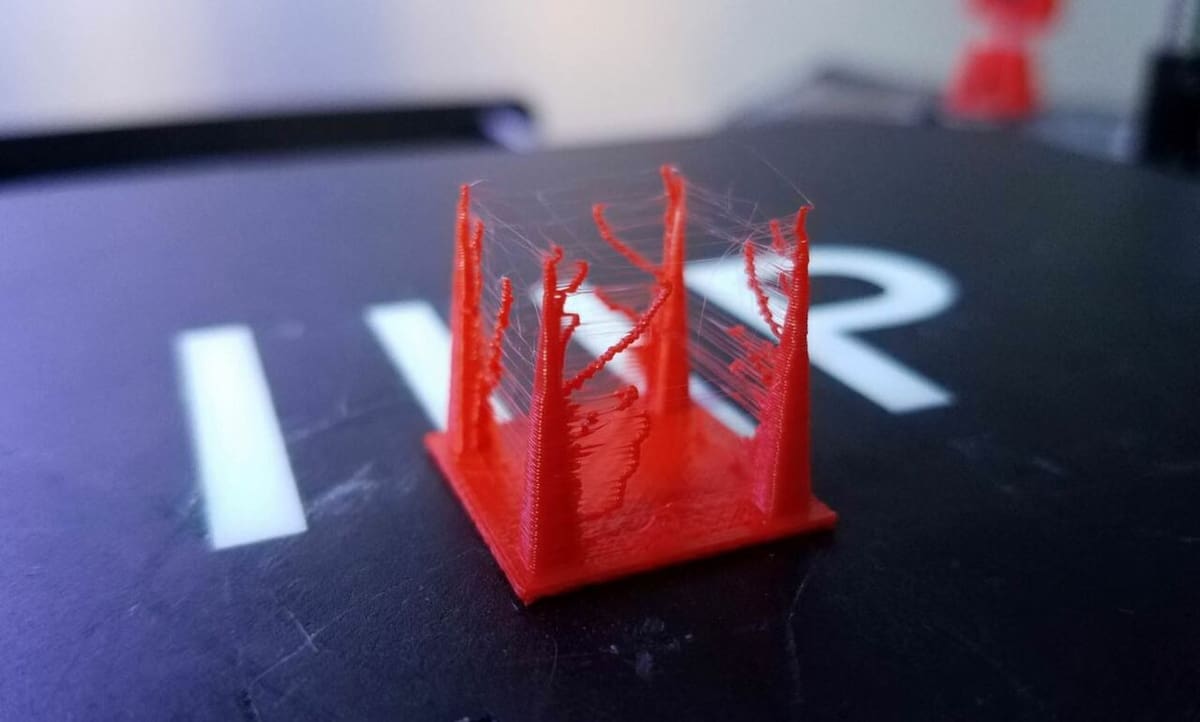
There’s nothing more frustrating than pulling a multi-hour 3D print off the build plate, only to find it covered in zits and blobs. If you aren’t familiar with these terms, they are those irregular bumps, ridges, or accumulations on the exterior of a 3D printed model that occur due to a printing issue. These defects don’t just ruin the print’s aesthetics, though, they can cause functional problems, too. They may throw off the dimensional accuracy, cause parts to no longer fit together, or alter the print’s strength and overall shape.
It’s a common headache in 3D printing, but the good news is that for the most part, it can be easily avoidable. There are five main causes that result in zits and blobs on your final print, and we’ll walk you through how to not only deal with them but also give you tips on how to prevent them from happening in the first place.
When "Default" Goes Wrong
Before we move forward, it’s important to mention that we’ll be working under the assumption that you’re using a default 3D slicer profile. These profiles are typically tried and true and work for most printer and material combinations. However, they’re also pretty general, and their settings and values don’t account for unique elements of your printer (such as the extruder configuration), so they usually require some tuning to achieve high-quality prints.
Lastly, although this article will cover how to prevent zits and blobs on prints, it may also be useful to know how to remove this type of print defect from already printed models. Unfortunately, there aren’t many ways to do this, but post-processing is one option, including techniques like sanding and acetone smoothing.
The Causes
To prevent any 3D printing complications, you first have to identify the source of the issue and use it to determine how you should solve the problem. There are a few potential causes of zits and blobs on 3D prints, and below we’ve listed a few of the most common ones.
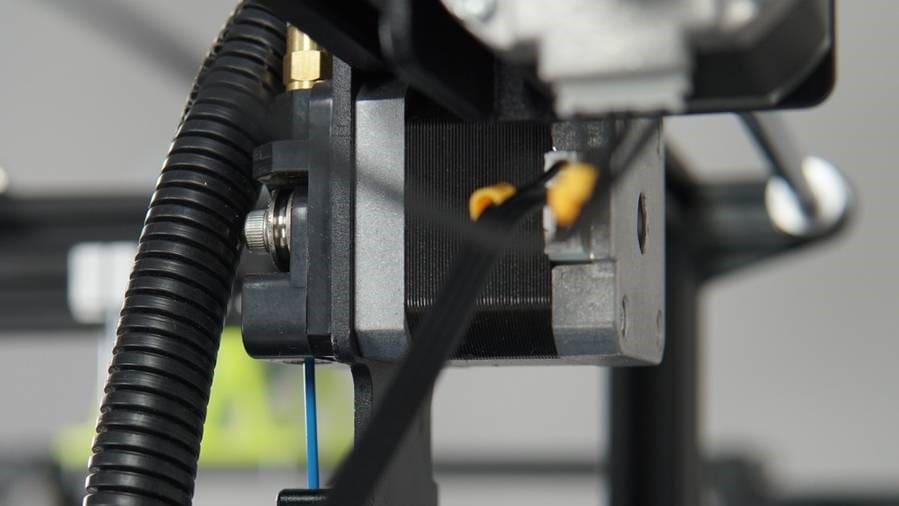
Before moving forward, though, it’s important to mention that you should tune and calibrate your printer, so that you don’t mistake another problem for zits and blobs. This means leveling the bed, calibrating the extruder (E-steps), ensuring that the nozzle is cleaned and screwed in tightly, correctly setting the Z offset, and using correct temperatures for your choice of filament. In addition, you should also ensure that your filament is dry before printing.
Now that’s out of the way, let’s get to the causes!
- Retraction: Retraction is the action of the extruder pulling back a small amount of filament to relieve hot end pressure. While this feature can help prevent stringing on prints, too small, large, slow, or frequent retractions can lead to zits and blobs.
- Extrusion: Extrusion is a potential source of many print quality issues, and it describes how filament is extruded or printed. Zits and blobs are a form of inconsistent or over-extrusion on the exterior of a model.
- Nozzle temperature: The nozzle temperature is another possible source of zits and blobs, affecting a printer’s extrusion and how filament is melted. Too high a nozzle temperature can cause filament to ooze excess material even when the extruder isn’t pushing filament.
- Printing speed: Printing speed is how fast the printhead moves while depositing material for the infill, walls, and first layer, for example. Constant changes in printing speeds and too high a speed can lead to quality defects, including zits and blobs.
- Cooling: Cooling is a major part of the FDM 3D printing process, as the deposited filament needs to properly cool before a new layer is added. Too little cooling can cause zits and blobs because melted material will be more prone to move and form unwanted features when another layer is added.
Now, let’s get to some solutions!
Tip #1: Fix Incorrect Extrusion
As mentioned previously, extrusion is a potential cause of printing issues. That’s why tuning your printer’s extrusion is the first method for solving zits and blobs. If your printer isn’t extruding material consistently and in the right amounts, printing issues will occur.
To tune your printer’s extrusion, we recommend properly calibrating your extruder if you haven’t done so recently. Then, you might want to check that your flow, or extrusion multiplier, in your slicer profile is set correctly. The flow is a slicer setting that allows you to control how much filament your printer is told to extrude.
Another fix for extrusion is to clean or change the nozzle in case there’s a partial clog causing inconsistent extrusion. You can also use Linear Advance, a feature in firmware programs like Marlin, to further improve extrusion. This special feature tells your printer to extrude a distance of filament per every 1 mm/s of print speed, allowing you to predict and counteract hot end pressure that can cause zits and blobs.
Tip #2: Lower Temperature & Speed
The second solution for zits and blobs is lowering your nozzle temperature and print speed, as both of these affect your printer’s extrusion.
Too high a nozzle temperature can cause over-extrusion, and zits and blobs will form as excess filament flows out of the nozzle. While your exact printing temperature will depend on your specific filament, if blobs are occurring on prints, you can try lowering the nozzle temperature in increments of 5 °C. Just be sure not to go too low, as low temperatures can results in problems with layer adhesion. Always refer to the manufacturer’s recommended print temperature as a starting point.
Printing speeds that are too high can also reduce print quality, as there’s less time for the material to settle and properly cool before the next layer is added. As the filament is delivered more quickly to the hot end, extra pressure is created. This makes it more difficult for your printer to control the filament flow. For these reasons, we recommend lowering your printing speed by around 5-10 mm/s to prevent zits and blobs from occurring.
Tip #3: Adjust Retraction
Another way to prevent zits and blobs is adjusting the retraction settings on your 3D slicer profile. Retraction tells the extruder to pull back filament from the hot end to prevent pressure built up in the hot end from unintentionally extruding material. Retractions can affect the appearance of zits and blobs through their frequency, distance, and speed.
In addition to the following, it can be useful to consider Z hop settings. During retraction, these affect how the printhead travels over the design without the nozzle touching it.
Retraction Minimum Travel
As retractions are a potential cause of zits and blobs on prints, the most effective solution is trying to avoid them. You can do this by activating or increasing your slicer’s minimum retraction travel distance, which is the smallest distance the nozzle can travel before a retraction is allowed. This will lower the frequency of retractions and, hopefully, the number of zits and blobs.
Retraction Distance
While avoiding retractions is effective, it may also lead to more stringing in your print. Don’t worry, though, because there are other ways to tune your retractions to prevent zits and blobs. The second setting you can adjust is the retraction distance, which controls how much filament is pulled back for every retraction event.
If the retraction distance is too small, not enough filament will be sucked back from the hot end and excess material could leave the nozzle, causing zits and blobs. If retractions are too large, there will be a gap between the end of the filament and the nozzle, and air will be pushed through the nozzle, causing blobs and bubbles on a print. To prevent this from happening, you should first try to increase the retraction distance and then lower it if this doesn’t reduce the blobs or zits on a print.
Retraction Speed
The third setting is the retraction speed, which controls how fast the filament is pulled back during a retraction and how fast it’s pushed back through the hot end when the retraction ends. If a retraction isn’t fast enough, the material won’t effectively be pulled away from the nozzle and oozing can occur, resulting in blobs and zits on a print. To avoid this, you should try increasing your retraction speed by around 25%, with a maximum of around 65 mm/s.
Tip #4: Increase Cooling
Our fourth tip for preventing zits and blobs on 3D prints is to increase the printer’s cooling. As metnioned, too high a nozzle temperature can cause over-extrusion (including zits and blobs) because higher temperatures cause the material to stay melted for longer. If layers are not cooled properly, they can ooze over the edge and create unsightly surface defects.
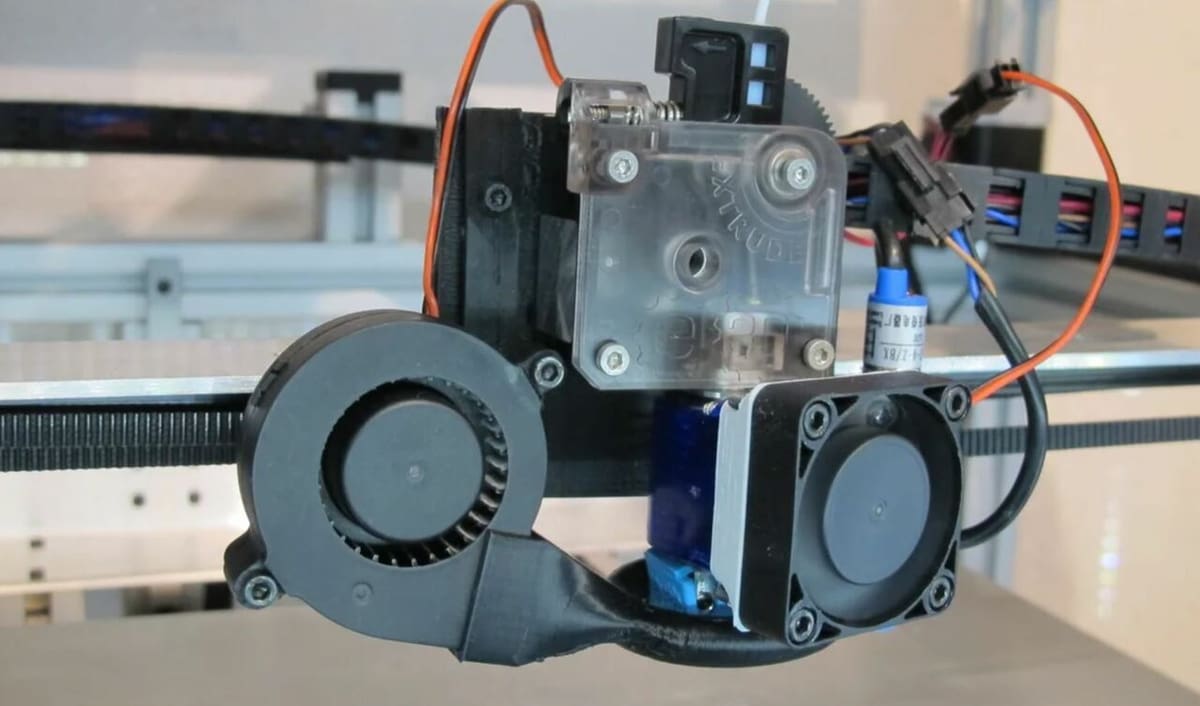
In addition to lowering your nozzle temperature, you can also use more cooling on your machine to accomplish the same goal. To do this, try increasing the fan speed in your slicer in increments of 10% until the problem goes away. If your fan is running at maximum speed and there’s still not enough cooling, you can also add another fan (like the 5015) or use a more powerful one.
Tip #5: Use Coasting

Another suggestion to prevent zits and blobs is to activate coasting in your 3D slicer program. Coasting basically tells your printer to stop extruding material a small distance before a print move ends.
As pressure exists in the hot end that unintentionally pushes filament out the nozzle, material will continue to move through the nozzle even when the extruder stops moving. In other words, coasting predicts hot end pressure and uses it to prevent over-extrusion, including zits and blobs, on prints.
Most slicer programs, like Cura, have this feature (or a similar one), and all you need to do is activate it and adjust it accordingly based on its effectiveness. You can increase the value until you notice that no defects are occurring when the extruder comes to a stop at the end of a perimeter. In most cases, a coasting distance between 0.2-0.5 mm should do the trick and make a noticeable improvement in print quality.
Tip #6: Adjust Shell Settings
Lastly, the shell settings in your 3D slicer program refer to the settings and features that control how the exterior of your model is printed. Since the shells form the exterior surface of a part, adjusting shell settings can prevent or hide zits, blobs, and similar problems, such as Z seam and infill bleeding.
The following are shell settings in Cura that can help prevent zits and blobs:
- Wall Ordering – Outside To Inside: As the name suggests, this setting prints the outer wall before the inner wall. As inconsistent extrusions are more likely to appear later in the layer, this feature helps hide any printing mishaps by moving them to the interior of the model.
- Outer Wall Wipe Distance: This slicer setting can hide exterior visual problems by moving your nozzle a certain distance after it finishes printing the outer wall of a print. It’s mainly used to hide the Z seam on a model, which appears as an alignment of inconsistent extrusion down the side of a print. On this note, there are a few other slicer settings you can use to prevent the Z seam of your print, such as the Z seam alignment and position.
- Enable Ironing: This is another shell-related feature meant to smooth out the top layers of a print and squish down any over-extrusions (zit or blob-like features) on a model’s top exterior areas. This is a more experimental slicer feature, and you can find it in Cura and PrusaSlicer.
Tip #7: Buy Better Filament

Believe it or not, some filament can comes in inconsistent tolerances or thicknesses. It may says it’s a 1.75 mm filament, but the actual size may range from 1.70 mm to 1.80 mm, causing surface blobs and inconsistencies. Even small diameter changes can create noticeable defects.
If you’ve encountered issues when using a new brand for the first time, it could be your filament. When the filament is thicker than expected, the printer pushes out too much plastic. This creates bulging surfaces and reduces dimensional accuracy. Symptoms include blobs, among other defects.
The consistency of filament tolerance largely depends on how well it is manufactured. Selecting high-quality filament not only improves print reliability but also saves time spent on troubleshooting.
Trusted brands usually enforce tighter quality standards and may even provide laser-measured data for each production batch. While these spools often cost more, they reduce variation, improve extrusion stability, and deliver smoother, more accurate prints.
License: The text of "Want Flawless Prints? Simple Tricks to Eliminate Zits and Blobs" by All3DP is licensed under a Creative Commons Attribution 4.0 International License.