50 Cool Raspberry Pi Cases to 3D Print

Looking for a Raspberry Pi case? Check out our list of cool Raspberry Pi cases to 3D print, from the Raspberry Pi 5 down to the original!
The Raspberry Pi is the world’s most popular single-board computer, with the Raspberry Pi 4 B being the leading model in its lineup. Despite being no larger than a credit card, the diminutive computer has enough punch to power a variety of applications, ranging from web servers to home theaters.
Integral to its back-to-basics charm is that it doesn’t come packaged in a fancy case. It’s just a circuit board with soldered components and ports – one of the many reasons it’s so affordable.
For this reason, one of the first projects people begin with their new computer is searching for a case. If you’re one of the millions that own a 3D printer, that means there are a lot of custom Raspberry Pi cases for you to choose from.
That’s why we broke it down into categories in an effort to make your life a little bit easier! These include unique designs, minimalist cases, referencing pop culture and video games, and stackable options.
Unique Designs
Who said that a Raspberry Pi needs to be boring? Each of these cases has plenty of flair.
Raspberry Pi 4 Case
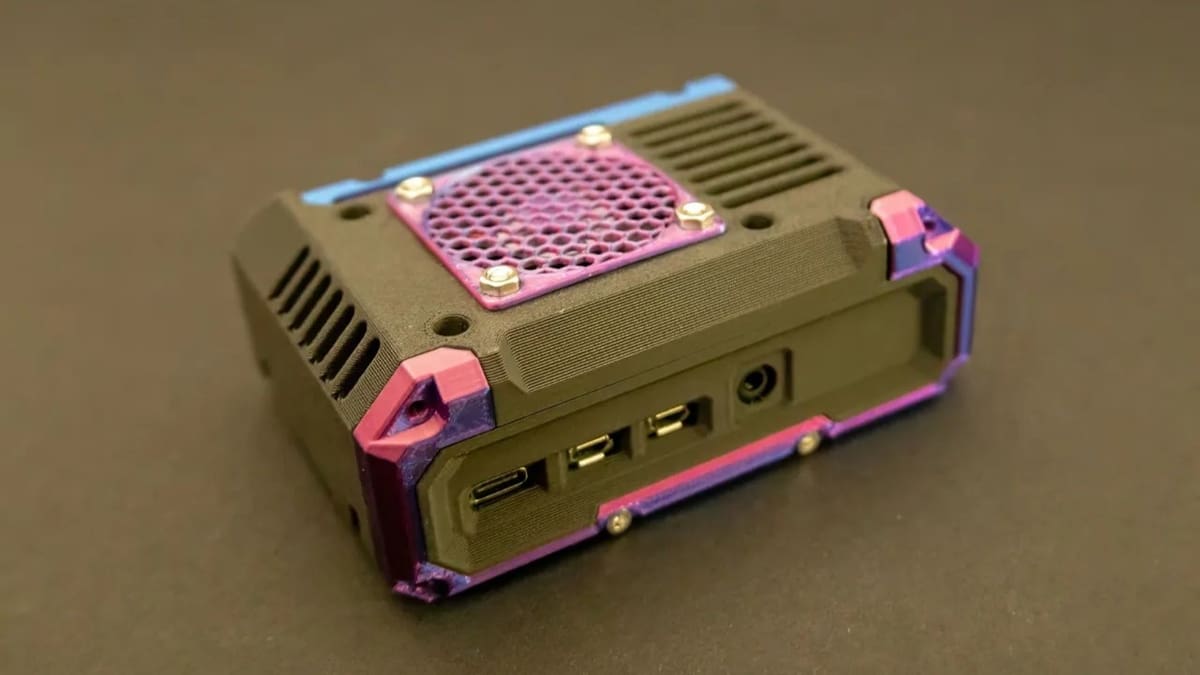
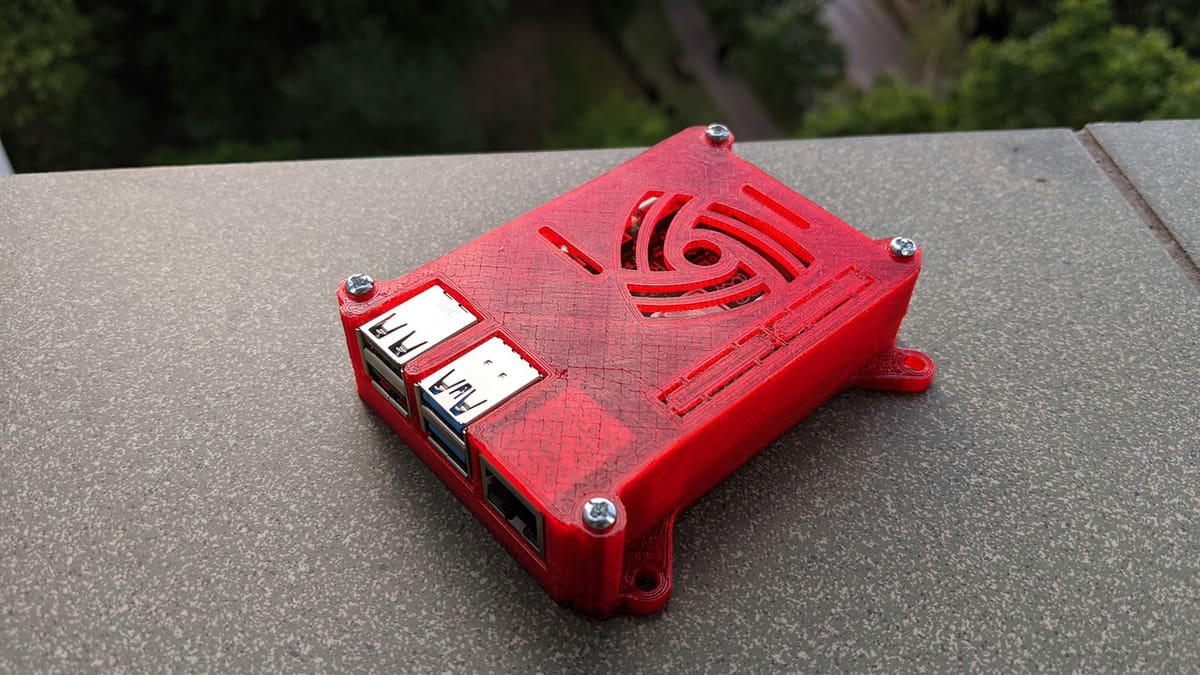
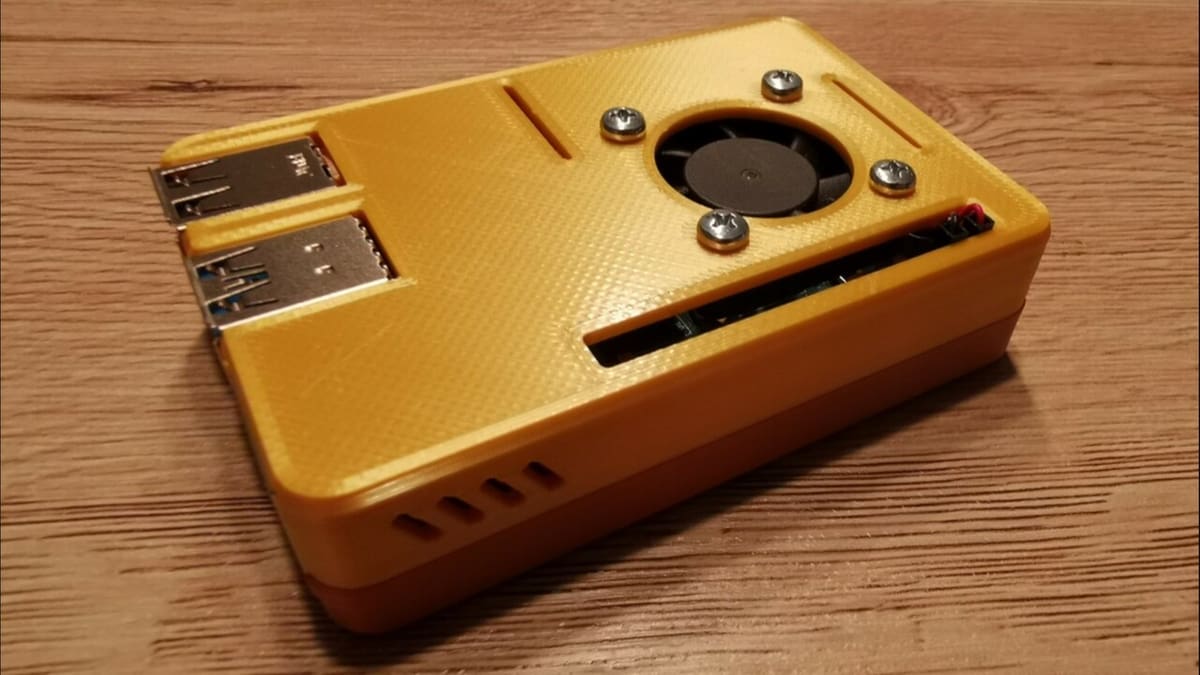
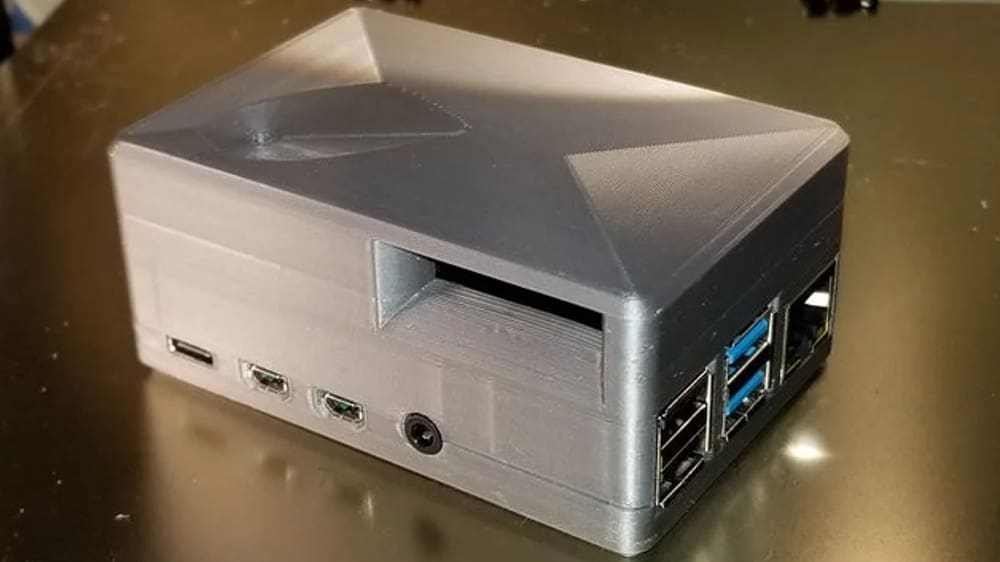
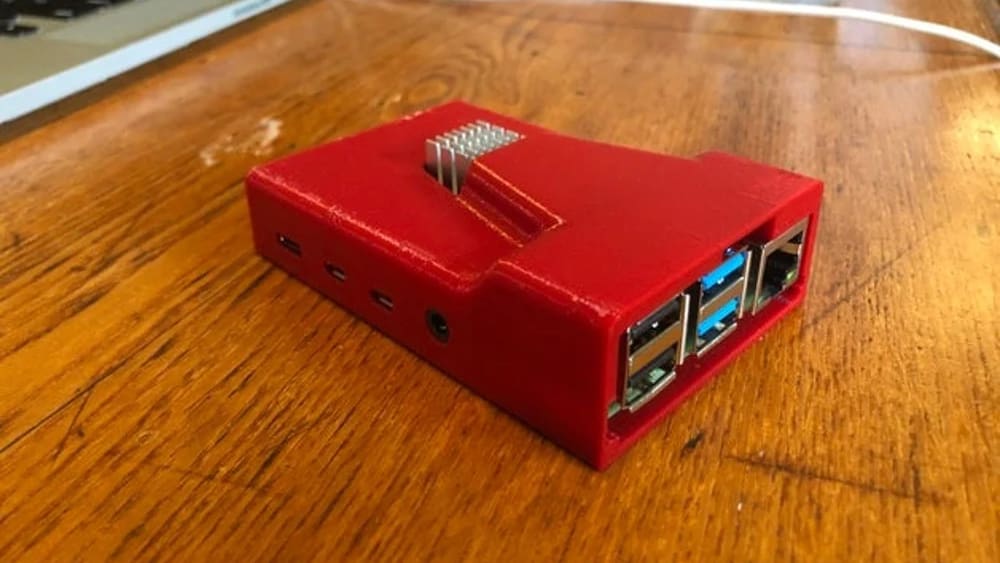
This next case is just a great all-rounder. It sports a unique and attractive look with its futuristic, rugged, and angular design. It has all the features you need and more, with support for a 40 mm fan and plenty of ventilation.
It prints without supports, and the five pieces are held together with screws and heat-set inserts, which makes the case extra sturdy and gives it a professional finish. The designer also highlights a couple of walls in the model that can be removed in a CAD program to provide access to the Pi’s ribbon cable.
- For Raspberry Pi: 4
- Who designed it? Squirrelbrain
- How printable/popular is it? This design is featured in over 1,600 collections and has 52 makes to its name.
- Where to find it? Printables
Desktop Case With UPS
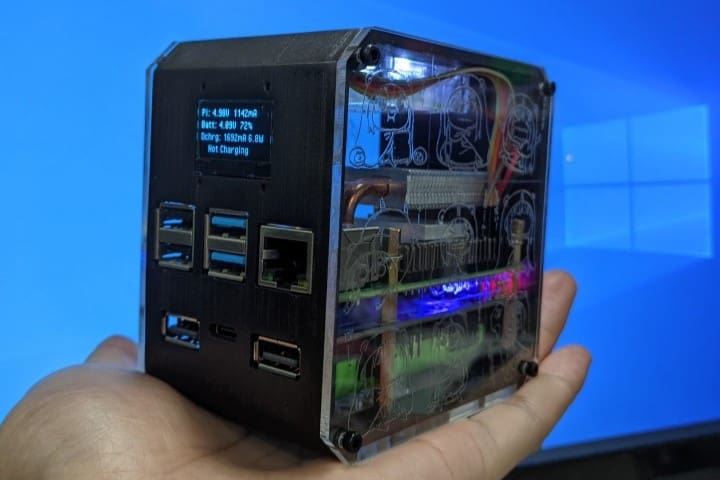
This case emulates the look of a modern gaming PC and is shown with an acrylic side panel and PC-style heatsink. It’s also designed to house a UPS battery backup for mission-critical applications or using it on the go.
And if that isn’t enough, you can also install a small OLED display in order to add even more functionality to this tiny powerhouse. The case measures 92 x 92 x 60 mm. You’ll find a complete list of materials on the MyMiniFactory page.
- For Raspberry Pi: 4
- Who designed it? dafa1
- How printable/popular is it? Over 1,700 downloads and 29,000 views make this a pretty popular little PC!
- Where to find it? MyMiniFactory
Adaptable Fan Case
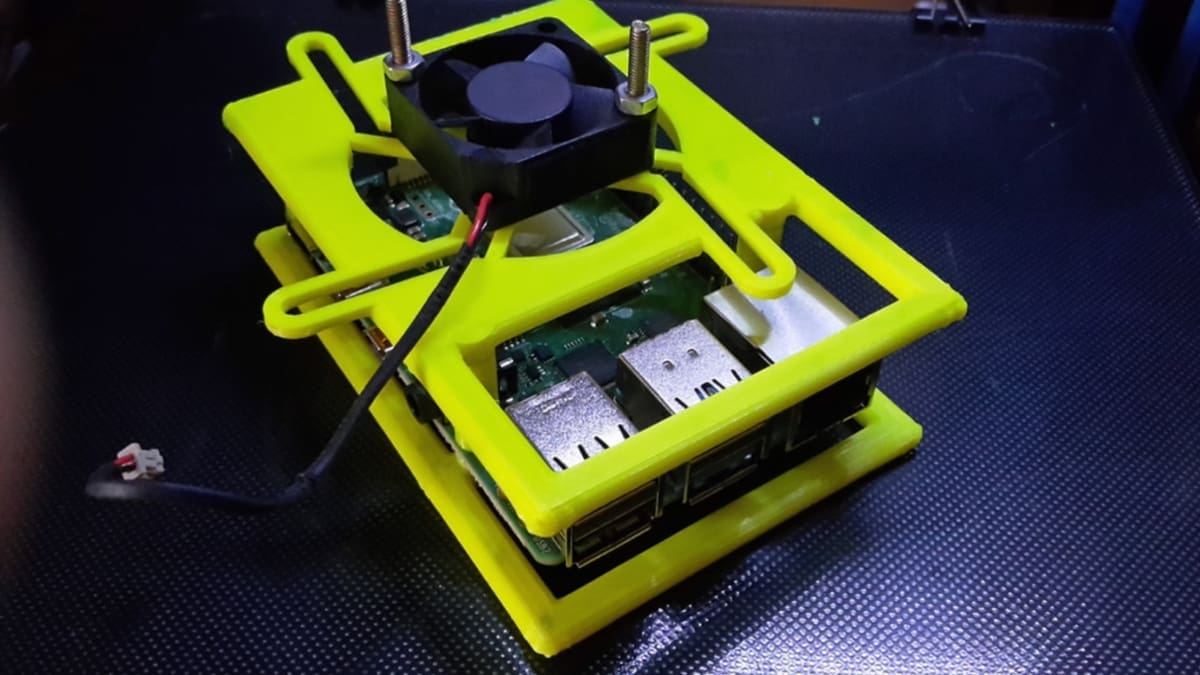
This minimalistic case protects the precious interior from accidental bumps. It’s clearly a case of function over form; with this casing, you can mount pretty much every fan size up to 70 mm, or even larger fans with customization. Needless to say: We are a big fan of the utility this provides.
- For Raspberry Pi: 4
- Who designed it? MegaSaturnv
- How printable/popular is it? Nobody wants to be forced to use the same amount of cooling as the maker of the project. That’s probably why it has over 6,500 downloads, 129 likes, and 2 makes.
- Where to find it? Thingiverse
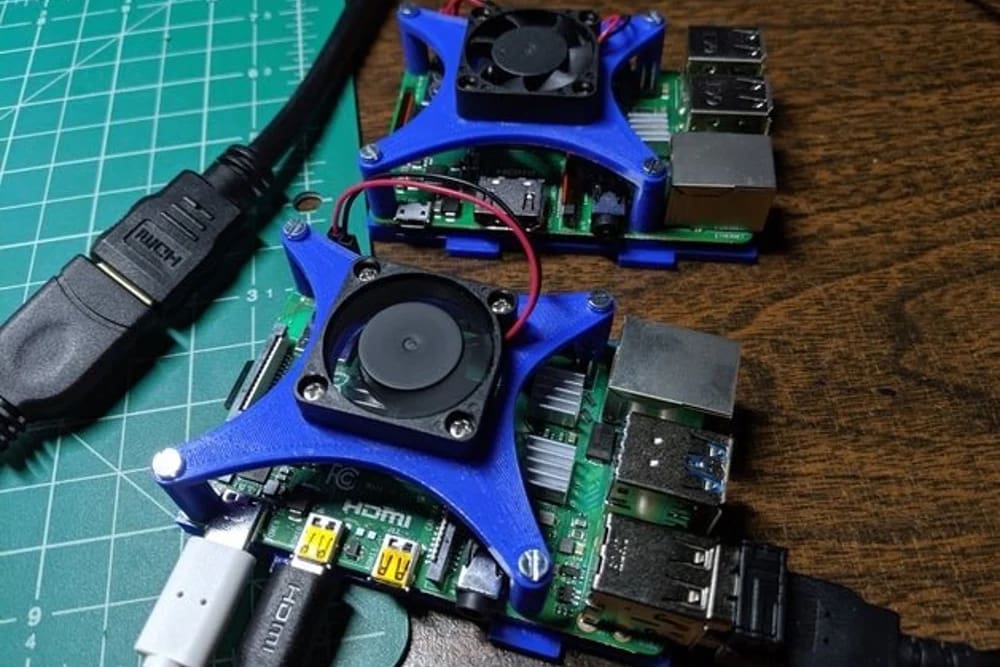
Mini Desktop Ice Tower Cooler
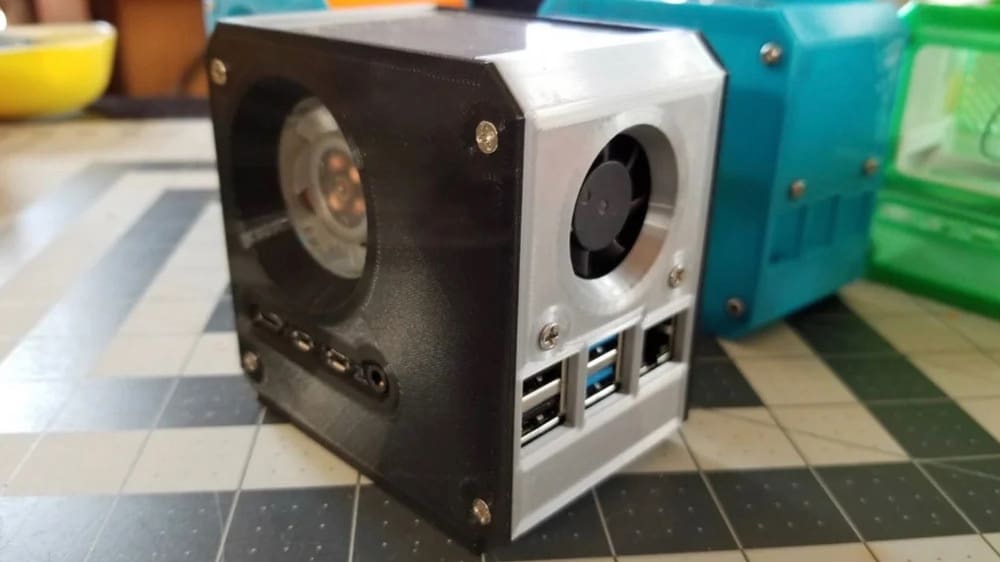
This case is built to mimic a desktop computer chassis not just in style, but also in function. It includes ductwork for a 30 x 7 mm and 30 x 10 mm fan. Thingiverse user JISpal01 made the designs specifically to prevent filament waste – it’s incredibly economical and effective, considering it’s made with enough room to include an actual heatsink alongside the two fans. Videos on YouTube illustrate exactly how to put the case together, including the installation of the fans and Raspberry Pi itself.
- For Raspberry Pi: 4
- Who designed it? JISpal01
- How printable/popular is it? Most of the 19 makes are very creative and clean; if those aren’t to your taste, then you still have a chance with 11 remixes available.
- Where to find it? Thingiverse
GR8 PI2
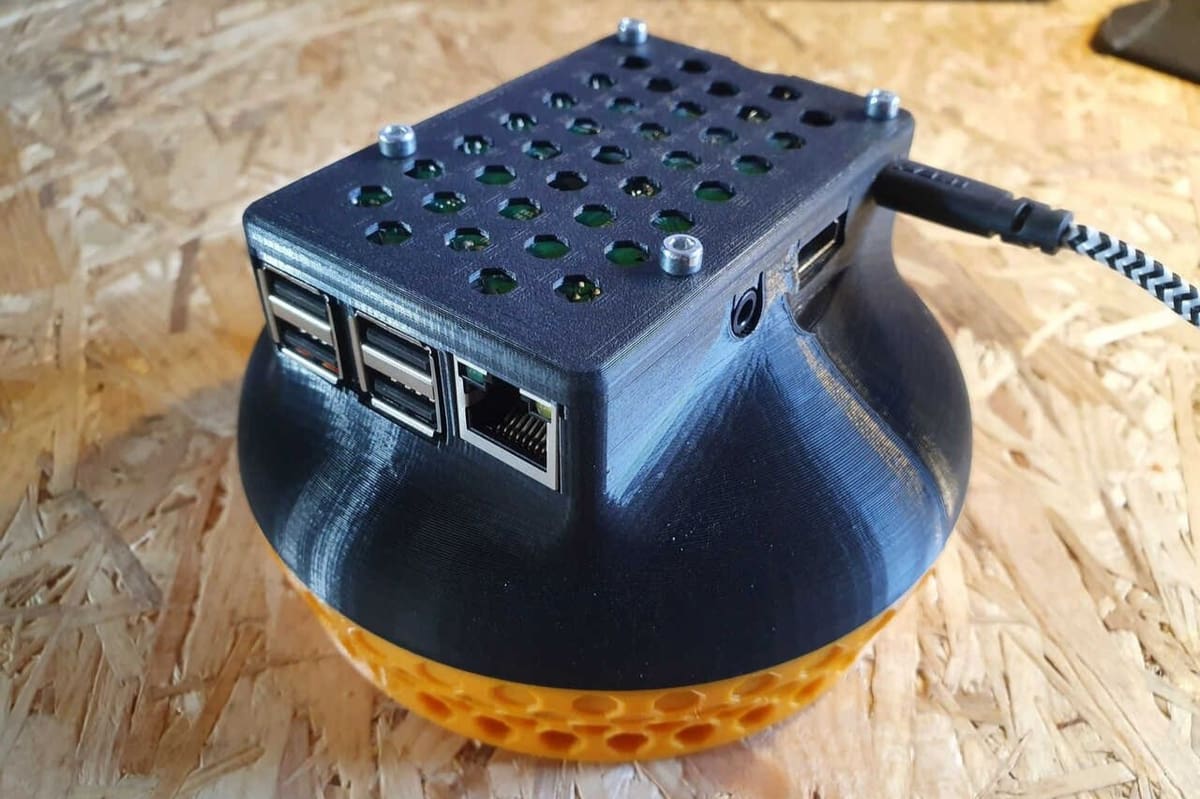
This first case features a unique design, with a UFO-shaped bottom that holds an 80 mm fan. The three parts are designed to snap together. However, there are places for M3 screws if you want to make it extra secure. These holes are filled when printed, so you’ll need to drill them out if you wish to use screws.
The designer recommends printing with 20% infill, and the model is designed to print without supports. The GR8 PI2 is a case with an arguably overkill amount of cooling, and a truly out-of-this-world look!
- For Raspberry Pi: 3
- Who designed it? Tripnutz
- How printable/popular is it? Over 5,000 downloads and 277 likes means there is a good chance that you’ll like this case, too.
- Where to find it? Thingiverse
Black (Pi) Hole
This is a one-of-a-kind case and looks out of this world. Before you decide to go straight for it, we’ll warn you that this isn’t for the faint of heart or beginners. It will require following the directions exactly as explained and having a little skill with installing some thermal set inserts while having a foundation in using Linux.
We’re glad to report that even though it’s not the easiest on this list, the designer does give step-by-step instructions that are detailed and clear.
- For Raspberry Pi: 3
- Who designed it? OutpostKodelia
- How printable/popular is it? With around 230 downloads, this model is just getting started.
- Where to find it? Thingiverse
Futuristic Case

We love to see function and art combined. This case is a fun take on the ordinary or bland cases around, and we welcome it with open arms. It’s also an easy way to get heads to turn when guests are over.
This was the maker’s first attempt at a Raspberry Pi 4 case, and the response has been welcoming in the comments. He has even made edits based on feedback by giving more room for heatsinks. It only takes about six screws altogether to get this assembled.
- For Raspberry Pi: 4
- Who designed it? Tripnutz
- How printable/popular is it? Over 200 likes and more than 8,800 downloads tell us that people like simple cases but they want style, too. Looking through the six makes will show you some very creative minds.
- Where to find it? Thingiverse
Retro
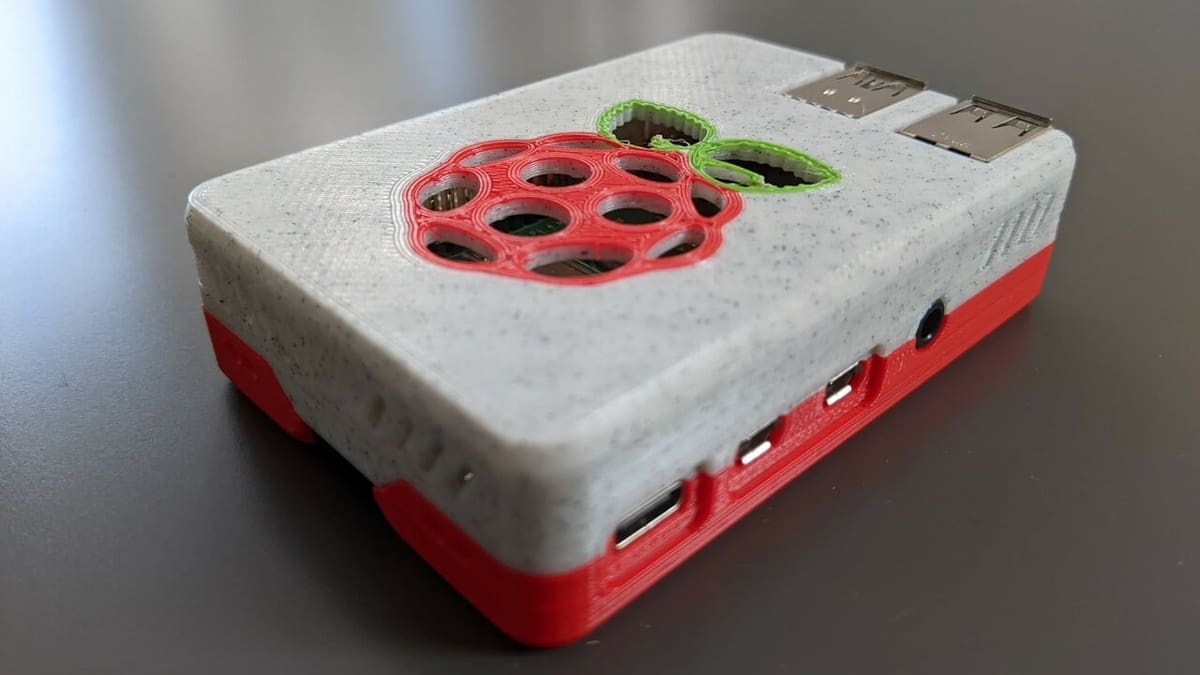
Who doesn’t like a clean retro aesthetic? This case was inspired by the Art Deco style and was created to complement the look of modern GPUs. The combination of these ordinarily contrasting themes creates quite a brilliant effect. Furthermore, this case keeps your Pi cool by supporting the original cooling fan and gives you easy access to the GPIO pins.
With a simple color change at layer 16, the pattern of the case pops. You can use whatever colors you like, but a dual silk filament will surely get you a marvelous result. You can print it at 0.2-mm layer height and you won’t need any supports. Once you have the parts printed, the lid will simply snap in place.
- For Raspberry Pi: 5
- Who designed it? theprintedcow
- How printable/popular is it? Over 120 makers have opted for this retro style for their Raspberry Pi 5 and 3 of them have shared their cool makes on Printables.
- Where to find it? Printables, Thangs
Desktop Tower Case
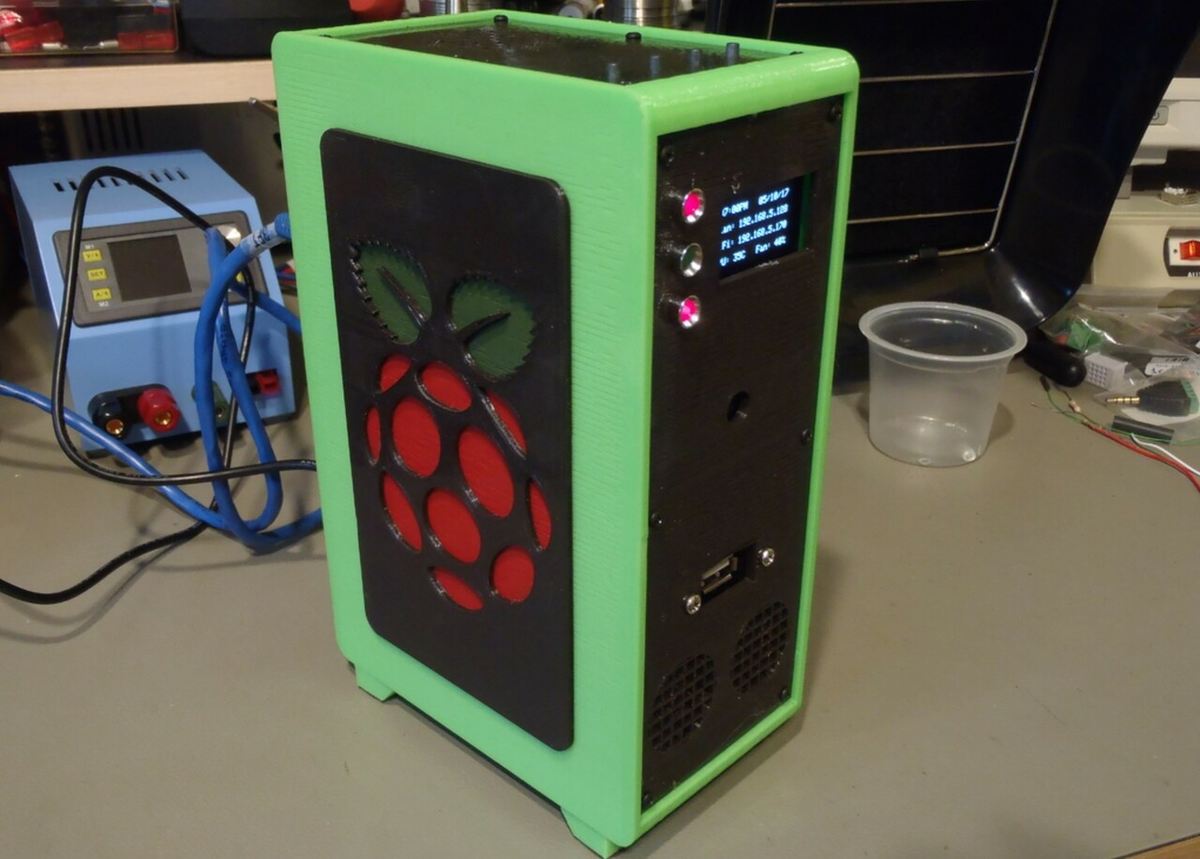
This 3D printable Raspberry Pi 3 case is actually still a work in progress, so approach it with caution. But it’s interesting because it attempts to build a more functional PC tower from the Raspberry Pi and additional components, such as a hard drive, variable temperature cooling fan, audio amplifier, stereo speakers, and an OLED screen. Oh yeah, and it has an oversized raspberry logo on the side. But don’t let that deter you! A little editing of the available files could change that into any logo you like.
- For Raspberry Pi: 3
- Who designed it? joeyC
- How printable/popular is it? This case proves to be a winner, with over 22,000 downloads.
- Where to find it? Thingiverse
Open Case
The quest to keep the Raspberry Pi 4 cool led the designer of this case to take a very minimalist approach. Essentially just a base plate and a mount for the fan, this case does leave the delicates of your board a little exposed. It’s a good option if you want to crunch a lot of numbers with your Raspberry Pi 4.
- For Raspberry Pi: 4
- Who designed it? knowledgecravings
- How printable/popular is it? While no makes have been shared yet, with over 2,500 downloads, there’s sure to be a print or two out there.
- Where to find it? Thingiverse
The 120 mm Tornado Case
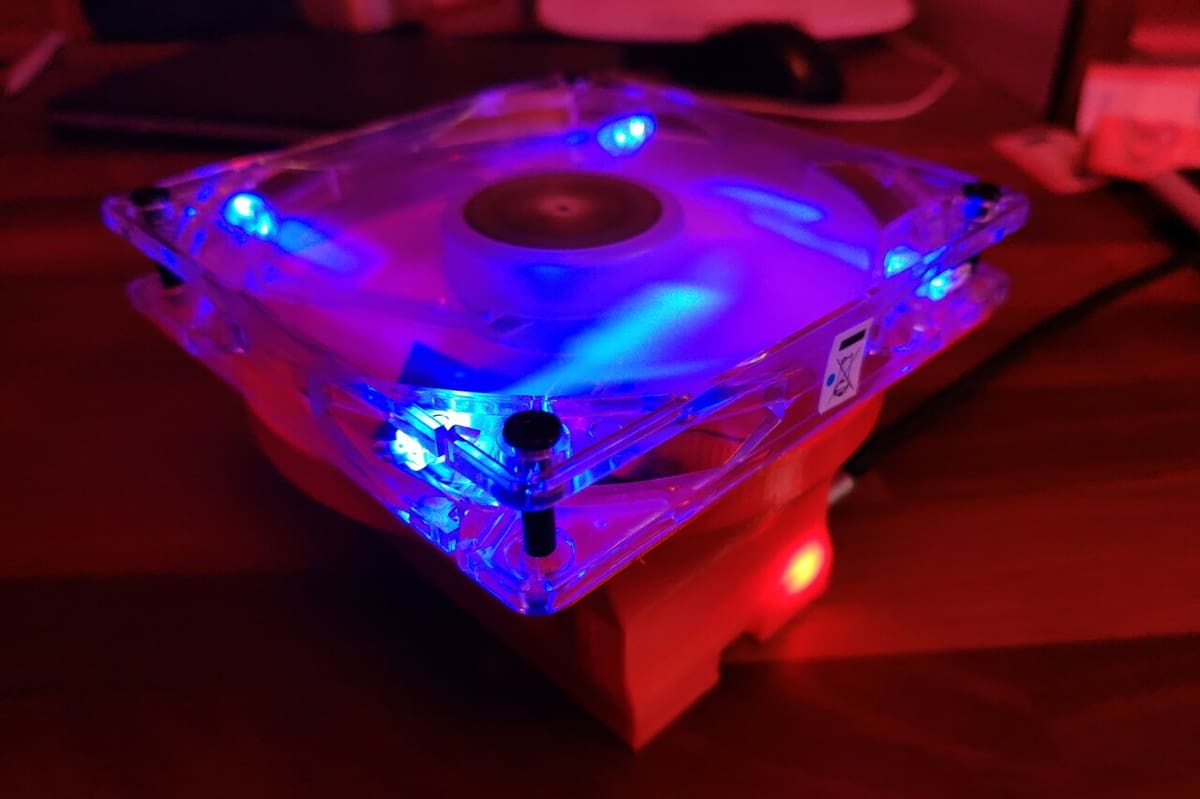
If you like taking things to the extreme, you may appreciate this design. It’s all about cooling, and we mean a lot of cooling. Using a 120 mm fan to pull the air away from the board, it’s designed to pull from the air ducts below and beside the board.
You’ll want to pay attention to the maker’s recommendations about using a step-up converter to convert the 5-V output of the Raspberry Pi to be compatible with running the 12-V computer fan. Also, you may want to send a PWM signal to the PWN pin to make it not blast at full power all the time.
- For Raspberry Pi: 4
- Who designed it? jesperklang
- How printable/popular is it? This case has over 270 likes, 8 makes, and a remix, while the design has been downloaded over 6,600 times.
- Where to find it? Thingiverse
With VESA Mounts
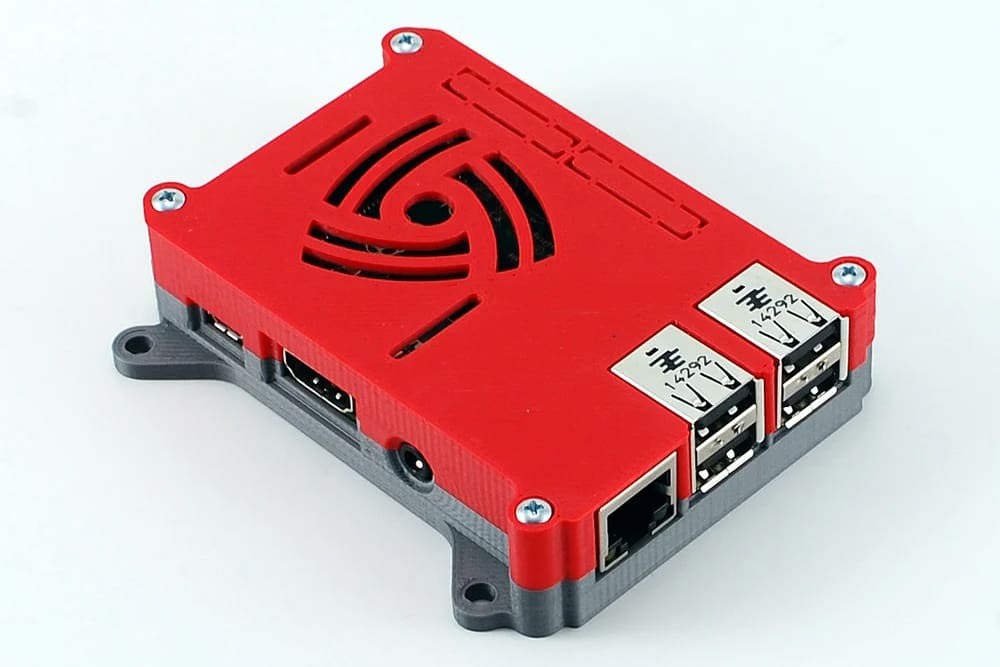
This model is enormously popular, and rightly so. It features an access slot for the Pi camera, screw-mounting of the Raspberry Pi to the case using holes in the PCB, integrated 75-mm VESA mounting tabs, a rotary engine vent design, and a high-resolution STL mesh. This is the custom Raspberry Pi 3 case to 3D print and rule them all.
- For Raspberry Pi: 3B+, 3B, 2B, and 1 B+
- Who designed it? 0110-M-P
- How printable/popular is it? This should get an award. With over 26,000 likes, 1,000 makes, and 325 remixes under its belt, this case is nothing to take lightly.
- Where to find Ii? Thingiverse
With VESA Mounts Pi 4
No, you’re not having déjà vu.
This is a Thingiverse remix of the incredibly popular Raspberry Pi 2/3 case that came before this one. Despite the ventilation holes included in the design, we’d recommend printing with a more temperature-resistant filament than PLA to handle the heat of the Pi 4.
If you have a Pi 5, you can find a remix of this case that’ll fit your new board perfectly.
- For Raspberry Pi: 4
- Who designed it? plammers
- How printable/popular is it? Throughout the colorful array of 40 makes, we’re impressed with the variety of creativity found in the 35 remixes.
- Where to find it? Thingiverse
Minimalist
Most of the designs in this category should print fairly quickly and without issue, and they get the job done. No fuss and pretty impressive!
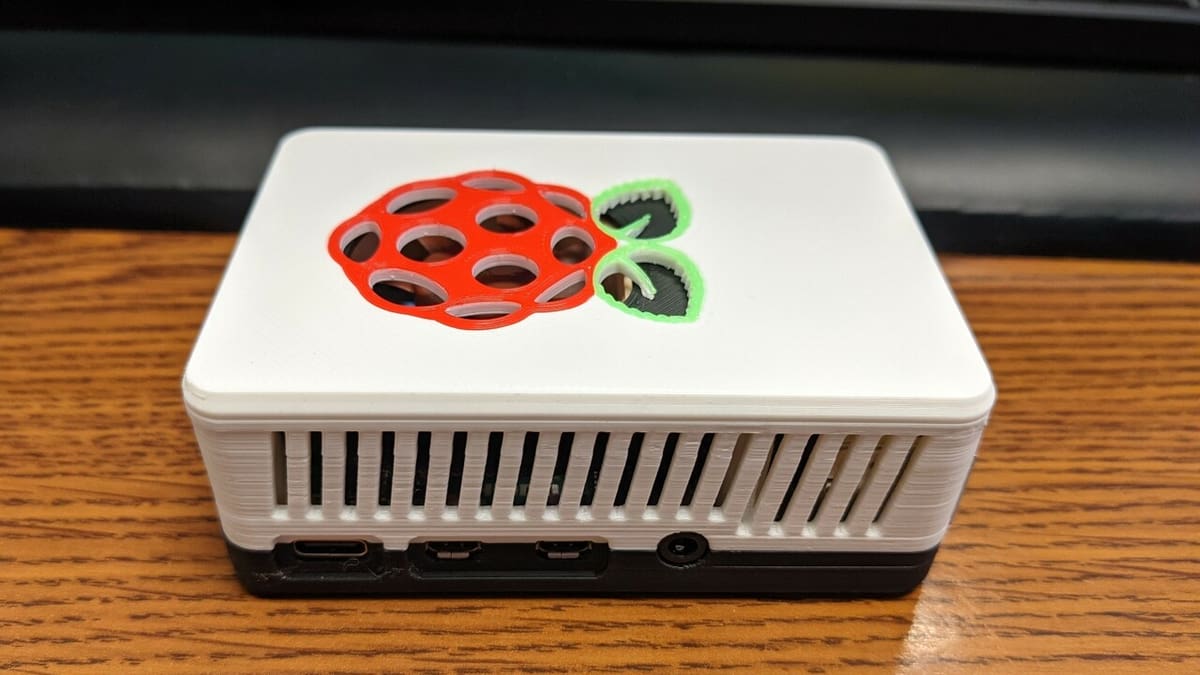
Adafruit
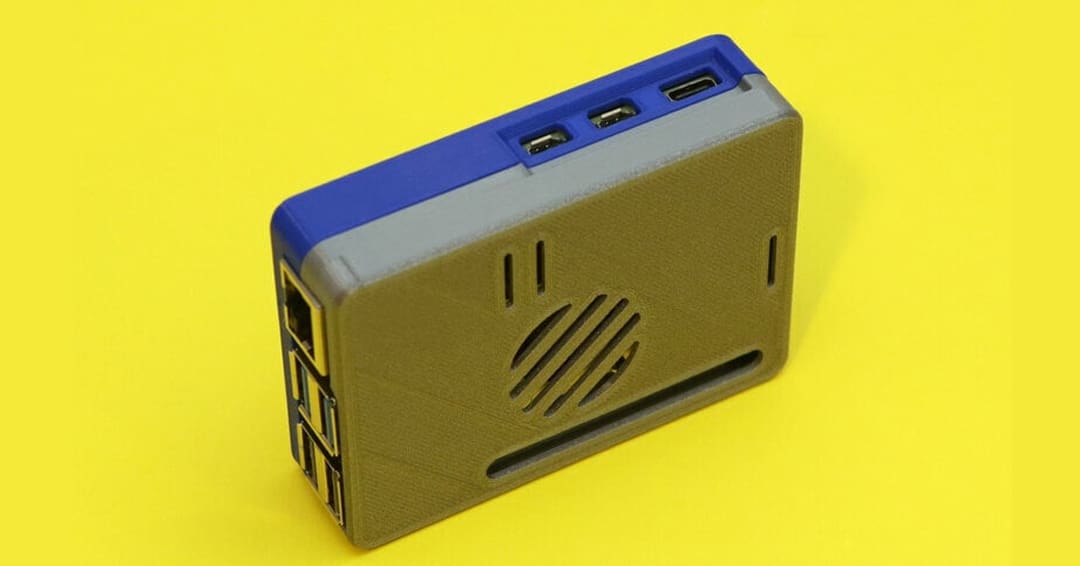
A Raspberry 5 3D printed case by the producer of the Raspberry Pi definitely can’t be missed! Consisting of only two parts, this case was designed to fit the official active cooler. Furthermore, the model lets you easily access the USB-C, USB-A, mini HDMI, and Ethernet ports so you can fiddle your fingers with your Pi. Together with those ports, the GPIO pins can also be easily accessed thanks to the slot on the top part of the case.
Assembling it is easy: The Raspberry fits securely into place within the case thanks to the snap-fit design. In that way, you won’t need any screws to put the two halves together.
Minimal
Here’s another sleek and minimalist Raspberry Pi 3 case to 3D print. What makes this one distinct is how the designer strives to strike a balance between providing maximum protection while still providing full access to the complete range of pins and connectors on the Raspberry Pi 3 board. The semi-open enclosure helps with cooling as well.
- For Raspberry Pi: 3
- Who designed it? adamwdraper
- How printable/popular is it? Minimalists are back to making a statement again, with over 5,000 people downloading this design and 860 liking it.
- Where to find it? MyMiniFactory
Wall-Mounted Case
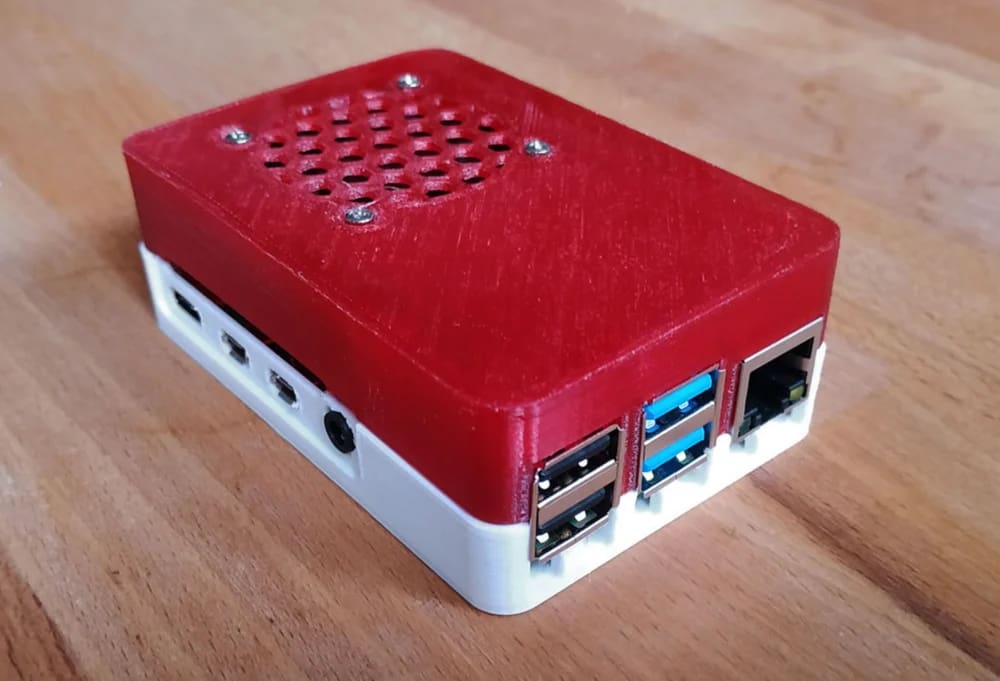
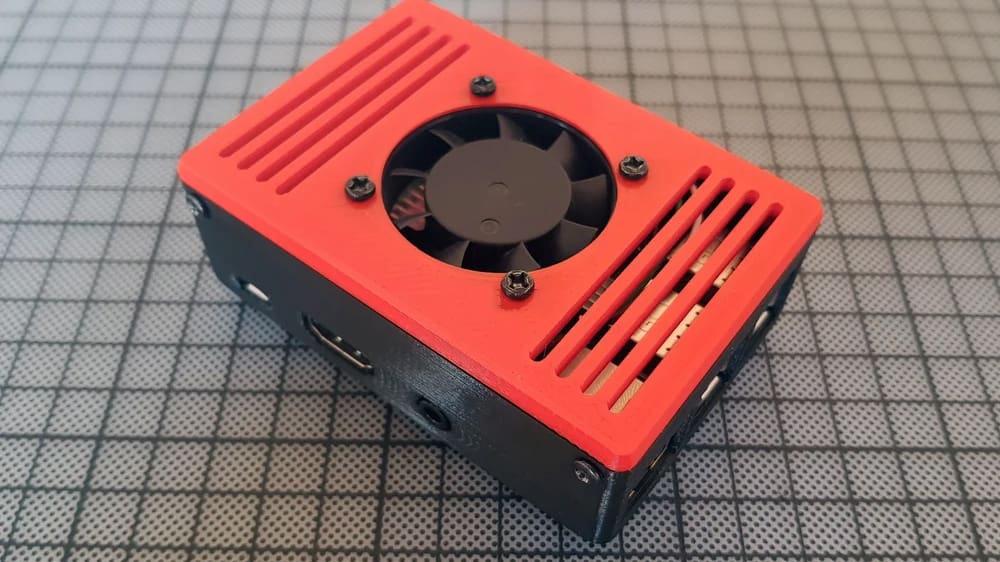
This model, designed by user tipam on Thingiverse, has it all. Not only is the casing well-ventilated, but it also features active cooling with space for a 30 x 30 x 7 mm fan (something the Raspberry Pi 4 seems to struggle with due to the more robust processing power). With this casing, there’s no need to fear your Pi entering a meltdown phase.
It consists of two parts that easily click together, plus a wall mount plate with a quick slide-to-remove mechanism.
- For Raspberry Pi: 4
- Who designed it? tipam
- How printable/popular is it? The maker of this case is very responsive to feedback. Maybe that also helped it gather 27 makes and 7 remixes.
- Where to find it? Thingiverse
Variations on Snap-Fit Cases & Stands
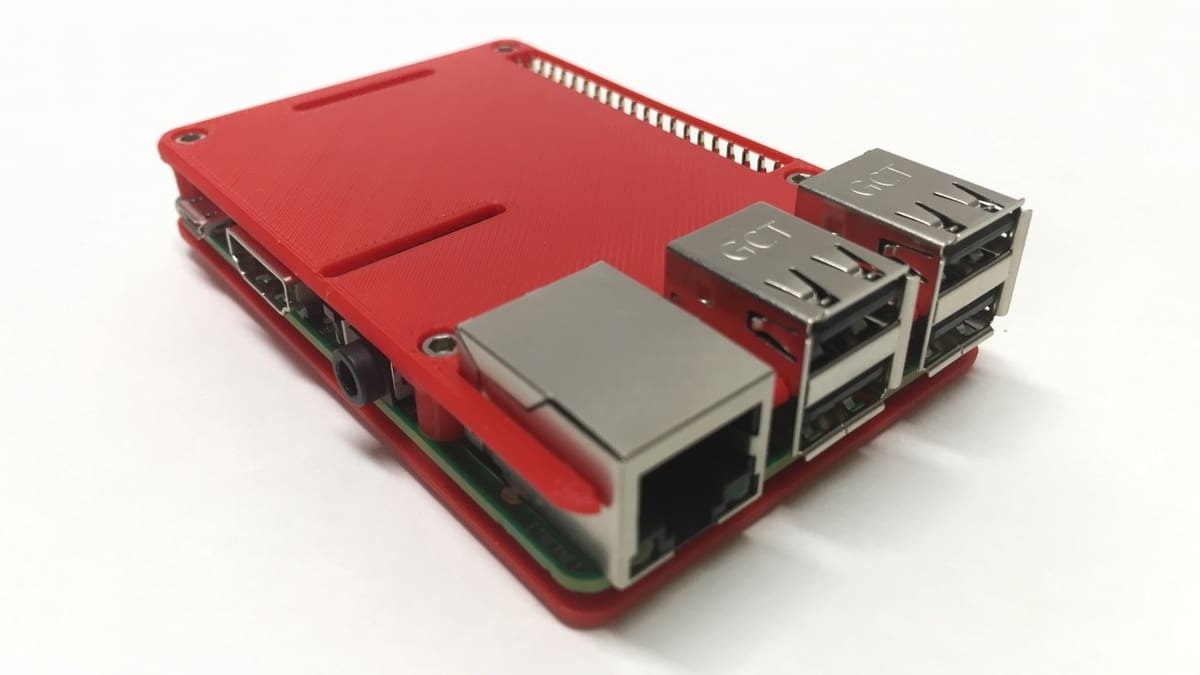
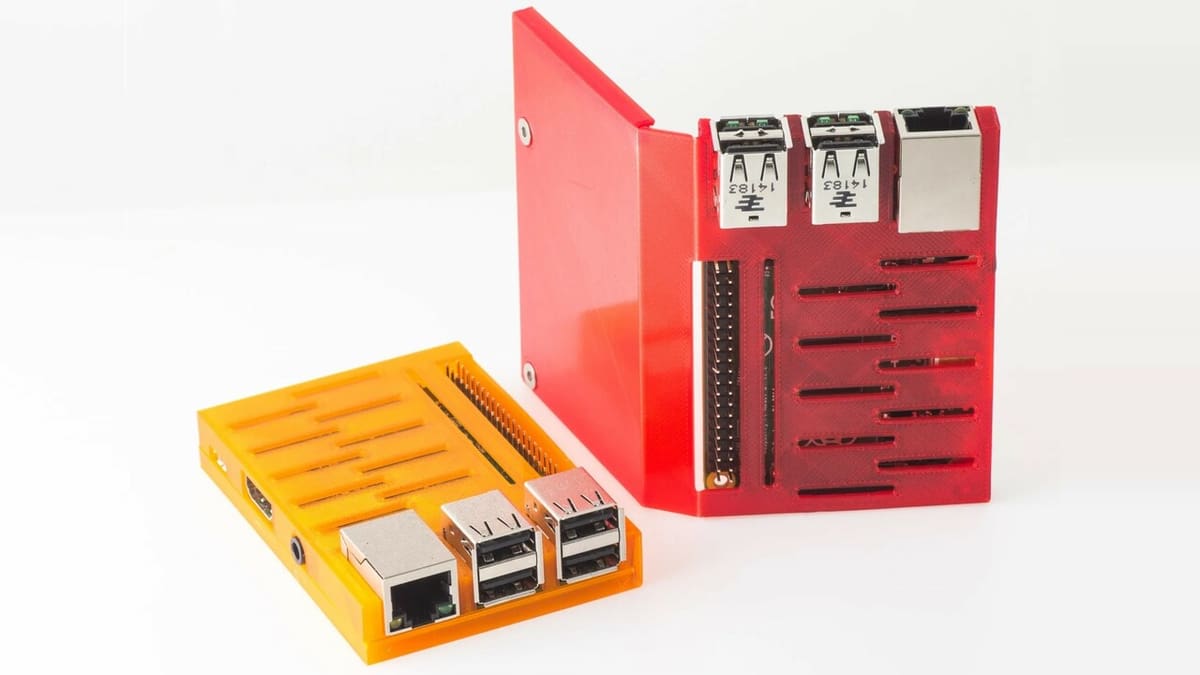
A highly versatile, configurable design, as seen in how many Thing files are available for download. The cases are intentionally simple to print and piece together. Part of the simplicity is relying on adequate ventilation to cool the board rather than a fan. The overall visual effect of the case is pleasing, and it even has a stand to help show off your new Raspberry Pi 4.
- For Raspberry Pi: 4
- Who designed it? Malolo
- How printable/popular is it? It’s rather impressive that this has accumulated over 7,500 likes on Thingiverse. It doesn’t stop there, with 183 makes and a whopping 94 remixes.
- Where to find it? Thingiverse
Snap-Fit Case
A remix of the previous model, it follows the same principle of easy printing and piecing together. Specifically designed to encourage active cooling, the maker of this case created a hole on the top capable of mounting a 30-mm 5-V fan using four M3x12 screws and four M3 nuts. Installing the fan is claimed to help bring the temperature to ~42 °C when idle.
The overall visual effect of the case is pleasing, and it even has a stand to help show off your own Raspberry Pi 4.
- For Raspberry Pi: 4
- Who designed it? Bigjeffrey
- How printable/popular is it? It’s fun to look through all 18 makes of this model. That’s not even including the 9 remixes that might save you some time!
- Where to find it? Thingiverse
Snap-On Case
This snap-on Raspberry Pi 4 case comes with an optional 30-mm or 40-mm fan mount. It looks really good if you print the upper half in translucent material with minimal infill. You won’t need additional screws to assemble, as everything’s designed to snap-fit. It’s best printed with PETG or ABS, as parts of the board can reach as high as 80 °C.
- For Raspberry Pi: 4
- Who designed it? lazax
- How printable/popular is it? The fan base feels strong when seeing that it has eight makes and eight remixes.
- Where to find it? Thingiverse
Quiet Case
Not the most attractive case on this list by any means, but the intention behind this design is noise reduction, not beauty. The bulky shape comes from housing a well-thought-out cooling system that uses a heatsink and blower rather than a fan.
- For Raspberry Pi: 4
- Who designed it? glabifrons
- How printable/popular is it? With over 2,200 downloads and a shared make, this functional case can’t be missed.
- Where to find Ii? Thingiverse
Cool Case
An update on a previous version for Raspberry Pi 2/3s, this form-fitting case is made of a single part, eliminating the need for clips and screws. As previously mentioned, the Raspberry Pi 4 can run hot, so this design includes a space for a 15-mm heatsink. The result reminds us of the hood of a hot rod.
- For Raspberry Pi: 4
- Who designed it? Mentaluproar
- How printable/popular is it? This doesn’t use any screws, glue, or clips for assembly. This may confuse some people, but not the 1,800 makers who downloaded the slip-on design.
- Where to find it? Thingiverse
Folding Case
As you can expect from other models in this category, this case is straightforward to print and set up – it’s the filament that can add some pizzaz. The model is printed flat and wraps around your Pi of choice; it can’t get easier than this!
There are three designs available for different models of boards, and note that, whichever one you go for, you’ll need two M3 flathead screws to complete the model.
- For Raspberry Pi: 3B, 3B+, 2, B+
- Who designed it? WalterHsiao
- How printable/popular is it? We like this case for its originality. 708 makers agree with us and have downloaded the design.
- Where to find it? Cults
Case with 40 mm Fan
This is a simple, unpretentious custom Raspberry Pi 3 case to 3D print, with room for a 40-mm cooling fan. You’re not going to find any oversized logos, homages to vintage game consoles, or wacky pop-culture references here. It’s just a well-designed enclosure to keep the unit safe and secure.
- For Raspberry Pi: 3B
- Who designed it? Harry Vourtsis
- How printable/popular is it? Sweet and simple is always a big hit with people these days. This has around 10,200 downloads to prove it.
- Where to find it? YouMagine
Sleeve
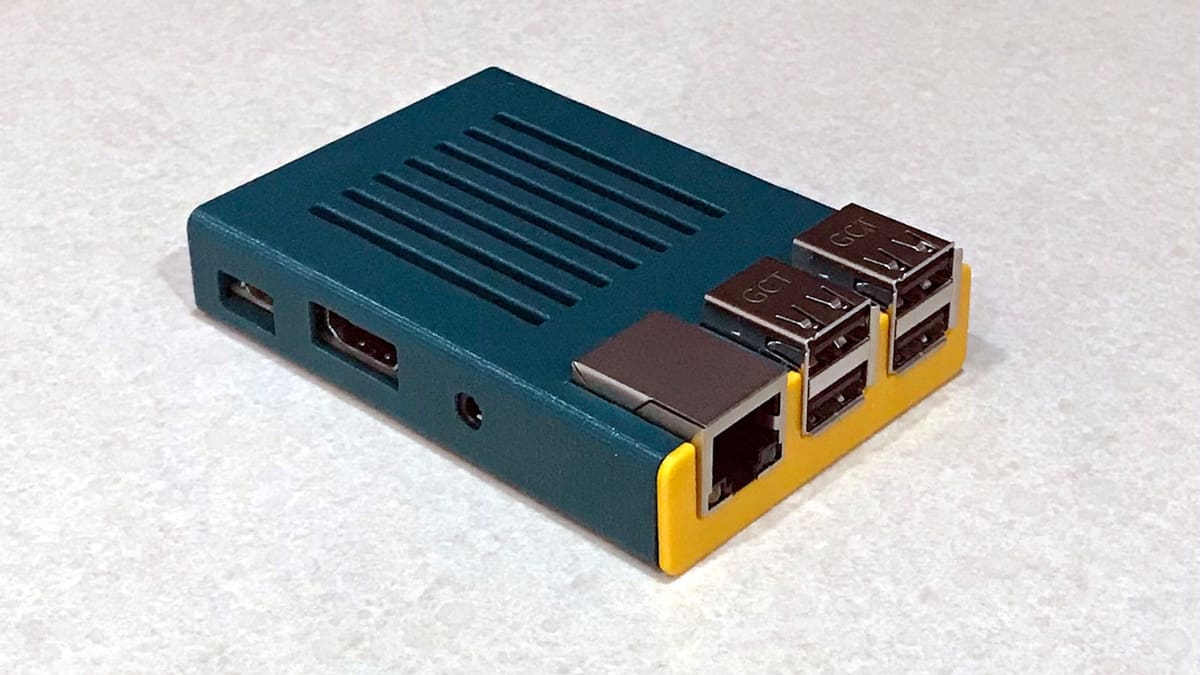
We are fans of SBCs here at All3DP, and we’ve often had cause to fabricate cases for them. Over the course of our testing, this model has become the classic Raspberry Pi 3 case to 3D print. It fits like a glove – regardless of whether it’s printed in FDM or resin – and it’s tidy and robust. Especially suitable if the Raspberry Pi is being used for low-intensity activities such as browsing the web.
- For Raspberry Pi: 3
- Who designed it? walter
- How printable/popular is it? This case is almost at 10,000 likes! Not to mention the 237 makes and 137 remixes. Impressive as they come.
- Where to find it? Thingiverse
Quick Case
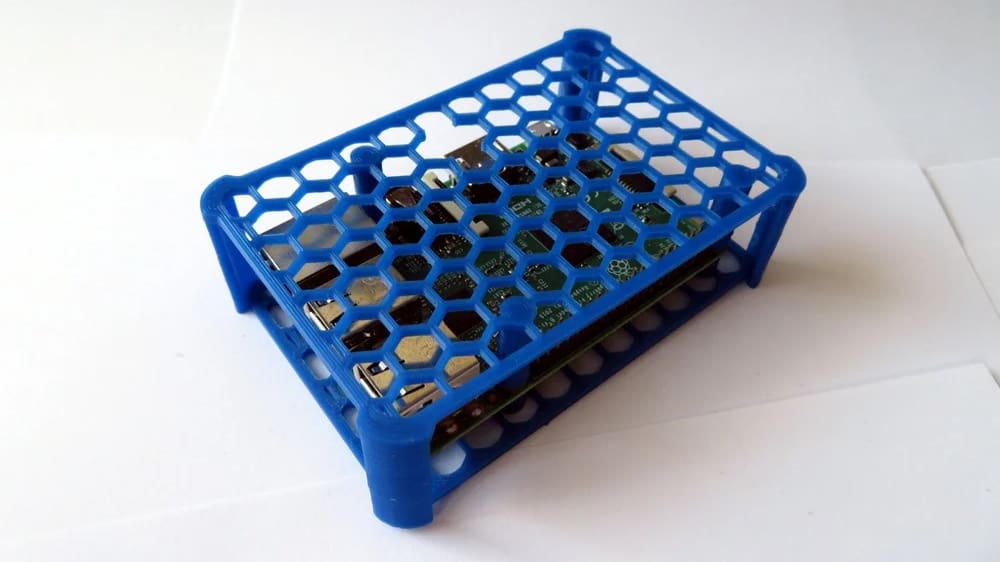
This is a quick Raspberry Pi 3 case to 3D print when you’re in a hurry but still want to provide the computer with some degree of protection. Fast and easy to print, the design sets it apart with its honeycomb structure.
- For Raspberry Pi: 3
- Who designed it? EL3D
- How printable/popular is it? People like simple, which makes it not surprising to see that more than 430 people have liked it and over 5,450 have downloaded it.
- Where to find it? MyMiniFactory
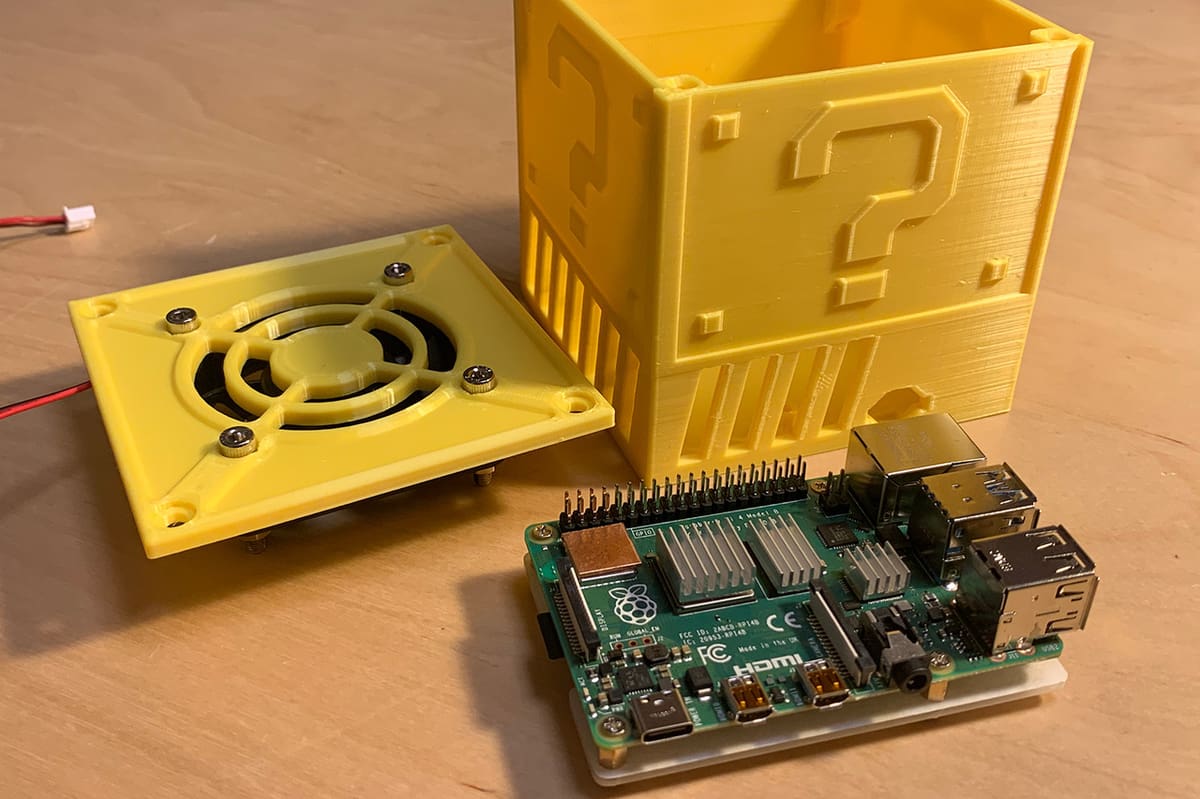
HAT Support
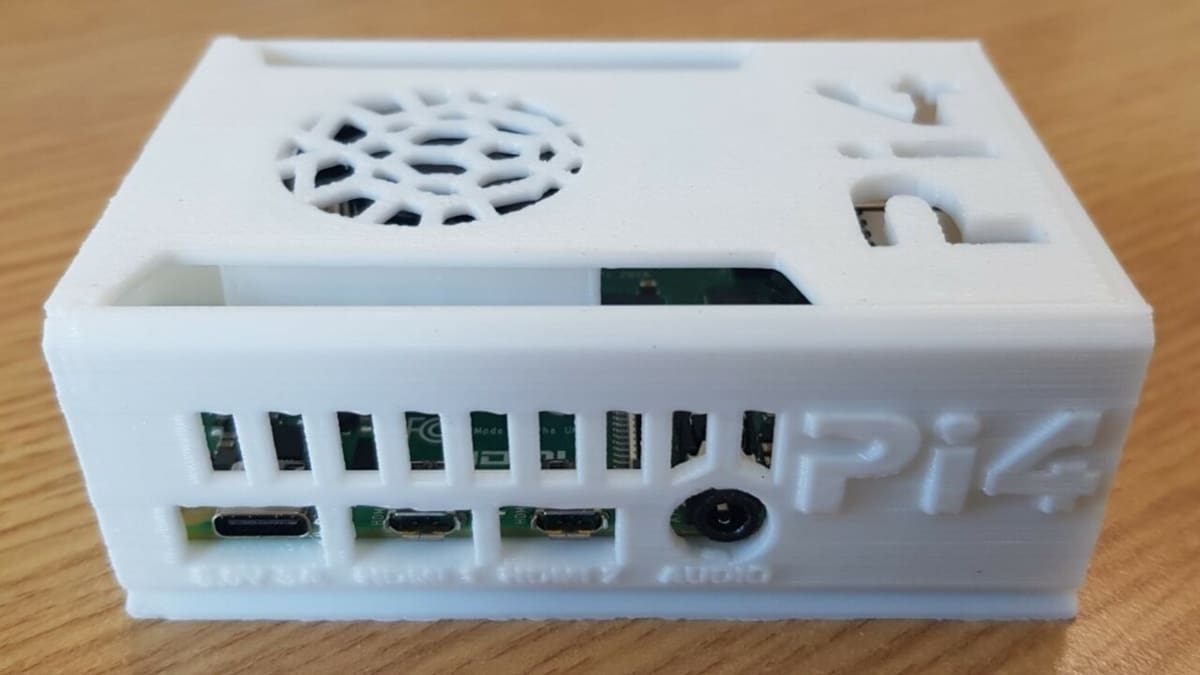
HATs are add-on boards that you can use with your Raspberry Pi to give it additional functionality or control, such as motors, sensors, or displays. However, they do make the Pi a bit bulkier, so if you’re looking for a case that has room for a carry-on, this can be the right solution for you. With this case, you’ll be able to protect both your Raspberry Pi 5 and your NVME HAT in a stylish print.
This case can be printed with both resin and FDM machines, but you’ll need supports if you decide to use filament for it. The model is composed of a case body with a case top, an optional button, and a mid-frame. To choose the right parts for your setup, pay attention to the creator’s instructions. In the description of the design, you’ll also find some suggestions for installing and working with the HAT.
- For Raspberry Pi: 5
- Who designed it? Nikolica
- How printable/popular is it? Over 500 people have downloaded this model, 6 of them shared a make, and several others left positive comments.
- Where to find it? Printables
Pop Culture
Add some cool references to your setup with these designs.
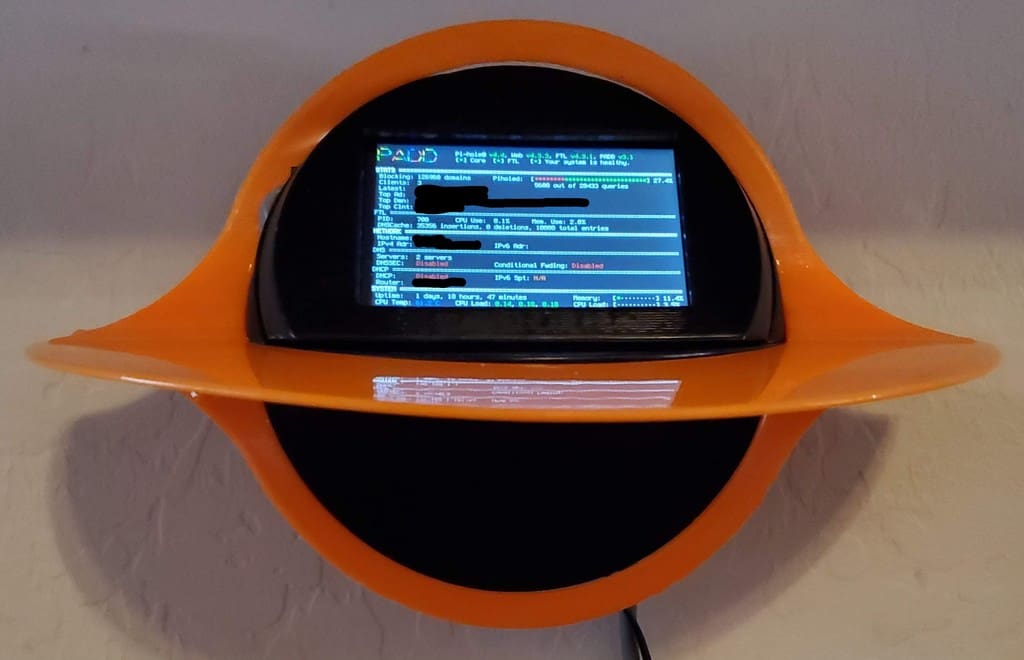
Spaceship
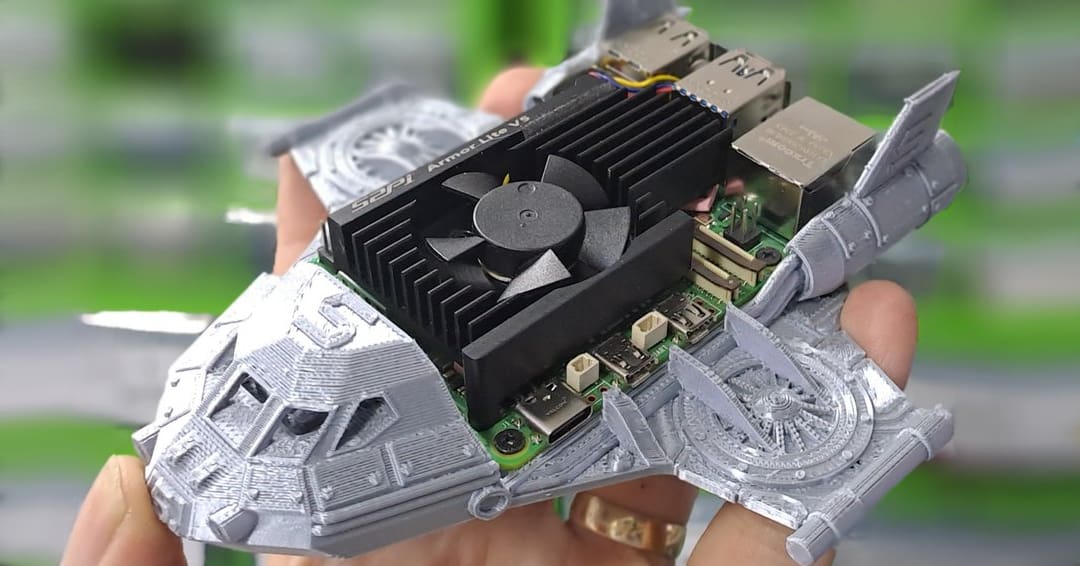
Spaceships are fascinating, arguably one of the coolest sci-fi vehicles out there. The concept of space travel has always captured the imagination of people around the world, and this case is perfect for those dedicated fans. This spaceship case is without a doubt one of the coolest cases out there for the Raspberry Pi 5.
To assemble it, you need four 10-mm M2 bolts that will secure the Raspberry Pi to the print. If you’re worried about the supports, you can rest easy, because the creator has designed a flat bottom to make the model easy to print. It would be ideal to use a 0.2-mm layer height and 10% infill since that’s an aesthetic print.
- For Raspberry Pi: 3, 4, 5
- Who designed it? tipam
- How printable/popular is it? Around 200 people have already downloaded this model from Printables and Thingiverse, but you can be the first to share your spaceship!
- Where to find it? Thingiverse, Printables
Star Wars Death Star
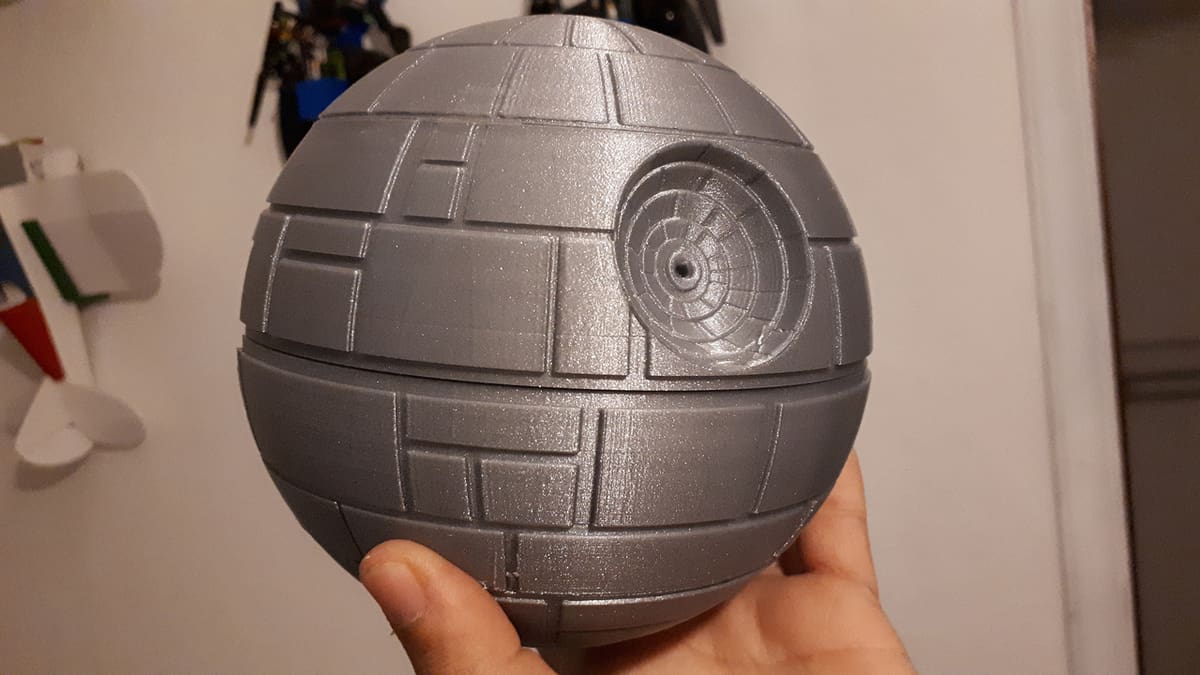
That’s no moon. That’s a media center for your pop culture entertainment cave. This is a large Raspberry Pi 3 case to 3D print in four parts, but it should be very simple to assemble. There’s also room at the top to mount a cooling fan. With a bit of post-processing, the end result would impress even Lord Vader himself.
- For Raspberry Pi: 3
- Who designed it? furnibird
- How printable/popular is it? It’s got to give the maker of this model a really good feeling inside knowing that over 12,500 people have downloaded his moon *cough* Death Star! We meant to say Death Star.
- Where to find it? MyMiniFactory

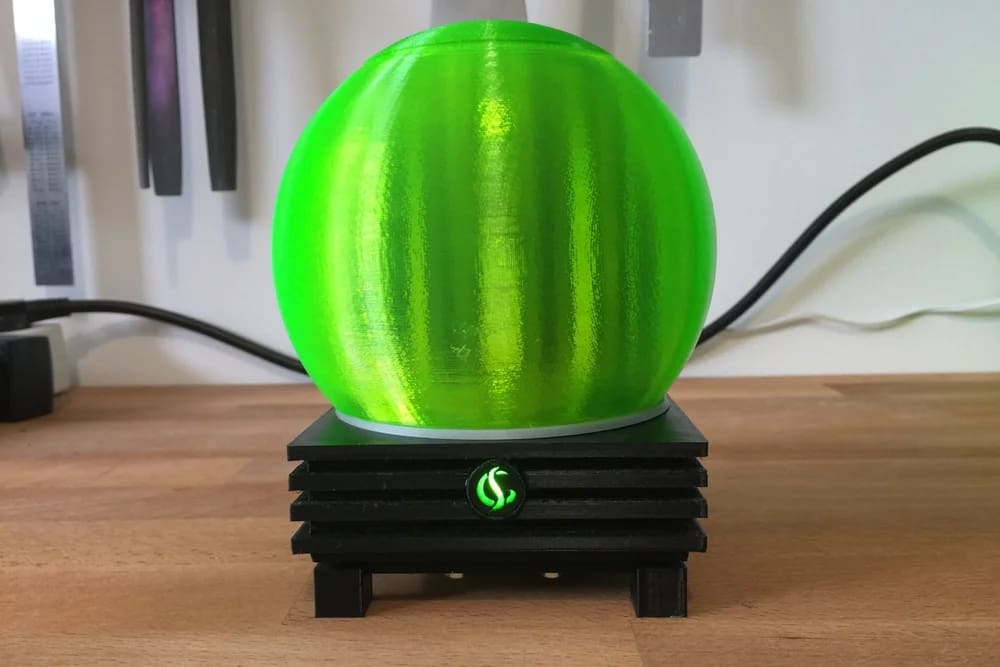
Borg Cube
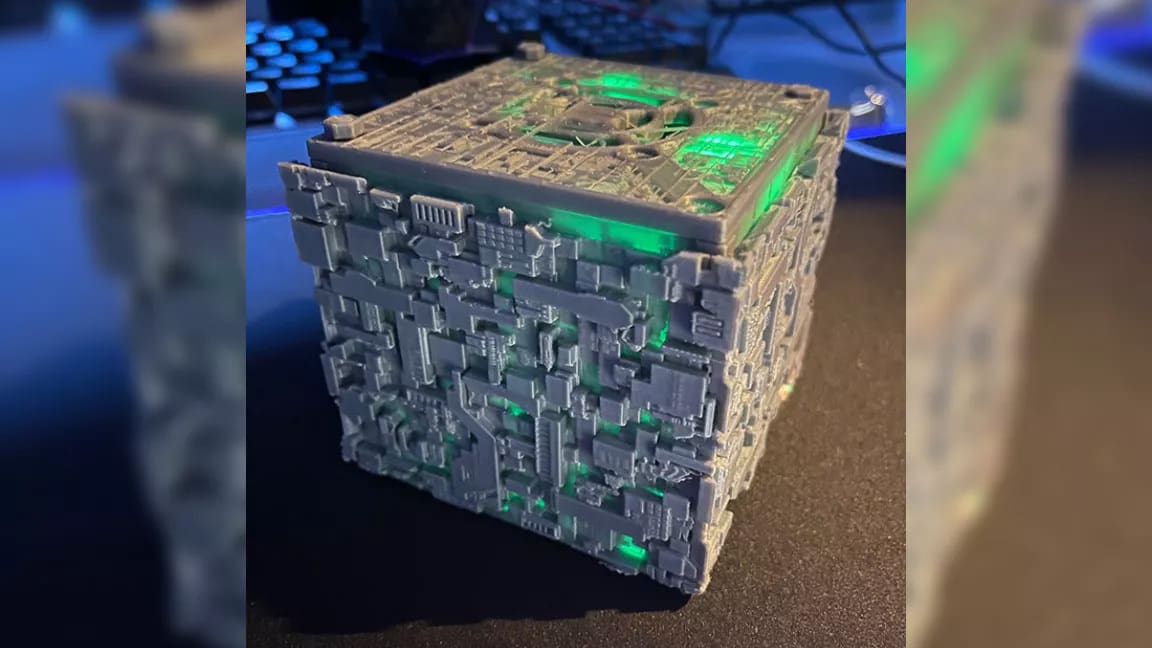
This Borg cube offers enough space to house a Raspberry Pi 4, and a 50-mm fan to cool down your Raspberry Pi. The cube shape has been assimilated from the Retrocube Case. If you want to give the case an otherworldly look, choose a fan with green LEDs – this will give your new mothership the eerie look of a Borg habitat.
With this detail, you won’t be surprised to find out that it was printed at a 0.18-mm layer height with supports and a brim needed along the way. Make sure to take some time to read the notes they have written for this Borg case.
- For Raspberry Pi: 4
- Who designed it? NCC74656J
- How printable/popular is it? Star Trek fans rejoice! With this Borg Ship getting over 16,000 views and over 2,600 downloads, the Borg is here to stay.
- Where to find it? MyMiniFactory
TARDIS
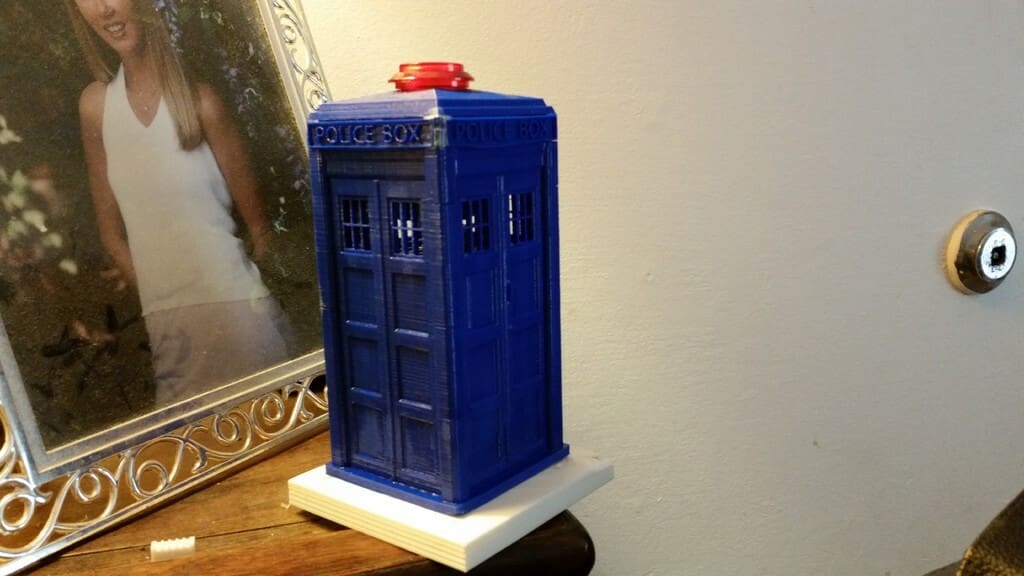
The candidate for Best Dad in the Whole Wide World ever goes to the designer of this Raspberry Pi 3 case to 3D print. First off, the maker’s teaching his son how to use Linux on a Raspberry Pi. Secondly, because his son is a massive fan of Doctor Who, he went ahead and designed and 3D printed an enclosure for the computer.
Just like the big blue box of legend, this father’s heart is bigger on the inside than it looks from the outside.
- For Raspberry Pi: 3
- Who designed it? Jason3030
- How printable/popular is it? This is a remix of an older Tardis design. It’s impressive for a remix to have 17 makes and 7 of its own remixes.
- Where to find it? Thingiverse
Pac-Man & Ghost
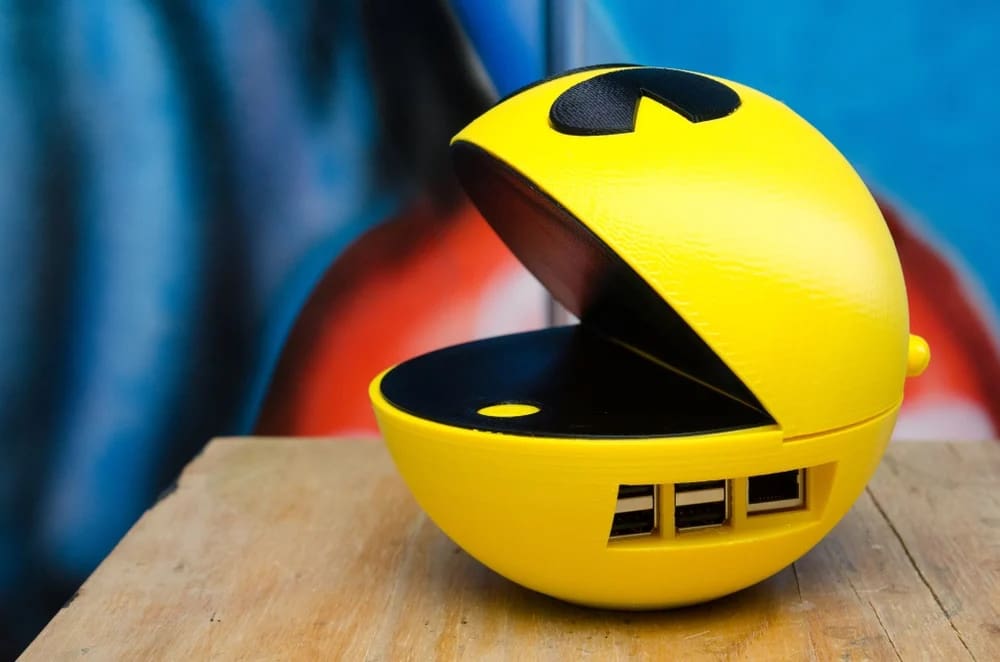
Gamers of a certain vintage will love these next two case designs. First, we have a colorful Pac-Man case that’s impossible to resist. Pac-Man is arguably the first-ever superstar icon of the 8-bit arcade era; the root cause of many a misspent youth on the mean streets of suburbia. And now he’s back in all his power-pill gobbling, ghost-chasing glory. But this time, he’s packing upgrades in the shape of a Raspberry Pi 3 board.
We also have a Ghost case inspired by the Pac-Man franchise, perfect for chasing our yellow hero around the maze. It’s a big Raspberry Pi 3 case to 3D print, and in no way is it intended to be discreet or go unnoticed. But it’s a simple design with large integrated vents in the folds of the ghostly undercarriage for ambient cooling. Add some acrylic paint for the eyes, and you’ve got yourself a ghost with the most.
Okama GameSphere
Oh my god, they… turned the Okama GameSphere into a case for the Raspberry Pi. All South Park fans will recognize this strikingly familiar model. Don’t miss out on your chance to own the greatest games console of all time!
- For Raspberry Pi: 3
- Who designed it? Leodym
- How printable/popular is it? The greatest fake console ever created is here with more than 360 downloads and over 12,500 views.
- Where to find it? MyMiniFactory
Video Games
Some of these offer a nice walk down memory lane. Even if you’re not using the Raspberry Pi for gaming, you can keep the spirit alive.
PlayingStation 5
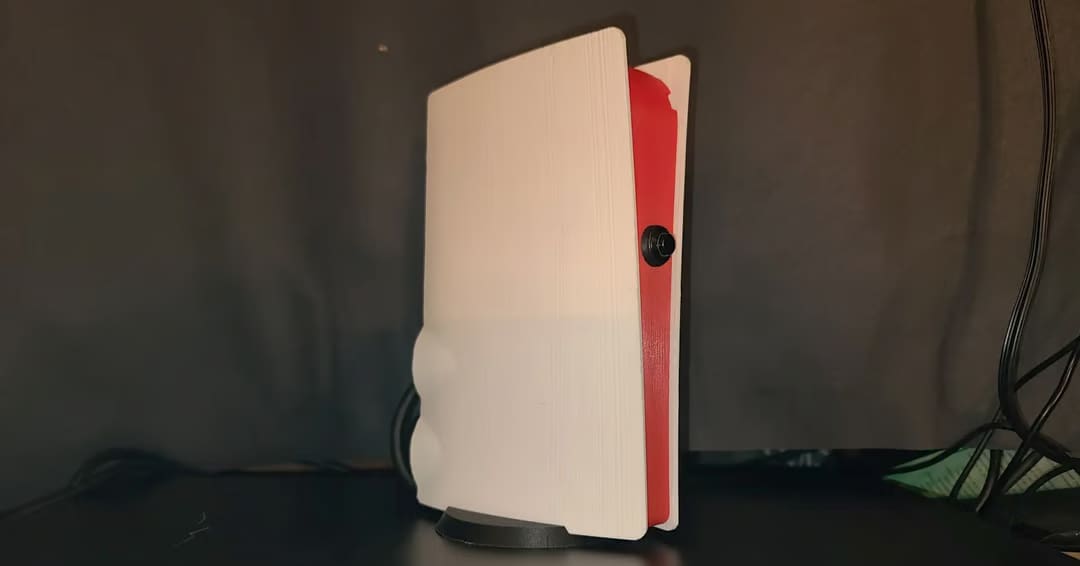
The Raspberry Pi 5 packs a powerful punch and can be used for some heavy-duty projects, such as a game emulator. With this case, you can transform your Pi 5 into a “PlayingStation” that can run the games you love the most. This is one of the longest builds on the list, but it’s worth it!
For this build, you’ll need some additional hardware, such as magnets, screws, and nuts. You can download the complete BOM from Printables, which also includes links to the correct parts to ease your research. If you need to modify the design, the creator has included the STEP file, too.
- For Raspberry Pi: 4, 5
- Who designed it? Ubermeisters
- How printable/popular is it? Almost 110 people have already downloaded this design and the creator has shared images of their finished console!
- Where to find it? Printables
π64
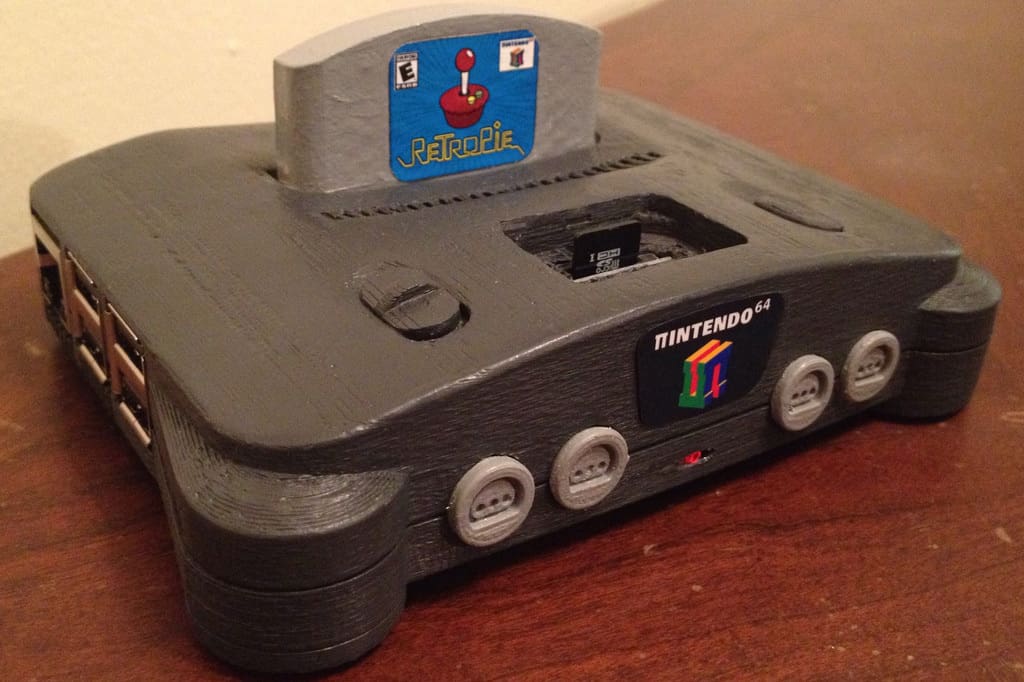
This case may hit close to home for a lot of the makers in the community. You might even remember that feeling of playing as the lovable plumber in 3D and being blown away by the graphics. Now, you can 3D print a Nintendo 64 from your house to be able to hold a quite capable computer that can fit in your pocket.
The maker gives credit to the iconic RetroPie and the other sources that aided them. The details are all there, including the parts you need, such as M2.5 6-mm screws down to the filament colors used.
- For Raspberry Pi: 4, 3
- Who designed it? elhuff
- How printable/popular is it? Long live this gaming system, as it’s still attracting love to this day. Over 2,600 likes make us believe we aren’t alone in that feeling, and the over 19,000 downloads, 24 makes, and 6 remixes appear to agree with us.
- Where to find it? Thingiverse
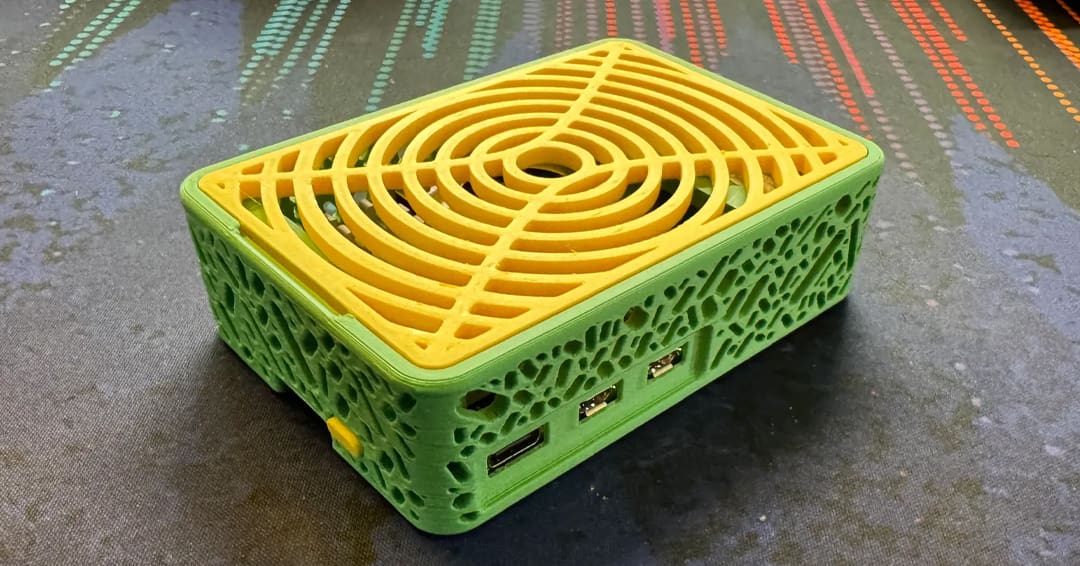
Retrocube
This case sacrifices some of its accuracies as a nostalgic replica to provide greater functionality. Because the Raspberry Pi 4 runs hotter than its predecessors, a housing with a big fan is desirable. Your Raspberry Pi 4 will be so safe in here that not even a certain Italian plumber could get at it.
Might we suggest painting the case? The looks can be elevated relatively easily with a quick once-over.
- For Raspberry Pi: 4
- Who designed it? Uncle_Gru
- How printable/popular is it? 19 people who were jumping over mushrooms to make this model and 9 people wanted to add a little love with a remix of the case.
- Where to find it? Thingiverse

PS4 Case
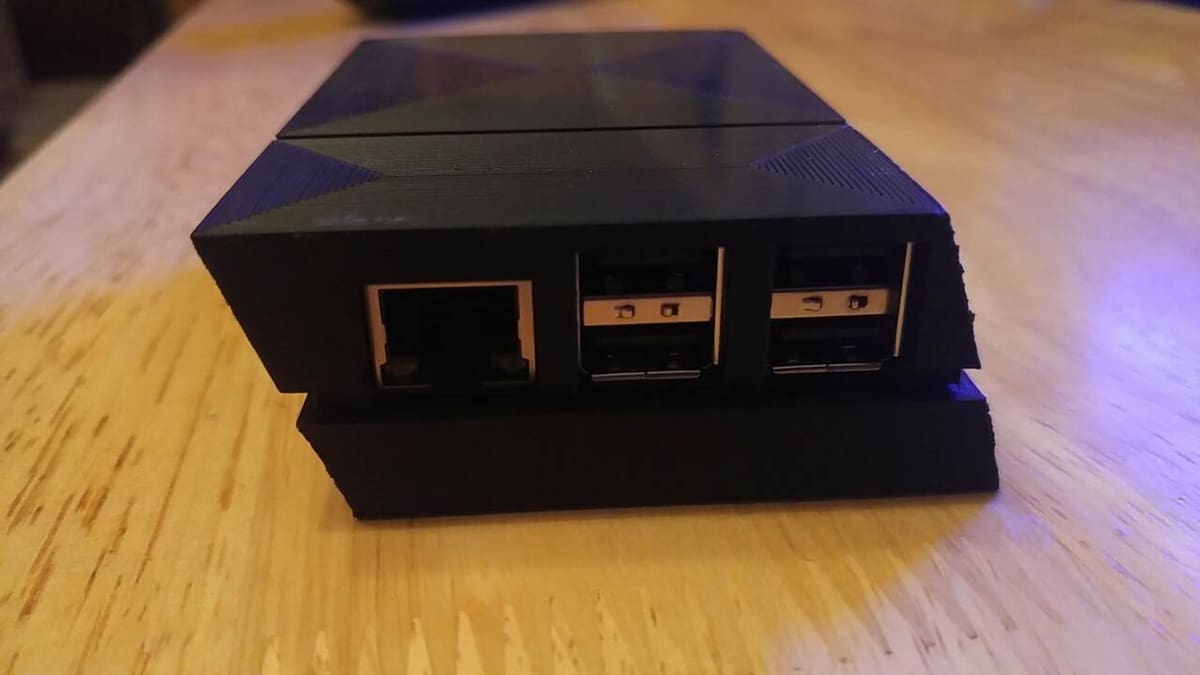
This imposing slab of angular black plastic looks like the spitting image of a Sony PlayStation 4. But in actual fact, it’s a custom Raspberry Pi 3 case to 3D print. Just don’t expect it to perform like a next-generation gaming rig, or you’ll be left sorely disappointed.
- For Raspberry Pi: 3
- Who designed it? Waynicus
- How printable/popular is it? The PS4 was a big hit and people have liked this design over 600 times. Nearing 40,000 views and over 4,000 downloads, we can say that this made people stop and look.
- Where to find it? MyMiniFactory
Mini NES
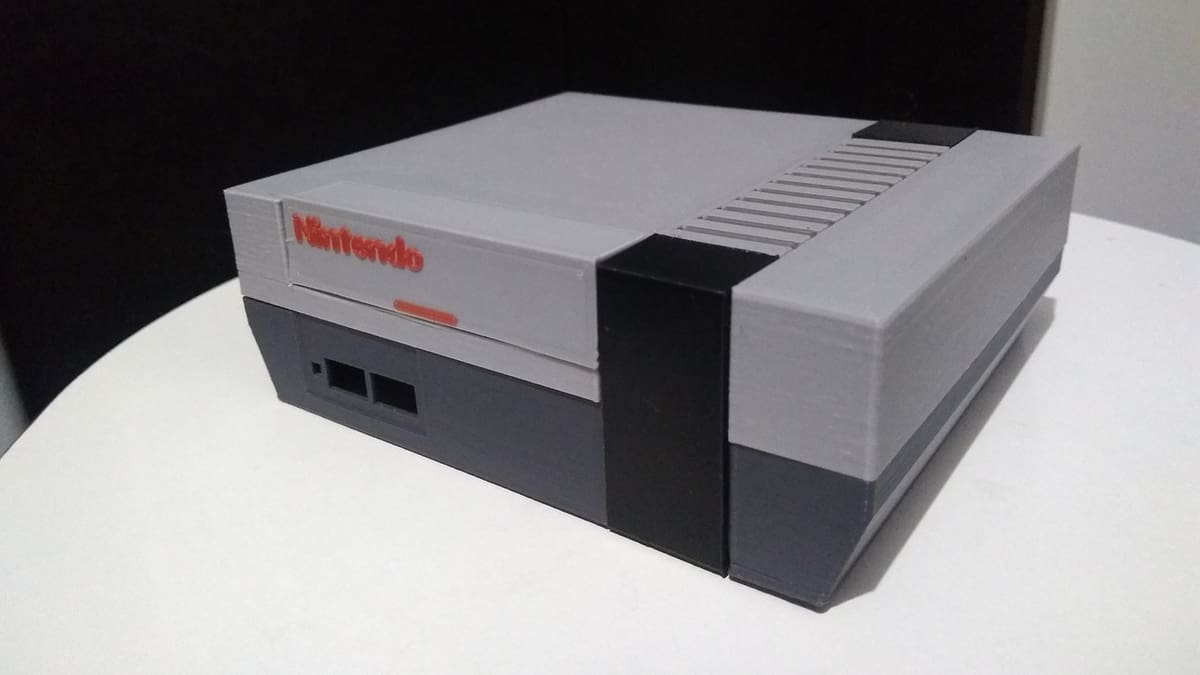
For those who couldn’t find an NES Classic Edition, here’s a viable alternative. Find a Raspberry Pi 3 case to 3D print in the shape of an NES, then install a game emulator such as RetroPie. It really is that easy, and costs a fraction of the money and aggravation it would take to find the official version. This isn’t a sermon, merely a pro tip to bypass scalpers who are capitalizing on supply shortages. Also, who could resist the chance to personalize their new NES with custom colors?
- For Raspberry Pi: 3
- Who designed it? xadow
- How printable/popular is it? With over 8,400 downloads and 4 makes, this Nintendo isn’t going anywhere.
- Where to Find it? Thingiverse
NES Cartridge Holder Case
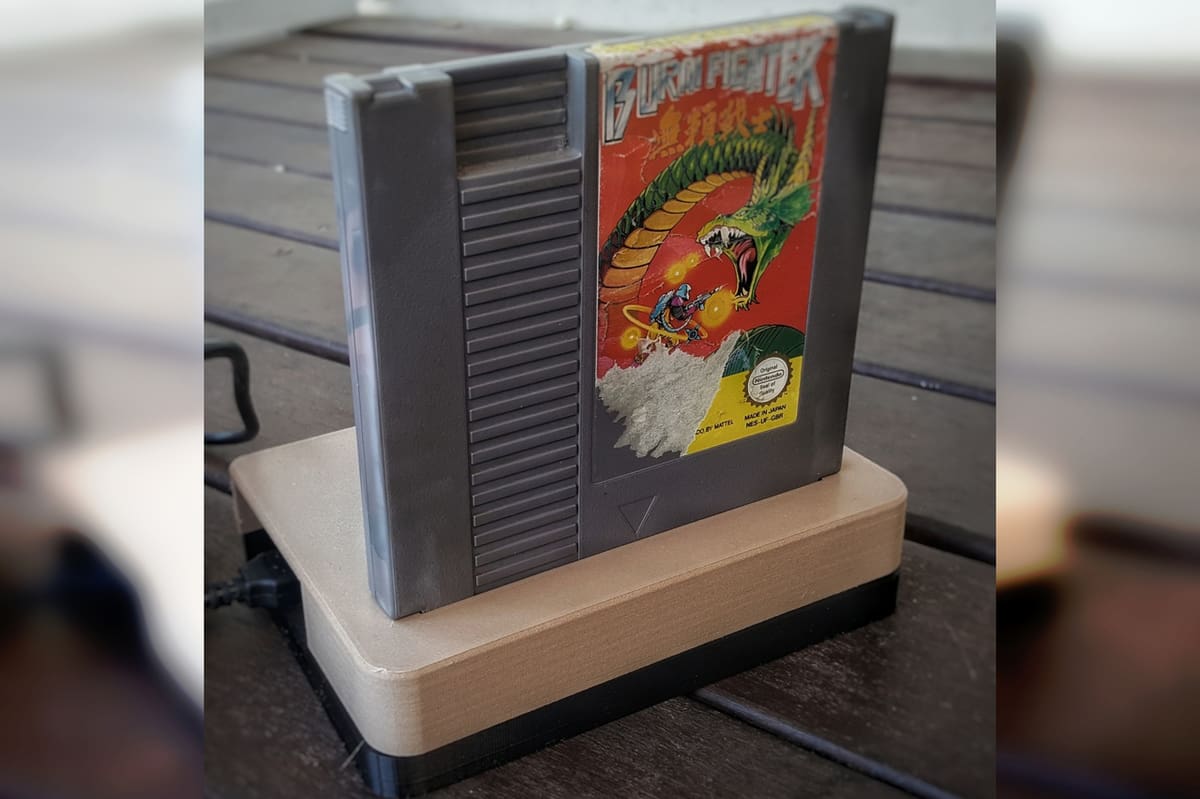
This is an interesting Raspberry Pi 3 case to 3D print, which kind of functions as elaborate camouflage. While it appears to be a display stand for a vintage NES game, in actual fact there’s a fruity computer concealed in the base and a hard drive concealed inside the cartridge. The two parts are connected to each other via discreet cabling.
It’s pretty damn clever, though upcycling the vintage cartridge means you won’t be able to blow on the connector pins like in days of yore.
- For Raspberry Pi: 3
- Who designed it? furnibird
- How printable/popular is it? With over 8,000 views and more than 200 downloads from this case, we can see this being nice desktop art that also happens to be a mini-computer at the same time.
- Where to find it? MyMiniFactory
Appleberry G5
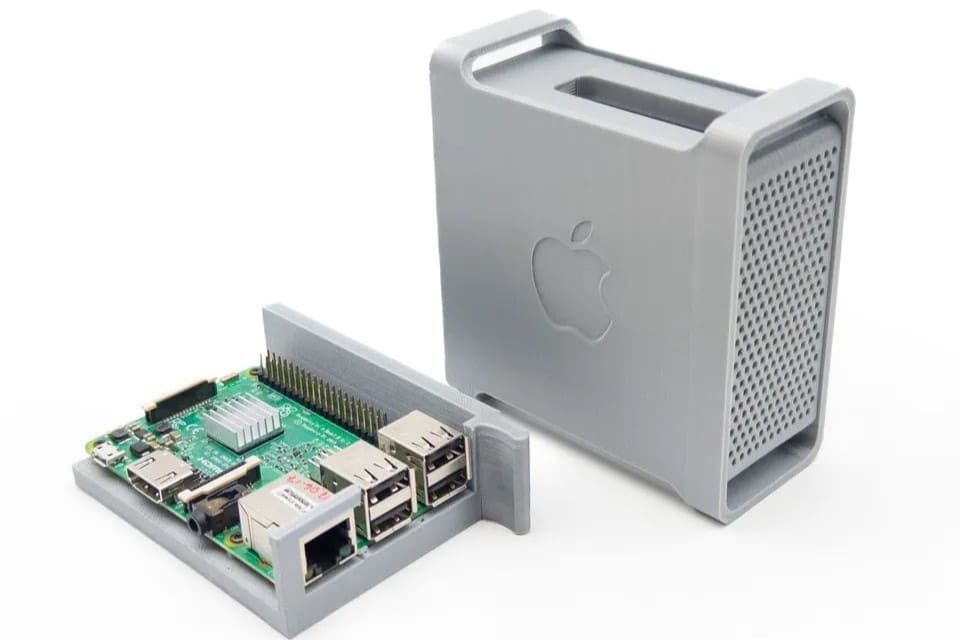
This next design is born of the union between two fruit-based computer creators, Apple and Raspberry Pi. The adorable enclosure is based on the original Apple G5 and Mac Pro, the case of which was affectionately called the “cheese grater”, for obvious reasons. It’s a very compact size for a novelty case, packing in both looks and functionality with the clever drawer-pull-like mount for the Pi.
The only hardware that’s needed is four M2 screws to secure your Pi to the inner part that slides into the case. The design also has slots in the outer case and inner slide for optional 5×3 mm magnets that secure the drawer slide with a satisfying snap.
- For Raspberry Pi: 4, 3
- Who designed it? MroznyHipis
- How printable/popular is it? This case has been a hit with Apple fans, with over 1,500 likes and more than 2,900 downloads so far.
- Where to find it? Printables
Stackable
Some makers are bound to have more than one Raspberry Pi, whether they’re all part of the same project or used for different things. With these options, you’ll have no issue keeping them all together.
Mini Server Rack
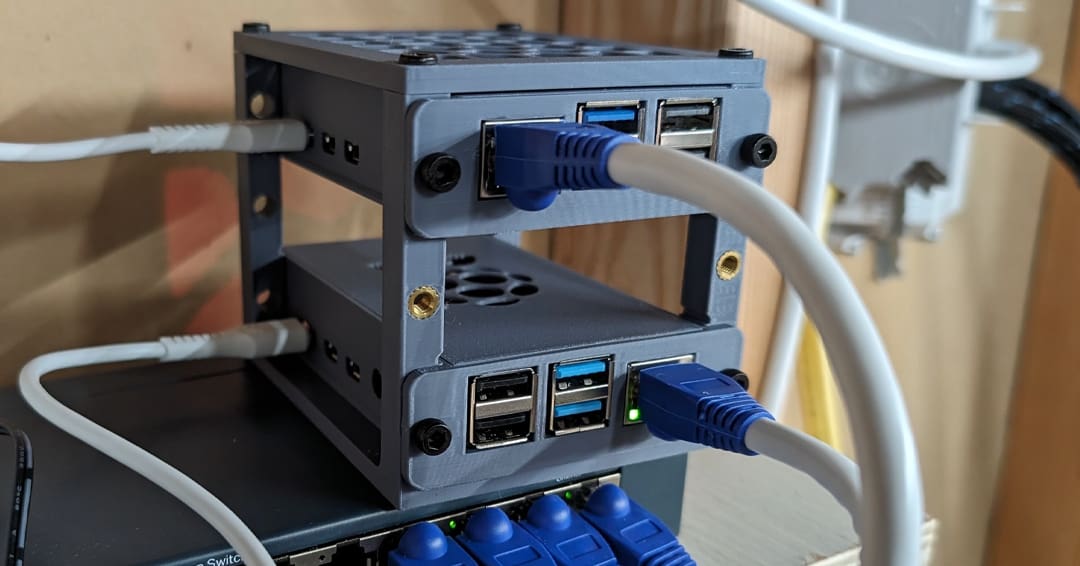
A server is a computer or system that provides a service to other computers, known as clients, over a network. Servers can do a lot of things, such as web or email hosting, file storage, video or music streaming, and much more. If you’re planning on putting your Pis to work as servers, you’ll love this model. This design allows you to stack up to three devices to create a powerful mini-server.
You can choose between two versions: the first uses threaded inserts, while the second is designed for threading the screws directly into the plastic. If you plan on disassembling and reassembling the server often, you should go with the first type.
The creator has written the instructions for the assembly, together with photos of the process to make the step-up crystal clear. The STEP file of the model has also been made available in case you want to modify it to add additional space for extra Pis, for example.
- For Raspberry Pi: 3, 4, 5
- Who designed it? jonthemiller
- How printable/popular is it? 150 people are interested in this project and have added it to their collection and around 90 have downloaded the files.
- Where to find it? MakerWorld
CustoBlocks
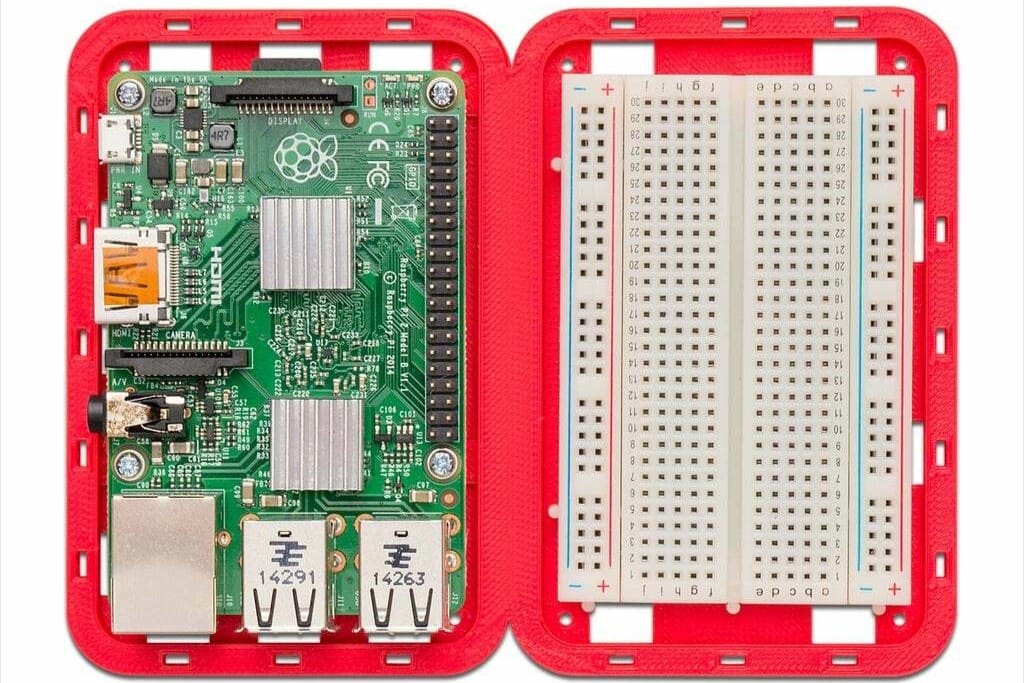
When prototyping circuits, a breadboard is a handy thing to have around. With this design, you’ll always have one close at hand! This design is infinitely expandable and connectable, allowing you to connect as many blocks together as you desire. The designer also provides blocks made for Arduinos as well.
In order to connect the pieces together, you’ll need some 10 mm M2 screws. The designer recommends a minimum of two per block connection. The only other required hardware is the self-tapping screws to secure the Pi or Arduino to the block.
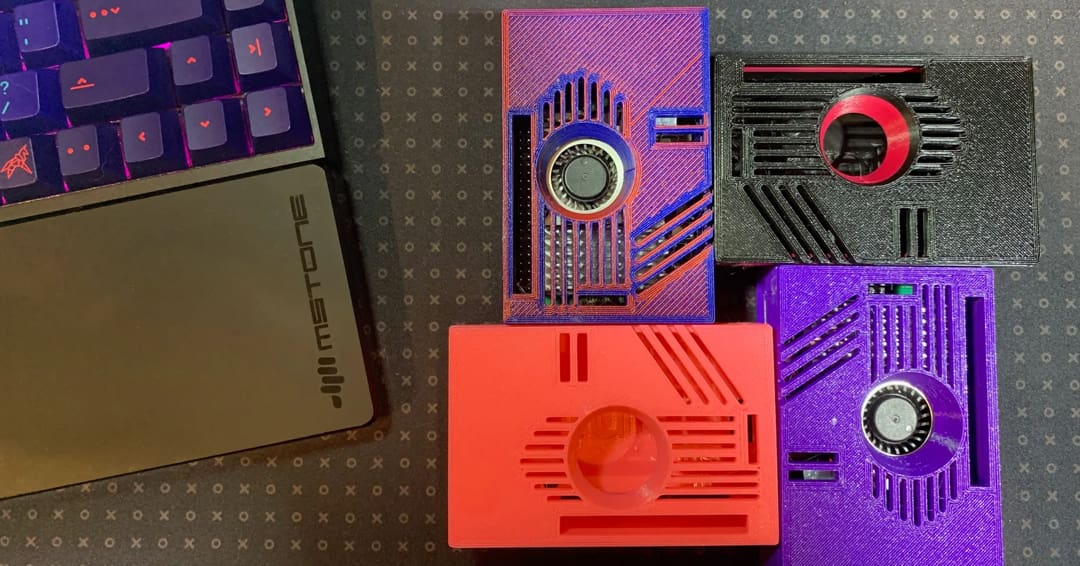
Mother of All Fan Brackets
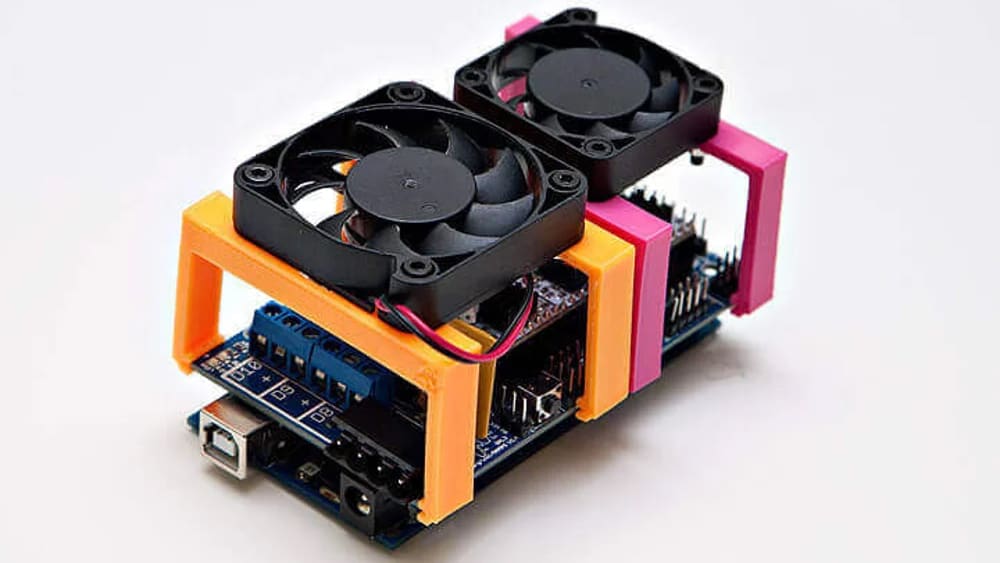
This is a case undoubtedly targeted at those who want to overclock their Pi and take performance to the next level. With an obvious focus on functionality, you can eliminate the chances of a sudden breakdown with the MOAB, otherwise known as the Mother of All fan Brackets. With this Raspberry Pi 3 case to 3D print, you can append not one but two fans to the unit, and they can be of varying sizes, too.
- For Raspberry Pi: 4, 3, 2, 1B+, and more! Just make sure you’re using the right dimensions.
- Who designed it? mgx
- How printable/popular is it? With 42 makes and 492 remixes, this is a popular design! Yes, you read that right, 492 remixes.
- Where to find it? Thingiverse
The PiRack

For a more industrial look, consider the PiRack. The primary benefits include unlimited expandability and entirely independent bays. If you have five racks and want to swap out one in the middle, there’s no need to take the other units apart. It’s strikingly similar to a server mounting tray, only much smaller and more compact. There are designs included for all models of Raspberry Pi.
The maker of this model has laid out a lot of detailed information to help you not waste any material or buy the wrong part. For instance, one of the mods has a screen that needs to be purchased, and he supplies you with the correct one to buy for that rack. Then he tells you to toss out the instructions that come with it! Don’t worry, he supplies a guide of his own for you to follow.
- For Raspberry Pi: 4, 3, and Model B+, Zero W
- Who designed it? rustlerustle
- How printable/popular is it? The maker of this project gave out the FreeCAD files to let people modify things to their preferences. This seems to have gone over well with 5 makes and 10 remixes to date.
- Where to find it? Thingiverse
RPI Modular Cases & Cluster
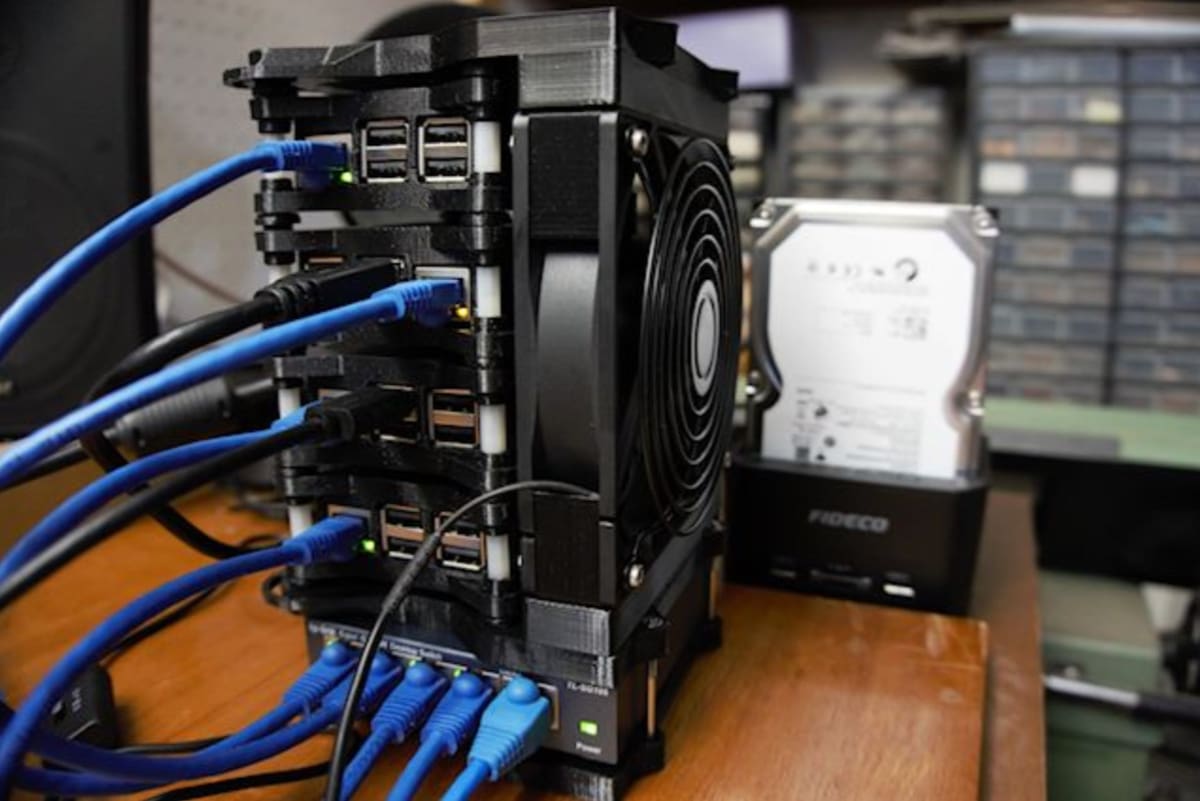
Many different cases hold multiple Raspberry Pis, but this setup begs the question, “Why not even more customizability?” And boy, does it answer! You’re able to have all four generations of the Raspberry Pi’s mounted on top of each other, but it doesn’t stop there either!
The maker of this model has eight different modular designs, ranging from a covered rack and a slim rack to ethernet switches and PSU racks. This design is well crafted and loved by many, and we agree. We bet you can’t wait to see when the community adapts it once more for the Raspberry Pi 5. We can’t.
- For Raspberry Pi: 4, 3, 2, and Model B+
- Who designed it? Andrew_Overby
- How printable/popular is it? While the project has 50 files to choose from, over 10,000 people have downloaded them. Nine makers have shared their prints.
- Where to find it? Thingiverse
1U Rack-Mount Bracket
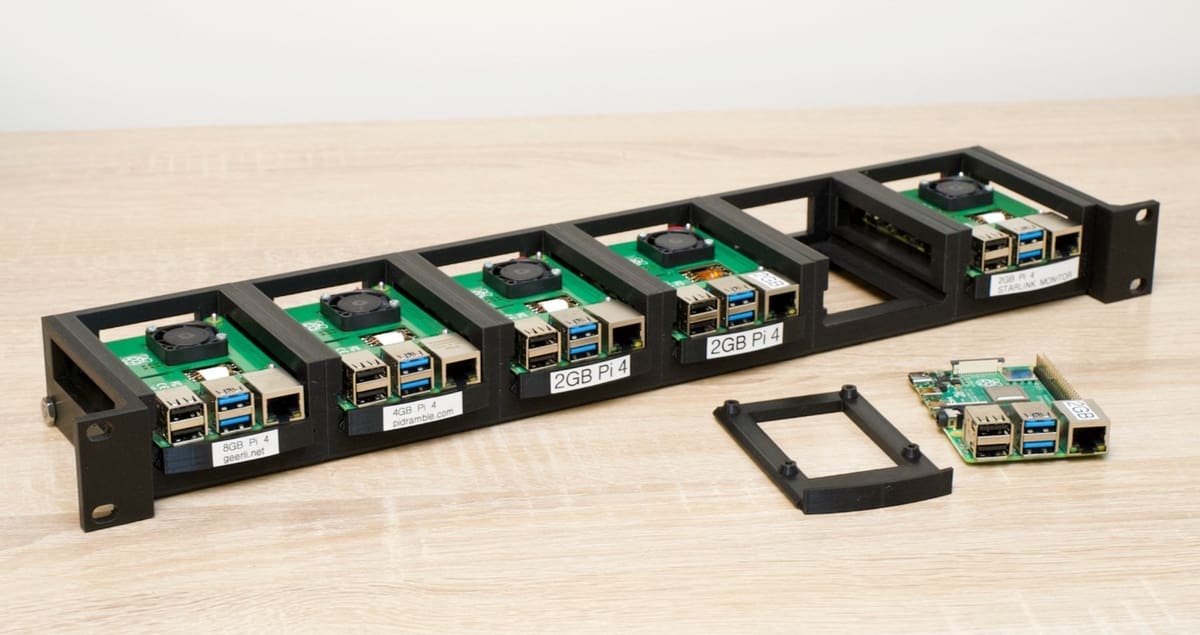
This bracket allows you to mount up to six Raspberry Pi 4s in a standard 19-inch server rack. There are two versions available (1U and 2U). You can also power your Pi cluster via Power Over Ethernet (PoE). Print the frame, ear, and tray parts, assemble everything, and start crunching those numbers!
- For Raspberry Pi: 4
- Who designed it? russross
- How printable/popular is it? You can feel the enthusiasm from the community, and it proves itself with an impressive 20 makes and 42 remixes!
- Where to find it? Thingiverse
License: The text of "50 Cool Raspberry Pi Cases to 3D Print" by All3DP is licensed under a Creative Commons Attribution 4.0 International License.