PLA Not Sticking to Bed: 6 Simple Solutions

When it comes to printing in PLA, not sticking to the bed is a common issue. Read on for six simple solutions to this problem!
If you know anything about 3D printing, you probably know PLA, the most popular 3D printing filament out there. While PLA is known for its ease of use, sometimes it comes with printing issues that can make achieving great prints a struggle.
Challenges with the first layer deserve particular attention, as a good first layer is the foundation for a successful print. In order for successive layers to print properly, the first layer needs to stick to your printer’s build surface. This is known as bed adhesion in the 3D printing world.
This common problem can be annoying, but it’s also easy to fix. In this article, we’ll go over a few different ways to make your first layer of PLA stick to the bed. Since these solutions aren’t exclusive to PLA, feel free to use them with other filaments.
Level the Bed

As for most 3D printing problems, leveling the bed should be your first go-to solution. Bed leveling is the process by which you adjust points on your build surface so that they are flat and level. An unlevel bed can cause filament to stick in one area but not others.
There are two main ways to achieve a level bed: automatic and manual leveling.
Automatic leveling is a built-in feature for most current 3D printers. It involves a sensor or end-stop switch that calculates compensation values so that the printer’s nozzle is the same distance from the bed everywhere. Auto-bed leveling is easy: Simply run a sequence from your 3D printer or, if you’re slicing with a program like Bambu Studio connected to a Bambu Lab printer, make sure that the option’s checked before printing. It’s also possible to run auto-bed leveling on older printers by adding a sensor or end-stop switch.
Manual leveling, more common on 3D printers from previous generations, involves handling knobs under your print bed to make sure the surface is level. To manually level your bed, start by bringing the printer nozzle to its home position. Then, use the manual bed leveling sequence and make sure the nozzle is the same distance above the bed at all points. It’s easier than it sounds, and you can find guides for specific machines, like Creality’s Ender 3 (V2/Pro).
A final head’s up: Because the latest generation of 3D printers is designed around advanced leveling and calibration features, they often miss knobs and other manually adjustable features. This makes manual leveling on these newer machines a little more complicated.
Change the Z Offset
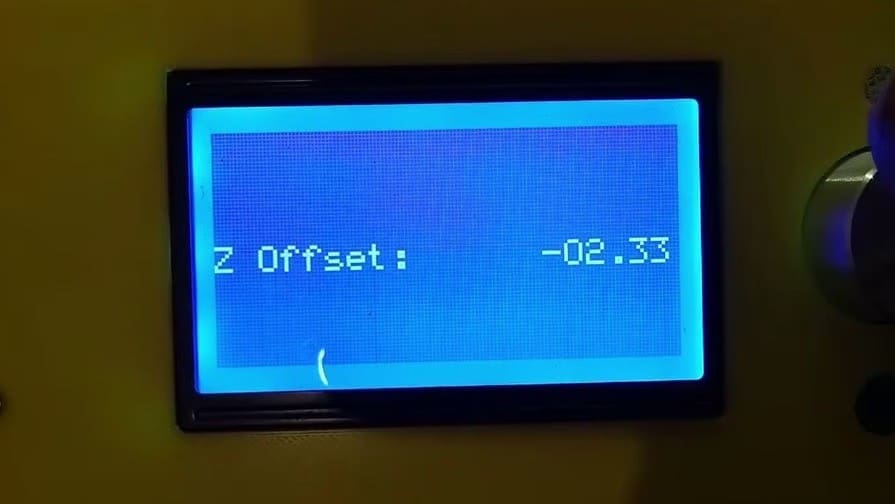
Even if you have a level bed or a set of compensation values from an automatic bed leveling sensor, a bad Z offset can still cause poor bed adhesion.
If you’re unfamiliar with the term, Z offset is the distance between the nozzle and the home position of the Z-axis. A poor, unturned Z offset will cause the nozzle to be either too far above the bed or too close. Both will negatively impact how the PLA is extruded, potentially damaging your bed.
To find a functional Z offset for good bed adhesion, you have to adjust the Z offset value and test it. While the testing process can be repetitive, it’s worth the effort.

Clean the Bed

A dirty bed can cause poor first layer adhesion because dirt and grime can make the surface uneven. While it may not be visible, oils from your hands, dust, dirt, and more can often remain on your print bed. If you’re using an adhesive like glue or painter’s tape, leftover residue or an uneven or damaged tape strip can also be problematic.
Cleaning the bed is easy. All you’ll need is a damp cloth to wipe down the bed. Just make sure to dry the print surface afterward because water may also limit bed adhesion. If any residue is still stuck, you may want to try using acetone or an unscented IPA in a concentration of over 70%.
It’s important to keep in mind that not all cleaning products or methods can work with all beds, given that these can be made of different materials that react differently to the particular agent. Cleaners like acetone can damage plastic-based surfaces like PEI sheets, whether smooth or textured. And even when cleaning glass beds, it’s best to take a cautious approach, diluting the acetone with water, and trying it out in a small area.

Use a Bed Adhesive

If you’re not already doing so, you may want to try using an adhesive substance on your build plate to enhance bed adhesion. Bed adhesives can be vital in laying down a good first layer. Specifically, they allow the melted filament to stick to the surface better and stay down throughout the print.
There are many options for bed adhesives, including sheets that cover large portions of the print bed, like Kapton or painter’s tape, or DIY options like glue or hairspray. You can also use advanced, purchasable special adhesives, including 3D Gloop! or Magigoo.
When applying adhesive to your print bed, be sure to apply an even layer over the build plate. If you’re using hairspray, the bed should feel sticky to the touch. For adhesives, remember that more is not always merrier. Too much adhesive can worsen problems if leftover residue remains on the bed after a print.

Adjust Slicer Settings

After addressing the mechanical issues, the slicer should be the next place you turn your attention. A few different slicer settings can affect bed adhesion for the first layer, including bed temperature, first layer printing speeds, and adhesion assistants like a brim or a raft.
When adjusting your slicer settings, try not to change more than one setting at a time. Otherwise, it’s hard to identify which setting is responsible for fixing the problem.
Bed Temperature
The correct temperature can be instrumental for good bed adhesion. For PLA, start at 55 °C, and as needed, raise the temperature in increments of 5 °C up to 70 °C. You might have to bump up the print bed temperatures by about 5 °C during colder seasons and cold snaps depending on how cool the room where your 3D printing setup is. This can be especially in the case if, for example, your printer is in a garage without heating or good insulation, and it’s especially true for 3D printers without an enclosure. Make sure, however, not to set the bed temperature too high because this can cause difficulty with removing parts.
If you don’t see better results after setting the bed temperature to 70 °C, your solution probably lies in other settings.
Print Speed

The next setting you should adjust is print speed. There are two ways of going about this: special speed profiles and default print profiles.
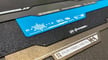
For the former, if you’re slicing in Bambu Studio and are connected to a Bambu Lab printer, under the “Device” tab, you can find the options of “Silent”, “Standard”, “Sport”, and “Ludicrous” speeds. These, highlighted in the image above, appear once you’ve sent the model to be printed. Alternatively, you can find them on the printer’s display screen. The idea is to start by trying a slower print profile, like “Standard” or “Silent”.
If this didn’t help, it’s time to focus on the first or initial layer print speed setting, which can be found in the general options before you slice the model. In Bambu Studio, for example, the initial print layer or first print layer speed settings are found in the “Prepare” tab, under “Speed”. No matter what slicer, it’s usually set in millimeters per second. Then, set your first layer speed to 25 mm/s and adjust in increments of 5 mm/s as needed.

Brim & Raft Settings
Another setting you may want to change to improve the first layer is an adhesion assistant, such as a brim or a raft. Some slicer settings default to using a skirt, which is helpful to detect issues prior to beginning a print. However, a skirt doesn’t support bed adhesion for the print itself; a brim or a raft would be a better choice.
A brim is a perimeter that goes around and attaches to the print, and a raft is an entire base structure that’s printed before your print to go underneath. A raft consumes a fair amount of material, especially if your print is large. For this reason, we recommend starting with a brim and then trying a raft if that doesn’t work.
Change the Build Plate

As a last resort, you may want to swap out your build plate. That’s because some build plates, especially cheaper ones, fail over time as they can warp and have permanent bends in certain areas. Warped or damaged beds are hard to level, making bed adhesion a problem. Getting a new build plate made of premium material can help you achieve good bed adhesion.
There are many options for the material of a print bed. For example, you can get build plates made of steel (like Prusa’s sprint steel sheets), glass, and polypropylene, among many other materials. For glass, you have a range of different types, including borosilicate glass (Comgrow) and even ceramic glass (NeoCeram).
In addition to the material, you can also get beds with special features or abilities. For example, there’s a wide range of flexible and magnetic build plates available (like BuildTak’s FlexPlate system), not to mention smooth and textured beds.
There isn’t one single best type of build plate because each bed is good for different things. For PLA, tempered glass and smooth spring steel build plates are magnificent options with good performance.
License: The text of "PLA Not Sticking to Bed: 6 Simple Solutions" by All3DP is licensed under a Creative Commons Attribution 4.0 International License.