PrintMon Maker: Create & 3D Print with MakerWorld

MakerWorld's PrintMon Maker is a handy tool that helps you create 3D printable models easily. Read our tutorial on how to use it!
Unless you’re super new to 3D printing, odds are you’ve heard about Bambu Lab and its 3D model repository, MakerWorld. But more than just models, MakerWorld hosts tools, and one of the latest additions is PrintMon Maker: an AI-powered creature generator.
If you’re not the best at designing or you’ve got ideas but don’t know how to make them a reality, or maybe you’ve got limited time and funds to develop your skills, this tool lets you create digital models based on either a written prompt or an image.
The designs are in the style of cute animated creatures or objects, so if you’re looking for more realistic depictions, other text-to-3D model generators might be more interesting to you.
Below, we’ll go over how to create and tweak text- and image-based models on PrintMon Maker, from conception to slicing to printing. We’ll share a few headaches suffered along the way, plus tips and warnings to make the most of it.
Let’s take a closer look at how it works.
Getting Started
Accessing PrintMon Maker is as easy as can be expected.
- Go to MakerWorld.
- Click on the MakerLab tab.
- Scroll down until you find the “PrintMon Maker” tool and click on “Start”.
You’ll be prompted to log in or sign up. This is because transforming the digital designs requires credits, which you can earn by purchasing them with your MakerWorld points. Which, in turn, you earn by uploading models, receiving boosts from other makers, and reviewing print profiles, among other activities.
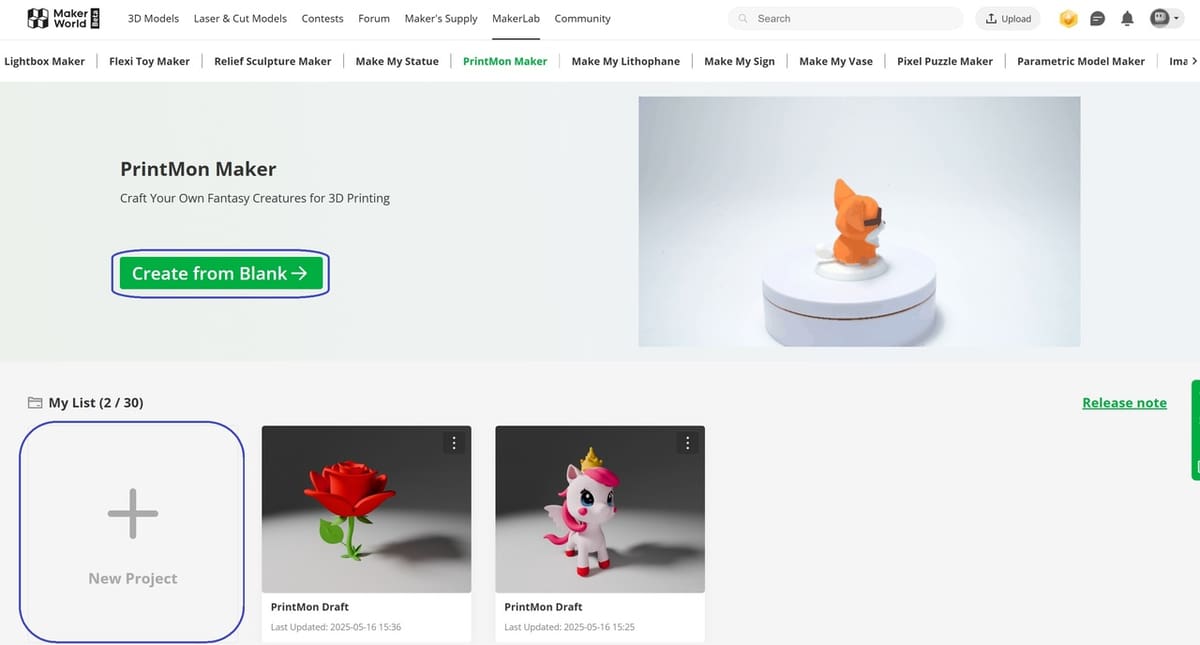
Once you’ve logged in or signed up, you’ll be in your PrintMon Maker profile. From here, you can get creative by either clicking on the “Create from Blank” button or the “New Project” box. As you can see above, any designs you’ve already created will be listed here so you can access them as necessary.
Once you start a new project, you’re led to the platform where you can choose from two tabs: “Create from Text”, and “Generate from Image”. We’ll go over how both work, starting with how to create based on a text input.
Text-Based Creation
There are two options for creating a PrintMon based on text: You can input your own or you can click “Random Text” at the top of the text box.
1. Designing
For our example, we’ve created a specific idea we had in mind.
- To start with, you’ll want to write what you’re after. In the text box, we wrote “A winged unicorn wearing a crown”. We didn’t specify colors or any additional features. While there’s a 300-character limit, we wanted to keep things simple.
- Then, click “Get a Concept” and let PrintMon Maker do its thing.
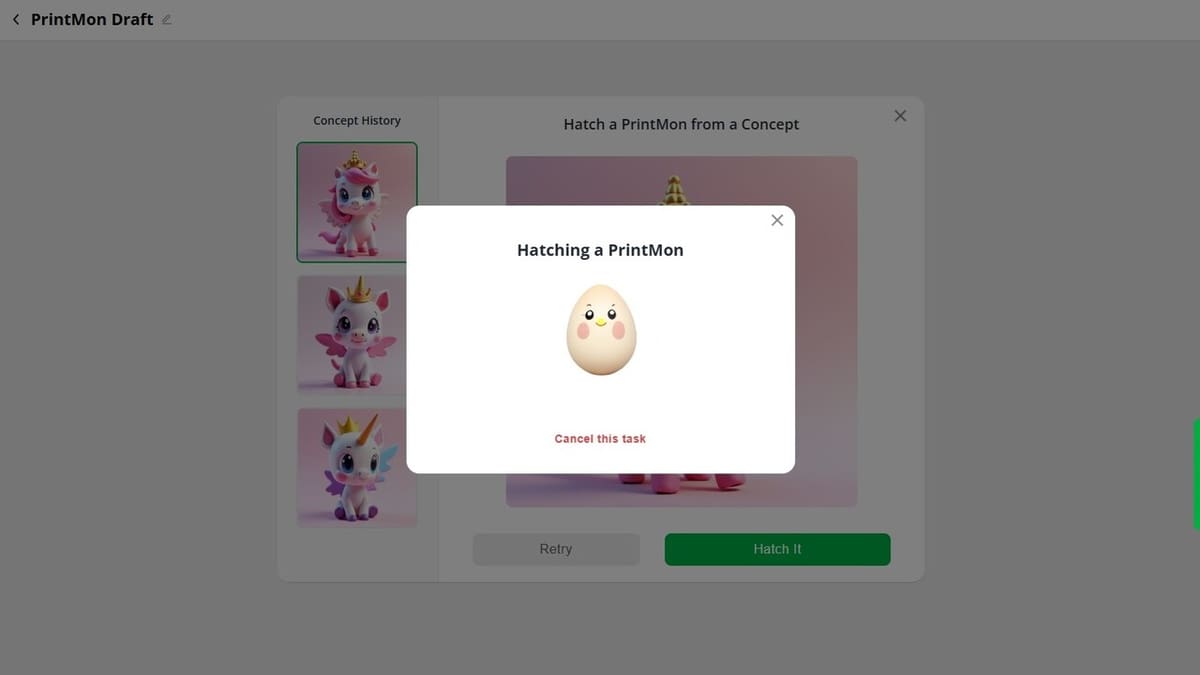
- You’ll be shown the model, and you can decide whether you’re ready for it to “hatch” or if you’d like PrintMon Maker to give it another go. Because the first model didn’t quite work with us, we clicked on “Retry” and saw two more drafts before we thought it worked well enough with what we had in mind.
- Next, click on “Hatch It”. A message will pop up letting you know that it’s being created.
- Once it’s ready, you’ll have the possibility of retrying the “hatching” or confirming that it’s the model you want to work on.
2. Hatching the Design
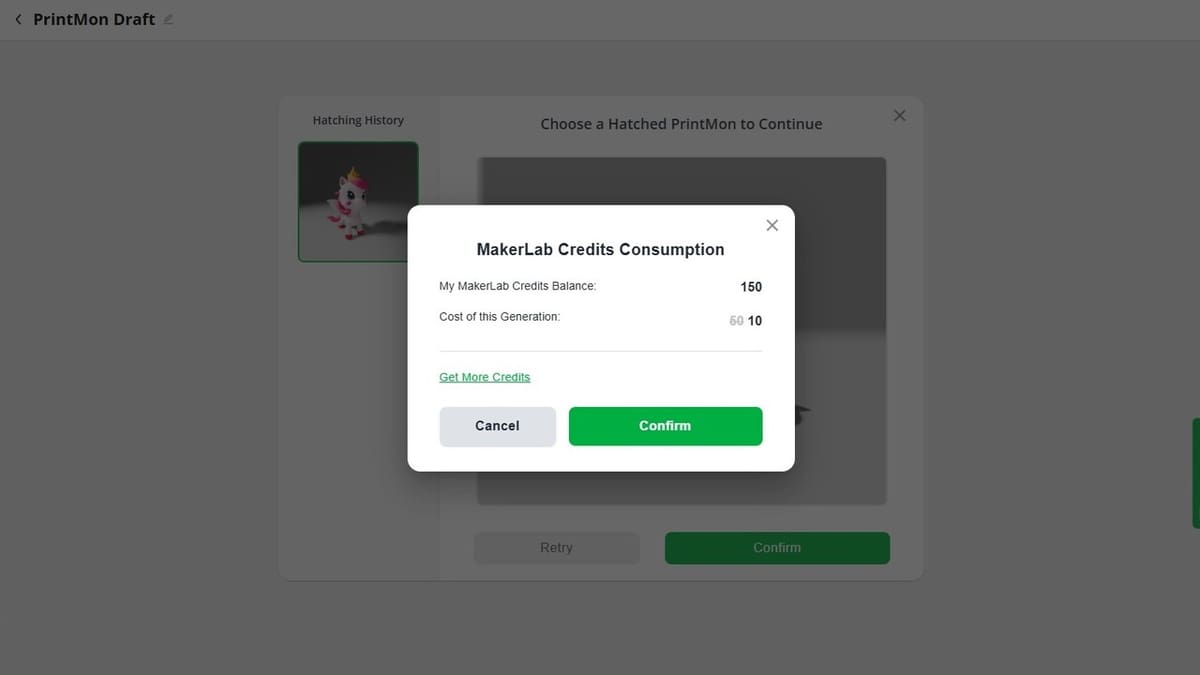
- If you’re on board with the model, a message will pop up letting you know what your MakerLab credits balance is and how many credits you’ll need to generate the model. If you don’t have enough credits, there’s a prompt for you to get more credits directly.
- Once you’ve confirmed the generation, a pop-up box will appear, letting you know how long it should take for the model to be created.
- The model will next appear in the “Design” section, so that you can work a few more details before exporting it.
3. Working on Colors
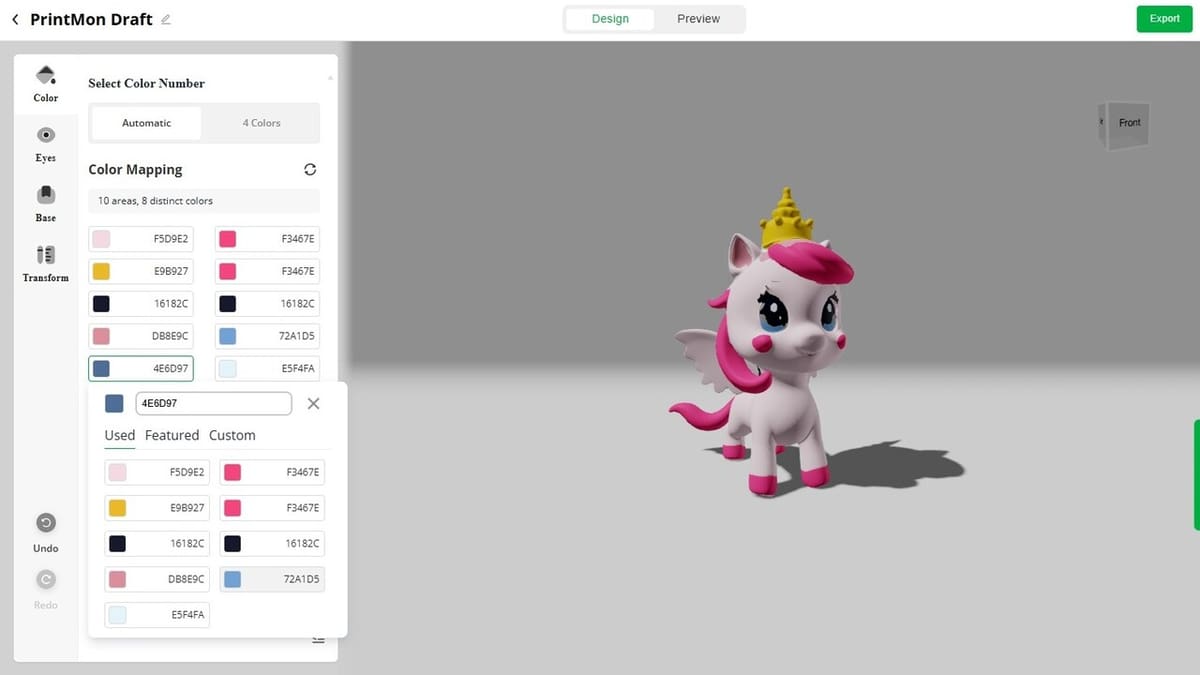
Depending on your 3D printing setup, the number of filaments you have available and their colors, you can tweak your PrintMon’s colors. For example, you might want to print the model all in white so that you can then paint it yourself.
Or, if you have an AMS with, for example, only four colors, you can click on the “4 Colors” tab. A message will pop up asking to confirm the choice, because if you’ve made any changes beforehand, they won’t be saved. Then a version of the model with a simplified color scheme will appear.
Otherwise, you’ll have a list of the specific colors each part has, and if you want to narrow down the options or replicate one color for a different part, you can simply click on it and choose the alternative from the drop-down list.
Another option is to make the whole part white (or in one color), and once it’s imported to Bambu Slicer, to add the colors.
4. Changing the Eyes
There’s also the option to change your PrintMon’s eyes by selecting a different template. To try it out, replicate the following steps.
- Go to the “Eyes” tab on the left of the options.
- Toggle the “Use Eyes Templates” button.
- Click on the “Eyes X” (‘X’ stands for a number) and from the drop-down list, select the template you want.
- Change the sclera, eyes, and highlight colors to meet your preference.
- If you want to, toggle the “Print Eyes Separately” button.
5. Adding a Base
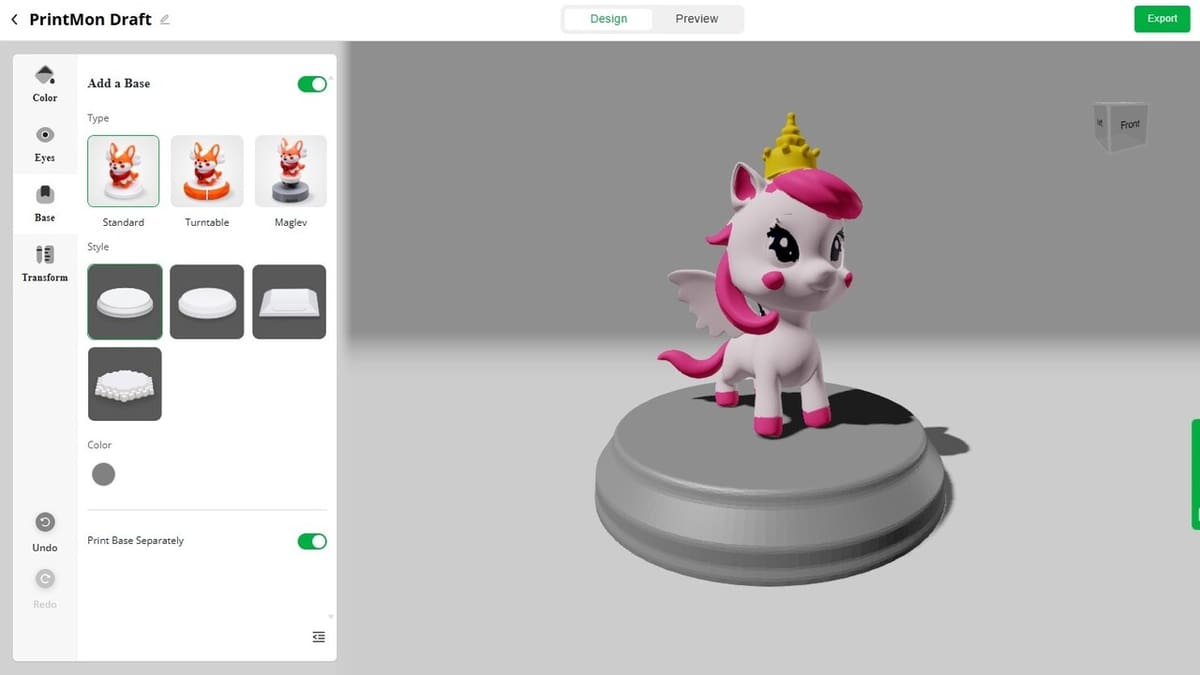
Once your model has the color scheme you want, you can choose to add a base.
- Click on the “Base” tab on the left.
- Toggle the “Add a Base” button.
- Select the type of base from “Standard”, “Turntable”, and “Maglev” and choose a style. For the latter two options, you’ll need to purchase the Rechargeable Power Kit or Magnetic Levitation Kit (PrintMon Maker Edition) from MakerWorld, respectively.
- Choose the color for the base you want.
- If you want to, toggle the “Print Base Separately” option.
6. Transforming
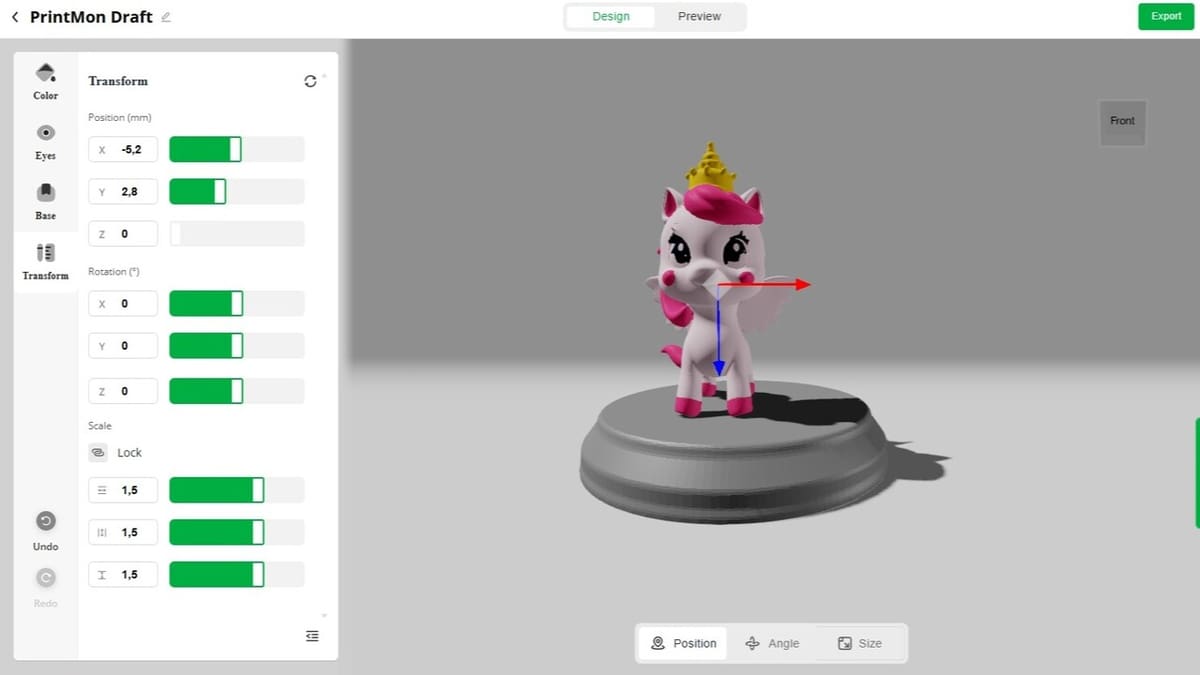
Under the “Transform” tab on the left, you can change the position, rotation, and scale of the PrintMon. This can be especially useful if you want to move the model to a different place on the base or if you want to change any of its general attributes.
When it comes to scaling, you can also opt to lock the proportions as they’re worked on, so that the model is uniformly scaled up or down.
7. Exporting
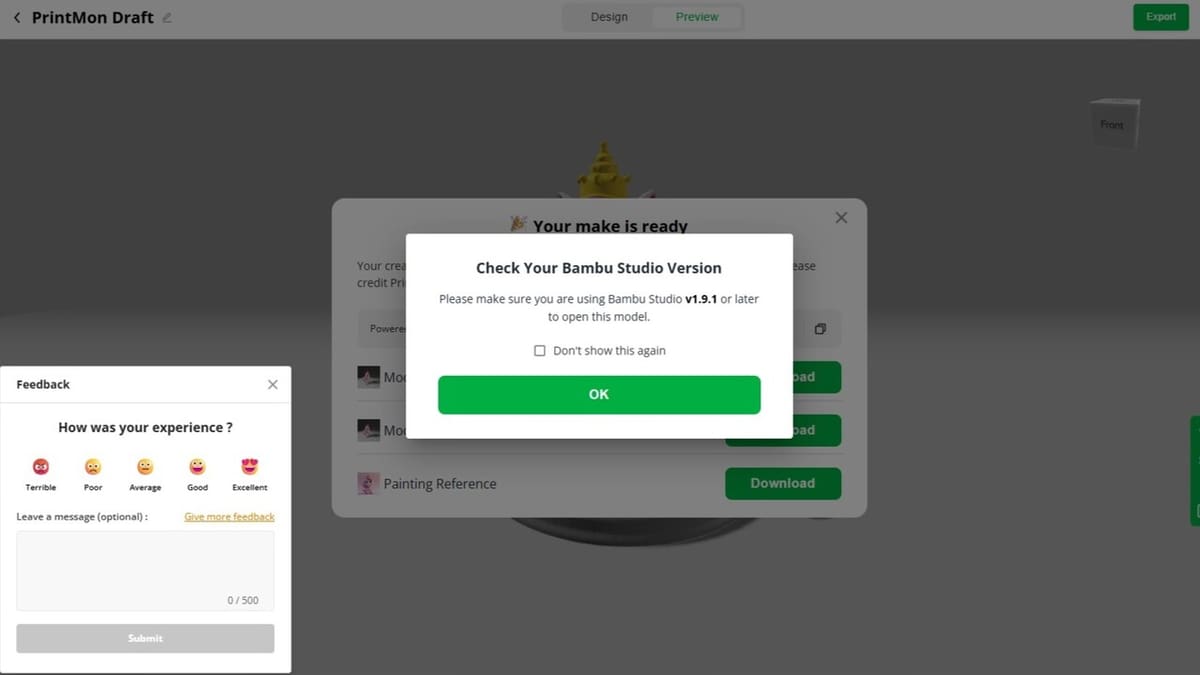
With your 3D model ready to find its way to reality, click on “Export” on the top right of the screen. A pop-up message will appear, letting you know that you need v1.9.1 of Bambu Studio to open the design.
You’ll be able to download three different files: a 3MF, an OBJ, and a painting reference in PNG format. Again, depending on your 3D printing setup, choose the file that’ll meet your requirements best and import it to Bambu Studio.
8. Slicing in Bambu Studio
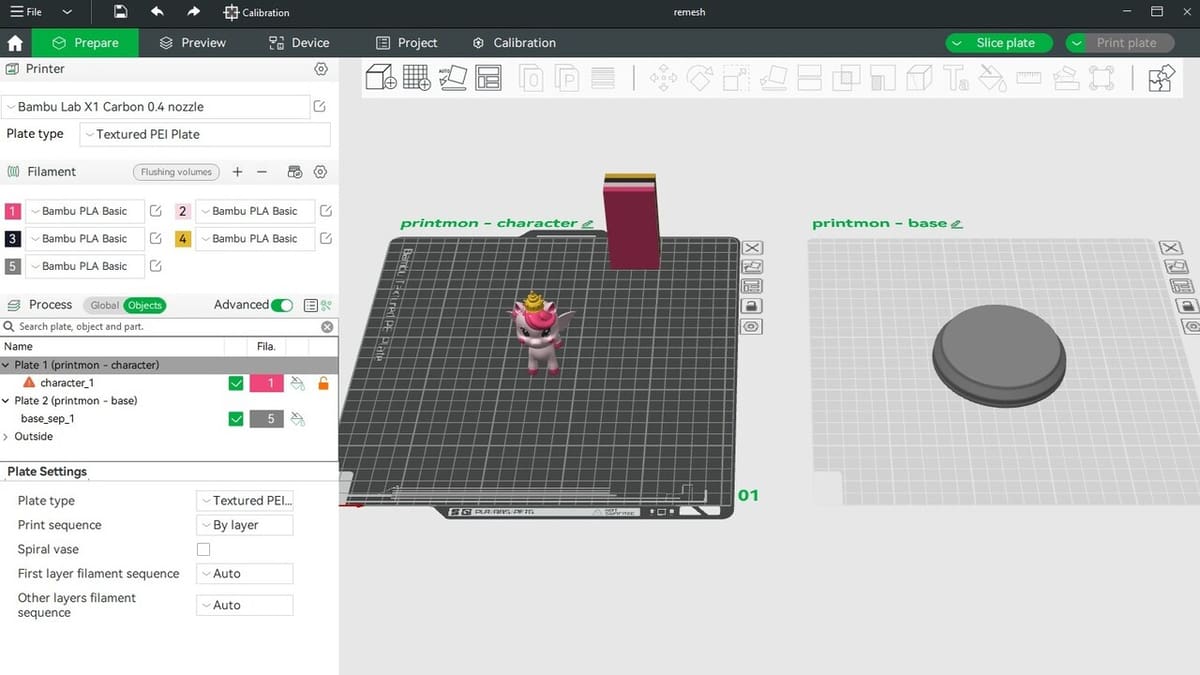
The model will import according to the settings and features you’ve enabled earlier (e.g. whether the base will be part of the model or if it’ll automatically be added to a different plate, as seen above).
Then, it’s a matter of 3D printing as normal:
- Select the 3D printer, plate type, and filaments in your setup.
- Change any of the settings (e.g. layer height, infill, supports), as necessary.
- Slice and preview the print.
- Print!
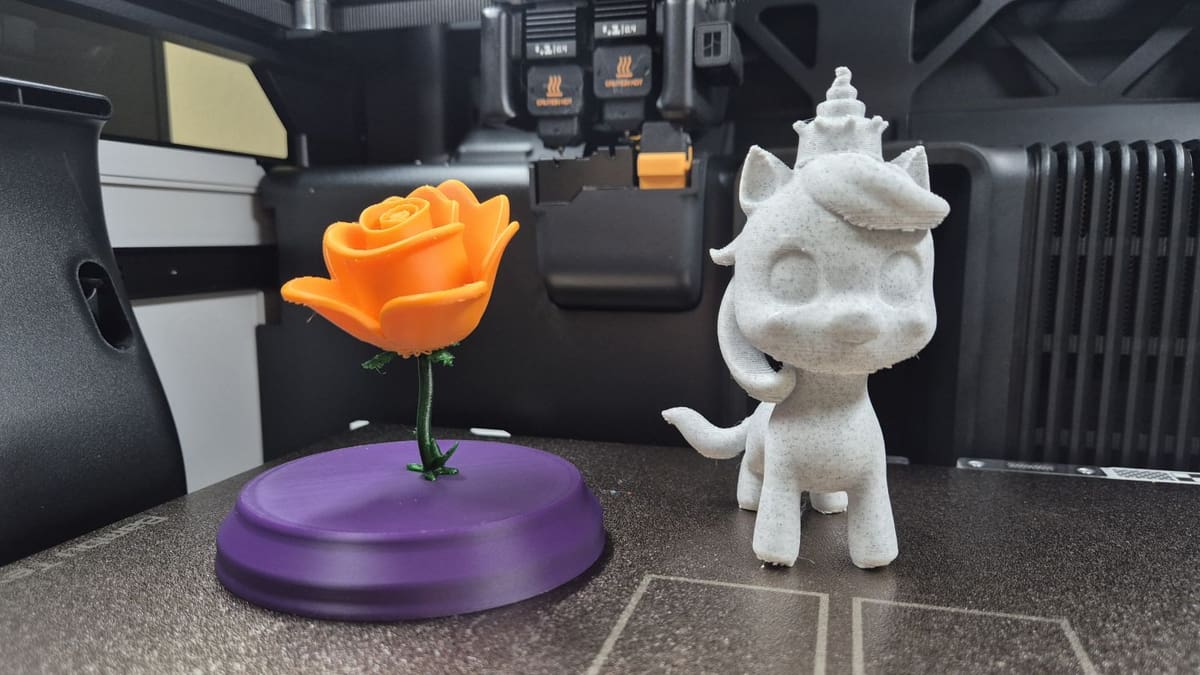
The filaments we had at hand didn’t match the generated unicorn, so we simplified things and opted for Prusament Marble PLA, enabled supports and a brim, scaled the model up to 150%, and printed on our A1 Mini. If there were any kiddos, it’d be a great painting project.
While we’re happy with the overall print, it should be noted that the wings were actually floating, so only one was printed and it was a stringy mess. Plus, while the 3D model showed a fabulous mass of hair, the STL had it jutting out of the head with much less style (and logic). Even though it won’t be flying, it’s still a pretty unicorn with a crown, but we recommend thoroughly reviewing the print in the Preview tab, since there can be thin and floating features and inconsistencies with the 3D model that you might want to work on.
Next, we’ll go over how the image-based process worked for us, and what printing was like.
Image-Based Creation
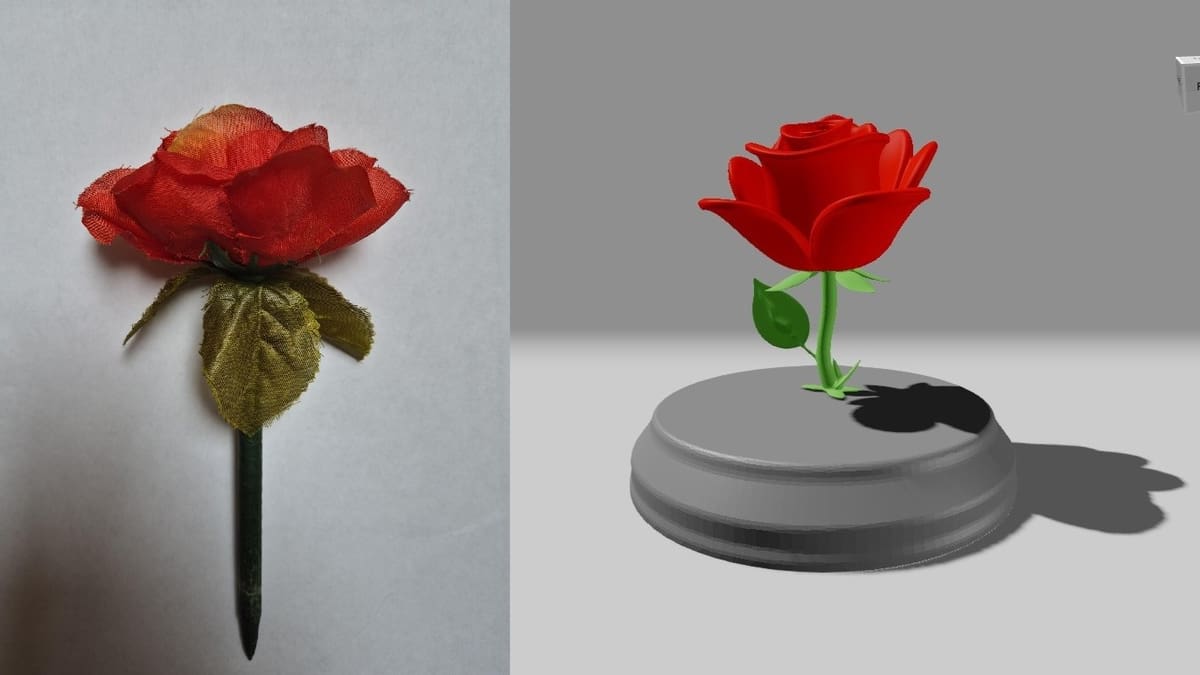
This process is very similar to the text-based one, only it starts from an image. For reference, the photo we took was of a pen shaped like a rose, which you can see above. When we clicked on the “Generate from Image” tab, a message popped up saying that the output, regardless of the input, “will always be a cute cartoon creature”.
We also tried a lighting bolt that did, in fact, produce a cute creature, but the rose became a rose. And thinking it might be a glitch with our specific image, we tried with a different flower photo and with a “Stop” sign, and got the same non-creature (but still cartoon style) results. A flaw? A bug? Who knows? (If you’ve tried PrintMon Maker and have also failed to come across a creature from an image-based generation, let us know in the comments.)
But back to the rose. We tried three options but liked the first the most, so we hatched it. And, since only two colors were needed (three if you include the base), we didn’t need to make any significant changes to the color scheme. We opted to make the base print together with the flower, and we scaled up the rose a bit to make it a bit more prominent. Once all this was done, we exported the files and imported them to Bambu Studio…
Slicing & Printing
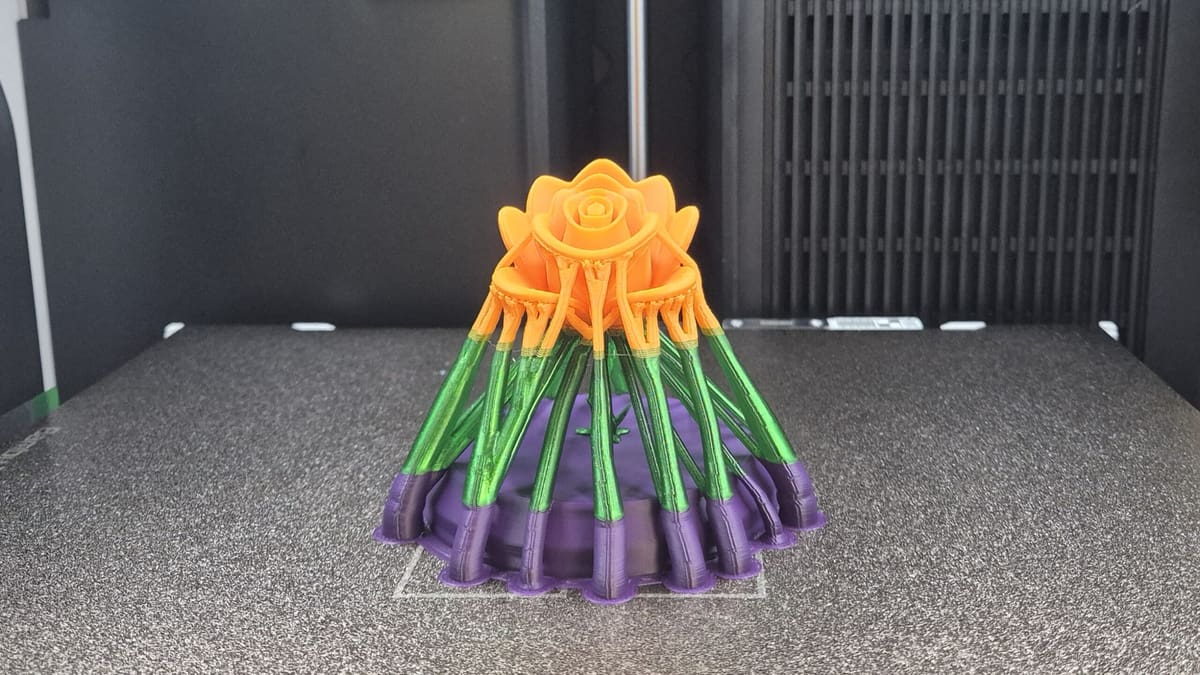
While the model was cute (as was the unicorn), the conversion to a 3D printable design also showed some discrepancies (hello, unicorn’s wings and hair). The sepals and leaves were much smaller, and some of the individual petals printed as one.
In terms of our 3D printing setup, we opted for Bambu Studio as connected to the H2D with two AMS 2 Pro devices. While the process was streamlined, we had a few hiccups.
Learn from our mistakes and, unless you’re printing the base separately from the model, enable “On build plate only” supports. Plus, a brim can help. The first time we tried to print the rose, we didn’t enable supports, yet the model was sliced with them by default. The main problem appeared to be when the supports printed on the base and didn’t stick to it, therefore coming loose and affecting the rest of the process.
We grabbed three nearby filaments: Bambu Lab PLA Basic Indigo Purple for the base, Prusament Galaxy Green PLA for the stem and leaves, and Bambu Lab PLA Basic Orange for the petals. Unfortunately, we’d just run out of red, so yours truly’s attempt at recreating a prop from Beauty and the Beast failed. Still, the color combination turned out pretty nice. While most of the rose and unicorn came out great, the overhangs came out rather messy (even with supports). A smaller layer height or a bit more checking out the file would’ve been warranted.
While overall we liked the experience of creating the designs and they’re now cute decor, there’s definitely some room for improvement to ensure that the models can be 3D printed without needing to edit the designs.
License: The text of "PrintMon Maker: Create & 3D Print with MakerWorld" by All3DP is licensed under a Creative Commons Attribution 4.0 International License.