The Cura PETG Settings/Profile for Perfect Print

PETG is a durable, non-toxic filament that can be difficult to print. Learn how to find the Cura PETG settings/profile for your needs!
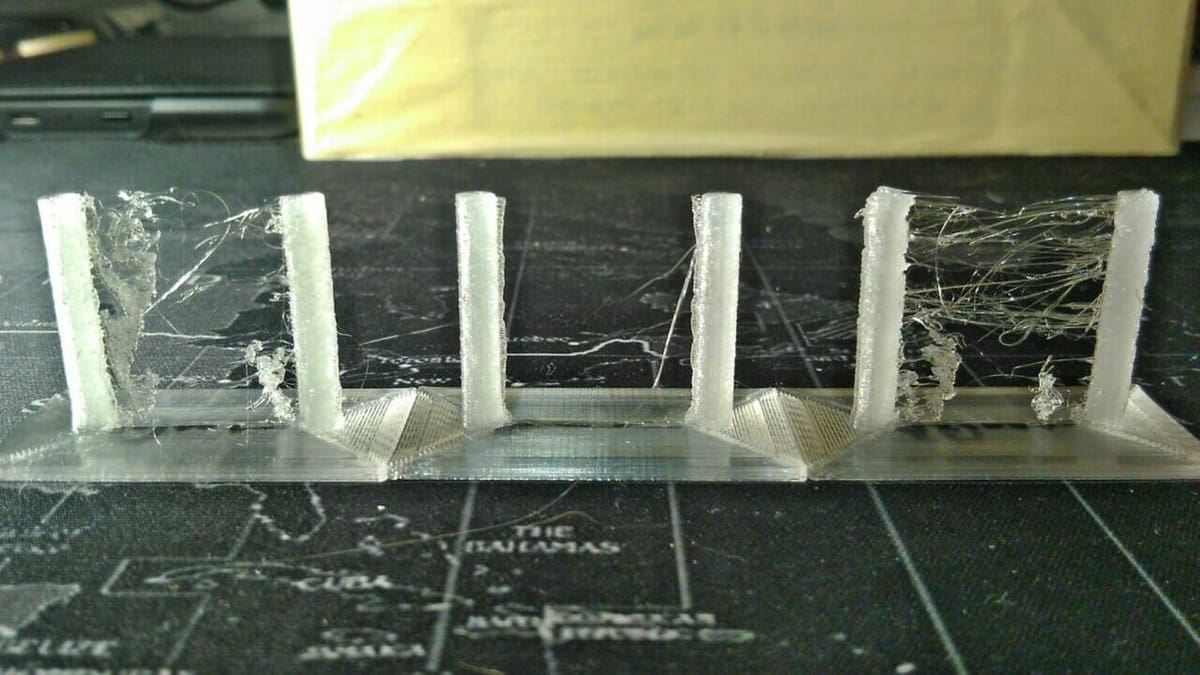
Polyethylene terephthalate glycol, most commonly known as PETG, is a 3D printable version of the widely-used (such as in water bottles) polyethylene terephthalate material. It’s a durable, non-toxic, low-shrinkage material that’s almost as easy to print as PLA if it weren’t for the sometimes-excessive stringing users experience.
Whether you have a direct or Bowden extrusion system, PETG stringing is an agonizing issue. Furthermore, the extruder can only suck in so much material before clogging the hot end, so switching to a direct extrusion setup, which is usually correlated with less stringing, won’t do much to fix the issue. To combat stringing, users often turn to their 3D slicer, the program that turns a 3D model into a G-code script, interpretable by your 3D printer.
UltiMaker Cura is the most popular open-source 3D slicer for fused deposition modeling (FDM) 3D printers. Adjusting print settings in Cura is a great way to fend off print quality issues when they aren’t caused by hardware issues (e.g. clogged hot end). There are, however, a lot of settings. Knowing which ones to adjust is important because you don’t want to solve one problem but cause another.
In this article, we’ll go over a good Cura slicer profile for printing PETG, including individual settings and the reasons for using them.
PETG Profiles in Cura
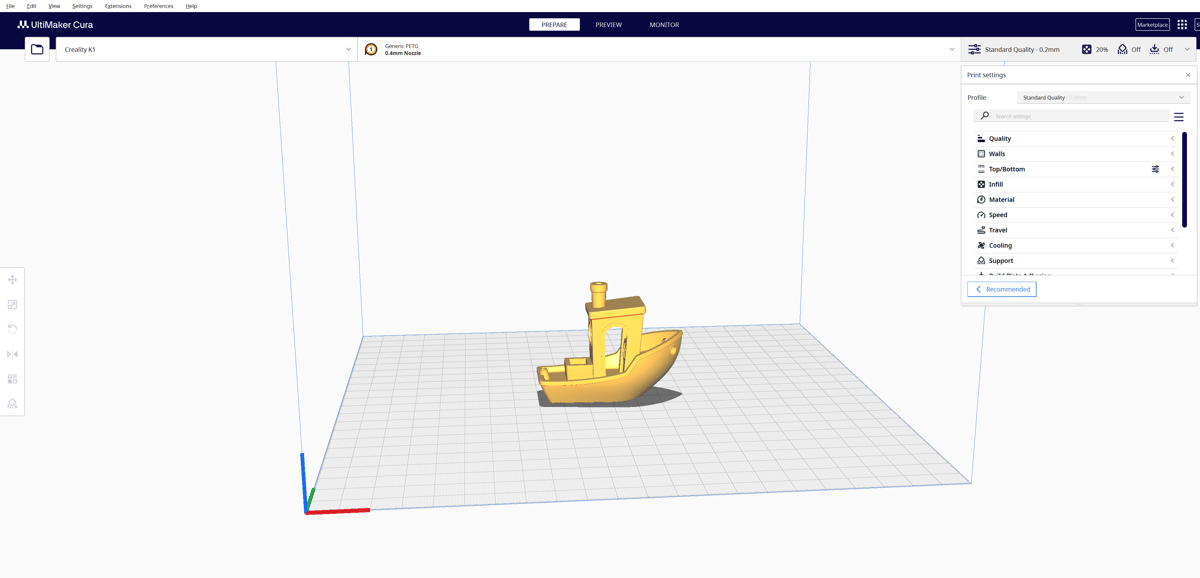
Like most slicers, Cura offers a default slicer profile for printing different filaments. Here’s how to activate the one for PETG:
- Open Cura and click on the material drop-down menu on the top middle toolbar.
- Click the drop-down menu to the right of “Material”, slide your cursor over “Generic”, then select “PETG”. Depending on your default printer, you may also be prompted to select the nozzle size.
- Then, click the print settings drop-down menu (just to the right of the material drop-down) and select a profile that corresponds with the desired layer height of your print project. For example, the “Standard Quality” option presents settings for a 0.2-mm layer height.
You should now see the default settings for this PETG profile in the various categories listed in the print settings panel. It’s important to note that the default settings in Cura vary depending on the preset printer. The default Cura settings for PETG discussed below are configured for the Creality Ender 3 printer.
Perfect Cura PETG Settings
The settings we’ll recommend deviate a bit from Cura’s PETG profile. If you want to skip the read and get right to printing PETG, below is a snapshot of an ideal Cura PETG slicer profile:
- Nozzle temperature: 235 °C
- Bed temperature: 70 °C
- Print speed: 40-50 mm/s
- Initial layer print speed: 20 mm/s
- Travel Speed: At least 120 mm/s
- Retraction distance: 6 mm for Bowden setups, 2-3 mm for direct extrusion setups
- Retraction speed: 25 mm/s
- Combing: “Not in Skin” or “Within Infill”
- Cooling fan speed: 50%
- Initial layer cooling speed: 0%
- Build plate adhesion: Brim
- Brim width: 5-6 mm
Temperatures
The first and perhaps the most important settings to adjust when creating a PETG slicer profile are the temperatures.
In Cura, when set to “All” mode for what settings to display, you’ll see a few variations of the hot end and bed temperatures to adjust under the “Material” tab. However, the significant ones are “Printing Temperature” and “Build Plate Temperature”. The other settings can be adjusted later if you want.
You should set these temperatures to the values recommended by the manufacturer of the specific PETG filament brand that you’re using. If they give you a range of temperatures, it’s usually a safe bet to choose the middle value (e.g. given 220-240 °C, set to 230 °C).
On the off chance the manufacturer didn’t provide any temperature recommendations, 235 °C for the hot end and 70 °C for the print bed should work well.
Fine Tuning
Even if the manufacturer assures you that their recommended print settings work, you still may need to fine-tune the temperatures. Before printing any real parts, you should start with a few calibration prints, including a temperature tower to find the best nozzle temperature.
If you see blobs or excessive stringing, lower the temperature up to 10 to 15 °C from the mid-point recommendation. On the other hand, increase the temperature 10-15 °C if you detect under-extrusion or layer gaps.
It’s important to note that you should really only be making temperature adjustments up to 10-15 °C because if that doesn’t fix a problem, the issue probably isn’t related to temperatures. If this is the case, try adjusting other settings or hardware fixes.
Summary
- Hot end temperature: 235 °C
- Bed temperature: 70 °C
Print Speed
Print speed is another important Cura setting to adjust when printing PETG, indirectly influencing extrusion and directly impacting printing time. Obviously, you don’t want to make a slicer profile that causes your machine to spend five hours on a simple print, but reducing speed can increase part quality.
In Cura’s stock PETG profile, they set the print speed to 60 mm/s, which lowers printing time while maintaining quality and avoiding under-extrusion. However, a lower speed of around 40 mm/s will yield even higher-quality prints, as your printer has more time to properly produce details.
Fine Tuning
Aside from the main print speed, there are speed settings for other parts of the model, and Cura reduces the speed for the majority of these settings. “Wall Speed” and “Top/Bottom Speed”, for example, are set to 30 mm/s.
A commenter on Reddit found that you can increase these speeds to around 30 mm/s (instead of the default 25 mm/s) without any significant loss in quality. Plus, you’ll get slightly shorter printing times. So, there’s room to play with these settings as well.
Another key speed setting is the “Initial Layer Speed”, which is the speed that your printer operates at while printing the first layer of any print. PETG requires a different distance between the nozzle and the build plate than most materials because PETG likes more space to lay down when printed.
For this reason, we recommend using an initial layer speed of 20 mm/s because it reduces the chances of having your first layer messed up. A lower “Initial Layer Speed” also allows you more time to make bed leveling adjustments to get the distance between the nozzle and the bed just right.
“Travel Speed” is also of note for PETG. To avoid oozing, travel moves should be as fast as possible. Cura’s default profile is set at 150 mm/s, but we’ve seen values ranging from 120 mm/s all the way up to 200 mm/s. If you’re tweaking the settings to achieve better results, we recommend that you go no lower than 120 mm/s.
Summary
- Print Speed: 40-50 mm/s
- Other types of print speeds (e.g. “Top/Bottom Speed”): 30 mm/s
- Initial layer Speed: 20 mm/s
- Travel Speed: At least 120 mm/s
Retraction
Retraction refers to the sucking in motion of the extruder every time the printhead moves locations, which is meant to reduce stringing and oozing from the nozzle. In Cura, retraction is split into two settings: “Retraction Distance” and “Retraction Speed” under the “Travel” tab.
First, make sure you have “Enable Retraction” turned on, as retraction won’t occur otherwise. Now that retraction is enabled, which it should be in the stock Cura profile, you can adjust the distance and speed.
The retraction distance is the length of filament (in mm) to be pulled up every time the extruder makes a retraction. For PETG, you’re going to want to use a length slightly larger than the retraction distance for PLA.
Retraction distance also depends on your printer’s extruder setup. If you have a Bowden setup, the distance will be longer than if you have a direct extrusion setup. Users have noted that a distance of 6 mm is effective for a Bowden setup, while 2-3 mm will work on a direct extrusion system. If stringing persists, try to use a longer distance, but too much could cause a hot end jam, in which case you should lower the distance.
Next, retraction speed determines the speed at which the retraction is performed. For PETG, the user community is mixed, with some advocating a speed of 25 mm/s and others, 40-45 mm/s. Print quality may suffer if the retraction speed is too slow or too fast, and getting it right depends on the nuances of your machine and the material you’re using.
So, we recommend that you start at 25 mm/s and adjust upwards if necessary. You may have to do a few test prints to determine what works best for your setup.
Combing
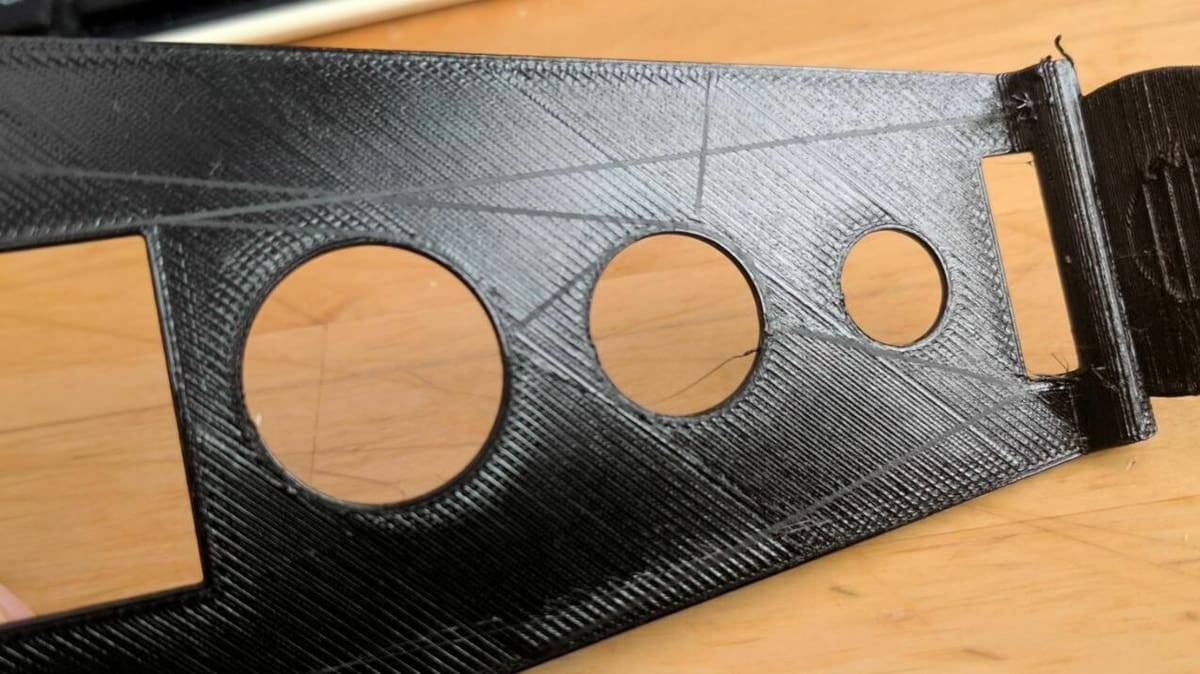
Besides retraction, stringing can also be fixed another way, using Cura’s “Combing Mode” setting. The Combing Mode is a movement and positioning method that the printhead follows to avoid certain areas (spaces outside the perimeter of a part, for example).
In Cura, the “Not in Skin” and “Within Infill” modes both work great and will reduce stringing in parts, or at least the visibility of them. The former option prevents your printhead from combing on the top skin layer, which could potentially leave drag marks or scars on the surface of your print. The latter option ensures that the printhead moves only across the infill of a part in order to prevent any mess from showing outside the infill.
Summary
- Retraction distance: 6 mm for Bowden setups, 2-3 mm for direct extrusion setups
- Retraction speed: 25 mm/s
- Combing: “Not in Skin” or “Within Infill”
Cooling Fan

Cooling is another important setting for printing PETG filament, as PETG’s cooling properties are a mix between PLA, which likes a lot of cooling, and ABS, which doesn’t like any cooling. In Cura, the cooling fan speed is set as a percentage and adjusts how fast the part-cooling fan on your printer spins while your machine is printing.
First, make sure to enable part cooling by checking the “Enable Print Cooling” setting, then set your fan speed to 40-60%. Cura’s default works great for many users, but it may depend on the specific brand of PETG filament you’re using.
Fine Tuning
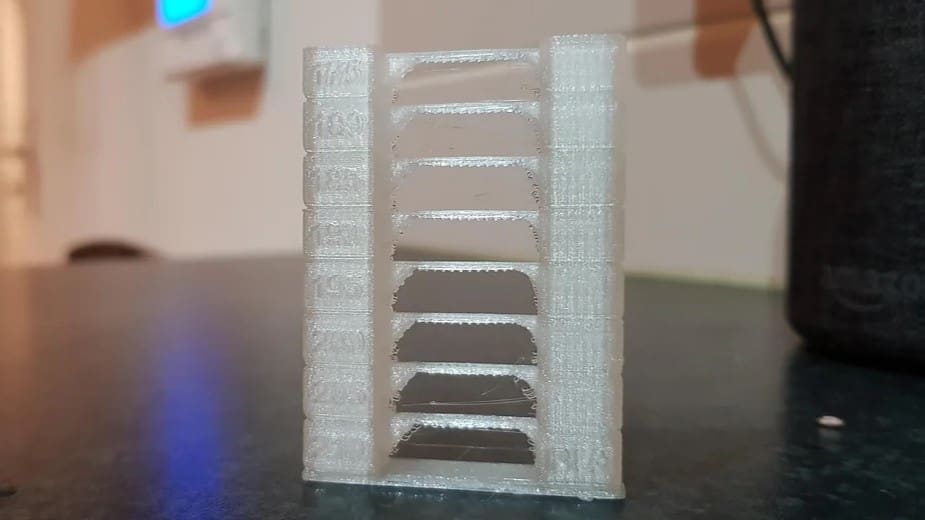
A good way to test cooling is by using an overhang test, which you can find on 3D model repositories. Alternatively, you can check out the one we used in our test print article.
If your machine struggles on basic overhangs at relatively small angles (e.g. 45 or 50 degrees), you should increase the cooling fan speed in increments of 5%. If you experience warping or cooling-related quality defects, you may want to lower your fan speed in the same increments until the problem is gone.
A cooling speed of 50% functions great as a normal cooling speed, but you should use no fan for the first few layers (four works). That’s because the first few layers of a print usually come out best when nothing disrupts their adhesion or causes them to deform, which an active cooling fan could do.
Additionally, some users, like CNC Kitchen, have found that less or no cooling on prints leads to stronger models due to enhanced layer-to-layer adhesion. While less cooling presents this advantage, overhangs are more difficult to print, and fine detail is usually lower quality.
Summary
- Cooling speed percentage: 50%
- Initial layer cooling speed: 0%
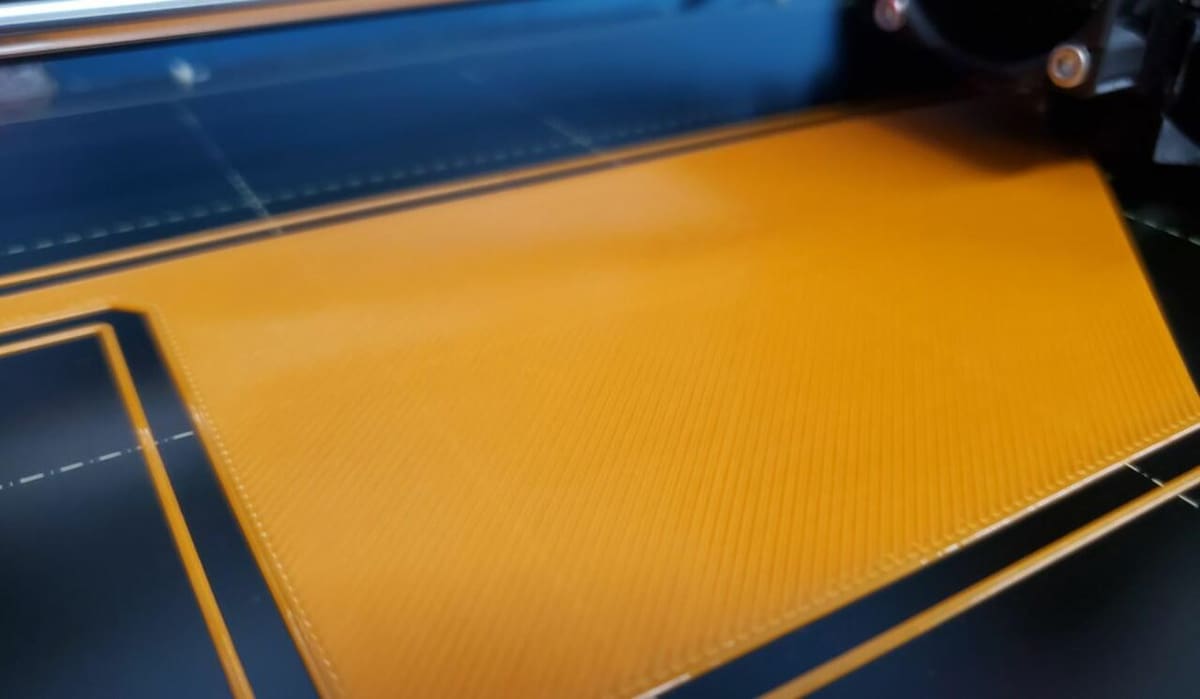
Build Plate Adhesion
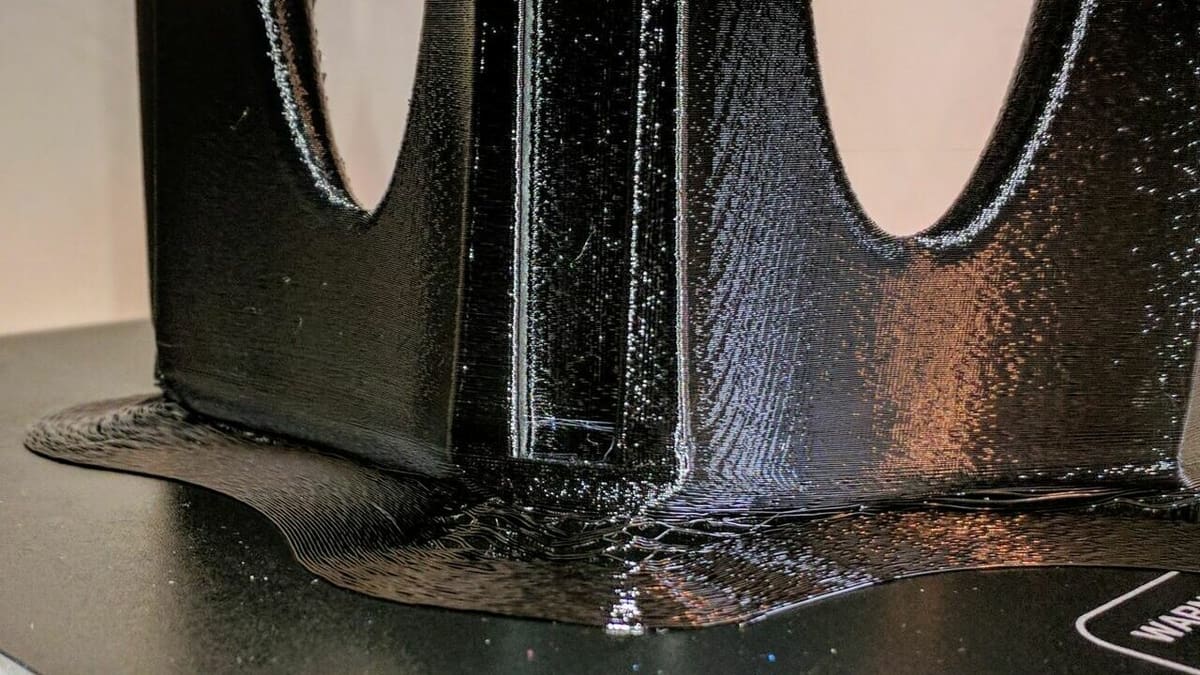
Lastly, PETG is notorious for being a super-sticker material, and it can literally bring chunks of glass from the build plate with it when removed from a glass bed. Despite this, adhesion assistants like glue or hairspray actually provide a nice separation layer between the bed and the first layer of a print.
Cura offers three printable adhesion assistants in the “Build Plate Adhesion” category: a raft, a brim, and a skirt. A raft is the most material- and time-consuming method, while a skirt is the least.
For printing PETG, a brim usually works best, as long as you’re using a thin layer of glue as well. That’s because a raft means a larger surface area is connected to the bed, making the problem worse, and a skirt does nothing to provide adhesion or an easier part-removal process.
A brim secures the print to the bed and allows you to slip a blade or spatula tool under to pry the part loose. This way, you get both good first layer adhesion and a way to safely remove your PETG part. Balancing between material usage and functionality, a width of 5-6 mm is recommended for a brim.
Summary
- Build plate adhesion: Brim
- Brim width: 5-6 mm
License: The text of "The Cura PETG Settings/Profile for Perfect Print" by All3DP is licensed under a Creative Commons Attribution 4.0 International License.