How to Clean Up 3D Prints: FDM & Resin Parts

Cleaning 3D prints doesn't have to be a drag. Learn easy ways to clean up 3D prints and make sure your parts always look beautiful!
3D printers are used in a multitude of applications. While many are put to use for drafting and prototyping, they’re also typically used to create finished parts as well. If you’re looking to create beautiful, professional-looking parts with your 3D printer, cleaning and post-processing are crucial.
Admittedly, it can be difficult to make poorly printed parts look great solely with post-processing, so you may just need to reach out to professionals. If you’re looking for prints that look great straight out of the machine, try Craftcloud. Simply upload your model and pick a material, and you’ll have a beautiful part in no time.
Now, let’s take a look at the top cleaning tips to help make your 3D prints look their best.

FDM 3D Printing
Fused deposition modeling (FDM) 3D printers are the most common form of desktop 3D printer. Unfortunately, the layer-by-layer nature of the process can create unwanted deformities and layer lines in the finished product.
Some of these imperfections can be eliminated with proper maintenance and print settings. For those that can’t, post-processing is the next step. Here are seven tips to help eliminate any deformities and make your parts shine.
Removing Supports
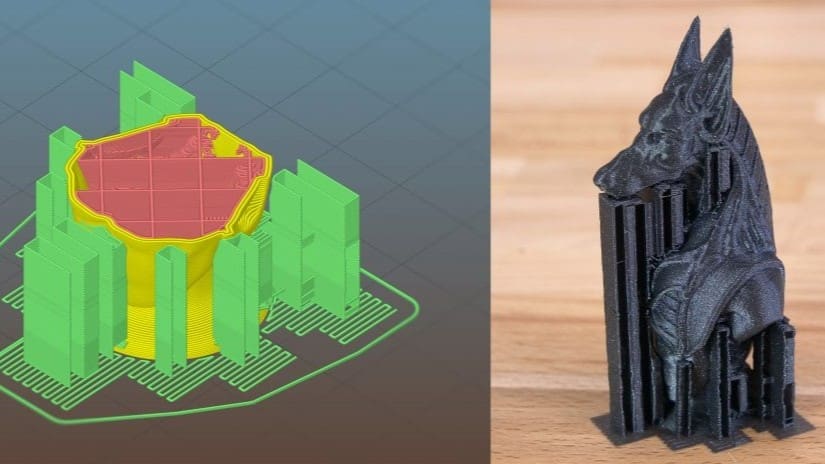
If your part was printed using support material, it’s important to carefully remove this material before proceeding with cleaning. There’s plenty to consider when printing with supports, but all the same, if improperly removed, they can permanently damage your part. Taking extra care during this step will greatly reduce the amount of effort that needs to be put into further cleaning techniques.
How to Do It
To avoid damaging the model, begin by removing the supports that are most exposed. Using your fingers, gently try to break off the supports that seem easiest to maneuver by hand. If you do this right, the majority of the support structure should come off pretty easily.
For supports that are harder to access, we recommend using needle-nose pliers, a putty knife, or an exacto knife. Be sure to cut close to the part to minimize scarring from the material. When using a knife or scraper, it’s a good idea to heat the tool first. This will make removing the support material significantly easier and cleaner.
Rinsing
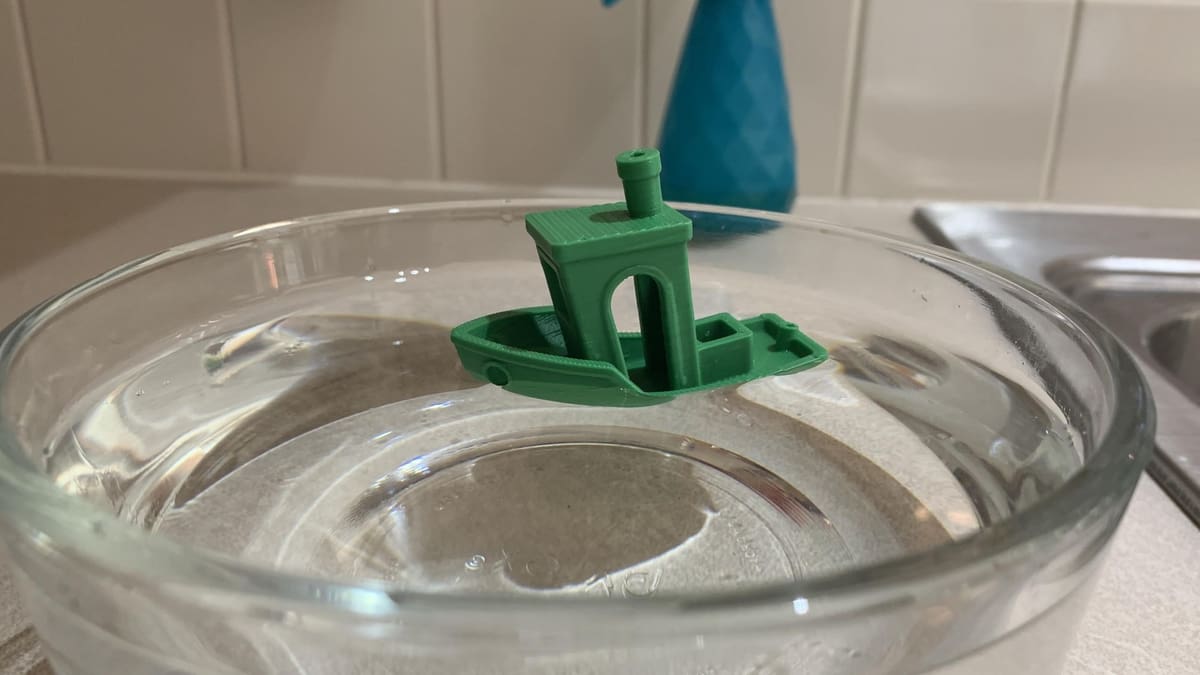
A basic rinse can go a long way in keeping your prints clean. Residual glue from first layer adhesion, small blobs, stringing, and other undesirable protrusions can all be washed away just by scrubbing the print!
No matter your technique, be sure to exercise caution when rinsing your prints. It’s not always a good idea, especially if the print isn’t guaranteed to be watertight and could hold water inside of it. Nobody likes moldy parts!
How to Do It
We recommend rinsing the print using soapy water or isopropyl alcohol, depending on the filament. Simply drop the print in the liquid and scrub using a sponge or paper towel. Be careful not to scrub too hard, as you could potentially discolor or damage the part.
You can also 3D print or purchase a dedicated wash station to clean your prints automatically. While many of these solutions are designed for resin 3D prints, they will work great for rinsing FDM parts.
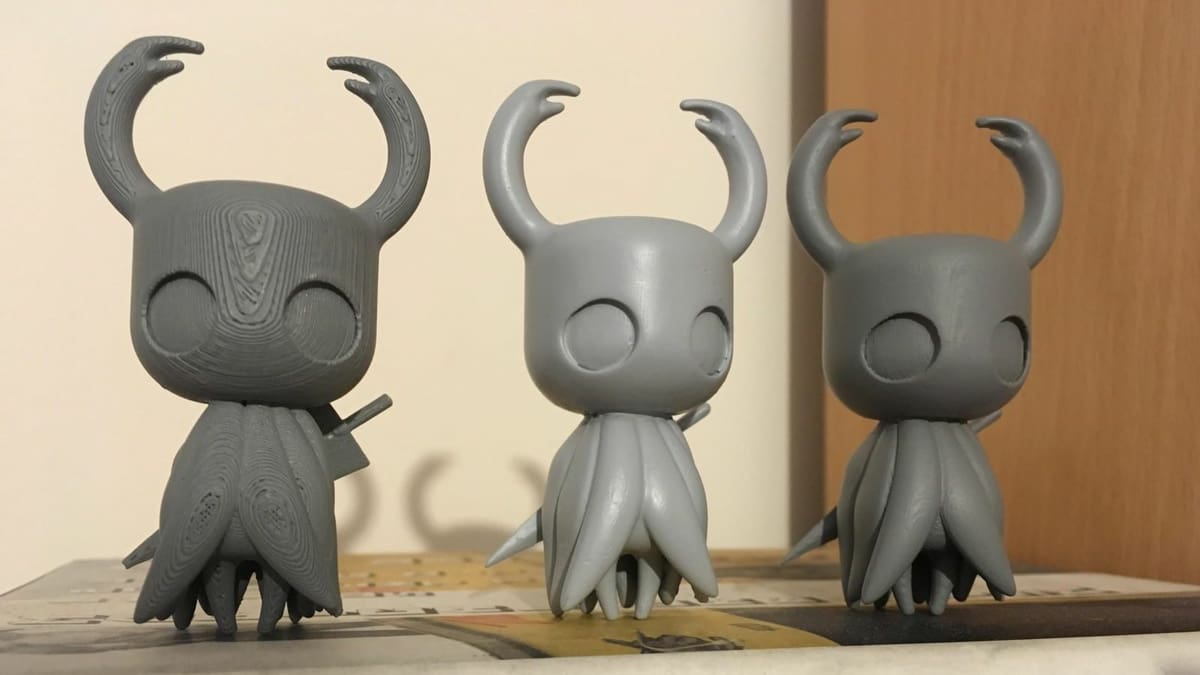
Sanding
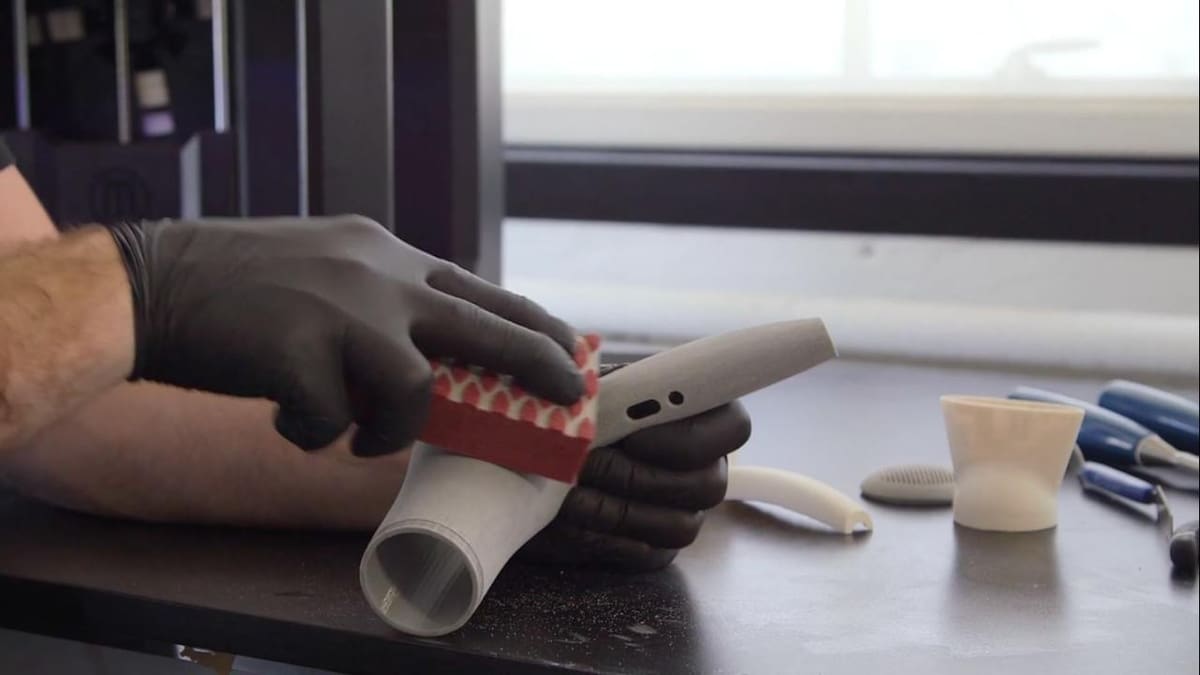
Sanding is one of the most common methods for cleaning 3D printed parts. When done properly, it can nearly eliminate layer lines from the final print. Sanding can also be used to remove unwanted protrusions such as blobs and support marks from the surface of the model. However, it can be very time-consuming depending on the size of the print.
How to Do It
For best results, we recommend starting with a low grit sandpaper and moving towards a higher grit as you sand. 120-2000 grit sandpaper will work well for most prints. Once you’re using sandpaper higher than 200 grits, we recommend sanding with water. This will prevent any clogging and should give a smoother surface finish to the model.
When you’re working, be sure to sand in a smooth, circular motion. We recommend sanding both with and against the grain of the model for a more even finish. Resist the urge to use any electric tools, as the friction created will melt the plastic and deform the surface of your part.
After you’re done, you may want to rinse the model again to dislodge any particles created in the sanding process.
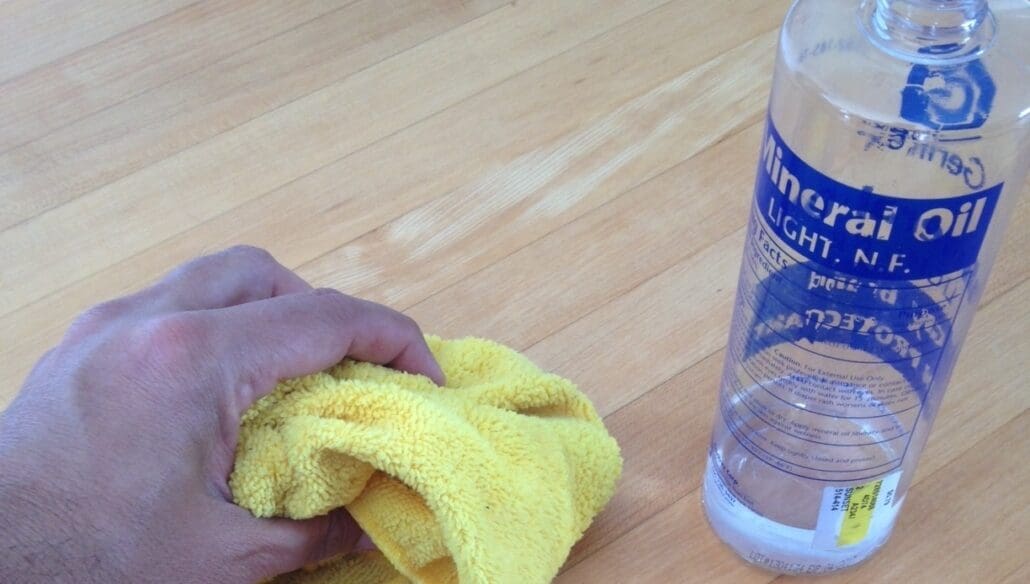
Unfortunately, vigorous sanding can strip the pigment from the part. This will result in undesirable light spots across the model. Your print may look like a leopard after you’re done!
To remedy this, we recommend a light coat of mineral oil after sanding. Simply wet a paper towel with the oil and gently rub it over the affected areas.
Not only will the oil help fill in the light spots, but it will create an even, glossy finish across the surface of the model.
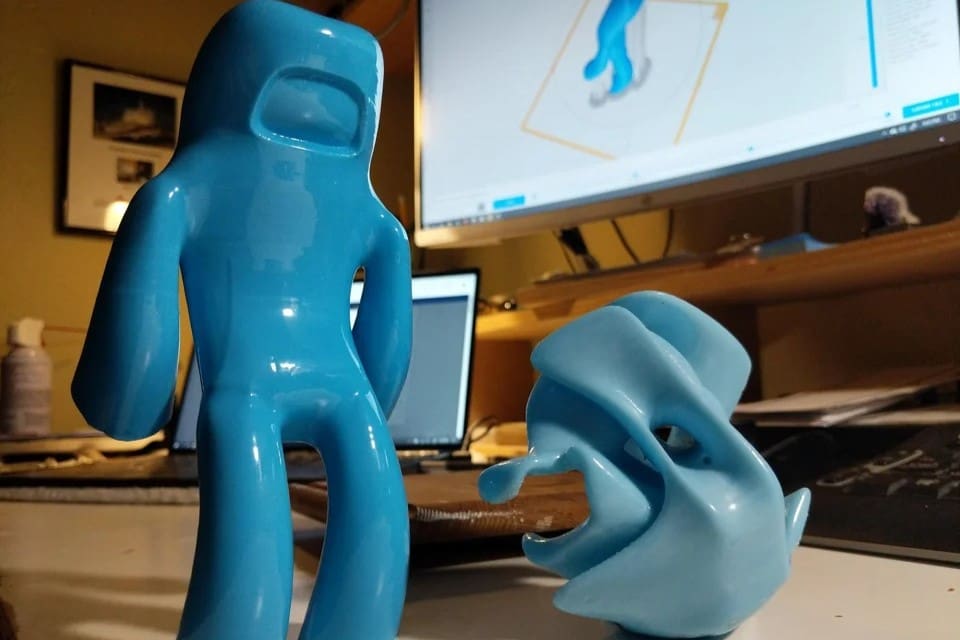
Polishing

For a clean and professional-looking part, we recommend polishing. A nice polish will enhance the effects of sanding and further eliminate layer lines from your print. Depending on the filament color, it may even make your part shine!
Before you start to polish, be sure that your part has been adequately sanded with at least 1,000-grit sandpaper. Otherwise, the polish will not stick well to the surface of the model. Only after the surface is smooth and free of any artifacts can you begin the polishing process.
How to Do It
Any liquid metal polish should work well for this process. Brasso Multi-Purpose Metal Polish is particularly popular in the 3D printing community. You will also need a soft cotton cloth to apply the polish.
Once you have your materials, simply apply a small amount of polish to the cloth. Then, rub the cloth across the surface of the model in small circles until all the polish has been absorbed by the print. After applying the polish, take an unused portion of the cloth and buff the surface into a mirrored shine. The result will be a beautiful, mirrored finish across the part!
Vapor Smoothing
Much like polishing and sanding, vapor smoothing can be used to help eliminate layer lines and smooth deformities in a print. The vapor partially dissolves the exterior of the model’s surface, resulting in a super smooth finish that looks almost injection molded!
Unfortunately, vapor smoothing only works on certain types of filaments. It’s most commonly performed on ABS prints using acetone vapor. There are also specialty filaments, such as PolySmooth, which are designed to be vapor smoothed. However, there are no widely available chemicals to dissolve PLA, so sanding and polishing are better alternatives for finishing these parts. Spray paint and polyurethane can also be used to achieve a similar look.
How to Do It
Vapor smoothing can be done by hand or with a specialized machine, such as Polymaker’s Polysher. In both cases, make sure that you’re smoothing in a well-ventilated area with no open flames, as the vapor is highly flammable.
If you’re smoothing by hand, the procedure is relatively straightforward. Simply soak some tissues in the appropriate chemical, place them on the walls of a container, and place this container over your part.
It’s important to note that vapor smoothing isn’t appropriate for all parts. It will dissolve many of the small details in a model, so it’s not a good option for highly intricate or mechanical parts. In this case, rinsing or manual sanding might be more appropriate.
Filling & Priming
When techniques such as polishing or vapor smoothing are impractical, filling and priming can be useful. In this technique, a primer is applied to smooth the surface of the print. Then, putties and similar substances are used to fill any larger gaps in the model.
How to Do It
For covering smaller imperfections, all-in-one filler primer solutions work great. Just apply the primer and sand it down with medium-grit sandpaper after it dries. Pay particular attention to the drying time of your particular primer, as most need at least 24 hours. Check out our article on painting your 3D prints for more information on priming.
If your part isn’t adequately filled by primer, try spot filling with putty. Bondo Glazing and Spot Putty is particularly popular in the 3D printing and cosplay communities. Simply smear the putty onto the part and wet-sand it once dry. Be sure to avoid getting the putty on your skin, and make sure that you have proper ventilation while using it: It has a very potent smell!
Cleaning the Nozzle & Bed
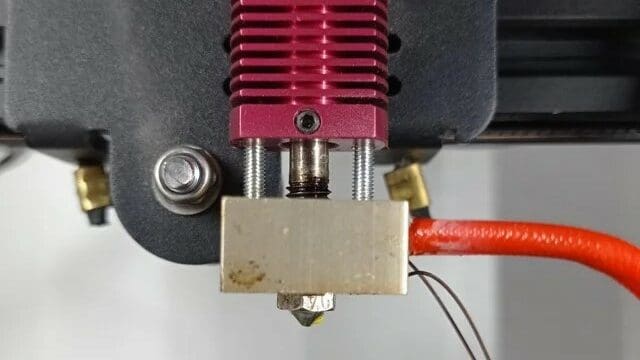
In addition to post-processing, ensuring that the printer is in proper working order will help result in cleaner parts. If there’s any debris on the bed or on the nozzle, it could interfere with the printing process and cause deformities in the final print. Cleaning both the bed and nozzle before printing will help prevent any blockages and minimize the chances of any imperfections.
How to Do It
Before printing, make sure that the nozzle is clear of any debris and that filament is running smoothly through the extruder. The simplest way to do this is to clean the nozzle and the area around it with a wire brush. When brushing, use a linear motion and be sure to approach from multiple directions. If the nozzle is clogged or partially clogged, try a cold-pull to keep filament flowing smoothly.
The process for cleaning the bed will vary depending on the bed type. For glass beds or beds with a PEI sheet, we recommend using cleaning alcohol such as IPA. If you’ve been using a glue stick or other adhesives, gently scrape the bed to dislodge any residue. Then, wash the bed with soap and water to remove this residue from the surface. If you use tapes or adhesion stickers, check them for damage and replace them if necessary.
It’s extremely important to ensure that the printer is turned off and cool before beginning to clean. Touching a hot nozzle or heated bed will lead to serious burns, and cleaning the nozzle with a wire brush can potentially fry the controller board if the printer is still on.
Resin 3D Printing
Prints from resin-based 3D printers often appear more polished than those from FDM printers. However, they typically need more post-processing to function as standalone parts. When you’re post-processing resin prints, be sure to wear latex gloves and to fully cover your workspace. Most resins are toxic to the touch and are difficult to remove once cured.
Now, here are five tips to make your resin 3D prints look their best!

Cleaning the Print
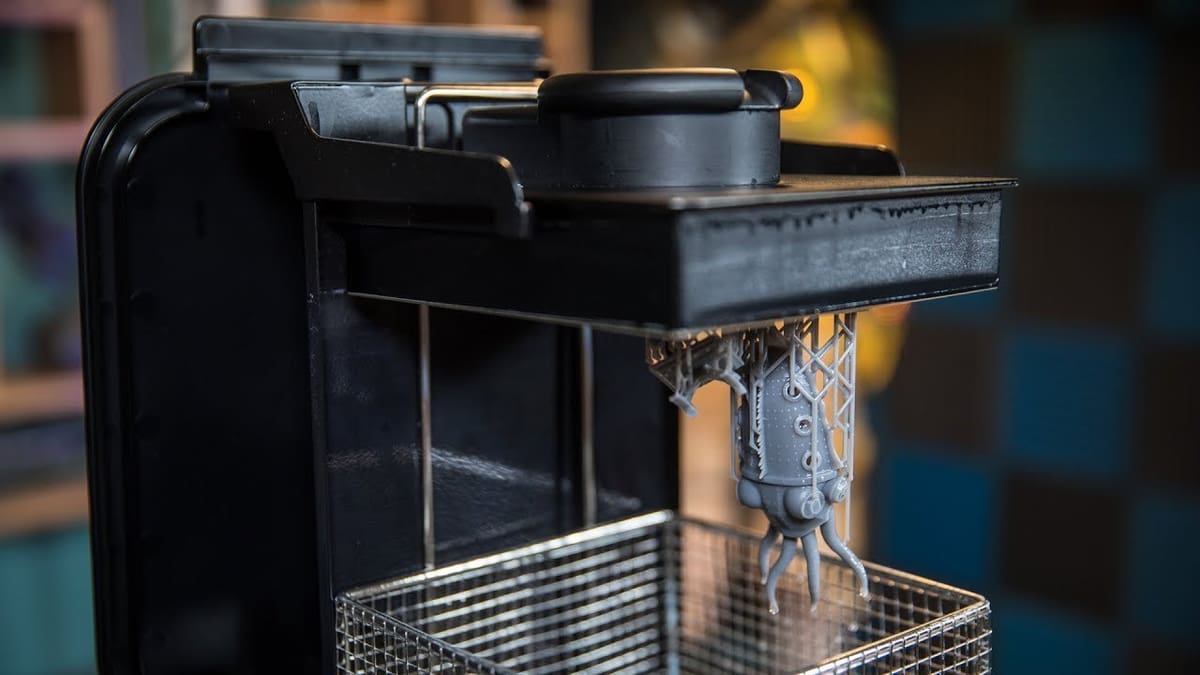
Immediately after printing, it’s important to rinse parts in an isopropyl alcohol bath or water, if you’re using a water-washable resin. Prints directly from the machine will be covered in excess resin, which is both unsightly and toxic to the touch. As such, it’s imperative that you rinse your parts before continuing with the cleaning process.
How to Do It
Similar to FDM, there are both automated and manual methods for rinsing your parts. Formlabs, a manufacturer of higher-end desktop SLA machines, offers a popular solution called Form Wash. Solutions such as the Zortrax Ultrasonic Cleaner are popular as well.
If you don’t have an automated machine, manually rinsing the part in a tub of isopropyl alcohol also works well. Be sure to move the part around while rinsing to clean all of the small crevices and details. Two or more separate rinses may be necessary to fully clean the exterior of the part. If you need to clean resin prints often, it may be worth it to create your own wash station.
Removing Supports
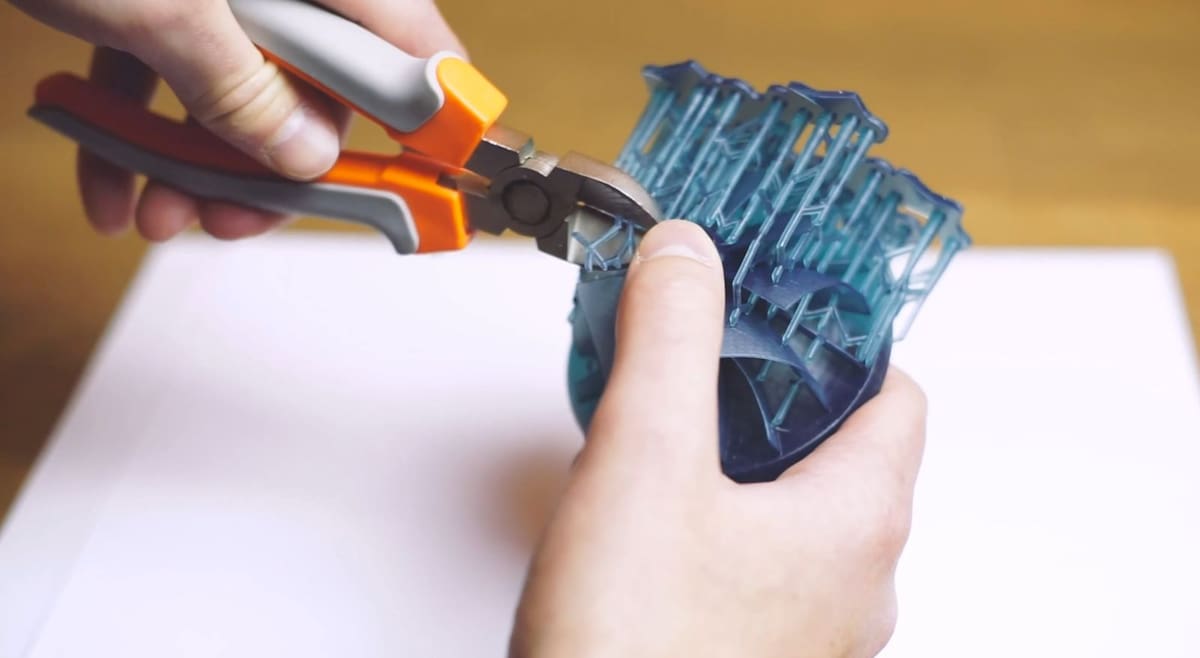
Much like FDM 3D prints, proper support removal is imperative before curing resin parts. If done incorrectly, support removal can severely damage and scar your prints. Taking extra care during this step will greatly reduce the amount of effort which needs to be put into further cleaning techniques. If your model’s supports are very dense, leaving them on during the curing process could result in sticky and half-cured parts.
How to Do It
The process for removing resin supports is similar to the process described above for FDM prints. Begin by removing the most exposed supports with your fingers, then use tools such as needle-nose pliers to remove the supports which are more difficult to reach.
For best results, we recommend removing the majority of the supports before washing and curing your print. That way the final part can be rinsed and cured as thoroughly as possible. It may be beneficial, however, to leave some supports in place during the curing process. Otherwise, the model may deform before it’s fully cured.
Post-Print Curing
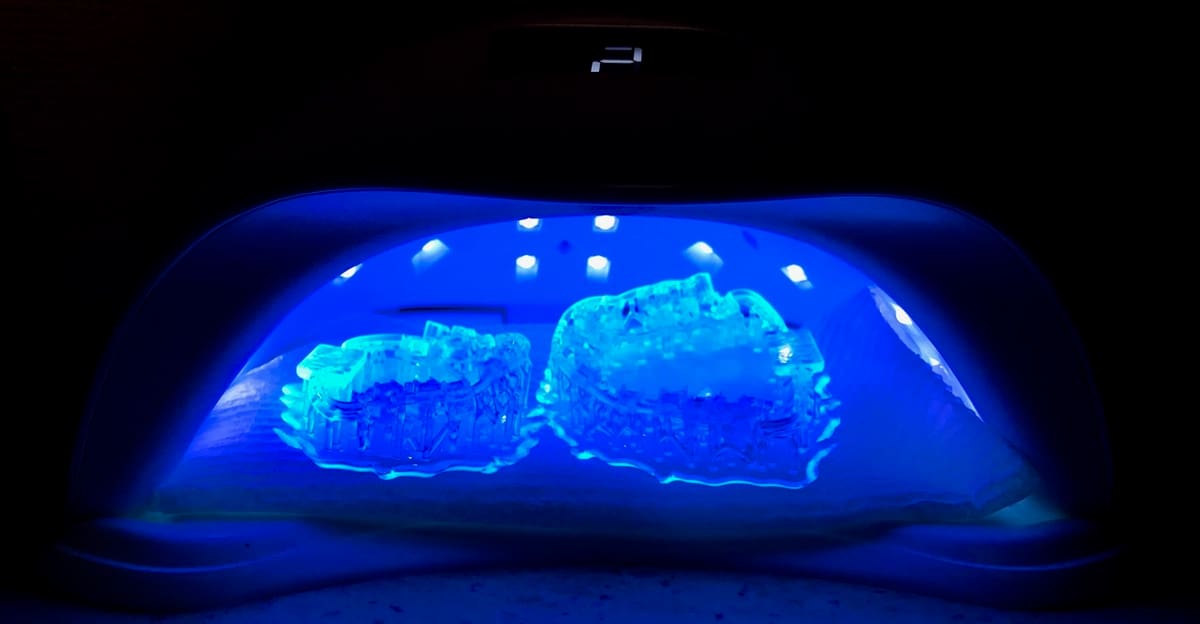
Ultraviolet (UV) curing is an important next step in post-processing and cleaning your print. The UV light increases the strength and durability of the resin, and it greatly reduces the chances of the part deforming post-printing.
How to Do It
Much like rinsing, there are a variety of options when it comes to curing your part. Many resin-based printer manufacturers sell curing stations that are specifically optimized for their particular resins. The Formlabs Form Cure is especially popular among high-end users.
However, there are many cheaper alternatives as well. Simple nail-curers work great, and many opt to build their own UV curing chambers by placing a UV light in a box lined with aluminum foil. Of course, you can always harness the power of the sun too! Simply leave your part outside on a sunny day, and it will cure in a few hours.

Clear Spray Paint
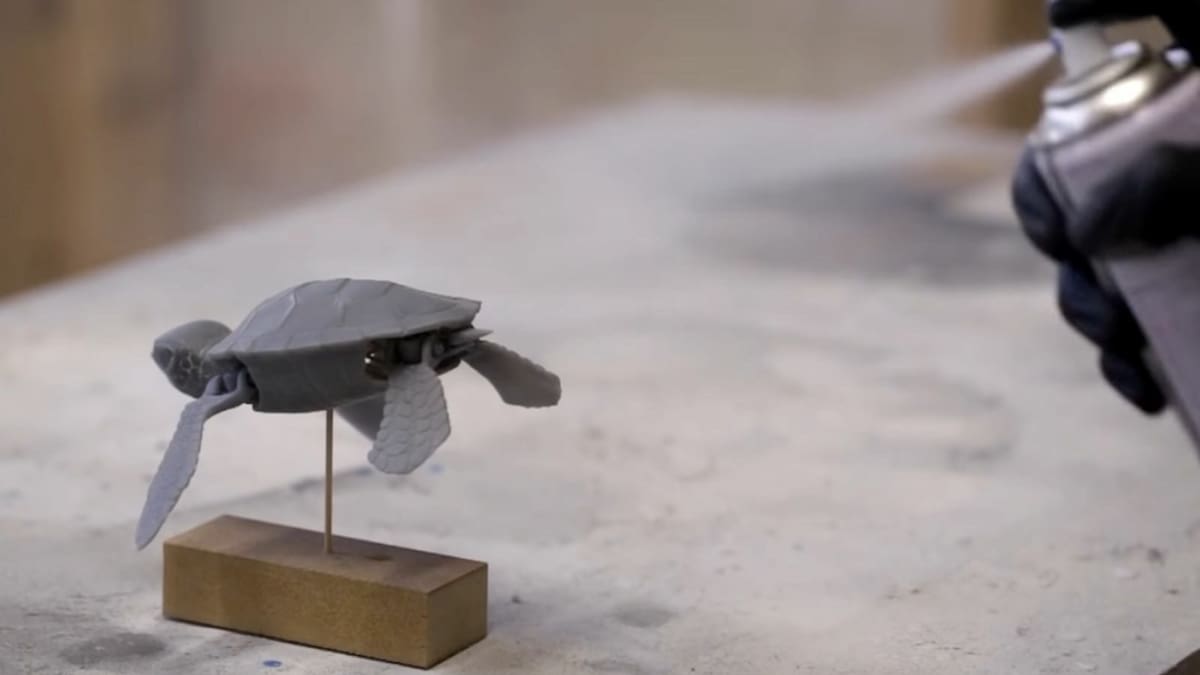
Applying a coat of clear spray paint is another great way to quickly clean your resin 3D prints. Spray painting the model will help conceal most small blemishes and reduce the need for further sanding and post-processing. The varnish also protects the model from yellowing and over-curing by limiting UV exposure.
How to Do It
Before applying the spray paint, you’ll want to ensure that your part is adequately smoothed and sanded. This will ensure that the paint sticks to the model and that it doesn’t accentuate any deformities in the print. Also, be sure to select a spray paint that’s compatible with your printing material; otherwise, it may not stick to the part.
When painting, hold the can roughly one foot away from the part and spray in quick, even strokes. Make sure to rotate the print as you spray and apply the paint across the entirety of the model. If necessary, you can apply multiple light coats. After painting, allow the part to dry before touching or moving it. You can then polish the print using the aforementioned techniques for an even smoother finish.
Remember that spray paints are toxic and flammable. Always wear appropriate clothing and rubber gloves when painting. Also, make sure that your painting environment is controlled with no drafts or wind. If you’re in an enclosed space, we recommend wearing a respirator for extra safety.
Cleaning the Machine
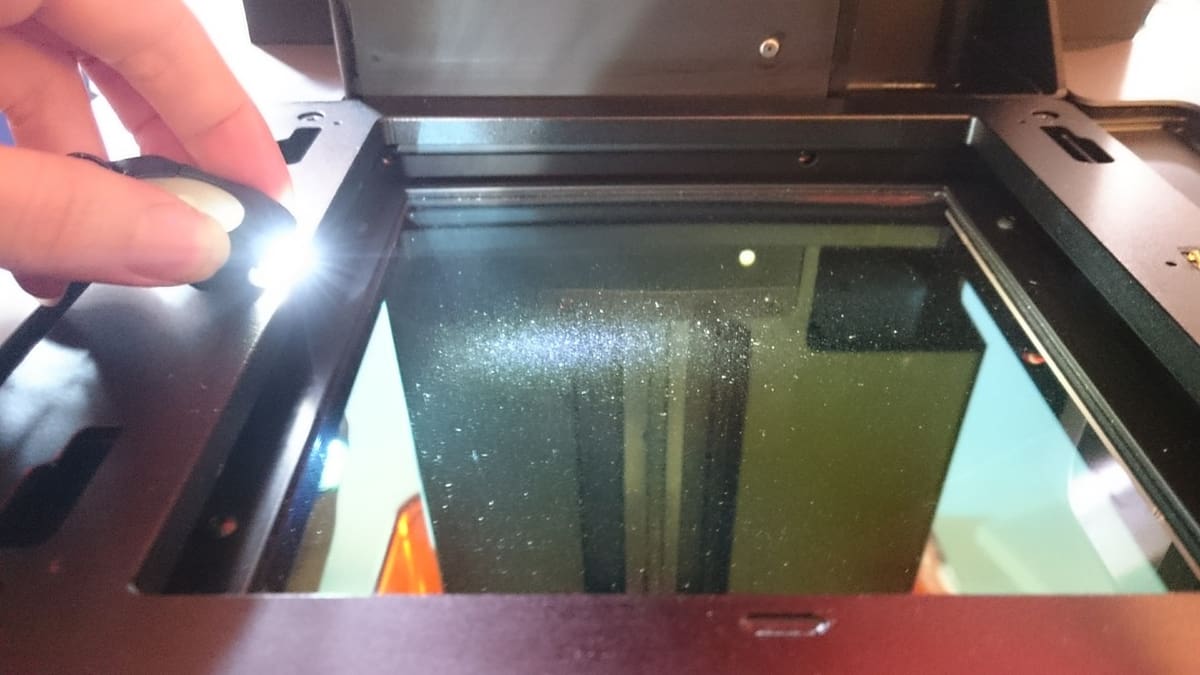
Resin-based machines need to be properly maintained in order to produce the cleanest parts. If there are any smudges on the mirror or bed, the laser will be obscured, and the part will have deformities. Be sure to use the manufacturer’s recommended products to clean the machine; otherwise, you could scratch or break these delicate parts.
How to Do It
The specifics of cleaning a resin-based 3D printer will vary depending on the manufacturer. Generally, the process entails using a specialty cloth to ensure that any optically clear parts remain free of smudges and residue. Most manufacturers recommend using a dry wipe followed by a wipe dampened with IPA for best results. Some printers may need to be put into maintenance mode before cleaning to expose all of the necessary mirrors.
It’s important to exercise extreme caution when cleaning resin 3D printers. Resin on the laser, the electronics, or the mirrors can severely and irrevocably damage these parts. For proper cleaning practices, be sure to contact the printer’s manufacturer.
License: The text of "How to Clean Up 3D Prints: FDM & Resin Parts" by All3DP is licensed under a Creative Commons Attribution 4.0 International License.