Stop Trashing Failed Prints: 8 Best Filament Extruders to Make Your Own Material

If you're tired of buying 3D printer filament, why not make your own? Read on to learn about DIY filament extruders!
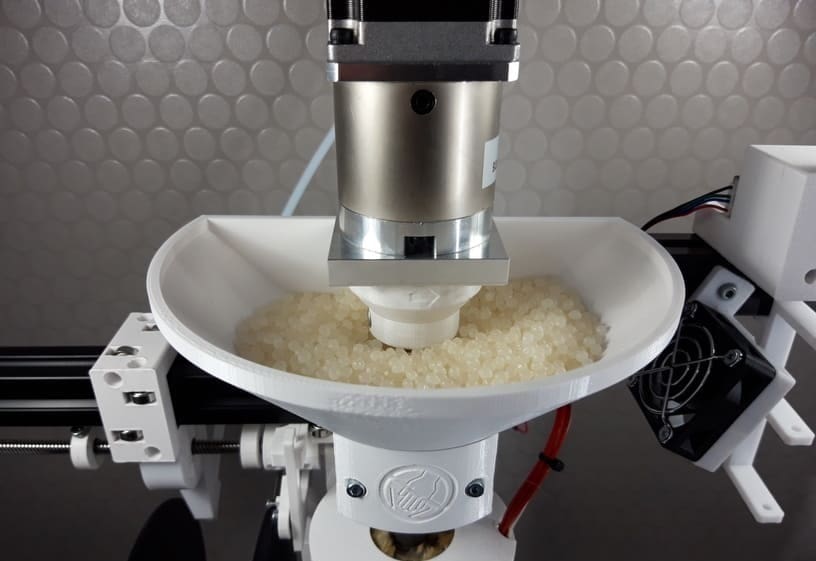
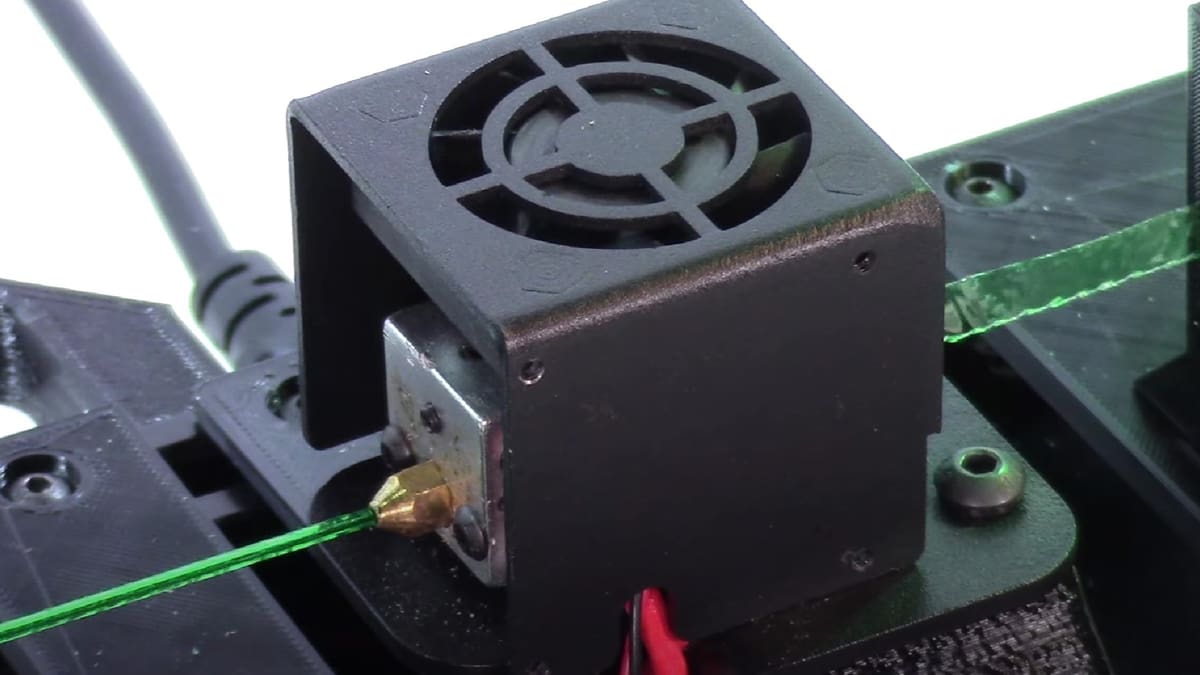
Filament extruders turn granulated material pellets into 3D printable filament by melting the pellets into a molten substance, then feeding them through an output nozzle. While such extruders are most commonly found in the mass production of filament for commercial purposes, there are also a handful of DIY filament extruder projects that are perfect for individual use.
Some DIY filament extruders are more DIY than others. There are kits that you assemble, while others are open-source projects with guidelines or recommendations for hardware. In the former, most of the hardware is provided, and in the latter, you have to gather components yourself, some of which are 3D printable. In either case, you have to build the extruder on your own.
Before we get into the selections, though, let’s first discuss the nuances of homemade filament and what’s important when choosing between DIY filament extruders.

Home-Made Filament
The way you can make filament at home is somewhat similar to how a large, professional manufacturer might produce filament – only at a much, much smaller scale. Whether hobbyist or professional, a filament extruder is needed, along with some granulated pellets, which are fed into the extruder, melted, and pushed out in a string-like form.
The devil is in the details, though. A desktop filament extruder is typically smaller and slower than professional setups, costing less but taking longer to make filament that’s less precise that industrial machines will achieve. The process is more hands-on.
It’s also worth pointing out that hobbyist filament extruders don’t have the same high-end heating and cooling mechanisms. With fewer heating and cooling zones, these machines usually produce filament with a higher degree of variance in the filament’s diameter when compared to professionally made filament.
Finally, unlike professional manufacturers, some desktop filament extruders lack the post-extrusion tools of their mass-manufacture counterparts, like a spooling device to wrap the stringed filament around a spool.
At the end of the day, though, filament is still filament. While homemade filament might have some quirks compared to mass-produced, commercial filament, you can still make it work. It just might take some time to fine-tune the slicer settings.
Considerations
There are many important characteristics to consider when looking at a filament extruder. Here are some of the most important ones.
- Speed: When it comes to filament extruders, speed refers to how fast it can melt the loaded plastic pellets and pump out filament. As we mentioned above, the speed of DIY filament extruders is much less than that of a professional-level filament extruder. Still, there’s some variation between DIY setups, so speed is an important factor to consider. In each section, we’ve listed a range (or an average value) for the speed of each extruder, measured in kilograms (of filament) per a certain amount of hours.
- Supported materials: Depending on the maximum heating temperature, as well as a handful of other factors (type of feed screw, for example), filament extruders are only able to extrude certain pellet materials. In general, the higher the maximum heating temperature of the extruder, the longer the list of materials the machine can work with. Most DIY filament extruders will be compatible with ABS and PLA pellets, as it doesn’t take much heat to melt these materials.
- Assembly difficulty: If you go the route of DIY-ing a filament maker it’s important to assess how difficult the project will be to assemble and get up and running. Difficulty is subjective and will depend quite a bit on your familiarity with the hardware involved and your experience with such machinery. The instructions for some projects are more straightforward than others. Take a look at the “Difficulty” bullet point at the end of each section to see how challenging we estimate the project to be.
Note that we didn’t list the projects in any particular order.
Wellzoom Pellet Extruder
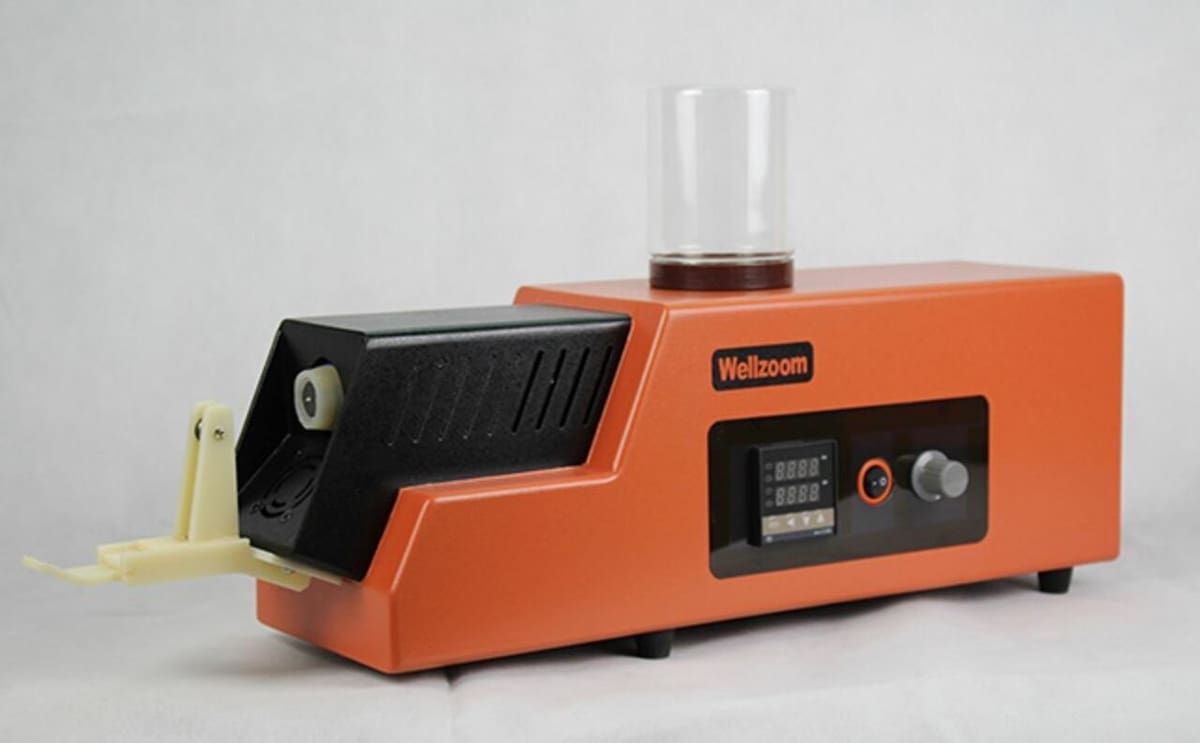
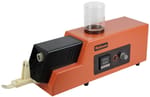
Wellzoom is a Chinese developer of 3D printing-focused filament extruders and extruder accessories. Its B2 Desktop Extruder is a pre-assembled filament extruder that only costs around $600.
According to Wellzoom, the B2 can reach 300 °C, meaning it’s capable of working with a fairly wide range of materials. The company also lists the B2 as having a temperature variance of just 1 °C. Despite the machine’s capabilities on paper, it’s important to note that reviewers have experienced issues with its heating system, resulting in high diameter variation and low-quality filament.
A further statement from Wellzoom is that the B2 has an extrusion rate of around 250-650 mm per minute, but again, reviews tell a different story, indicating that the machine tops out closer to 415 mm per minute. Regardless, even 650 mm per minute would be pretty slow for an extruder, equating to around a kilogram of filament every 10 hours.
Despite lacking some production power, the B2 has many good visual and operating features. The extruder comes in a fairly well-designed and clean-looking orange body, with an integrated hopper. Although, this hopper isn’t very large, so you may have to refill the device frequently.
- Speed: ~1 kg per 10 hours
- Supported materials: PLA, wood-infused PLA, ABS, and more
- Difficulty: Easy
- Price: ~$680
Filabot EX6

The Filabot EX6 is a significant evolution from the legacy EX2, transitioning from a hobbyist-grade recycler to a professional-grade extrusion system. Designed for researchers and engineers, it is built to handle the most demanding polymers. With a four-zone heating system, it allows for the desktop extrusion of high-performance materials like PEEK and HIPS.
The EX6 features a high-torque drive system and a precision-machined screw with a superior compression ratio, ensuring consistent filament diameter and melt-homogeneity. Whether you are developing custom masterbatches or recycling industrial waste, the EX6 has its sights set on being the gold standard for desktop-scale material science.
- Speed: ~4.5 kg per hour
- Supported materials: PLA, ABS, PC, PEEK, HIPS, and more
- Difficulty: Professional
- Price: ~$15,000
Noztek Pro Desktop Extruder
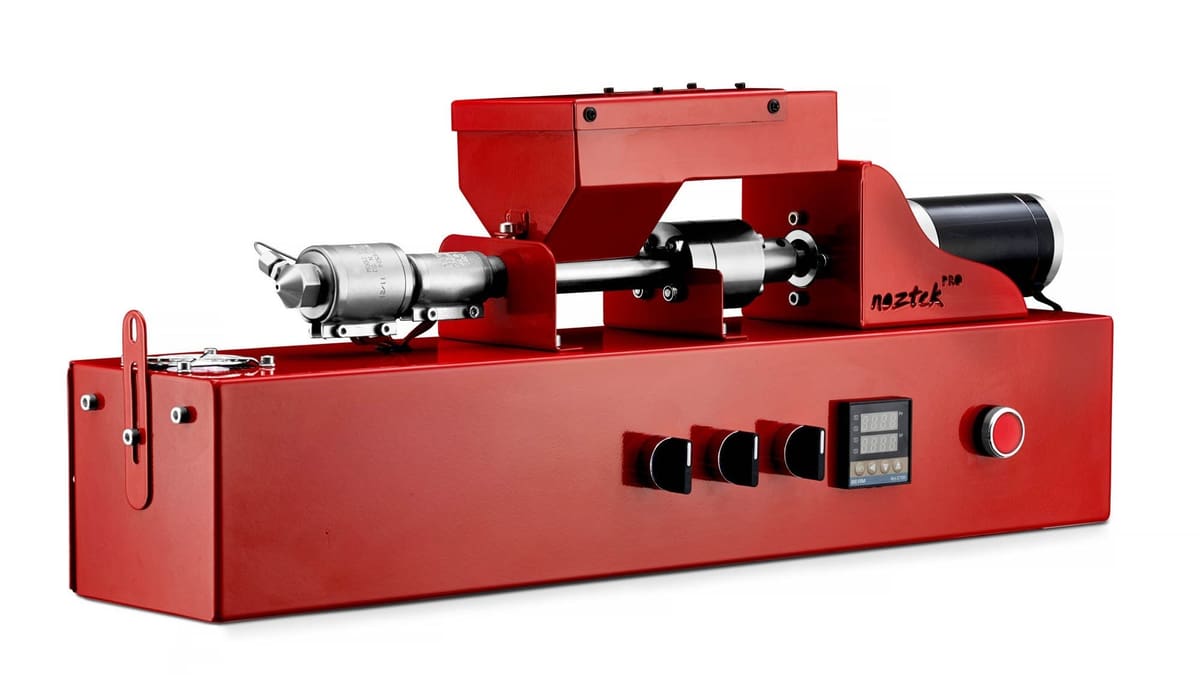
Noztek is another company centered around 3D printing filament production, and the Pro Desktop extruder is a great machine that costs less than many other pre-assembled options. It’s considered a plug-and-play extruder and not just because it looks cool with its slick red sheet metal frame that hides the underlying complexity – the company boasts that you can set this machine up and start extruding filament in only 15 minutes.
The base model of the Noztek Pro can achieve a maximum temperature of 300 °C, but the Pro HT model gives the temperature a boost up to 600 °C. If you want to produce multiple spools of filament, you can upgrade your Pro Desktop extruder with Noztek’s extended vertical hopper and filament winder to store more pellets and spool the filament as it’s produced.
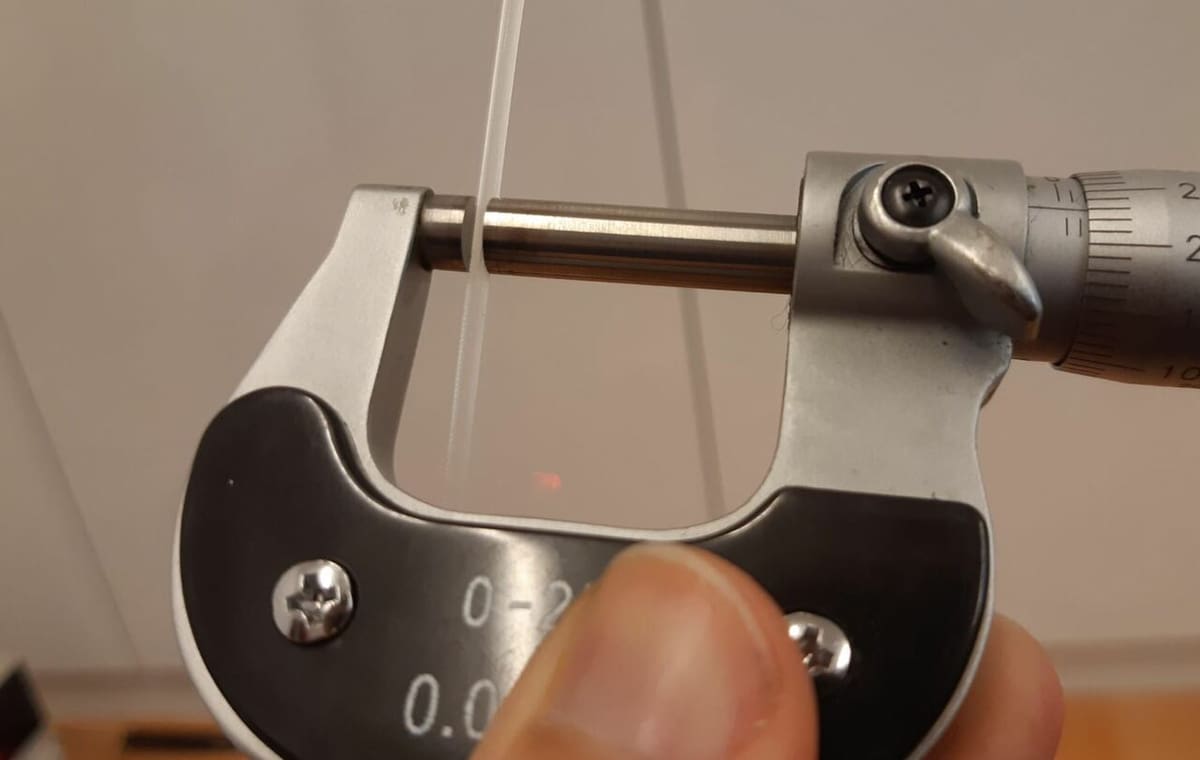
Yet, one of the best parts of this machine is its precision. The Noztek Pro can maintain a diameter tolerance of just ±0.04 mm – better than many filaments made from more expensive professional machines. You can also make filaments in both 1.75- and 2.85-mm diameters using Noztek’s swappable output nozzles.
Like the other manufacturers on this list, Noztek produces multiple filament extruder models. The most expensive ones, the Xcalibur (costing around $10,600) and FusionX (costing around $30,000), both allow for more control thanks to independently controlled heater bands. The former is advertised for big loads and produces around 2 kg of filament per hour, while the latter is specialized for research and development purposes. There’s also a model with a touchscreen display, a compact desktop footprint, as well as new built-in safety features – all of which would set you back about a grand more than the base model of the Noztek Pro.
- Speed: ~1 kg per 2 hours
- Supported materials: PLA, ABS, PP, and more
- Difficulty: Easy
- Price: ~$1,660-$2,440
3devo Filament Maker Two

3devo’s Filament Maker Two is designed for professional and industrial environments, and offers a significant leap in power, precision, and automation compared to the company’s Precision and Composer series.
The Filament Maker Two is a fully integrated “all-in-one” system that handles everything from raw material intake to final spooling. The most notable upgrade is the new stepper motor and gearbox, which delivers three times more torque than the original Filament Maker One. This added power allows the machine to handle tougher materials and produce larger 3 kg spools of filament with ease.
To ensure industry-leading consistency, the device features a 50 mm longer extruder screw and a three-axis camera sensor that measures filament diameter and ovality at a staggering 10-micron accuracy. 3devo has also modernized the user experience with a 7-inch touchscreen and an open-source API, making the machine easier to integrate into existing workflows or research labs.
The Filament Maker Two is available in two specialized versions. “High Flow” is optimized for high-volume production of standard materials like PLA, PETG, and Nylon, Alternatively, “Fusion” is designed for experimental material compounding, such as mixing additives or creating carbon fiber and metal-infused filaments.
- Speed: Up to 1 kg per hour
- Supported materials: PLA, ABS, Nylon, carbon fiber blends, metal-infused, PEEK, and more
- Difficulty: Easy (Plug-and-play with advanced software controls)
- Price: ~$18,200
ExtrudeX
While industrial machines like the 3devo target professional production, the ExtrudeX is aimed squarely at the “everyday maker” looking for an affordable way to recycle failed prints, purge blocks, and support material. Developed by Creative3DP, this machine is a DIY-friendly, compact desktop recycler that costs a fraction of commercial alternatives.
The ExtrudeX is a “no-code” hardware project, meaning there is no complex firmware to flash or electronics to program. It operates on a simple hardware control system using a DC gear motor, band heaters, and a PID temperature controller. To keep costs down, the machine uses an open-hardware approach: users purchase the STL files for the frame and then source standard components from retailers like Amazon or AliExpress.
To ensure the best filament quality, the creator recommends a mix of 60% virgin pellets and 40% shredded waste of the same material. The system guides the molten plastic through a cooling path and pulls it onto a spool at a constant speed, producing approximately 1.75 mm filament. For those who want more precision, the design includes an optional mount for a digital dial gauge to monitor filament diameter in real-time.
- Speed: Steady extrusion flow
- Supported materials: PLA, PETG, and more
- Difficulty: Medium (DIY build required)
- Price: ~$300 ($49 for files + ~$180–$250 for parts)
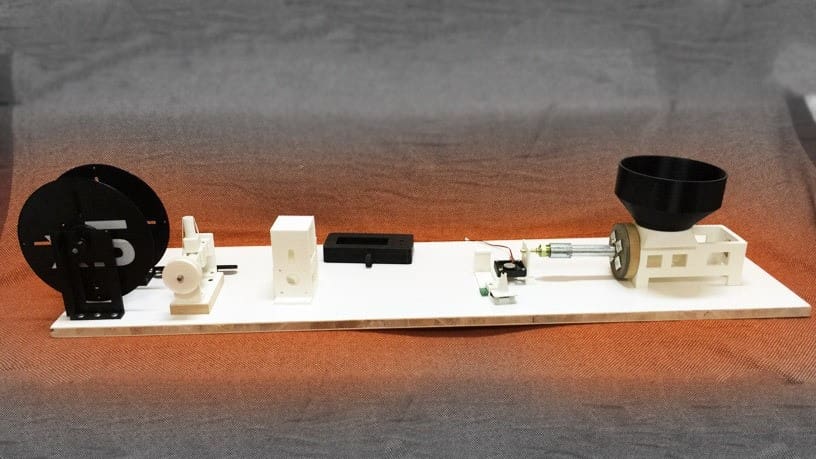
Felfil DIY Project Pack
The Evo is a purchasable filament extruder made by Felfil, a company that specializes in filament production equipment. However, it’s completely open source. Technical drawings, 3D models, and instructions are all part of the Felfil’s DIY Extruder Project Pack.
Many of the parts required to complete the DIY extruder are easy to source and similar to parts used on 3D printers. For the specialty mechanical parts that are harder to source, Felfil sells a basic kit for makers who want to get a head start on building their DIY filament extruder. There are also a few 3D printable upgrades you can print to soup up your DIY Felfil extruder.
If you follow Felfil’s design, the extruder will have three heating zones and be able to reach maximum temperature of 250 °C. As a result, you should be able to produce most standard 3D printing materials, including PLA, ABS, and PETG.
The assembly will be more difficult than simply buying their fully assembled Evo filament extruder, but thanks to their detailed step-by-step guide, the DIY version should be well within the reach of a determined maker.
- Speed: ~1 kg per 7-10 hours
- Supported materials: PLA, ABS, and more
- Difficulty: Medium
- Price: ~$400 for basic kit
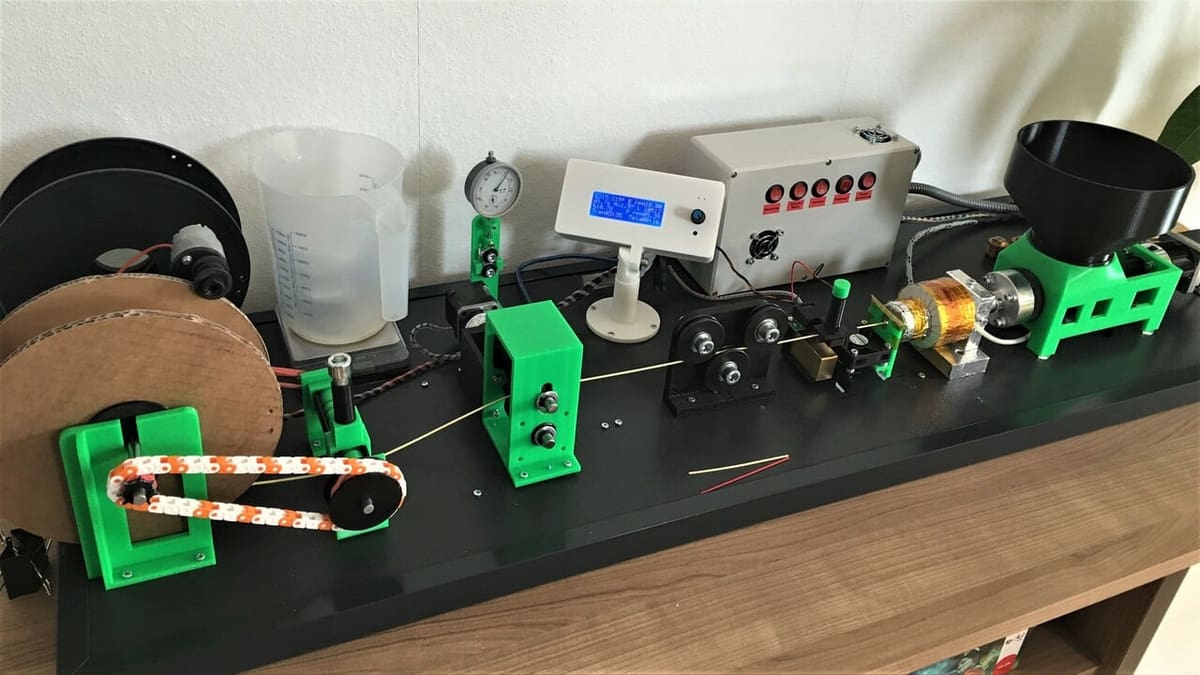
RepRap Recyclebot
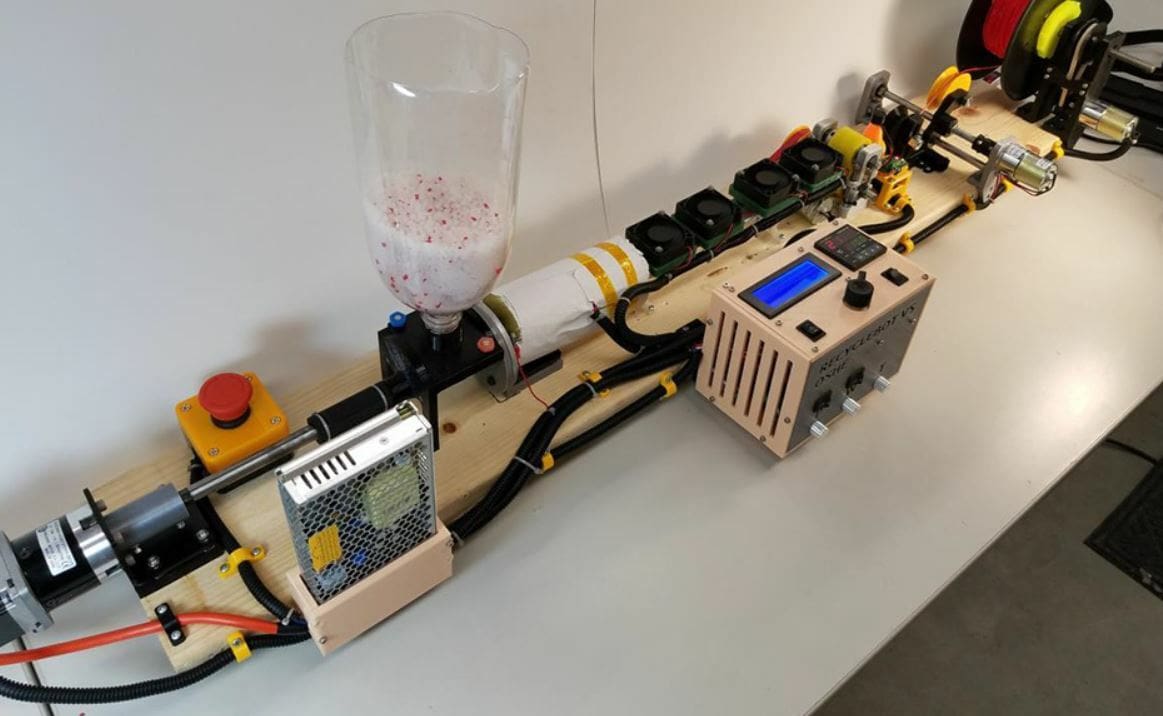
The RepRap Recyclebot is an open-source filament extruder project developed by Michigan Tech’s Open Sustainability Technology Lab. While most of the information about the device can be found on the RepRap project page, the 3D printable part files for the extruder – 25 in total – are available on the project’s Thingiverse page.
The 3D printable components make up the body of the filament extruder. A few other pieces of hardware are required, including metal sprockets, a windshield wiper motor, an auger bit, some wire, and an Arduino Uno board to control the machine. None of the hardware is proprietary, and as the Recyclebot is an open-source project, you can make basically any parts work. For example, the original maker of the project was able to use an old laptop power adaptor as their heating component.
Assembling the Recyclebot is a bit difficult, considering how many different parts are involved in the machine. However, the RepRap and Thingiverse pages (wiring, parts) for the projects all have some instructions about how to make the machine, which should make the building process slightly easier.
- Speed: ~1 kg per 2.5 hours
- Supported materials: ABS and PET (PLA should also work, but it hasn’t been officially tested)
- Difficulty: Hard
- Price: Varies depending on hardware
Artme3D MK2
Artme3D is a well-known name in the 3D printing community, mostly for small-scale plastic extrusion. Established in 2016, the company has created several DIY extruder kits, the latest being the MK2 and the MK2.5. The kit (at time of writing, only the MK2.5 is available) doesn’t come assembled and you have to print the plastic parts yourself.
It should be noted that the only difference between the two kits is the gear for the extruder drive, which in the MK2.5 includes 3D printed parts as the creator faced challenges when acquiring the hardware, causing further delays in preparing the MK2 kit. There are otherwise no differences in performance and features. So, the MK2 (and MK2.5) works with pellets and grinds as raw materials to produce filament. The creator notes that fiber-reinforced, polypropylene (PP), and shredded PET materials shouldn’t be processed. Some flexible materials have been tested, but it might be best to err on the side of caution.
Once the kit is assembled, it’s possible to interchange nozzles and adjust temperature and speed. But what really sells this machine is its stir bar, which allows even feeding of the shredded filament or pellets that might otherwise congest and stop the feeding. If the shredded plastic has some impurities, some plastic grinders are prone to letting these into the extruded filament, which may also clog the nozzle. Luckily, Artme3D MK2 uses a melt filter, with holes smaller than the nozzle of a typical 3D printer.
Its output is at about 1 kg per hour, which is decent for its price range. When it comes to filament diameter, it won’t give the tightest tolerances, but users can expect a variance of about 0.01 mm, which, to be fair, is acceptable even for commercial filaments.
On the flip side, assembling the kit requires a more than significant amount of tinkering. On top of that, its wire sensor arm can get in the way, causing the filament to get stuck to it and bounce back. And there’s no shredding solution – users have to build or buy one themselves.
While it might be a bit on the more expensive side and will require significant tinkering, the Artme3D MK2 gives a good bang for your buck if you’re a hobbyist intent on making your own filament.
- Speed: ~1 kg per 4 hours
- Supported materials: PLA, ABS, PETG, and more
- Difficulty: Hard
- Price: ~$730
Bonus: Pultrusion
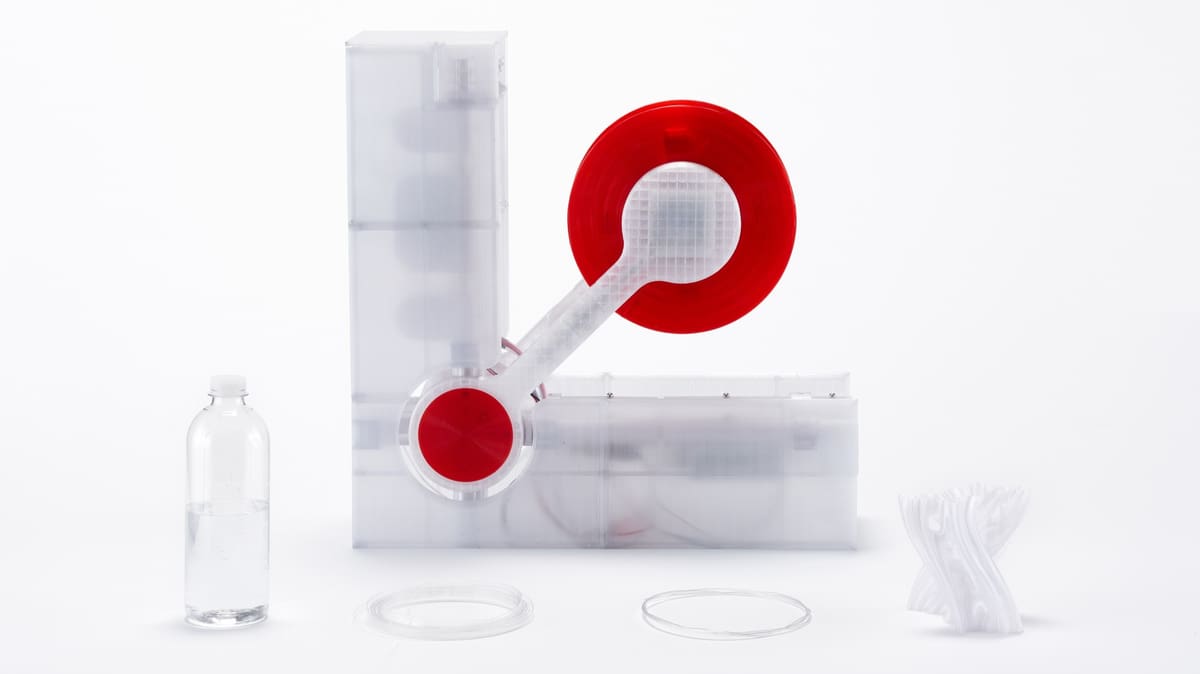
Another DIY filament-making method called “pultrusion” – you’ll also see “pullstrusion” – takes the notion of reduce, reuse, and recycle to the next level. Rather than melting pellets and extruding them into filament, used PET bottles are the source material for the pultrusion method.
They’re cleaned, then depending on the shape of the bottles, inflated and heated to achieve a smooth surface. Next, the bottles are sliced into long strips, then fed through a heat end and nozzle where they’re curled into a hollow filament whose cross section isn’t perfectly round. This last point is particularly important when it comes to 3D printing because the flow rate settings must be adjusted to compensate for the filament’s shape.
The obvious benefit of pultrusion is the ability to reuse a material that’s readily available in abundant quantities. It’s easy to do, even on a shoestring budget, and there are a number of devices that can be printed at home or purchased to facilitate the process.
In terms of cons, the amount of filament you can get is limited to the size of the bottle. You’re looking at about 20 grams of filament, so you’ll have to splice the filament together to get a longer strand for larger printing projects. Then, there’s the adventure of printing with PET. However, with adequate cooling and the right print settings, these challenges can be overcome.
Example Machines
As mentioned above, there are several machines out there, both DIY and paid, that facilitate filament making with pultrusion. The following are a few that caught our attention:
- Recreator 3D: Designed by Joshua Taylor, this pultrusion unit is created from a combination of 3D printed parts as well as parts from an Ender 3 3D printer. The design has gone through a few iterations, with the MK5 Kit being the latest. There copious amount of support materials on the website and YouTube, and all of the necessary STL files can be found on Printables.
- Polyformer: This award-winning design was inspired by Taylor’s Recreator 3D project. Unlike the Recreator, though, all of the pultrusion action happens vertically in a compartment that opens rather gracefully at the front of the unit. The strips sit above and are fed down into the hot end. The curled filament exits the nozzle, rolls along a guilder, then is wound with a winder at the back of the unit. The machine is fully open source, and non-printable parts can be repurposed from a 3D printer or bought separately.
- Pullstruder: This DIY project is the most complex of the three. While the concept is pretty much the same, it involves building a custom hot end with a combination of aluminum, a heat band, and a PID controller. Similar to the other projects, repurposed parts are used – this time, a car wiper motor from an old car. This one is definitely for those who love to tinker.
License: The text of "Stop Trashing Failed Prints: 8 Best Filament Extruders to Make Your Own Material" by All3DP is licensed under a Creative Commons Attribution 4.0 International License.
CERTAIN CONTENT THAT APPEARS ON THIS SITE COMES FROM AMAZON. THIS CONTENT IS PROVIDED ‘AS IS’ AND IS SUBJECT TO CHANGE OR REMOVAL AT ANY TIME.