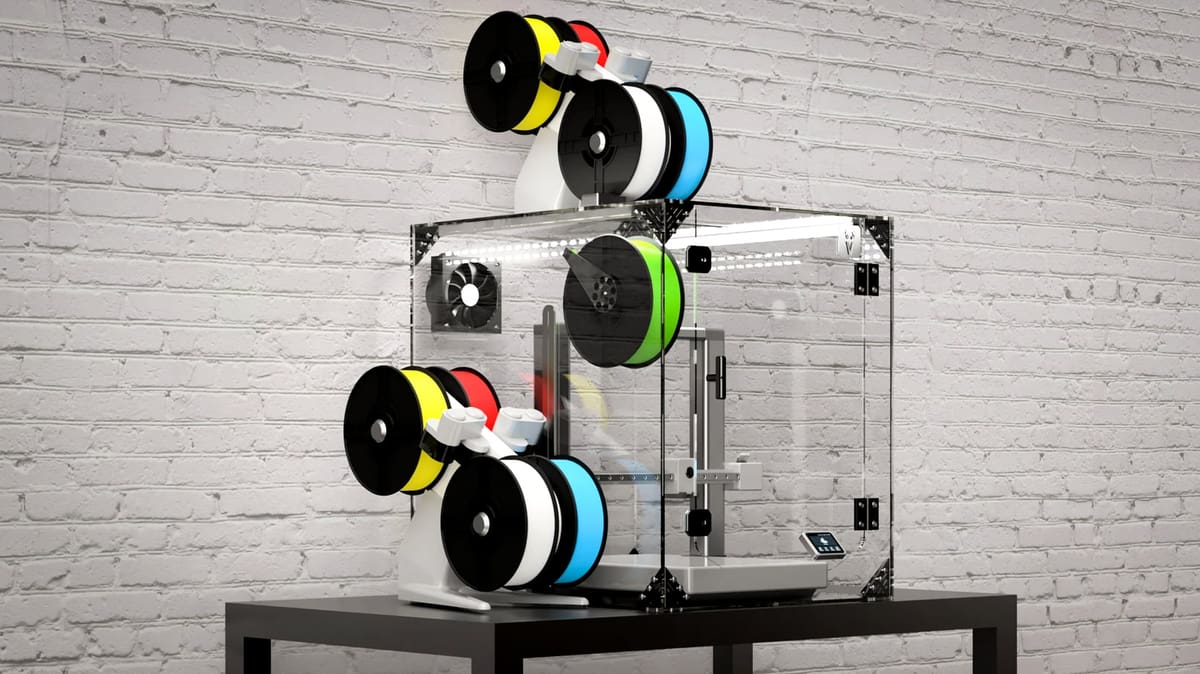
Bambu Lab A-Series Enclosure: 7 Simple Solutions

Having your Bambu Lab A1 with an enclosure will help you print engineering-grade materials, but comes with extra risk.
Should you enclose an open-frame Bambu Lab A-Series printer? Bambu Lab’s own answer is no: its official FAQ states plainly that it doesn’t recommend enclosing these machines over concerns about internal heat buildup. But we read the forums, and we know plenty of owners are doing it anyway.
We get it; maybe you’re printing a filament that benefits from a more consistent chamber temperature, or you want to kill drafts that are wrecking your layer adhesion. Maybe you want to vent fumes and emissions outside instead of into your room, or maybe your only real complaint is dust and pet hair settling on the printer between jobs. Perhaps you want to keep your students’ from touching moving parts or hot surfaces.
Plus, there’s a real appeal to turning a budget A1 Combo into something like an enclosed P2S Combo, or a larger A2L Combo into something like an enclosed H2C — for a fraction of the price.
So if you’re going to enclose your A-Series printer anyway (and we’re not explicitly recommending it) here’s why Bambu says no, what to consider if you do it, and which enclosures may help you get better prints while reducing (not eliminating) the risk of overheating and damage.
Bambu Lab A1 Enclosure: Why Bambu Lab Says No
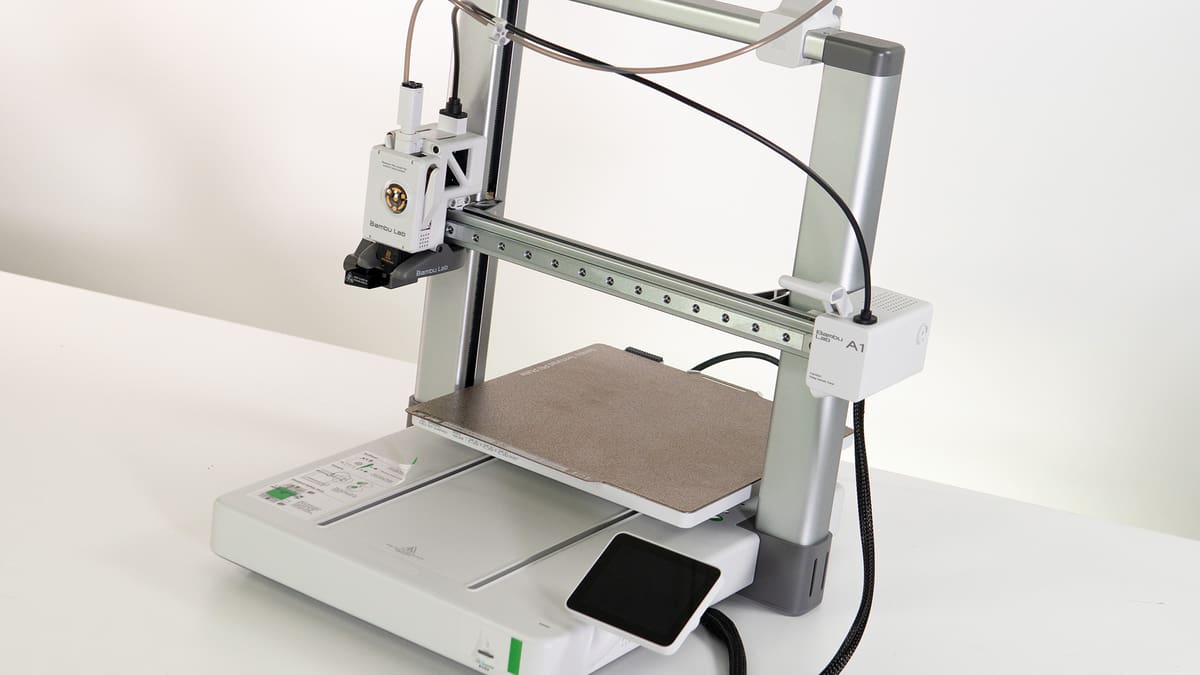
Bambu Lab’s own A1 FAQ is blunt about this, stating that it doesn’t recommend enclosing the A1 at all. This is because Bambu Lab’s uses a Mornsun LM150-20B24 AC-DC converter (100–240V input, 24V/6.5A output), and its own rating label reads Ta: 50°C. What does this mean? The part is only rated to operate correctly up to 50°C of surrounding air temperature. It’s a sealed, finned metal case with no fan of its own; whatever cooling it gets comes entirely from passive airflow through the printer’s open frame. Take that airflow away by sealing the printer in a box, and you’re pushing a component that’s already only rated to 50°C ambient into a hotter, stiller pocket of air than it was ever designed for.
Beyond that spec, real owner reports in Bambu Lab’s forum back it up. People running their A1 enclosed have reported power supplies failing after overheating, and Bambu Lab staff and moderators on the community forum repeat the “please don’t enclose A-series printers” guidance directly to anyone who asks. So this isn’t a vague liability disclaimer, it’s a specific, now-confirmed thermal limit on a specific part, and some owners have burned out hardware finding it the hard way.
This also applies to the newer Bambu Lab A2L. When an owner asked Bambu Lab’s own community forum about a standalone tent enclosure for the A2L, the community’s own read was that reputable sellers avoid making one at all, for the same reason: the A-Series needs steady fresh air across its electronics, and sealing it in a box courts exactly the failure mode described above.
Tips for Safer Enclosure Use
If you’re enclosing your A-Series printer despite the above, match what you build or buy to the actual problem you’re solving since a full airtight seal is the riskiest option and often isn’t what you need:
- Just keeping dust and pet hair off between prints? A loose, breathable cover you remove before printing solves this without trapping any heat at all — you don’t need a sealed enclosure just for this.
- Mainly bothered by drafts, not fumes? A lift-off or vented enclosure — one where the top or a panel stays open, or that’s built with real vent holes — eliminates drafts without sealing heat in the way a fully closed box does.
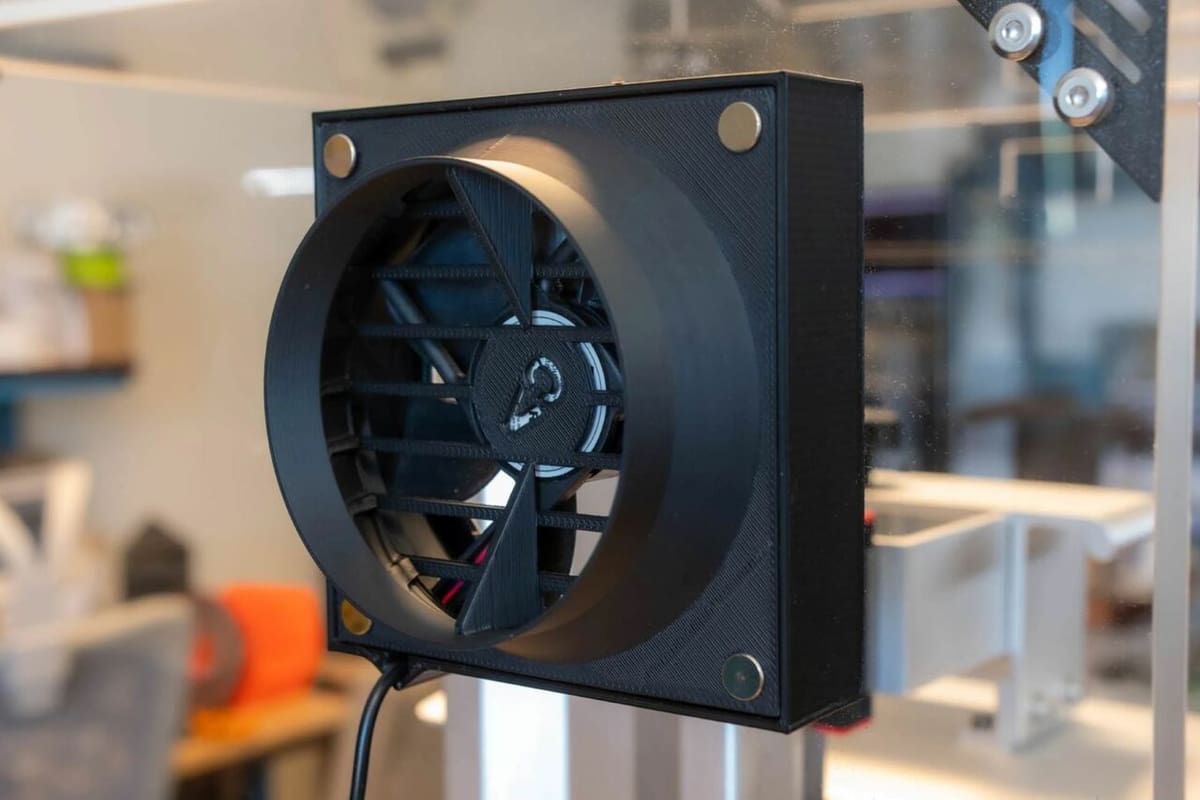
- Concerned about fumes or VOCs (ABS, ASA)? Prioritize active exhaust venting over an airtight seal: a fan pulling air out and away from your workspace matters more here than how enclosed the box looks. You can see the best practices for dealing with printer fumes in our guide.
Here are some additional add-ons and advice for keeping your machine cool inside an enclosure:
- Add active cooling or automated exhaust rather than relying on a passive box. Installing an exhaust fan to trigger automatically once the chamber hits a set temperature (~30 °C) rather than just hoping ambient heat dissipates on its own.
- Use an independent temperature sensor inside the enclosure, separate from whatever the printer itself reports, and set a hard mental (or automated) cutoff well below your enclosure’s rated maximum.
- Never leave the printer enclosed and unattended while running high-temperature materials like ABS or ASA.
- If you plan to run the printer enclosed 24/7, budget for real active cooling (fans, vents, exhaust) rather than a sealed box, or consider that an already-enclosed printer like the P2S may be the safer buy for your use case in the first place.
What Enclosures Do & Which Fit A-Series Printers
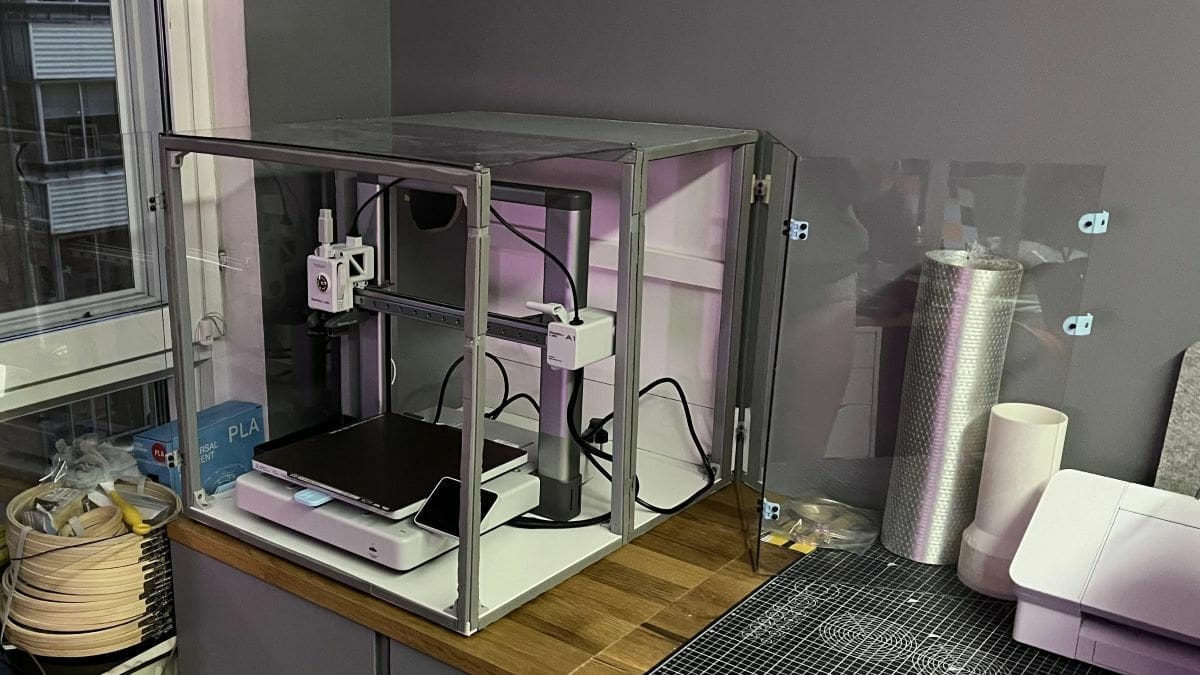
An enclosure is meant to serve a few purposes as we mentioned above. Mainly it can maintain an ambient temperature for your printer, eliminating drafts and keeping your printed parts from cooling down too fast. This is especially important when printing materials such as ASA or ABS, which have bed and layer adhesion issues when exposed to open-air cooling. It can also trap fumes and particles, keep little kid’s small hands away from hot and moving parts, and work as a cover to keep you printer dust-free.
With all this in mind, here are the main factors we looked at when picking enclosures for this list:
- Temperature: We’ve chosen enclosures that are designed to maintain a consistent temperature for the printer by creating a truly enclosed space with no drafts.
- AMS compatibility: While there are many enclosures that would house a single A1 printer, we want to have the option of storing both the A1 and the AMS Lite unit. Our list prioritizes enclosures that are large enough for both the printer and AMS Lite.
- Accessibility: How easily you can reach the print bed and clear finished prints without breaking the enclosure’s seal.
- Visibility: We opted for enclosures that allow users to easily monitor printers to watch for failures or capture amazing time-lapses.
We’re not telling you to do this, Bambu Lab explicitly doesn’t recommend it. But if you’ve decided to anyway, here are seven A series enclosure options you can use and modify to your needs.
TopCube
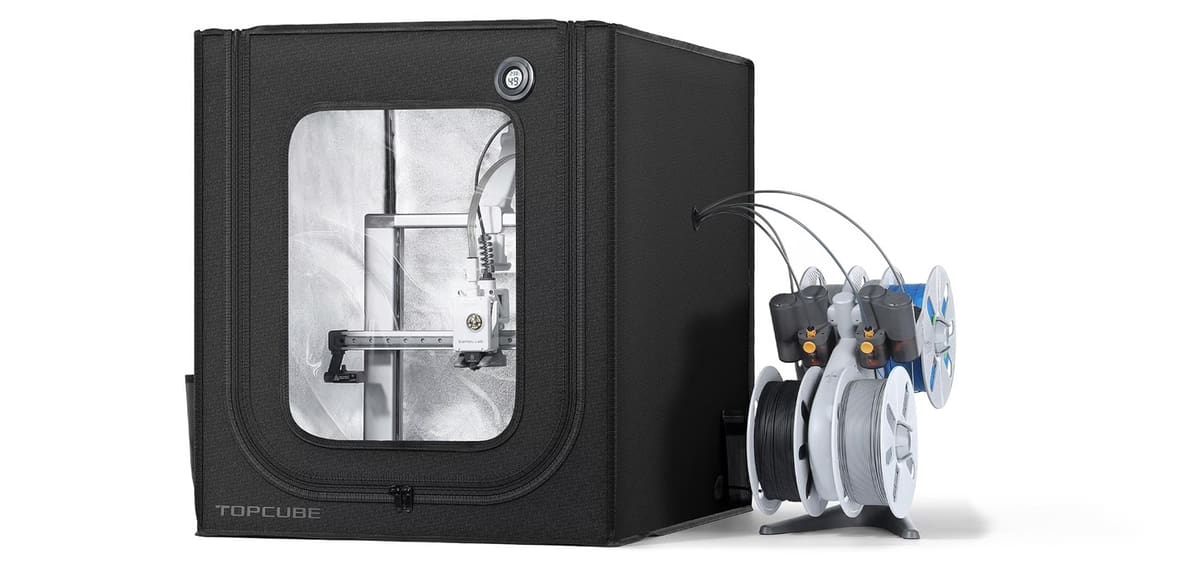
TopCube is the name that comes up most often when actual A1 owners on Bambu Lab’s own community forum talk about buying a ready-made enclosure rather than building one. It’s a fabric-and-frame tent enclosure with a clear panel for visibility, built from fireproof, waterproof material, with an integrated LED light and an optional fan/fume-extraction add-on kit. At under $50, it’s the cheapest way into an enclosure on this list that doesn’t require any assembly beyond setting up the tent frame.
It’s not without trade-offs: some forum owners report fitment issues and airflow restriction leading to overheating. Given the safety section above, this is exactly the failure mode to watch for. If you go this route, don’t skip the temperature sensor, and strongly consider pairing it with the fan/fume-extraction add-on rather than running it sealed.
- Visibility: Clear panel on the fabric/frame tent
- Accessibility: Zippered or panel access, depending on configuration
- Price: $46
Chitu Systems
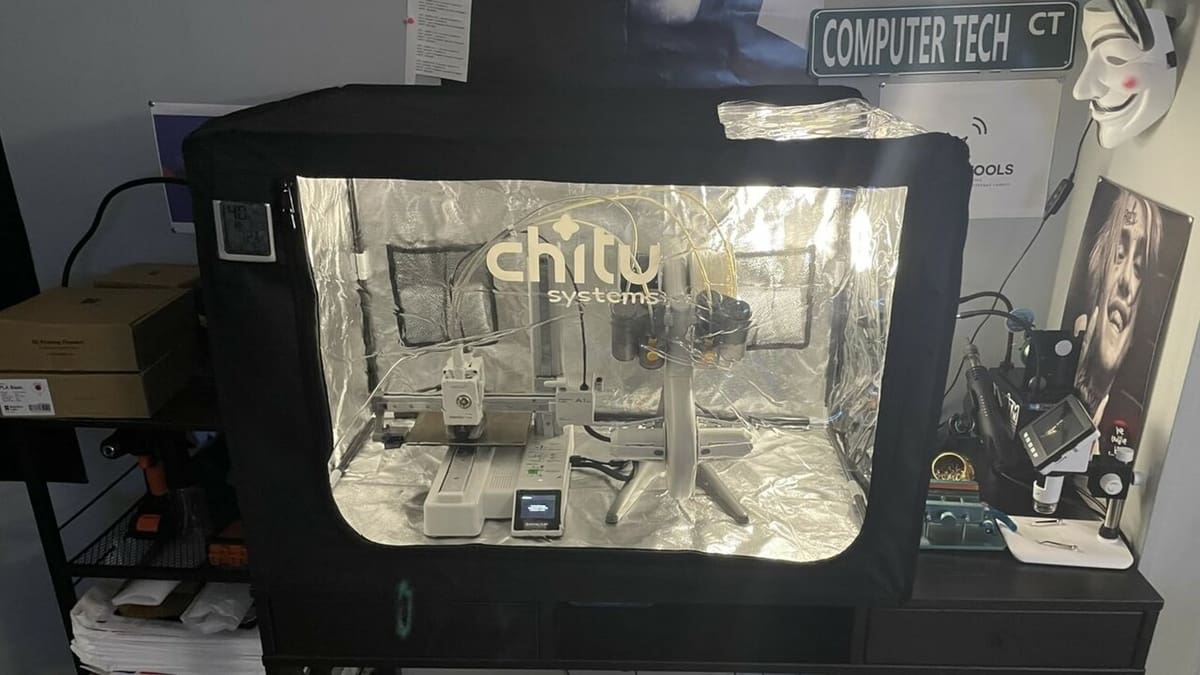
If the A1 Mini has that companion enclosure ecosystem, the standard A1 has Chitu Systems as one of the most established purpose-built options.
For the longest time, one of the easiest ways to enclose a printer was to use a frame and tent design. This is the same approach that Chitu Systems uses for their A1 enclosure. Using a thick Oxford cloth and a zip-close flap, this enclosure can easily keep heat inside of the chamber, while the see-through flaps make it easy to monitor your printer.
This enclosure is larger than the average tent setup, with more than enough space for both the A1 and the AMS Lite unit. It also comes with some nice features, such as exhaust fan outlets, a mesh pocket for carbon filtration, and a mini hygrometer. The enclosure is also compatible with other 3D printers, making it a worthwhile investment.
- Visibility: Front, right side, and (partial) top
- Accessibility: Front and side plastic windows
- Price: ~$53
Fnatr
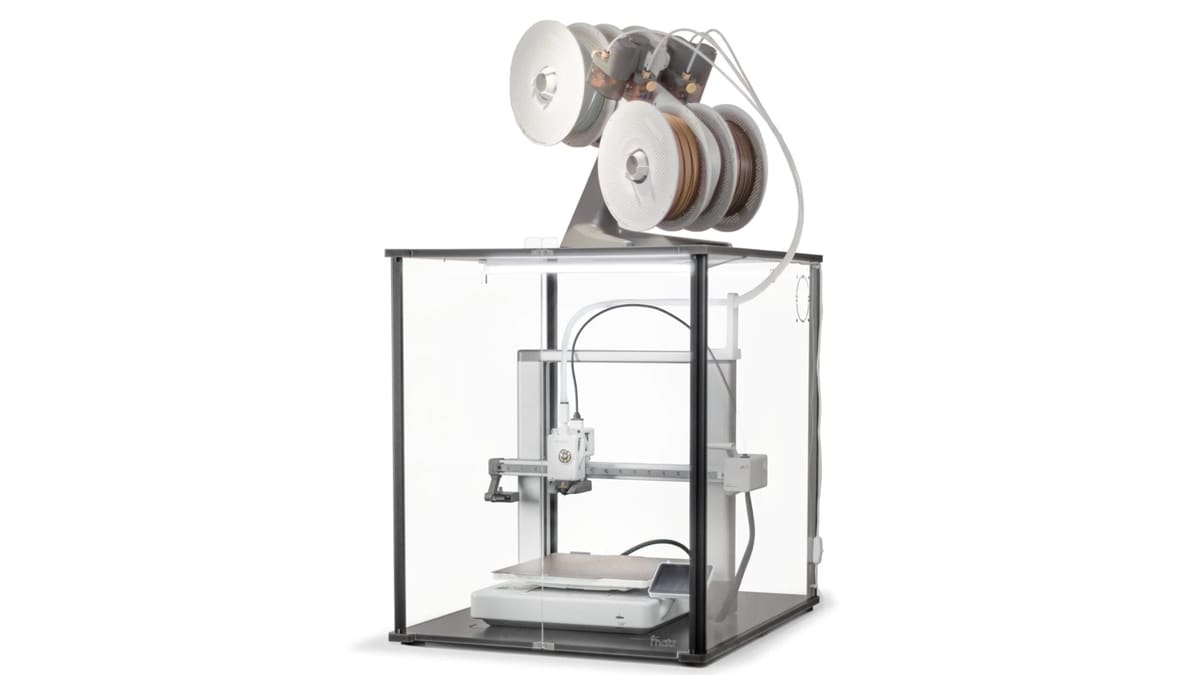
Fnatr makes a dedicated A1 and A1 Mini enclosure built from aluminum alloy profiles with transparent acrylic panels, with bottom vents and a dedicated heat outlet for airflow, and supports mounting the AMS Lite on top or to either side. It’s sold in three tiers: enclosure only, enclosure plus ventilation system, and enclosure plus ventilation plus two filters. You can then decide how much you would like to spend depending on how seriously you plan to run high-temperature filaments.
- Visibility: Transparent acrylic on all sides
- Accessibility: Hinged access panel
- Price: $159 for the base enclosure; ventilation and filter add-ons cost extra
Printable Accessories Modular Enclosure
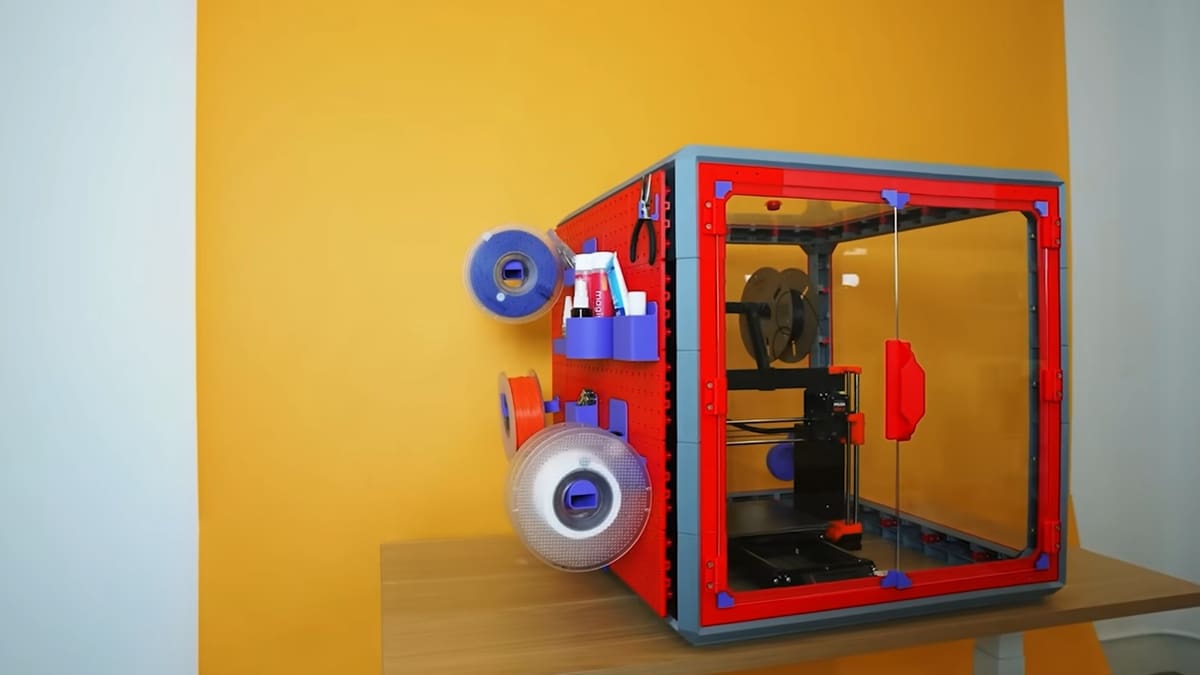
Printable Accessories has been creating 3D printable files with a wide range of applications, from filament storage systems to tabletop miniatures. All of their designs are made to be modular, allowing users to print them in any way they choose. The same goes for their Modular Enclosure.
The frame is completely 3D printed using a modular connection system, so you can print out as big or small an enclosure as you need. You’ll need a few acrylic panels for the sides and doors in addition to the printed parts (or you can print side panels too, at the cost of visibility).
The modular design means you can size it for just the A1 or make it larger to include the AMS Lite, and it’s easy to disassemble and extend later, including adding a pegboard for tool storage.
- Visibility: Up to four sides and top (depends on design choice)
- Accessibility: Front-opening hinged door
- Price: ~$90
Clearview Plastics
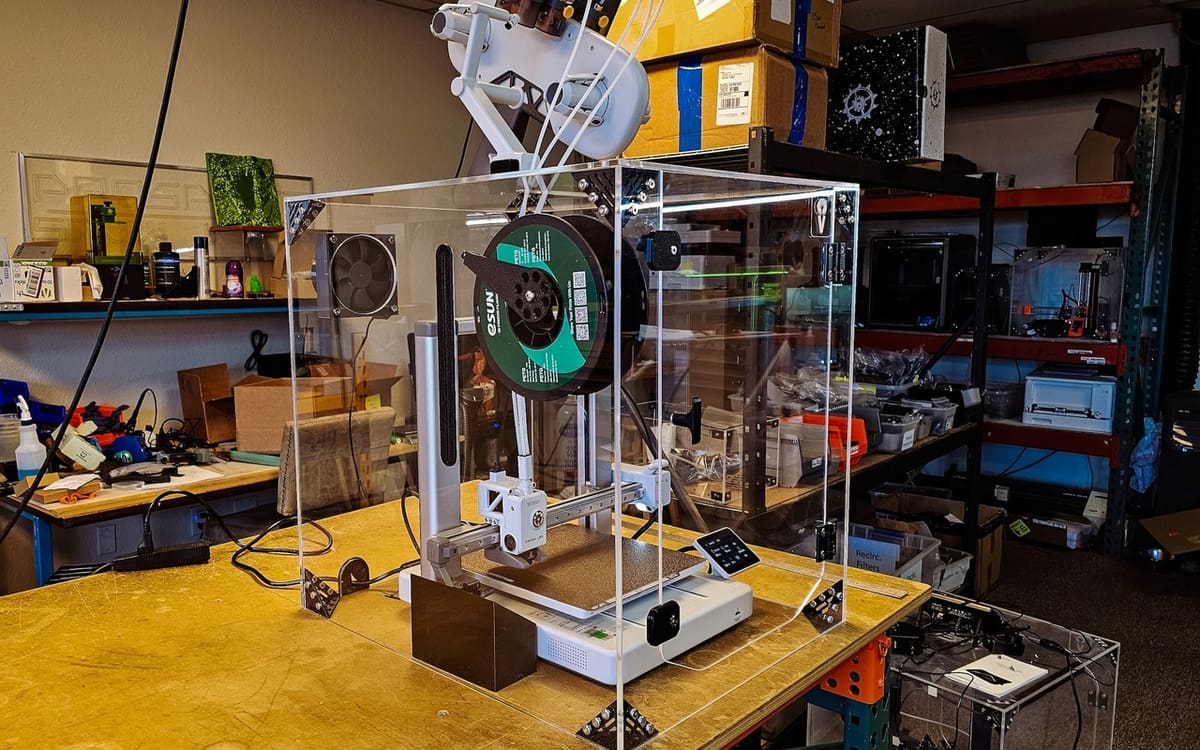
Clearview Plastics focuses on creating premium custom acrylic enclosures for the most popular 3D printers, using 3D printed brackets and grommets to simplify the assembly process. Their A1 Enclosure Kit is sized to perfectly fit the A1 without taking up more space than needed. The AMS Lite unit sits on top of the enclosure and feeds down into it. This reduces the horizontal space required for your A1 Combo, while requiring a bit more vertical space.
Clearview offers some optional upgrades to their enclosures as well, including an exhaust fan, an air filter, and an air intake for the bottom. These allow for air to flow freely to the motherboard underneath the A1 while still maintaining heat throughout the chamber. They also offer a power cable extender and a longer Bowden tube for the AMS Lite, both of which are required if you plan on mounting the AMS unit on top of the enclosure. These extensions, as well as any optional upgrades, will come at an additional cost.
While definitely the most expensive option on our list, Clearview provides a fully custom and premium enclosure for anyone looking for an all-in-one solution for their A1 printer.
- Visibility: All sides
- Accessibility: Front-opening hinged door
- Price: $449
Ikea Lack
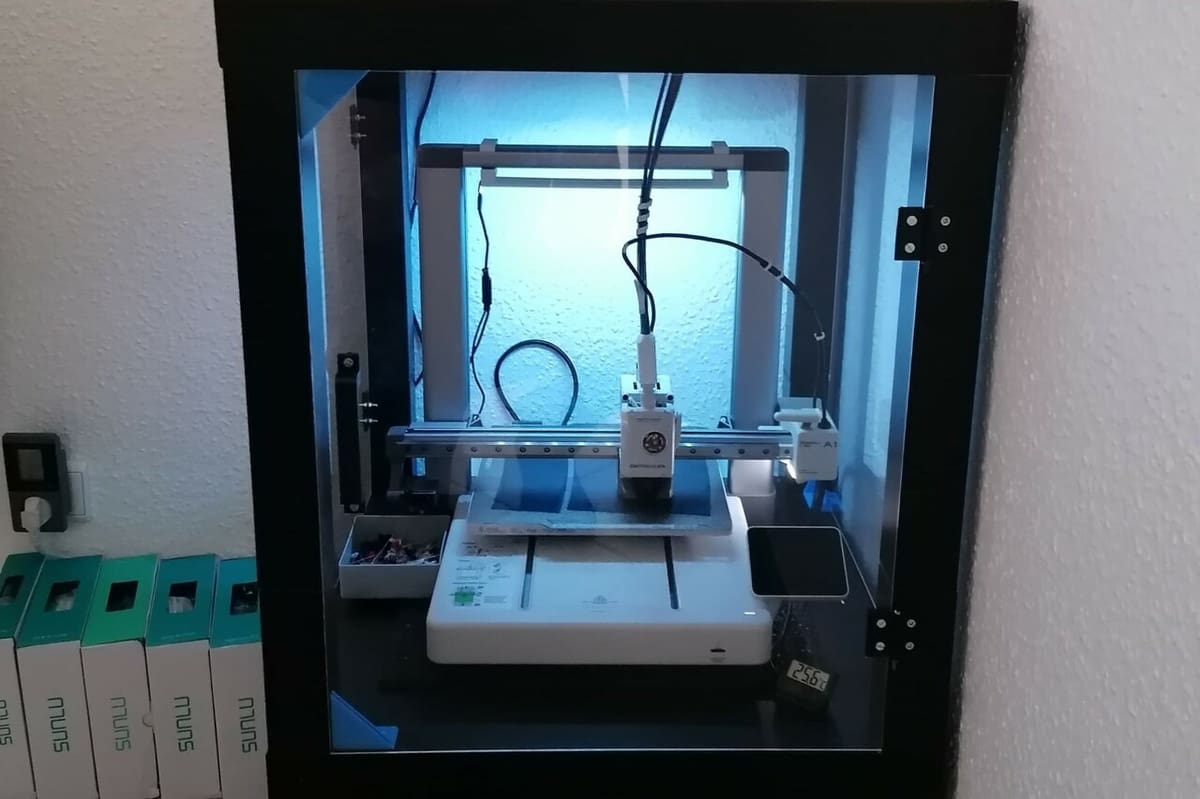
If you’ve ever looked into enclosure options for a 3D printer, you are most likely already familiar with the Ikea Lack setup. Some of you may even have a leftover Lack enclosure from a previous 3D printer enclosure build. This DIY enclosure utilizes two Ikea Lack tables stacked on top of each other, with acrylic panels mounted to the sides to enclose the open space. These tables are perfectly sized for most medium-sized FDM 3D printers, and the A1 fits snugly.
Some users leave the back panel off to relieve stress on the power cables and placing the enclosure’s back near a wall should still maintain a decent internal temperature. You’ll need to mount the AMS Lite on top if you’re using one, along with Bowden tube extensions. It’s more hands-on than the other options here, but it has a large community behind it, with plenty of instructions, mods, and personalization options.
- Visibility: Four sides
- Accessibility: Depends on design, but usually front-opening hinged door
- Price: ~$50, depending on modifications and acrylic panel price
Free MakerWorld Build
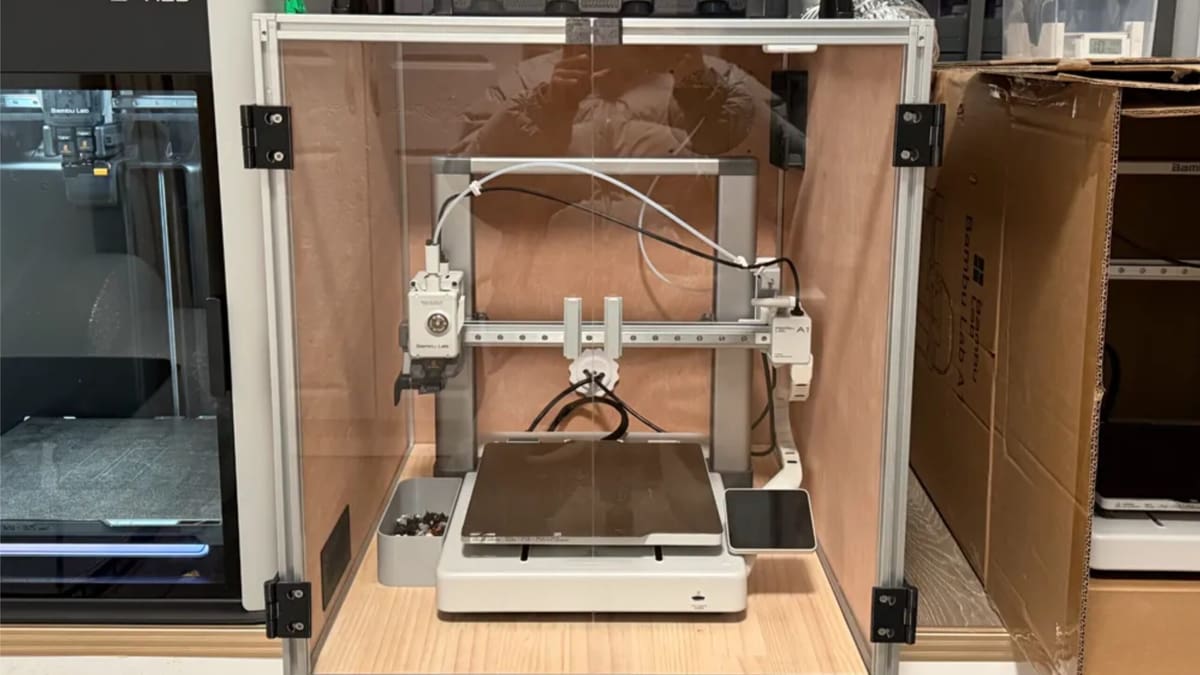
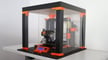
If you’d rather build your own enclosure for free, this design on MakerWorld is the strongest we’ve found: a fully documented aluminum-profile frame with pine finger-joint boards, clear acrylic panels, and front-facing double doors. What sets it apart from the Ikea Lack build above is that it’s engineered around the exact airflow problem mentioned earlier. The plans include a dedicated ~12cm exhaust vent and call for an inline exhaust fan, plus a wire-entry hole in the back panel, rather than just sealing the printer into a box. There’s also a dedicated shelf on top sized for the AMS Lite.
The design file itself is free; you’re paying only for materials (aluminum profile, boards, acrylic, and the exhaust fan), which typically runs somewhat less than the Ikea Lack build once you account for not needing a secondhand table.
If you own an A2L instead: this specific build is sized for the A1 and won’t fit. MakerWorld does have a separate free design sized for the A2L; the A2L Enclosure. It is a larger acrylic-panel build with lighting, fan, and filtration call-outs (the designer notes some of those electronics are still a work in progress). It’s not the same design scaled up, just a comparable free option for the bigger printer.
- Visibility: Front acrylic double doors
- Accessibility: Front-opening double doors
- Price: Free design; expect roughly $50–80 in materials
You May Also Like:
License: The text of "Bambu Lab A-Series Enclosure: 7 Simple Solutions" by All3DP is licensed under a Creative Commons Attribution 4.0 International License.