Mega Potential
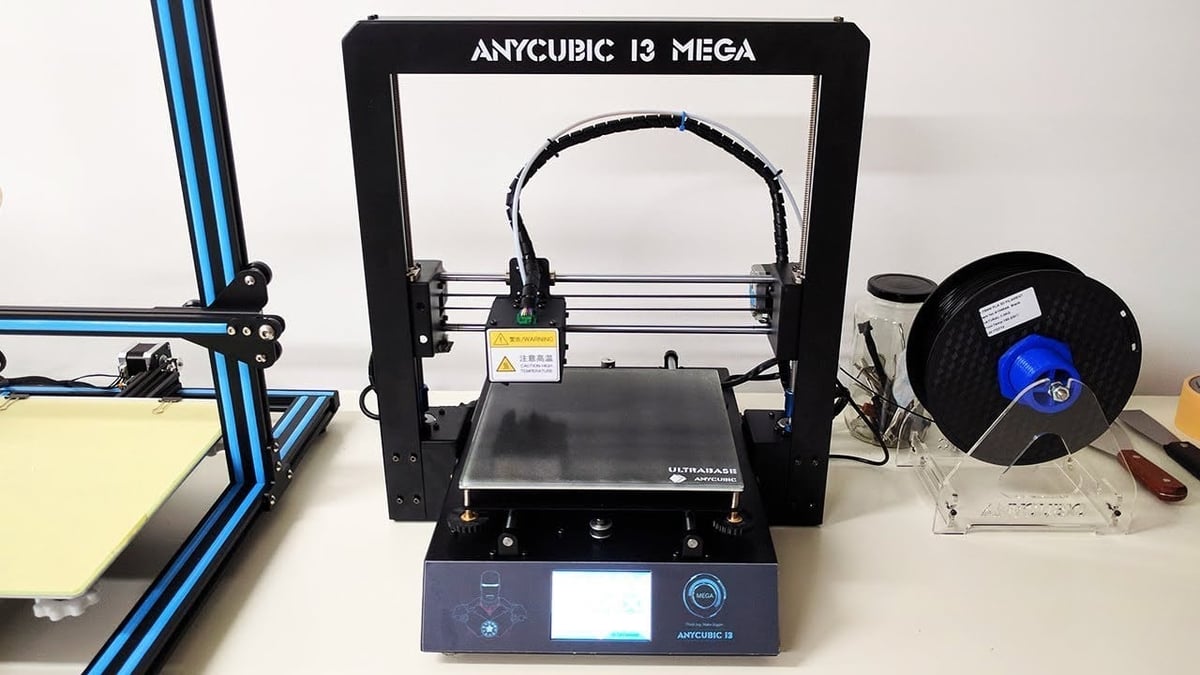
In early 2019, we gave the Anycubic i3 Mega an award for the best 3D printer under $300. We were amazed by some of the features it offers, which are usually reserved for more expensive printers. The whole printer feels like it should be way more expensive than it actually is.
As with any other 3D printer, its printing performance highly depends on the slicer settings. The Anycubic i3 Mega is compatible with a handful of slicers, but this time we’ll focus on Ultimaker Cura.
The standard settings straight from the user manual give solid results. However, with a few changes to the settings, you can get even better prints. In this article, we’ll present what we think is the ideal Anycubic i3 Mega Cura profile.
As you consider these settings, keep in mind that different 3D printing applications require different settings. For example, you won’t be printing a detailed action figure with the same settings you’d use for printing prototypes where details aren’t crucial.
The Anycubic i3 Mega Cura profile we’ve compiled here is a more general form, for anyone who’s aiming to take a step up from the default.
We’ll kick things off with adjustments to basic settings and move towards advanced settings as the article progresses. At the end, we have a summary of all the tweaks to get the best Anycubic i3 Mega Cura profile.

Basic Settings: Print Speed
One of the simpler changes you can make to your Anycubic i3 Mega Cura profile is to adjust the print speed. Reducing the print speed from the standard 60 mm/s to 45 mm/s could help get better details on small features. Why you may ask? Well, imagine you’re handwriting. The more time you take to write, the nicer it can look. The same goes for 3D printing.
As the nozzle travels slower, there’s less of a chance of mistakes, so it’s particularly useful to slow down the speed when you’re printing something detailed or on a smaller scale.
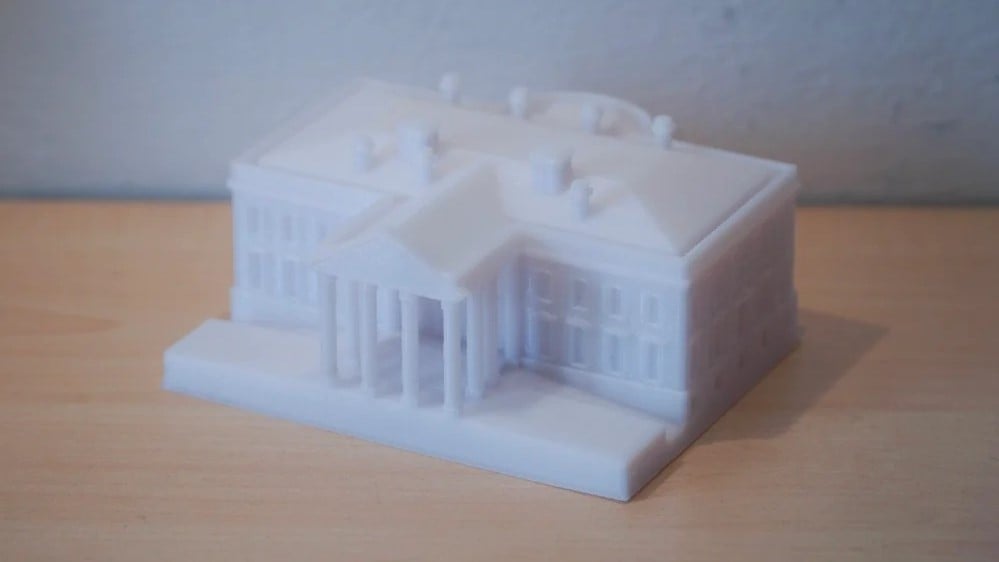
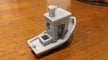
The model you see above was 3D printed on the Anycubic i3 Mega at 45 mm/s. The small chimneys on the roof turned out great, as did the rest of the model.

Basic Settings: Layer Height
Besides the print speed, one of the crucial parameters for your Anycubic i3 Mega Cura profile is the layer height. Lowering the layer height will add more finesse to your model. However, if you were to adjust the layer height from the standard 0.2 mm to 0.1 mm, you’d automatically double the number of layers required and therefore your print time, which is not ideal.
Instead, if you want to achieve a better visual appearance, split the difference and try printing with 0.15-mm layer height. This way, you still decrease the layer height, but not to a degree which would mean your prints take twice as long to print.

Basic Settings: Infill
Infill is a handy setting that affects the weight and rigidity of your model. The standard suggested infill setting is 20%. What’s great about this infill percentage is that it doesn’t take too long to print, but it gives a part a decent level of stiffness.
If you need to 3D print a functional component, consider bumping up the infill to 40% or more. This will provide more structural strength to the part, which is especially important if the part needs to carry a certain weight. On the other hand, if you need a very fast print, feel free to decrease the infill to 10% or lower.
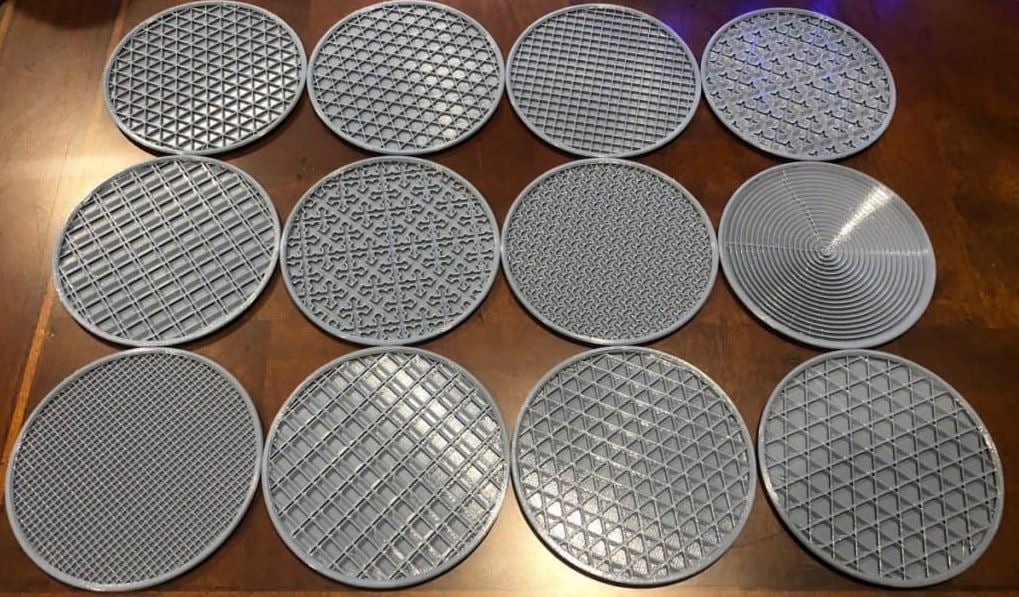
In addition to setting the infill percentage, it’s important to consider the best infill pattern for your print. The basic grid pattern is usually a good place to start, unless you need a particularly strong part.
Basic Settings: Hot End & Bed Temperatures
Next up, we have the hot end temperature. We can’t really give an ideal Anycubic i3 Mega Cura setting for this parameter because it entirely depends on the specific filament in use.
For example, classic PLA is usually printed at around 195 °C, which is the standard setting for the i3 Mega. If your PLA includes other materials like carbon fiber as reinforcements, you should raise the hot end temperature. But don’t worry, most filament spools come with the suggested hot end temperature clearly marked.
The Anycubic i3 Mega comes with an “Ultrabase” heated glass bed which has a texture applied to it with the goal of reducing warping. Still, if you do experience warping and your bed is perfectly level, try raising the bed temperature from the standard 50 °C to 60 °C.
This will keep the lower layers even more heated, which should reduce the difference in temperature between the new layers and the “old” ones. The result should be fewer stresses between the part’s layers, meaning less warping overall.
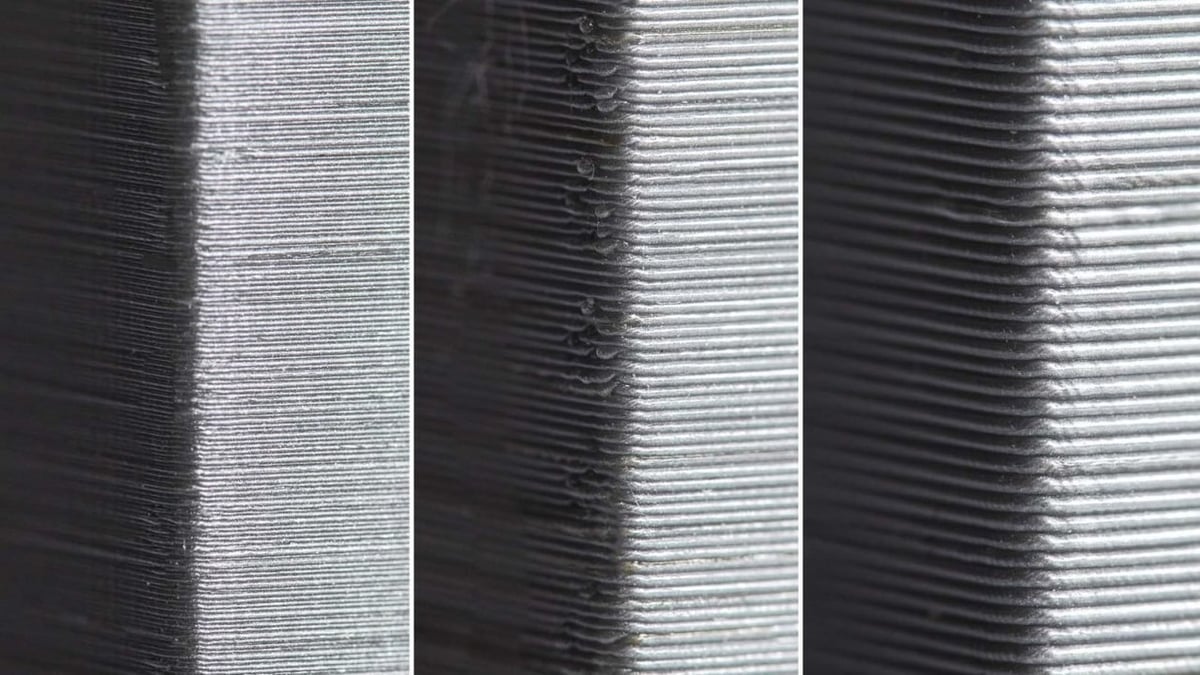
Advanced Settings: Retraction Speed & Distance
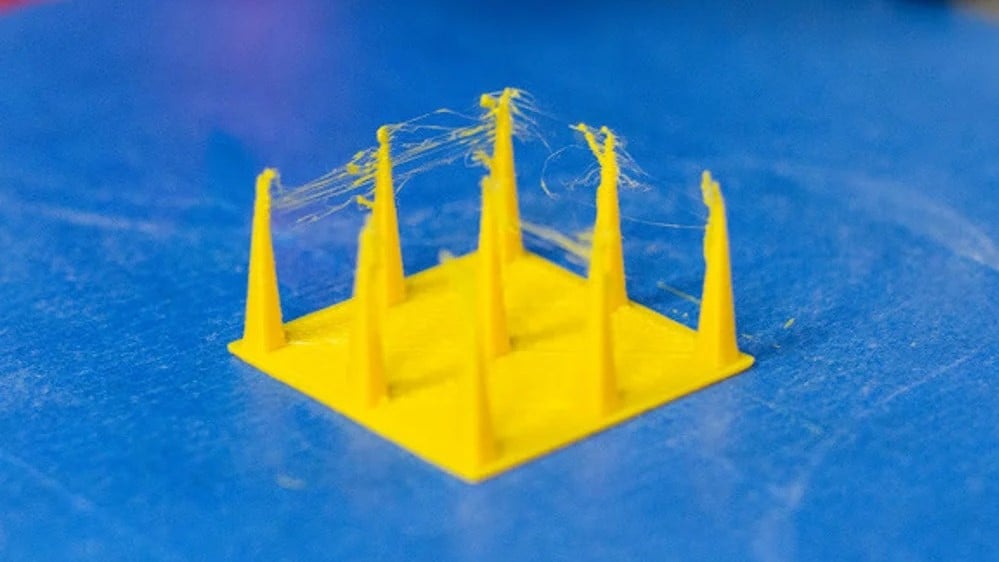
A less obvious Anycubic i3 Mega Cura setting is connected to the hot end: the retraction speed and distance. More complex 3D models require your printer’s print head to travel across the cross-sectional area of a part without printing. While doing so, the filament is pulled back a bit by the extruder motors so that it doesn’t exit the nozzle while the print head travels.
If your retraction settings aren’t suited to the task, you’ll see filament strings between the part’s features.
In the Anycubic i3 Mega Cura profile, there are two settings for retraction: retraction speed and distance. Retraction speed defines the speed at which the filament is pulled back through the nozzle. By default, it’s set to 60 mm/s. The retraction distance defines the length of the filament which will be pulled back. By default, it’s set to 5 mm.
Although the standard settings aren’t bad at all, it’s good to know how to further improve them. In case you experience filament stringing, try adjusting the retraction speed to 40 mm/s and retraction distance to 4-4.5 mm.
Feel free to experiment to fine-tune your own retraction settings. For the retraction speed, we suggest you play with the values in 5-mm/s increments. For the retraction distance, we suggest increments of 0.5 mm.
Advanced Settings: Initial Layer Thickness

As you may know, Cura offers a range of settings beyond what you can adjust in other slicers. This means that there’s even more to tweak to perfect your Anycubic i3 Mega Cura profile.
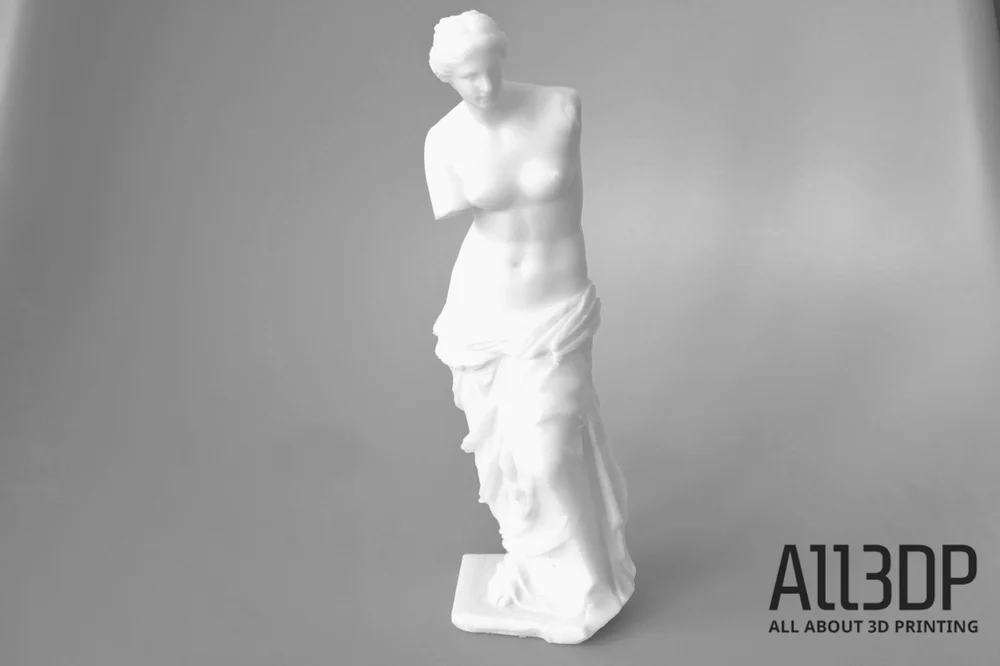
What you may not notice from the picture above is the size of the model. It’s quite big, measuring 22 cm (8.7 in) in height. Despite the size of the model, we experienced perfect bed adhesion with no warping. We think it’s due to good bed calibration and the height of the initial layer, which was set to 0.15 mm. This setting ensures that the first layer is thicker than the others to provide greater bed adhesion, and it surely did.
We highly recommend setting the initial layer thickness to at least 0.15 mm for your Anycubic i3 Mega Cura profile.
Advanced Settings: Shell Thickness and Inner & Outer Shell Speed
As the name suggests, shell thickness defines how thick the walls of a part are. Alongside a few other settings (such as infill), shell thickness defines the strength of a part.
The standard shell thickness for the i3 Mega is set to 1.2 mm. We were happy with the test results, so we didn’t feel the need to change it. However, if you’re 3D printing a part that needs to be very rigid, consider bumping up the value for the shell thickness.
But once you’ve decided the thickness, what about inner and outer shell speed? With the shell thickness at 1.2 mm and the nozzle diameter at 0.4 mm, there are three walls beside each other to form the desired width. The layer you see when a part is finished is the so-called outer layer. The other two are inner layers. Using Cura, it’s possible to specify the print speeds separately for the outer and inner layers.
We left the outer shell speed on the standard 30 mm/s when printing the “thinking man” model you can see above. Since it was the visible layer, we wanted to make sure it was printed nicely. This worked well for us, but feel free to tweak it on your own if you’re not satisfied with your results.
For the two remaining inner layers, we bumped up the print speed to 80 mm/s in order to shave a few minutes of the print time. It worked! The overall quality was not sacrificed, yet we managed to shorten the total print time.
Summary of Settings
Here’s a quick summary of changes to the standard Anycubic i3 Mega Cura profile you might consider:
PRINT SPEED
- Standard: 60 mm/s
- New: 45 mm/s
LAYER HEIGHT
- Standard: 0.2 mm
- New: 0.15 mm
INFILL
- Standard: 20%
- New: Depends on your needs, feel free to try with 40% for stronger parts, 10% for quicker prints
HOT END TEMPERATURE
- Varies according to filament material
BED TEMPERATURE
- Standard: 50°C
- New: 60°C
RETRACTION SPEED
- Standard: 60 mm/s
- New: 40 mm/s
RETRACTION DISTANCE
- Standard: 5 mm
- New: 4-4.5 mm, but feel free to tweak in 0.5-mm increments
INITIAL LAYER THICKNESS
- Standard: 0.2 mm
- New: 0.15 mm
SHELL THICKNESS
- Standard: 1.2 mm
- New: No change, but adjust upwards for extra strength
INNER SHELL SPEED
- Standard: 40 mm/s
- New: 80 mm/s
OUTER SHELL SPEED
- Standard: 30 mm/s
- New: No change
Lead image source: 3dprinterkart kart via YouTube
License: The text of "The Best Anycubic i3 Mega Cura Settings / Profile" by All3DP is licensed under a Creative Commons Attribution 4.0 International License.