3D Printer PID Tuning: Simply Explained

Looking to auto-tune the PID settings on your printer to improve print quality? Learn how 3D printer PID tuning works!
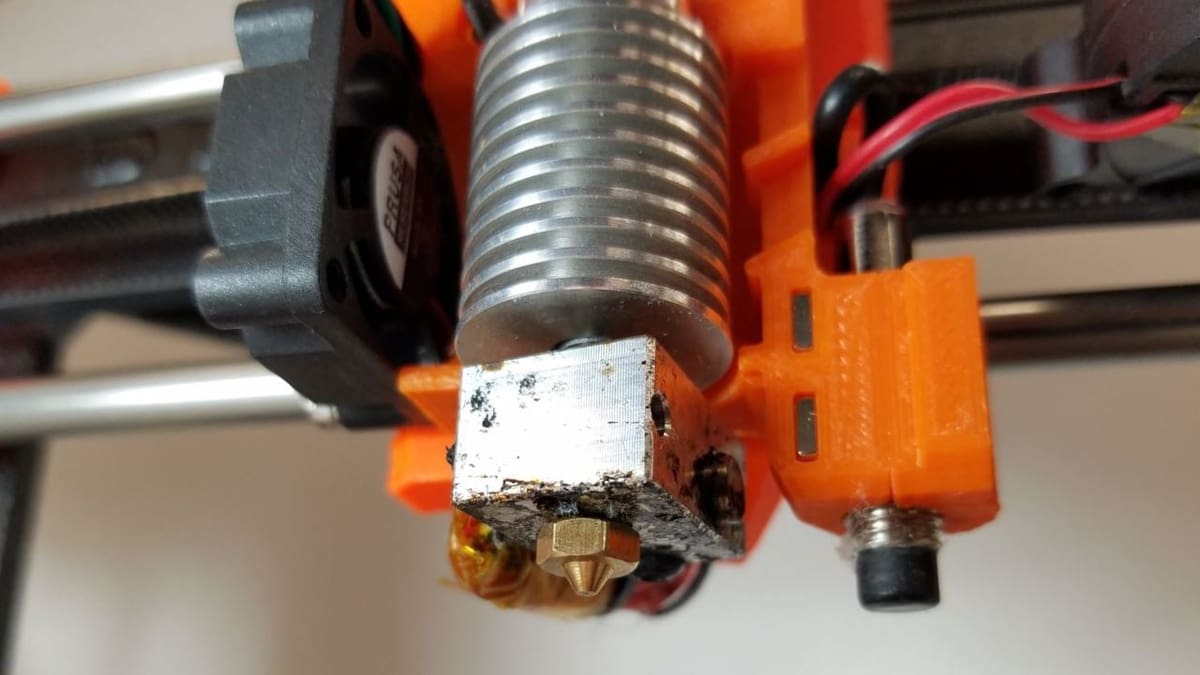
If you’ve worked with 3D printers before, you’ll be familiar with the heating components on your machine. If you have a heated bed, you probably have two heating components: one for the nozzle and one for the bed.
These components use algorithms to keep the temperatures stable by using three variables: the proportion of the actual temperature to the requested temperature; the integral, which is a measurement of the historical error of the heating process; and the derivative, which is a measurement of how quickly the temperature changes from above and below the requested temperature.
Together, these are typically called PID settings, and they can be used for a wide variety of applications. Essentially, PID is all about maintaining a proper balance. In this article, we’ll go through all the ins and outs of PID tuning, including how to do it on your printer!

What Is It?
So how does PID heating work on a 3D printer? In simple terms, the machine’s firmware accepts three values – P, I, and D – and an algorithm calculates how to maintain the proportion of heat, integrating the recorded error, using a derivative to modulate speed.
PID vs. Bang-Bang
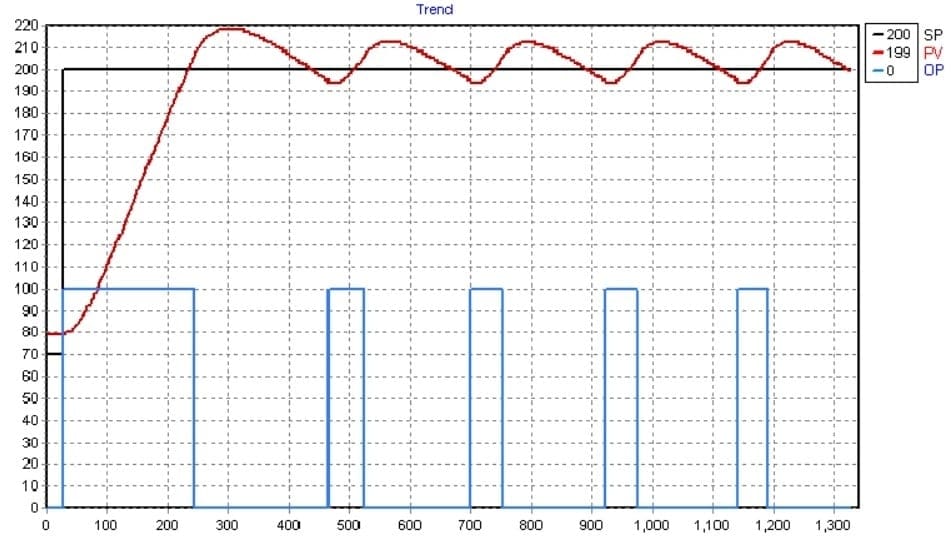
PID heating is more commonly used on 3D printers than the alternative heating method: “bang-bang” heating. “Bang bang” (or on-off) heating is typically used by ovens and other low-precision heaters in the home, as it only involves fully activating (100%) the heating element when the temperature is below the requested value and turning it off (0%) when the temperature is reached. The “Bang bang” control system is unsuitable for 3D printer heaters because it doesn’t accurately maintain the set temperature – rather, it fluctuates the temperature above and below the set point. Unfortunately, if the true temperature fluctuates too much above and below the set point, print quality can worsen.
On the other hand, PID uses three variables to restore and maintain the set point accurately. We’ll take a more detailed look at how this is achieved further below.
Tuning
While PID values may not seem that important, their impact shouldn’t be underestimated when it comes to 3D printing.
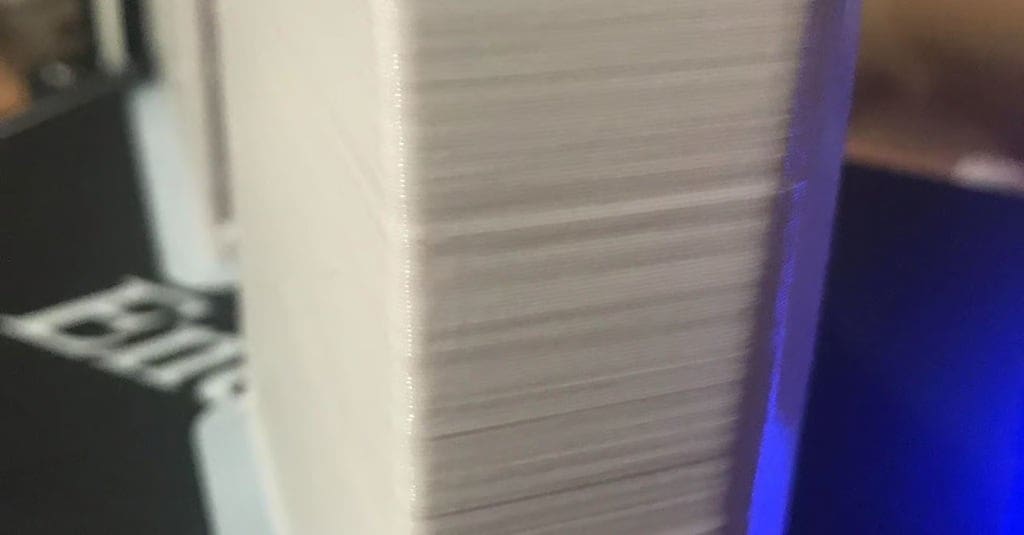
Significant temperature variances in your nozzle or heated bed can create inconsistent lines on your prints (not the normal layer lines), worsening a printed part’s appearance. For the nozzle, varying temperatures can cause inconsistent extrusion. For the bed, uneven thermal expansion can cause the height for each layer to vary, and this in turn causes slightly uneven side surfaces (imagine that a layer is more squished than others because the same amount of plastic is extruded but at a slightly lower layer height). For example, even if the difference is just 10 microns (0.01 mm), a 0.19-mm vs. a 0.20-mm layer height leads to a ~5% change in width, which is an observable difference in surface quality.
Thus, when you get a new hot end, heated bed, or switch to a significantly new printing temperature, you should perform a PID tune to get the best results with your new gear or print settings.
How It Works
As we said, PID tuning works by adjusting the P, I, and D values on your printer’s firmware. These changes are kept in the printer’s onboard memory and are used for every print and action that involves heating.
In a nutshell, PID is a control algorithm that uses 3 variables – the proportional P, integral I, and derivative D – to determine how the heater (of the hot end or heated bed) is controlled to maintain a set temperature. Here’s an overview of how PID works (although keep in mind that PID is used for many control systems, not just temperature):
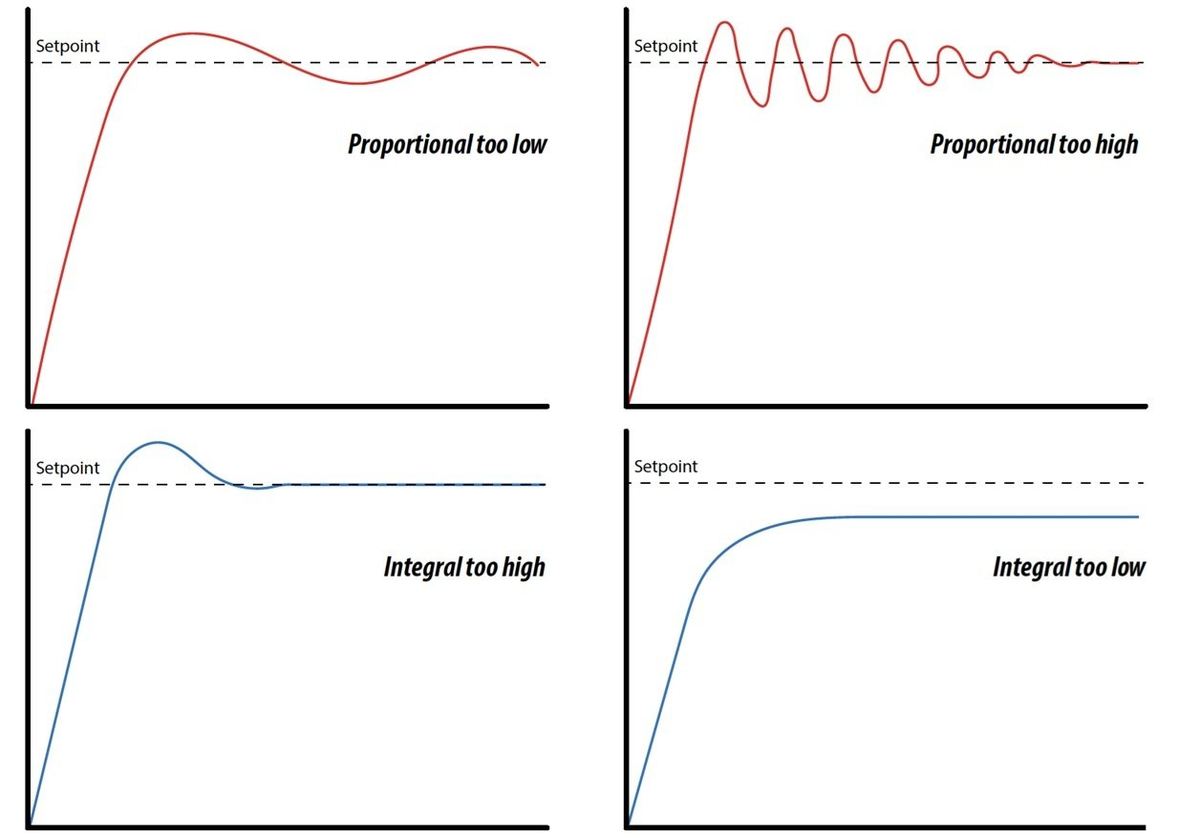
- P is the proportional to the present error value e(t), which is set point (SP) – process variable (PV). If the error is large, the control output increases proportionally using the gain factor Kp.
- Past values of SP – PV are integrated to produce the I (integral) term. It accumulates the persistent error and applies a correction. As the error reduces, the integral term continues to compensate, helping to eliminate the offset.
- D estimates the future trend of SP – PV error based on its current rate of change (derivative). It dampens the change depending on the current e(t), i.e. the larger the rate of change, the larger the dampening effect.
- The control variable u(t) is now adjusted based on the control system formula, which incorporates all the P, I, D values to minimize e(t), ensuring we get the most accurate end result possible.
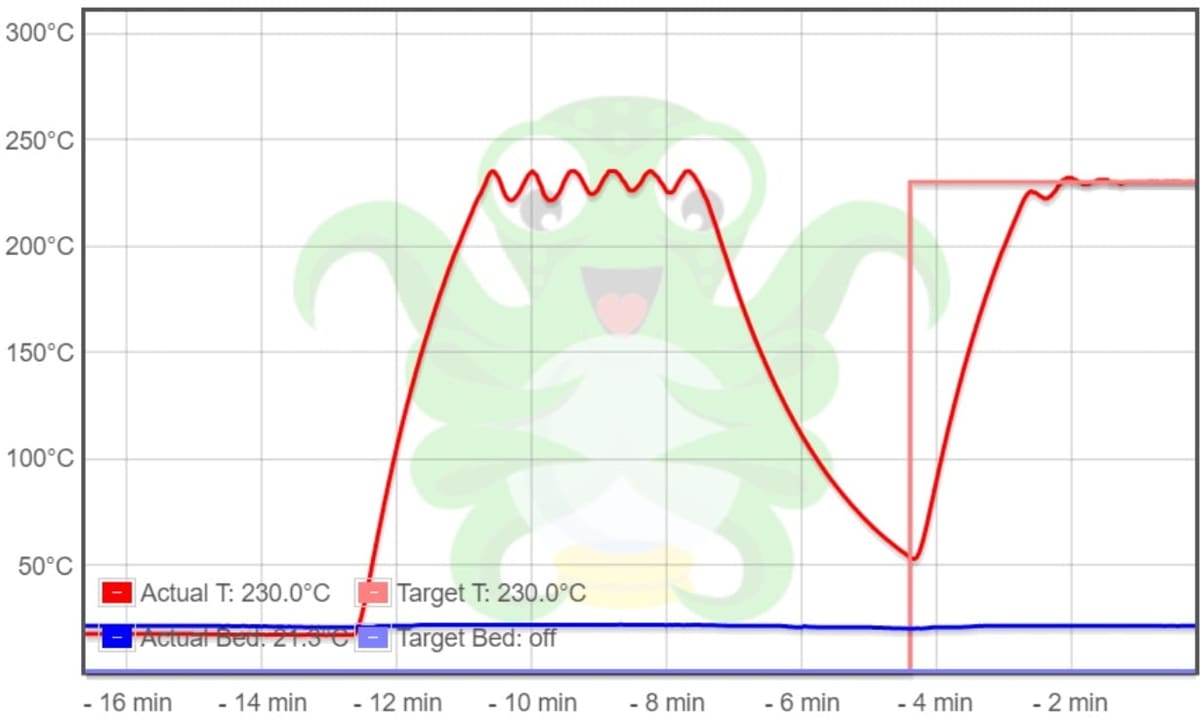
In 3D printers, loop tuning is used based on an initial estimate of these values. This means that your selected heater is cycled to slightly higher and lower values than the setpoint multiple times for measurements to be taken and for calculated values to be returned. As such, additional heating and cooling cycles help to ensure that the P, I, and D values are as close as their “ideal” value as possible.
When you start a PID tune, first set which heating element you want to tune and then the target temperature at which you want to tune it. This temperature should be the same you plan to use for printing. Finally, set the number of repetitions that the printer should heat the specified element up and down, let the PID tuning commence, and then re-input your newly calculated P, I, and D values into your G-code terminal.
Now, let’s move on to the instructions for auto-tuning PID on machines running Marlin 1 or Marlin 2 firmware! To tune PID for Klipper, find our guide here.
Before You Tune
For this process, we’ll take you through tuning your printer’s PID settings if it is running on Marlin (or Marlin-based firmware like TH3D Unified). We’ll go over how to tune your first hot end (“E0”) and your heated bed, and because the processes are slightly different for the two, we’ll split the procedure into two parts.
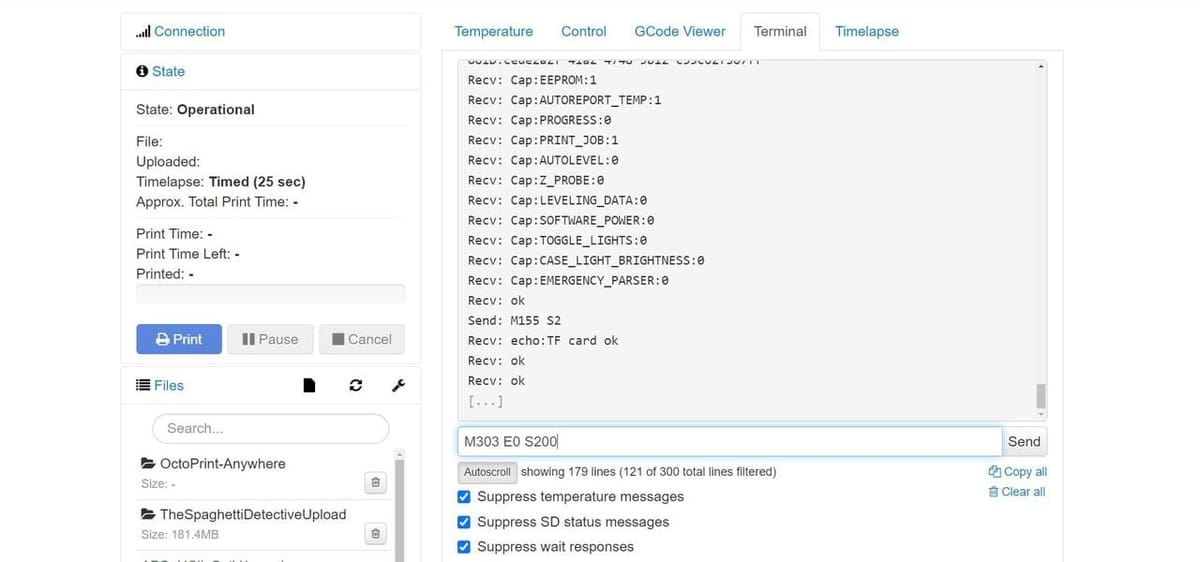
Before doing anything, if your printer is running Marlin, check to see which version of Marlin your printer’s firmware is based on (Marlin 1.X or 2.X). Also, make sure you have a G-code terminal. Pronterface is a compatible with many printers and is easy to use, and OctoPrint’s terminal is another commonly-used option.
If you’re not running Marlin, the process will be very similar, if not the same, on other firmware. Check your firmware company’s website for their G-code syntax to find the right commands for PID tuning, and if you can’t find that, use the following process as a starting point.
Hot End
Follow the steps below to PID tune your printer’s hot end if your machine is running Marlin firmware:
- Open your G-code terminal and connect your device (with the terminal) to your printer’s mainboard.
- Heat soak the printer to the chamber temperature you plan to print at (if applicable).
- Set the part cooling amount to that which you plan to print at.
- Choose a nozzle temperature that will be closest to the one you will most often print with.
- Choose which heater you want to PID tune (E0, E1, and so on).
- Choose how many heating cycles (repetitions of heating the element up to and down from the target temperature) you want to run.
- The more cycles, the longer it takes, but the more accurate the results.
- The default number of heating cycles is 5.
- Enter “M303 E{heater number} S{target temperature} C{number of cycles}” and then send it using your G-code terminal. For example, “
M303 E0 S230 C7” will PID tune the first heater to 230 °C using 7 cycles. - Wait for the terminal to finish cycling and show the calculated P, I, and D values. These will read as “kP, kI, kD”.
- Enter “M301” followed by “P{generated kP value} I{generated kI value} D{generated kD value}” and send the command. For example, “
M301 P70 I3 D65” will input new hot end PID values of P = 70, I = 3, D = 65. - Send the M500 command to save and store these values to your mainboard. Or, if you prefer to use the LCD interface, you can accomplish the same task by selecting, “Save Settings”.
Heated Bed
PID tuning your bed is very important, and it can prevent unnecessary extra layer lines on your 3D prints. Follow the steps below to PID tune your printer’s heated bed if your machine is running Marlin firmware:
- Open your G-code terminal and connect your device (with the terminal) to your printer’s mainboard.
- Choose the heated bed temperature that you will most often be printing with.
- Identify the version of Marlin you have: If you have firmware based on Marlin 1.X, use the heating element “E-1”. For Marlin 2.X, use “EBED”. (Some readers have noted that “E-1” is also used for 2.X.)
- Choose how many heating cycles (repetitions of heating the element up to and down from the target temperature) you want to run.
- The more cycles, the more accurate and the longer the time it takes for the tuning.
- The default number of heating cycles is 5.
- Enter “M303 E{heating element firmware name} S{target temperature} C{number of cycles}”, which is the “PID autotune” command, and then send it using your G-code terminal. For example, “
M303EBED S100 C6” will PID tune the printer’s heated bed (on Marlin 2.X) to 100 °C using 6 cycles. - Wait for the terminal to finish cycling and show the calculated P, I, and D values. These will read as “kP, kI, kD”.
- Enter “M304” followed by “P{generated kP value} I{generated kI value} D{generated kD value}” and send the command. For example “
M304 P70 I3 D65” will input new bed PID values of P = 70, I = 3, D = 65. - Send the M500 command to save and store these values to your mainboard. Or, if you prefer to use the LCD interface, you can accomplish the same task by selecting “Save Settings”.
License: The text of "3D Printer PID Tuning: Simply Explained" by All3DP is licensed under a Creative Commons Attribution 4.0 International License.