
3D Printed Trophy: How to Model & Print Your Prize

A 3D printed trophy can be more special and look better than a conventional award. Learn how to make one today!
If you have an award to give, nothing will look better than having a custom-made 3D printed trophy with the winner’s name. Not only will it be one of a kind, and therefore special – it’ll also be purpose-fit to the occasion!
To make your custom trophy with the high quality you may expect from specialized manufacturers (but at a fraction of the cost), it’s worth committing some time to get your model, printing settings, and post-processing nailed.
In this article, we’ll go into detail about each of these three aspects of making a 3D printed trophy yourself (without any 3D modeling experience!), from choosing a design to coating it with a shimmering shine.
If you’ve already got a design ready to go but don’t have the means to make it yourself, we suggest trying a 3D printing service. Through Craftcloud, you’ll find a wide variety of materials and finishes at your disposal. When it comes down to it, a trophy’s job is to look special and last forever, and you can be guaranteed both when you use a professional service.
To get started, let’s take a look at some impressive examples of 3D printed trophies.
Looking for Inspiration
Before we dive into a detailed tutorial, let’s check out some examples of existing 3D printed trophies. They serve to demonstrate what’s possible with 3D printing. In a nutshell, anything and everything!
GLL Grand Slam
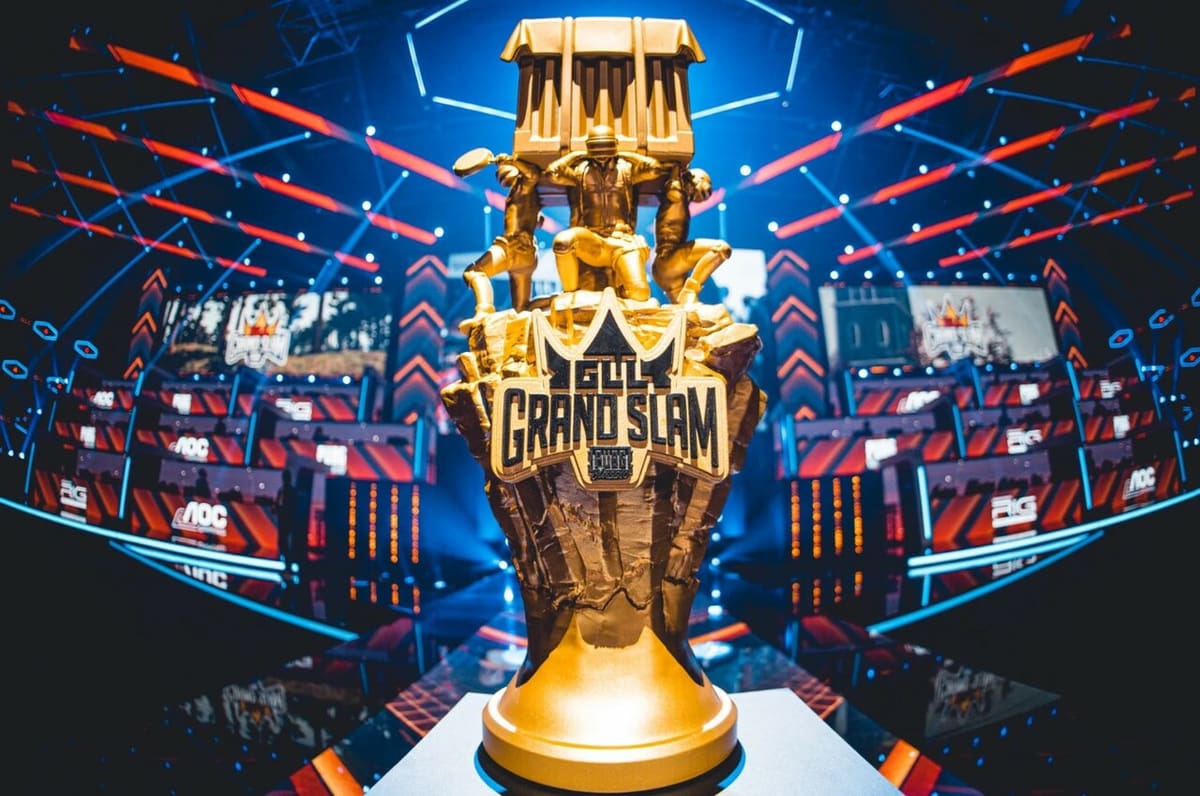
This first 3D printed trophy was designed by Essi R. Lantz for the winner of an e-sports tournament of a popular battle royale-style video game called PlayerUnknown’s Battlegrounds (or PUBG, for short). It depicts four of the playable characters decked out in their unique garb, hoisting up one of the game’s classic supply crates. It was created using a selective laser sintering (SLS) style 3D printer.
The trophy highlights one of the strengths of 3D printing: the ability to create unique shapes and geometries. Because of this, the characters on the trophy look identical to those in the game, brought to life by specific details from the game prominently displayed.
The Tommy Award
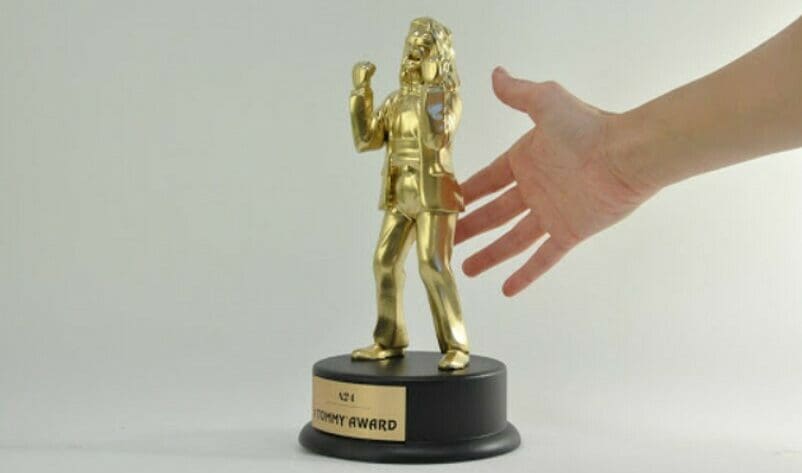
Perhaps when you think of an award, you think of a small, typically golden, figurine on a pedestal, such as an Oscar (a US movie award). Well, with The Tommy Award, presented by film studio A24 in 2017, there’s an example of just what you had in mind – in 3D printed form!
Created by the film studio to stir up enthusiasm for the upcoming release of their (then) new movie The Room, the award portrays the main character from the film, known as Tommy. It was given out by A24 as a prize to the fan who could recreate a scene from the movie as accurately as possible.
Although you might not want a Tommy award of your own, maybe you’d like something similar, and a 3D printer could do just that.
Some More Ideas
Whether you’re the best tuba player around or you’ve always wondered what it would feel like to hoist a Formula 1 racing trophy, here are some 3D models for you to get the ball rolling on a creation of your own:
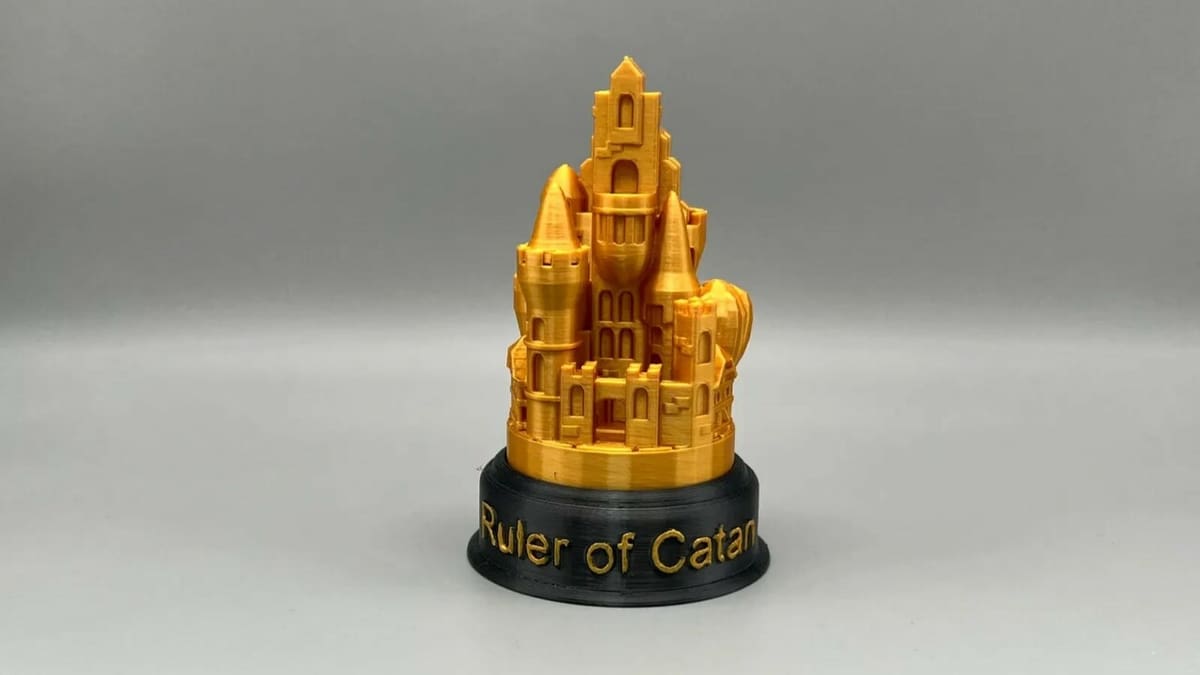
Catan Trophy
Reaching 10 victory points feels like it deserves a trophy. This Catan trophy model will make it quite clear to your opposition who the true Ruler of Catan is. Note that this should be an easy-to-print model that requires little to no supports.
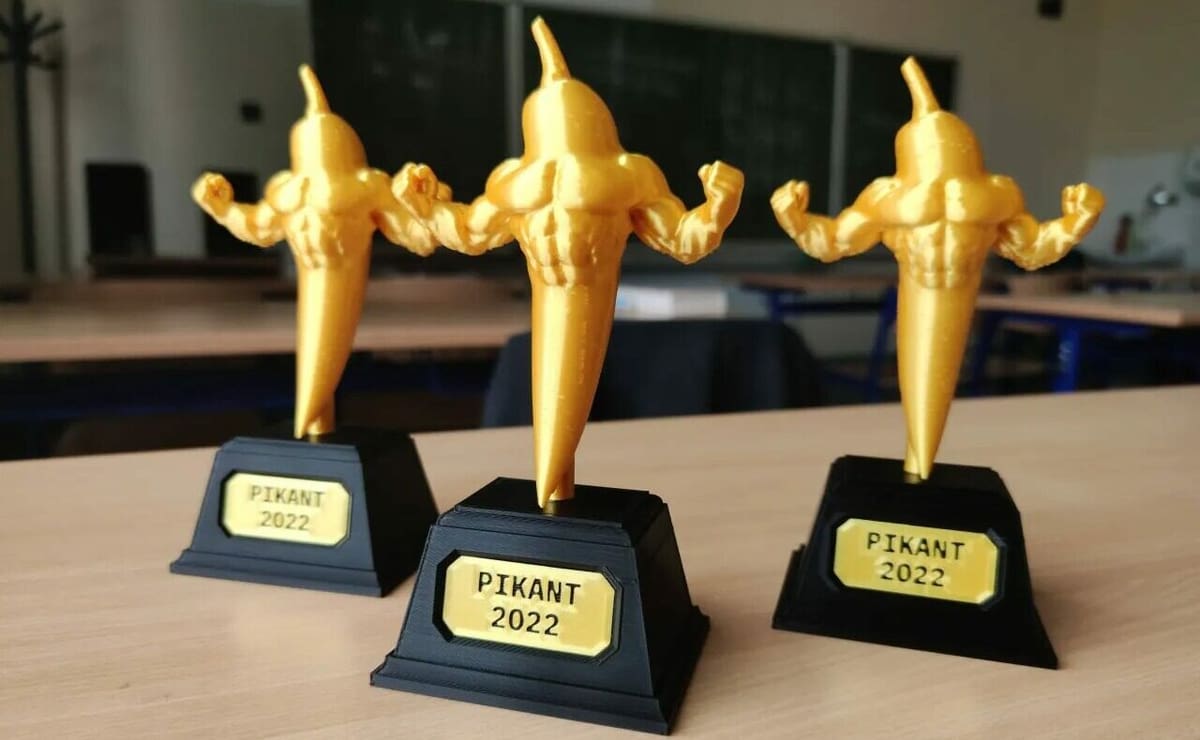
Banana Mario Kart Trophy
Throwing barrels and bananas at others has been a popular pass time for Mario Kart-ers since the game was released over 25 years ago. This Mario Kart trophy has just that: a barrel and a banana. Note that the banana may be difficult to print properly if supports aren’t used properly.
Ping-Pong Trophy
Have your cat-like reflexes and acute level of hand-eye coordination made you a table tennis champion? This ping-pong trophy offers the perfect place to rest your paddle.
Fantasy Football Trophy
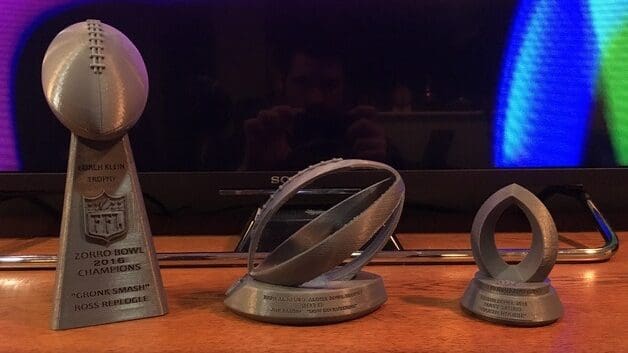
Fantasy football leagues are known for trash talk but if you’ve recently led your team to the promised land, this trophy can put an end to all your opponents’ talk, immortalizing your victory. Note that the model is in two separate files and will be printed in two pieces. The design has been formatted so that’s easy to add personalized inscriptions.
Monaco F1 Trophy
Printing this will give you the opportunity to know what it feels like to hoist the trophy for the most iconic race in the world: the Monaco F1. Note that printing the track separately from the stand and then combining the two may be the best way to go with this one.
Tuba Trophy
If you’re into brass instruments, this tuba trophy is made for you. The stand for the tuba in the model should be easy to modify if you wish to add lettering.
Modeling
The above examples show that it doesn’t matter whether the design is simple or intricate; it can be of any form, whether an everyday object or something abstract. The only requirement is that it should be a symbol of what’s been achieved.
To do this, we can break trophy modeling down into three things: an interesting body, a supporting pedestal, and your custom message or logo. Let’s see how to do it!
Body

For the sake of simplicity, we’ll create a trophy featuring the common cup. While the design is very simple, you can use it as a starting point to add your own style and competition-related insignia.
We’ll be using Tinkercad so that even if you’ve never done any of your own 3D modeling before, this free, easy-to-use computer-aided design (CAD) tool that operates via your browser should make designing your own trophy a breeze.
If you’ve never used Tinkercad before, you’re in for a treat! We would recommend quickly skimming our quick beginner’s guide to Tinkercad before you start to get familiar with the UI and navigation, which we won’t be getting into here. We also have a detailed tutorial on creating a name tag in Tinkercad that covers the basics in a hands-on tutorial, if you want to try another project first (or later).
Without further ado, let’s get started!
Creating the Cup
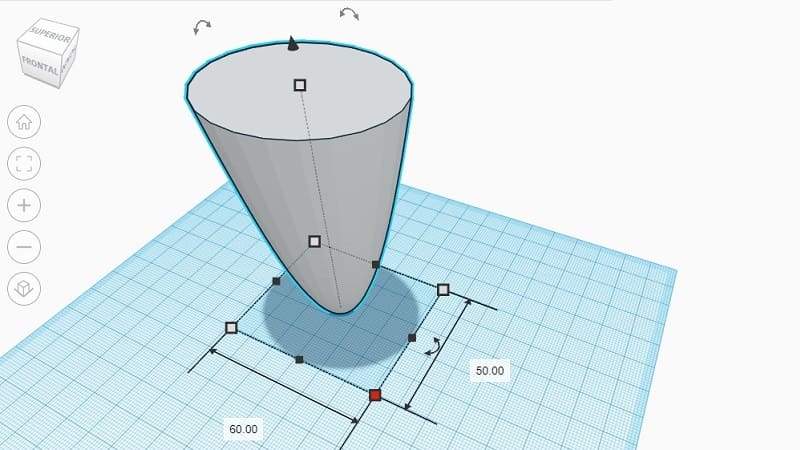
First, form the cup portion of the body using an upside-down Paraboloid. You’ll find this under the Shape Panel on the right-hand side.
Use object operations to rotate and resize the trophy as desired. (Rotation can be restricted to 45-degree increments by holding the Shift key.)
Creating the Base
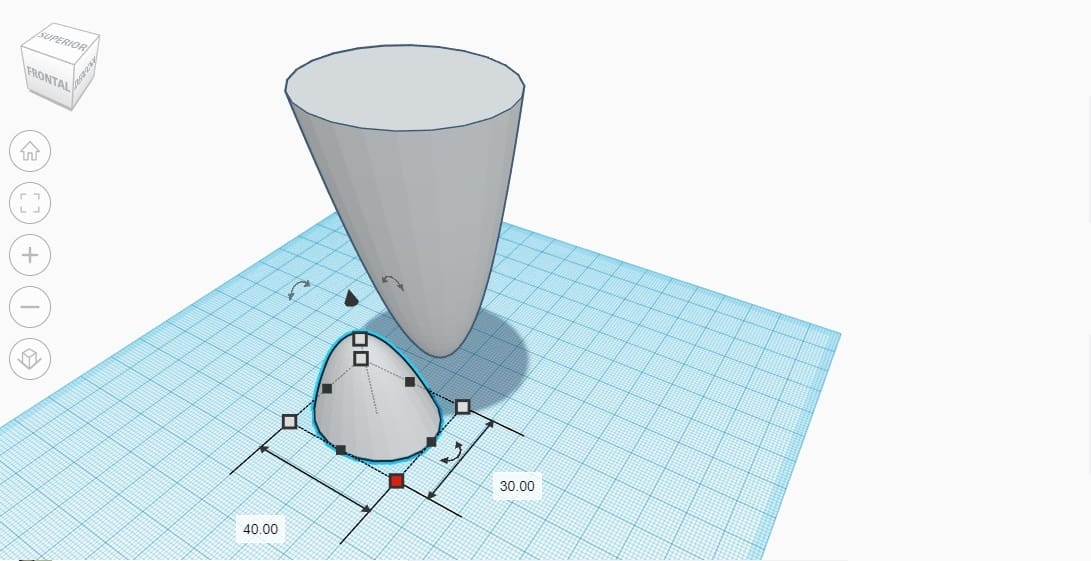
The base, in this example, is an upright Paraboloid shape meant to give the cup more stability by providing a larger surface area where the cup and the pedestal will meet. You could also opt for any base shape as long as it serves this function.
Similarly, if you’re going for a different body shape than our simple cup (or are leaning more towards the classic goblet geometry), be sure to consider whether you have sufficient surface area between adjoining shapes.
Once you’ve sized your base, align the base object and the cup object in both the X and Y directions using the Align tool. Then use the Group button to join the geometries.
Hollowing
A cup isn’t really a cup unless it’s hollow.
More advanced programs can handle this step with an operation often referred to as “shell”. In that case, one typically has to provide the wall thickness, and the software will work it out.
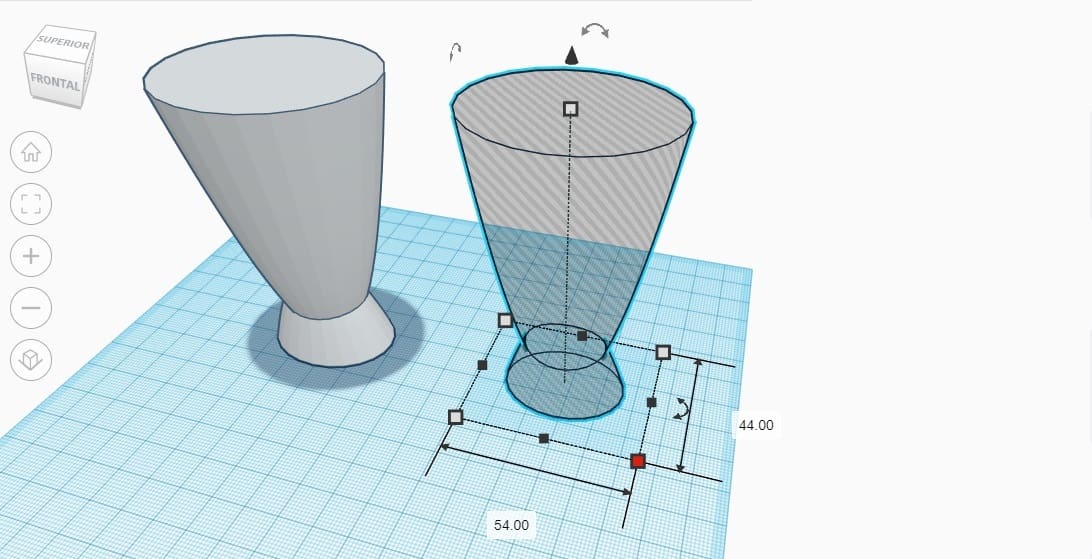
In Tinkercad, we’ll have to do this “manually” using the following steps:
- Duplicate the cup-base object.
- Set the duplicate to “Hole” (instead of “Solid”).
- Slightly reduce the length and width of the duplicate. (The subtracted value in each direction should be two times your desired wall thickness.)
- Use the aligning operation to center the objects in both the X and Y directions.
- Group the two objects together.
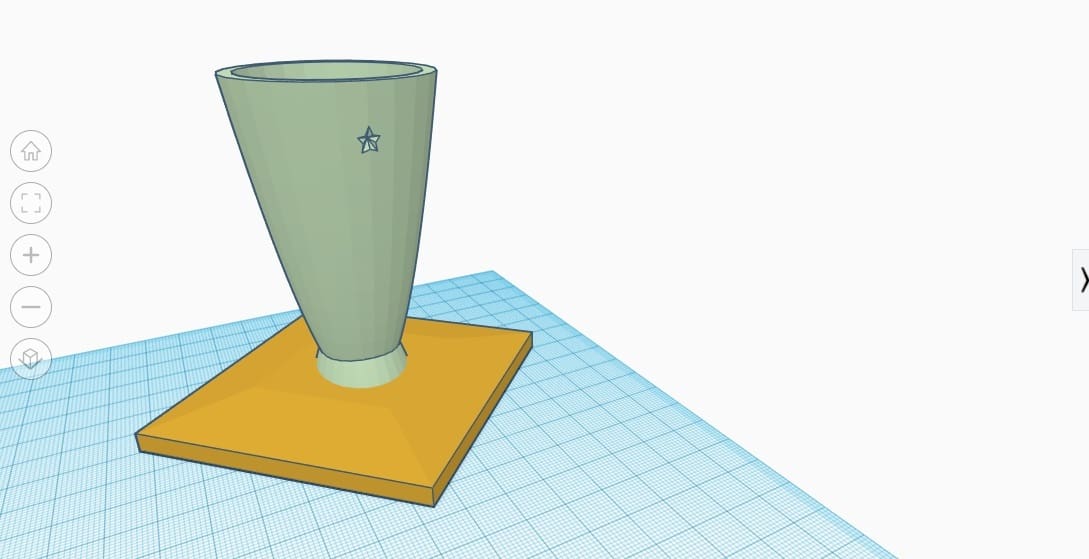
After completing these steps, the result will resemble a funny-looking funnel.
Decoration
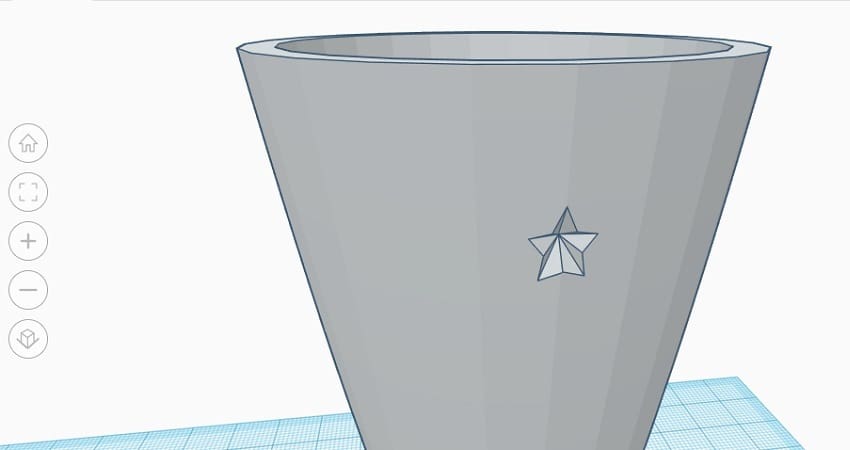
Most trophies, even cup-based ones, feature some kind of decoration. As a simple demonstration, we’ll “carve” a small star into the surface of our cup. Naturally, you’re free to add whatever detail you like!
To create something like what’s pictured above, you’ll need to do the following:
- Grab a Star shape from the Shape Panel and set your desired dimensions.
- Set the star to “Hole”.
- Position your star so that it partially overlaps with the outer surface of the cup.
- Group the two objects.
Note that this decoration was made in a recessed and sloped way so as not to require supports during printing.
Pedestal
Most trophies will require a pedestal of support. Apart from providing stability, it can also be used to display text.
The Rectangular Sided Polyhedron shape will do the trick (you’ll have to search for it), as we chose to angle the top outward to make the added text easier to read from the front. In the Shape Window, slide the “Height of Mid” all the way down so you have a flat bottom but keeping the top angled.
We also chose to rotate the pedestal a bit relative to the body so it sits like a diamond instead of a square.
To add your pedestal to your body, center the two objects in the X and Y directions and group them together.
Text
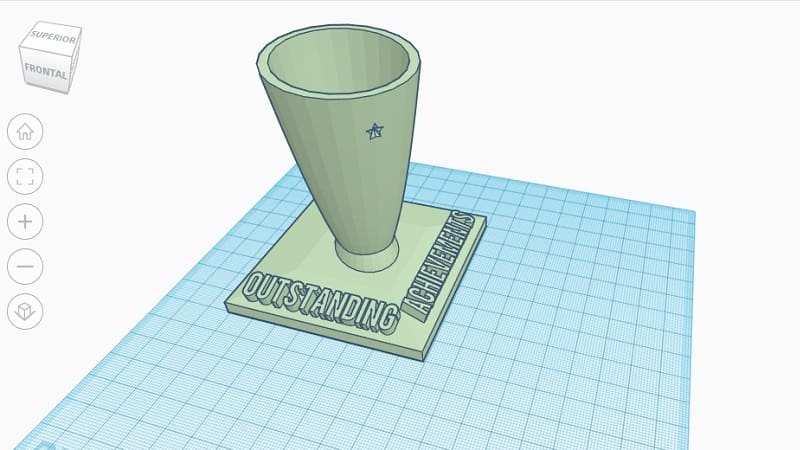
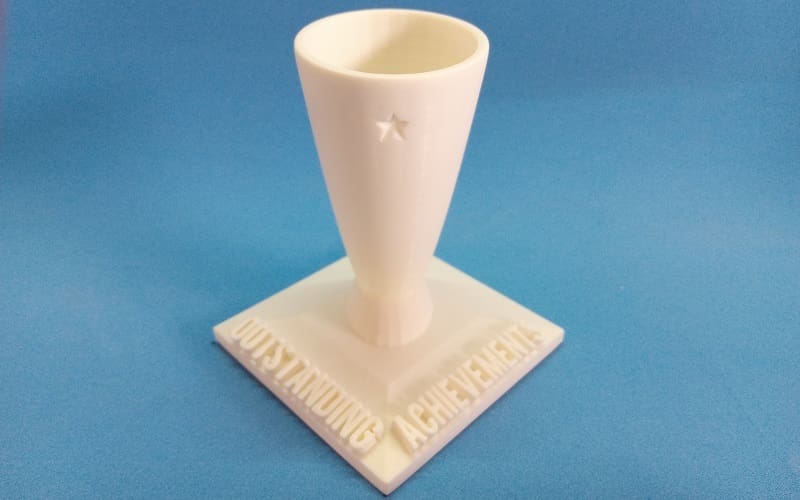
If you’ve more-or-less followed the steps (and images) until now, your pedestal should have enough space to display many letters. If you have a specific event, winner, or year in mind, these would make prime candidates. In our case, we’ll keep it generic with the words “Outstanding Achievements”.
Tinkercad’s text feature allows one to quickly and easily make 3D text. Just make sure that your text is high enough so that the letters will be clear even after post-processing.
If you were able to slope the top of your pedestal earlier, a nice trick is to set a new temporary Workplane on that slope. This will allow you to place your letters more easily. Otherwise, create your text, adjust the size, rotate as needed, and group it along with the rest of your trophy.
Once you’ve finalized your design, all that’s left is to export it as an STL file and load it up in your slicer to get it ready for printing!
Printing
Now that you have your model situated, the next question is how can you print your design to get the absolute best results. Well, this will depend on exactly which method you choose to print with.
In the following, we’ll go over how the two most popular hobby 3D printing methods, FDM and resin, compare in terms of 3D printing a trophy, and how to optimize the aesthetics of your print (rather than mechanical strength, for example) for each.
FDM vs. Resin
The standard layer height of an FDM printer is typically about 0.25 mm, about five times greater than that of resin printers (0.05 mm). Layer width for each is similar in comparison. To put that in perspective, the thickness of a human hair is approximately 0.12 mm. This simple discrepancy in layer dimension means that in terms of surface finish and detail, resin objectively does a better job than FDM.
That being said, there are still plenty of attractive reasons to choose FDM for your trophy. With a bit of elbow grease in the post-processing department, an FDM print can hold its own in terms of good looks. The palette of materials to choose from is much broader when it comes to FDM: Just about any color in the rainbow is probably available in a PLA filament and there are even filled filaments with additives such as metal and wood.
Both resin and FDM prints can be primed and painted. But because the surface quality is so much better for resin, there will likely be much less sanding, if at all, for resin post-processing. That said, resin does have the downside of needing to be cleaned and cured.
Whichever method you prefer or have access to, there are some things to keep in mind for each when getting ready to print that could help improve the outcome of your trophy.
FDM Printing Tips
If you’re opting for FDM printing, we have a few tips for you to help ensure you get a truly (award) show-stopping print!
Slicer Settings
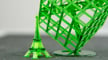
It’s important to remember that supports and proper bed adhesion are critical to the good looks of your product. If either of these is lacking, the force from the tool head will cause the print to wobble. The print can finish but it may have suffered cosmetic damage from the lack of support. For an aesthetic print like a trophy, you may have to be strategic regarding where you place supports.
Orienting the print so that the most detailed areas, such as fine lettering or similar features, are printed along the Z-axis can help yield higher-quality prints. But the benefits gained from this are relatively marginal compared to some of these other suggestions.
Print Settings
Decreasing overall print speed in tandem with lowering layer height are two quick ways to improve the look of your print. Slower print speeds are better for quality because the printer has plenty of time to sketch in the fine details.
Reducing layer height will reduce the layer line visibility and increase the resolution of the print. Opting for a smaller nozzle size will also help in this regard.
Changing these parameters will all add to the print time but you can easily get some time back by minimizing the infill percentage and decreasing the number of perimeter walls. Both of those settings are correlated with strength but we are operating under the assumption that strength is of lower priority for a trophy.
You should be wary of going too slow with print speed, though. The toolhead is quite literally hot enough to melt plastic, so hovering over the previously deposited material for too long will be detrimental. The highest quality print will take some tuning to determine the perfect match of flow, temperature, and speed, but the points discussed above are a good starting point.
Materials
Now that you’ve got a good idea of what print settings to use, let’s talk about what materials to use. Because the mechanical strength of your trophy is of lower importance, you have free range to choose any filament (that can print the kind of resolution your design requires).
But, since strength doesn’t matter, why not choose PLA? It’s the cheapest material on the market, is easy to work with, and offers the largest selection of colors and specialties so you can go all in on those shiny aesthetic filaments.
Silk PLA could be an appealing option for your trophy. It’s regular PLA but with elastomer additives to achieve its namesake, and looks like shiny silk in plastic form. If you’re trying to emulate metallic bronze, silver, or gold in your design without having to do loads of post-processing, silk PLA is the way to go. One possibility is Eryone’s silk PLA, a popular pick given its ease of use and because it offers four other colors beyond those of Olympic metals.
Believe it or not, in 2023 it’s possible to 3D print with wood. PLA (or other polymers) filled with wood fibers can really spice up 3D prints. You can make a wood base for your award while leaving the woodworking to your 3D printer. Many filament manufacturers even have plenty of wood (and therefore color) options to leaf through including cedar, cherry wood, birch, cork, and bamboo, just to name a few. Fillamentum is a trustworthy brand with a well-reviewed Timberfill that has eight different color options!
Resin Printing Tips

If you’re going for resin printing, you’ll probably have an easier time finding the right settings to achieve a suitable resolution. Nevertheless, here are some tips that may help you along the way.
Slicer & Print Settings
Supports should be used so long as they are a benefit, but remember that you’ll need to remove them, which could damage the part. Try to add supports to the back of the model and in easy-to-reach places. Orienting the model 45° on the build plate (so that it’s tilted backward) may help you achieve this.
To achieve a top-quality resin print, consider emphasizing quality over print time. Decrease the overall speed of the print and reduce layer height; the goal is to obtain the highest resolution possible from your current setup.
Although all these settings will increase print time, remember that the infill percentage can be lowered to a level suitable for display and non-weight-bearing parts.
Materials
For a trophy, there are no limiting factors for resin selection. With that in mind, there’s no need for an expensive tough resin or anything similar. A standard formulation, like the one from Elegoo, will likely be able to meet your needs. Then you just need to decide what color or effect you would like to go for!
For example, choosing a clear, translucent resin to make a trophy look like it’s made of glass could be a neat idea; glass awards with laser engraved lettering made easy! An option for this is Flashforge’s standard resin in transparent, which can also offer high print quality.
If you want the benefits of resin printing, or just want to do something a bit more extravagant than what your current setup is capable of, then try Craftcloud to get the best price from 3D printing services worldwide.
Post-Processing
Even with the finest settings, an FDM print will look 3D printed, and a resin print will have some support marks left behind. And you don’t want to see either of those on the surface of a trophy.
And if you didn’t opt for a fancy filament or resin, painting could be an option to get the shiny prestigious look that befits an award.
Any way you spin it, there’s always (at least) a little bit of post-processing needed to make your print look its best. No matter your end goal, you should probably start with smoothing.
Smoothing
The exact post-processing needs will heavily depend on your design and which method of printing you used. Regardless of your needs, it’s important to make sure that you have a smooth surface before you paint as going back and forth between sanding and painting will get messy.
Sanding
In general, sanding should be performed uniformly across a surface in multiple stages. Earlier stages should use a coarser grit (e.g. 200) while in later stages, a finer grit (e.g. 4,000) would be best.
That said, it’s up to you to decide how obsessive to get with this step – and remember that microscopic edges and flaws can be covered up with paint or a clear finish.
Coming back to the model that we designed in Tinkercad, after printing with FDM, the surface had a fair amount of ridges that needed smoothing. In the image above, you’ll notice how the surface is much smoother after some heavy sanding. (It was sanded progressively, and the last grit used was 600.) The letters were left untouched so as to not wear them down.
If you hate sanding, there are some options for surface smoothing that take less physical effort (by delegating it to chemicals). The exact method will depend on which material your trophy is printed in and is only possible for FDM materials like PLA and ABS.
Modeling Putty
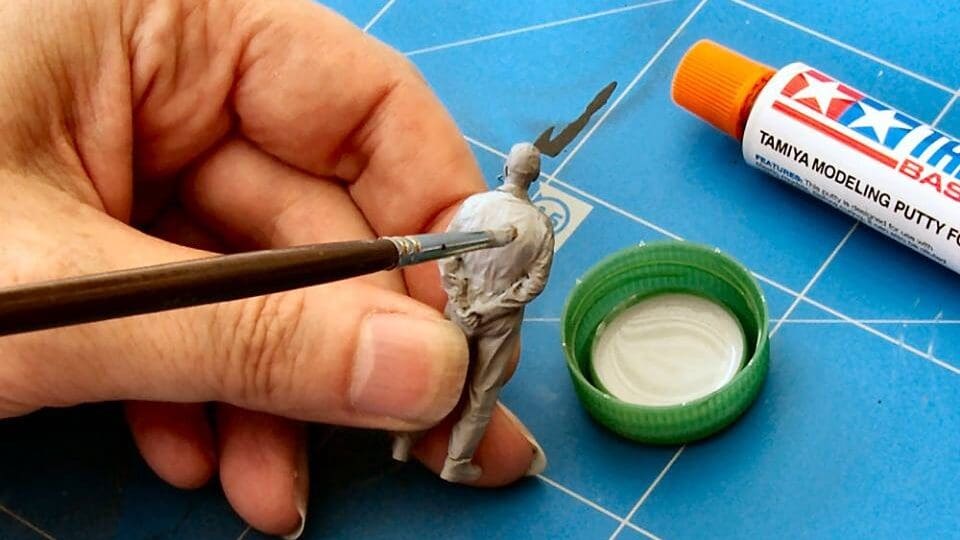
A smooth surface and well-aligned components are essential for overall aesthetic quality.
In cases where sanding isn’t enough, it might be worthwhile to use some modeling putty. To achieve that non-3D printed look, fill in those rogue nooks, let it dry, and sand down anything that bulges.
Clear Coating
If you have some fine defects (like marks from sanding) that you want to fill in or you want a shiny finish without changing the color of your print, using a clear coat will be the way to go.
One option for this is using a polyurethane spray or paint, preferably a fast-drying one with a satin finish. Alternatively, you could try an epoxy coating like XTC-3D, which is specifically made for 3D prints. This will give a smooth, shiny seal to your print that will make it look professional.
Painting
As a final step that should come only after you’ve smoothed to your fullest desire, you can move on to painting. It’s recommended to paint slowly, adding one light coat of paint at a time. If too much paint is applied in a single coat, you run the risk of visible drops. Also, make sure to allow ample time to dry between coats.
As a model like this is bound to have many nooks and crannies, apply paint from several directions. It’s quite easy to overlook the little corners around the letters. When painting, always follow all safety recommendations, including setting up proper ventilation.
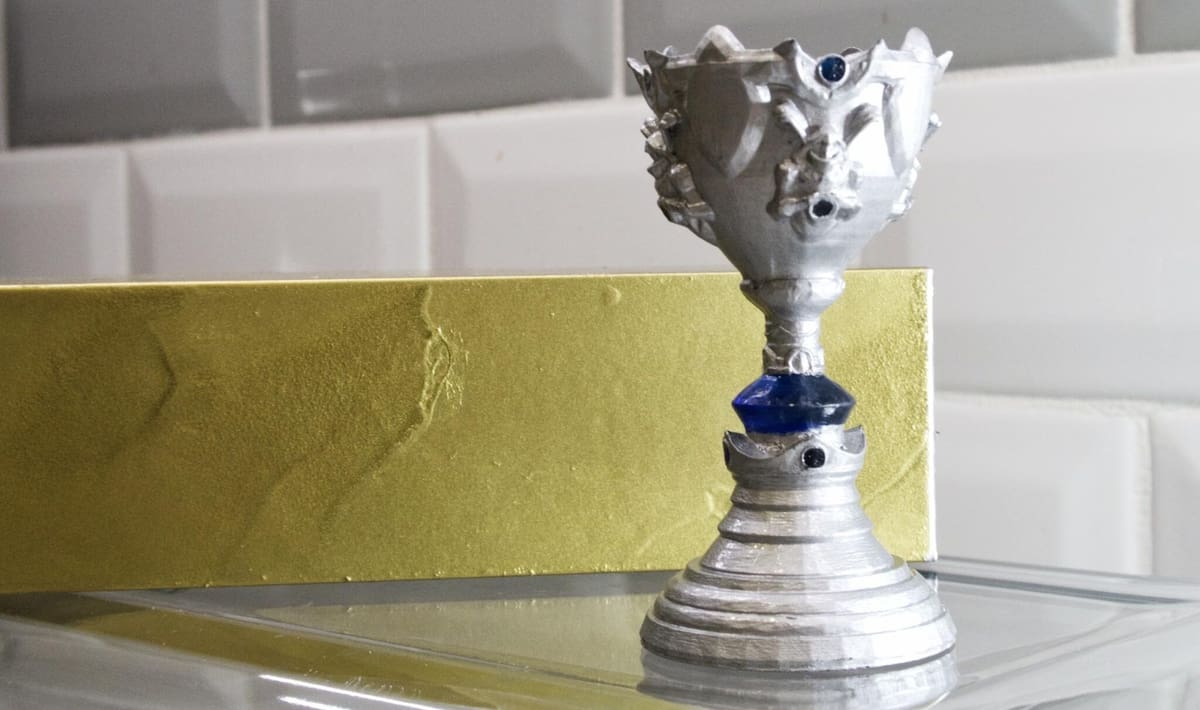
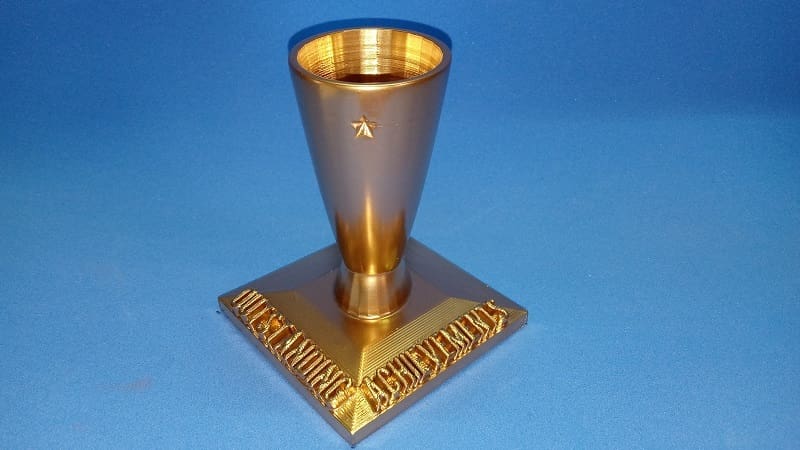
To achieve the result in the photo, a standard, off-the-shelf gold spray paint was used. Even with several coats, little of it was needed. For simplicity, we painted the entire model in a single color, but don’t be afraid to get creative with multiple colors!
And there you have it! A beautiful, custom-made, 3D printed trophy!

License: The text of "3D Printed Trophy: How to Model & Print Your Prize" by All3DP is licensed under a Creative Commons Attribution 4.0 International License.