How to 3D Print Miniatures & Figurines in an FDM 3D Printer

3D printed miniatures can take your tabletop games to the next level. Use these tips and tricks to make your figurines perfect every time!
One of the most popular reasons for getting into 3D printing is to make stuff for other hobbies. People print their own tools, kitchen gadgets, and board games, as well as miniatures (typically 28+ mm) used for tabletop games, such as Warhammer and Dungeons & Dragons.
There’s a widely held belief that resin printers are best when printing models with intricate details, whereas fused deposition modeling (FDM) printers are thought to be better suited to bigger, bulkier models, like terrain features or buildings. Straight out of the box, this can indeed be the case. But with the right amount of fine-tuning, it’s possible to get resin-like results from FDM printers.
In this article, we’ll be covering multiple areas where a little tweaking can bring outstanding results: layers, speed, supports, infill, and cooling. Lastly, we’ll go into general printer tuning and give you some additional resources. When referring to specifics, we’ll be working with Cura, but other slicers should have similar settings.
If you’re keen to expand your army of miniatures but aren’t able to print them yourself, check out Craftcloud. Thanks to our many partners, you’ll have your pick of a vast array of materials, colors, and finishes.
Now, let’s learn how to print the perfect figurine!
Layers
The major benefit of 3D printing is of course the third dimension: height! A print’s vertical structure is achieved through gradually building up layers, but not all layers are created equally.
Two major aspects of a print are layer height and the number of top and bottom layers. Layer height is the thickness of each layer, usually measured in fractions of a millimeter. The thinner the layer, the more finely detailed the resulting object. However, truly tiny layers can result in huge printing times, layer defects, or even total failure, meaning that there must be a balance between time and detail.

Tips & Tricks
- Start with a 0.15-mm layer height. This means swapping the standard 0.4-mm nozzle for a 0.2-mm one. It will increase your printing time, but that’s just the name of the game.
- Increase layer height for batches. This will result in faster print times for mobs of minis, such as an army of goblins. They won’t look as intricate, but players won’t usually mind because they probably won’t show up in every encounter and because there are so many.
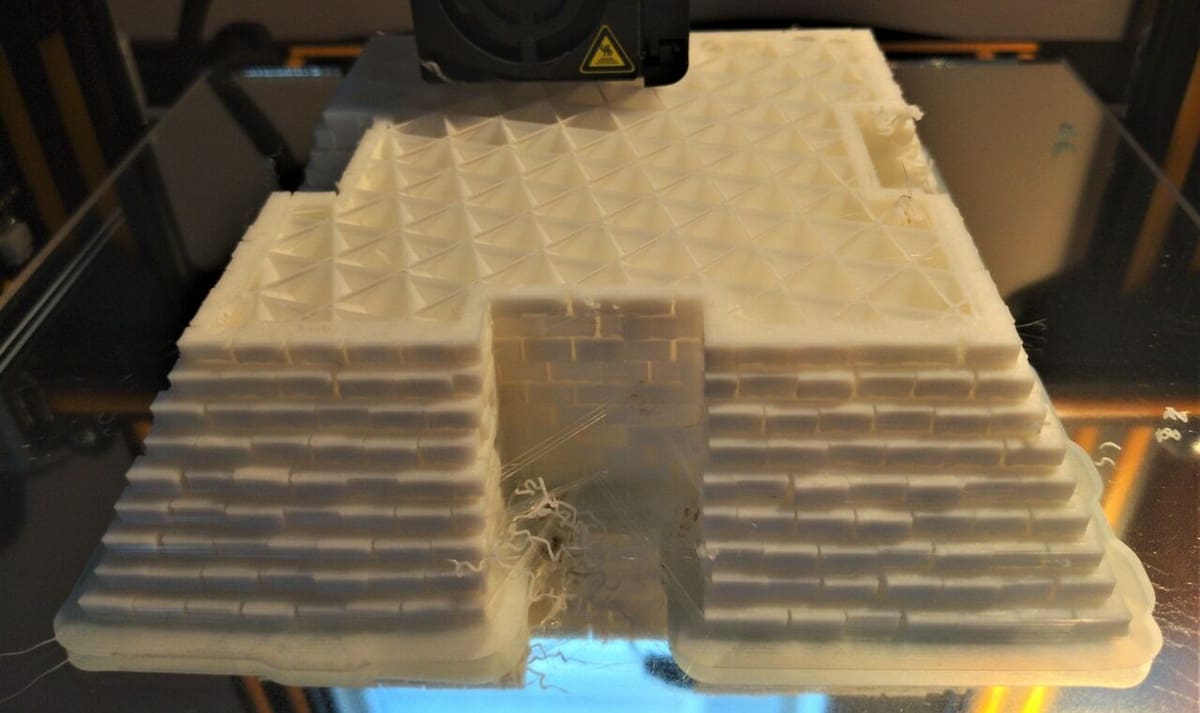
- Experiment with adaptive layers. For minis with areas of less visual importance, such as the base of this statue from MyMiniFactory user kijai, try working with adaptive layers. Maintain quality where it counts, and gain print speed where it doesn’t.
- Consider the top layers. When printing items with flat tops, such as bases for miniatures, the number of top layers can become an issue. The finer the layer height settings, the more top layers are required to give a smooth, flat surface and avoid pillowing.
Print Speed
Print speed is one of the most important considerations in 3D printing and one of the trickiest to get right. Too fast, and you can encounter issues like blobs, poor layer adhesion, or even knocking the print off the bed entirely. Too slow, and you risk print failure from things like drafts or power surges over extended periods of time.
“Print speed” is a catch-all term for several secondary settings, and your specific print may require you to tweak some or all of them.

Tips & Tricks
- Slow down the initial layer. The key to a good print is a solid first layer. Slowing the print speed just for this layer often leads to a better base and stronger adhesion.
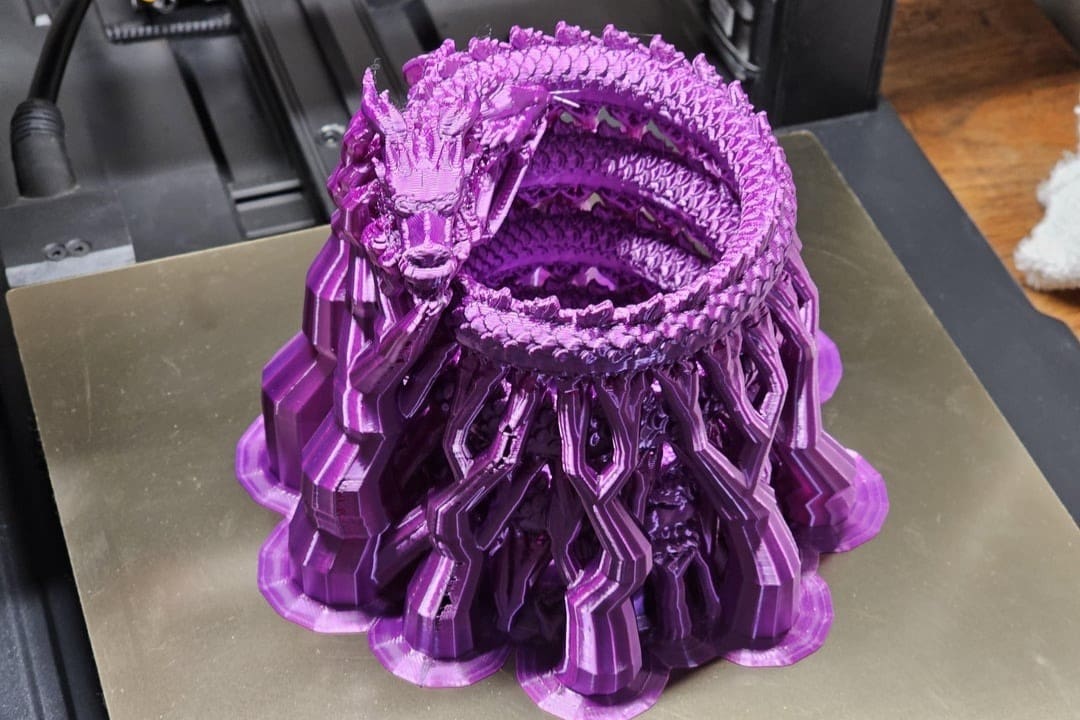
- Optimize your travel speed. This is the speed at which the printhead moves while not extruding. If it’s set too low, you can encounter bloated print times for intricate models, with lots of tapering points and valleys, like this model of Xenia, Hunter Heroine. Just be aware that, if you increase the travel speed too much, the print could get knocked off the build plate entirely if it gets rammed by the nozzle.
- Tweak your retraction speed. The retraction speed is how quickly the filament is pulled back into the printhead before traveling. If it’s not pulled back quickly enough, it can drip onto the model and produce strings.
Supports
Everyone needs support sometimes, and miniatures are no different.
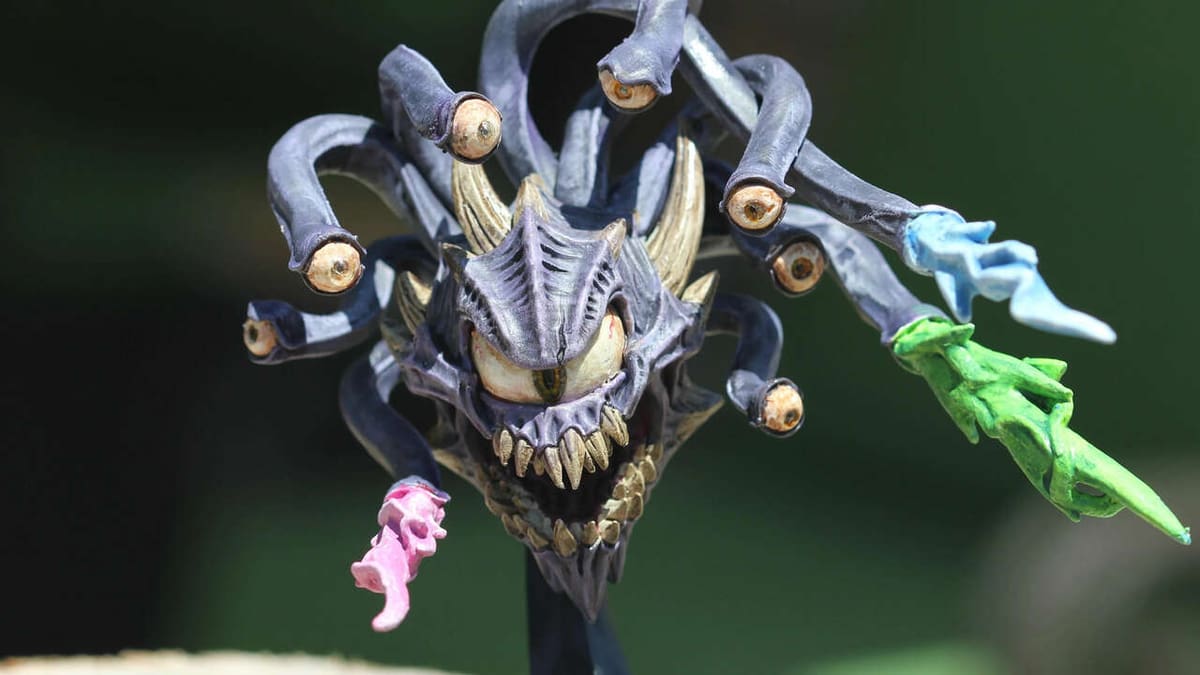
In this case, supports are the structures generated by the slicer program to hold up floating parts of the print, such as the wings and upraised arm of an Ashen Manticore. Without supports, small overhangs and bridges can be excessively stringy and large or severely angled features simply won’t form (while your nozzle produces plastic spaghetti).
Yet, supports bring their own problems, namely that they have to be removed after printing, which can leave pockmarks on or damage the model. This can be especially bad when supports are used for areas of visual focus, like dramatically upraised arms.

Tips & Tricks
- Support only extremely angled overhangs. What constitutes “extreme” is a matter of debate, but 60° is a good starting point. Anything less than that can often be supported by previous layers.
- Use tree supports, when appropriate. Tree supports form structures that reach in from around the model to support it, like a hug, rather than straight up and down. This results in fewer contact points, easier removal, and less waste material. Just know that tree supports aren’t suited for all models.
- Use a plug-in. Install the Custom Supports plug-in from GitHub, which allows you to place supports only where you think they’re necessary, rather than relying on an algorithm.
Infill
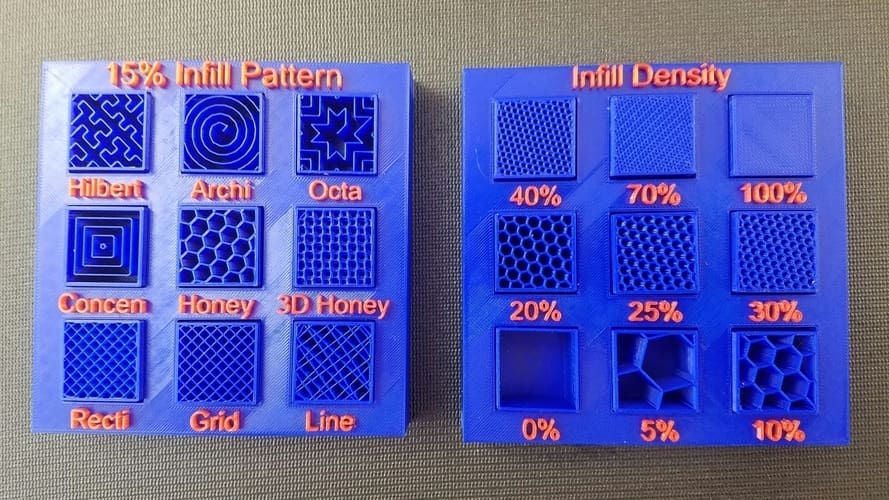
Infill settings matter just as much when printing miniatures as when printing terrain, with the proper combination of pattern and percentage having a massive impact on the life of the print.
Infill patterns determine the structural strength of the print, particularly if it’s dropped or compressed. While little will stop a sword or a staff from snapping off, the right pattern could save your model from further harm.
Infill percentages, on the other hand, impact printing speed. The less time the printer fills the inside of the model with plastic, the quicker you get the final product, and with less waste. Most models are best printed at around 20% infill.
Tips & Tricks
- Use the right pattern. If you’re printing basic minis, you don’t need to use robust (and time-consuming) infill patterns like cubic. A simple zig-zag or lightning pattern will give you the quickest results.
- Increase strength with larger models. When your three-headed T-Rex model can be measured in decimeters, “minis” starts to be a bit of a misnomer. If your centerpiece figure is going to be bigger than normal, invest in a higher infill percentage (e.g. 30% or more) and a stronger pattern. This will keep it from buckling under its own weight, and prevent damage from normal handling. Your future self (and fellow players) will thank you!
- Use percentage to your advantage. If a model needs to be printed at a lower speed in order to produce delicate points or curves, you can lower the infill to make up the time. Be careful, though: If you drop it below 15%, you may make your model structurally weak, no matter the pattern.
Cooling
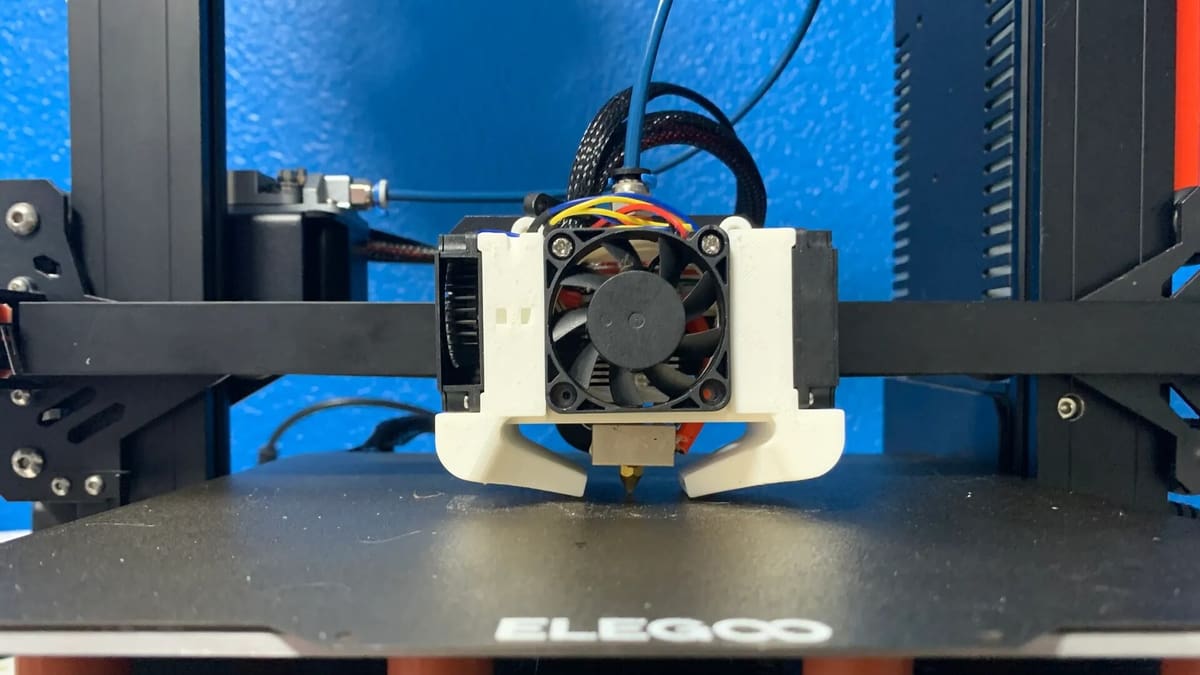
FDM printing is essentially the process of melting plastic and letting it cool into new shapes. However, there are ways to control these temperature changes for better results. Generally, printers use a cooling fan attached to the hot end to blow air onto the print.
Cooling is more important for miniatures than for larger models, as the hot end will remain in a confined area for longer, which can increase the chance of artifacts or even deformation.
Tips & Tricks
- Ensure cooling is activated. Check this in Cura by going to the Cooling menu and making sure that the “Enable Print Cooling” box is selected.
- Set cooling based on the filament. The level of cooling needed depends on what kind of plastic you’re using. PLA requires cooling during the entire print, while PETG and ABS require little to none and can even fail if over-cooled. Check your filament spool or the manufacturer’s website for the suggested cooling temperatures for your materials.
- Print a fan upgrade. Search for your printer model on a design site like Thingiverse to find printable upgrades.
Printer Tuning
Of course, all the software tweaks in the world won’t matter if the printer itself is out of tune. Regular maintenance of your FDM printer will enable you to print reliably and accurately, whether it’s an army of low-quality grots or an intricately detailed three-headed dragon. A few areas to keep in mind are bed leveling, nozzle cleaning, and the occasional upgrade if required.

Tips & Tricks
- Keep your nozzle clean. A clogged nozzle can leave blobs on your mini, or worse, cause under-extrusion. If you haven’t changed filaments for a while, consider performing a cold pull to clean out any build-up in the hot end.
- Invest in spare nozzles. You can also purchase cheap replacement nozzles to switch out regularly. A side benefit to this is having a variety of nozzle diameters, allowing you to experiment with different layer widths and varied flow rates.
- Level your print bed. Bed leveling is one of the most important preparation steps, as even a slight misalignment can ruin a print. If you have a manually leveled printer, you can download G-code that will semi-automate the process. Alternatively, you can purchase an automatic bed-leveling sensor like the BLTouch.
License: The text of "How to 3D Print Miniatures & Figurines in an FDM 3D Printer" by All3DP is licensed under a Creative Commons Attribution 4.0 International License.