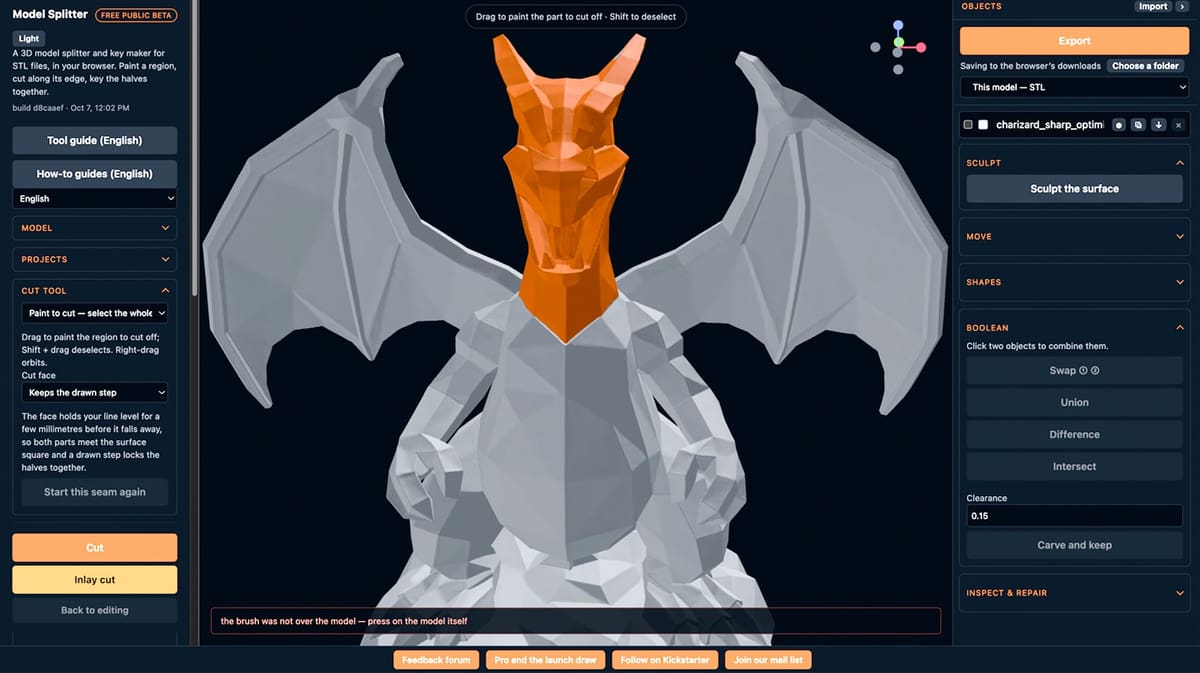
New Model Splitter Tested: Easier & Faster Than Your Slicer, Plus It’s Free

We took the new Model Splitter for a spin and found it's the splitting tool we didn't know we needed. This browser-based tool makes cutting and adding custom seams incredibly simple.
Splitting a model for 3D printing doesn’t usually require a dedicated application. As our guide to cutting models in Bambu Studio, PrusaSlicer, OrcaSlicer, and Cura explains, slicers can handle many everyday splitting jobs and offer connectors for assembling the resulting parts.
So why try another tool?
Model Splitter adds more precise ways to define a cut directly on a model’s surface and can automate the process for speed and efficiency that other tools can’t match. Plus, it has features that let you add shapes to your model and sculpt a bit off, too.
Instead of positioning only a straight cutting plane, you can paint the section you want to separate or draw a closed seam around it. That makes it particularly interesting for organic models that defy plane boundaries.
Of course you could go the Tinkercad route. Its familiar solid-and-hole workflow lets you remove material with overlapping shapes, duplicate a model to preserve both sides, and build your own alignment features. But Model Splitter packages those preparation tasks into a dedicated cutting workflow: define the seam, choose a connector, adjust its dimensions and clearance, and generate the pieces. The advantage is less manual construction, rather than an inability to achieve similar geometry in Tinkercad.
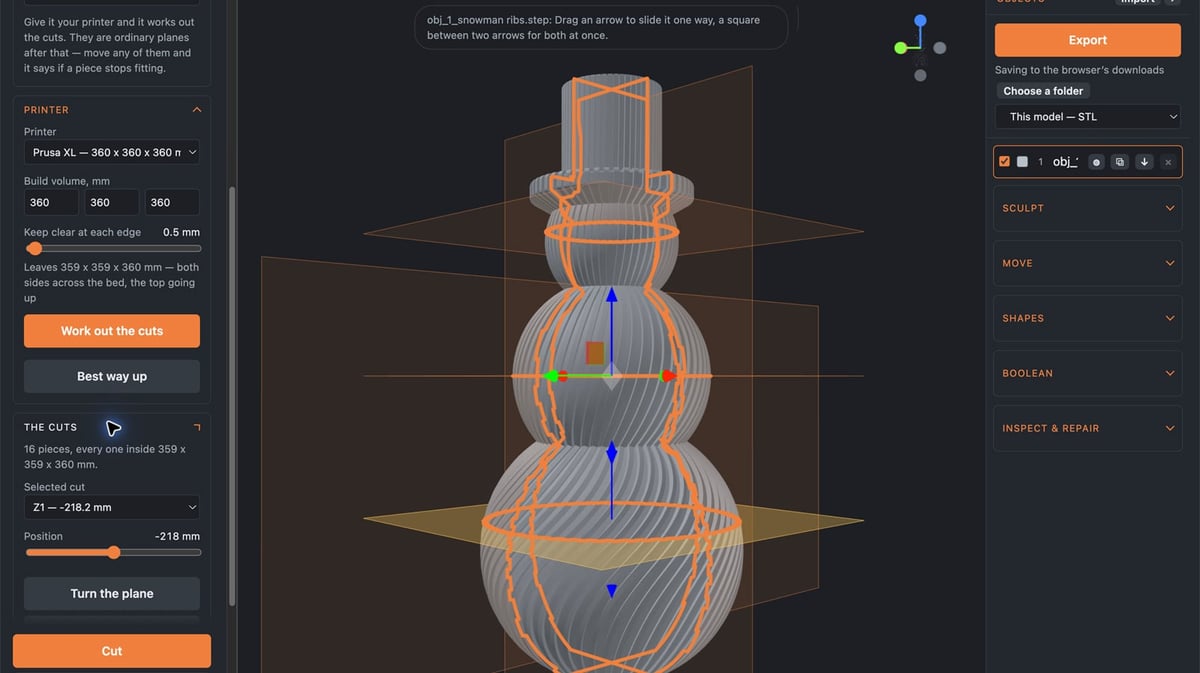
One big advantage is the automation. The “Auto multi-plane” tool addresses a different problem. Enter your printer’s build volume, and the application calculates a set of cuts to make the model fit. In our test, it generated multiple planes in one operation and let me adjust them afterward while checking whether the pieces still fit. Those cuts were spaced for size, however; they didn’t automatically find the most attractive joins between features.
The feedback was another useful part of the experience. Model Splitter lets you know when your cuts may not be optimal. It flagged disconnected pieces, marked them for inspection, and explained when a cut face lacked room for the requested joining pin. That helped distinguish a completed cut from an assembly that would actually have enough material for a connector.
Currently in public beta, Model Splitter accepts STL and 3MF files and, according to its website, processes models locally in your browser. It also includes Boolean operations, basic shapes, mesh inspection, and sculpting tools.
To see how that combination works in practice, we tested a T. rex skeleton and a solid snowman below. The cutting tools impressed me most. Sculpting proved harder to control on our test model, but the application already offers a promising option when a simple slicer cut isn’t enough.
First Test: Taking Apart a Dinosaur
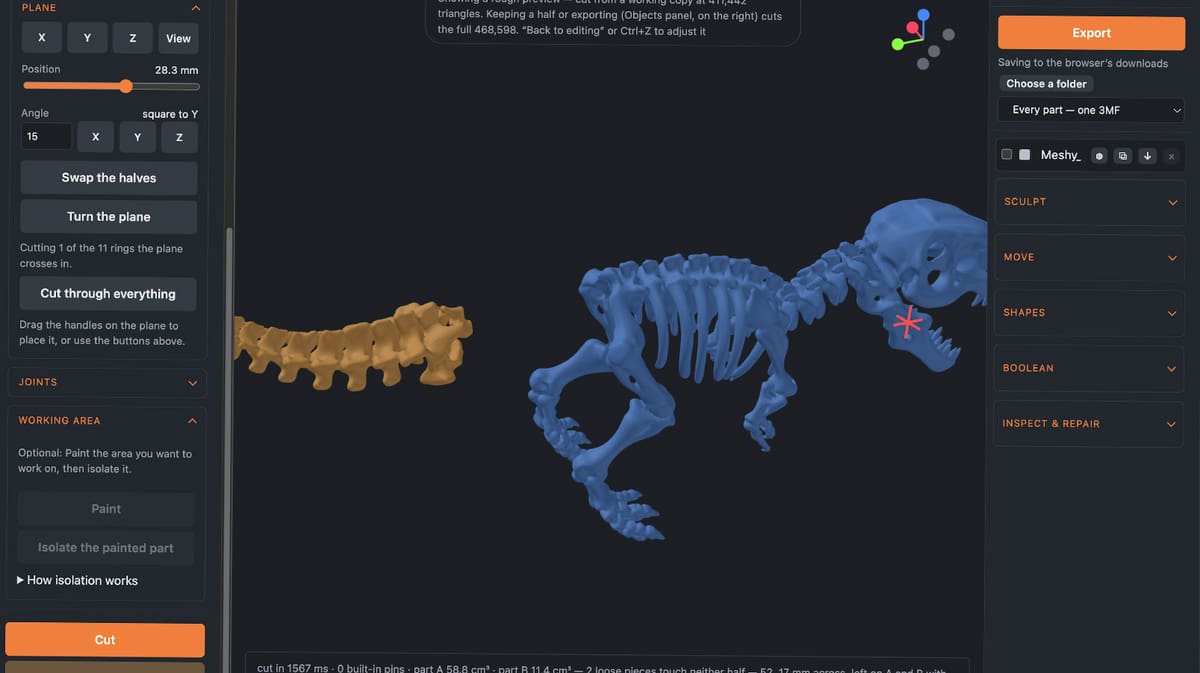
Our first subject was a T. rex skeleton. Its thin bones and disconnected features made it a challenging test, particularly for adding joints.
We started with Paint to cut, which lets you paint the entire section you want to separate. It offered detailed control, but selecting the tail took time: we needed to rotate the model and reach surfaces on the back.
Switching to Plane made the task quicker. One useful feature became apparent here: when a plane intersects the model in several places, you can click an individual intersection ring to target that area rather than cut through everything the plane crosses.
The tail cut completed, but Model Splitter supplied detailed feedback. It identified two loose pieces that weren’t connected to either main half and marked their locations in red. It also explained why it had omitted the requested joining pin: the cut face was too narrow.
That feedback was valuable. A successful cut doesn’t necessarily mean every resulting piece is connected or ready to assemble, and the application made those limitations explicit.
Drawing a Custom Neck Seam
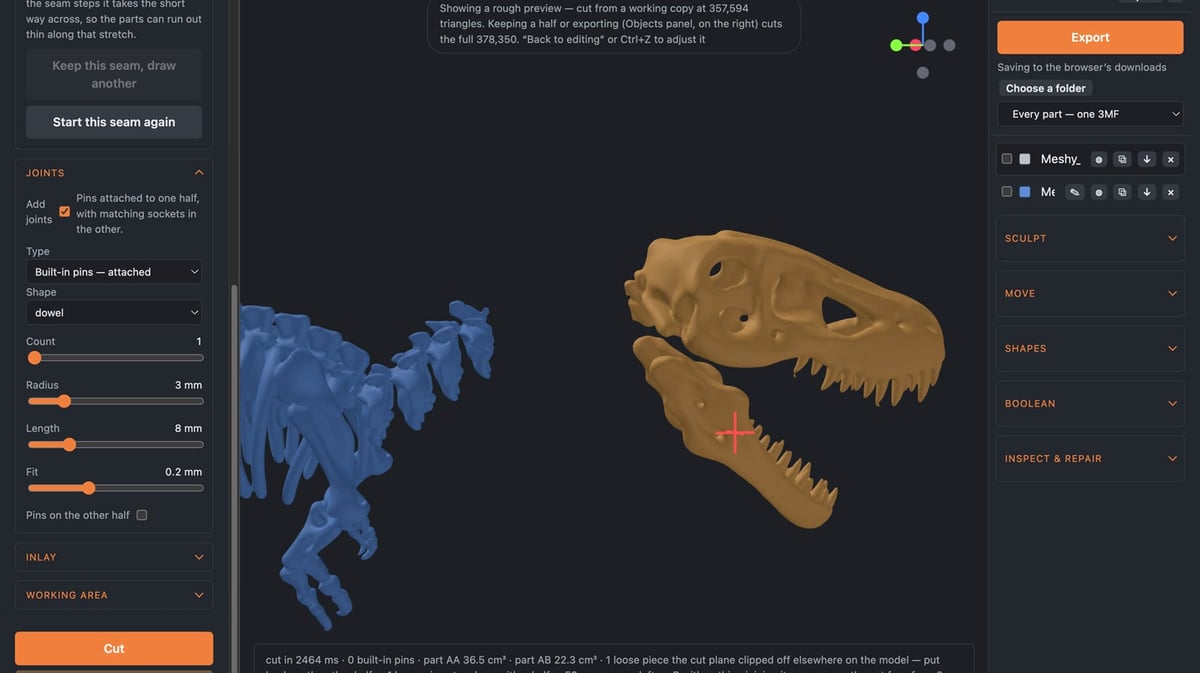
For the head, we tried Rope, which lets you draw a seam in stages. You drag across the visible surface, release, rotate the model, and continue from the loose end. Returning to the white starting anchor closes the loop.
This felt precise, although completing the seam took practice. We initially relied on the view gizmo in the upper-right corner and found rotation difficult to control. Learning that right-dragging still rotates the view while Rope is selected made the process easier.
With the seam closed, we used Follows the seam as the cut-face setting and completed the head separation.
Again, the skeleton’s geometry limited the joint options. The application reported a cut face only about 2.6 mm across and completed the operation without a pin. It also flagged another disconnected piece.
The lesson was straightforward: custom cutting can work on delicate geometry, but a usable connector needs enough material around its pin and socket.
A Snowman Tests Automatic Splitting
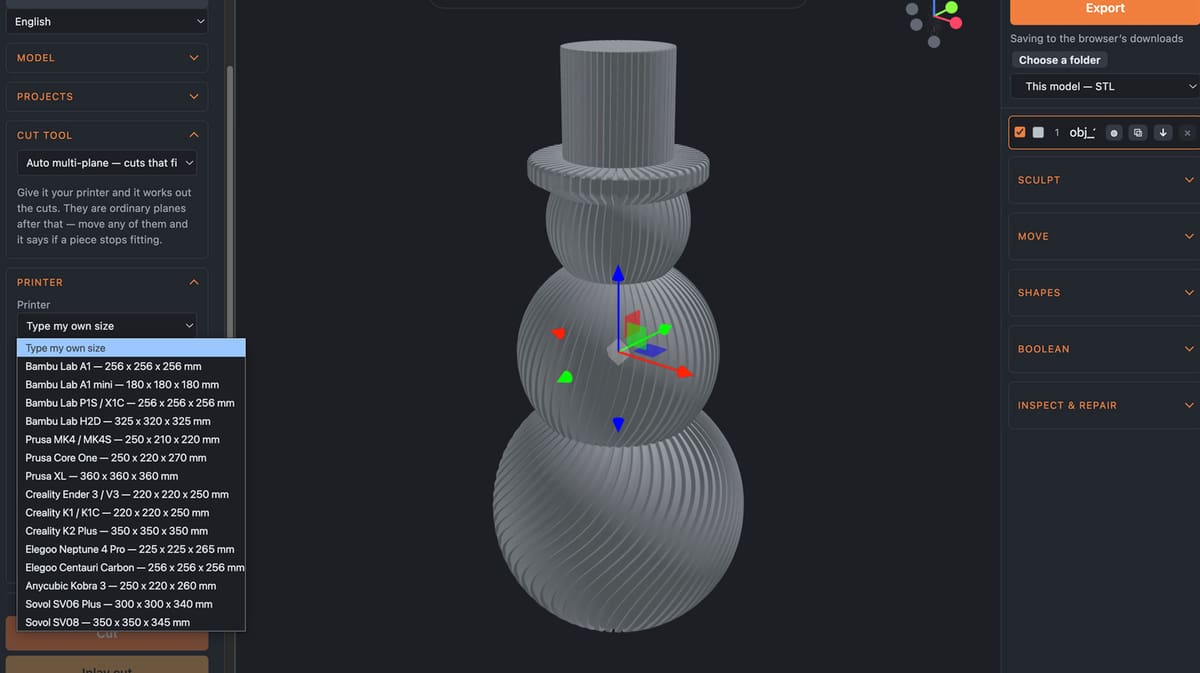
Next, we loaded a solid snowman to test Auto multi-plane, which calculates cuts from a printer’s build volume.
We selected the Prusa XL preset. At its initial size, the snowman required no cuts; the application reported that it would fit as one piece.
A scaling mix-up provided an unexpectedly useful comparison. At approximately 500 × 500 × 1,101 mm, the application proposed 16 pieces. After setting the height to 500 mm, with width and depth scaling to roughly 227 mm, it needed only two.
The automatic plane didn’t land at a natural join between snowballs. Auto multi-plane spaces cuts to fit the available printing volume; choosing an attractive seam still requires manual adjustment. The generated planes remain editable, and the application provides fit feedback as you reposition them.
This model also successfully accommodated a built-in dowel and matching socket. The initial 3 mm radius pin looked small against the enlarged snowman, so we undid the cut, increased the joint dimensions, and cut again.
Adding a Button & Testing Sculpt Function
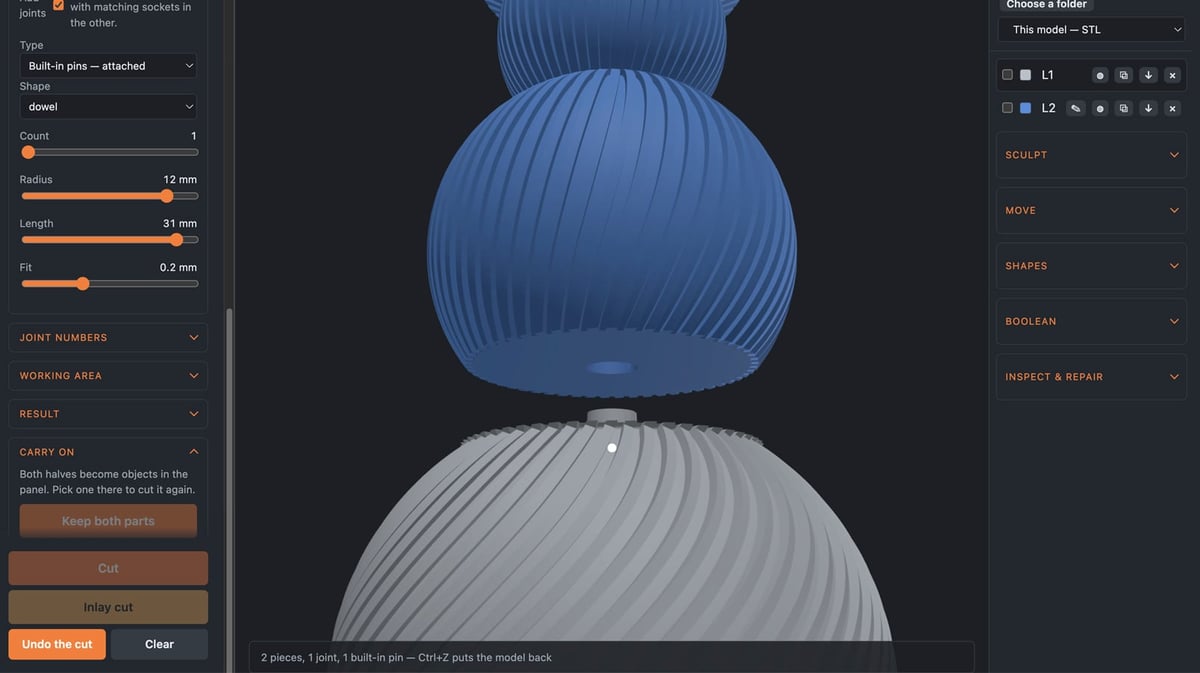
The right-hand tools extend beyond splitting. Using Shapes, we added a ball, sized and positioned it on the snowman, and used Boolean Union to combine it with one body section.
Boolean operations require exactly two selected objects. Selecting both snowman halves along with the ball disabled Union—a small workflow detail worth watching.
Sculpting was less successful. We tried the Smooth brush around the added button, but it visibly softened nearby body ridges without noticeably changing the button.
The application warned that my smaller brush was finer than the model’s triangles. Increasing the brush size didn’t achieve the intended result: the surrounding ridges were still affected. This test didn’t establish whether the cause was mesh resolution, brush targeting, or a beta issue, but precise smoothing remained difficult.
A Really Promising Cutting Tool
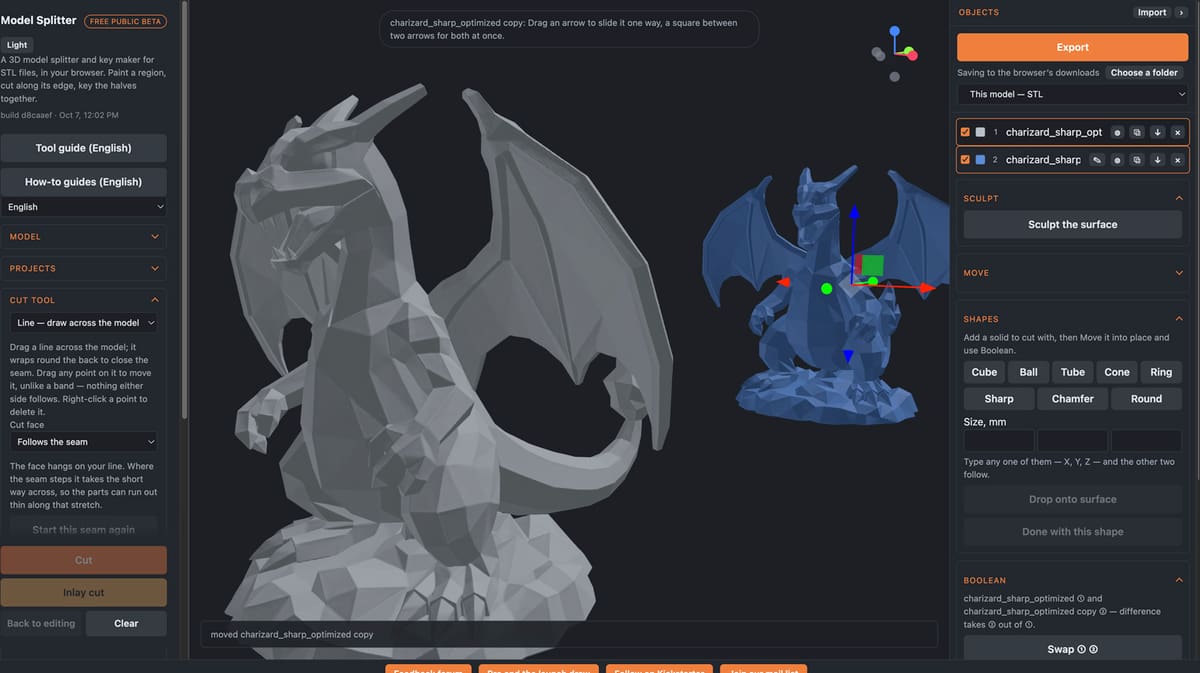
Model Splitter’s cutting features were the strongest part of this experiment. Plane selection, custom Rope seams, automatic printer-sized divisions, and built-in joints offered useful control. Its warnings about loose pieces and insufficient room for connectors were particularly helpful.
The interface took some learning, especially the distinction between selecting an object for movement and activating a surface-editing tool. Sculpting also needs further testing before we would rely on it for delicate changes.
For splitting models and preparing parts for assembly, though, this beta already offers a compelling toolkit. The digital results were inspected on screen; printability and connector fit still need a physical printing test.
Right now, it’s free, the company says, implying that it may not be forever. So, give it a spin!
You May Also Like:

License: The text of "New Model Splitter Tested: Easier & Faster Than Your Slicer, Plus It’s Free" by All3DP is licensed under a Creative Commons Attribution 4.0 International License.