We Tested Hi3D’s Split-to-Print Beta: Slashing CAD Time for AI Models

We used Hi3D Studio to divide a humanoid model, add articulated connectors, and arrange the resulting parts for printing. The tools produced a usable result, but several essential steps have a learning curve.
Hi3D, the browser-based AI modeling tool, just launched Split-to-Print, a feature designed to turn complete 3D models into separate, printable parts. It can divide character models and parts, automatically seal the resulting meshes, adding assembly connectors, and arranging the pieces for optimal printing on the build plate.
While it doesn’t work flawlessly, it does save you probably hours work in CAD or slicing software when it comes to splitting oversized models into pieces that fit in you build volume and creating connectors, which typically takes substantial design skills.
And if you’ve never thought of creating an articulated model, this makes it far more approachable, once you get the hang of it.
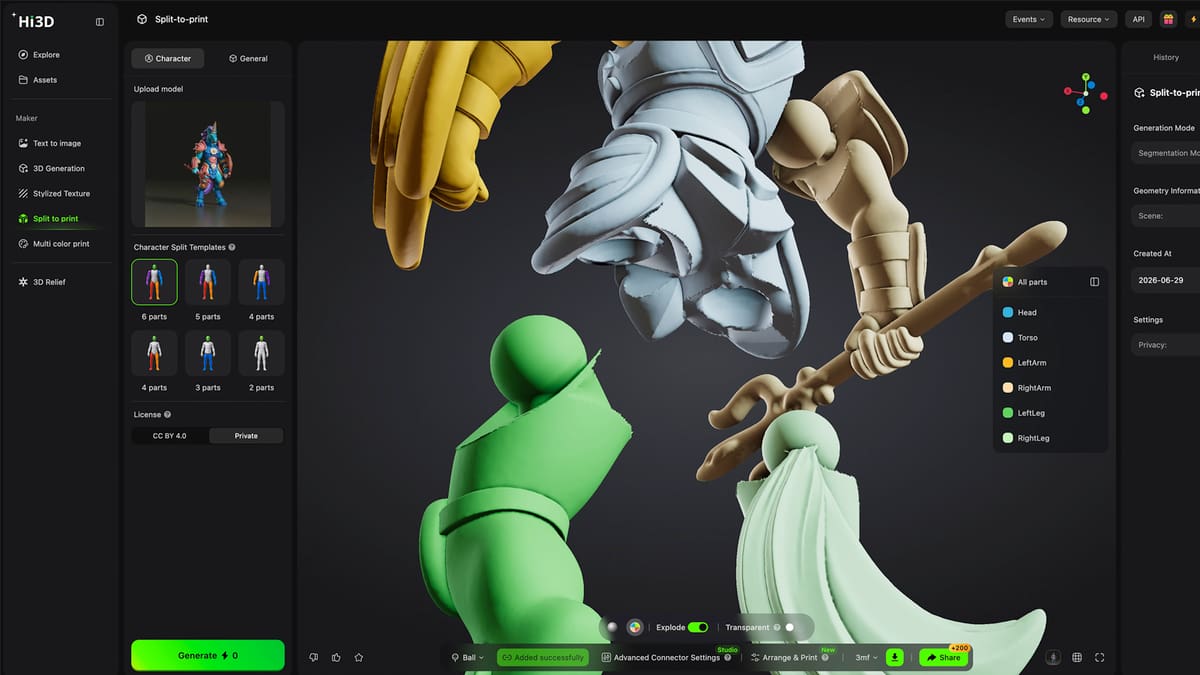
Split-to-Print offers two main workflows. Character mode is designed for humanoid figures, action figures, and collectibles. You can choose to divid your character into two parts or up to six parts. The software identifies areas such as the head, torso, arms, and legs and divides the mesh accordingly. If it didn’t get the parts just right, you can adjust them manually in General mode.
General mode handles objects without a predictable anatomy, including buildings, vehicles, machinery, and props. A beginner setting performs the split automatically using selectable levels of granularity, while a professional setting lets you select regions, merge automatically generated sections, or divide individual parts further.
We took Hi3D Studio’s new feature for a test drive to split an action figure we created on the platform into printable sections, add connectors, and prepare the parts for export. Here’s how it went for us. Note that we used the beta version and some issues we ran into may be resolved before you get your hands on it.
The General Method Offers More Control
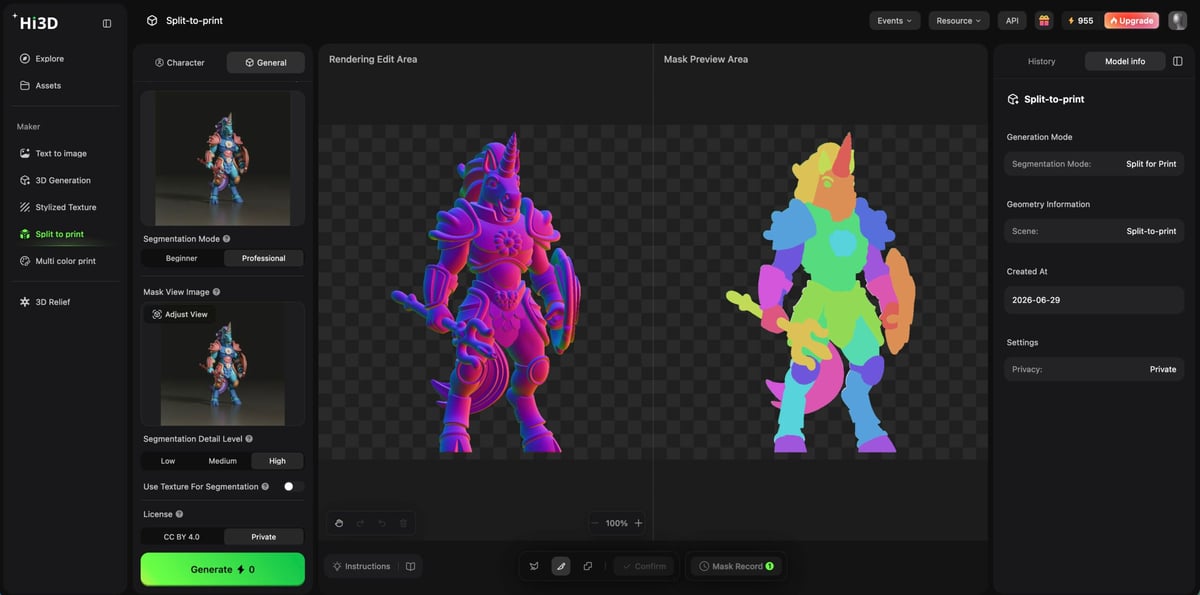
Split-to-Print’s humanoid template that recognizes arms, legs, etc. , gives you a quick starting point, but becomes limited if your models require more complex segmentation. Fortunately, there’s also a more manual General method for more flexibility in your segmentations.
For our model, which we used Hi3D’s text-to-model feature to create in the first place, was an action figure we described as a “Unicorn Guardian of the Ocean.”
Using the merge and split tools, we were able to define the sections we wanted split on our figurine. This level of control is useful for figures with unusual costumes, accessories, or anatomy that do not fit a standard humanoid template. Characters with tails, wings, capes, long hair, weapons, backpacks, or other geometry extending behind the body need to be examined from every angle. Without free rotation during segmentation, it is easy to create unwanted cuts in areas that are not visible from the default view.
Hi3D also provides several practical connector options, including ball joints, rivet joints, and mortise-and-tenon connections. You can adjust their size, position, direction, tilt, and fit – important controls when preparing articulated figures or parts that need to be assembled after printing. Importantly, when it cuts a model is seals up the cut part so your mesh remains printable.
Automatic connector placement nevertheless requires careful checking. The suggested ball-joint locations did not suit our figure because its costume prevented the legs from moving freely.
Connectors can be repositioned, but moving one does not alter the original cut line or create additional clearance around clothing and accessories. Models with obstructing geometry may therefore need to be divided again before the connectors are added.
Once you get the splitting workflow down, which entails finding the right buttons and understanding how they work, it’s nicely automated. The downside we found it that it will cost you some credits as you learn. How many? It’s hard to say since every action has a different credit cost. Generating a model is 40 credits, so the $7,96/month Pro plan (currently on sale from $19/month) that comes with 1,000 credits should be enough. This plan also comes with six free retries per task, so you’ll save a few credits there. Above the Pro plan, there’s the Max and Ultra plans, currently on sale for $15.96 and $51.96 respectively.
Watch the tutorials and read the guidance before jumping in to cut down on credit loss.
The complete workflow sequence we found was:
- Merge and Split → Confirm edits → Generate → Fill Face → Connector
Arrangement & Printer Selection
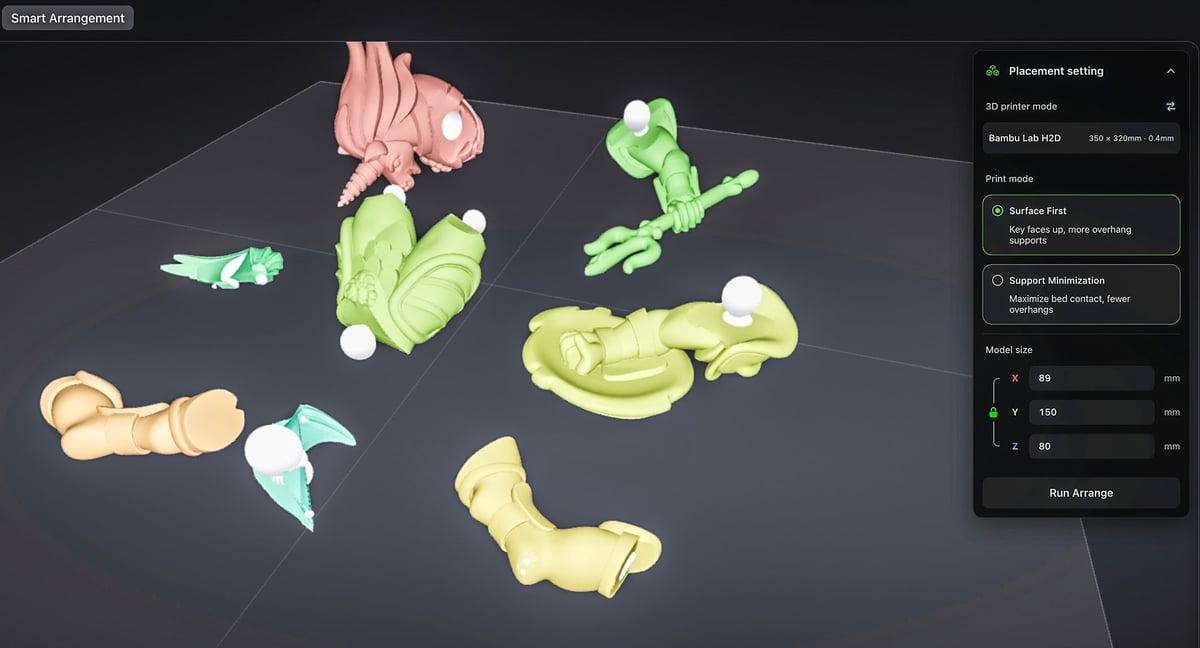
Once the parts were generated, Hi3D’s Smart Arrangement feature recognized our Bambu Lab H2D printer profile and positioned the sections on the build plate.
To open the printer list, we had to select a small double-arrow icon beneath “3D Printer Mode.” A clearly labeled “Change Printer” button would make this control much easier to find.
Overall Hi3D Studio ultimately allowed us to split the humanoid model into the intended sections, seal the meshes, add adjustable connectors, arrange the components, and generate a printable 3MF package that we can open on Bambu Slicer. Overall it saved an enormous amount of hassle and multiple software tools.
Even though it was a huge time saver and, for us, the problem was not the lack of functionality, but discovering how the functions were supposed to be used and in what order, which is pretty much the definition of learning software.
Better tooltips, descriptive button labels, clearer button states, and a persistent workflow guide would remove much of the trial and error. As it stands, Split-to-Print produces useful results and since this feature is still in beta testing, we expect Hi3D to iron out these issues before the final launch.
License: The text of "We Tested Hi3D’s Split-to-Print Beta: Slashing CAD Time for AI Models" by All3DP is licensed under a Creative Commons Attribution 4.0 International License.