PrusaSlicer Support Settings: The Basics

PrusaSlicer gives users a lot of control over their prints. Read on to get the most out of PrusaSlicer support settings, even tree supports!
PrusaSlicer is a popular open-source 3D slicer from Prusa Research, the makers of well-known 3D printers such as the Prusa i3 MK3S+ and Prusa Mini. Like all 3D slicers, PrusaSlicer converts 3D model files (e.g. STL, OBJ, 3MF, etc.) into machine-readable G-code using the settings and options specified by the user.
PrusaSlicer was originally a fork of Slic3r, another popular slicer program. Since the original division, Prusa Research has implemented a plethora of changes and new features, including ironing and variable infill density.
PrusaSlicer isn’t only known for its more unique features, though. In fact, many users love the program because of its more basic ones, such as its amazing pre-calibrated default slicing profiles and numerous control options for supports.
In this article, we’ll be going over PrusaSlicer support settings, including how to adjust the placement, gap distance from the print, pattern, and speed. We’ll also review how you can use organic supports, the newest addition to the support settings in PrusaSlicer.
Note that, upon installing PrusaSlicer, you’re likely to be by default in the “Simple” tab of settings (right top corner of the program), which doesn’t show as many options. You’ll be able to access more features by clicking on “Advanced” or “Expert”.

Placement
One particularly strong aspect of PrusaSlicer is the range of support settings, which allow you to easily control the placement and printing of support structures for your prints.
Supports are the printed structures that hold up overhangs on prints, and they’re necessary because a printer can’t print in mid-air. Ideally, support structures should hold up any “floating” features of a print without adhering too much to the print’s surface; otherwise, they can be hard to remove and even damage the appearance of your print.
Our first array of support settings relates to their enforcement and placement. In a majority of slicers, the most basic support setting is whether to activate them at all. You can control this in PrusaSlicer by going to the “Print Settings” tab, clicking on “Support material”, and checking (or not checking) the “Generate support material” box.
Overhangs
Checking this box will generate support structures on your model wherever there are overhangs equal to or exceeding the default “Overhang threshold”. The threshold can be adjusted beneath the support checkbox and is defined in degrees. This value determines how extreme overhangs have to be before the slicer will automatically support them; raising this value can reduce the number of supports generated on the model.
Another way you can control support enforcement on PrusaSlicer is by choosing one of the options from the “Supports” drop-down box in the Plater tab. Here, you’ll see the basic “Everywhere” and “None” options, but you’ll also see other options, including “Support on build plate only” and “For support enforcers only”.
It’s important to note that the “Everywhere” option doesn’t put supports literally everywhere, only where the overhang angle meets or surpasses the defined threshold. Selecting the “Supports on build plate only” option will tell your slicer to only generate supports when the bottom of the support structure touches the build plate (rather than the support touching another area of your model).
Paint-on Supports
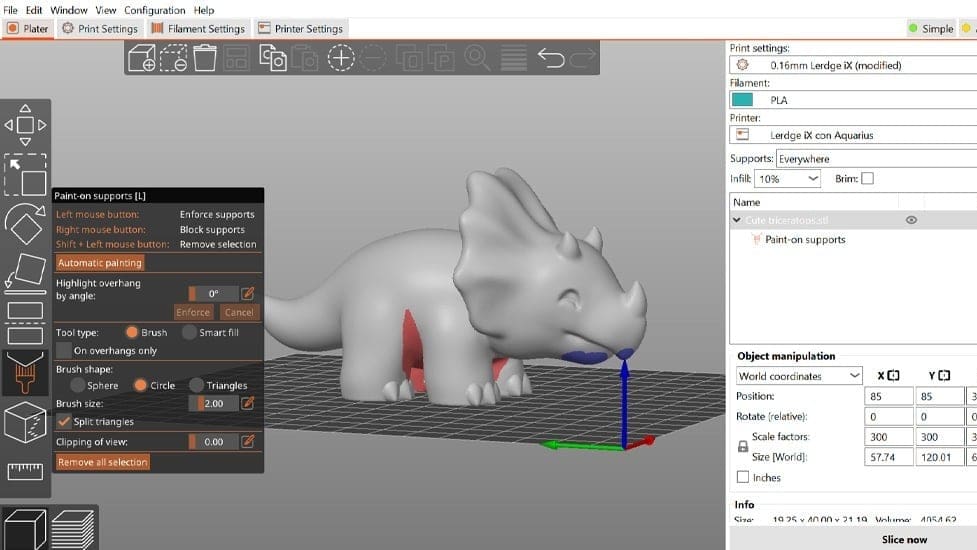
Paint-on supports are one of the most handy support settings. With this tool, you can define the areas where you want to add supports, as well as the parts where you don’t want the slicer to generate them. To activate them, press “L” for the shortcut or click on the brush icon in the panel on the left. The object will turn grey and other parts on the plate will be hidden.
To use them, left-click to add supports in precise zones and right-click to exclude regions from generating supports. If you want to delete highlighted areas, simply hold Shift and the left mouse button and move over the zone you want to erase. This tool is particularly handy for models with many different features, such as bridges, holes, and steep overhangs.
If you’re working on a particularly intricate model, the “Automatic Painting” mode is helpful. With this function, PrusaSlicer will automatically highlight areas that would print in the air without supports. A similar tool is the highlight overhang by angle slider. This allows you to adjust the overhang threshold and visualize in real-time which areas will need support. You can then paint supports over these parts.
To visualize the new supports you painted, set to the “For support enforcers only” mode. Set to “Everywhere” or “Support on build plate only” if you want your painted areas to be added to the auto-generated supports.
Snug Style
Initially, the only style option you had for supports was “Grid”, but with the release of PrusaSlicer 2.4, a new alternative has been added: the “Snug” style. These settings can also be found under “Print Settings > Support material > Options for support material and raft”.
While “Grid” may offer more stability, “Snug” supports will be especially useful for rounded or detailed areas where you may want to avoid the print potentially being scarred upon removal of the additional structures. This latter option will also mean less use of material.
As you may assume from the name, a snug style of supports means that they follow the shape of the overhang, and makers have voiced their support (sorry) for this setting.
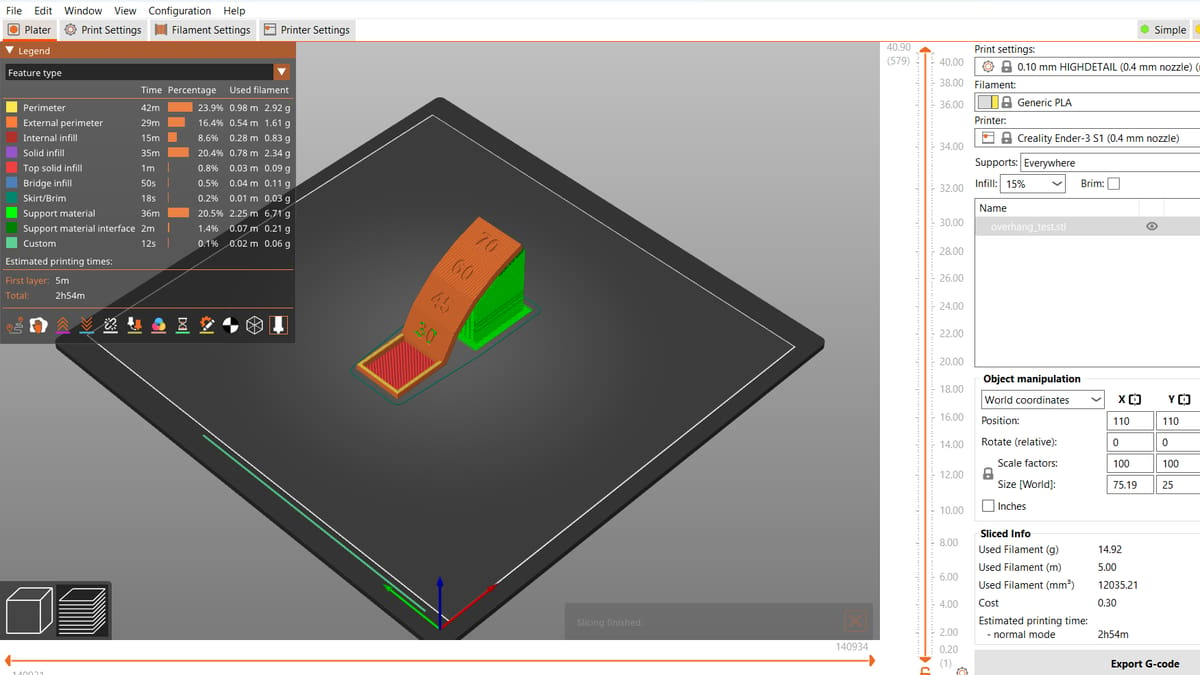
X, Y, Z Support Gap
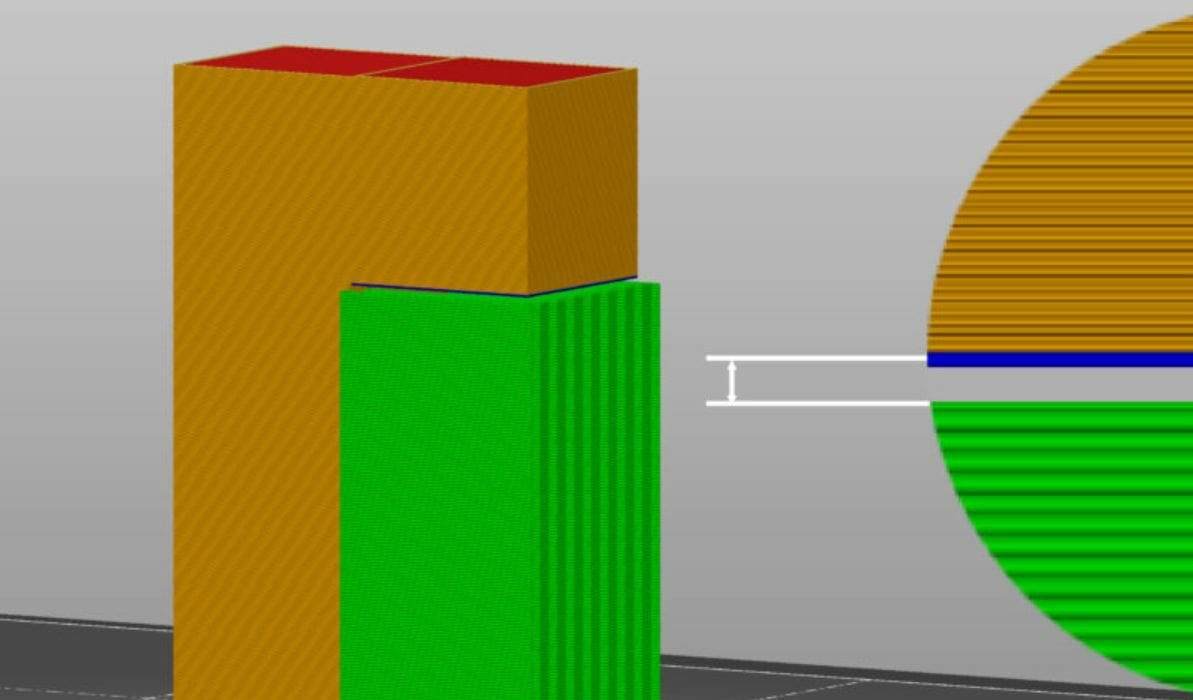
A crucial slicer setting for 3D printing supports is the gap between the support structure and the printed object, which we’ll refer to as the X, Y, Z support gap. A gap is necessary between an object and the underlying support structures because, without one, there would be no differentiation between the desired object and the support material.
Settings for the X, Y, Z support gap can be found in most 3D slicers, including PrusaSlicer, and it’s a key setting to set correctly because it can lead to some print issues. Too small of a distance can make the structures difficult to remove, while too large a distance can lead to the structures not serving their purpose.
In PrusaSlicer, three main settings relate to the X, Y, and Z support gap. They’re broken down into “Top contact Z distance” and “Bottom contact Z distance”, “XY separation between an object and its support”, “Top interface layers” and “Bottom interface layers”. These settings all seem quite similar, but they do affect different aspects of the gap distance. You can locate and adjust these settings in the Print Settings tab, under the “Support material” section.
Firstly, the “contact Z distance” options are responsible for the vertical distance between the support structure and the main object (i.e. along the Z-axis). These settings are especially significant when you’re printing an object with vertically oriented supports, like the ones necessary to hold up a standing ‘T’ shape.
Secondly, the “XY separation” can be found in the same section and, as you probably guessed, performs the same function as the “contact Z distance” but for the X- and Y-axes. This setting becomes particularly useful when printing an object that requires supports in contact with the print’s horizontal edges.
Lastly, the “interface layers” values on PrusaSlicer set the number of special top layers of the support structure. Unlike the “contact Z distance” options, this setting doesn’t set a gap between the support structure and the main object. Rather, the “interface layers” setting creates several easily removable layers on the top or bottom of the support structure, so you can effortlessly detach the supports from a print.
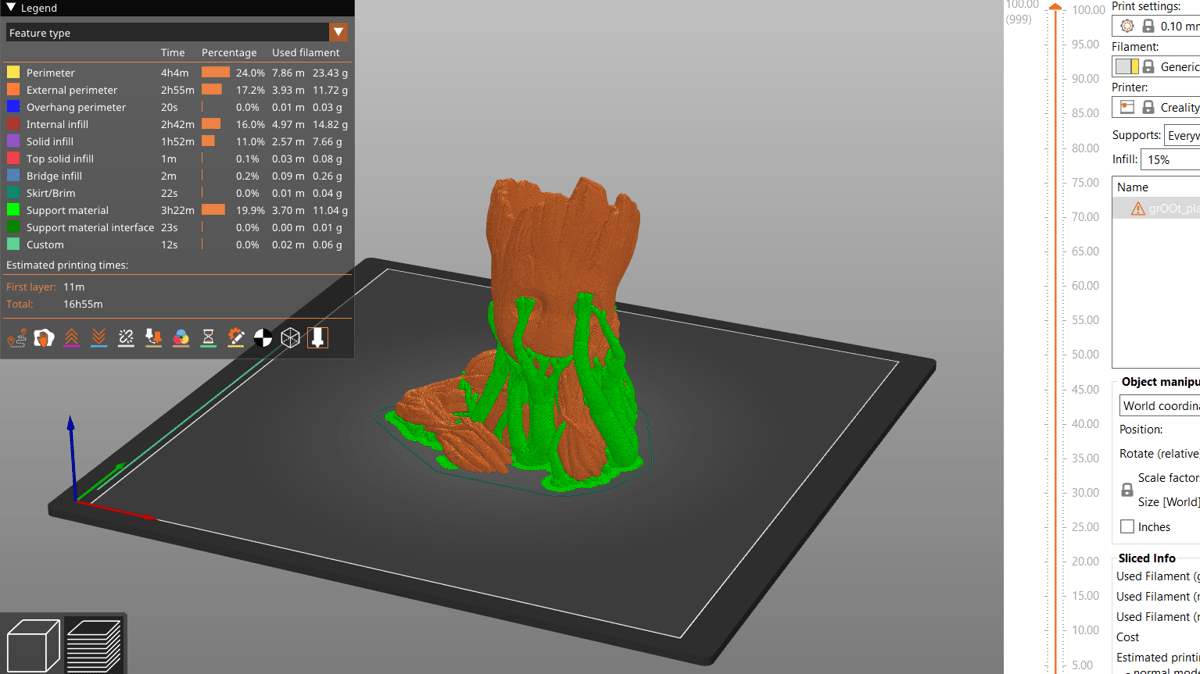
Organic Supports

Organic supports were originally introduced at the end of 2022, and have been constantly improved since then. Loved by the maker community, this support type is an alternative to the grid and snug styles, and uses a different generation algorithm. Organic supports allow you to save material and time.
As the name suggests, organic supports have an organic shape that’s similar to a tree. To activate them, go to the “Print Settings” tab after enabling supports. Under the “Support material” section, you’ll find the “Style” tab. Here, select the “Organic” option. After you activate them, an “Organic supports” settings list will appear.
There are a lot of values you can tweak. The most important settings are the “Branch Diameter” and “Maximum Branch Angle”. With these, you can make your organic supports more stable, a key factor when printing them. By increasing the diameter of the branch, you’ll obtain thicker trees that can handle more weight. On the other hand, by decreasing the maximum angle, your supports will be more straight and therefore more stable.
This style of support is perfect for miniatures, statues, and aesthetic prints since they touch the model only on the supported area and leave just minor imperfections on the overhangs. It’s also good for functional parts. The only limit is larger models that require more support strength. Being hollow on the inside, organic supports are weaker than grid and snug supports, so you should consider switching styles for heavier prints.
To obtain the best possible results, check out our guide on organic supports!
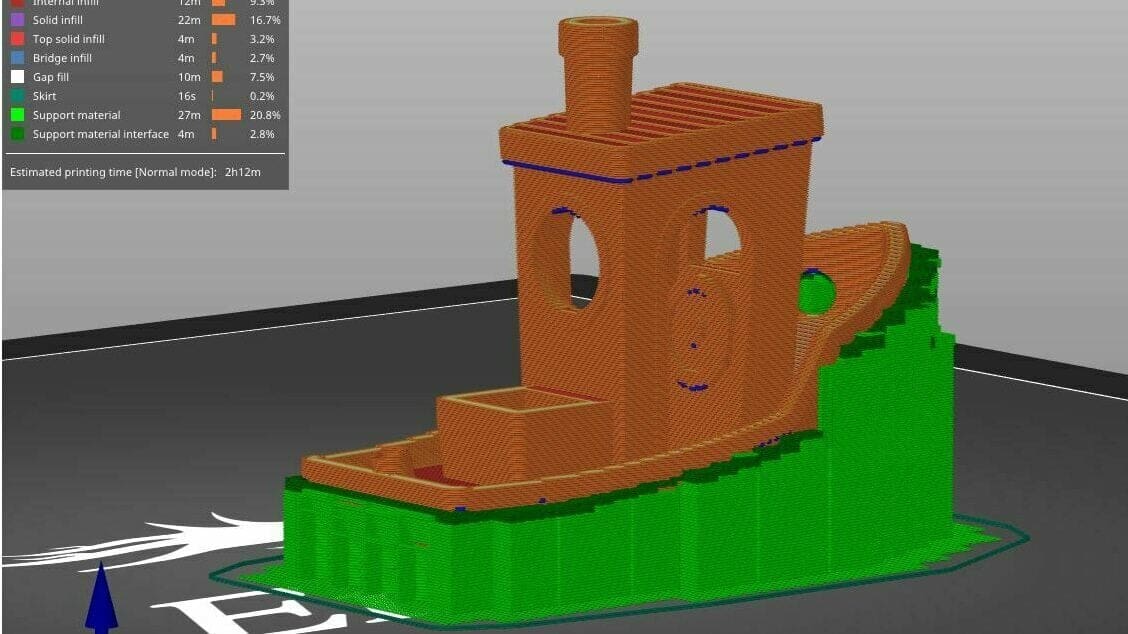
Pattern

The next setting we’ll discuss relates to the placement pattern of the support structures, which you can find under “Support material > Options for support material and raft”. Again, note that “Pattern” will be visible only if you’ve clicked on the “Advanced” or “Expert” tabs on the top right of the screen.
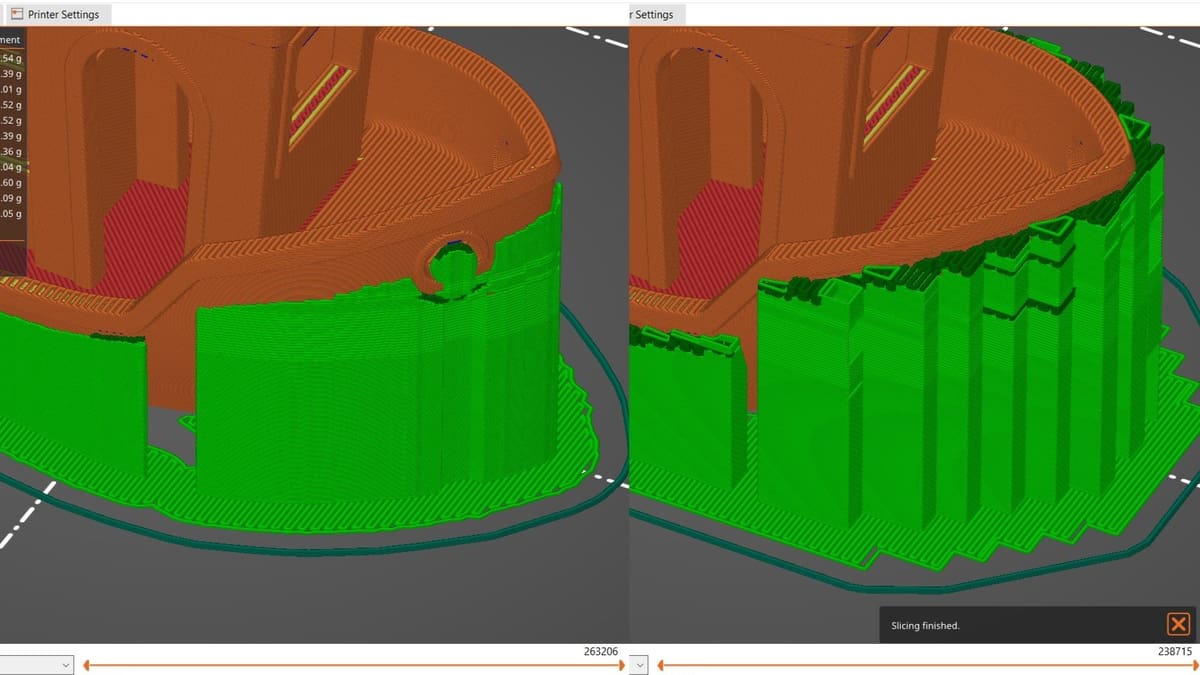
The pattern controls the configuration of an object’s support structures; in other words, this setting is responsible for the arrangement of the walls of the support structures, almost like choosing between infill patterns. For a visual example, the image above shows two different support pattern options. The left is quadrilateral and the right is hexagonal.
On PrusaSlicer, this support setting contains three options: “Rectilinear”, “Rectilinear grid”, and “Honeycomb”. Something to remember when choosing your pattern is that, unlike the infill for the main print, you don’t really want the pattern for supports to be super dense or interconnected because you’ll want them to be easily removable when the time comes, as well as reduce the amount of material that will ultimately end up as waste.
The “Rectilinear” and “Rectilinear grid” patterns provide adequate strength for supports and are pretty quick to print due to their uncomplex design. The “Honeycomb” pattern will work well for some models, but because the printhead has to make more movements and turns to achieve the honeycomb design, it might take longer to print, depending on the placement.
Speed
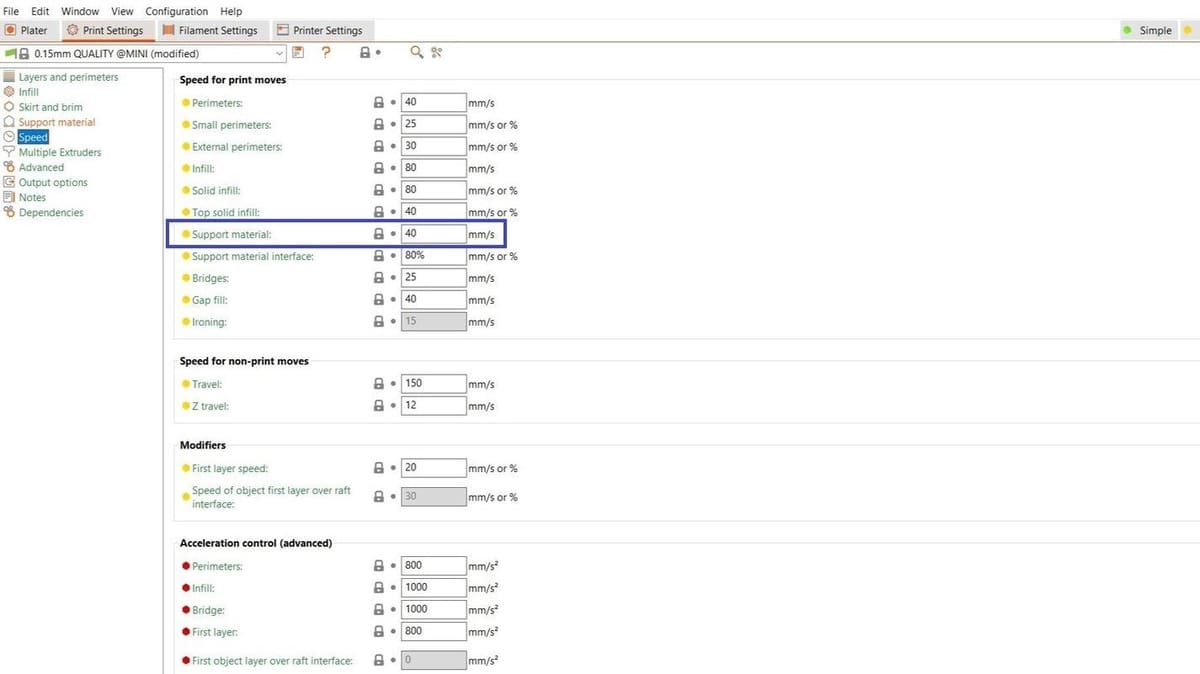
The last support setting we’ll touch on in PrusaSlicer is the printing speed for your support material, which can be found by going to “Print Settings > Speed”. This adjustable value sets how fast your nozzle extrudes material when printing the support structures.
As you might have guessed, the higher this value (in mm/s), the faster your support structures will be printed, meaning the print time is reduced. Just be careful not to set this value too high, as faster printing means the support structures have a higher risk of failure or getting knocked over by the nozzle mid-print.
The speed for “Support material” is, by default, 40 mm/s, and you can change it to whatever value you like. However, we recommend setting it no higher than your infill print speed, as supports need to be printed delicately in order to fulfill their purpose.
License: The text of "PrusaSlicer Support Settings: The Basics" by All3DP is licensed under a Creative Commons Attribution 4.0 International License.