PrusaSlicer: Ironing – How to Get a Smooth Surface

PrusaSlicer ironing can yield smooth top surfaces on 3D prints. Read on to learn more about what it is, what it does, and when to use it!
If you’re a 3D printing enthusiast, you’re probably familiar with the popular 3D slicers out there, such as Ultimaker Cura, Slic3r, and PrusaSlicer. Developed by Prusa Research, PrusaSlicer started as an offshoot of Slic3r but now contains some of the latest and greatest slicing features in the consumer 3D printing industry.
In recent years, popular open-source slicers have seen a surge of experimental features. These features provide unique capabilities to the programs that users can take advantage of to improve their prints. Examples include settings such as fuzzy skin in Cura to top layer fill patterns in PrusaSlicer.
Another one of these innovative features is ironing, a relatively new craze for 3D slicers that allows users to achieve a smooth top surface finish. Ironing for 3D slicers is a few years old but is an experimental setting because the feature is still being improved and developed by the community.

The ironing feature is available in PrusaSlicer, which is a great platform to use ironing due to the other benefits that the program carries (support for multiple extruders, integrated firmware flashing capabilities, and excellent default slicer profiles, to name just a few). The feature comes with a few adjustable settings that impact the speed, extrusion, spacing, and placement of the ironing process.
In this article, we’ll go over how ironing works, how to use it in PrusaSlicer, as well as some tips and tricks.
What Is It?
A commonly known flaw in 3D printed parts is the ubiquitous layer lines in prints, both on the sides and the top layer. There are a few ways to eliminate or significantly reduce the appearance of these lines on the outside of prints – acetone layer smoothing or sanding, for example.
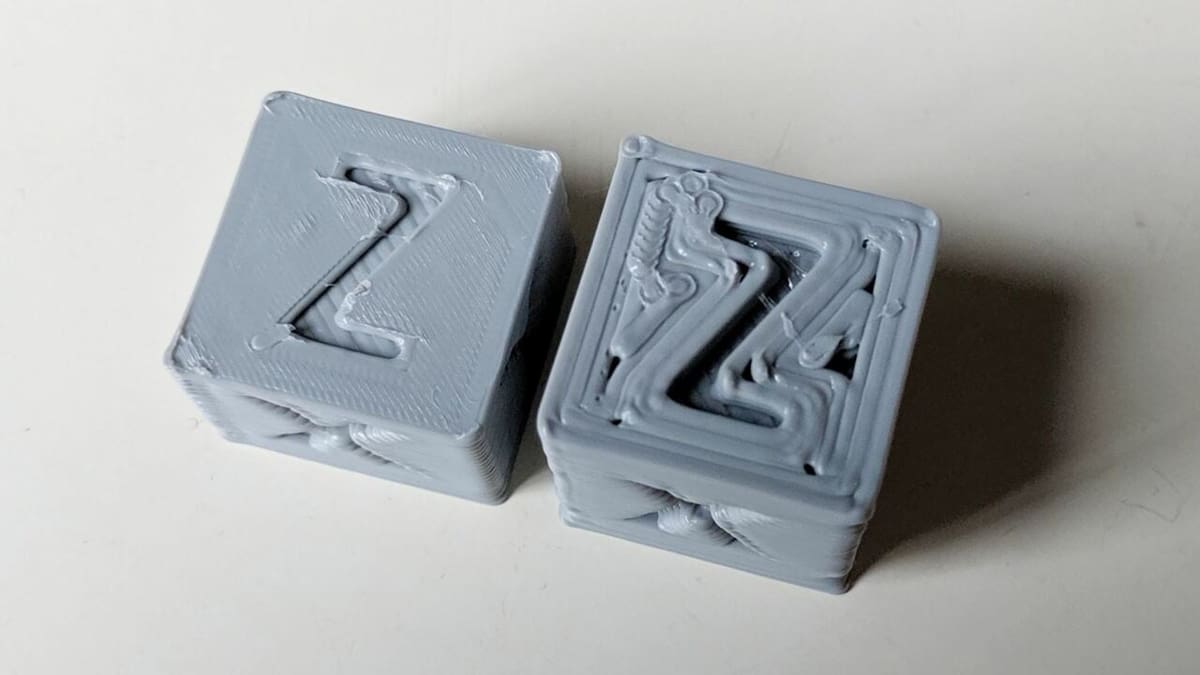
Ironing is a fairly new way for 3D printers to smooth out the top surface of 3D prints, making parts more visually attractive. In theory, ironing for 3D printers is very similar to ironing clothes: Clothing irons use heat to eliminate wrinkles and printers use the nozzle’s heat to eliminate layer lines.
Essentially, the feature works by telling your printer to brush the nozzle over the top surface to smooth it. While doing so, the nozzle extrudes a small amount of material on the surface. The heat of the nozzle brushing over the top layer softens the layer lines, allowing the extruded material to easily fill and smooth the layer.
Because the nozzle on almost all 3D printers is face down, ironing is only possible on the top layer of prints. That’s because there isn’t enough clearance for the nozzle to smooth the sides of prints when it’s facing down.
The Cons
Ironing offers the obvious advantage of a smoother top layer, but it also has a few downsides. Extra print time is required to complete this process, and this extra time could be significant if you’re printing a part with a large surface area.
It’s difficult to achieve a perfectly ironed surface if you’re not taking the time to properly calibrate the ironing settings on your slicer profile. If done incorrectly, ironing can yield inconsistent top layer quality and even bumps.
Lastly, ironing is limited to models with a flat top because curved top surfaces don’t have a consistent height. On such surfaces, ironing won’t be able to blend the layer lines.
Use
Ironing can be a great way to improve the appearance of the top layer without taking extra steps such as sanding or chemical layer smoothing. As we mentioned above, there are a few downsides to ironing, so you should only activate it in PrusaSlicer when the advantages would outweigh the negatives.
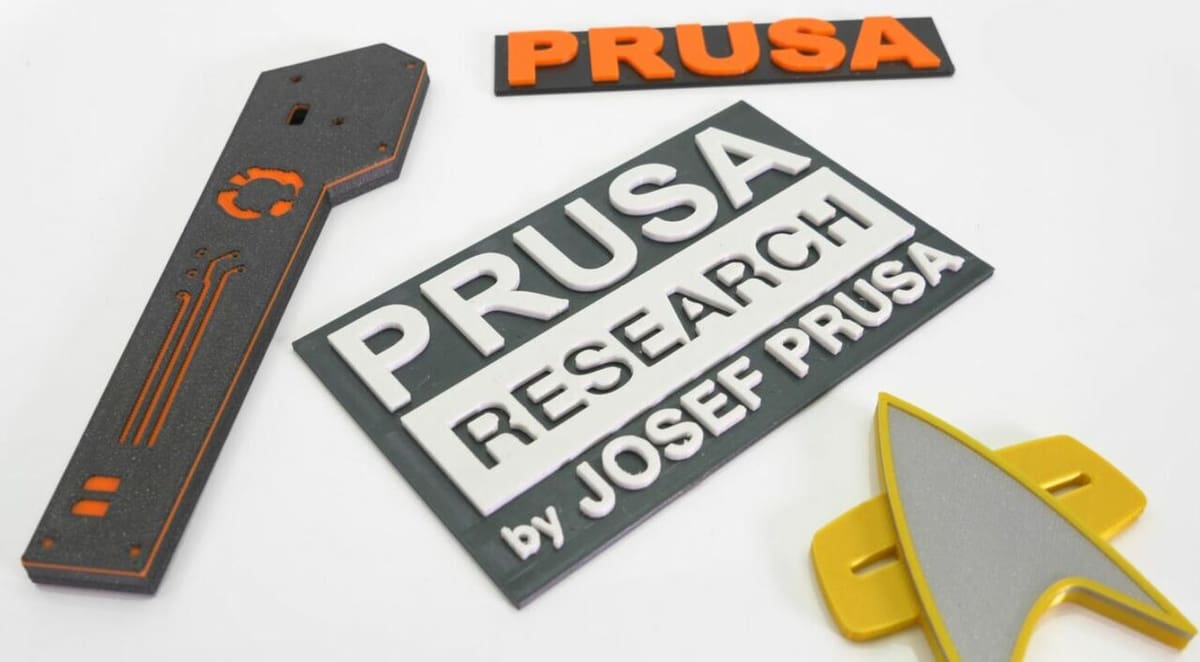
For example, you should use the ironing setting if you’re printing a model that has a flat top surface without excessive amounts of fine detail, like a flat sign. Some other types of 3D prints where ironing might yield an improved appearance include flat cosplay pieces, phone cases, and wall art.
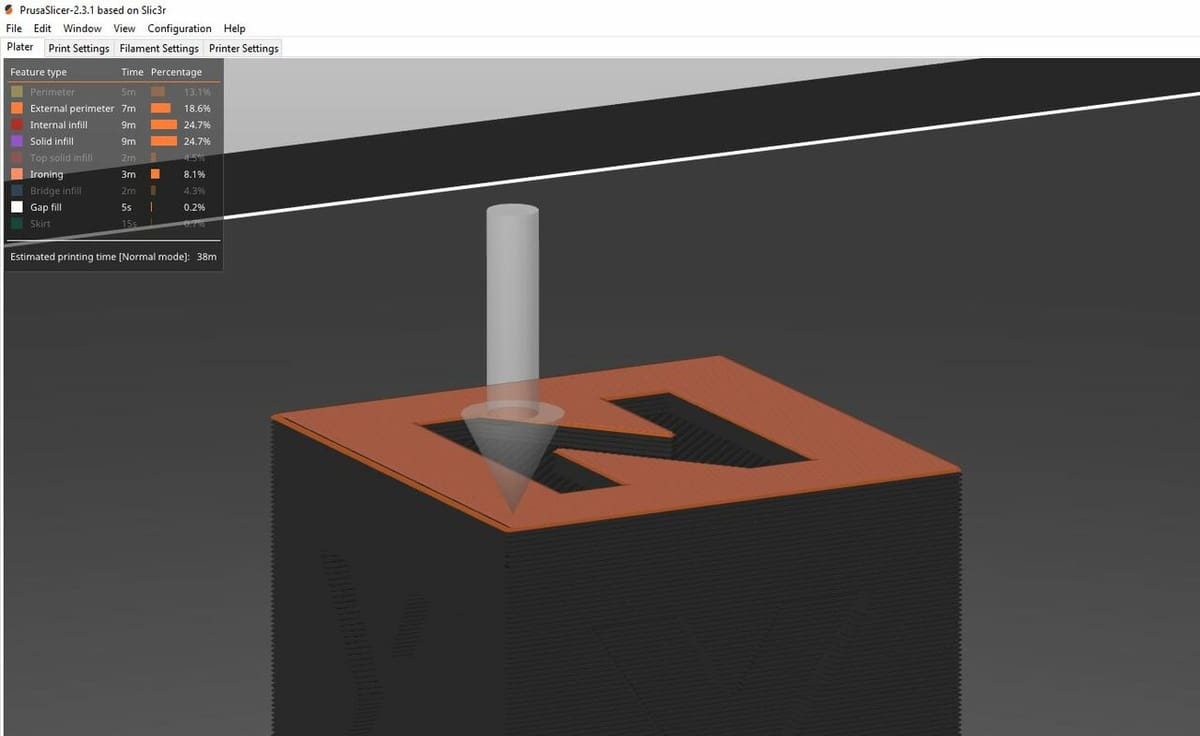
Activating ironing in PrusaSlicer is fairly simple:
- Open PrusaSlicer (version 2.3 or later).
- Go to the “Print Settings” tab, and click “Infill”.
- Select either “Advanced” or “Expert” mode on the top right side of the screen. You should then see a section labeled “Ironing”.
- Check the “Enable ironing” box.
Settings

There are a few different settings that control the effects of ironing, and it’s important to know what settings to adjust to get the desired outcome.
- Ironing type controls which surfaces your nozzle should iron. There are three options for “Ironing type”, but the default “All top surfaces” is probably what you want to use. That’s because this option tells the nozzle to smooth out the entire top layer even if the part’s top surface is across multiple heights.
- Flow rate is in charge of setting the percentage of material to be extruded from the nozzle while it’s ironing a surface. This value is, by default, 15% and should be kept very low because you only need a small amount of material to fill gaps and smooth the layers. In Cura, ironing is set as low as 10%, so don’t be afraid to change this value if you think it’ll improve results.
- Spacing between ironing passes determines the distance between each nozzle brush across the top surface of a print. The larger this distance is, the more spaced out the nozzle will be from its previous brushing path.
Lastly, you can adjust the ironing speed, but this setting isn’t found with the others. It’s located at the bottom of the “Speed” settings section on PrusaSlicer. As the name suggests, the ironing speed controls how fast the nozzle moves when making passes across the top surface of a part.
Tips & Tricks
Even though you have a few settings in PrusaSlicer to adjust how your printer irons models, getting the best results can still be challenging. Below, we’ve made a list of a few common problems that impact PrusaSlicer’s ironing feature along with some solutions you can use to fix them:
- Inconsistent smoothness: Sometimes, ironing causes parts to look like they have different sections because their level of smoothness is different. You can fix this by increasing your ironing speed by a lot (around 90 mm/s) to generate more consistently smooth parts.
- Bubbles or low surface quality: Filaments that have absorbed a lot of moisture can cause bubbles or low surface quality on ironed surfaces. Wet filament can significantly reduce the quality of produced parts, so make sure to store your filament in a dry location. If your filament has already absorbed a lot of moisture, try using a filament dryer or dehydrator to dry the filament.
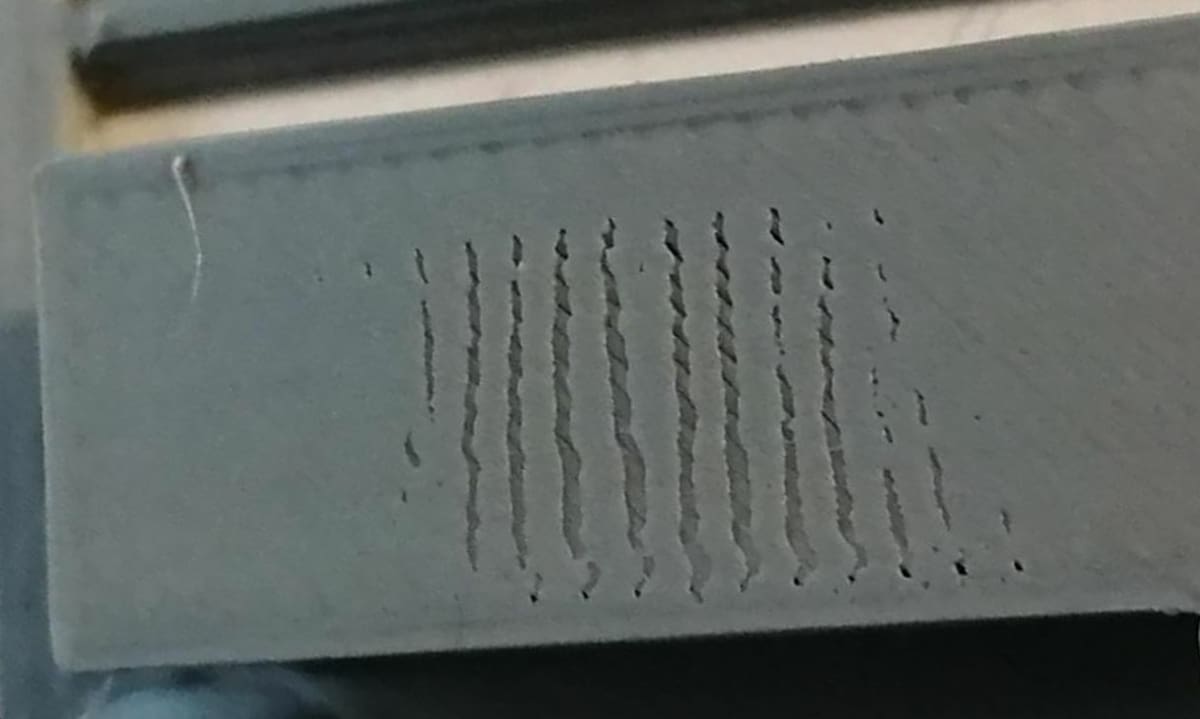
- Gaps or bumps: You may notice bumps, gaps, or pile-ups of material on an ironed surface. This may be caused by either over- or under-extrusion. To fix this problem, you should calibrate your E-step value and consider adjusting your ironing flow rate. Over-extrusion can also be caused by too high printing temperatures, so lowering your hot end temperature could help.
- Layer lines bleeding: As experienced by one user, you may notice the original layer lines bleeding through the rest of the ironed surface. If this happens, you should increase the flow rate, as bleeding occurs due to over-extrusion.
- Material piling up: If you notice material piling up on the side of the nozzle as it makes ironing passes across a surface, it could be from too low of a spacing distance. To fix this, try increasing the “Spacing between ironing passes” setting.
Lead image source: BillieRubenCamGirl via Reddit
License: The text of "PrusaSlicer: Ironing – How to Get a Smooth Surface" by All3DP is licensed under a Creative Commons Attribution 4.0 International License.