Painting TPU: How to Paint TPU Prints

Parts printed out of TPU are extremely tricky to paint due to poor adhesion. Read this flexible guide to paint your flexible material!
3D printing filaments come in all sorts of materials and colors, but sometimes, the perfect look isn’t available right off the spool. Whether you’re going for a custom hue, want to add details, or have a special finish for a wearable piece in mind, painting your 3D prints can really bring them to life.
Among the several filaments used in 3D printing lies thermoplastic polyurethane (TPU), which stands out for its flexibility, durability, and resistance to wear and tear, making it quite unique for its material properties. Generally, parts printed out of this material must be able to bend, stretch, or absorb impact, as is the case for mobile phone cases, bike handle grips, wearable gadget straps, and more. Compared to more conventional filaments like PLA or PETG, TPU behaves more like rubber, and doesn’t sacrifice strength even though it’s flexible.
But with that flexibility comes the ultimate challenge for those who want to get creative by adding paint. It isn’t nearly as straightforward as painting PLA, PETG, or other conventional filaments. This is because TPU resists most coatings and tends to flex and bend under use, so it’s imperative to find the right paints and methods. Without the right approach, your painted model may end up with cracks, peeling, or the paint will simply fail to stick to the part.
In this article, we’ll explore everything that you need to know about how to paint TPU 3D prints effectively. From types of paints to use and to avoid, plus how to prepare your part, to application methods and post-processing techniques, you’ll find all the guidance you need. And if you want to skip the hassle of 3D printing TPU and want to jump straight into the painting, check out Craftcloud. With manufacturers all over the world, your 3D printed parts will be on their way to your doorstep in no time, ready for a fashionable upgrade.
The Challenge
It’s good to start off with an understanding of why painting a TPU part is more challenging than usual. While it might seem simple at first – to grab some paint and brush it on – the reality is a bit more complicated.
TPU’s rubbery, non-porous surface means that paint doesn’t hold on the same way it does to other filaments, and as mentioned earlier, its flexibility adds to the hurdle. If a regular paint is applied, it might look good at first, but soon after, it will develop cracks, flake slowly, or peel the moment the part is handled. To better understand why painting TPU can be extremely frustrating, let’s try to break down the two main reasons behind this: material limitations and other common issues.
Material Limitation
TPU is known for its strength, elastic property, impact resistance, and low surface energy, all of which are also what make painting it a difficult task:
- TPU’s low surface energy doesn’t support surface bonding, meaning that the paint and coatings often just settle on top of the material rather than fully adhere to it. This makes flaking a common issue.
- The material’s hydrophobic – water repellent – nature makes it harder for water-based paints to bond with it, unless paired with some specialty primers.
- TPU’s chemical resistance means that it simply doesn’t interact well with chemical-based paints and primers. Solvents that would support adhesion on other plastics may lead to TPU’s warping, or the material may remain unaffected altogether.
- The elasticity means that the parts go back to their original shape after stretching, compressing, or bending. Any rigid or brittle paint layer won’t move with the material and it will easily peel off.
Other Common Issues
Even if you manage to get the paint to stick initially, there are other commonly seen issues that can arise:
- Delamination takes place when the paint layers that aren’t properly bonded start separating after a light wear, especially at the part’s corners or edges.
- When paints are left unsealed or when selecting ones that are incompatible with TPU, poor durability will lead to quick wearing off, especially on parts that are frequently touched, flexed, or even worn.
- Surface smudging will occur when some paints, which never fully cure on the material, can remain tacky or stainable even after several weeks.
So What’s the Solution?
Instead of using standard painting techniques or common paints, TPU requires a more tailored strategy. With the right preparation, flexible-compatible paints, and definitely some patience, it’s possible to achieve a good looking and long lasting paint finish on your TPU parts. Next, we’ll walk you through the paints that work best and the ones you should avoid.
The Best (& Worst) Paints for TPU Prints
Once you’ve decided you’re up to the challenge of painting TPU, it’s time to choose the right type of paint. Not all options are manufactured in the same way; TPU demands paints that can bend, stretch, and stick without cracking or flaking. Let’s look into some ideal options, as well as others you should steer away from.
Recommended Paints
When selecting a paint for TPU, the key features to look for are strong adherence, that it remains intact under stress, its durability, and that it acts well on flexible surfaces. Some keywords to look for in the product description or label are, “for use on fabric or leather”, “won’t crack or peel”, “stretchable”, and the like.
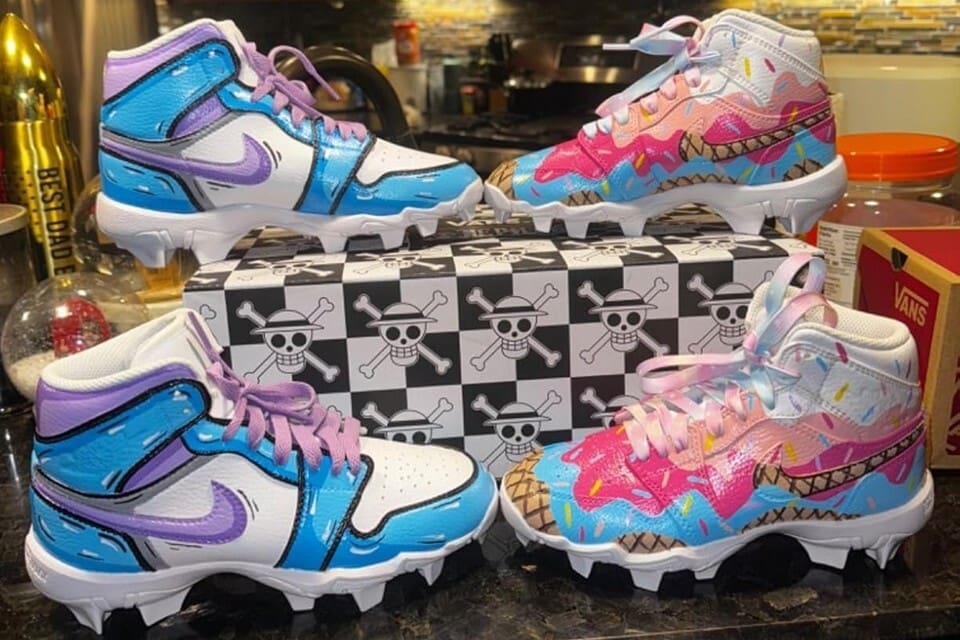
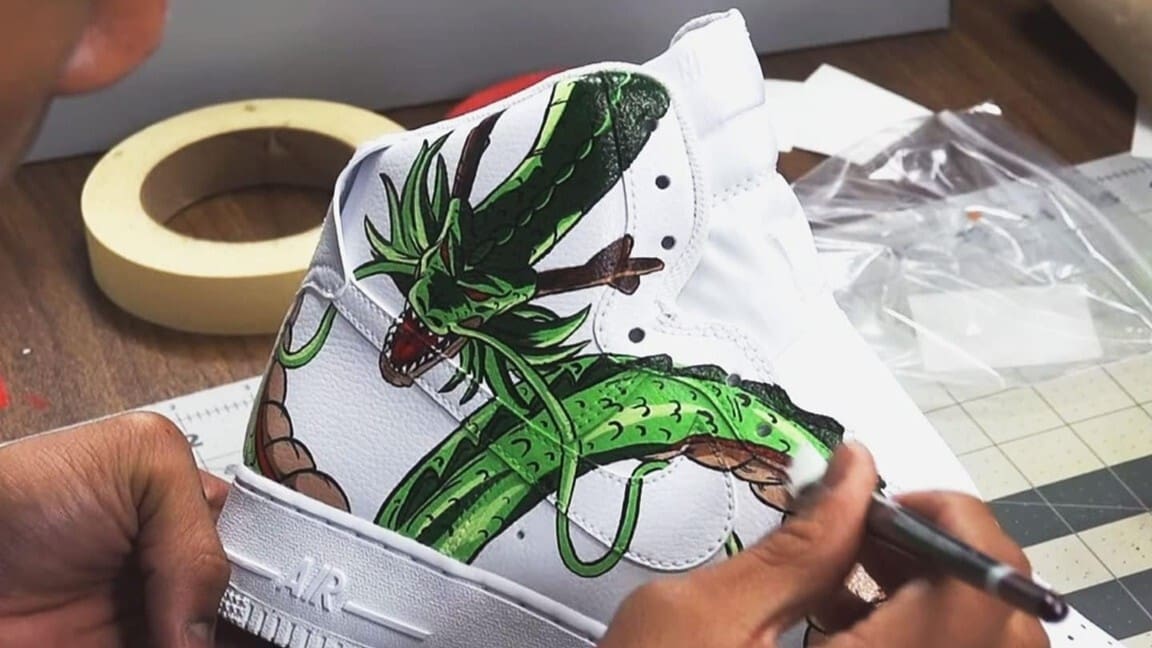
- Angelus Leather Paint: Originally made for leather shoes, it’s a water-based acrylic paint. Though TPU is hydrophobic, Angelus Paint works well, as it was designed specifically to bond with non-porous and flexible materials like leather and vinyl. It also has some built-in binders to enhance grip on smooth surfaces; it adheres well, dries evenly, and resists cracking under heavy flexing.
- Createx Colors (airbrush paint): Another brand that makes water-based paints, which are especially formulated for textiles and soft surfaces. It’s very popular in the airbrush community.
- Jacquard Airbrush and Textile Colors: Made for fabrics and wearables as they are soft and flexible once cured, this can be great for a detailed TPU print painting job.
- Tulip Fabric Spray Paint: Specifically formulated for fabrics and wearable items, this spray paint provides a vibrant and long-lasting color with excellent flexibility. It adheres well to soft, flexible surfaces, and is a great choice for TPU prints like cosplay props, soft-touch components, and so on.
- Dupli-Color Vinyl and Fabric Coating: A brand that supplies paints originally for car interiors, it’s shown to work well on TPU for black, gray, and primary tones.
- Liquitex Flexible Modeling Paste: While not a paint on its own, this can be mixed with some standard acrylics to enhance flexibility. This makes it very useful when customizing your own paint blend for TPU.
These paints not only stay on better, but they are less likely to peel or crack even after repeated use or bending.
Paints to Avoid
While some paints may look great at first, they are simply incompatible with materials like TPU.
- Fusion or rust-oleum universal spray paints: These solvent-based, hard spray paints are generally suitable for regular filaments such as PLA and PETG. However, unless specifically labeled as flexible, these dry to a rigid finish that will eventually peel off TPU.
- Enamel paints: Oil-based enamels are known for their hard, glossy finishes; these paints tend to crack and flake when the surface flexes. They also take extremely long to cure and offer very poor flexibility, they also chip under stress.
- Standard spray paints: The most commonly used paints for covering hard plastic materials, they’re certainly good for wall graffiti too. But TPU doesn’t support these paints as they soften the surface and leads to potential damage on the surface, and they aren’t formulated for flexible materials at all.
Preparation of Prints for Painting
Proper surface preparation is a key step in ensuring that the paint adheres effectively to the TPU part. Due to its naturally smooth, flexible, and sometimes oily surface, skipping this step before applying paint can lead to poor adhesion or uneven results. Let’s go over how to get your print ready for printing.
1. Cleaning the Surface
Start by removing any residue left from printing, such as dust or extra material. Use 90% or higher isopropyl alcohol (IPA) and a lint-free microfiber cloth to wipe the entire surface of the TPU part. For better results, avoid soaking the part too much; just dampen the cloth and apply gently. Clean the surface in circular motion to lift the particles rather than smear them. Ensure that the part is fully dry before proceeding any further.
You may ask, why does this matter? It’s because TPU’s surface often carries a fine layer of contaminants from filament manufacturing and defects from the extrusion process, which can prevent the paint from sticking properly.
2. Surface Treatment
Once the surface of the part is clean, it’s time to give it some micro-abrasions for the paint to grip onto. TPU’s rubbery texture makes it tricky to prepare using traditional methods like sanding. Unlike rigid filaments like PLA or ABS, TPU tends to stretch or fray under mechanical abrasion instead of smoothing out.
If your TPU print has minor surface imperfections, like small seams or layer inconsistencies, you can apply a small amount of flexible spot filler, like Bondo’s spot putty. Applying only in needed areas is enough as it needs to dry and can then be sanded.
However, light surface scuffing can still be useful and the goal here is not to completely smoothen the part, but to create a micro-tooth-like texture that improves paint adhesion. Gently use a fine-grit sandpaper (400-600 grit) and apply minimal force, and focus on the areas where the paint needs to grip well. Avoid over sanding or aggressive rubbing, as it can deform or defile the part.
For minor imperfections such as small blobs or fine stringing, a heat gun on a low heat setting can help in surface reflow. Ensure to use it sparingly and at a safe minimum distance, ideally 15-20 cm away from the part to avoid melting or warping the TPU. This technique is useful for touch-ups before priming the part.
3. Priming
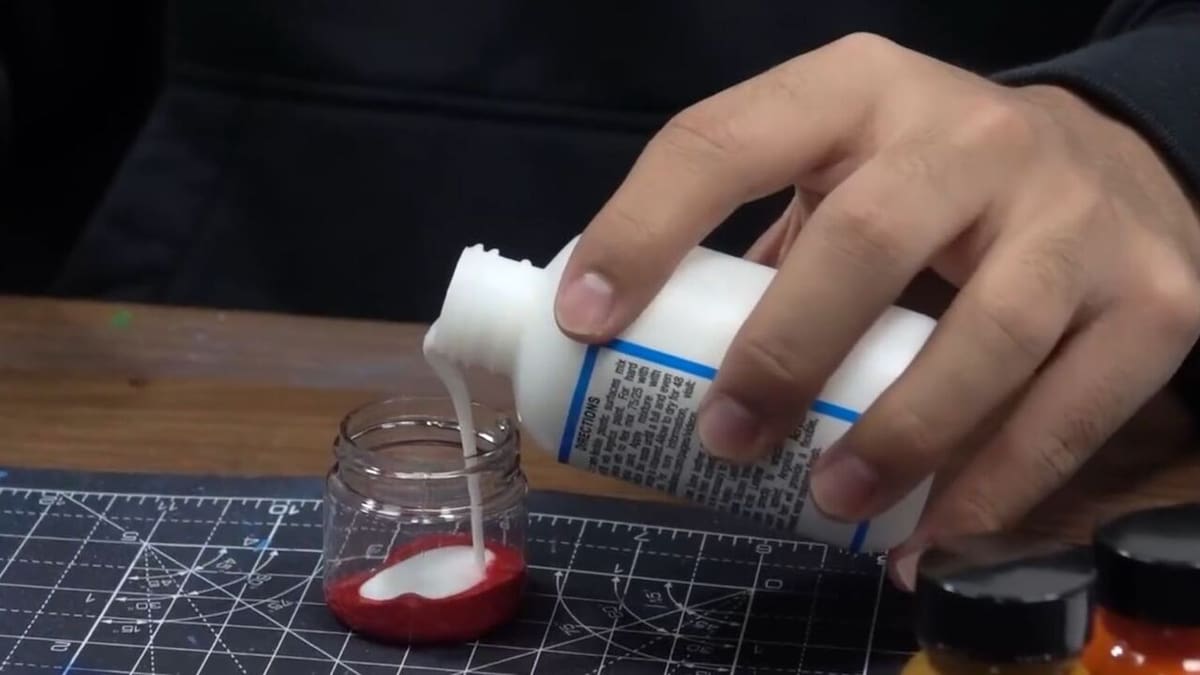
To further enhance the paint adhesion and durability, a flexible primer or adhesion promoter designed for plastics or rubbery materials should be applied.
- Angelus Adhesion Promoter is specifically designed to help flexible acrylic paints adhere non-porous surfaces like TPU.
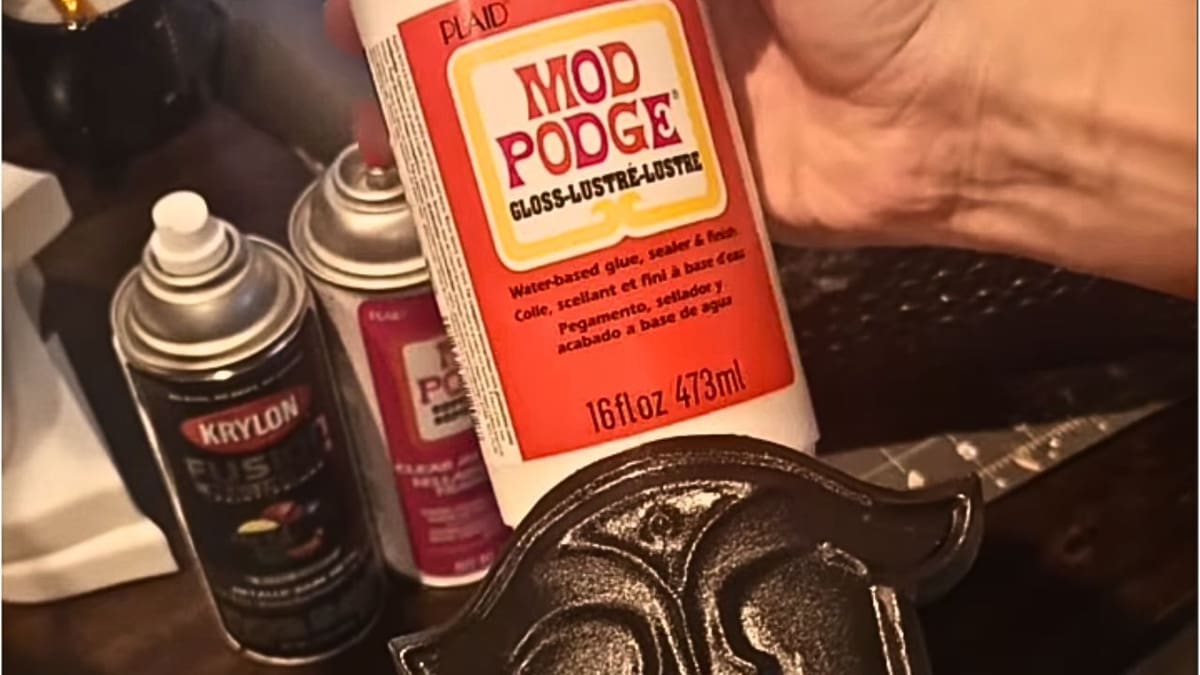
- Mod Podge (Fabric or Gloss finish) is a gentle, water-based primer that dries clear. It works well especially when using Angelus or other acrylic leather paints.
- Flexible Gesso is made for priming canvas originally, but it offers good flexibility and creates a paint-ready surface without any stiffness of the part.
Apply in thin, even coats, and allow sufficient drying time between layers of application, anywhere from 25-30 minutes, depending on the product. To understand the general principles of pre-processing a part before painting, you can refer to our article on painting PLA and ABS parts.
While you know what can be done as part of the preparation stage, it’s also important to realize that most common techniques might do more harm than good when it comes to TPU, and there are a few things that you have to avoid. As mentioned earlier, don’t sand the part aggressively or use any kind of sanding power tools, as TPU doesn’t handle abrasion well. Avoid vapor smoothing, which is a method used for ABS that offers no benefits for TPU. Lastly, don’t expose TPU to high heat while treating it using a heat gun, as it could melt away.
A suggestion is to grab a pre-curated bundle that contains a flexible spot putty, assorted sanding sponges, lint-free cleaning clothes, IPA (90%+), and a flexible primer, which is all that is needed for pre-processing. Just stick to the gentle methods relevant to flexible materials and always ensure to test on a small section if you’re unsure.
Painting Methods
Once your TPU part is properly prepped, it’s time to apply some color to it. It’s key to choose the right methods of painting that don’t compromise the flexibility of the material.
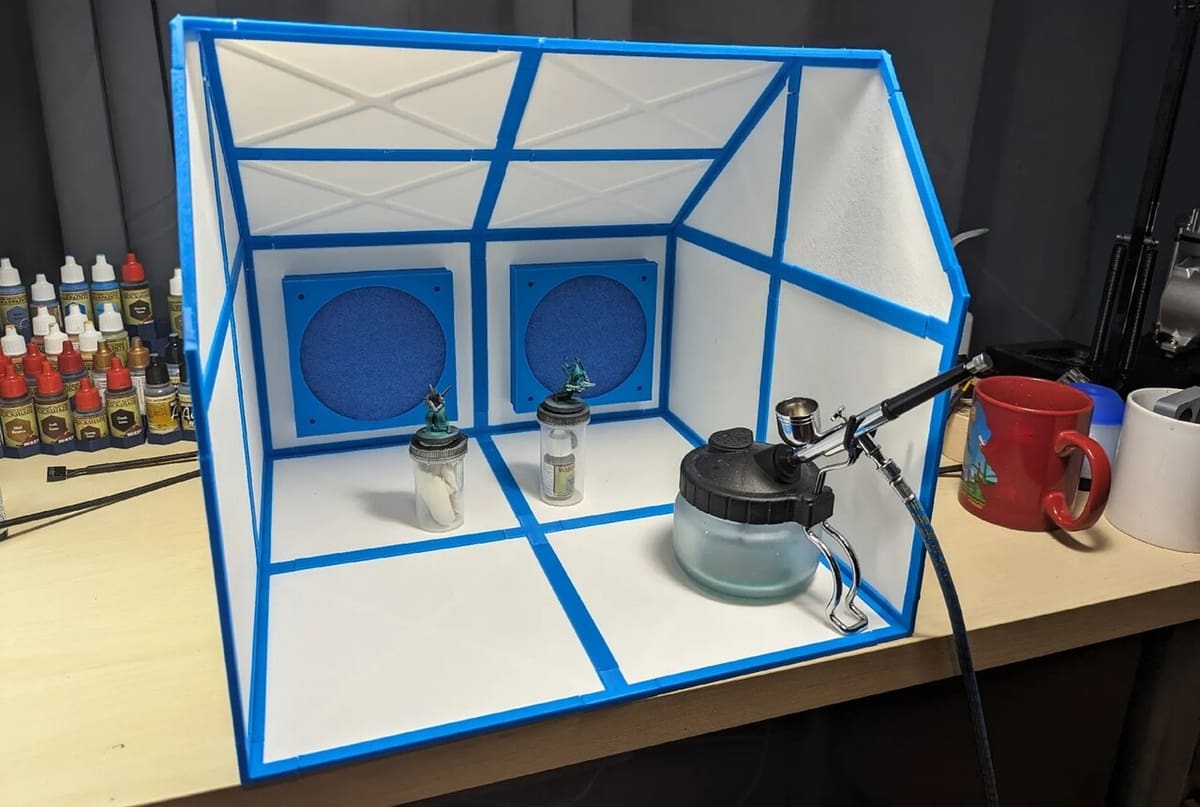
Airbrushing
This is one of the most effective methods for painting TPU, especially when using flexible paints like Angelus Leather Paint. The fine mist will ensure that there is an even coverage over the surface without applying a thick layer, which helps preserve the flexibility of the part. Some tips for success are:
- Thin the paint slightly with acrylic thinner or water (if needed) to prevent clogging.
- Apply multiple thin coats, allowing each one to dry before applying the next.
- Try to maintain a consistent distance (20-25 cm) between the airbrush and the surface while spraying. This helps to ensure an even coat and prevents an uneven buildup over the same spot. As a beginner, it is easy to accidentally over-spray to avoid gaps, but with practice, overlapping strokes will greatly improve the finish.
- Use light air pressure, typically between 20-25 psi, to avoid puddling or blowing off paint on some lightweight parts.
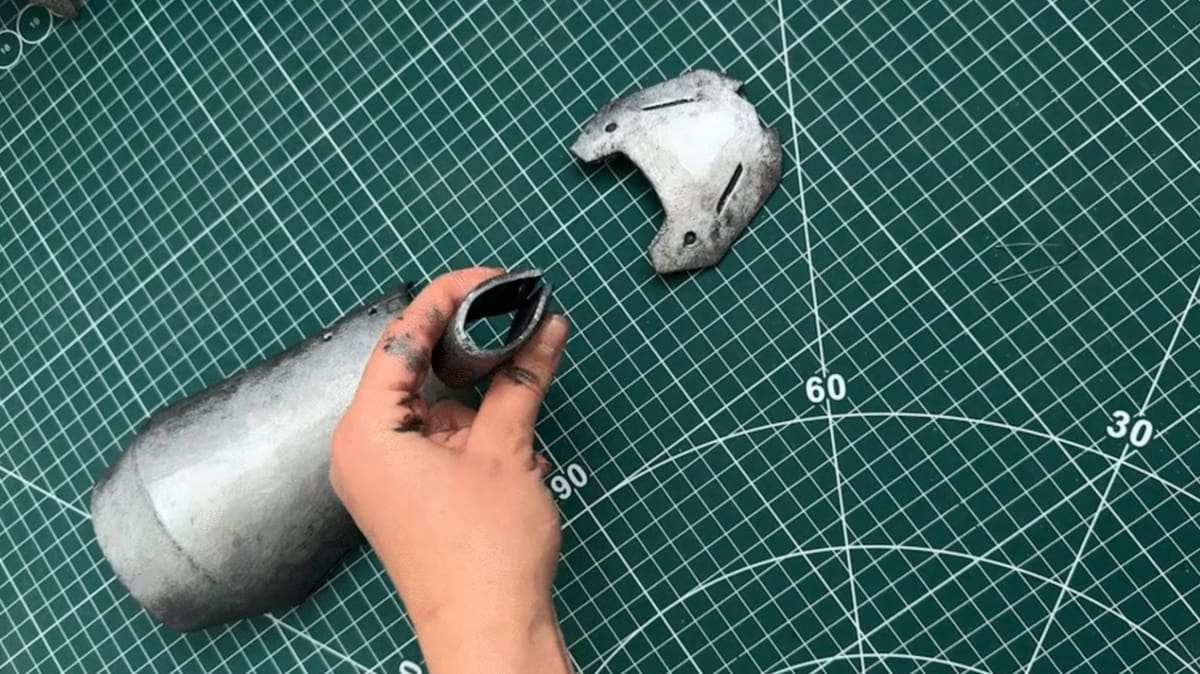
This method is ideal for flexible props, wearable accessories, or even cosplay armor that requires a clean finish.
Brush Painting
TPU parts can be painted using a soft, synthetic-bristle brush using flexible, soft fabric paints that can be applied directly on the surface. This is generally used when small areas require touch-ups and for detailed work. A few things to keep in mind are:
- Use a flat or round brush, depending on the area that is being painted, such as narrow curved areas or small holes.
- Work in thin and even strokes to avoid the streaking or pooling of paint.
- Allow drying time between the coats to avoid lifting the underlying layer.
- Don’t overwork the paint, as it lets the imperfections settle while it dries.
This technique is great for patching scuffs and painting some small props and accents.
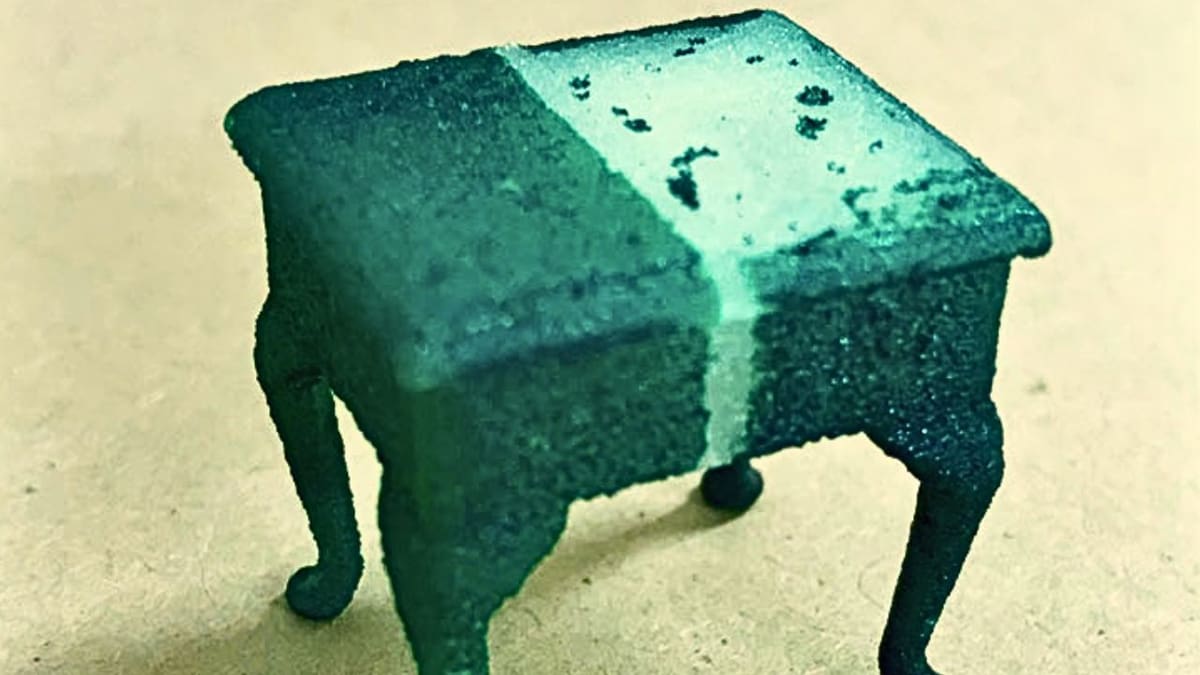
Dip Dyeing

With this method, the entire print is immersed in a heated dye bath and color penetrates the surface and is absorbed by the TPU. Unlike painting, which applies a layer on top, dyeing can tint the material itself, which therefore reduces the risk of cracking during flexing. This technique works for TPU as this material is semi-porous and absorbs certain types of dye under heat, although paint might not take to dark TPU prints. When this process is done, the dye bonds well without compromising the flexibility. Some tips for success are:
- Choose dye specially used for synthetics or designed for plastics and nylon-like materials.
- Heating the dye to around 60-70 °C is ideal, as boiling it would soften TPU.
- Keep the part submerged for 5-10 minutes until the color is achieved.
- Rinse and allow the part to fully dry before treating it any further.
- Add a tablespoon of dish soap to the dye bath to reduce the surface tension; it will improve the dye uptake.
- Wipe the part well and soak it in alcohol solution for 1-2 minutes, then take it out before gently cleaning it with a soft cloth.
- Use flexible masking tape or liquid frisket to protect some areas that you wouldn’t want to be painted. Don’t use standard painter’s tape, though, as it may peel off flexible paints.
If you choose this method, keep in mind that it doesn’t hide surface imperfections, so your earlier steps must be thorough.
What Not to Do
Painting TPU, as seen, is a delicate process, and while it’s possible to get some great results, there are several common mistakes can cause even the most careful paint jobs to fail.
Using Rigid Topcoats
While it’s tempting to obtain a glossy finish over the part, most traditional topcoats dry hard and become brittle. As you flex your TPU part, the rigid layers fall off leading to loss of paint. This is sometimes overlooked, so you should keep an eye on the type of topcoat, which should be labeled as flexible and is made for leather or fabric applications.
Using Standard Primers
Although addressed earlier, it’s important to avoid primers that are made for rigid plastic use, such as the ones that you might use to prime your PLA or ABS model. On TPU, these primers fail and don’t bond well, leading to flaking and creating an uneven base for painting. Use flexible primers only, which are fabric compatible.
Using Harsh Solvents
TPU is sensitive to harsh chemicals. Solvent-based paints can partially dissolve the surface, which leads to a permanent texture damage. Stick to mild cleaners like IPA to clean the part, and avoid strong solvents in general, even if it’s for hard plastics.
Skipping Surface Preparation
Post-TPU-printing, the surface might contain some debris, either due to the dust on the build plate or just leftover residue that interferes with the paint bonding. Thorough cleaning and light surface scuffing are essential. Don’t skip this step at any cost, as it will result in a patchy surface and your paint won’t settle.
While these are a few pitfalls that you might encounter, there are some fixes. If your paint cracks after bending, lightly sand the cracked area to smooth the edges. Use the same grit that you would have used on a normal day (400-600 grit). Clean it again with IPA and repaint the part using thin coats of leather paint. Once dry, seal it with a flexible finisher to blend the repair. This can be followed even if the paint peels, but you’ll have to go an extra mile to prime the surface again and repaint the layers again. If your entire paint job fails, don’t worry; soak the part in warm, soapy water and gently scrub out the remaining paint. Once clean and dry, follow the same steps to prepare the surface for a repaint.
Post-Processing Do's & Don'ts
Now that your paint job is successful, it’s important to post-process your part. This can enhance durability and visual finish, but it must be done with care like any other step. It’s not easy to post-process or get a smooth finish like what one would expect to have, and the finishing steps should focus on mostly preserving the elasticity of the part while protecting the paint.
- First, put your part to flex tests in stages; gently flex small sections to test the paint adhesion, as this will help you spot some weak bonding early, especially at corners or edges.
- Avoid prolonged friction against the part, such as rubbing it against skin or cloth, as this will lead to wearing of the paint. TPU wearable parts, like watch strands and bands, should be used with this awareness.
- While letting the paint dry before carrying out any sort of cleaning, it’s necessary to store the part away from heaters or direct sunlight, or anywhere that could freeze or melt either the model or the paint.
- Use an appropriate water-based sealant, like Angelus’ acrylic finisher, to protect your paint. This topcoat will settle above your paint. Don’t expect a glossy finish, though.
- If you’re trying to mount your TPU part with adhesives post-painting, avoid strong glues on painted surfaces and instead use fabric-safe Velcro to preserve the coating.
- Edge sealants, such as rubber cement, can be applied around critical edge zones to prevent paint from lifting off at high-flex points. This acts like a buffer to absorb stress.
- For use cases like phone covers or tool grips, you can use a soft grip coating, which is more of a functional enhancement; this coating can be of liquid rubber or Plasti Dip for extra grip. Apply it only on top of well adhered paint.
- Maintain a paint log for complex builds, especially for functional prototypes. Otherwise, it may be complex to keep tabs on the combination of paint, primer, and topcoat used, and it will be useful in the future for touch-ups.
These are a few post painting tips that will help in increasing the longevity of painted TPU. Happy painting!
License: The text of "Painting TPU: How to Paint TPU Prints" by All3DP is licensed under a Creative Commons Attribution 4.0 International License.