3D Printing Post-Processing: PLA, PETG, ABS & More

3D printing post-processing can make your work look better and improve strength. Learn post-processing methods for PLA, PETG, ABS, and more!
Almost every 3D print requires some post-processing after it’s printed. Post-processing can improve a printed part’s aesthetics, but it can also enhance its strength and other properties. Once you discover the beauty of post-processing, you’ll never want to leave your 3D prints untouched again.
There’s a lot of information and advice about post-processing 3D prints out there, but we’ve gathered the most important techniques in one place. For each tip, we’ll clearly explain what to do and provide some tips on how to get perfect results every time.
There are many techniques to choose from, and we’ve divided our choices into two categories: “cleaning and prepping” and “finishing”.
Without further ado, let’s dive deeper into post-processing and how to perfect your FDM prints!
Cleaning & Prepping
We’ll start our journey into post-processing with some cleaning and prepping techniques, including basics such as support removal and sanding. Depending on the print’s application, these techniques are usually the first post-processing steps. They can also be the only techniques you use, depending on how far you want or need to go with your print.
Support Removal
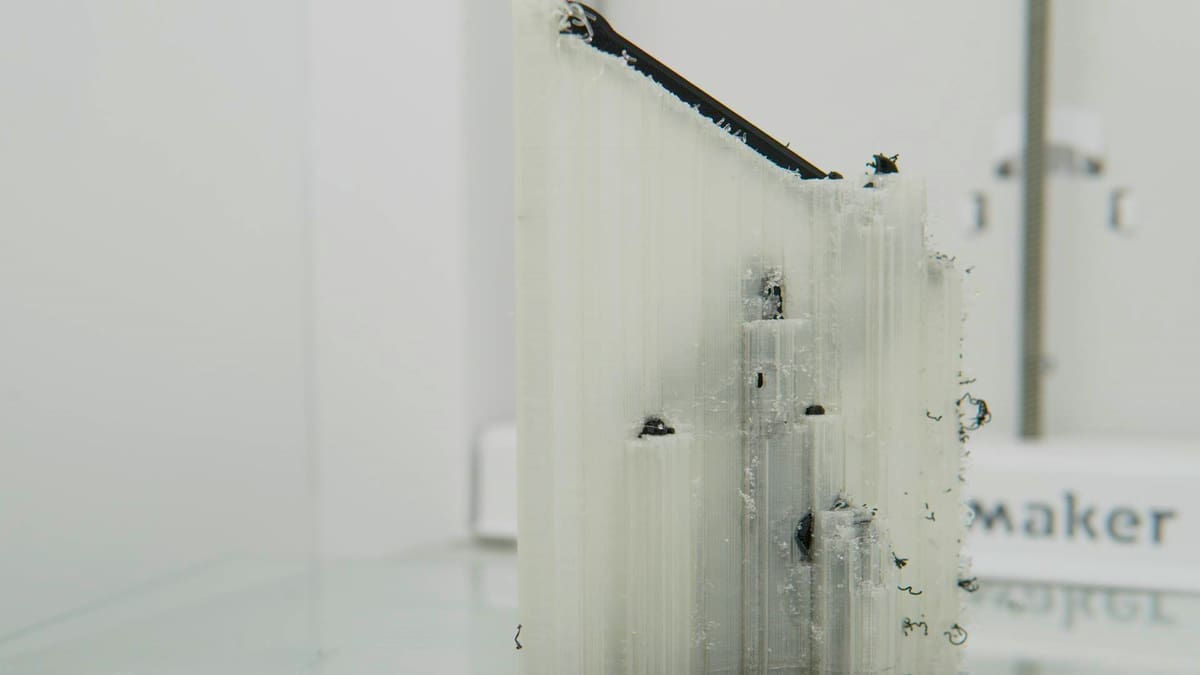
Support removal is the most basic form of post-processing. Usually, it doesn’t require much effort unless there are supports in tight corners or other hard-to-reach places. Depending on the material, supports can be insoluble or soluble, meaning they’ll dissolve in water or other liquids.
Insoluble supports are made of the same material as the main part. FDM 3D printers with a single extruder can only use this type of support, as the part and its supports will print from the same spool of filament. Removing insoluble supports is usually done by snapping them off with your fingers or cutting them away with a pair of pliers.
If you’re lucky enough to have access to a dual-extruder 3D printer, you’ll be able to use soluble supports. While insoluble supports can be very tricky to remove in places that are hard to reach, soluble supports can simply be dissolved by soaking the part in water or another liquid, leaving little to no markings or residue.
Two of the most common materials for soluble supports are HIPS and PVA. HIPS is used with ABS and dissolves in D-limonene, while PVA is a great fit for PLA and dissolves in water.
Pros
- Relatively easy to do
- Doesn’t require much equipment
- Soluble supports provide more design flexibility
Cons
- Even when removed carefully, supports can leave marks
- While sometimes structurally necessary, supports don’t improve the appearance or properties of a part
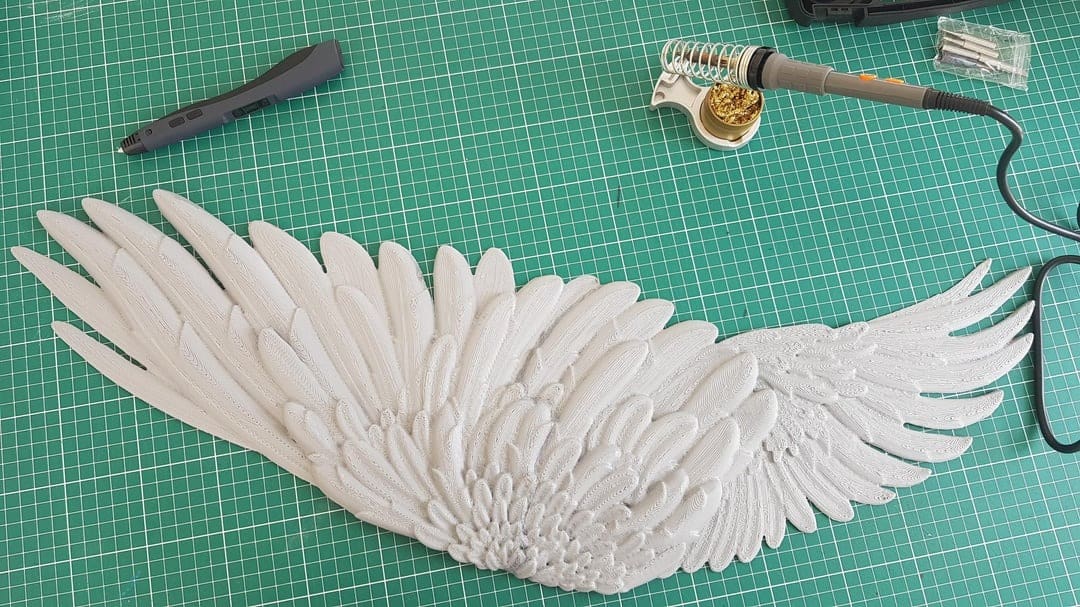
Sanding
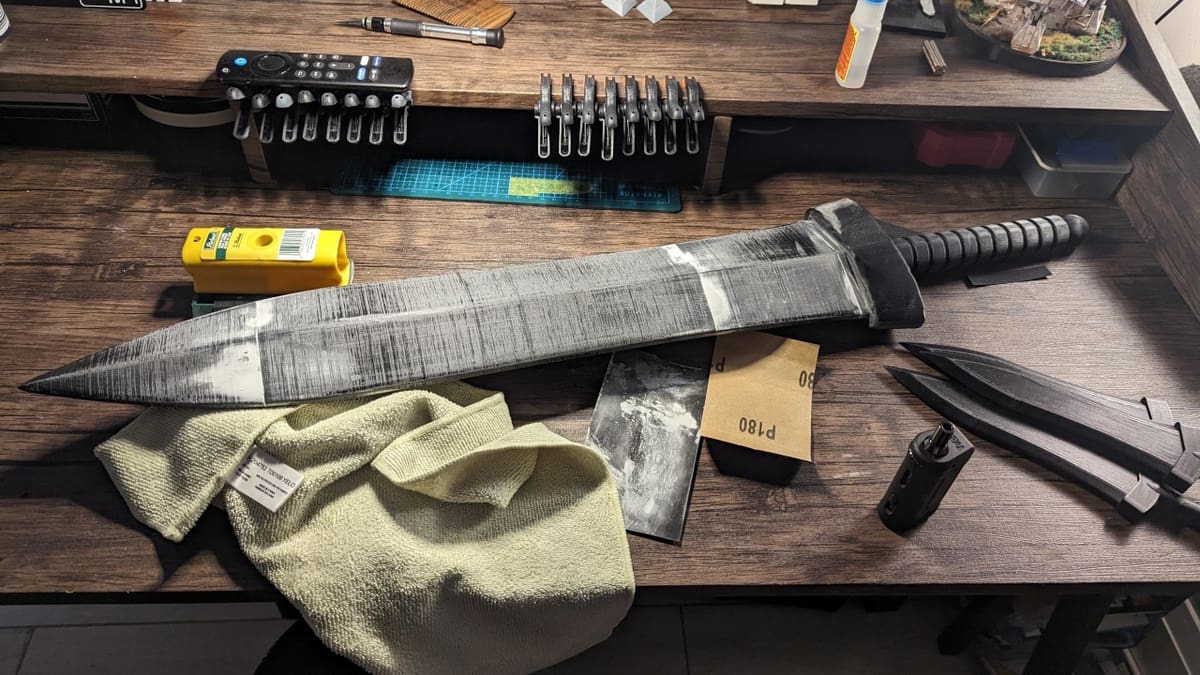
Apart from support removal, sanding is the most common form of post-processing. Generally, FDM 3D prints have a slightly rough surface, and sanding is the easiest way to smooth them.
After printing, a part might have a few blobs left on its surface or some nasty marks remaining after you’ve removed supports. The ideal way to remove such blemishes is by using sandpaper. It’s always best to start with low-grit sandpaper (150-400) and move towards higher-grit sandpaper (up to 2,000) in a few stages of sanding.
There are a couple of tricks you can use to make the sanding process smoother, including circular movements and adding water. As you’re sanding the part, friction between the sandpaper and the surface generates heat, which could harm the fine features of the print, especially with heat-sensitive filaments. To avoid this, simply wet your part before sanding to absorb any excess heat.
Especially with FDM parts, where layers are easily visible, it’s important to sand the parts in a circular motion. If you sand the parts parallel or perpendicular to the layers, you could ruin the visual appearance of the parts.
Pros
- Great prepping technique before polishing or painting
- Nicely smooths the surface
- All FDM materials can be sanded
Cons
- Can be time-consuming
- Tough to perform on small features and details
- Can affect dimensional accuracy
Joining
If you’d like to print a large object but the build volume of your 3D printer is too small, you’ll have to split the model, then assemble the pieces after they have been printed.
Fortunately, there are a lot of options for joining 3D printed parts. Gluing is the easiest method, and you could use custom products like 3D Gloop! or bonding agents like super glue. Regardless of the glue or bonding agent you choose, please keep in mind that you’ll probably need to (lightly) sand the surfaces that will be glued together, and after you’ve glued the pieces together, you may have to apply some filler to any large gaps at the seams of your assembled model.
Chemical welding or “cold welding” is another joining option but only for 3D printing materials that dissolve in a solvent. For example, ABS and ASA are reactive to acetone. It’s possible to apply a little bit of acetone to ABS or ASA prints, which will slightly melt the plastic. At that moment, the other part can be attached to the melted edge to weld them together securely. Just keep in mind, however, that acetone is a hazardous substance, and safety precautions need to taken when storing and handling it. (For more on the precautions, see the smoothing section below).
For materials that aren’t reactive to acetone, you could weld parts together with a soldering iron or 3D printing pen. Given its low melting point, it’s possible to weld PLA simply by creating friction. Check out our article on PLA welding for more details on all three welding techniques.
Pros
- Inexpensive
- Not time-consuming
- Low skill-level required for gluing and chemical welding
Cons
- Parts are weak at joining seam(s)
- Can be messy
- More skilled required for heat- or friction-based welding techniques
Finishing
Finishing techniques are the final steps in post-processing your 3D prints. We’ll explain how to perform techniques like painting, smoothing, polishing, and dipping on FDM 3D prints.
The extra effort that goes into finishing techniques certainly pays off in the end. By applying these techniques, you’ll be able to get rid of visible layer lines and create the smoothest possible surface. No one will ever suspect your prints came off a 3D printer!
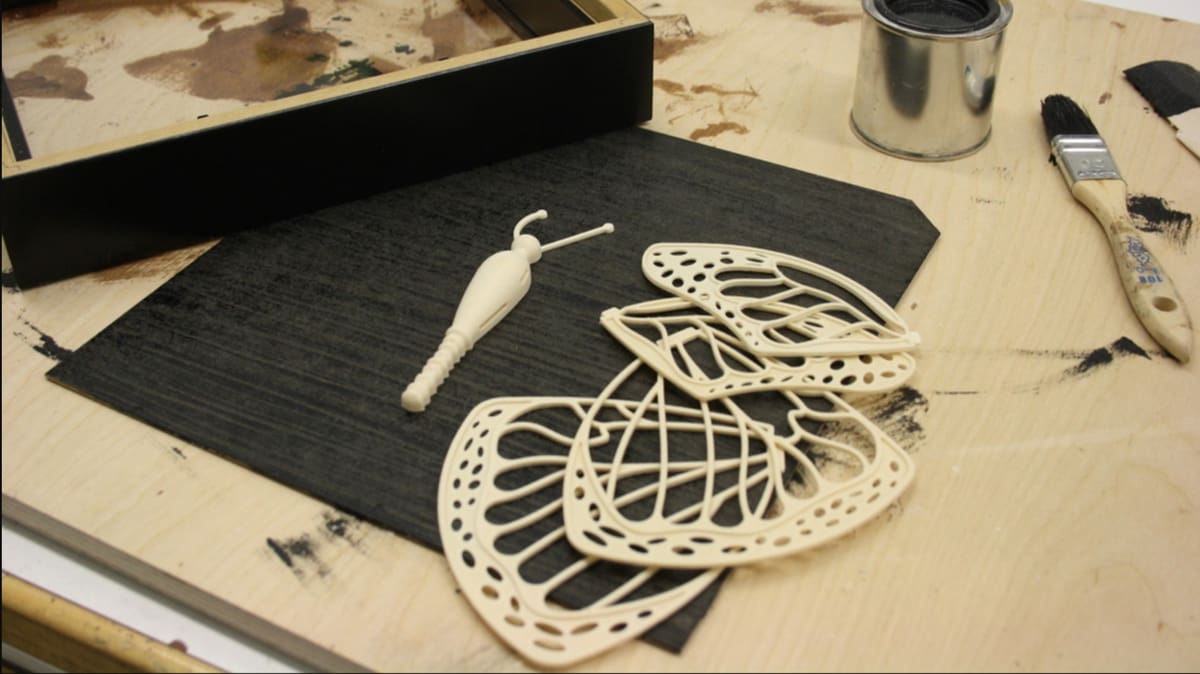
Priming & Painting

Priming is a post-processing technique that prepares a surface for painting. It simply means coating the part with either primer paint or primer spray, which acts as a base layer for the paint you will apply later.
Before applying the primer, it’s best to sand your part with low- and then medium-grit sandpaper. This removes layer lines and smooths the surface. After sanding the part, apply two coats of primer, allowing it to dry between coats.
Once everything is dry, you can start painting your 3D print using a brush or spray. If you want to achieve sharp color intersections, use masking tape.
Priming and painting are best done in a well-ventilated area or outdoors. Always wear a mask to avoid breathing in unwanted fumes.
Pros
- Enhances the look and feel of a part
- Provides a smooth surface finish
- Works on all FDM materials
Cons
- Relatively time-consuming
- Can be costly due to the equipment needed (paints, sprays, sandpaper, masks, and brushes)
- Some skill is required to achieve great results
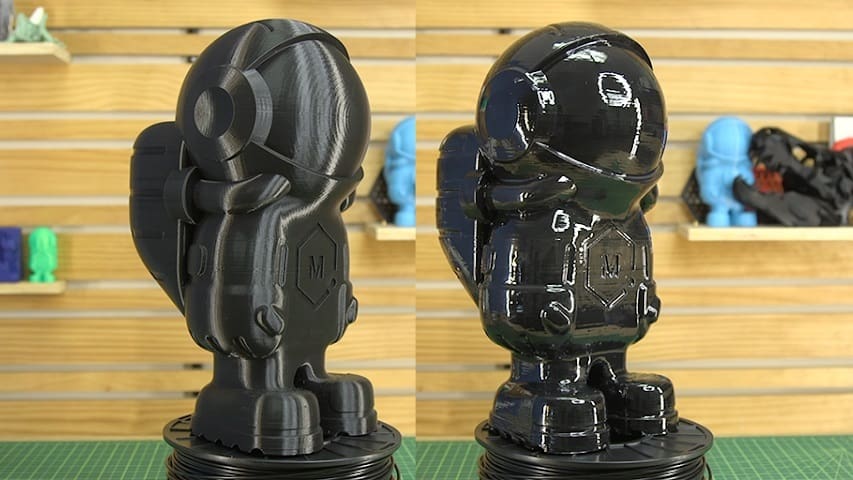
Smoothing
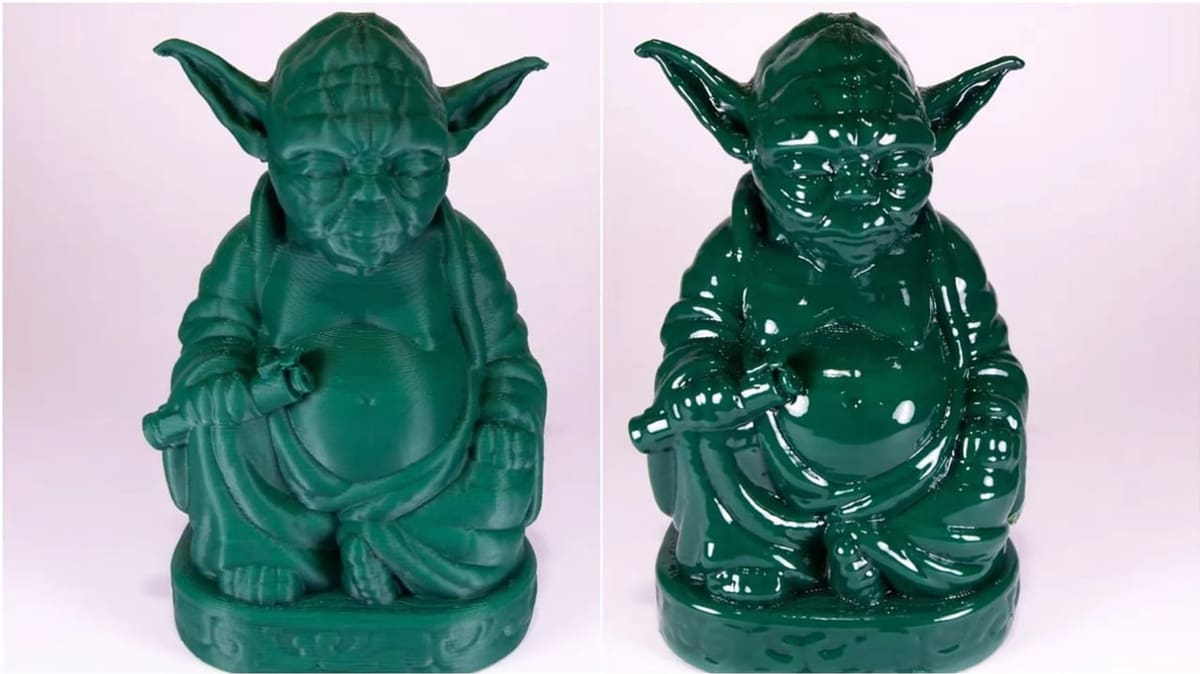
Smoothing is a popular post-processing technique, especially for ABS prints. Acetone can melt ABS and therefore smooth away the layer lines visible on a part’s surface.
The simplest method is to pour acetone into a large container (which can be plastic, but glass is recommended), then place your prints on a platform above the acetone. Close the container lid for 10-20 minutes so that the vapor can melt the outer layer of the parts. You want the vapor to be able to escape the container rather than build up, though. So if the lid seals tightly, consider drilling a few holes beforehand. If you don’t have an appropriate container, you can apply small amounts of acetone with a brush onto the surface of your 3D prints.
Please keep in mind that safety precautions are a must for acetone, as it’s highly flammable and can explode. Even the fumes can be harmful if inhaled, causing irritation and other negative effects. Always work in a well-ventilated area, and be sure to wear gloves and a mask.
As for PLA, smoothing can’t be done with acetone as it doesn’t melt it, and it could even destroy the entire print by making it “gummy”. PLA can be smoothed with chemicals like THF or MEK, but the results won’t be as nice as acetone-smoothed ABS.
In case you have some 3D prints made from PVB filament, you can use isopropyl alcohol to perform the smoothing.
Pros
- Smooth and shiny surface
- Acetone is relatively cheap
- Quick to achieve
Cons
- Acetone smoothing is only possible for ABS and ASA prints
- Dimensional accuracy can be compromised
- Risk of warping for larger prints
Polishing
This 3D printing post-processing technique is used to achieve the smoothest possible surface. You can polish 3D prints with plastic polishers and tools available at almost every hardware store. A microfiber cloth and a plastic polisher are all you need, but if you’ve got the enthusiasm and a few more dollars, using a Dremel tool will make this process even easier.
Before a part can be polished, you need to sand it properly, finishing with the finest sandpaper. After sanding, rinse your parts and make sure no particles left behind. If you’re using a cloth, apply the polisher to the sanded part and move the cloth in a circular motion until you’re satisfied with the result. A Dremel buffer will do much of the work for you, but make sure it’s moving evenly along the surface.
Pros
- Produces smooth and mirror-like surface
- Inexpensive, unless you invest in a Dremel
Cons
- Dimensional accuracy can be compromised
- Moderate skill-level required
Hydro Dipping
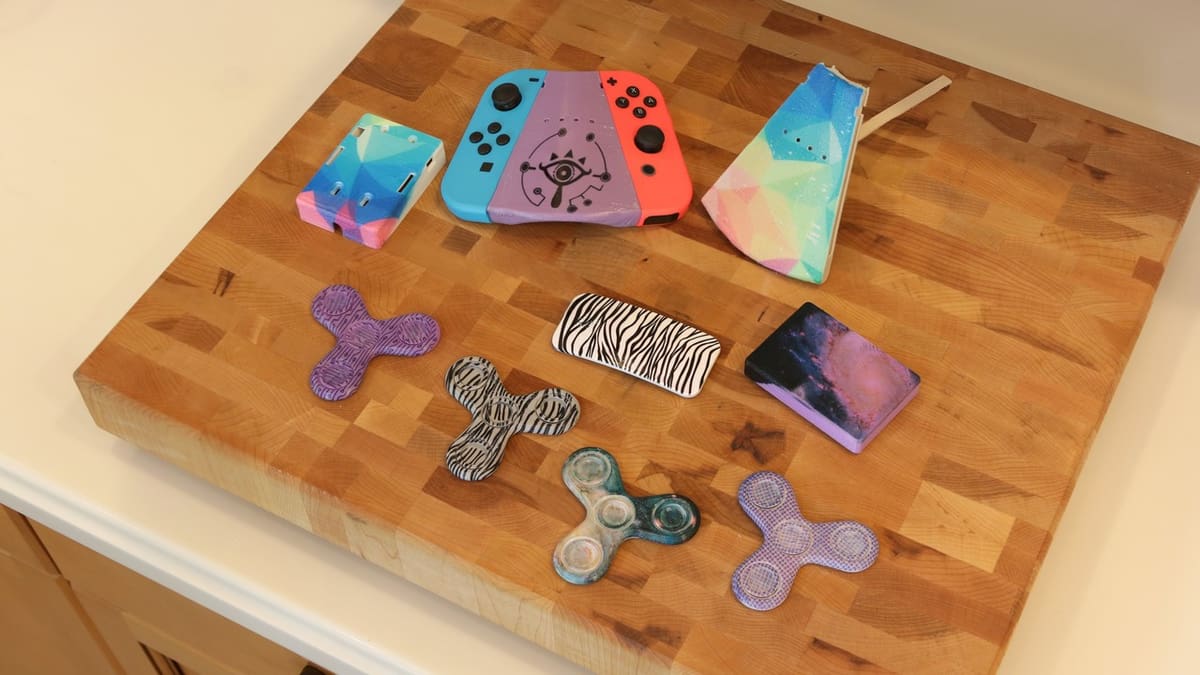
While typically used on a large scale for industrial products, you can easily apply small-scale hydro dipping to 3D printed parts for a great look. Also known as water transfer printing or water transfer imaging, hydro dipping is the process of applying printed graphic designs to solid objects using special water transfer paper. The paper has one side made from PVA, onto which graphics are printed with an inkjet printer.
Once that’s done, find a large container that can accommodate your part and fill it with hot water. Remove the back of the paper so that you’re left with only the clear PVA with a printed graphic. Carefully lay it down into the water and wait for the PVA to dissolve so that your graphic is floating on its own.
Then, slowly submerge the part into the graphic at a 45-degree angle. You can either hold it with one hand or attach a stick to be able to work from a distance. Once the part is fully submerged, shake it a few times, then pull the finished part out of the container.
Hydro dipping is only used to enhance an object’s aesthetics and does not change the feel or dimensional properties. However, the possibilities are infinite with the graphics you can add to a part, so this is one of the best ways to make your 3D prints eye-catching.
If you need some more support, this Instructable is very helpful.
Pros
- Dimensional accuracy is maintained
- Complete design freedom
- Works on all materials
Cons
- Paper transfers can be expensive
- A few attempts are needed to get the feel for performing this technique
- Not resistant to scratches or other surface damage
Epoxy Coating
Giving your 3D print an epoxy coating improves strength, but it can also seal porous parts of the print and act as a great protective layer. The epoxy coat consists of two different chemicals: the epoxy resin itself and a hardener.
When you buy chemicals for epoxy coating applications, the brand will provide mixing instructions. The ratio of hardener and resin must be correct to achieve good results, or you could end up with a coating that never dries! Once you’ve prepared the mixture, it’s time to apply it to a 3D printed part.
We suggest using a foam applicator or sponge to apply the coating. After the first coat, leave the part to dry, then sand it with either 1,000- or 2,000-grit sandpaper. After that, you’re ready to apply the second and final coat of epoxy.
If you’d like to give epoxy coating a try, there are specific epoxy-coating products for 3D printing, such as XTC-3D.
Pros
- Improves the strength of the part
- Adds a durable protective layer
Cons
- Layer lines won’t disappear entirely
- Can be messy to apply
Electroplating
Electroplating is a process that adds a metal coating to other metals or parts with a conductive surface. It’s a great post-processing technique that can significantly improve strength and visual appearance. The process may seem complicated at first, but it’s not as technical as it appears.
Electroplating is basically transferring a metal coating from one metal to another (or a part with a conductive surface). Electroplating is possible thanks to a chemical process called electrolysis, and the two main tools required are a power source (battery or rectifier) and an electrolyte.
The electrolyte is a mixture of a metal salt (of the metal that you want to coat your part with), an acid, and water. An electric current is needed to initiate the reaction between the cathode (connected to the power source’s negative pole) and the anode (positive pole).
The anode is made from the metal you want to use as a coating, and the part to be plated acts as the cathode. Both the anode and the cathode are then dipped into the electrolyte.
The salt in the electrolyte contains cations and anions (positively- and negatively-charged ions), which need to move to the cathode and anode to enable the metal transfer. Turning on the power source adds electric current to the electrolyte, causing the anions to move to the anode and the cations to move to the cathode.
Let’s say you’d like to coat your 3D printed part with copper. The electrolyte you’ll be using is copper sulfate (CuSO4). Once the electric current starts, the Cu2+ cations move to the cathode and coat your part. The most common metals used in this process are copper and nickel, but you can also use other materials such as brass, gold, silver, chrome, and more.
Since 3D printed parts are plastic and non-conductive, you’ll need to properly sand them and apply conductive paint before attempting electroplating. Some have attempted using conductive filament in place of the conductive paint, but the results have been mixed. So, it’s probably best to stick to the conductive paint.
Pros
- Parts become stronger and are conductive
- If done properly, dimensional accuracy won’t be compromised
- Visual appearance is improved
Cons
- High skill-level required
- Can be dangerous if you’re not wearing safety equipment (gloves and glasses)
License: The text of "3D Printing Post-Processing: PLA, PETG, ABS & More" by All3DP is licensed under a Creative Commons Attribution 4.0 International License.