Cura First Layer Settings: Initial Layer Simply Explained

The initial layer is the foundation of the entire 3D model. Learn all about Cura first layer settings and how to get them perfect!
Cura features a host of settings that focus specifically on certain areas of your 3D print. These include but are not limited to speed, support, and flow settings. With these adjustments, you can tune your slicer to get the best possible final print.
In striving for a great print, a well-laid first layer is key, as it drastically reduces the chances of errors in the subsequent layers. If you’re having first layer problems, they’re more than likely going to affect the rest of the print.
In this article, we’ll take a look at Cura settings for the initial layer. We’ll go over first layer basics and give you some recommendations on values to start with for each of the initial layer settings. Let’s get started!
UltiMaker Cura: Laden with Features
The initial layer in a 3D print forms the foundation of your entire model and helps ensure that the model stays firmly grounded to the printer bed. The main function of the first layer is to properly adhere to the build surface. If the first layer of your model isn’t sticking to the bed properly, the rest of the print likely won’t go very well.
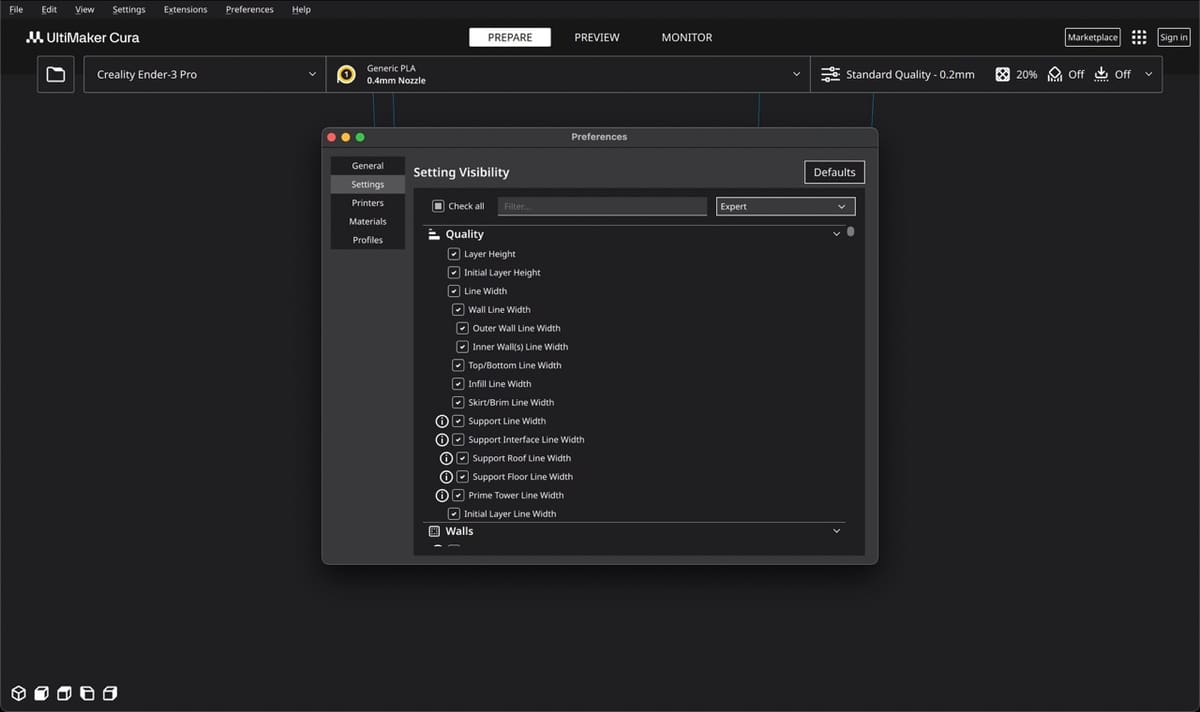
UltiMaker Cura has more than 50 different settings that pertain to the initial layer, controlling build plate adhesion, supports, and fan speed, all the way down to the thickness of individual wall lines. Each setting will have a different optimal value depending on the 3D printer model and material.
For example, a 3D printer with a brass nozzle and no heated bed will need slower print speeds and less cooling when compared to one outfitted with a DiamondBack nozzle and a heated bed. It’s also important to note that these settings should be used in conjunction with others to ensure first layer clarity, such as selecting the right temperatures.
Height & Width
These two settings control the “squish” of the initial layer. Both settings are equally important when it comes to getting a good first layer.
The height of the initial layer dictates how well it’ll stick to the bed. A lower value can result in improved adhesion, but might also cause the layer to become too squished. As a result, it may not be sturdy enough for the subsequent weight of the rest of the print. This causes what’s commonly known as elephant’s foot. It might also result in nozzle clogging if the bed isn’t leveled properly.
Having a slightly higher value than the rest of the print can provide better adhesion and help maintain the print’s intended measurements. A higher initial layer height may also ensure that any irregularities in bed leveling are evened out, and has a lower chance of damaging the build plate by way of scratching.
Different materials may also require the nozzle to be different distances from the bed. Some printers account for this during automatic Z-leveling, but if not, filaments like PETG may warrant a slight increase in initial layer height to prevent the nozzle from sticking to the quite sticky plastic.
The initial layer width is also important because it controls how much material will flow out of the nozzle for the first layer. A higher initial layer width means that more material will ooze out of the nozzle, helping ensure that the material sticks evenly to the bed. As such, all the initial layer lines should stick to each other very well.
Counteracting Elephant’s Foot
UltiMaker Cura added new features to help combat the agitating, print-ruining elephant’s foot. By decreasing the values of the settings Initial Layer Outer Wall Flow, Initial Layer Inner Wall Flow, and Initial Layer Bottom Flow, the bulge of the elephant’s foot can be mitigated.
Summary
- Initial Layer Height: You can keep this at 45-75% of your printer’s nozzle diameter, taking into account the reasons to increase or decrease discussed earlier. (For a 0.2-mm layer height, a good middle ground is also 0.2 mm.)
- Initial Layer Width: For a 0.2-mm layer height on a 0.4-mm nozzle, set this value to 100% for a width of 0.3 mm and a height of 0.2 mm. This is the default “draft” setting for FDM 3D printers.
Speed

The speed at which the layer is printed should allow the extruded material to properly cool while also giving it sufficient time to spread on the build surface. The material should be laid down evenly and stick to the bed properly. If the speed is set too high, both of these things are put at risk, and you might also experience under-extrusion.
Similarly to the initial layer height, different filaments work best with different speed ranges. Filaments such as PLA and ABS are less sensitive to speed, and as such, can be printed with much faster than, for example, PETG, which tends to print smoothly with slower speeds.
The travel speed of the nozzle during this time also matters. If there are various sections in your model and the nozzle has to move around a lot for the initial layer, it helps to keep the travel speed slow. This helps keep the first layer smooth as there will be no sudden jerks. Otherwise, the edges of some of the sections might come off the bed easily.
Summary
- Initial Layer Speed: This should be between 20-30 mm/s.
- Initial Layer Travel Speed: 80-100 mm/s^2 for the initial layer strikes the perfect balance between speed and quality.
Temperature
The right temperature for the initial layer is crucial for its success. These settings focus on the nozzle and the bed. Let’s look at them one by one.
The initial layer temperature is important because it controls how well the plastic will flow out of the nozzle. A higher nozzle temperature means that the filament will melt sufficiently (reduced viscosity allows it to flow better). On the other hand, a lower temperature could lead to under-extrusion of the first layer. So, a slightly higher temperature ensures that the material flows smoothly and evenly for the first layer.
The initial bed temperature controls the temperature of the bed for the first few layers. PLA doesn’t need a heated bed because it doesn’t react much to temperature differences. However, ABS and PETG require a heated bed. ABS and PETG will of course also require higher nozzle temperatures than PLA.
A higher bed temperature for the initial layer creates a warmer environment so the material doesn’t experience thermal shock. This can improve the quality of the first layer and also avoid any warping or curling issues.
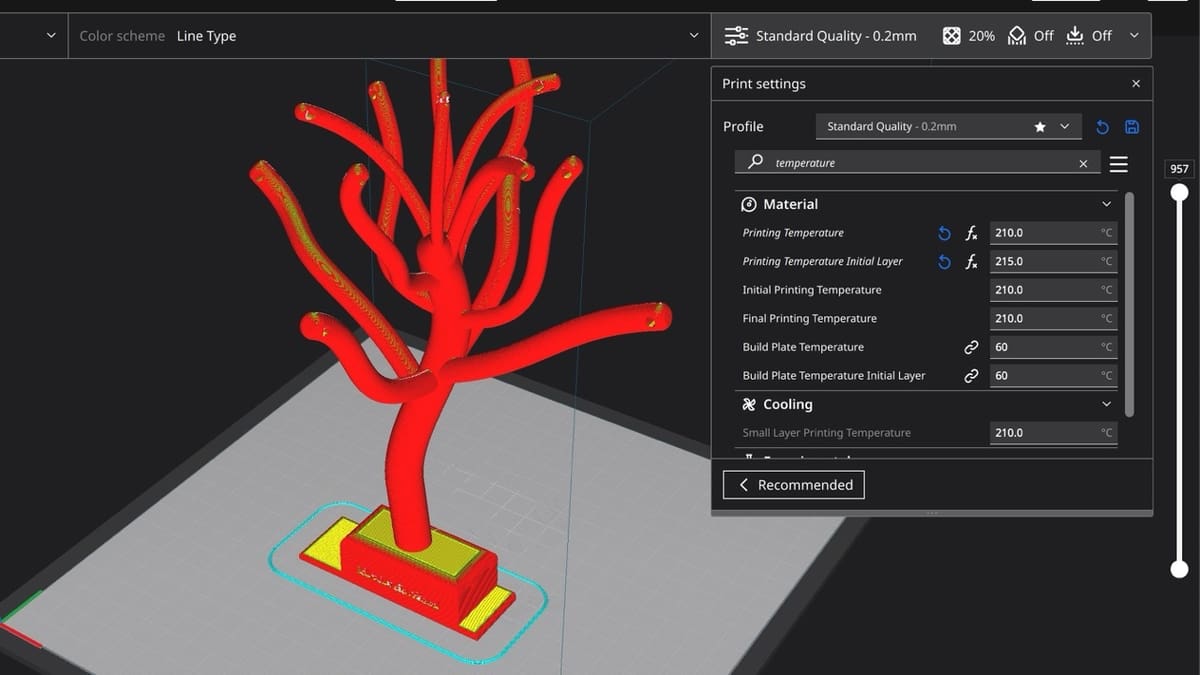
For example, if printing with PLA, a good starting point for temperatures may be 210 °C on the nozzle and 60 °C on the bed (although these may range from 180-220 °C and 20-60 °C respectively). In this case, a first layer nozzle temperature ranging from 215-220 °C may be advantageous, as well as a bed temperature from 50-60 °C. For more specific guidance, check out our article on the best print temperatures.
Summary
- Printing Temperature Initial Layer: It’s best to set this 5-10 °C higher than the rest of your print.
- Build Plate Temperature Initial Layer: Depending upon the material and the limits of your printer, you can keep this value between 50 °C and 110 °C.
Fans & Patterns
When you’re laying down the first layer, you need to ensure that it cools down properly. We know that a higher printing temperature helps in getting an even flow of material. But, if we cool this plastic down suddenly with a fan, it can cause the material to cool unevenly. This results in some parts of the first layer being hot and some being cool. So, to make sure that the first layer has sufficient time to cool down and lay properly, you should keep the fans switched off for the initial layer.
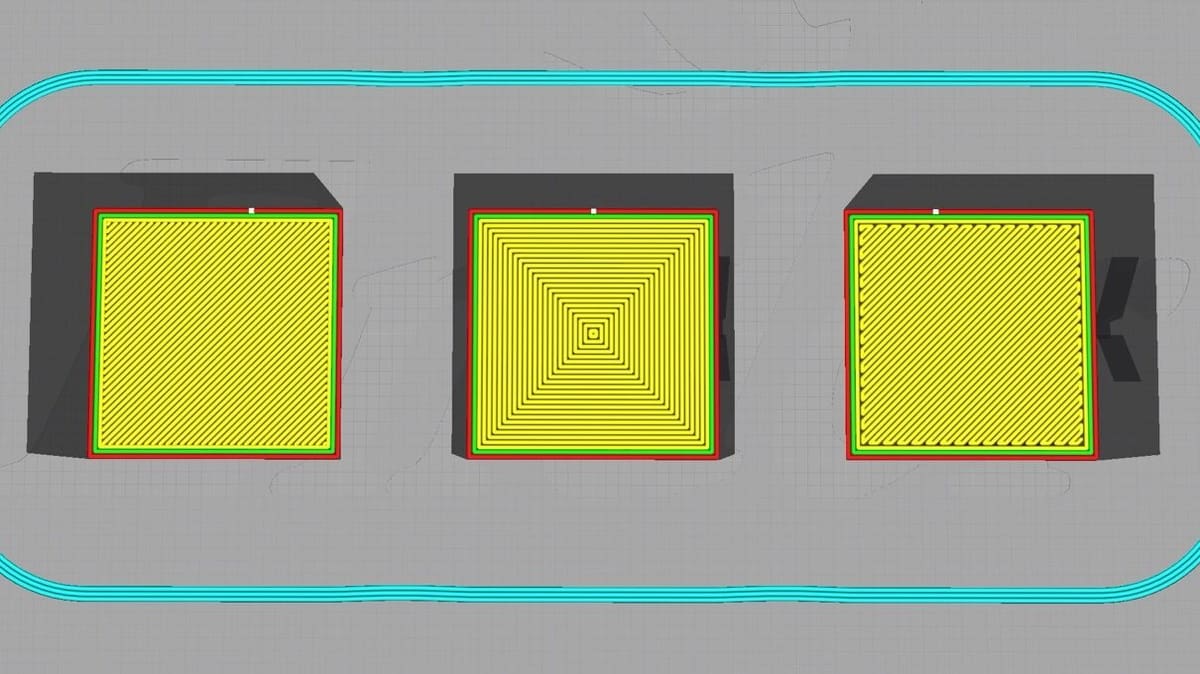
Cura also provides an option to change the pattern of the initial layer. You can choose between line, concentric, or zig zag patterns. This setting changes the orientation of the filament lines on the first layer, which can have a small effect on part strength and change the appearance of the bottom face of the 3D print.
Summary
- Initial Fan Speed: Set this to 0% for the initial layer to maximize build plate adhesion.
- Bottom Pattern Initial Layer: Lines, zig zag, or concentric; make sure to choose the option that best fits your 3D print.
Build Plate Adhesion
Filaments like ABS and PETG are notoriously trickier to adhere to the build plate than PLA. Thankfully, the following settings literally exist to improve your first layer adhesion, and each one works differently to help get a good first layer:
- A skirt is a perimeter that the nozzle prints before starting the actual model. Not connected to the model, its function is to prime the nozzle. This helps ensure that the material will flow evenly for the rest of the print.
- A brim is similar to a skirt, but it touches the model. It effectively increases the surface area of the first layer. This helps in getting the prints with smaller surface areas to better stick to the bed.
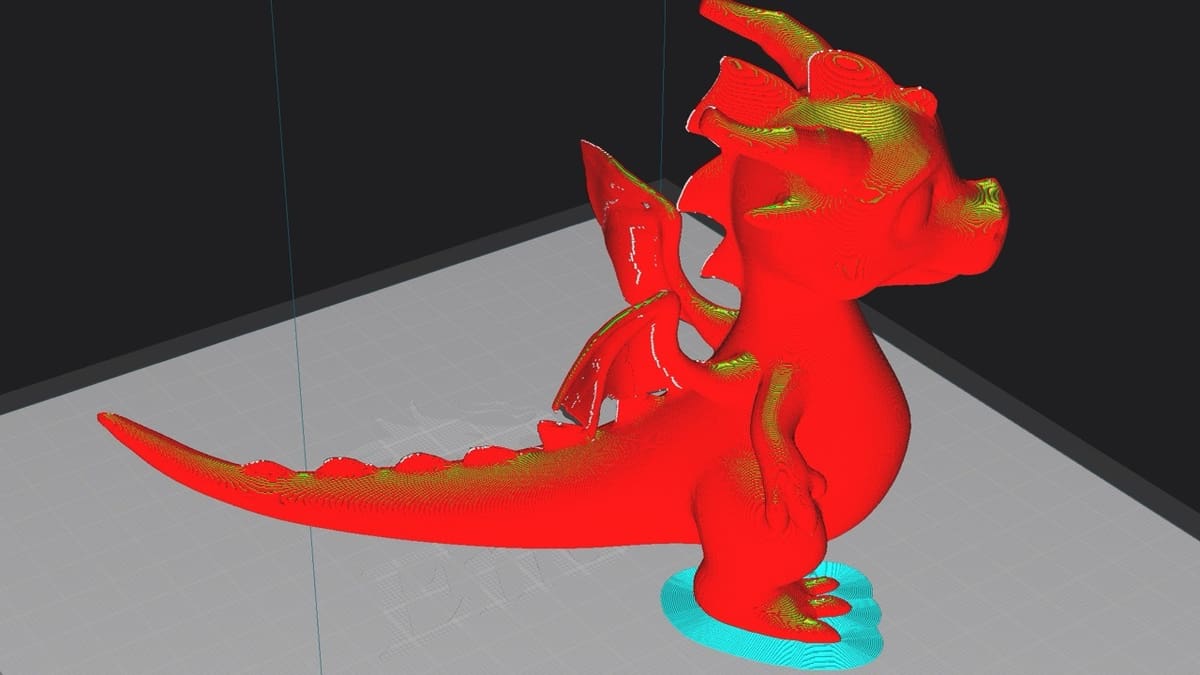
- A raft is essentially a layer below your model. The nozzle first prints the raft, then the model is printed on the raft. This can help with adhesion for smaller parts. However, printing rafts is time-consuming and it can waste a lot of material. In other words, you should only use one if you have to.
Additionally, brims can now be made out of multiple materials as of the 5.3.0 Cura release. This solves a past issue wherein one material would be used to print all brims of a 3D print, causing a second material to become disconnected from its brim.

First Layer Settings for Supports
With the amount of settings for the first layer of the object, it’s often easy to neglect the several options available for the first layer of another important printed part: the supports.
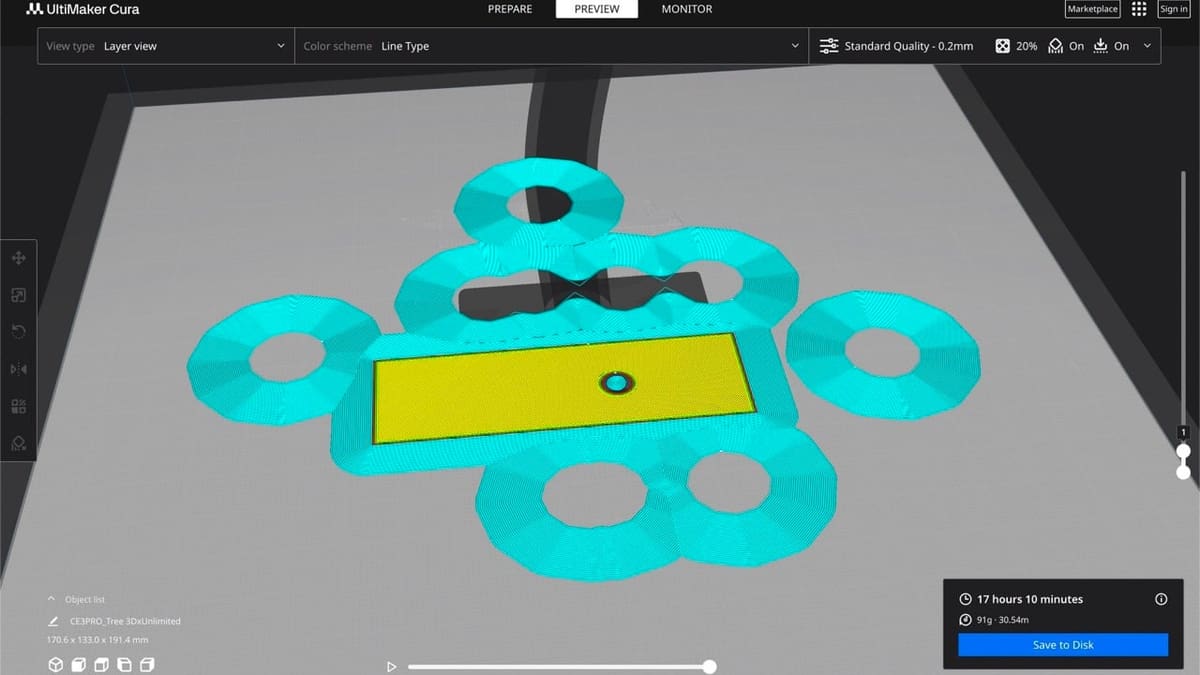
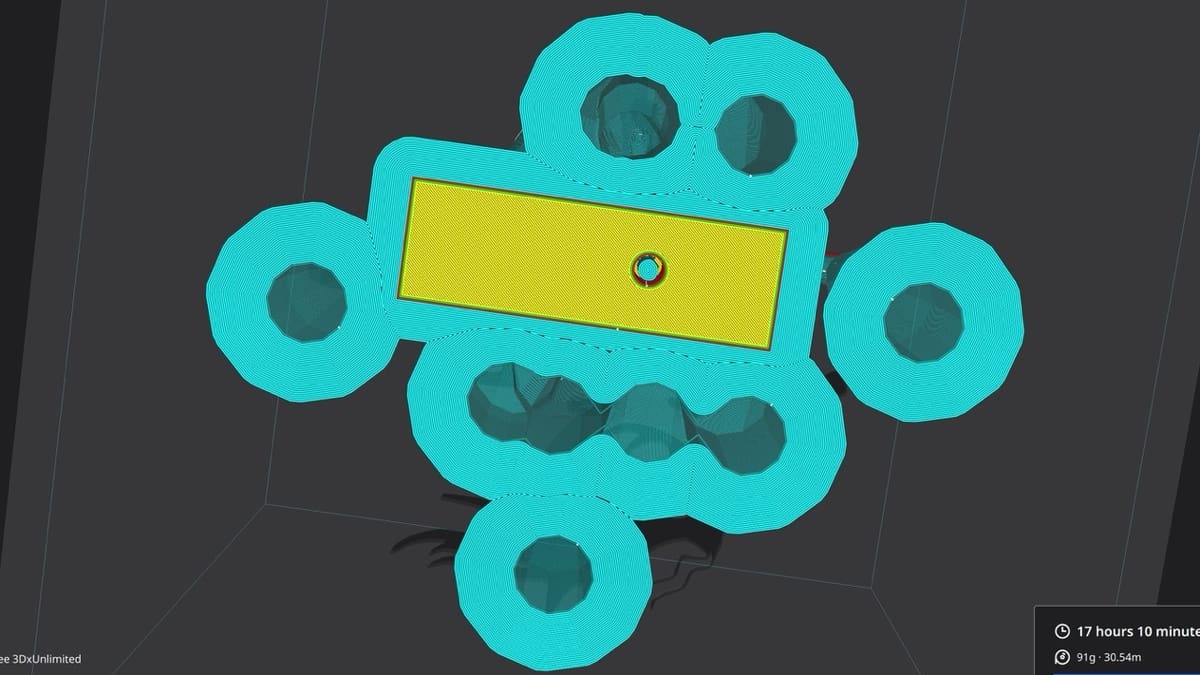
UltiMaker Cura provides several settings for both standard supports and tree supports to hone in on support adhesion and quality. After all, if a support fails, the 3D print fails.
- Minimum Support Floor Area: This option allows you to set the minimum area of the “trunk” or main branch of the tree support at the build plate. A larger minimum area for this main branch means more material usage, but also a stronger tree overall.
- Support Floor Thickness: With this setting, you can specify how thick you want the floor below the tree support to be, in mm. Set to ‘0’ to have a hollow tree support at the base.
- Enable Support Brim: Checking this box will create a brim for both standard and tree supports, which increases support adhesion to the bed. The width for this brim can be set by measured width or line count in the setting Support Brim Width.
License: The text of "Cura First Layer Settings: Initial Layer Simply Explained" by All3DP is licensed under a Creative Commons Attribution 4.0 International License.