The Best Cura & PrusaSlicer Settings/Profiles

Learn about the best settings and profiles for Cura and PrusaSlicer to get perfect prints with PLA, PETG, and ABS.
Without a slicer, your 3D printer would be rather useless. Slicing allows you to convert a 3D model into G-code, which are the instructions that tell a printer what to do. For example, G-code tells the printer where to move the printhead, how fast it should move, where to put supports on a model, the extruder temperature, bed temperature, and other important actions.
You’ve probably heard of some of the most popular slicers, like Cura and Prusa Research’s PrusaSlicer. Both of these are free, easy to use, and packed with great features. These programs allow you to control almost every aspect of your 3D print, which is especially useful when dealing with different materials.
When it comes to adjusting your specific slicer settings, how you adjust them will depend on the material, the slicer, the print, the printer, or a combination of these factors. In this article, we’ll focus on the settings in Cura and PrusaSlicer for any printer using PLA, PETG, or ABS filament. Let’s dive in!
Setting Up Printer & Material Profiles

Setting up a good print starts with your printer and material profiles. A profile is simply a collection of settings for a particular application. It can refer to a group of parameters and settings relevant to the printer, the material, the print, or all of these things.
Printer Profile
A printer profile contains the size of the printer, its G-code type, start code, and so on. In general, if a pre-existing profile for your 3D printer is available in the slicer, that’s a pretty good place to start. Alternatively, if your printer is similar to another printer that already has a profile, it’s possible to simply edit it.
However, if your 3D printer isn’t on the list, it’s easy to create a custom profile. In Cura, you can create a new profile by navigating to the first dropdown menu on the left, clicking “Add printer”, and selecting a networked or non-networked printer.
In PrusaSlicer, simply navigate to the Printer Settings tab. Select “Add/Remove printers” in the dropdown menu. After selecting the “Custom Printer” menu on the left, you can create a custom profile by entering information about your printer.
For both slicers, you’ll need to provide the firmware type, build plate dimensions, build plate shape and size, filament and nozzle diameters, and filament and nozzle temperatures.
Material Profiles
Similarly, a material profile is a group of settings that are optimal for printing a specific material. The settings included in a material profile could be diameter, melting point, fan speed, and so on.
As with the printer profile, it’s best to try to find your material in the list of provided profiles. If it isn’t available, a good option to go with is one of the generic profiles for PLA, PETG, or ABS. You can adjust specific settings later on, most importantly the temperature settings. (We’ll touch on this later.)
Of course, you can always create a new material profile. In Cura, you can do this by navigating to the middle dropdown menu, clicking the material, and then opening the “Manage Materials” window and selecting “Create new”. Under the information tab, you can add extra details like a display name, description, and cost per meter.
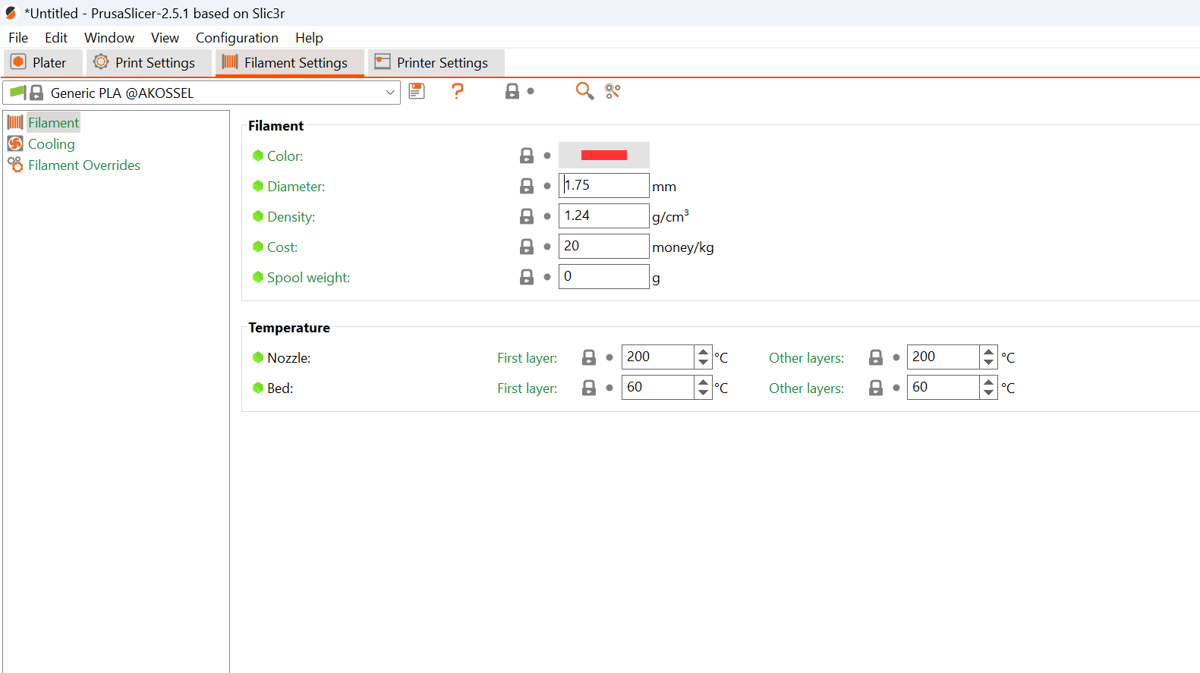
In PrusaSlicer, you’ll need to start with an existing profile under “Filament Settings”, modify it as you like, and then save it.
When creating custom material profiles, make sure to provide information for nozzle and bed temperatures, retraction distance and speed, and fan speed. While you can also add other values, these are the most crucial ones for printing purposes.
The Objective
Apart from setting up the printer and material profiles, the main driver behind adjusting slicer settings is the desired level of quality, which is usually balanced against print time. Several factors determine quality, with layer height perhaps being the most important.
Cura’s presets depend on the selected printer. As an example, the Ender 3 V2 has four quality settings: low, standard, dynamic, and super quality (corresponding to 0.28-, 0.2-, 0.16-, and 0.12-mm layer heights, respectively). Similarly, PrusaSlicer has presets for lower and higher qualities (ranging from 0.08- to 0.28-mm layer heights).
The rest of the important slicer settings need to be sought out and adjusted under their respective category menus, but they follow a similar pattern. In most cases, the default values will work. You will simply need to adjust them for optimization purposes.
Setting Visibility
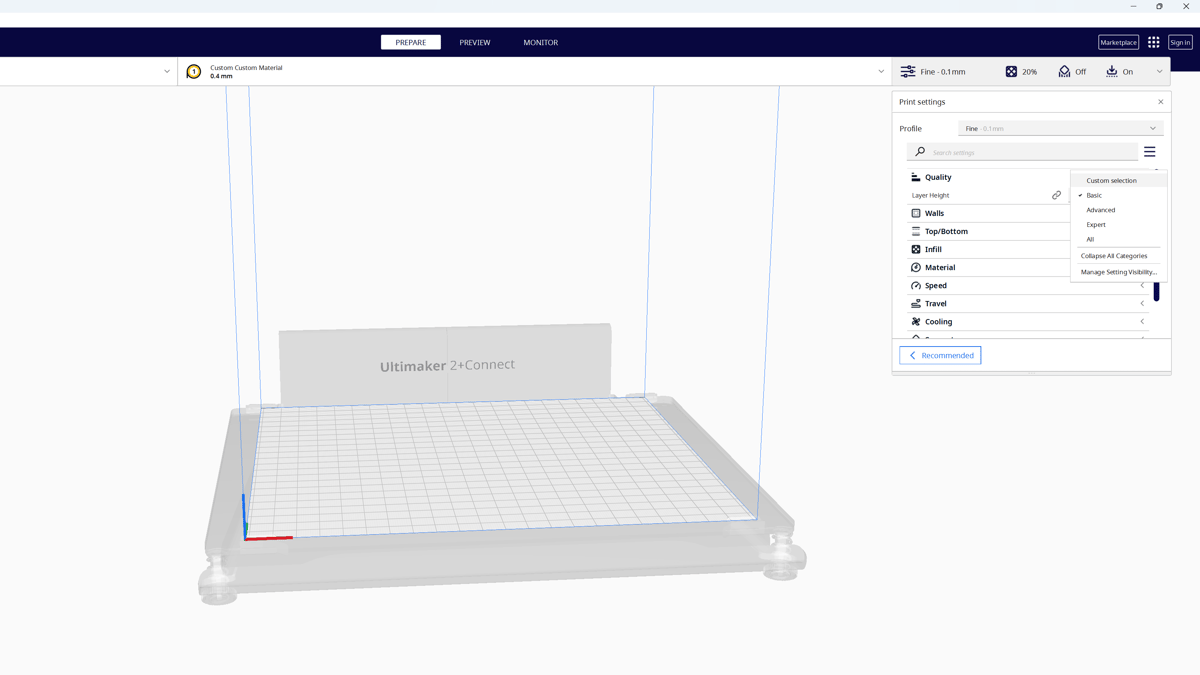
In Cura, settings are grouped, with many hidden according to the selected visibility level: Basic, Advanced, Expert, and All. You can find these levels on the right dropdown menu under “Profile.” Most of the time, you should be able to find everything you need by viewing the advanced or expert settings.
In PrusaSlicer, you can access the same settings in the “Print Settings” tab. Changing the mode – Simple, Advanced, or Expert – in the top-right corner will give you fewer or more settings to choose from.
Slicer Settings
Buckle up because we’re about to bring you all the most important settings for working with Cura and PrusaSlicer. For many of the things we’ll touch on, you can find even more information in a dedicated article, so keep an eye out!
Layer Height
Layer height refers to the thickness of each layer of the print, and it’s directly linked to print quality, with respect to resolution, as discussed in the previous section. Using either Cura or PrusaSlicer, you’ll notice the options for quality, like “Super Quality – 0.12 mm” or “0.24 mm DRAFT”.
0.2 mm is the standard layer height across all the slicers and strikes a good balance between quality and time. A smaller layer height will give you higher quality, while a larger layer height means lower quality. Naturally, a print with a smaller layer height will take longer to print, since there are more layers.
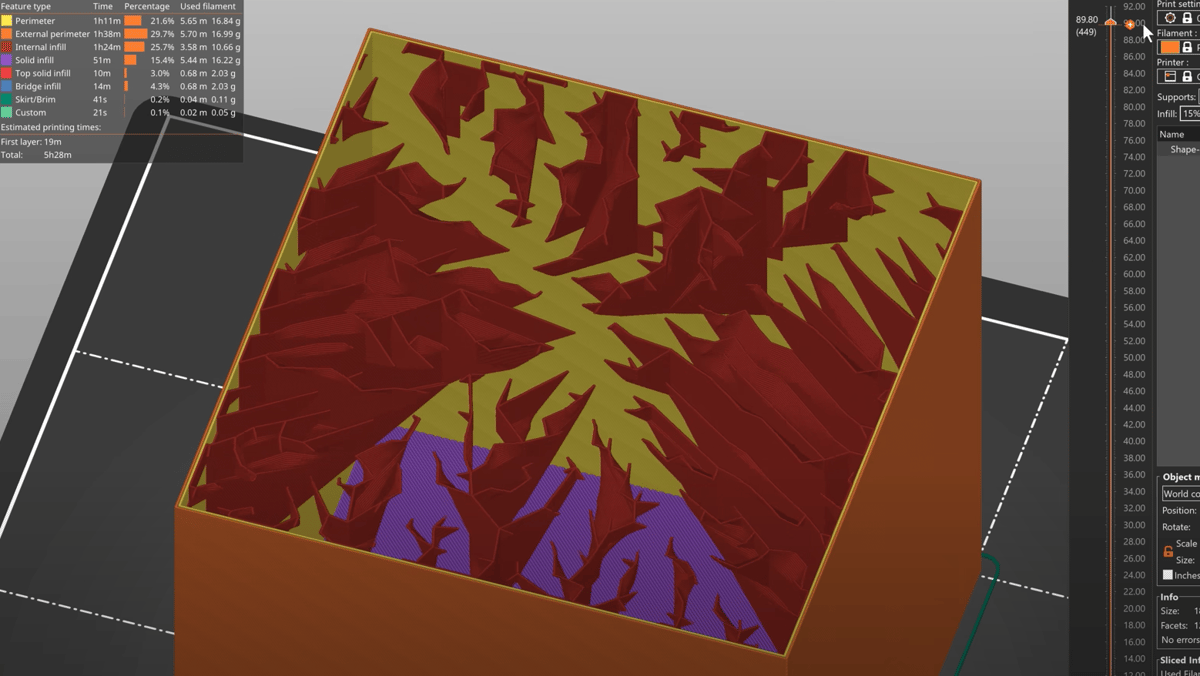
A good approach to adjusting layer height away from the standard 0.2 mm is to consider the function of your model, how you want it to look, and how much time it will take. You can determine this by slicing it and checking the preview information.
Layer heights can also be a useful tool for improving bed adhesion. A thicker first layer will absorb defects in the build surface and result in better adhesion. PLA, PETG, and ABS will all benefit from a thicker first layer, though PETG and ABS typically require more attention, which we’ll touch on later.
Layer height and its related settings can be found under the “Quality” dropdown menu in Cura and in “Print Settings > Layers and perimeters” in PrusaSlicer.
Infill
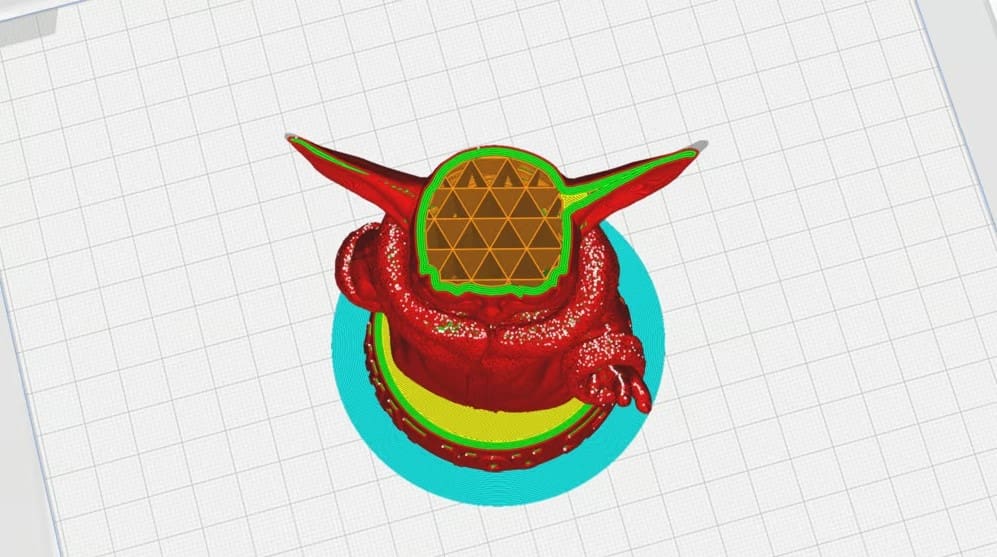
Infill is the material between the walls of the models. It’s an important thing to tweak since infill determines the structural integrity of your part. In Cura, all infill settings are located in the “Infill” dropdown. In PrusaSlicer, they live under “Print Settings > Infill”.
Density
Higher density infill means better strength but longer printing time and more material. Lower density infill gives the opposite effect, taking less printing time and material but losing strength. Here are some examples of what different infill densities are well-suited for:
- Decorative prints: 0-15%
- Standard prints: 15-30%
- Functional prints: 50-100%
Pattern
Though less crucial than density, infill patterns also offer differing levels of structural integrity in exchange for time and material spent. The main considerations here are how strong a model should be and in which direction.
Patterns such as rectilinear and grid print simply, quickly, and reliably but don’t provide a lot of compressive strength. These are best for non-functional prints, like busts or figurines. On the other hand, patterns like cubic or gyroid are more complex but offer better strength in all directions. Models that are for functional use, like brackets, are best suited for these patterns. Patterns like concentric are ideal for models that should be flexible.
Generally, the default slicer settings will work best for PLA, PETG, and ABS. However, you can always try playing around with them to produce better results. For example, some makers on Reddit claim that PETG prints best with line, gyroid, or zig-zag patterns. In particular, zig-zag can help minimize stringing issues that often occur with PETG.
For more on patterns, check out our articles on Cura and PrusaSlicer infill patterns.
Temperatures
After you’ve selected or created a material profile, the default temperature settings should already be set. In general, the hot end and bed temperatures need to be adjusted for optimal results. There’s a whole plethora of problems that can occur if either of these isn’t properly calibrated, including clogs or adhesion issues like warping. If you’re experiencing these issues, first check your filament manufacturer’s recommended temperature. If that doesn’t work, there are some general temperature ranges for each material that you can use to find the perfect temperature.
For PLA, you’ll want a nozzle temperature between 180-220 °C and a bed temperature from 20 to 60 °C. PETG should have a nozzle temperature between 220-250 °C and a bed temperature of 50-80 °C. A heated bed is strongly recommended. For ABS, the nozzle temperature should be between 210-250 °C, with a bed temperature of 90-110 °C. A heated bed and an enclosure are pretty much required.
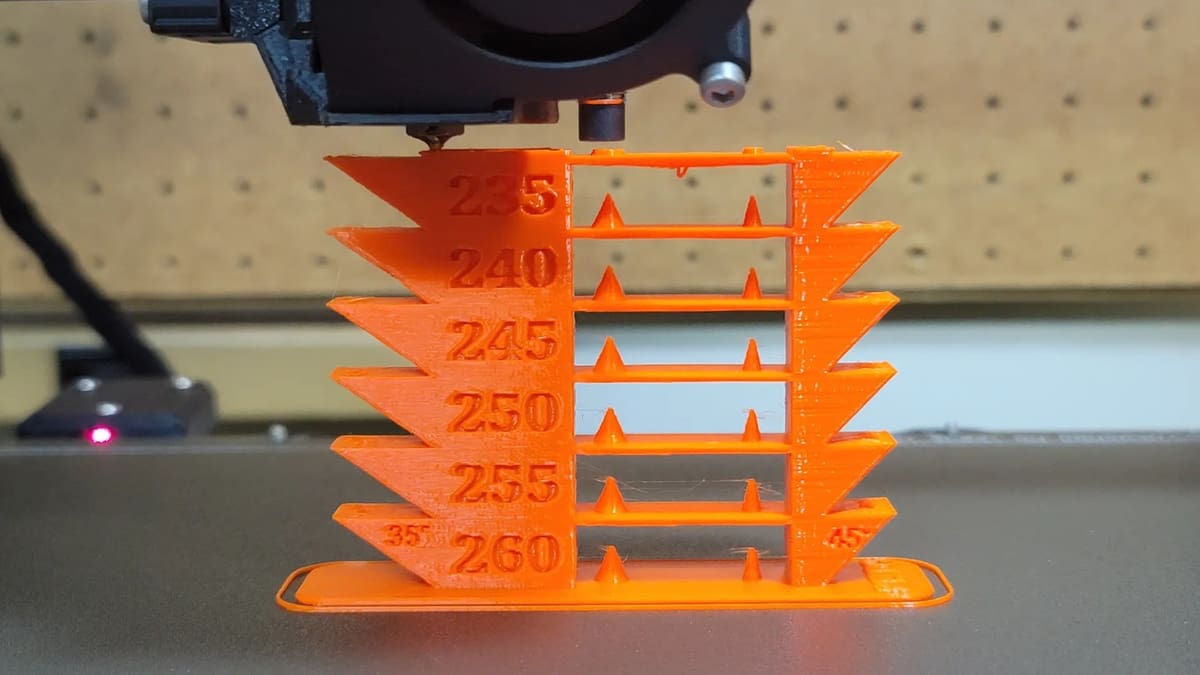
You can find these settings in Cura’s “Material” dropdown menu or in PrusaSlicer’s “Filament Settings > Filament”. Experiment with each material’s temperature or print a temp tower to find the perfect temperature for your filament.

Speed
Printing speeds allow you to control how fast each part of a model prints, which is useful when trying to optimize time and quality. Alongside a main print speed, specific speeds can be set for infill, the first layer, walls, travel moves, and so on.
In Cura, a main speed is used to derive other specific or sub-speeds. This works well since you don’t have to re-adjust each sub-speed, although you still can. Infill speed is usually the same as the main print speed, whereas wall speed and top and bottom speed are half.
You can also control other speeds that are independent of the print speed, like travel speed, which is how fast the printhead travels when it’s not extruding filament. There’s also initial layer speed, the speed at which the first layer prints. We recommend keeping this number low for optimal adhesion. Finally, there’s skirt/brim speed, which is how fast skirts and brims print.
PrusaSlicer also has all the additional speed settings listed above. However, they work a bit differently. There isn’t one “main” speed that all the other speeds are based on, so each setting has to be individually adjusted.
In both slicers, the default speeds – often centered around 50 or 60 mm/s – will depend on the material profile and quality settings, and one can usually rely on them. Most users print PLA and ABS between 45 and 65 mm/s. Since PETG is slightly more stringy than PLA, you may want to drop your print speed by 20 mm/s or so to combat this. Print speeds can generally be decreased to achieve better print performance and increased to lower print time.
Speed and travel settings live under the “Speed” and “Travel” drop-downs in Cura and under “Print Settings > Speed” in PrusaSlicer (with Advanced settings visible).
Retraction
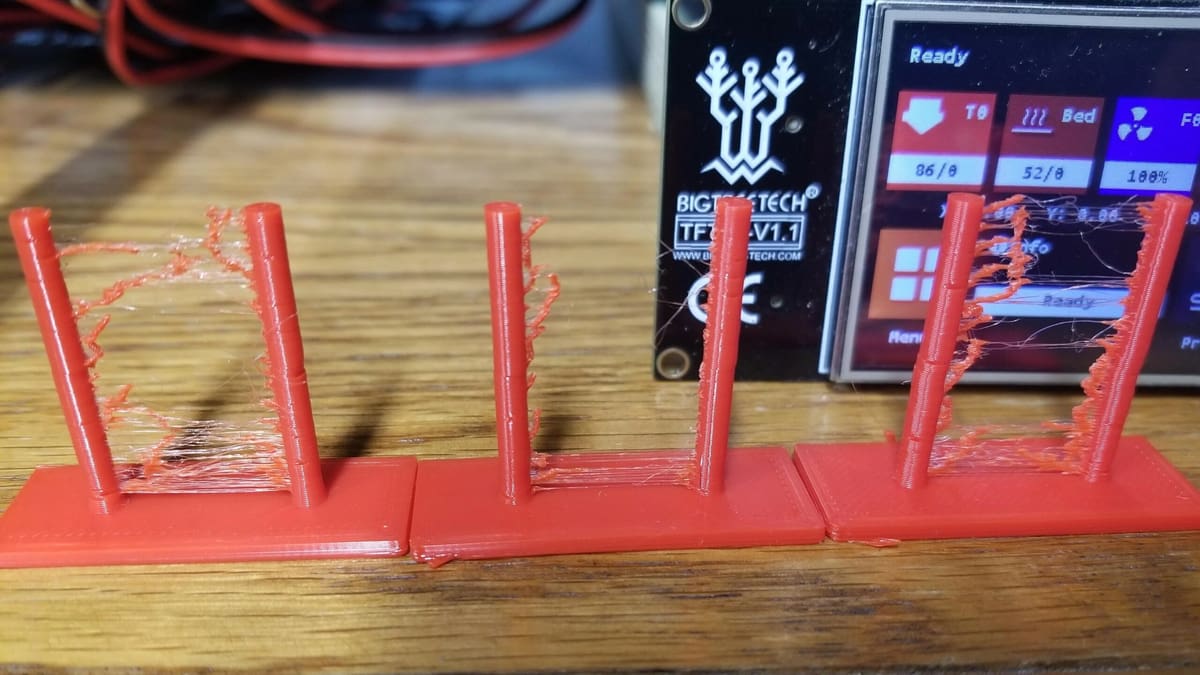
Retraction refers to the pulling back of material from the hot end during the print so no excess material is extruded. This is used when the hot end needs to stop extruding material to travel to another area.
Retraction settings are useful when trying to prevent stringing (thin wisps of material that come off the nozzle) and are especially present during bridging. Retracting material will lead to a cleaner and better-quality print. If you’re noticing stringing and ugly defects, increasing the retraction distance will help.
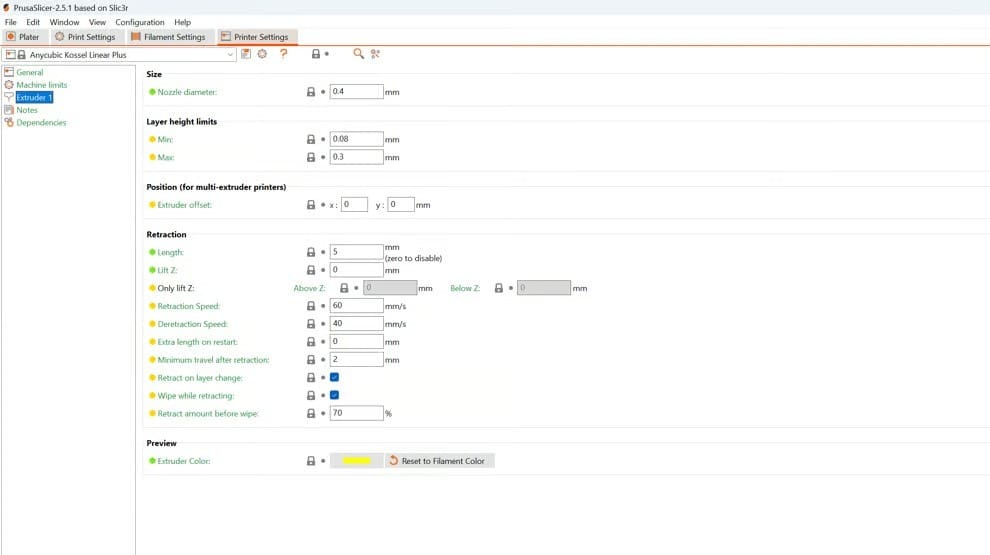
There are two settings you can control here: distance and speed. The retraction distance is how much material is pulled back from the nozzle, while the retraction speed is how fast the material is retracted. The default retraction distance and speed in Cura for all three materials is 5 mm at 45 mm/s, and 2 mm at 70 mm/s is the default in PrusaSlicer. Sticking to these values should be fine unless you’re noticing the above issues.
In general, a good retraction setting for PLA is a distance of 6 mm at a speed of 25 mm/s. PETG will do best with a shorter retraction distance, ideally around 4 mm. ABS benefits from a 6-mm retraction distance with a faster retraction of 40 mm/s. It’s worth mentioning that retraction settings will be different for flexible materials like TPU, as they handle retraction differently compared to non-flexible materials.
Z Hop
Z hop is a setting that is often associated with retraction, as both can go hand in hand. Z hop is when the Z carriage moves up, travels to another area, and moves down again. It basically “hops” to another area on the print. It’s useful when you don’t want to risk the nozzle hitting a particular area of the model, or if you’re having issues with plastic blobs on the print’s surface. The former can cause prints to fall over or detach from the build plate, so Z hop helps to improve reliability.
The default Z hop height in both Cura and PrusaSlicer is 0.2 mm. If you choose to activate it, it shouldn’t be necessary to change it.
All retraction settings can be found in the “Travel” dropdown in Cura and under “Printer Settings > Extruder 1” in PrusaSlicer. (Note that, in the latter case, you’ll need to have advanced settings visible to see retraction speed, and the Z hop setting is called “Lift Z”.)
Cooling
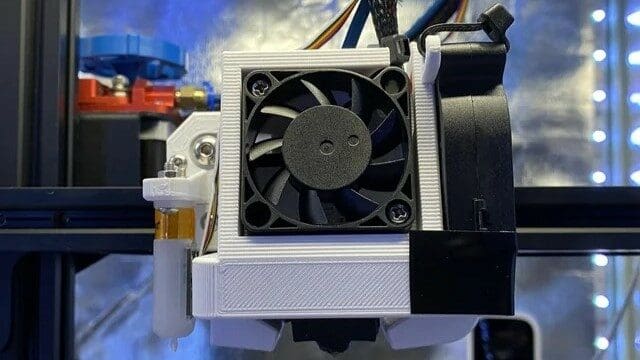
The cooling fan on a 3D printer blows air onto the plastic in order to cool it down. This can help you produce perfect prints or completely ruin them depending on how you use it.
Having a high fan speed on the first few layers usually isn’t typically a good idea. Cooling down plastic too fast can cause warping issues. ABS loves to warp, and a high fan speed will only amplify that problem. PLA and PETG can also warp, but not as severely as ABS.
If you have a print with a small area, like a tall and narrow shape, it will benefit from a fan for the last few layers. Small areas may not allow the material ample time to cool because the print time of each layer is too short. This can potentially cause the merging of layers, sagging, or other defects. To prevent this issue, the minimal layer time setting will allow you to set how long each layer will take, so when the nozzle comes back around to do the next layer, the previous layer has already hardened completely.
The slicer you’re using should already have a good default value for fan speed, but you can make some tweaks if necessary. A fan speed of 100% is the standard for PLA prints, while PETG and ABS would generally do better without cooling. That said, if your PETG print has shorter layer times, you can try setting the fan between 20% and 50%.
Cura and PrusaSlicer have values set by default, but it might be worth increasing them if you’re seeing sagging or melted layers. All cooling settings are located under “Cooling” in Cura and “Filament Settings > Cooling” in PrusaSlicer.
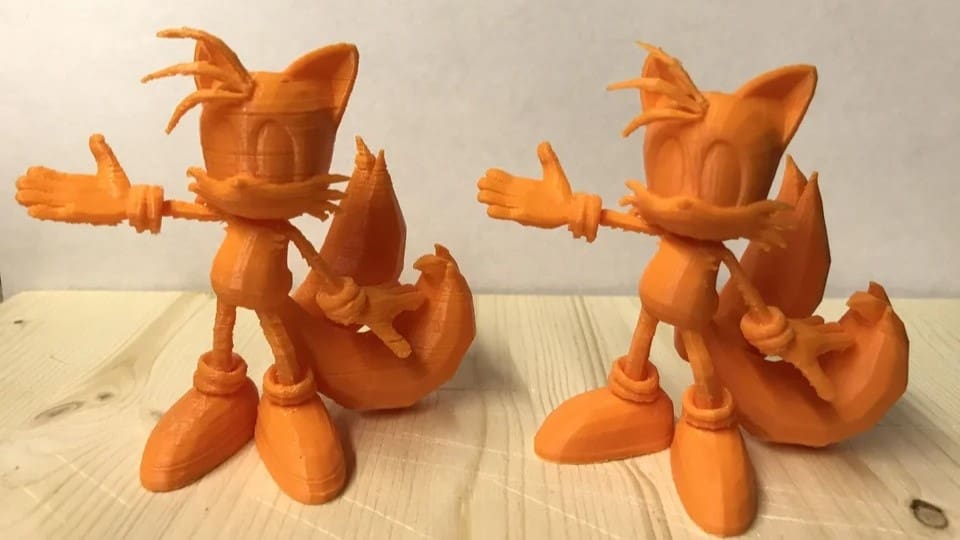
Supports
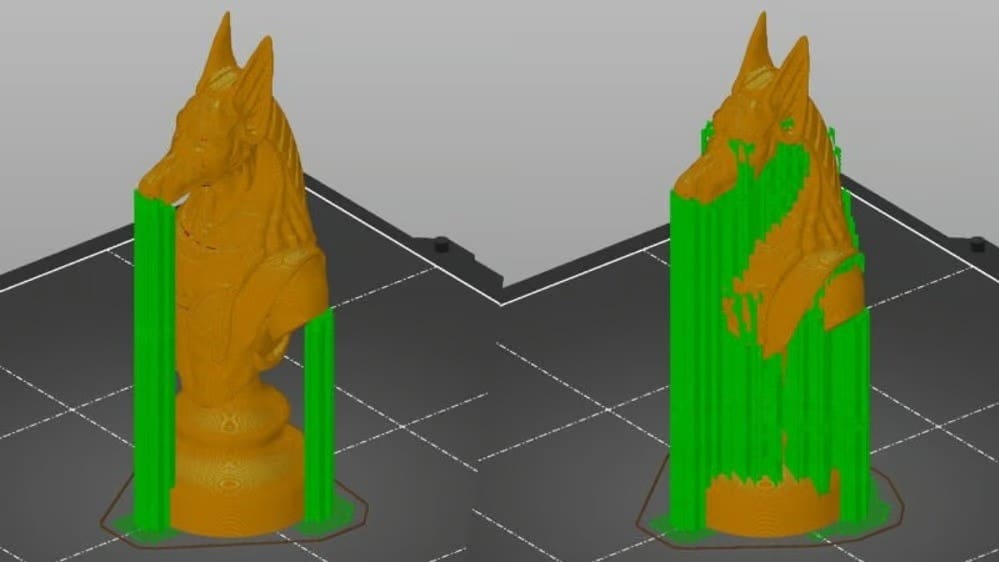
Supports are structures added to a model during printing to give overhanging features something to rest on. As they’re not part of the model itself, they should be removed after printing. The slicer you’re using should already have a pretty solid default range of settings for supports. However, you will have to activate them, and it’s also good to know how they work if you decide to tweak settings later.
As a general rule of thumb, you should use supports if the model you’re trying to print has large overhangs or areas where the printer would have to print in mid-air. The overhang angle setting limits supports to features not able to support themselves. Generally, if there are features with less than 45 degrees of support from below, which is the default setting in both programs, it’s a safe bet to use supports. If you don’t use supports in these cases, the overhang could droop, fail to print, or disrupt the rest of your print.
In terms of material, both PLA and ABS will work well with tower and tree supports. Since PETG can stick too well to itself, supports can be difficult to remove. To combat this problem, you may want to check out your slicer’s advanced settings and increase the distance between the support structures and your model.
Find these and more settings under “Support” in Cura and “Print Settings > Support material” in PrusaSlicer.
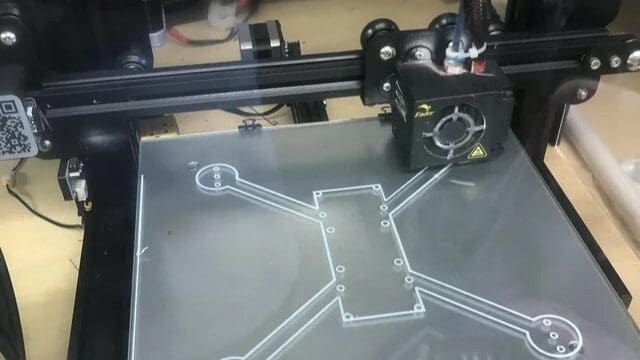
Build Plate Adhesion

Build plate adhesion is a key part of all prints. While there are options like glue sticks and tape, there’s also a variety of slicer settings to help with adhesion, like skirts, brims, and rafts. All of these features are extruded before the actual print. Keep in mind that skirts are activated by default within a slicer, whereas brims and rafts are optional.
Skirt
A skirt is a series of rings that outline the perimeter of the model, usually a fixed distance away from where the model will be printed. These rings help to prime the nozzle and remove any blobs or excess material. It’s a good idea to use skirts regardless of what you’re printing since they don’t use much material and increase the chances that the first layer will stick.
Brim
A brim is similar to a skirt, but there are typically more rings and they print outward from the base of the model. A brim might help to add a little more stability if the model has a small footprint (e.g. the Eiffel Tower). The settings for skirts and brims usually don’t need to be changed, and the default skirt and brim profile in your slicer should be fine.
Raft
A raft is a platform that is printed underneath the model itself. Out of the three choices, a raft is the “safest” bed adhesion option because it eliminates any bed-to-print problems. On the other hand, it takes much more time and material than either a brim or a skirt. You can choose how many layers you want your raft to be, but the default profile in your slicer should be sufficient. Keep in mind that using too many layers is probably overkill, so try to stick to two or three.
Materials
PLA
PLA has the least amount of adhesion problems compared to ABS and PETG. You may occasionally need a brim or raft when printing in PLA, but with a heated bed or an adhesive, you won’t face many issues.
PETG
When it comes to adhesion, PETG can have some problems, but they are relatively easy to solve. For instance, a common culprit of poor bed adhesion is a dirty print surface. PETG needs a clean, hot build surface for the best chances of sticking. It may take a few prints before you fully understand how your machine handles PETG, but from there you can apply the above adhesion techniques in your slicer.
ABS
ABS will definitely have adhesion problems without the proper preparation! As we mentioned earlier, ABS loves to warp and subsequently detach from the build plate. If you’re printing ABS, be sure to use an enclosure to trap the heat. This will help the layers from cooling too quickly. Using one of the three adhesion settings or even an adhesive will help to keep the ABS on the build plate.
Skirts, brims, and rafts settings can all be adjusted under Cura’s “Build Plate Adhesion” dropdown, but in PrusaSlicer, you’ll have to go to either “Print Settings > Skirt and brim” or “Print Settings > Support material”.
License: The text of "The Best Cura & PrusaSlicer Settings/Profiles" by All3DP is licensed under a Creative Commons Attribution 4.0 International License.