The Best Creality Ender 3 Software

Check out our selection of the best free 3D printing software for Ender 3 (V2/Pro/S1/V3) to make your beloved printer even better!
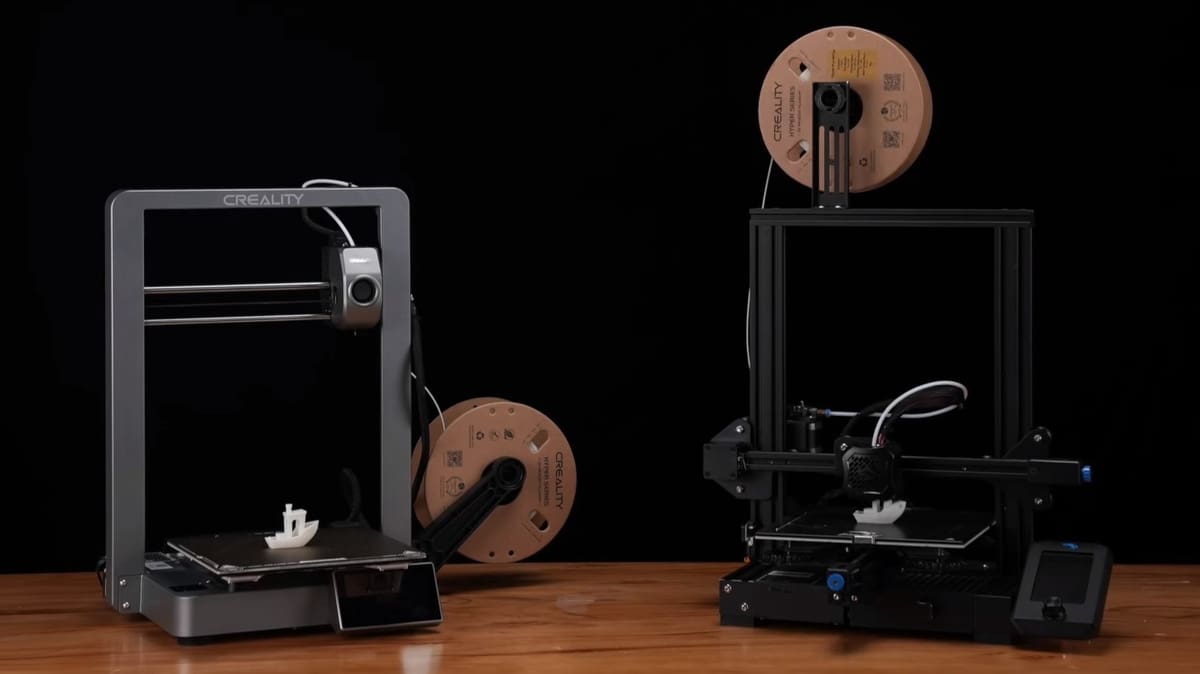
There’s no doubt that the Ender 3 (including the Pro, V2, S1, and V3) is a potent hardware package that can produce some stunning results in the budget printer price bracket. But have you stopped to think about the software you’re using with it?
In reality, having good hardware is just part of the story. Check out this list of must-have software options that should give you the most enjoyable experience with your Ender 3. These options are compatible with the Ender 3 Pro, V2, S1, and V3. We’ve divided our list of programs into different phases of the design and printing process, so you can target the tool you need the most.
3D Slicers
A key part of the success of any printer is the slicer you use with it. Here are a few that pair well with the Ender 3s.

UltiMaker Cura
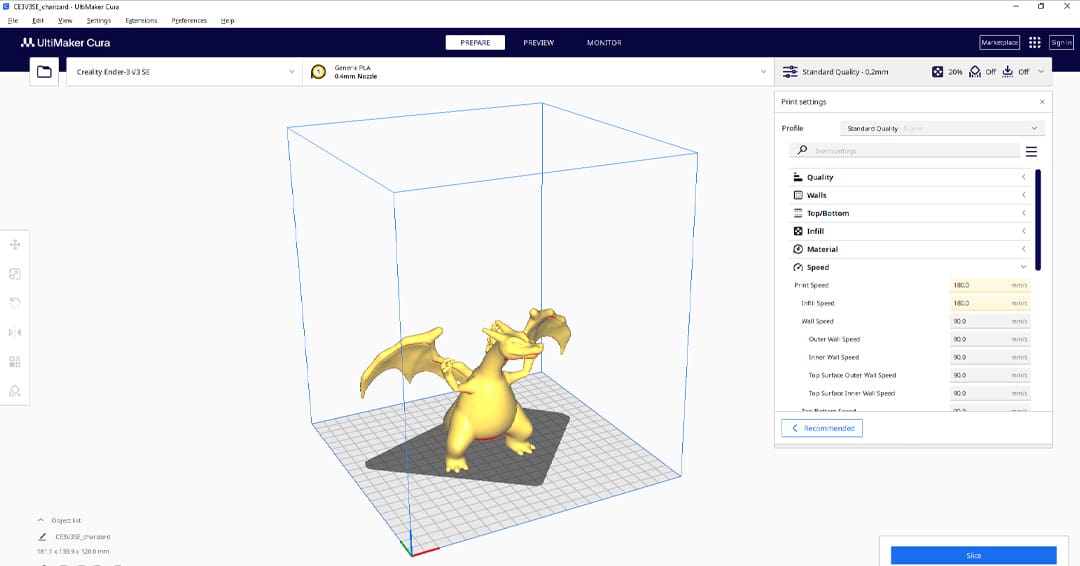
A slicer program is a must-have for a 3D printer. You can’t print without one. There are plenty of slicers with various price tags, but none are more popular than Cura.
If you’ve bought an Ender 3, you’re most likely trying to save some money, so buying an expensive slicer is probably not something you want to do, anyway. Fortunately for you, Cura is free and open source. But don’t let its low asking price deceive you! This is a feature-packed program with plenty of settings you can manipulate to get the best printing experience possible.
Cura supports all the Ender 3 models except for the V3 and V3 KE. But don’t worry, you can manually set up a profile for these devices using user-uploaded data from GitHub. Since the V3 is a recent release, there’s no doubt that in a few months a built-in profile will be available!

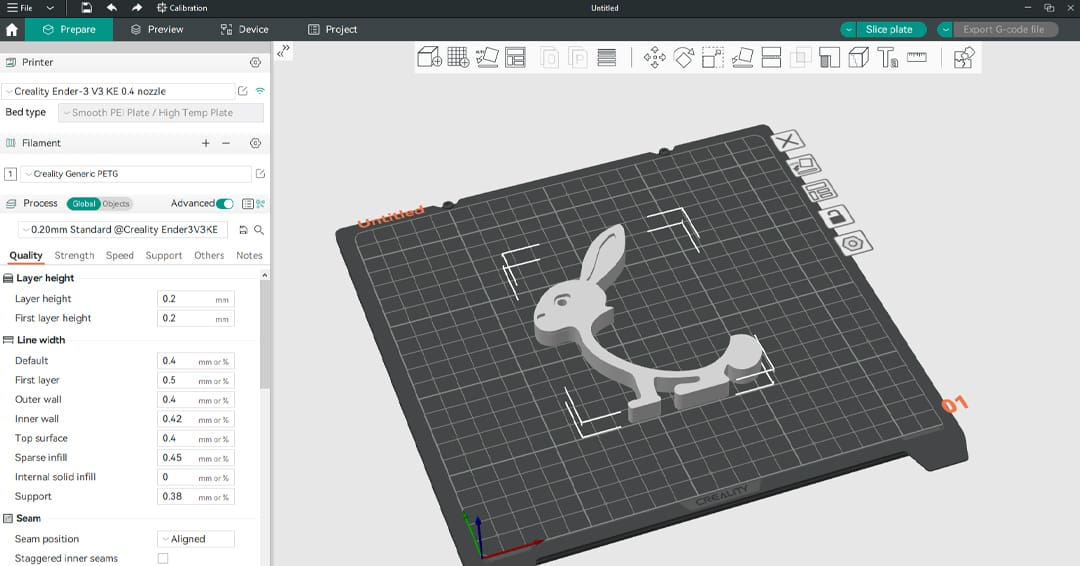
Creality Print
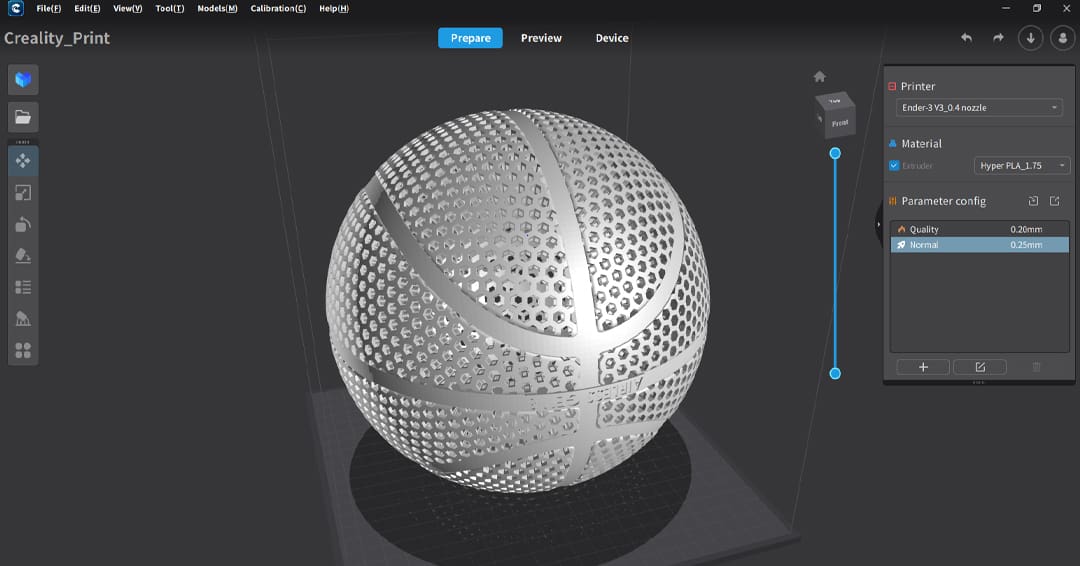
Creality Print is the slicer developed by Creality themselves. Despite the interface being similar to the Cura UI, Creality Print isn’t a fork and it differs from Creality Slicer. The company is actively improving this software to make it the go-to slicer for Creality machines. To achieve that, the team seems to prioritize user-friendliness and the addition of unique features to make this an all-in-one package.
For example, one can find a “Models” section directly within the slicer that serves as a repository for designs, with new models uploaded daily by the community. Users can select a model, slice it, and then send the G-code directly to a machine via Creality Cloud, once configured in the “Device” tab.
Instead of the typical setting menu present in many Slic3r descendants that contain a massive list of confusing parameters, Creality Print presents pre-configured profiles based on the printer model, filament material, and a couple of other simple parameters. Although the configuration can be modified by double-clicking on the profile, this detail makes Creality Print far more beginner-friendly than Creality Slicer or Cura. It’s certainly worth a try if you’re just getting started with an Ender!
PrusaSlicer
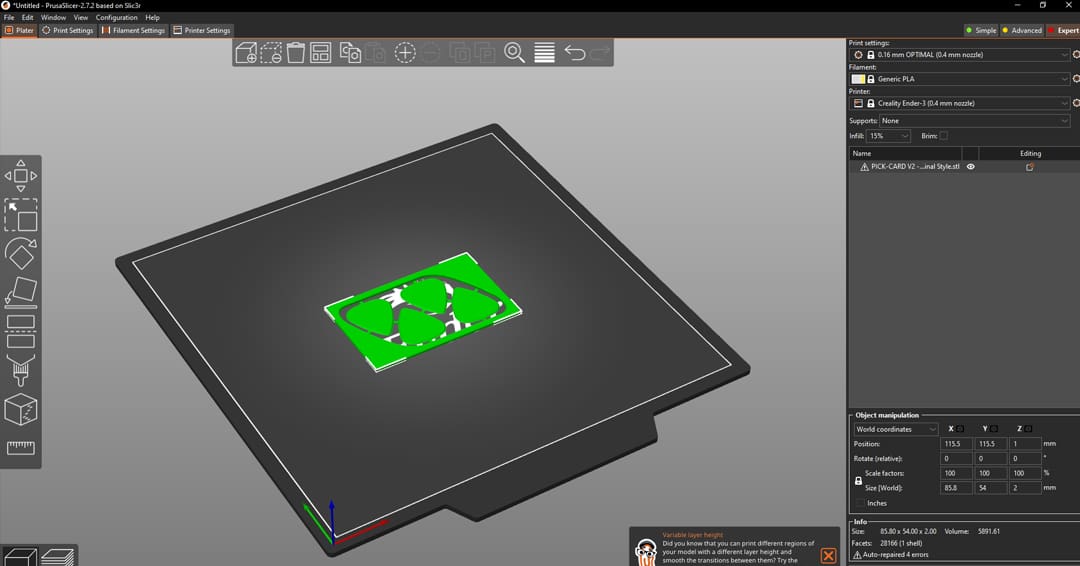
PrusaSlicer is another terrific 3D slicing program that’s free. While developed by Creality competitor and 3D printer manufacturer Prusa Research, there’s a slicing profile that you can use for almost every Ender 3 model, except for the new V3 series. PrusaSlicer is an open-source fork from Slic3r, an older slicer program, so it has many of the same features and tools.
PrusaSlicer offers all the more traditional and basic slicing settings, including layer height, print speed, retraction, and infill. In addition, Prusa Research has added some new and innovative settings, such as ironing, top fill patterns, and special infill patterns.
With every new release of PrusaSlicer, unique features are introduced in the program, such as organic supports, text and SVG embossing, or Klipper compatibility. PrusaSlicer offers you tools that you won’t find anywhere else.

Orca Slicer
Orca Slicer is a fork of Bambu Studio, which is a fork of PrusaSlicer. This software includes the best features from both of these slicers and also offers convenient tools that aren’t included in any other competitor program. Orca Slicer is the perfect slicer for those who often work on big projects thanks to its particular workflow that allows one to manage multiple build plates at once. The good news is that profiles for all the Ender 3 models, except the new Ender 3 V3, are available.
Another nice aspect of Orca Slicer is the Calibration tool, which will help you take your print quality to another level. There are numerous built-in test prints one can use to tune various profile settings, with a detailed guide that will help you during the process. Other useful features include the mouse ears option to help build plate adhesion and the “Make overhang printable” function that will adjust the model to allow for minimal or support-free printing of bridges and arches.
Although the list of settings that you can tune is long, the interface remains beginner-friendly, with an organized UI. If you’re just starting your printing journey, disable the “Advanced” view to have only the most important options visible on the left panel. On the other hand, if you’re an experienced maker, enable the “Expert” view and enjoy all the advantages of this software!
IdeaMaker

IdeaMaker is a 3D slicer program developed by Raise3D, a manufacturer of prosumer (and usually dual-extrusion) 3D printers. The program has plenty of features for Raise3D printers, but it’s also useful for the Ender 3 due to its slicing abilities and other features. IdeaMaker offers configurations for the Ender 3 series up to the S1 Pro. The S1 Plus, Neo models, and V3 machines aren’t available (yet).
On top of offering an assortment of advanced slicer options like more speed control (e.g. “Thin Wall Speed”) and ooze prevention settings, IdeaMaker also has many default slicing profiles available. You can download and import a slicing template for the Ender 3s from Raise3D’s online public library of slicing profiles.
Raise3D offers many non-slicing features, too! For one, you can upload G-code to review it before sending it to your printer, which is especially useful for ensuring a slicer setting is functioning the way you want. Raise3D also has a few model editing tools, including “Scale”, “Max Fit”, “Boolean”, “Modifier”, and “Free Cut” that let you make small to moderate adjustments to your 3D model before slicing.
CAD Software
If you’re designing your own parts for printing, you’ll need modeling software to make your ideas a reality. That’s where CAD comes in!

Fusion
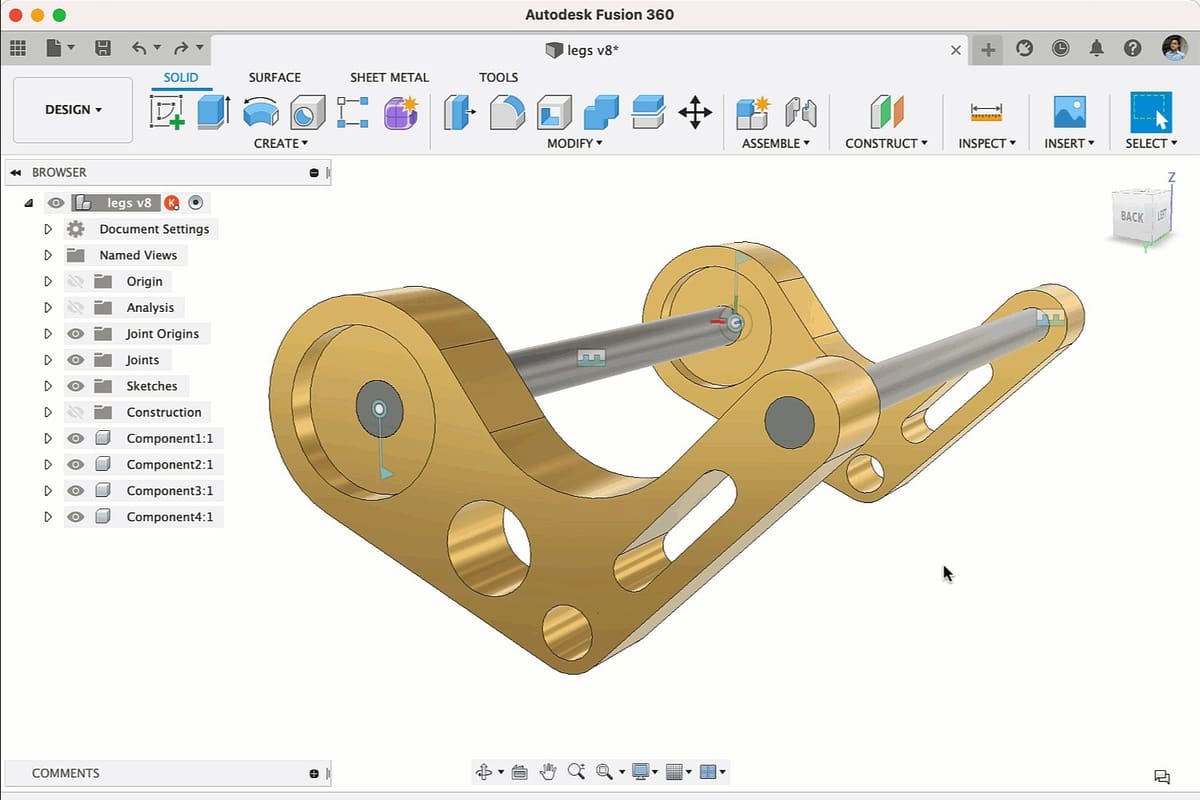
Autodesk’s Fusion (formally known as Fusion 360) is a massively popular parametric modeling tool that will serve you well in your 3D printing journey. It’s also popular in the hobbyist 3D printing community, since there are free licenses for hobbyist and educational use.
The tool is easy to learn with the help of ample online tutorials. In addition, Fusion tends to be good at creating functional, dimensionally accurate parts suitable for 3D printing and other forms of manufacturing.
While it’s mostly known as a capable and easy-to-use CAD program, it also offers some CAM options, including a slicer function. For users who are looking for a fully-capable CAD program, Onshape is also worth considering, particularly if working with assemblies is in your plans.
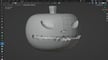
Meshmixer
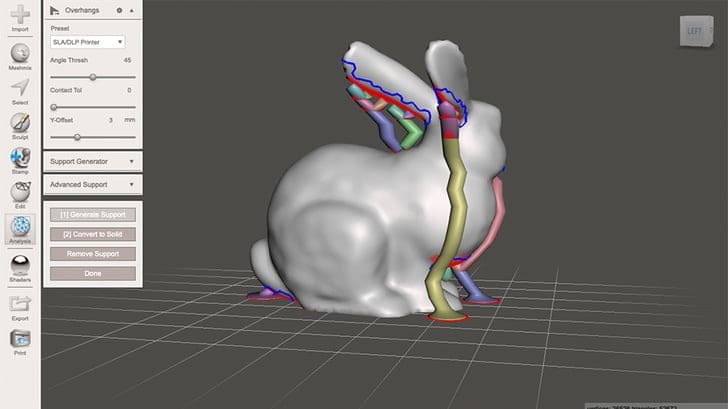
Meshmixer is an excellent program for any printer. Owned by Autodesk, Meshmixer allows you to edit and sculpt individual models to produce exactly what you imagine. You’re also provided with a wide range of tools to aid your model editing efforts. In fact, some have called Meshmixer “the Photoshop for 3D.”
From adding optimized supports to slicing objects into multiple sections, the sky’s the limit for what you can do. This ability to strategically split models into smaller pieces might be especially helpful for Ender 3 owners since the machines don’t have too generous build volumes.
Since Autumn of 2021, Meshmixer is no longer supported by Autodesk, and many of its features have been integrated into Fusion. On the bright side, Autodesk assures fans, “we have no current plans to retire Meshmixer.”

Tinkercad
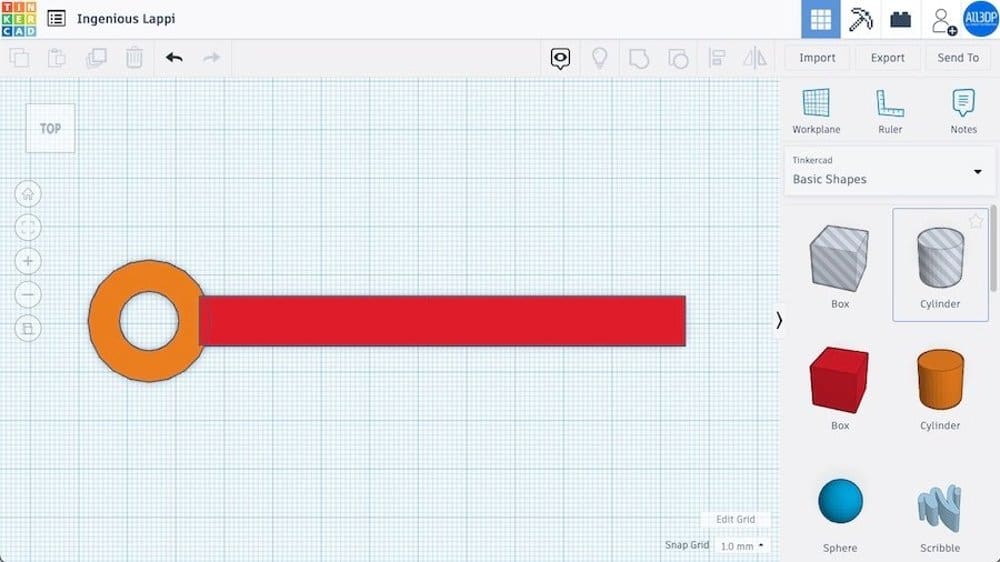
Tinkercad is a browser-based 3D modeling tool perfect for beginners in the CAD space. It differentiates itself from other common platforms in its simplicity. Complex geometries are primarily created by adding and subtracting simple solids, like cubes and spheres. You’d be surprised at how intricate projects in Tinkercad can get.
Since it’s free and easy to use, Tinkercad is often recommended for beginners in 3D printing, but it’s also certainly capable of serving your modeling needs further down the line.
MeshLab
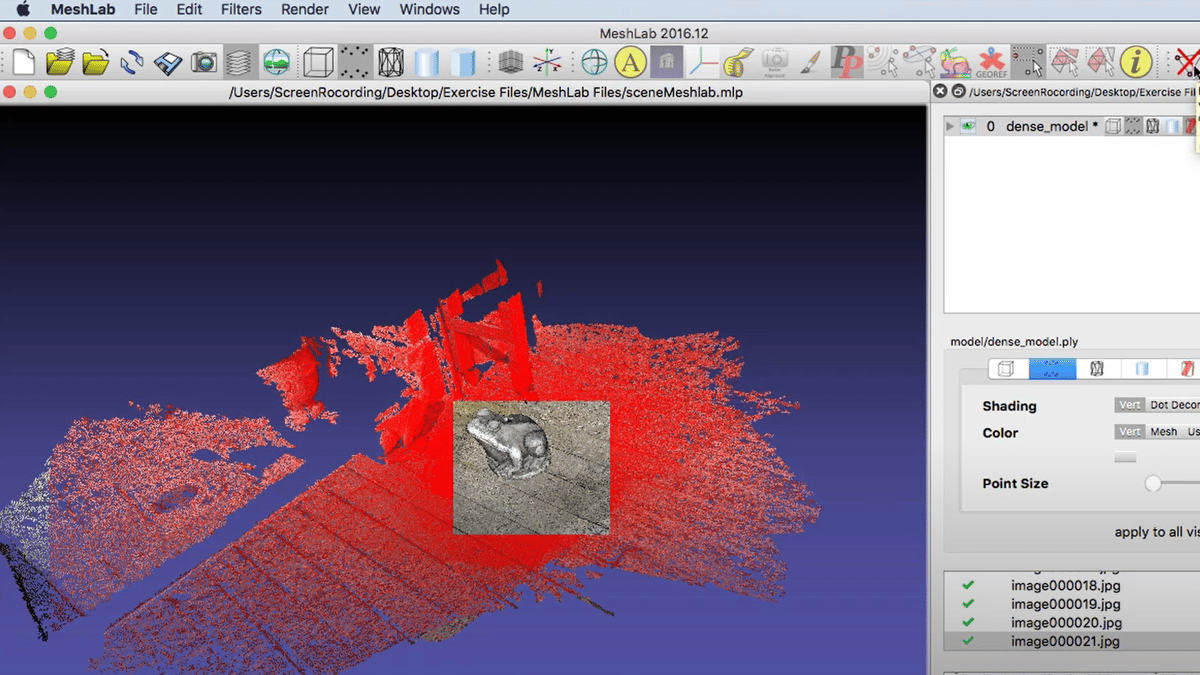
Next, MeshLab is a popular open-source program that provides STL mesh editing tools. Similar to IceSL, MeshLab isn’t specific to the Ender 3, but it’s useful software for downloading 3D models online.
Moreover, MeshLab can come in handy if you download a model with some issues, such as holes or overlapping triangles in the mesh. These issues would prevent the model from being imported into your 3D slicer program. In this case, you can use MeshLab’s suite of mesh editing tools, such as the Mesh Optimization tool, to repair any inconsistencies on your STL model, then download the fixed version.
However, editing STL meshes isn’t the only use of MeshLab. The platform also offers other tools like mesh visualization and conversion from the point cloud format (e.g. 3D scans) to a 3D surface. On this note, many people like to use MeshLab for turning 3D scans into 3D printable models.
Blender

Next up is Blender, perhaps one of the most open-source software programs out there. Blender is an all-in-one designing platform offering tools for sculpting, animation, regular 3D modeling, and more. As such, you can use this program to make models to print on your Ender 3 or modify models you’ve downloaded.
While Blender’s general 3D modeling suite is limited because it lacks a sketching feature, it has many specialized tools, such as sculpting, that make up for it. For example, Blender offers over 10 different sculpting brushes to make designing complex 3D models a breeze.
Due to its sculpting capabilities, Blender is especially popular for designing and adding detail to miniatures or 3D models with small features. Blender is an ideal program for your Creality printer if you ever want to design your own. Miniatures are popular models to print on the Ender 3.
Blender also supports many different file formats. Although this may not seem important, it means you can use the program to import a downloaded file, even if it’s not in the STL format. Then, you can export it in a 3D model file format suitable for your 3D slicer program.
Other Programs
In addition to slicing and modeling, there are plenty of programs that can improve your 3D printing workflow on an Ender 3. Here are just a few!
OctoPrint
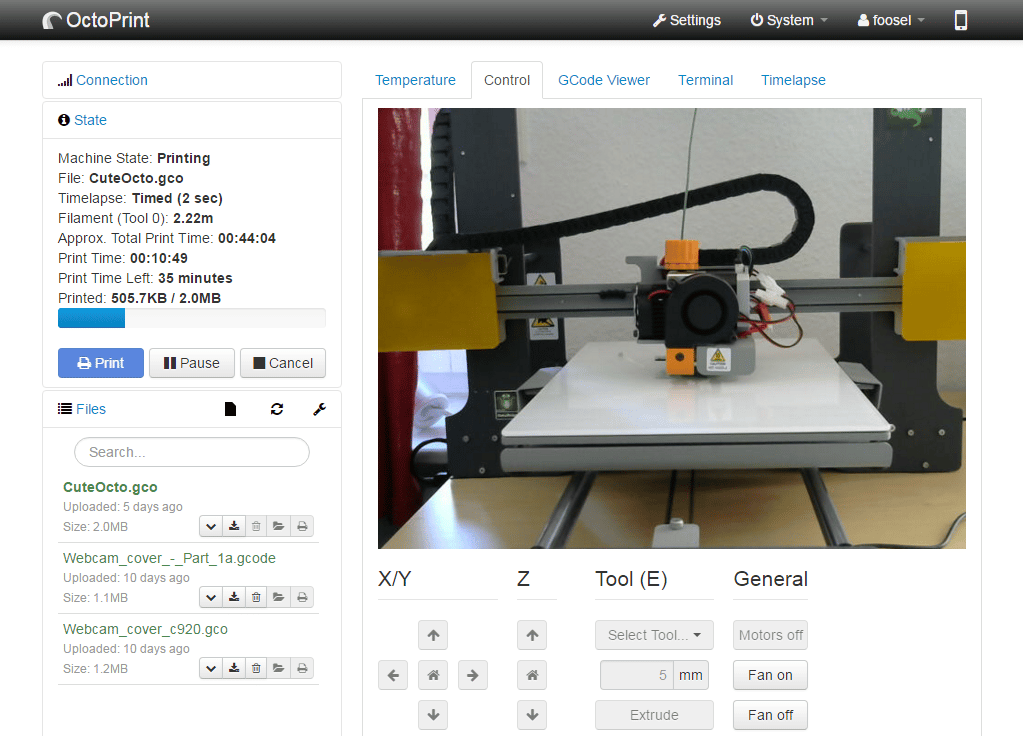
One of the most well-loved upgrades for the Ender 3 is OctoPrint. Open source and fairly easy to install, OctoPrint allows you to connect your printer to a Wi-Fi network for remote monitoring and basic control. This is tremendously convenient for a number of reasons.
For instance, you don’t need to hover over your printer while it’s in action. With the webcam integration, you can simply monitor the progress of your prints through a web browser.
Pronterface
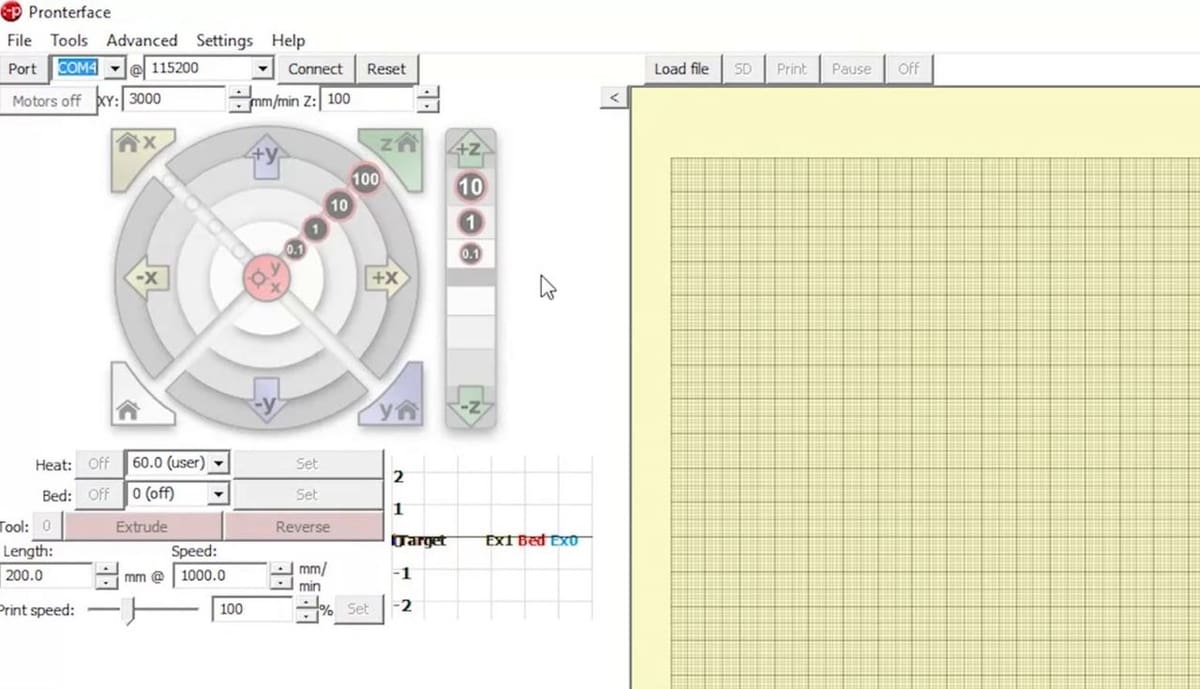
Pronterface is open-source, Python-based G-code terminal software for 3D printers and CNC machines. Using Pronterface’s straightforward user interface, you can quickly send G-code commands to your machine to implement tasks like setting temperatures and controlling movement. In addition to sending G-code commands, you can also use Pronterface to start 3D prints and debug G-code scripts.
This software is compatible with the Ender 3 via a USB cable connected to your printer’s mainboard. When connecting to your printer, select the correct port (“COM”) and baud rate, typically 115200 for the Ender 3.
For more information, check out our Pronterface installation guide and tutorial.
Visual Studio Code
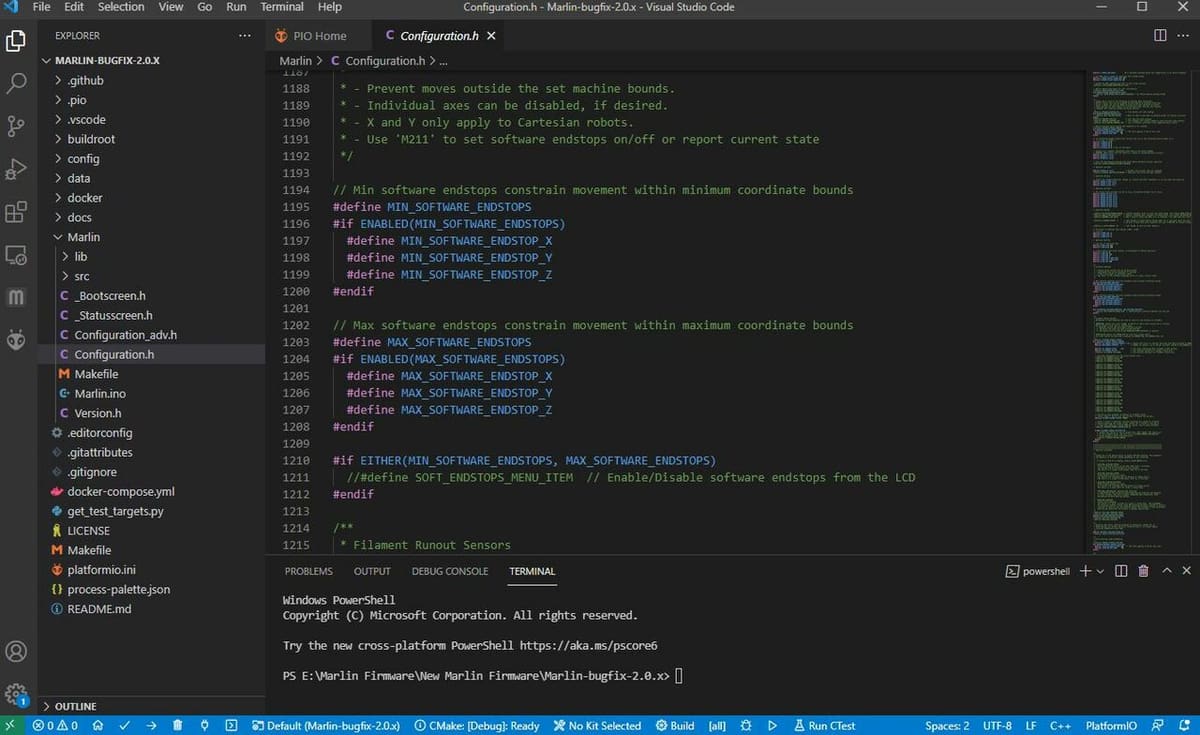
Visual Studio Code, often referred to as “VS Code”, is an integrated development environment (IDE) made by Microsoft. VS Code allows you to edit source code, and you can use the program to import, adjust, and compile firmware for your Ender 3’s mainboard. It’s worth mentioning that VS Code is best for firmware configuration for Ender 3 32-bit mainboards. For the older 8-bit boards, it’s recommended to use Arduino IDE.
This process is necessary if you’ve upgraded your printer’s hardware and need to make firmware adjustments to make the machine compatible, such as upgrading the hot end. You might also want to upgrade your printer’s firmware to the latest version of the firmware package to have access to more or better printing features.
While VS Code has many integrated programming features, you’ll need to install the “PlatformIO” and “Auto Build Marlin” plug-ins to use it to configure firmware packages. The former will allow you to edit the source code of your imported firmware package, which you can do by un-commenting lines of code in the configuration files. The latter will enable the IDE to compile the firmware to get a “BIN” firmware file that you can easily upload to your Ender 3 through its MicroSD card slot.
IceSL WebPrinter
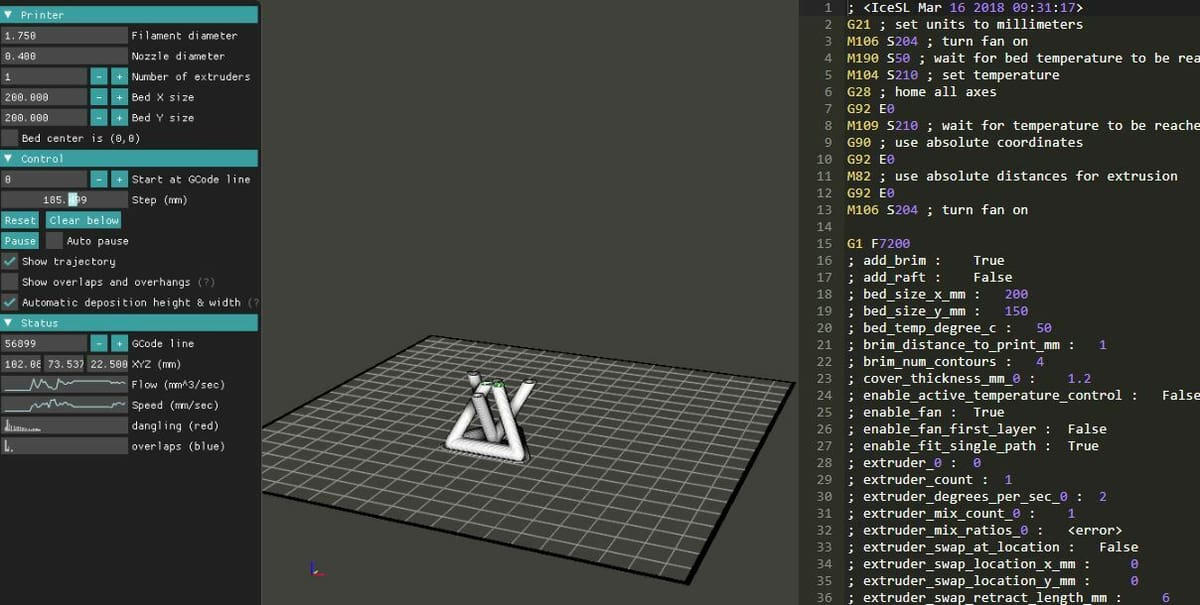
IceSL WebPrinter is an online program that you can use to visualize a G-code print file and check that your printer is doing everything right. It’s an excellent application you might want to have by your side if you own an Ender 3.
Of course, it’s unreasonable to use WebPrinter to visually analyze every moment of the print. However, if a particular section of your print is a little bit complicated, you might want to check how it will print. Alternatively, you can use IceSL WebPrinter to verify that a pre-sliced G-code file you downloaded online is actually printing what you intended.
Using WebPrinter shouldn’t be too difficult, especially considering that the graphical user interface is well-built. Once you upload your G-code file, WebPrinter will show you the printing process, and you can watch as your print is completed. You can also see the G-code scripts on the right side of the interface. To adjust aspects of the visualization, such as the speed, you can update the settings on the left side of the UI.
Img2gco
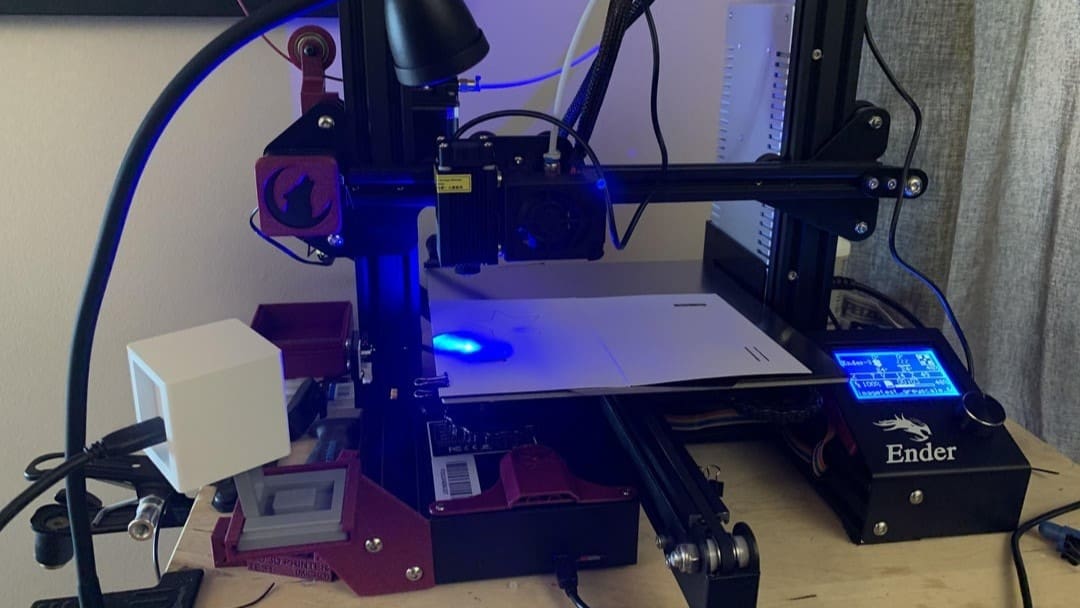
While the Ender 3 is a great 3D printer on its own, you can always give it some extra abilities. The Ender 3 laser engraving upgrade is a good addition to your hobbyist tool arsenal that’s compatible with models up to the Ender 3 S1 series. This is where Img2gco comes in. A maker in the community designed it to help others make this attachment usable.
But be warned: This is an advanced application for users who know what they’re doing. The Ender 3 isn’t primarily a laser engraver, so it doesn’t come with a safety enclosure. In addition, this program is nothing more than a script generator with no built-in safety measures. It simply moves the toolhead with a laser attached in a pattern that might create a usable final etch and has no way of checking if the material has caught fire, for instance. Be sure to thoroughly dissect the Wiki page linked above before attempting anything on your own.
All in all, the Ender 3 laser engraving attachment is an extremely versatile tool. Keep in mind that it requires the proper software and some user experience to avoid causing serious injuries, such as blindness.
License: The text of "The Best Creality Ender 3 Software" by All3DP is licensed under a Creative Commons Attribution 4.0 International License.