Best DIY 3D Printer Enclosures for Small Budgets

3D printer enclosures protect your printer, improve printing quality, and reduce noise and odors. Check out the best DIY, low-cost options!
A 3D printer enclosure isn’t necessarily a must-have in your 3D printing workshop, but having one can improve your printing results. There are many advantages that come along with having a 3D printing enclosure, such as allowing better control of the temperature in the printing environment, thus reducing warping.
Additionally, having an enclosure protects both the users and the printers. For users, it reduces noise and exposure to gases that cause odors, and for the printer, it limits its contact with exterior elements such as dust, which can deteriorate both the machine and the models.
In this article, we’ll look at our top picks for DIY 3D printer enclosures, so that you can find the one that best fits your needs to help you create perfect prints.

Considerations
3D printer enclosures aren’t always accessible, so we’ve selected the best DIY enclosures or items that you can repurpose for that goal. To do so, we’ve taken into account the following:
- Accessibility: Whether it’s a DIY enclosure or a repurposed one, the design should be such that it doesn’t obstruct access to the printer. With this in mind, enclosures that have to be completely removed to access the printer weren’t included.
- Safety: All enclosures selected use materials or are designed to take into account that the printer will be reaching high temperatures and as such shouldn’t represent a fire hazard (although special care should be taken when noted).
- Price: As the purpose of the article is to provide affordable alternatives for enclosures, the sets provided have to be cheap or the materials for the DIY options have to be less costly than commercial enclosures.
- Visibility: If you’re 3D printing a model, chances are you want to see how the printing process is going. Some enclosures use transparent side panels to give you all-around visibility of your printer, but some offer no visibility at all.
- Space for accessories: We’ve added a readymade option in case your setup includes a multi-material solution, such as Bambu Lab’s AMS or Prusa’s MMU, or if the filament’s stored in a dry box. Keep in mind, for the DIY enclosures, that additional space or holes for the filament tubes may be necessary, so you might need to rework some of the instructions depending on your choice.
- Optional considerations: Additionally, some enclosures may have attractive features such as lighting for better visibility, temperature sensing, a camera, or other factors that might make them preferable.
With these aspects in mind, let’s look at our top picks for DIY 3D printer enclosures!
Readymade
To begin with, let’s look at a few affordable 3D printer enclosure options to buy. They still require assembly, but they’re definitely down the low-effort end of “DIY”. Choose wisely, taking into account budget, what 3D printer you own, space availability, and preference on looks!
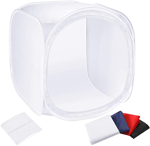
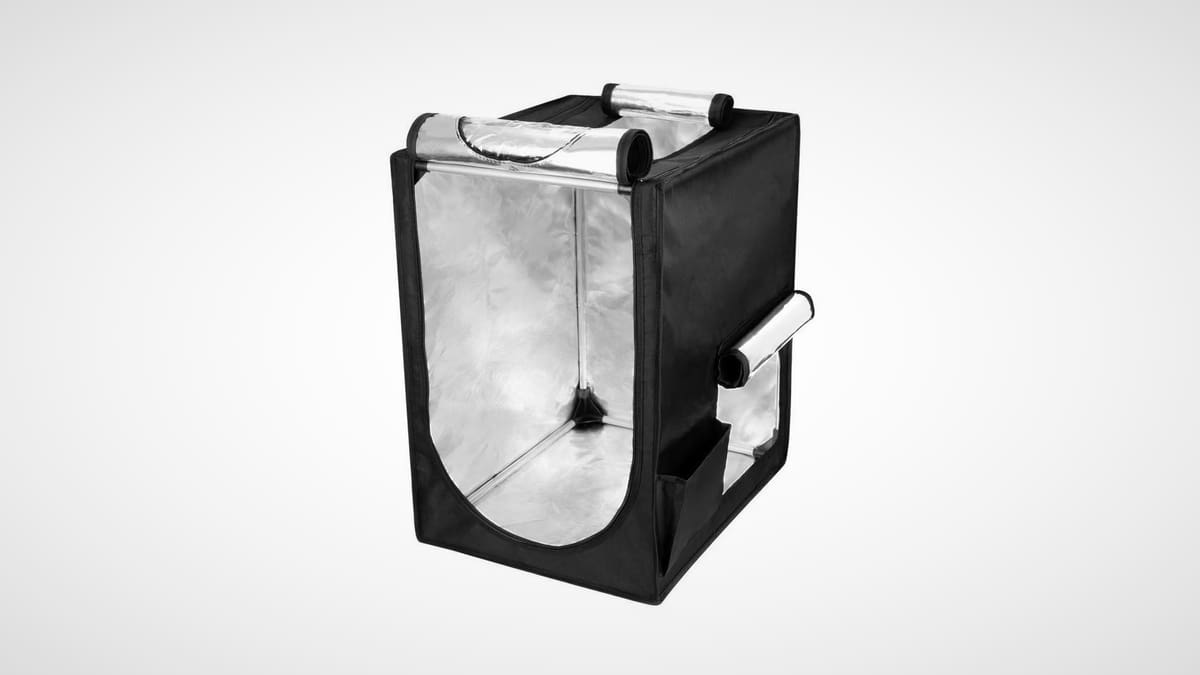
Photography Tent
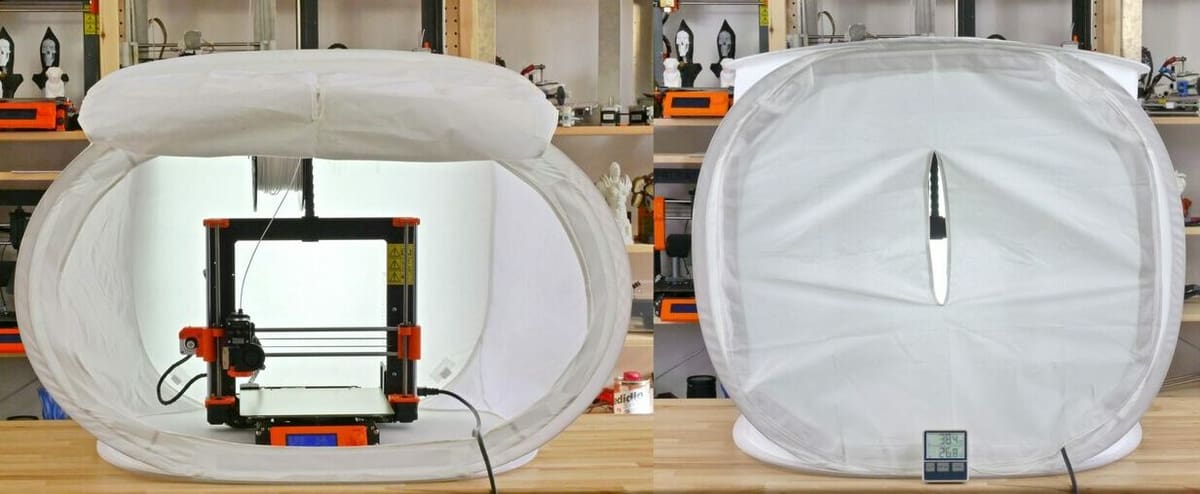
The point of an enclosure is to keep your 3D printer isolated, protecting it from dust, while also keeping the temperature inside constant. A photography tent is an inexpensive and effective way to do both.
They’re typically white and made of flexible synthetic material, which in the context of photography acts as a light diffuser so that objects inside can be more evenly illuminated. One added bonus is that you’ll be able to get amazing shots of your printer at work!
Be aware, however, that the material typically used to make these tents is highly flammable, so to be safe, don’t choose sizes that make it a tight fit. A little “breathing room” is helpful for accessing your printer, anyway.
- Cost: ~$40
- Complexity: Easy
Creality Enclosure
3D printer enclosures, especially those designed to fit a specific printer, can get really pricey, but we can always count on Creality to provide accessible options. True to form, they sell an affordable enclosure that’s portable and safe thanks to its flame-retardant material. It opens from all sides for easy access and can fit a Creality CR-10, Ender 3, or Ender 5.
This is an ideal option if your printer fits inside and you want a quick, affordable solution that doesn’t require hours of work.
- Cost: ~$65
- Complexity: Easy

Chitu Systems
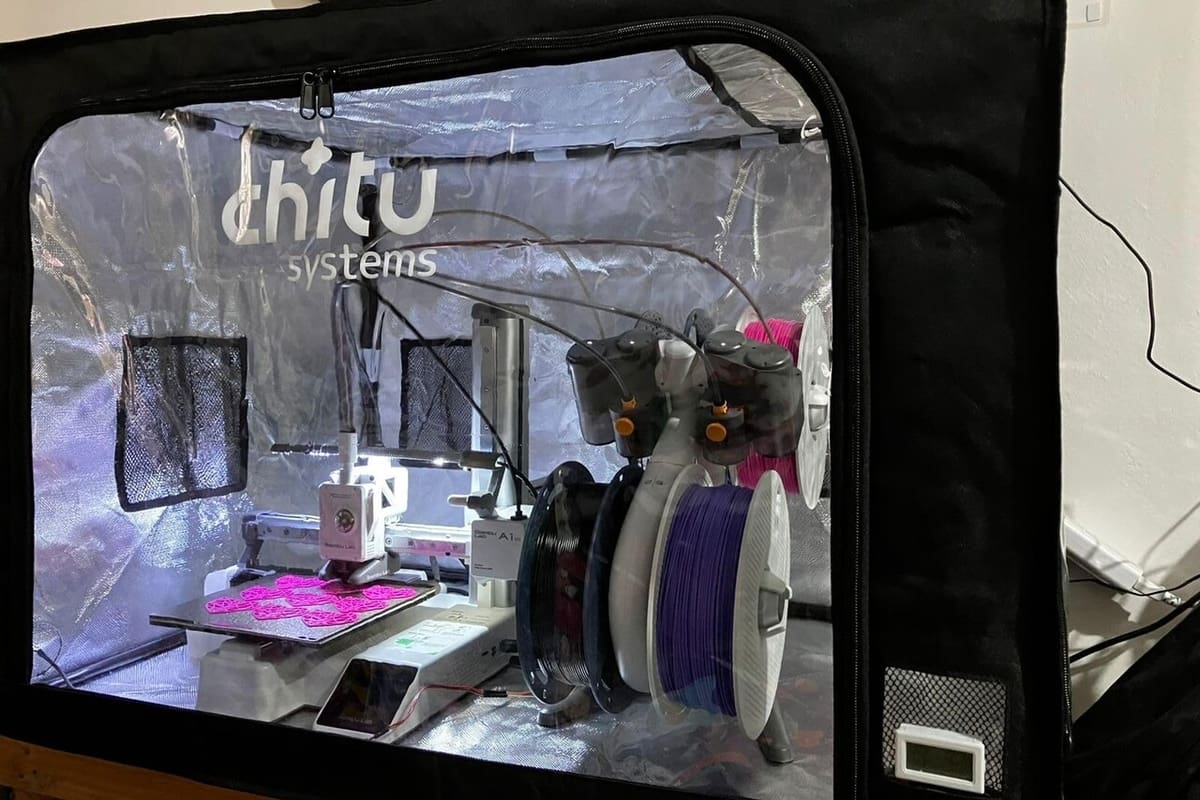
Following major manufacturers like Creality, Chitu Systems also sells enclosures with flame retardant material. This one is specifically for the Bambu Lab A1 and A1 Mini printers with their AMS Lite module. It’s quite spacious and has a large window and a small pocket with a hygrometer.
Although the manufacturer has specified compatibility only for the Bambu Lab A1 and A1 Mini, some reviews, like Ballistic Turtle’s, suggest that the space is quite limited for the full combo. Even with this limitation and a few criticisms of the hygrometer’s quality, most reviews express great satisfaction with a solution that the printer manufacturer itself does not yet provide.
And if you’ve modded your AMS Lite so that it sits on top of the printer, don’t worry. Simply changing the enclosure’s orientation will do the trick.
There are also a few alternatives, like a sturdier acrylic option and one for the AMS Lite to sit outside the enclosure, plus a few other upgrades, all within a budget-friendly range.
- Cost: ~$55
- Complexity: Easy
Repurposed
Sometimes you don’t need a lot of work, only a good price and a bit of repurposing! In this category, we’ve selected projects that take household items and upcycle them into 3D printed enclosures.
Exercise Mats
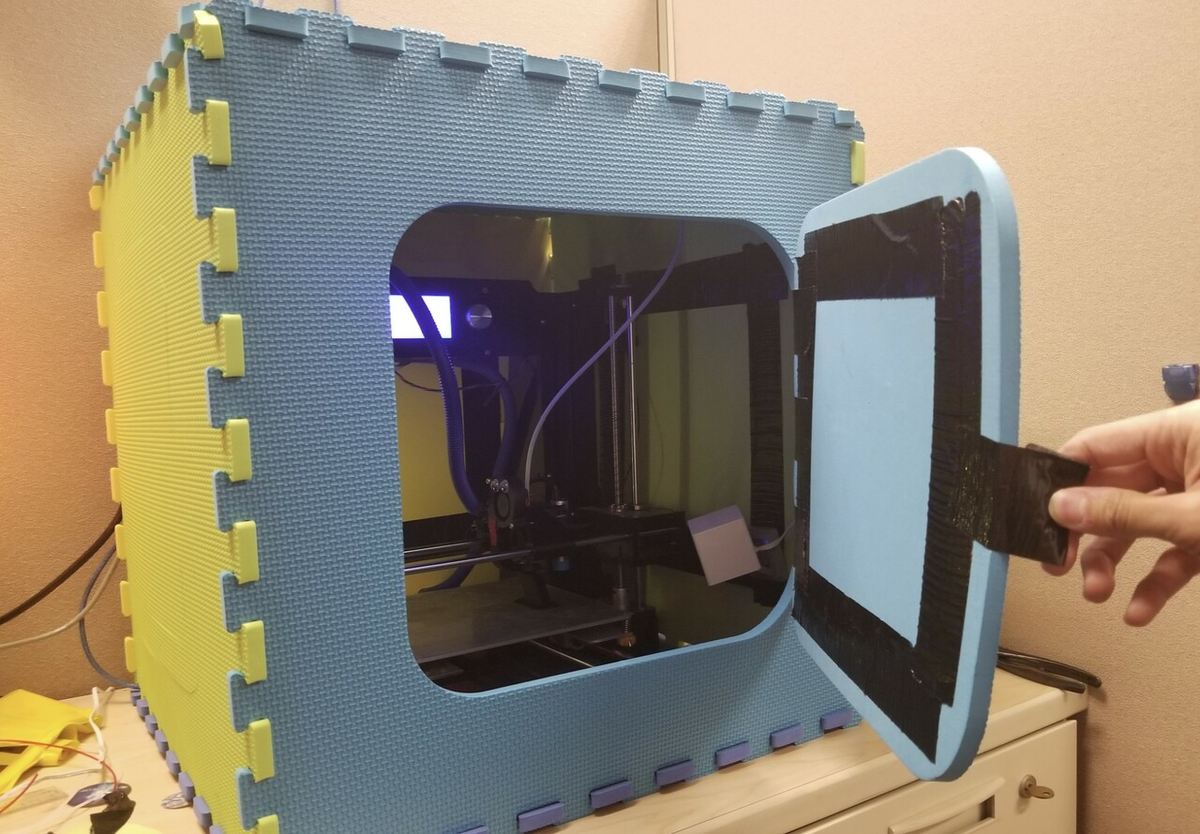
While not the most visually appealing solution, exercise mats, like those you’d use for an at-home gym, make for a terrific 3D printer enclosure. Most exercise mats have puzzle-piece edges that allow you to interlock multiple squares creating a foam cube enclosure. On that note, foam is actually a very effective insulator so trapping heat around the print space won’t be an issue, and you’ll be able to print high-temperature materials like ABS and ASA with ease.
Additionally, there’s practically no assembly required for this type of enclosure because all you have to do is line up the edges of the six tiles and squish them together. And, best of all, exercise mats are very affordable, with a typical 6-pack costing well under $50.
Of course, this type of enclosure comes with a handful of downsides, such as the lack of visibility and access to the print space. As seen in the image above, you can add a makeshift door to your foam cube enclosure with some scissors and tape. Apart from that simple modification, though, the upgrades and accessories for this type of enclosure are very limited.
- Cost: $20-$35
- Complexity: Easy
- Core components: Interlocking exercise mats
Cardboard Box
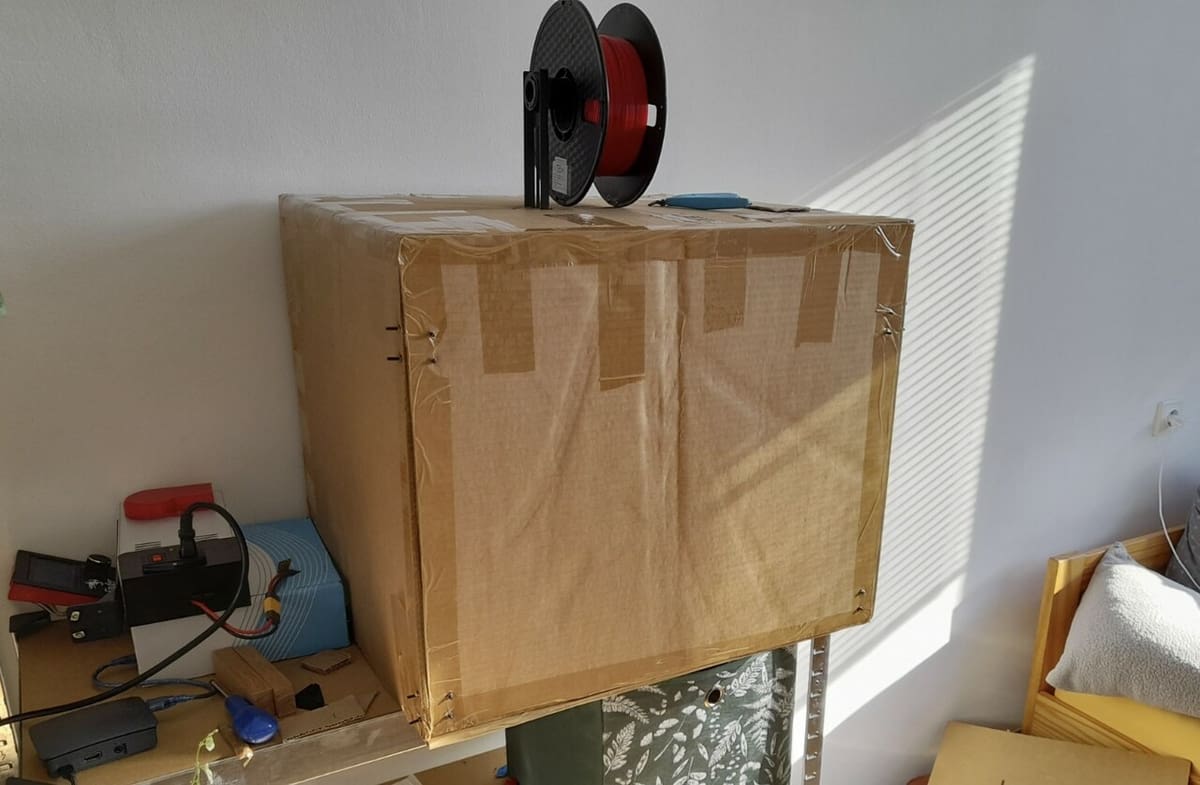
Chances are, you’ve got a couple of cardboard boxes lying around in your home that are just wasting space. You can repurpose those almost-trash boxes to build a simple and practically free enclosure for your 3D printer so you can print materials like ABS, ASA, and PC.
As you might expect, cardboard isn’t the best material for an enclosure because it’s not very insulative. However, as long as you make sure the cardboard surrounds the entire printer, you have no reason to worry because the paper panels will still keep the space around the machine warm while preventing air drafts from coming in.
Making this type of enclosure is a breeze; all you need is thick cardboard and some tape. Similar to the exercise mat option, the accessory options for a cardboard box enclosure are very limited due to cardboard’s lack of sturdiness. But, with some DIY-ing and some more tape, you can add a few helpful features to your enclosure like an access door and a spool holder.
- Cost: $0-$10
- Complexity: Easy
- Core components: Corrugated cardboard, tape
Storage Boxes
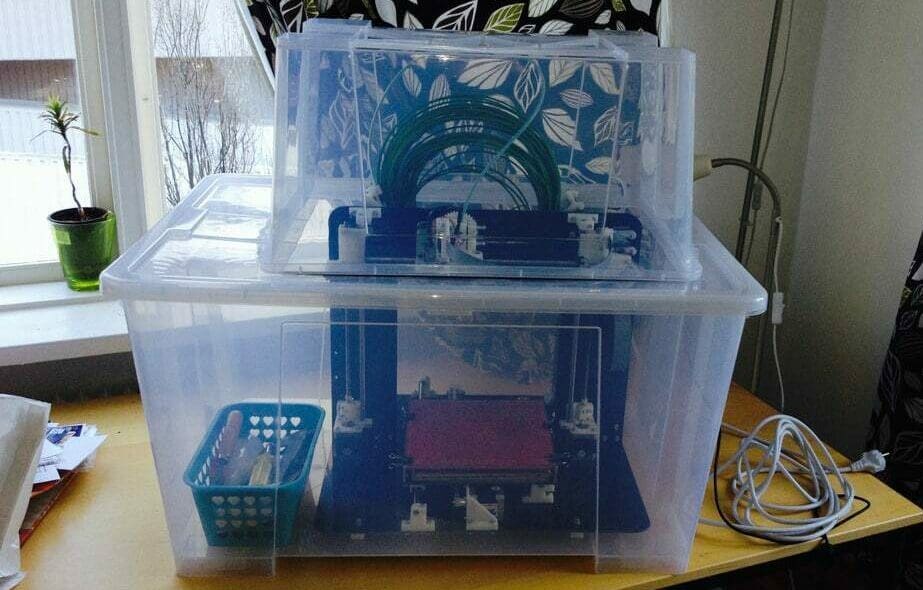
This is an option that’s easy to make and that’s adaptable to many sizes. It requires a bit of DIYing, but not that much: You only need some plastic boxes stacked together and you’re all set. Since they’re transparent, they won’t get in the way of checking the state of the print, and you can arrange them in the way that’s most comfortable in your space and convenient for you to access the printer.
There are many ways you could go about this, but for starters, we recommend following the Instructables tutorial posted by rjacobsson using Ikea plastic boxes. According to the creator, the boxes will cost you about $30 to $40. You’ll just need to cut a few holes and slits to accommodate the printer and its cables.
Due to the high temperatures that may be reached and because not all plastic boxes may have flame-retardant properties, it’s best if the enclosure isn’t a tight fit.
- Cost: ~$40
- Complexity: Easy
- Core components: Storage boxes, cutting tools
Plastic Jerry Containers
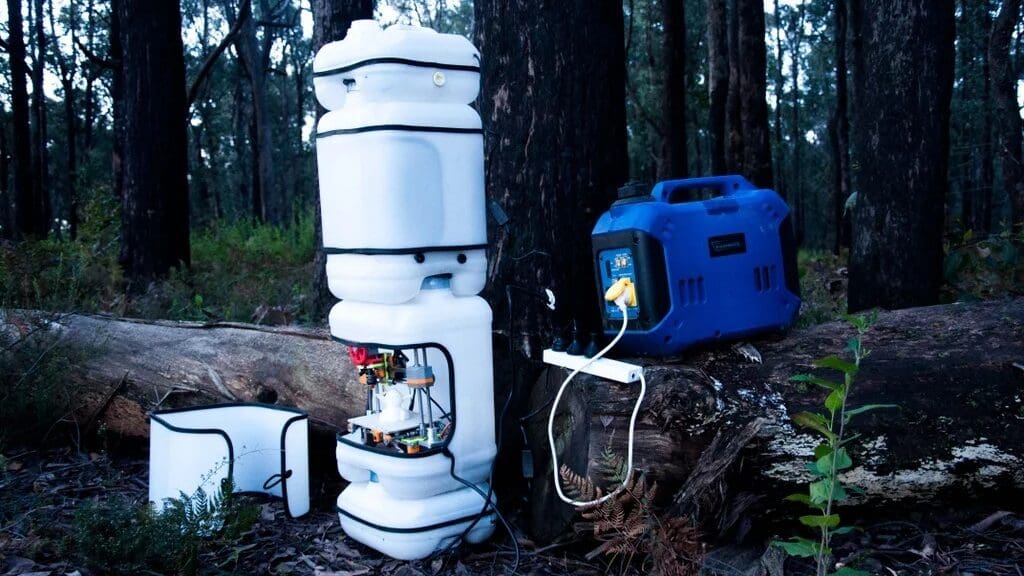
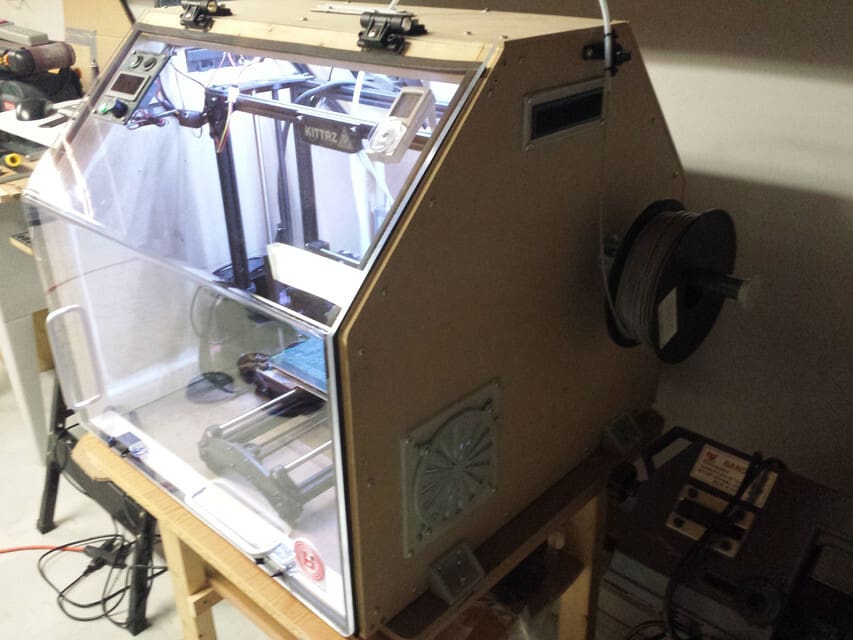
This project is made from upcycled bulk liquid containers, but it would be hard to tell with just a quick glance at the finished product. The creator, drac1d on Instructables, has gone into remarkable detail for the blueprints, explaining clearly and within technical design normativity.
Additionally, the design isn’t only functional but is also quite presentable despite being made from upcycled materials. The author doesn’t explicitly say the size of printer that fits, but according to the end result, a Prusa MK3 can comfortably sit inside this enclosure. This would be a great option for mini and small-format printers.
The final project can be as complex or as simple as you want thanks to the creator’s clever modular design. We classify it as easy because you don’t need a complex electronic system or woodworking tools to make it at home, although you will need to cut some plastic. For safety’s sake though, notice that the printer is kept on the bottom, and exercise a little extra caution while stacking and printing at high temperatures.
- Cost: ~$25
- Complexity: Easy
- Core components: 25-liter plastic containers, tubing, U-shaped rubber extrusion, fans, T8 threaded rods

DIY Projects
We’ve seen quick and easy solutions that just require a bit of smart purchasing, but what if you’re up to more of a challenge or want a more refined look?
The following selections are DIY projects that will take some time to buy, build, glue, and put together. The effort will pay off with the final result offering better protection, aesthetics, and in some cases additional perks such as remotely monitoring the print, better lighting, or temperature sensing.
Ikea Lack
The Ikea Lack table is one of the most popular DIY enclosure options, probably because it’s accessible, looks neat, and goes in tandem with the design of the printer. It’s often used to fit a Prusa i3 MK3S but will fit many different printers – you just might need to increase the height if your printer is quite tall.
The concept is straightforward: You buy two (or even three) Ikea Lack tables and stack them on top of each other to make a 3D printer stand. You can add plexiglass doors to seal the enclosure while maintaining easy access, and it’s easy to add filament guides and other accessories.
People have made 3D printed parts to avoid drilling into the tables themselves and to allow for easy assembly and disassembly of the system. An important aspect to consider is that putting the filament on top requires some way for it to get to the printer inside, so make sure that the design you choose accounts for the filament’s easy movement.
- Cost: ~$70
- Complexity: Intermediate
- Core components: Ikea Lack tables, plexiglass, 3D printed parts
- Designer: cisardom, Davycr, and many others
- Project page: Thingiverse
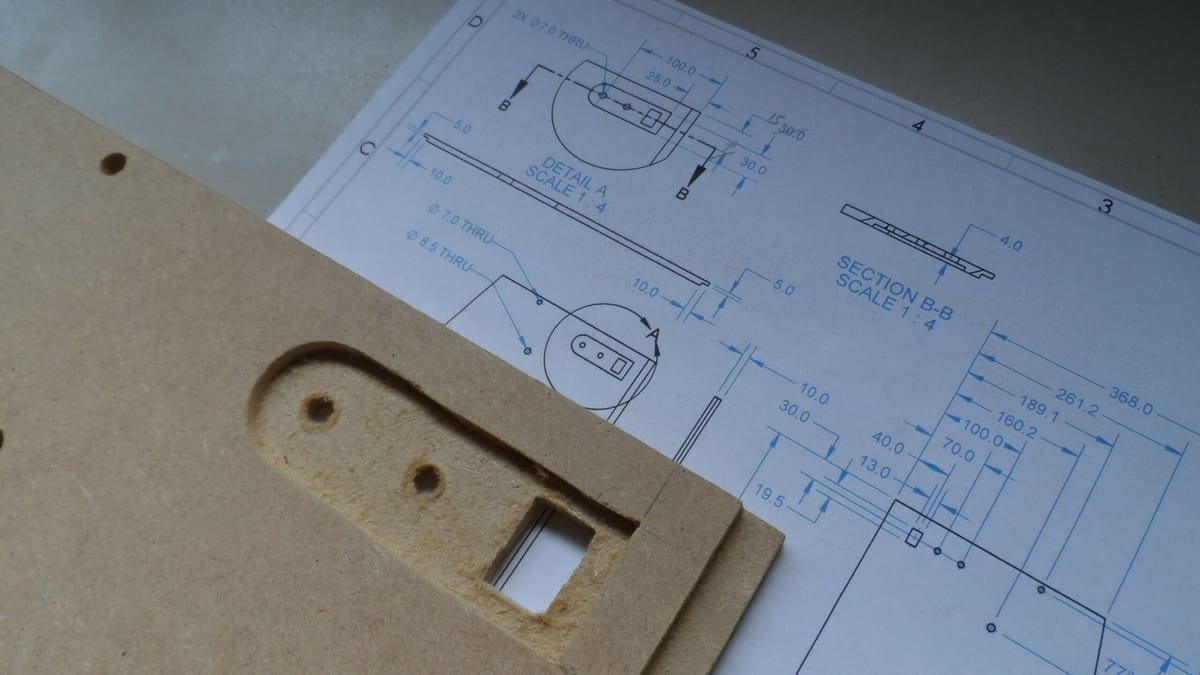
MDF
The main purpose of this boxy option is to keep the temperature regulated inside the enclosure space and to trap odors. The design is very easy to make as it requires only MDF, a door panel, and some 3D printing, and it costs less than $50, including screws and nuts.
The model has seven successful makes in Thingiverse. The only file provided is an STL, which, even though it doesn’t provide much information, is enough to export each view as DXF and cut it with a CNC machine.
- Cost: ~$50
- Complexity: Intermediate
- Core components: MDF board, door panel, 3D printed parts
- Designer: moczys
- Project page: Thingiverse
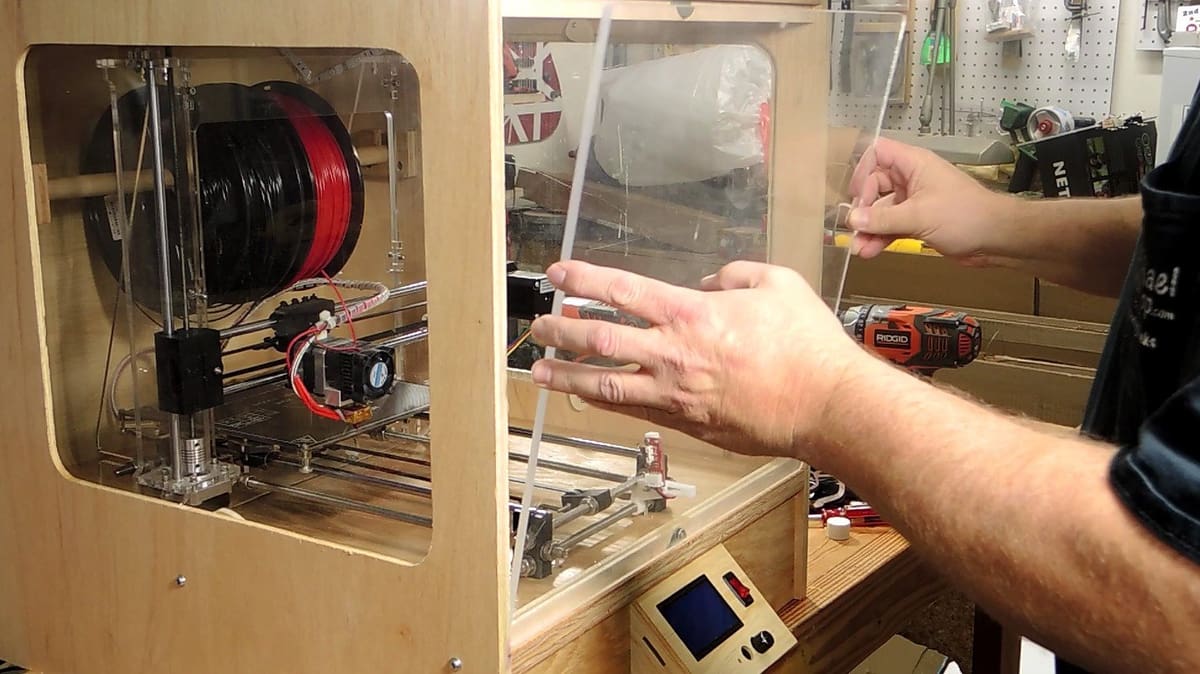
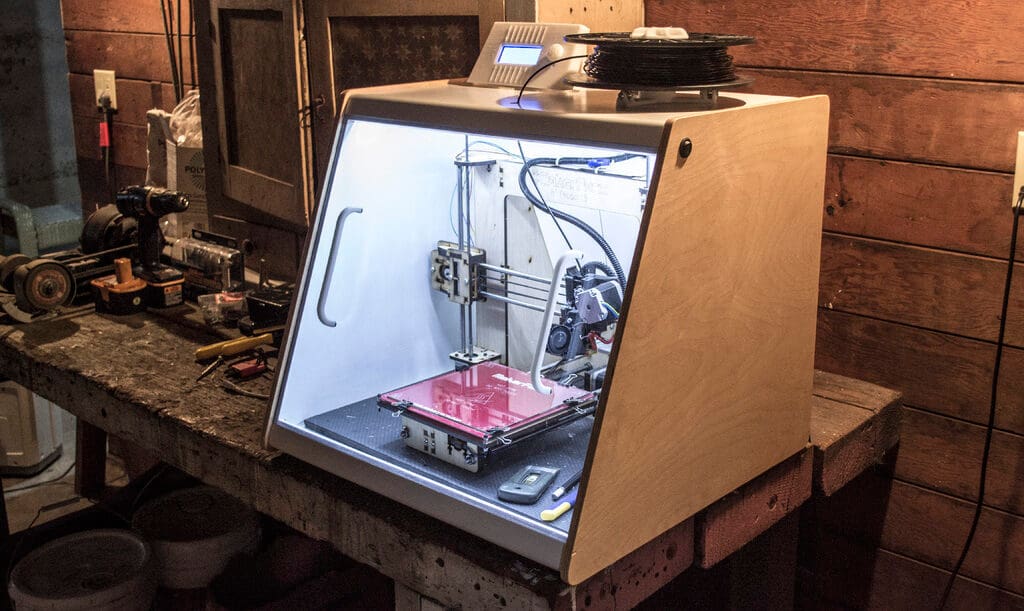
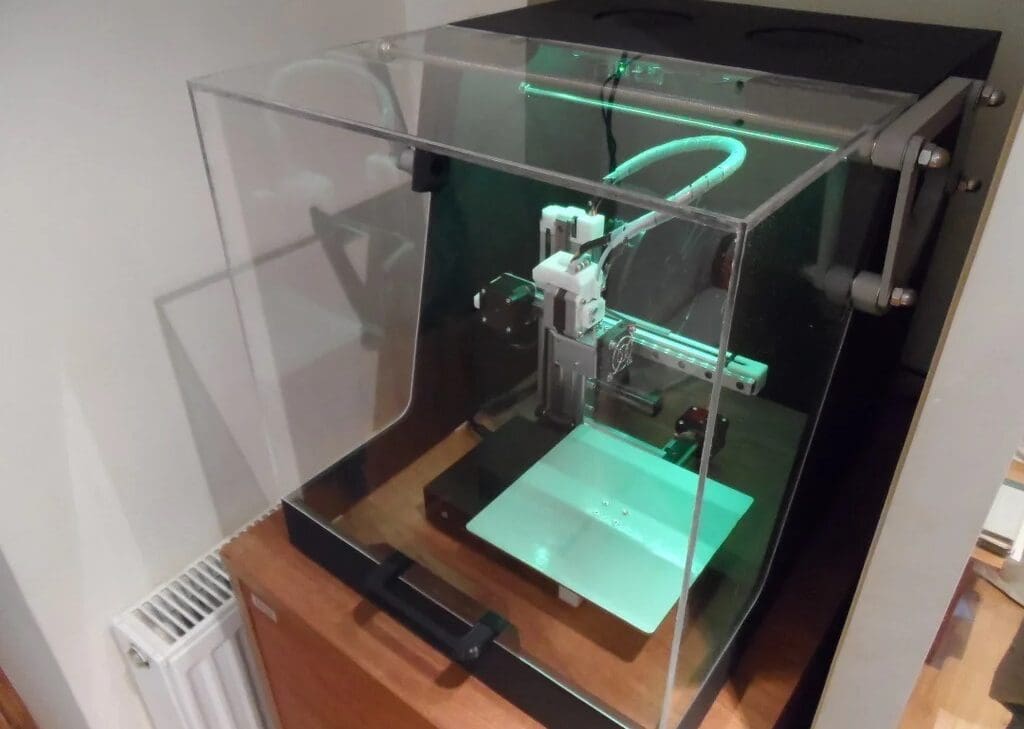
Full Visibility
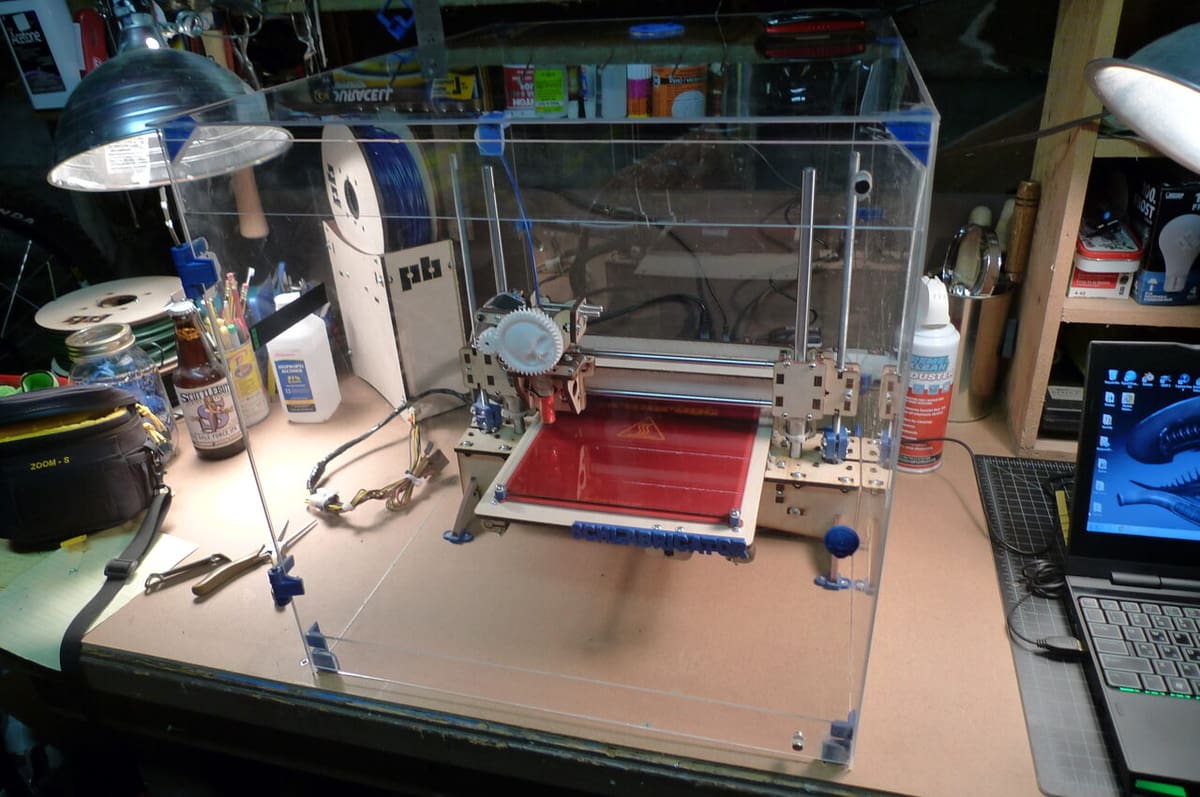
With this enclosure, your machine is protected from outside particles while ensuring maximum visibility. It’s easily customizable for any printer size as it only needs plexiglass, some 3D printed hinges, and some screws. Additionally, you may need some workshop tools like a saw or a CNC machine.
This design mostly provides protection from dust. It doesn’t include a ventilation or temperature tracking system, so it’s important to take that into account as, for example, working with ABS would require an additional hole with a fan to eliminate the toxins from the printing process. However, if your main aim is to keep the printer away from the hands of your kid or your cat, this enclosure will get the job done.
- Cost: ~$120
- Complexity: Intermediate
- Core components: Plexiglass, 3D printed parts
- Designer: schlem
- Project page: Instructables
Hinged
The opening mechanism of this printer could be made into a satisfying compilation. It uses 3D printed hinges to open very wide, allowing easy interaction with the printer. Thanks to the geometry of the hinges, the lid stays put in the open position without any counterweight or springs. A small wonder of engineering minds.
This design also includes a temperature control system, which is carefully explained in the instructions. The creator designed this setup with a reduced budget in mind. That being said, take into account that, for this enclosure system, you need the available space above your printer, so no upper shelves or stacking printer tools on top.
- Cost: ~$130
- Complexity: Intermediate
- Core components: MDF board, acrylic boards, PVC board, fans, 3D printed parts, 12-V DC power supply, Arduino Nano
- Designer: RBrayWood
- Project page: Instructables
Soundproof
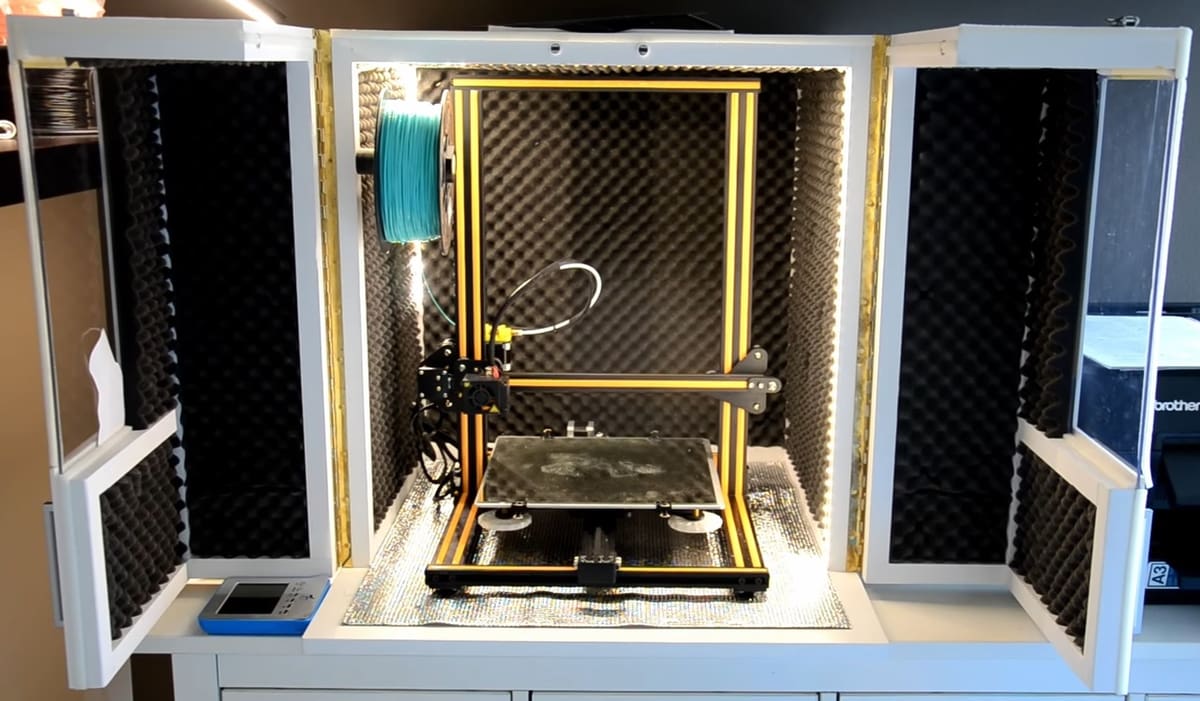
A fashionable option aimed mainly at noise reduction, this 3D printer enclosure was designed for a Creality CR-10, which is a rather large 3D printer, so if you have anything smaller than that, it should fit just fine.
The materials are very accessible, as it’s mainly MDF, isolation foam, and reflective foil. As you may gather from these materials, it isolates noise and even temperature. The result is a professional-looking enclosure with doors designed for easy access. The only downside may be the amount of space required to fit the enclosure, especially taking into account the size when the doors are open.
- Cost: ~$200
- Complexity: Intermediate
- Core components: MDF board, isolation foam, reflective foil, hinges
- Designer: Spare Time Shop
- Project pages: YouTube, Instructables
Wood Enclosure
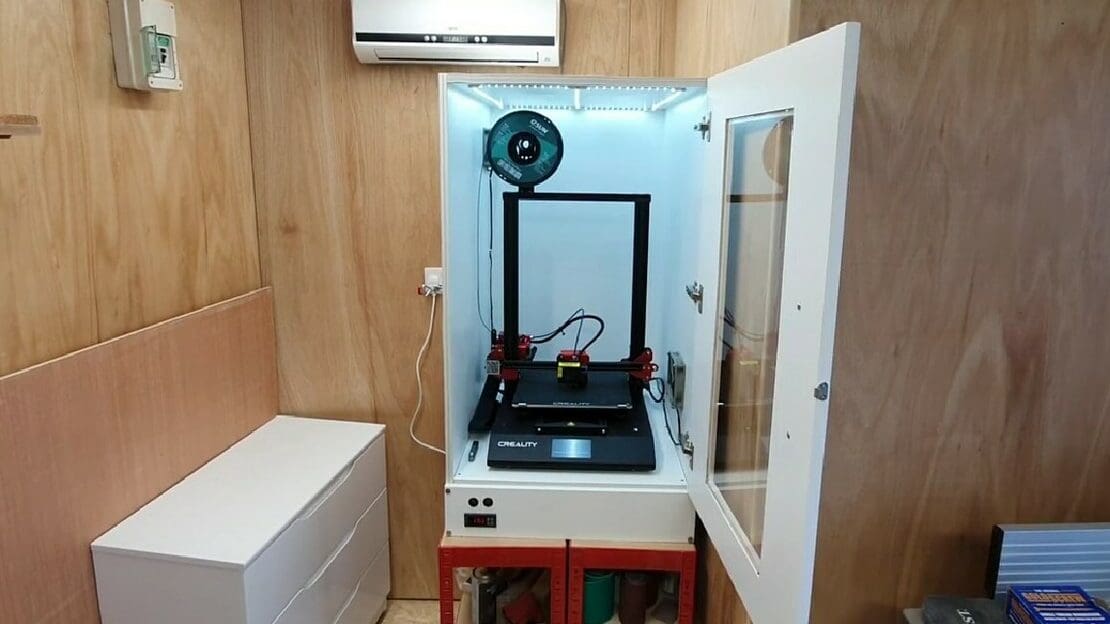
This enclosure is one for the views. The results look high quality, the machine is protected, and it matches most settings. Unfortunately, there are no written instructions to refer to for a tabulated list of materials or dimensions. Though, there is a video that walks you through the entire construction process in good detail, so you’ll have to follow along and take notes.
The enclosure design conveniently includes a separate compartment for electronics and tools. Making this yourself requires some basic woodworking skills and the exact measurements will be up to you and the machine you have. Therefore, we’ve classified it as an advanced project. However, it is nice that the creator presents a design that is already a fully functioning enclosure without progress or corrections to wait for. You’re all set to start with your own version!
PVC Foam
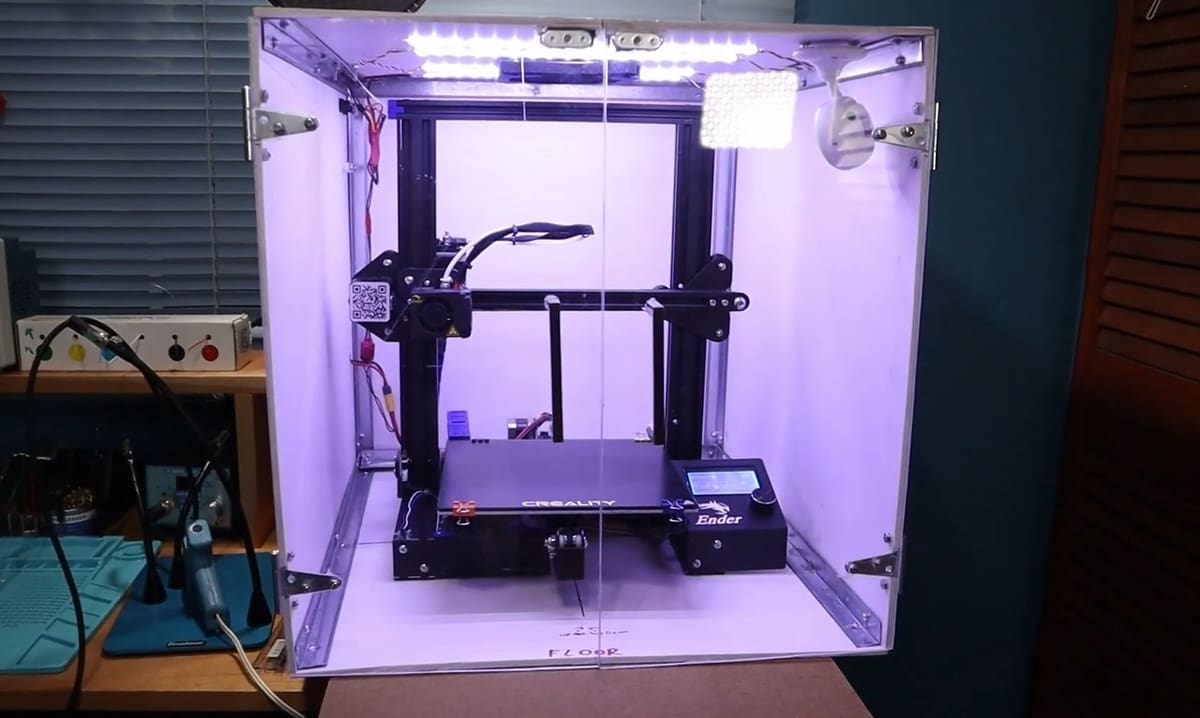
This enclosure option is designed to fit a Creality Ender 3, but you could fit similar-sized printers or easily adapt it to fit bigger machines. The structure itself is pretty easy to build as it consists mainly of PVC foam walls, but the project also includes some electronics to take it to the next level. Such additions include aesthetic elements, like LED lights, and safety elements, including a heatsink tube and fans to extract the hot air and gasses from the printing process.
Heads up: To assemble the parts you’ll need to solder, work with hot glue, and drill, among other activities. You may also need an extra set of hands to help you during construction.
- Cost: ~$150
- Complexity: Advanced
- Core components: PVC foam, plexiglass, hinges, LEDs, a fan
- Designer: Just Barran
- Project page: YouTube
DIY HotBox
Although the design may look complex, the results are worth it, and the creator has included a full and detailed construction manual for a road to success. The main materials needed are MDF boards, plexiglass, and a few electronic components. It includes a door to easily interact with the 3D printer, and it’s suitable to print many materials such as ABS or nylon.
Beyond protecting the machine with an enclosure, the design includes a ventilation system and temperature tracking sensors with a display, all of which are also fully explained in the instructions. If you’re up for a more sophisticated and challenging system, this one could be a great choice.
- Cost: ~$200
- Complexity: Advanced
- Core components: MDF board, plexiglass, fan, electronic components
- Designer: Jonathan Brazeau
- Project page: GrabCAD
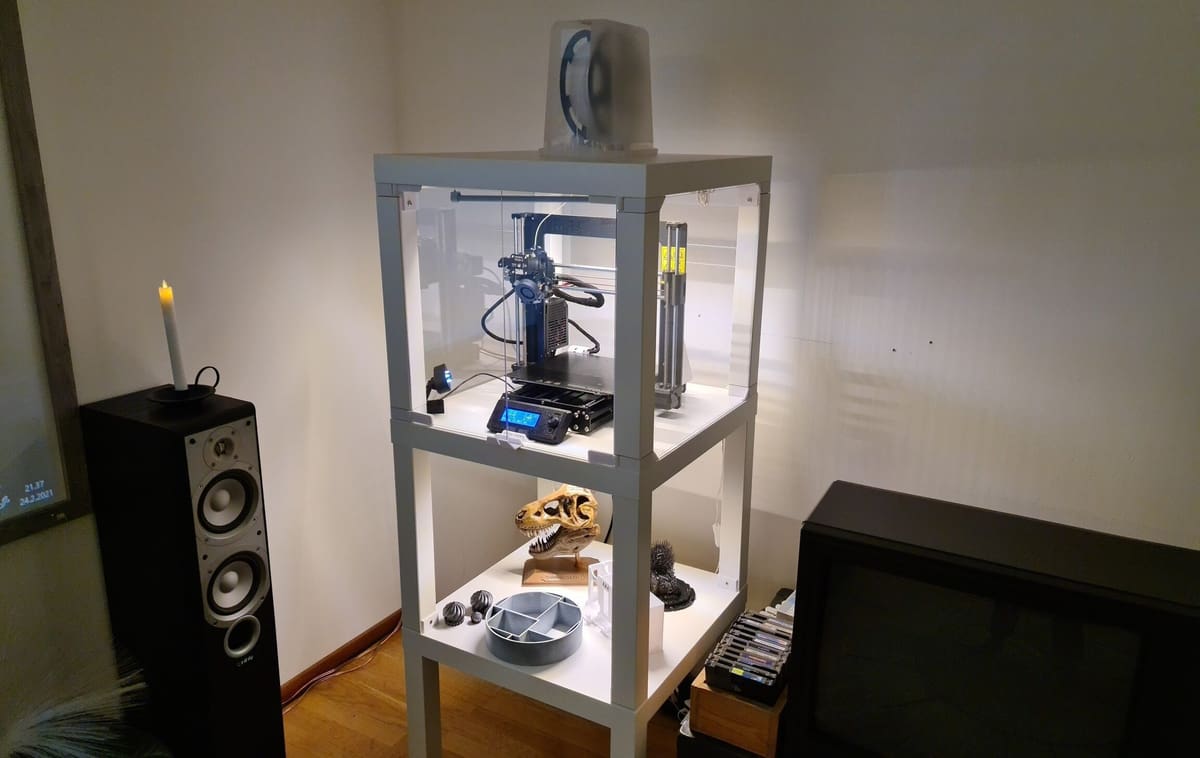
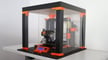
LED Lighting
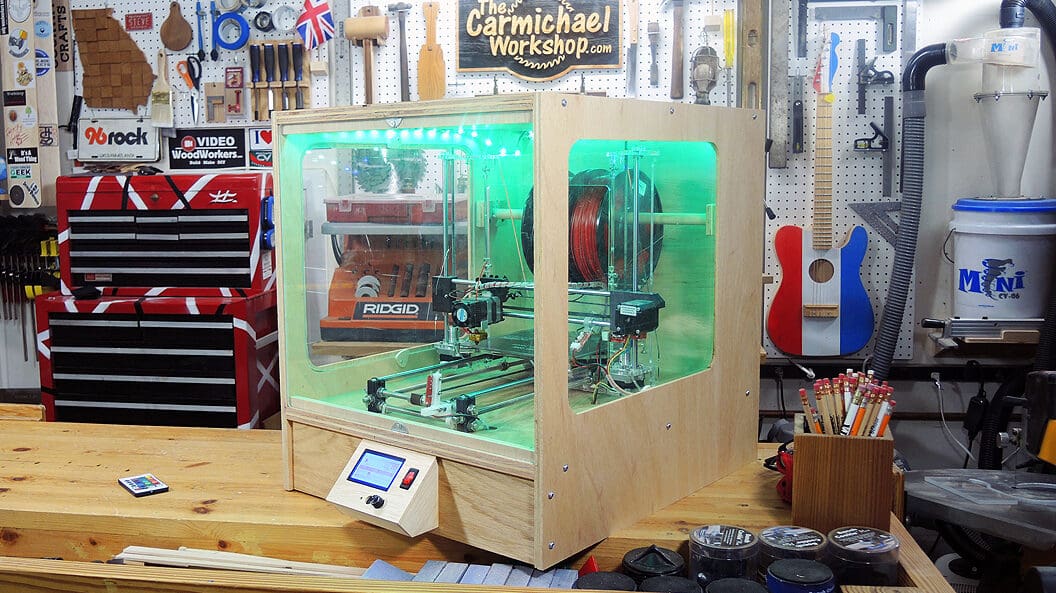
This is an inexpensive option that makes your printer look like a gaming PC. The option includes a slot for the display, so you can disassemble it from the actual machine and place it on the exterior, making it possible to interact with the machine without needing to open the enclosure.
LEDs are useful for lighting to get good time-lapses or pictures, and they make the machine look cool regardless of practicality.
- Cost: ~$100
- Complexity: Advanced
- Core components: Plywood, LEDs, plexiglass
- Designer: TheCarmichaelWorkshop
- Project page: Instructables
Bonus: Accessories
Last but not least, we’ll go over a selection of accessories for enclosures. If you’ve DIY-ed an enclosure instead of purchasing one, you might be missing out on some of the extras that can come built into complete systems. Staying true to DIY style, we’ve got a few enclosure accessories that you can build yourself to elevate your new printer enclosure!
Air Purifier
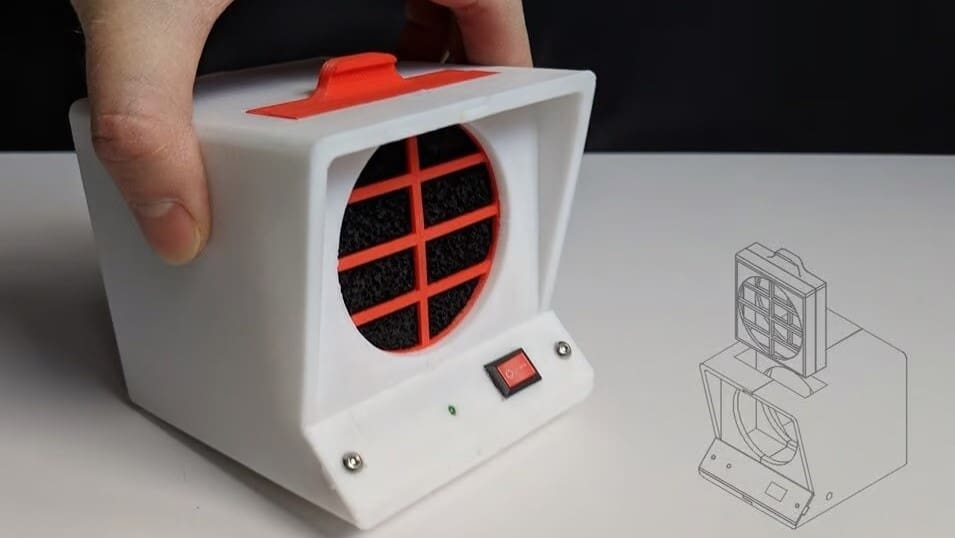
An air purifier, such as the Minimalist Fume Extractor created by rdmmkr on Instructables, is a great addition to your enclosure because 3D filament fumes can indeed be harmful if accumulated in a small space or inhaled over a prolonged period of time.
The principle is very simple: A fan takes in the air around the printer and passes it through the carbon filter. Its casing consists of 3D printed parts to keep everything fitted together for safety, efficiency, and good looks. Additionally, the creator has provided very nice and clear diagrams of the concept, assembly, and electronics.
Alternatively, you could opt for the Active Air Filter by Deep silence on Instructables which utilizes a HEPA filter with activated carbon pellets for those working with more dangerous chemicals or resin printing. The creator said it best, “The HEPA filter catches the particles, while the active carbon removes odors.” The HEPA filter used by the creator was cut from an inexpensive vacuum cleaner filter, which goes very well with our DIY theme.
Enclosure Heater
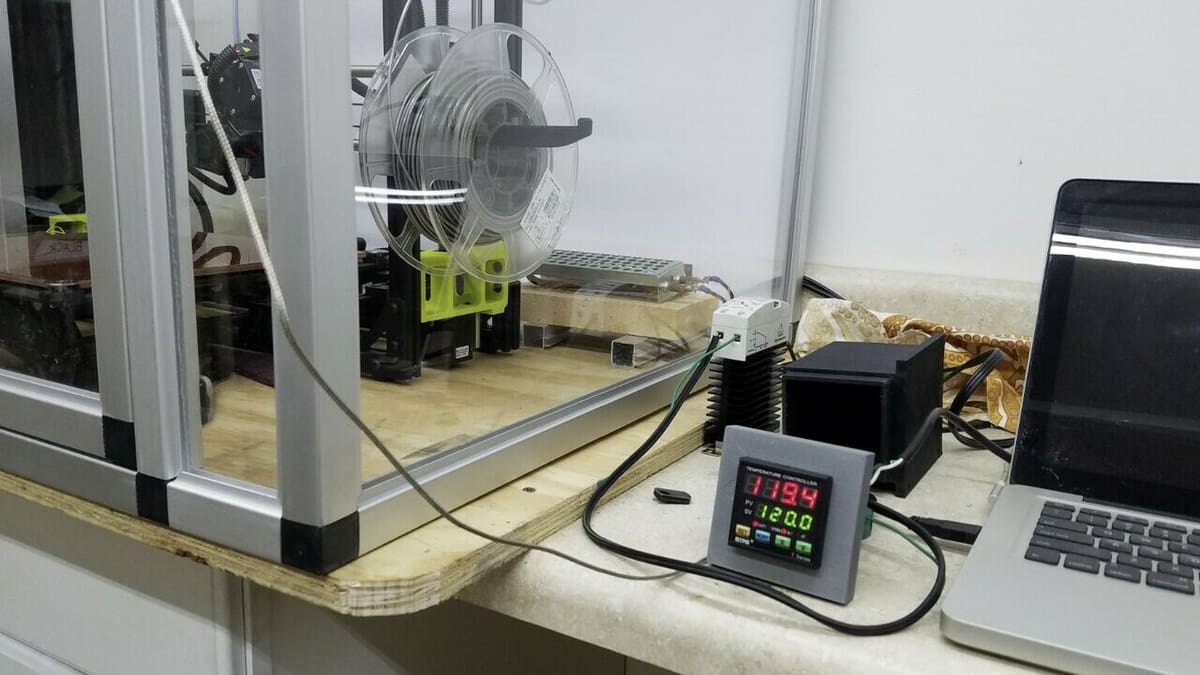
An enclosure heater is another great accessory you can add to your setup. An enclosure heater is essentially a mini space heater that ensures that the print space is always warm during the printing process to prevent issues like layer delamination. While enclosure heaters aren’t typically necessary to achieve high-quality prints, you should consider adding one to your setup if your printer is located in a naturally cold environment (like a basement).
It’s worth noting that there aren’t many enclosure heaters that are specifically meant for 3D printing, but you can make basically any generic space heater work. Some popular options include PTC space heater, Halogen lamps, and car heaters. You can check out our guide to enclosure heaters to learn more about this accessory and how it helps.
Fire Suppression

If you’re concerned about safety and fire risks, there are solutions that can give you even more peace of mind when leaving the machine to work for hours on end. There are devices capable of acting as “automatic extinguishers”, and they’re designed to deal with machines like lasers or 3D printers. When they come into contact with flames, they release a chemical powder or gas capable of suffocating the flames instantly.
Wham Bam’s The Cloud is a system that uses a chemical powder as the main agent, while BlazeCut’s T Series uses a gaseous agent. Although market availability and use may vary depending on your region and local legislation, they can help in long and tedious tasks that you cannot fully supervise. To install them, simply position them right above the printer or on the cabinet so that if the flame arises, it can easily reach it.
Although they’re a useful solution, it’s important to note that when activated, they usually release a relatively violent explosion. This can also damage some components or the enclosure and make a mess, but it prevents a major disaster or the complete loss of the machine. To install this on your printer, you need to print some support or adapter, and it’s not very difficult to find such designs in repositories like Printables or Cults, as seen above.
License: The text of "Best DIY 3D Printer Enclosures for Small Budgets" by All3DP is licensed under a Creative Commons Attribution 4.0 International License.
CERTAIN CONTENT THAT APPEARS ON THIS SITE COMES FROM AMAZON. THIS CONTENT IS PROVIDED ‘AS IS’ AND IS SUBJECT TO CHANGE OR REMOVAL AT ANY TIME.