13 Hidden 3D Printer Weaknesses Only a 3D Benchy Reveals

One tiny tug boat has remained the hallmark of a healthy 3D printer for years & one of the best ways to fine-tune your printer performance.
Swimming in piles of wasted materials and dozens of design iterations, Daniel Norée and Paulo Kiefe knew there must be an easier way.
It was 2015 and the pair was tasked with stress-testing the printers at Creative Tools, a 3D printing company based in Sweden. The job required printing multiple designs with specific details that are purposefully difficult to print accurately. Each model demanded long print times to find a single printing flaw, only for it to end up in the garbage.
That’s when Benchy was born.
Benchy — dubbed “the jolly 3D printing torture test” by its creators — is a single print that contains a number of difficult-to-print features, including:
- overhangs
- smooth curved surfaces
- holes (without supports)
- very fine details
The Benchy is also an ideal test for detecting:
- warping
- first layer issues (squishing
- inconsistent layer steps
- thermal management failures
- motion control issues
All this at a scale that doesn’t take much more than an hour for most printers to build. Not only does Benchy expedite the process of assessing a 3D printer’s capabilities, it results in an adorable, display-worthy print.
Benchy’s quirky character has won over many ardent followers and secured its position as a 3D printing icon, with its own website and a Facebook fan group that boasts over seven thousand members. Now ten years after its initial creation, it is thought to be the most 3D printed item of all time, and remains the most popular print on Thingiverse. Let’s look more closely at why it’s so useful, and how Benchy became canonized as the 3D printer savior.
13 Benchy Defects, Causes & Fixes
Default Settings
The genius of Benchy lies in its simplicity. At first glance, it’s merely a 60mm boat that prints in roughly an hour using standard settings: 0.2mm layers, 10% infill, 50mm/s extrusion speed. But every curve, angle, and surface serves a diagnostic purpose.
Benchy needed to fulfill several requirements to be successful; it must contain several variations of different shapes to reveal limitations in its printer. It must also be small enough to be completed in a reasonable amount of time — about an hour.
The default slicer settings are as follows, but users are encouraged to test and try different resolutions and settings to see what difference they make:
- Scale: 1:1 (unmodified in size, the 3D Benchy measures 60 mm from bow to stern)
- Layer height: 0.2 mm
- Infill: 10%
- Print speed (extrusion): up to 50 mm/s
- Print speed (travel): up to 150 mm/s
- Print nozzle diameter: 0.4 mm
These recommended settings have been stretched and pulled in every possible dimension by various projects, but they remain the established baseline used by the vast majority of benchmark prints.
The designer didn’t set out to create something that can test or calibrate every aspect of 3D printing, but rather to give designers a starting point when troubleshooting for common issues: layer inconsistencies, bed leveling, temperature settings, and speed. The 3DBenchy.com website has a very useful PDF file setting out the detailed design parameters it incorporates.
So how can Benchy best be used today? Let’s explore how to inspect the vessel and sail through some printer diagnostics.
Check the Overall Print Quality
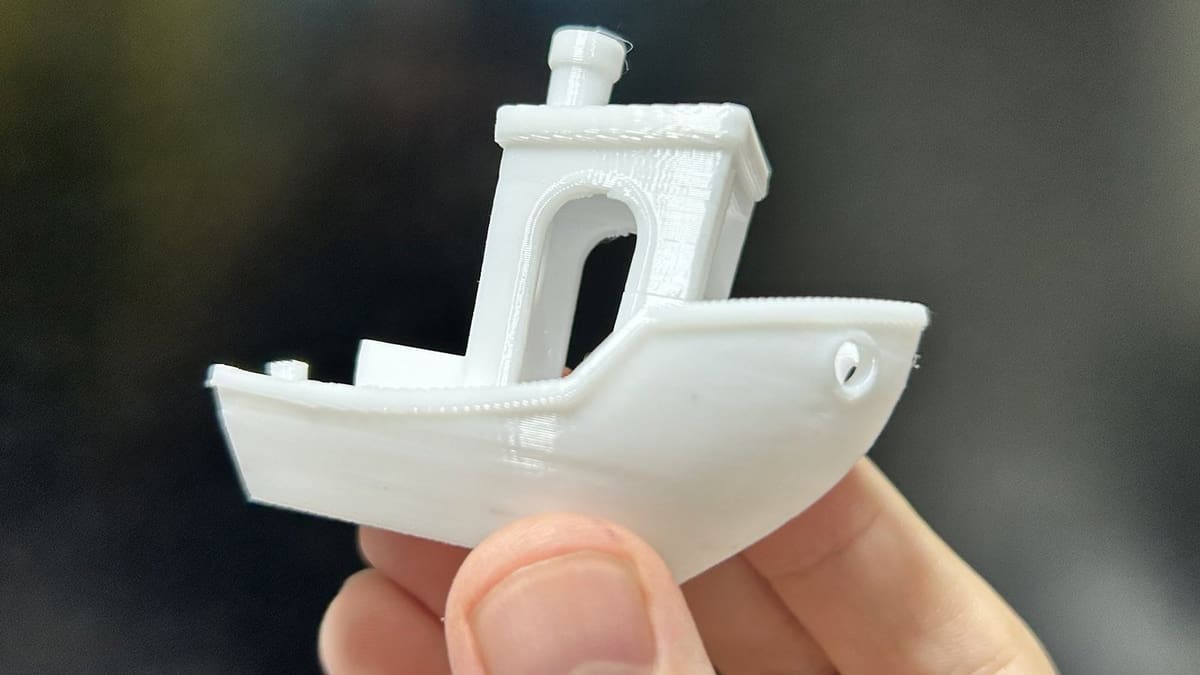
Our first check is for general quality and obvious printing issues. Step beck and assess your newly printed tugboat. Does it look like a boat?
Don’t expect absolute perfection: even flawless prints will display visible layer steps across the cabin roof. These horizontal ridges mark where each layer boundary occurs, creating a characteristic staircase effect. Be wary of impossibly smooth Benchy images online, as many are computer renders of the original model rather than actual photographs.
Watch for these warning signs that will give you a signal of some deeper mechanical issues:
- Stringing appears as delicate, web-like filament threads stretched between separate features—particularly noticeable around the deckhouse door and window frames. These gossamer strands typically indicate temperature miscalibration or inadequate retraction settings, though material properties and partial nozzle blockages also contribute to the phenomenon.
- Layer shifting manifests in two distinct patterns, each pointing toward different root causes. Horizontal misalignment—where layers slide sideways relative to each other—usually stems from loose belts, worn pulleys, or cooling fans positioned too aggressively near the print. More subtle vertical inconsistencies, where some layers appear thicker or thinner than others, often trace back to mechanical coupling problems in the Z-axis drive system. Direct-drive extruder users may find relief by repositioning their filament feed from overhead to side-mounted configurations.
Inspect the Hull
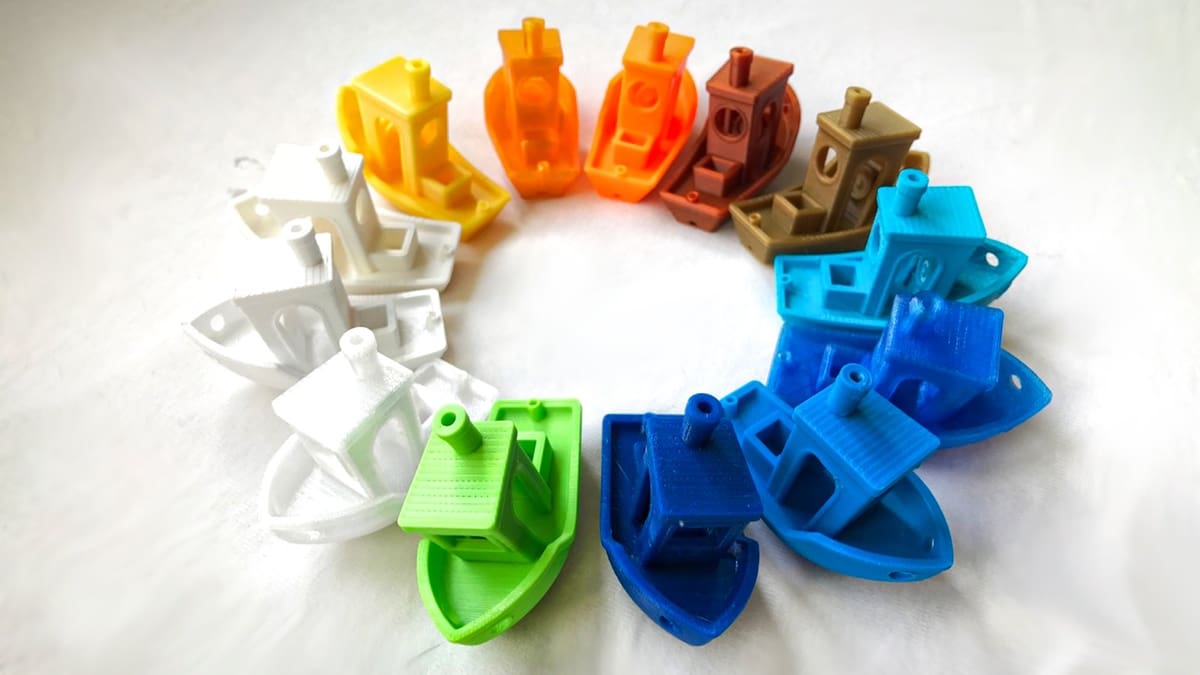
The hull serves as your printer’s canvas for demonstrating smooth curve reproduction and consistent layer deposition. Feel along its surface—it should feel uniformly rounded without prominent ridges or valleys. Remember that identical printer settings can yield dramatically different surface qualities depending on filament material and even pigment color.
Scan the hull systematically for these diagnostic markers:
- Excessive material buildup appears as random blobs, raised dots, or accumulated filament deposits scattered across the surface. Calibrating the extruder might help in this case. Slight imperfections, either randomly distributed or in a line, may also be due to Z-seam artifacts.
- Starved layers reveal themselves through consistently thin lines or visible gaps running along layer boundaries. Under-extrusion creates this undernourished appearance through multiple pathways: incorrect temperature settings, partial blockages, mechanical slippage in the drive train, or degraded PTFE tube performance in Bowden setups. If this is the case, start with our article on simple steps to fix under-extrusion to identify and remedy any problems.
- Repetitive surface patterns emerge as subtle waves or scale-like textures that repeat across the hull’s curvature. These effects likely indicate loose mechanical components somewhere in your printer’s framework—whether in the frame joints, extruder assembly, or drive belt system. The faster you print, the more pronounced these vibration-induced artifacts become. These issues are known as ringing and ghosting. There are some quick fixes that you can try, but for high-speed printing, you may need to consider advanced solutions such as input shaping.
Examine the Underside
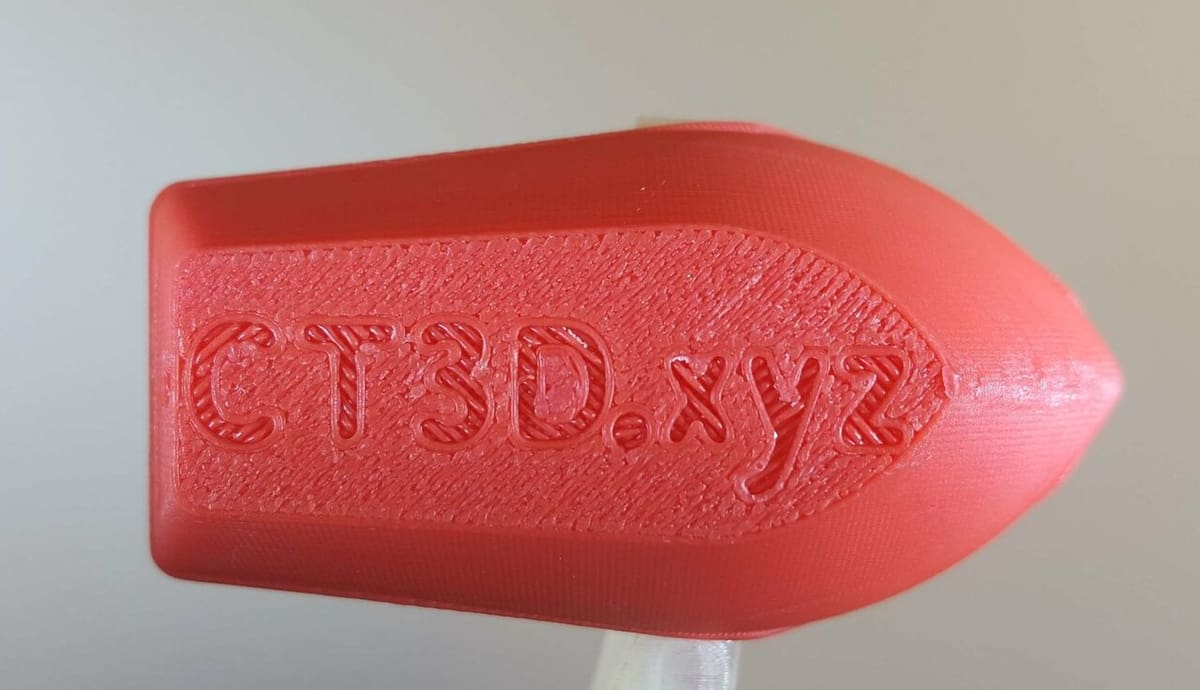
This is a great test of the quality of your first layer: flipping Benchy over will reveal the embossed “CT3D.xyz,” which should stand out against a smooth surface (or reflect the surface texture of the printer’s build plate). If this doesn’t look quite right, these are the most common first-layer issues you may come across:
- Visible extrusion lines with gaps between them indicate insufficient material deposition. Your nozzle likely sits too far from the bed, starving the initial layer of adequate plastic flow. Temperature settings below optimal ranges or slicer configurations with inadequate line width can produce similar effects. Check out our guide on getting a perfect first layer if you experience any of these issues.
- Crushed or illegible lettering signals the opposite problem—excessive material compression caused by nozzle height set too low, oversized line width parameters, or temperatures pushed beyond the filament’s optimal range.
- Elephant’s foot creates an unwanted flared base where the first layer spreads wider than subsequent layers, often accompanied by sharp ridges around the perimeter. This thermal expansion results from excessive bed or nozzle temperatures. When elephant’s foot appears unevenly around the print, suspect bed leveling inconsistencies rather than temperature alone.
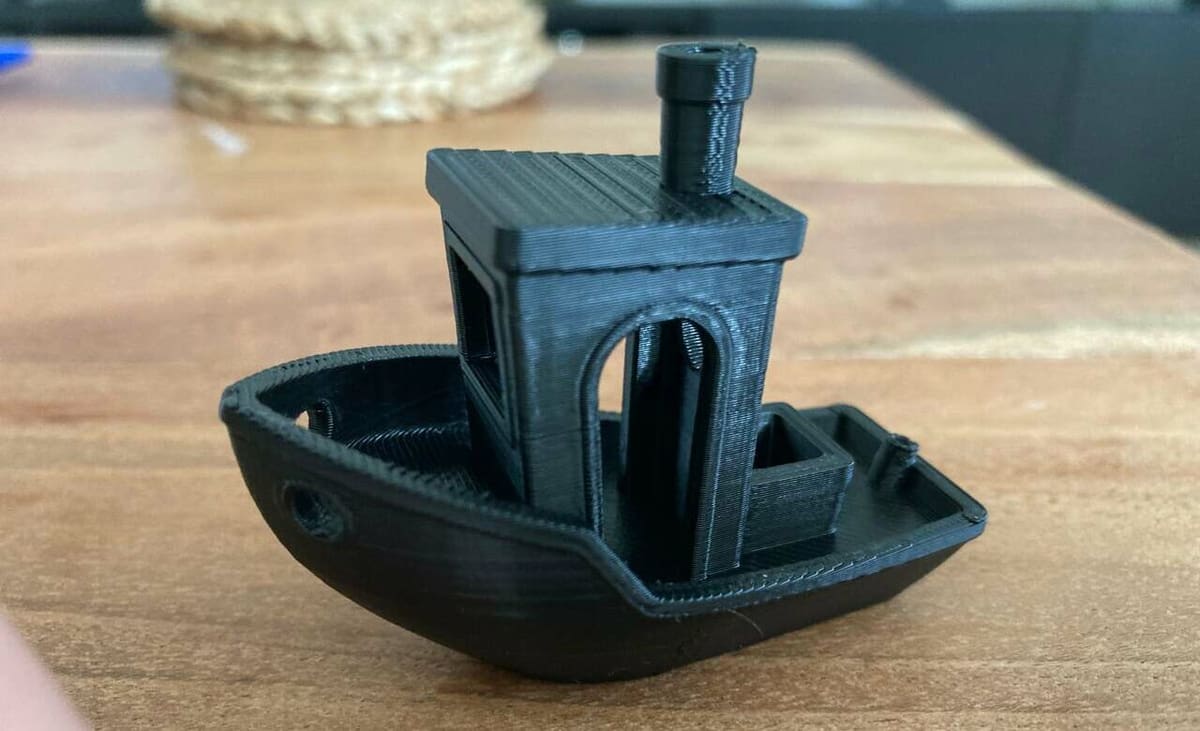
Check the Deck House & Deck Details
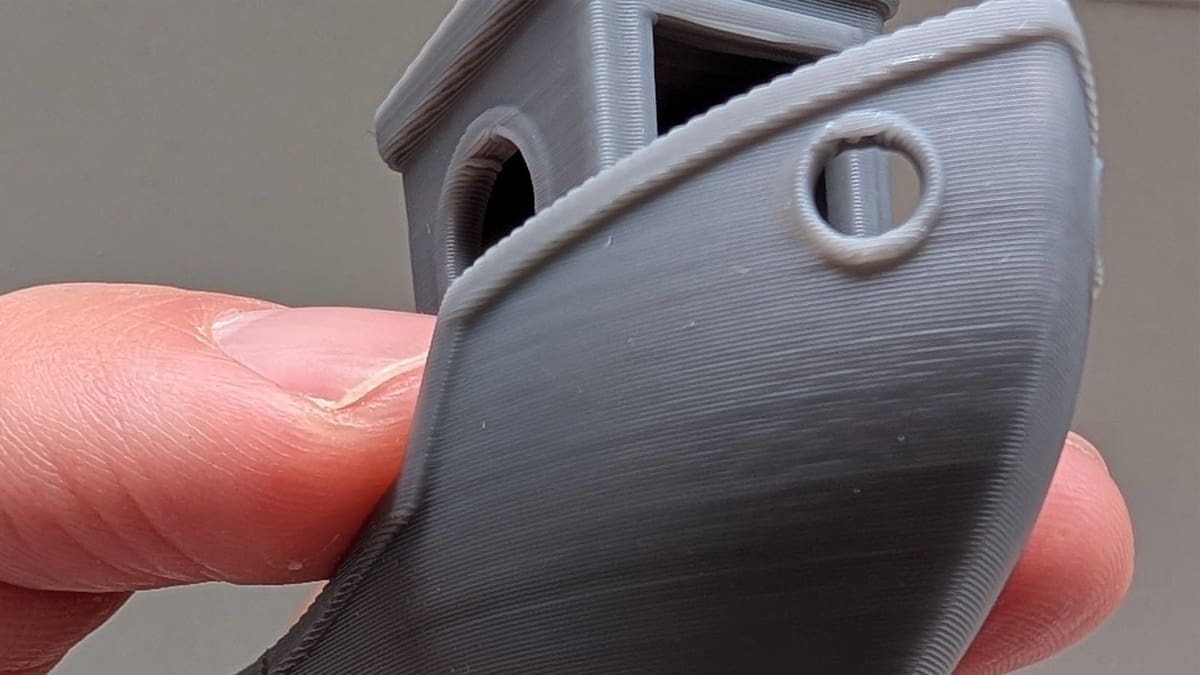
Next, look for how your printer handles detail, overhangs, bridging, and other fine features such as the writing on the back of the Benchy.
Look first at the top of the deck-house windows. The front (square) window should be straight and flat and the side windows should be cleanly arched.
- Sagging window tops reveal thermal management failures—insufficient part cooling, excessive printing speeds, or temperatures pushed too high for the material. The plastic simply cannot solidify quickly enough to maintain structural integrity across unsupported spans. Take a look at our article on tips and tricks for perfect bridges to identify ways the improve this part of your printer’s performance.
- Rounded or bulging corners indicate motion control limitations. When your printer struggles to execute sharp direction changes, corners become soft and imprecise. Reducing print speeds often provides immediate improvement, though firmware adjustments to linear advance, pressure advance, or acceleration profiles offer more sophisticated solutions.
- Non-circular chimney profiles suggest dimensional calibration problems—oval openings typically indicate axis scaling discrepancies that affect the entire print’s geometric accuracy. Indeed, the smokestack presents a unique challenge: rapid vertical construction where each layer builds immediately upon its predecessor. This compressed timeline amplifies cooling and speed-related issues that might remain hidden in other print regions.
- Vertical irregularities or quality degradation in the upper chimney reveal thermal bottlenecks. Without adequate cooling time between layers, the plastic structure begins to soften and deform under its own weight, creating the characteristic “slouched” appearance that signals thermal management failure.
Measure & Calibrate
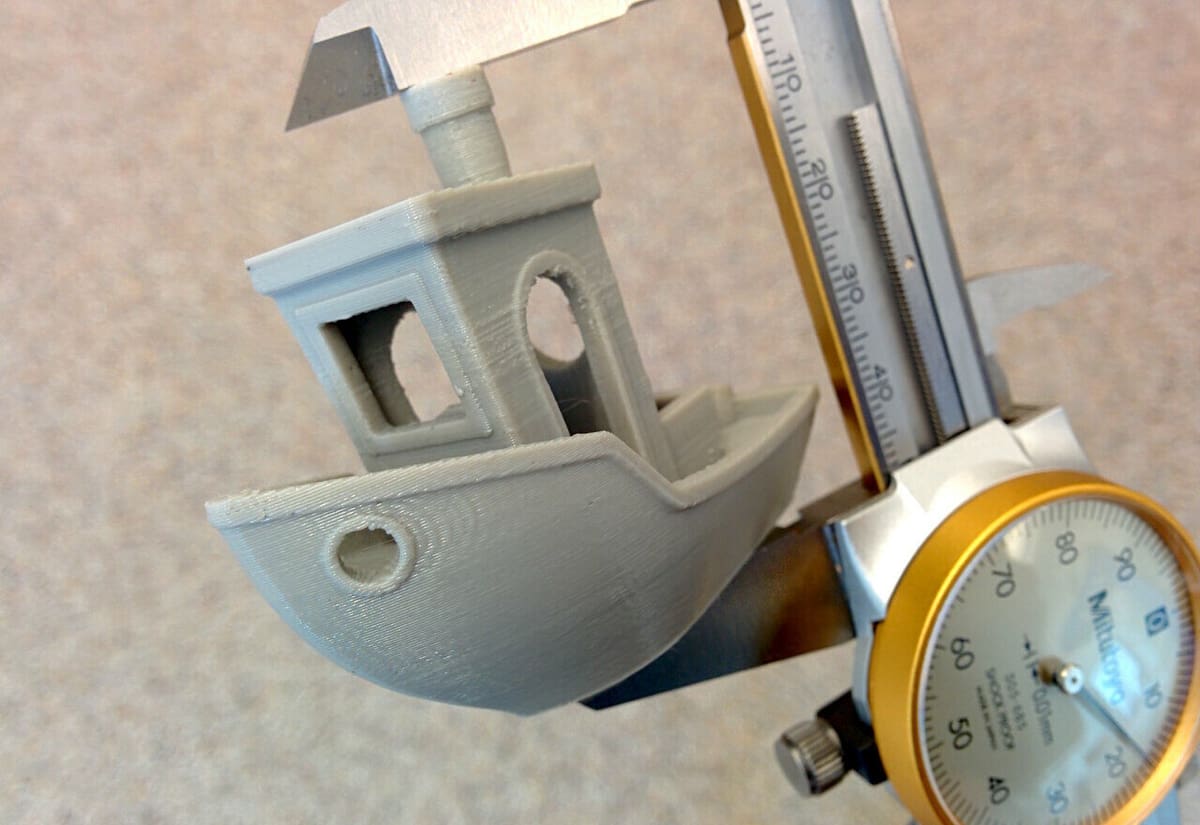
The 3D Benchy should be printed to the precise size it was designed. Although visual inspection reveals obvious flaws, precise measurement exposes subtle calibration drift that can compromise dimensional accuracy across all your future prints. It’s quite hard to measure Benchy with a ruler or tape, so a caliper is required or a digital 3D scan, if you have access to a 3D scanner. Detailed dimensions can be found in 3DBenchy’s “measure and calibrate” chart.
- Horizontal dimension errors (bow-to-stern dimension isn’t 60 mm, or beam-to-beam width isn’t 31 mm) indicate axis calibration discrepancies. When only one dimension deviates from specification, circular features like the chimney opening and flag post hole will appear oval rather than round. These scaling issues often trace back to incorrect “steps per unit” values in your printer’s firmware—the fundamental relationship between motor rotation and actual carriage movement.
- Vertical height discrepancies (base to tip of chimney isn’t 48 mm) present more complex diagnostic challenges. Minor variations might reflect first-layer compression or chimney printing quality rather than true Z-axis calibration errors. Significant height deviations, however, point toward the same steps-per-unit calibration issues affecting the horizontal axes.
When dimensional accuracy fails across multiple axes simultaneously, you’re likely witnessing systematic calibration drift—a gradual mechanical change that accumulates over time through normal wear and thermal cycling.
The Infamous Hull
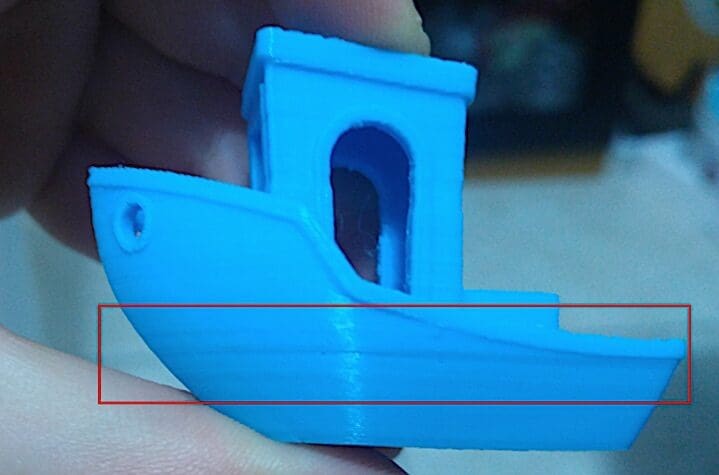
Like any icon, 3DBenchy has acquired its own mythology and surrounding debate. Many report that the original 3D Benchy STL files caused some slicers to report errors. Today, 3DBenchy.com claims that the STL file topology is “100% water-tight and contains no mesh errors.” However, several STL repair tools still report “degenerate faces” and make changes to the STL file. These are negligible and make no obvious difference to the resulting benchmark. Now, there’s also a 3MF version of the design available, which is smaller and free from any potential design confusion.
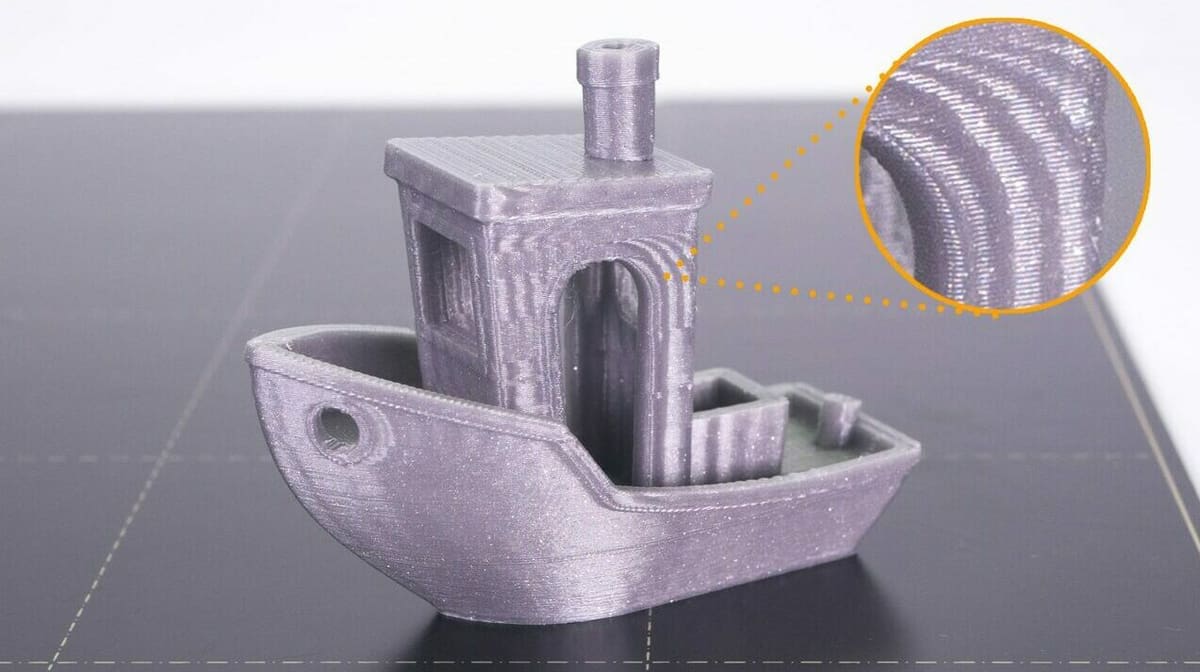
The most passionate Benchy discussion is no doubt the mysterious “hull lines” that can appear. These faint horizontal lines typically only show when the print quality is otherwise already quite good and have been the topic of debate for years. This Prusa article gives an excellent explanation for this strange phenomenon and what (if anything) can be done about it, highlighting how even subtle software changes can produce visible artifacts.
Some purists insist on precise dimensional accuracy—any deviation from the canonical 60mm bow-to-stern measurement signals calibration drift. Others embrace Benchy as a broader quality indicator, focusing more on visual consistency than micrometer precision.
The Future of Benchy
Recently, Benchy entered the public domain, ensuring its continued evolution and accessibility. The boat’s creators may have simply wanted to reduce workshop waste, but they accidentally created something that will live on as a tech benchmark as iconic as “Hello, World.”
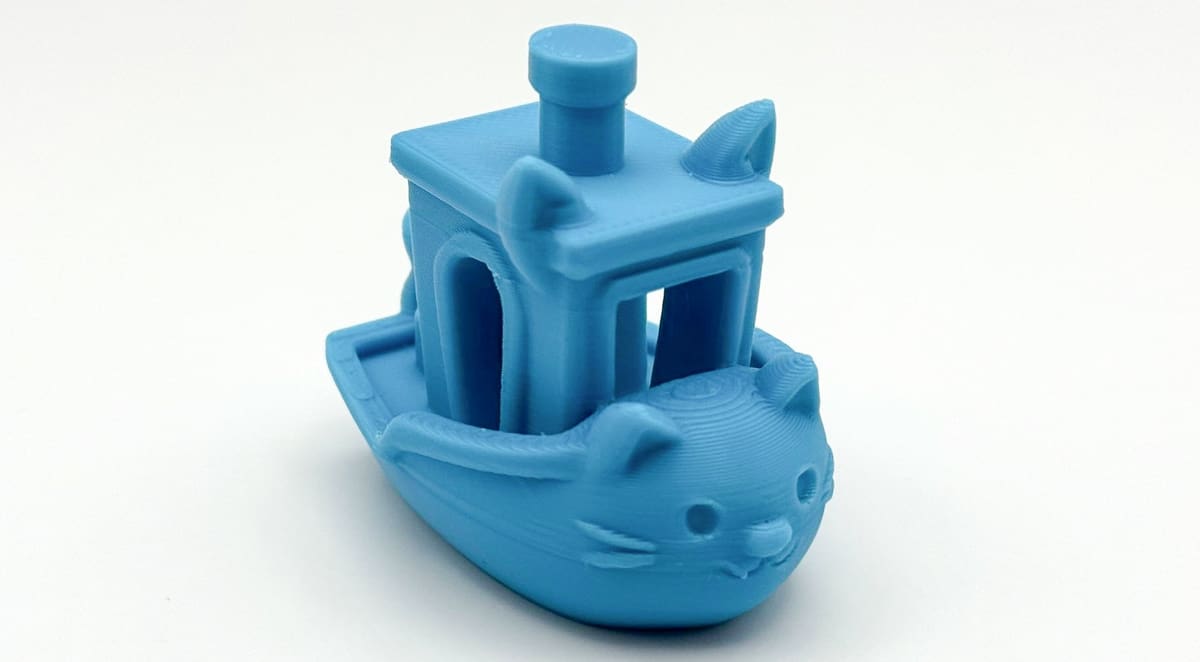
From a 3D Benchy Speedboatrace challenge that inspired 3D creators around the world to push the boundaries of printing speed, to microscopic Benchys around 40 μm long (1/10th the size of a human hair), Benchy has helped countless makers — amateur and professional alike — think outside the box. There are even prints to help you organize your accumulated Benchys – a useful point of reference for different materials, slicer settings, and even gauging the impact of printer aging.
A quick search of STL sharing sites will reveal dozens of Benchy-inspired designs, some designed for further printer troubleshooting, and others that are simply whimsical. As printing technology rapidly changes and improves, Benchy is sure to sail along with it.
You May Also Like:


License: The text of "13 Hidden 3D Printer Weaknesses Only a 3D Benchy Reveals" by All3DP is licensed under a Creative Commons Attribution 4.0 International License.