Raft vs Brim vs Skirt: The Differences (incl. Cura settings)

3D printing raft vs. brim vs. skirt: Learn the differences between these adhesion assistants and which to choose, using Cura as an example.
The first layer is what most people consider the beginning of a print, but it’s not always the first thing printed on the build plate. Most of the time, your slicer profile will have an adhesion assistant activated that is printed before the first layer in a print.
These adhesion assistants are meant to achieve two main tasks. The first is to check that your printer’s extrusion is working properly by laying out some filament before starting on your print. The second purpose is, in most cases, to help the first layer stay attached to the build plate throughout the print.
Adhesion assistants come in three forms: skirt, brim, and raft. Each is different in its structure and usefulness. In this article, we’ll go over each one, discussing what it is, when to use it, some advantages and disadvantages, relevant slicer settings, and more.
We’ll look into the main settings for skirts, brims, and rafts that can be modified in the latest stable version of UltiMaker Cura (version 5). We’ve opted for Cura because it’s the most popular 3D slicer program. Plus, its adhesion assistant settings are similar to those of other 3D slicers.
Skirt
In our first section, we’ll go over the skirt form of adhesion assistant. While a skirt doesn’t directly help adhere a model to the build plate, it primes the nozzle before a print and indicates how level the bed is. In the sections below, we’ll discuss more about skirts and how they are helpful!
What Is It?
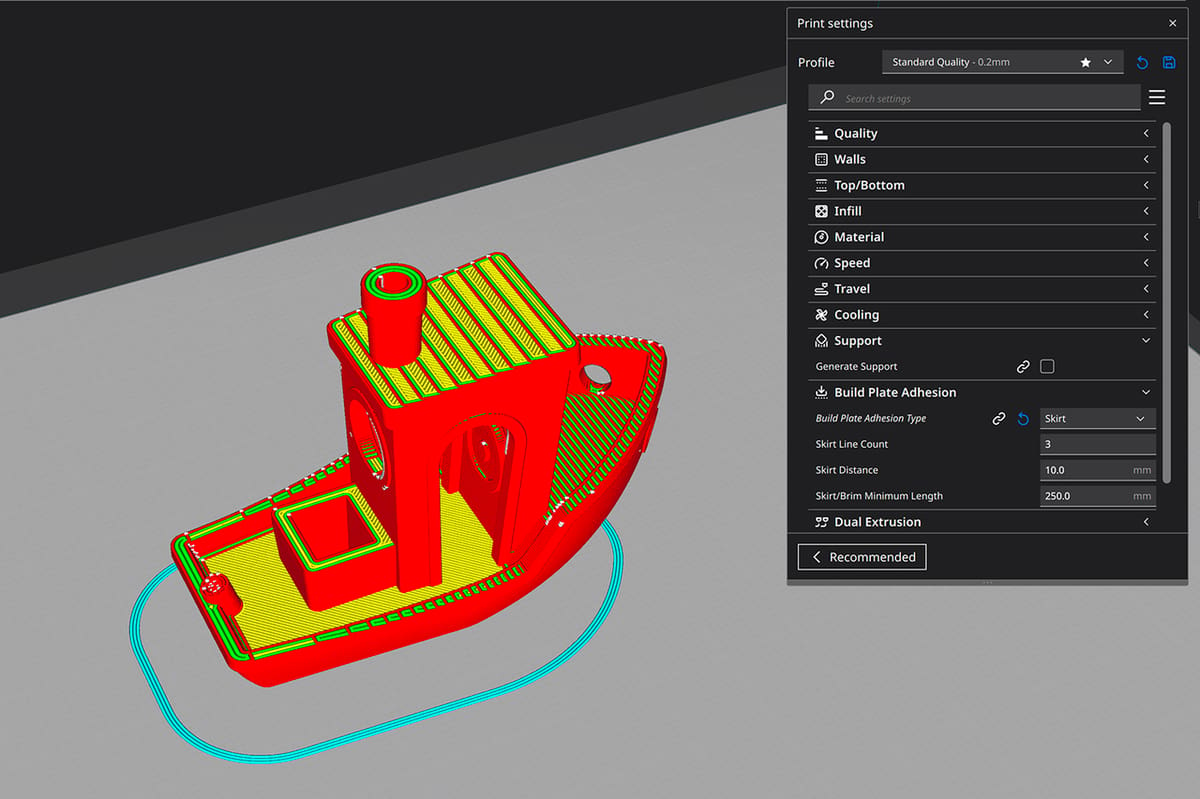
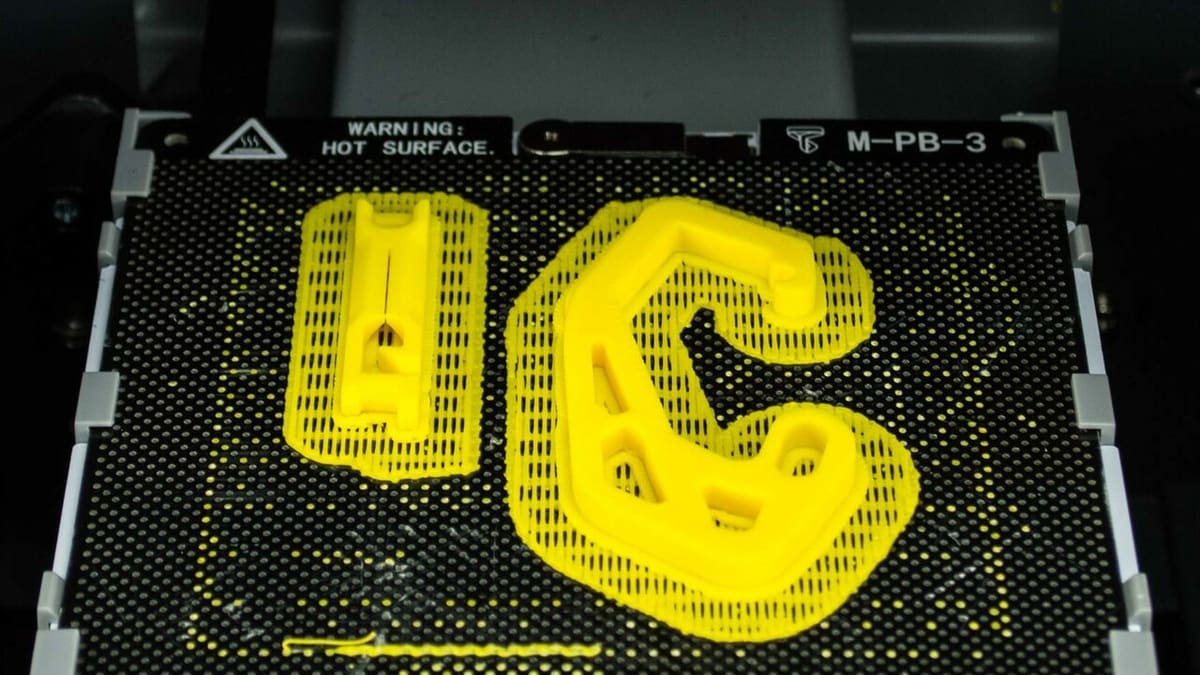
A skirt is the least intensive type of adhesion assistant when it comes to added print time, material consumption, and first layer adhesion. A skirt takes the form of a small perimeter that surrounds the area of a print but doesn’t connect to it or touch the first layer at all. It can be a few nozzle-passes wide (multiple lines), but it’s always only one layer in height.
Although we typically refer to a skirt as a type of adhesion assistant, it doesn’t actually provide adherence for the first layer like the other forms of adhesion assistants. Since it’s not directly attached to the first layer, it doesn’t expand the model’s surface area on the build plate. Therefore, it doesn’t improve the model’s print bed adherence.
Skirts, however, can tell you that your printer’s extrusion is working properly and are also a great tool to check whether your printer’s bed is level. Moreover, seeing the skirt come out okay will indicate that your nozzle isn’t clogged and that your printing area is pretty even.
When to Use It?
As skirts are more indicators of the printer’s readiness, we suggest using them for prints where you don’t expect bed adhesion to be a problem. This includes models with a large surface area resting on the print surface because these aren’t as likely to warp or have other adhesion issues.
You should also consider using a skirt when you’re concerned about material consumption and print time. A bad skirt will quickly indicate with very little material there’s a larger problem that may lead to print failure.
Of course, if you don’t need to be reassured that your printer’s extrusion is running smoothly and that your bed is level, you may not even need a skirt. However, it’s generally recommended that you always use a skirt (when you’re not using a brim or a raft) because it costs almost no time or material and can be quite beneficial.
Pros & Cons
Pros
- Least material consumption and waste (compared to other adhesion assistants)
- Least additional print time (compared to other adhesion assistants)
- Indicates that the nozzle is clear, the extruder is working properly, and the print bed is level
Cons
- Offers no direct bed adhesion support
- Consumes material and produces waste (compared to no adhesion assistant)
- Takes time (compared to no adhesion assistant)
Settings
As we indicated, adhesion assistants can be activated and adjusted in the 3D slicer, and there are a few related settings that control how a skirt is printed.
- Skirt Line Count: This setting controls the number of single-layer walls that make up the skirt. In other words, it controls the width of the skirt. The larger the value, the larger the skirt and the more time and material needed to print it. Cura’s default value of three works great, but you can lower it if you want to further conserve filament. Three is especially effective for confirming bed levelness because it gives you time to actually adjust knobs and confirm your tweaks.
- Skirt Distance: The skirt distance defines how far away the innermost line of the skirt is from the outermost line of the first layer. Raising this value will push the skirt further away from your print, decreasing the usable space on your build plate. The default value for the skirt distance is 10 mm, but if you have a larger print, you might want to decrease it (e.g. 5 mm).
- Skirt Minimum Length: This setting controls how long the skirt has to be to actually be printed. If your slicer calculates a skirt length smaller than this value, it won’t be printed. The default skirt minimum length of 250 mm works fine, but you can lower it for skirts on smaller models.
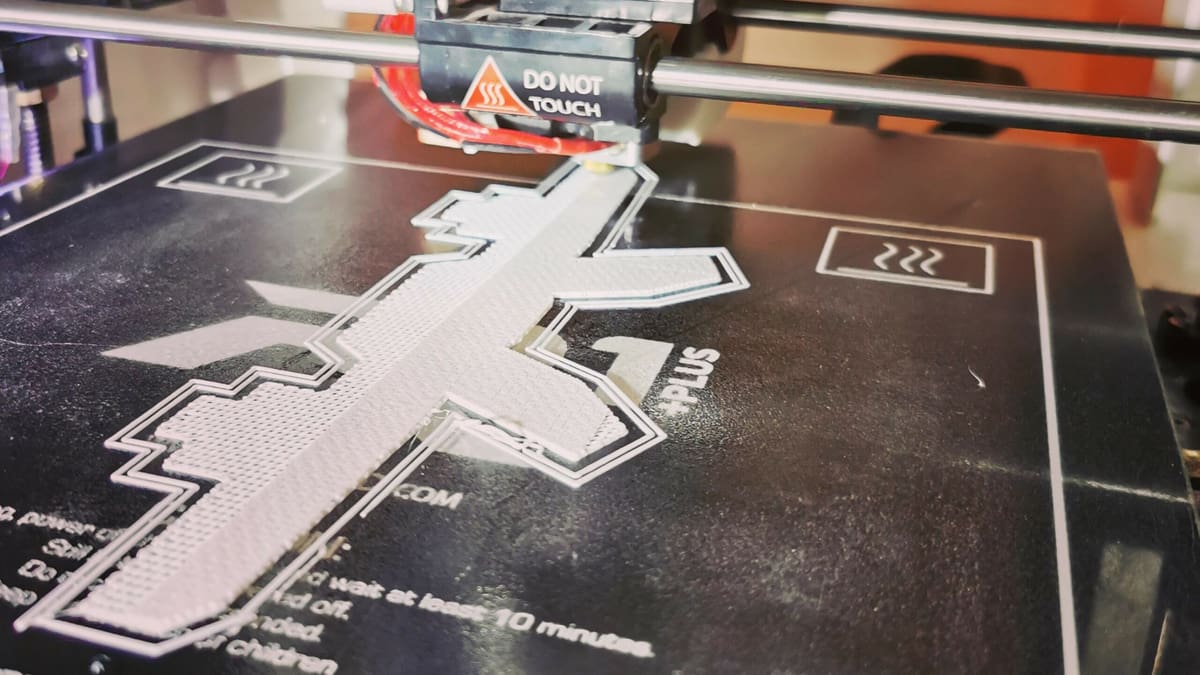
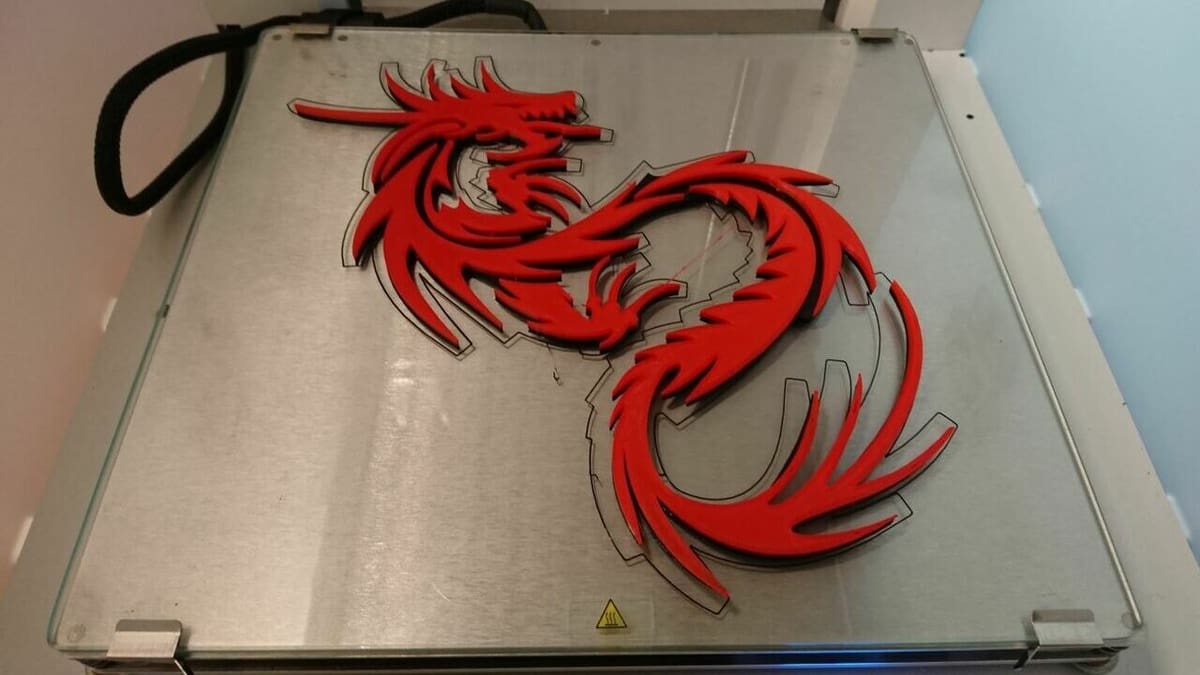
Brim
The second form of adhesion assistant is the brim. Brims lie in the middle of the three adhesion assistants, offering more bed adhesion than skirts but not as much as rafts. As with skirts, in addition to information about brims, we’ll go over the pros and cons, and the best settings in Cura.
What Is It?
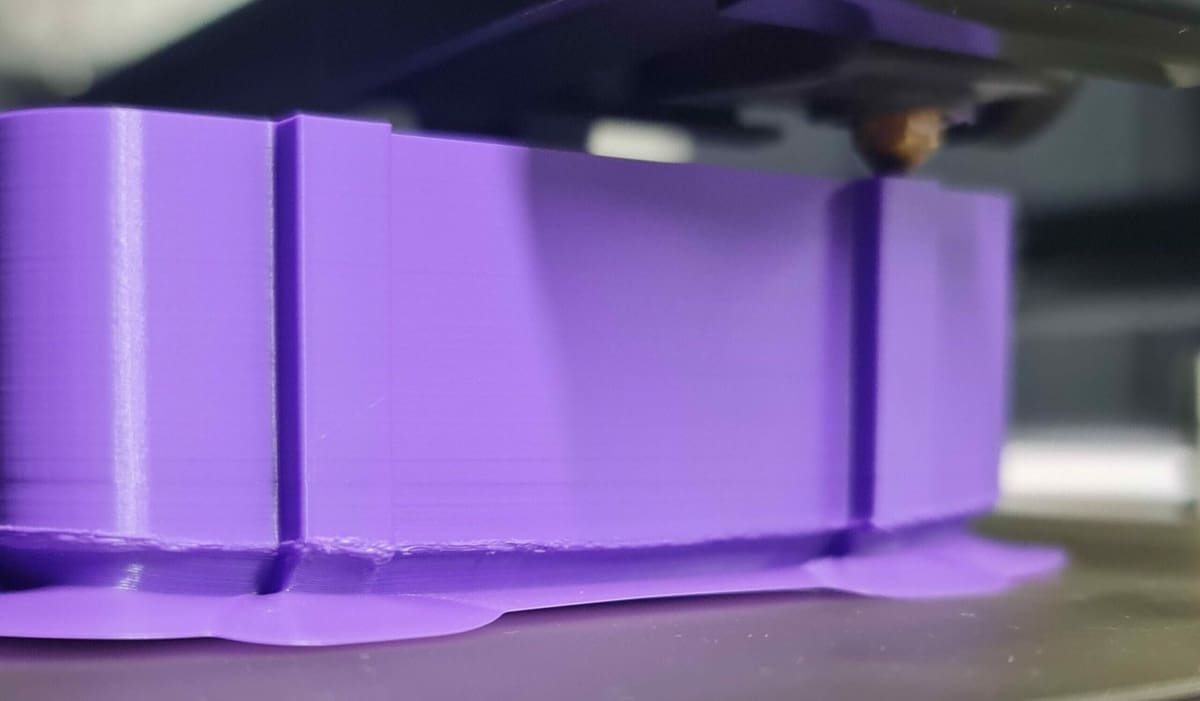
Brims are very similar to skirts in that they’re multi-line structures that are always only one layer in height and form a perimeter around the first layer of a printed model. However, unlike skirts, a brim is always directly connected to the first layer. This means that a brim actually expands the surface area that’s in contact with the print bed, helping keep a print adhered.
On top of helping with adhesion, brims accomplish the same things as a skirt, too: They allow you to check that your printer is extruding filament properly and that the bed is level in the areas where your print will occur.
While you can adjust the number of nozzle passes (lines), the width of the brim is typically larger than that of a skirt. This means that most brims increase a print’s material consumption compared to a skirt, but note that they still use less filament than a raft. The same is true for print time.
It’s important to note that, because brims connect to a model, you’ll have to remove them after a print is finished. While you can simply tug on the brim and tear it off, this usually doesn’t remove it all, and you might have to carefully cut it off the first layer of your print with a small blade. Even when you do this, though, the brim may still have altered the dimensional accuracy of your printed model. It’s worth experimenting with different tools, such as a deburring tool, which is often used. Sanding might also be helpful.
When to Use It?
Because a brim is like the Goldilocks of adhesion assistants, it’s often considered the best overall choice. It provides some bed adhesion while still keeping material consumption and print time relatively low. As such, we suggest using a brim for models that are susceptible to bed adhesion issues (e.g. warping), such as large flat-bottomed models with corners. Using a brim for these types of prints will help keep them stuck to the bed while keeping filament usage and waste low (compared to a raft).
However, because brims directly affect the dimensional accuracy of the area of the first layer of your print, you might want to avoid using them when the accuracy of the printed model is important. This is usually the case for functional prints that are designed to be assembled with other objects.
On another note, you might also want to use a brim when you want to have a prettier print bottom rather than a rougher texture like the one you might see when you use a raft. Moreover, with a brim, your model’s bottom layer will match the texture of your build plate. So, if you’re printing on a glass bed, the model will have a very smooth bottom.
Pros & Cons
Pros
- Moderate material consumption and waste (more than a skirt, less than a raft)
- Moderate additional print time (more than a skirt, less than a raft)
- Provides great bed adhesion for the first layer of prints
- Indicates that the nozzle is clear, the extruder is working properly, and the print bed is level
Cons
- More material consumption and waste than a skirt
- More print time, compared to a skirt
- Potential issues with printing the brim (e.g. overlapping brim lines)
Settings
Lastly, we’re going over a few of the common slicer settings for brims. For consistency with our section for print settings for skirts, we’re using the latest version of Cura for the specific settings, but as noted, they’re very similar to the ones found in other 3D slicers, such as PrusaSlicer.
- Brim Minimum Length: Like the skirt minimum length, the brim minimum length is the smallest distance of a brim that can be recognized by your slicer and printed. If your slicer calculates that a brim around your sliced model will be under this value, it won’t be included in the actual print. As with the skirt minimum length, leaving it at 250 mm should work just fine.
- Brim Width: Similar to the skirt line count, this setting controls how wide (in millimeters) the brim is. The larger the brim width, the more adhesion your brim will provide, but also the more filament it will take and the longer your print will be. A brim width of 8 mm works quite well for most prints, but consider increasing it if you’re still having adhesion issues or for larger models with corners, as these are most likely to experience warping.
- Brim Line Count: This setting overrides the Brim Width and sets the width by the number of printed lines. It essentially gives the user control over the brim width by line (nozzle passes) rather than by mm.
- Brim Only on Outside: This activatable feature controls whether brim structures can be printed around the internal features of a model. Turning this setting off will ensure that a brim structure is only printed around the exterior perimeter of a model. So, if you have a model like a hollow and open-ended box, the inside of the box won’t have a brim attached to it. For the most bed adhesion assistance, we recommend turning this setting on.
- Brim Inside Avoid Margin: This setting removes all brims in the set area from internal holes. It’s useful when a part fully enclosed within another part generates a brim that touches the other part.
- Brim Distance: This controls how far the innermost line of the brim is from the outermost wall of the first layer of the print. The default value of this is 0, and we recommend keeping this setting because it ensures that the brim attaches to the first layer of the print.
The most recent Cura update even added support for printing a brim of multiple materials in the same model.
Raft
Lastly, a raft is the third type of adhesion assistant, and we’re going over some important information about rafts as we have with the other adhesion assistants.
What Is It?
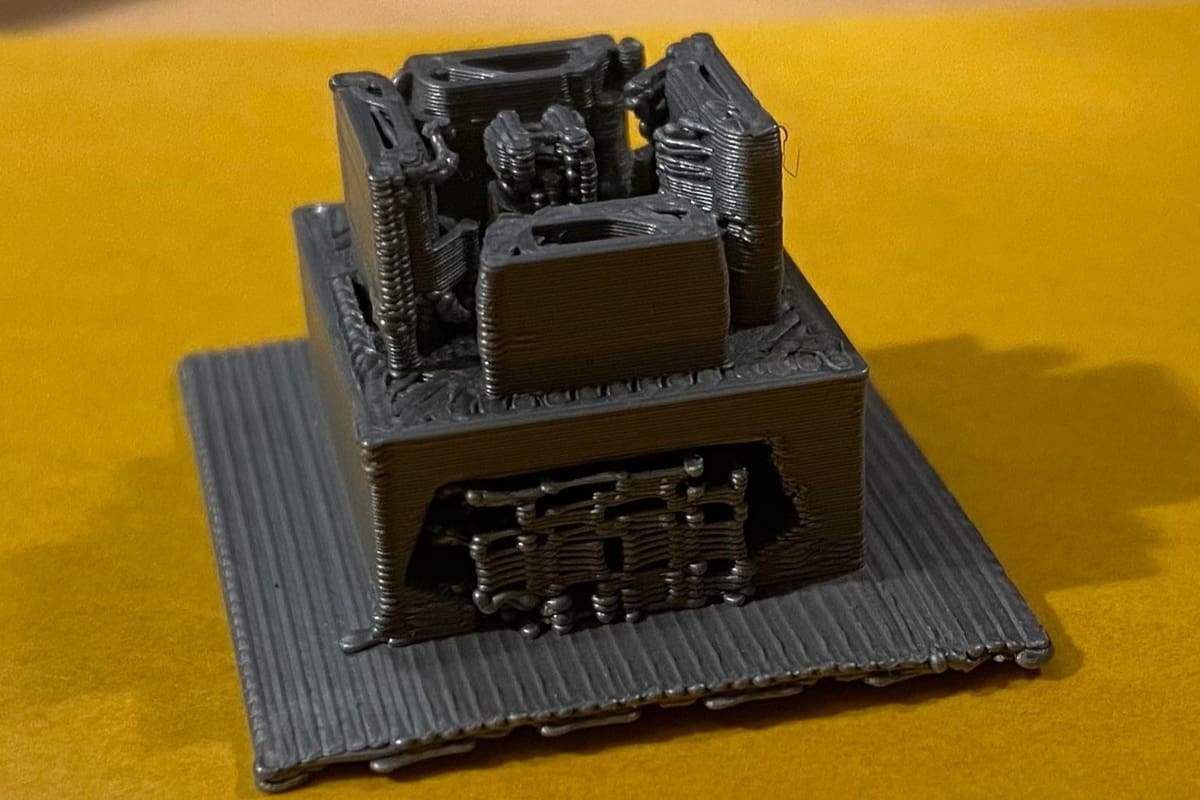
A raft is our third and final type of adhesion assistant. Of the three, it’s the most intensive when it comes to adhesion assistance, material consumption, and print time. Activating a raft adds a 3D printed base beneath your actual print. This base is multiple layers tall, and its area extends slightly beyond the maximum area of the first layer of your print.
The benefit of using a raft is that it provides great first-layer adhesion for any model because plastic sticks best to plastic. Additionally, because a raft’s area goes further than the area of your printed model, the amount of surface area that touches the build plate will always be greater with this adhesion type.
With a raft, your print doesn’t actually touch the print surface, so any inconsistencies with the build plate (e.g. dents) will likely only affect the raft instead of your model. And adhesion-related issues such as warping will also not affect your printed model as much and will mainly affect the raft structure.
Of course, because a raft is like a mini print inside of a print job, it takes a lot more filament and adds more print time than a skirt or brim. However, it might be worth it for some types of prints, which we’ll talk about next.
When to Use It?
So when do you use a raft? Well, because it provides the most bed adhesion of all three forms of adhesion assistants, it’s best to use this feature for models where bed adhesion has been an issue. Rafts are especially helpful for securing the corners of a model down, so they work great for any rectangular or similarly designed models with sharp corners.
Of course, rafts are also very useful for models that have a limited surface area touching the print surface. Moreover, adding a raft will expand the area that touches the build plate, and your print’s first layer will form a better bond by sticking to the plastic raft than sticking to the build plate.
However, you should really only consider using a raft if you’re not concerned about material usage or print time because rafts add a lot of both. If you still need some bed adhesion help and want to limit the print time and material consumption, a brim may be the better alternative. This is especially true when warping at corners is the concern.
On another note, not only do rafts consume a lot of material, but they cause a lot of waste because the only thing you can really do with a raft is to throw it out – unless you have a filament recycler. And while rafts beat the others in terms of bed adhesion, they also often lead to not-so-pretty bottoms.
It’s also worth mentioning that rafts are the common adhesion solution for those printing in ABS. That’s because this material presents a lot of issues with bed adhesion and rafts are usually effective at solving these problems.
Pros & Cons

Pros
- Provides most bed adhesion for prints and reduces chances of warping (compared to other adhesion assistants)
- Confirms that the nozzle is clear, the extruder is working properly, and the print bed is level
Cons
- Most material consumption and waste (compared to other adhesion assistants)
- Most additional print time (compared to other adhesion assistants)
- Difficulty with removing prints from the raft structure
- May cause imprecise bottoms
Settings
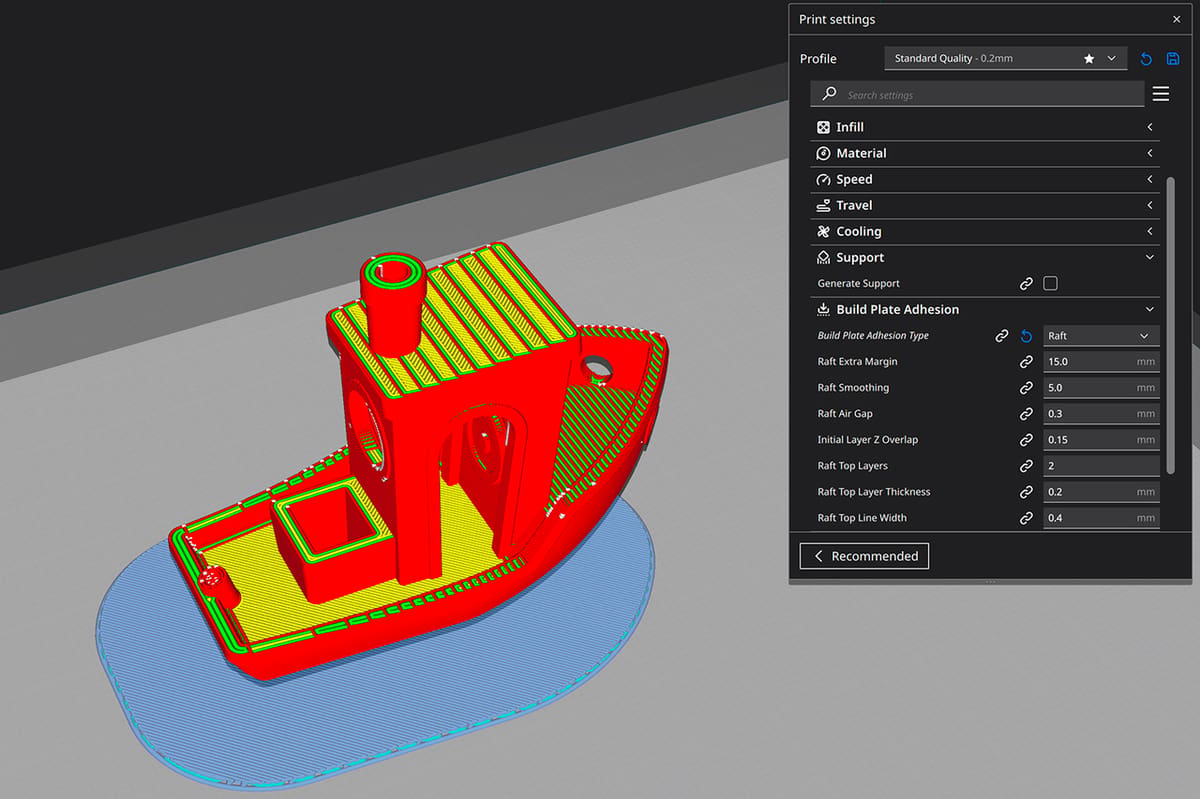
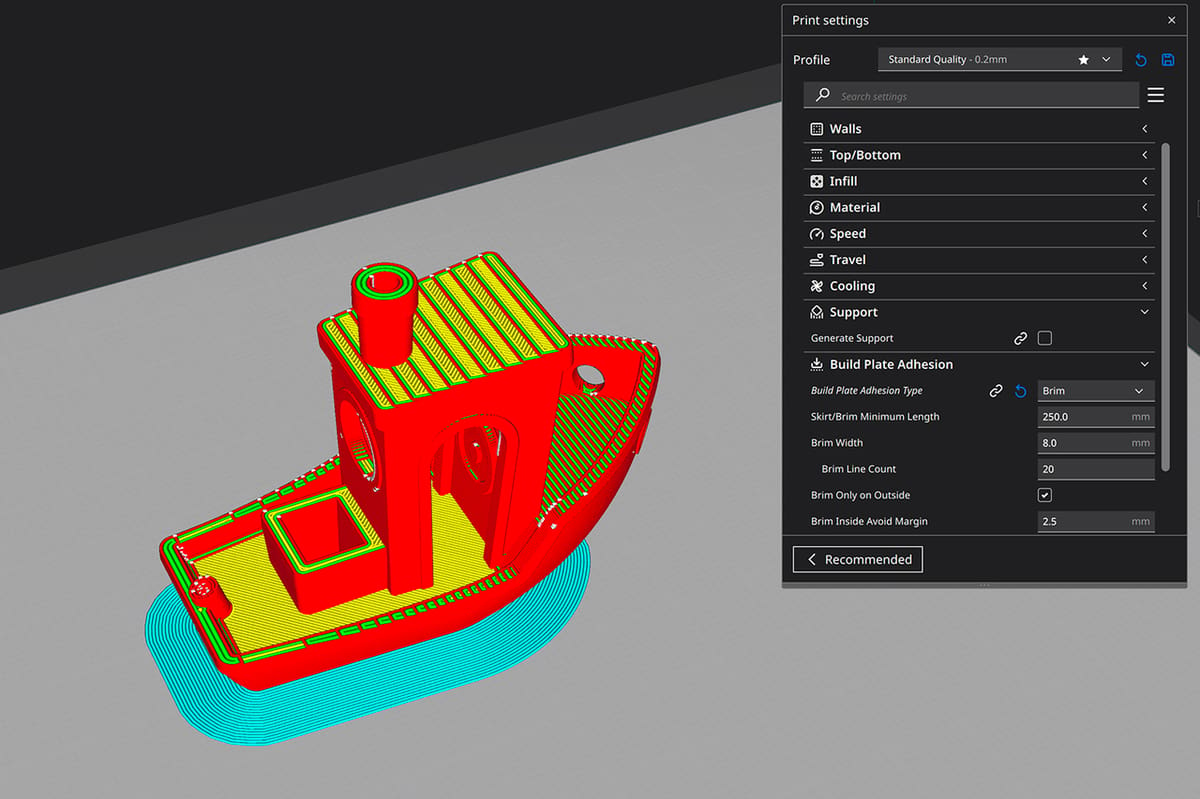
Additionally, it’s important to go over the print settings related to rafts, especially because they’re the most complex of the three adhesion assistant options. We’re going over the main Cura settings related to rafts below, but note that there are many more, as seen in the screenshot above.
- Raft Print Speed: As the name indicates, this setting controls how fast your machine prints the raft structure. There are a few sub-settings in Cura that control the print speed for certain features of the raft, such as the Raft Top Print Speed, Raft Bottom Print Speed, and more. We suggest keeping the print speed for the raft a lot slower than your regular print speed (like first layer speed). Cura’s default of 25 mm/s works great for getting a strongly adhered raft.
- Raft Extra Margin: The Raft Extra Margin defines how much further out, across the XY plane, the raft goes past the first layer area. For example, if you’re printing a cube that’s 20 x 20 x 20 mm and are using a Raft Extra Margin of 15 mm, your raft will be 35 x 35 mm. Cura’s default for this setting is 15 mm, but you can decrease it to save some filament or if you’re printing a large object.
- Raft Air Gap: Unless you use a variable layer height, the distance between layers usually stays the same. However, the raft air gap setting allows you to use a custom layer height between the top layer of the raft and the bottom layer of the print to control how much the print sticks to the raft. Using a low value will mean your model sticks better but will be harder to separate from the raft. Cura’s default raft air gap value, 0.3 mm, works great in most cases, but feel free to adjust in small increments (+/- 0.05 mm).
- Raft Top Layers: Finally, the Raft Top Layers setting controls the height of the raft structure. Too many top layers (higher value) will use a lot of filament, but too few might result in poor adhesion for your print. The default value of two for this setting works fine, but you might want to increase or decrease depending on how your prints come out and how much filament is used.
Other Bed Adhesion Tricks
Now that we’ve gone over skirts, rafts, and brims, it might also help you to know some other ways to keep the first layer of your prints secured to the print bed. Below are a few other methods for keeping your prints grounded:
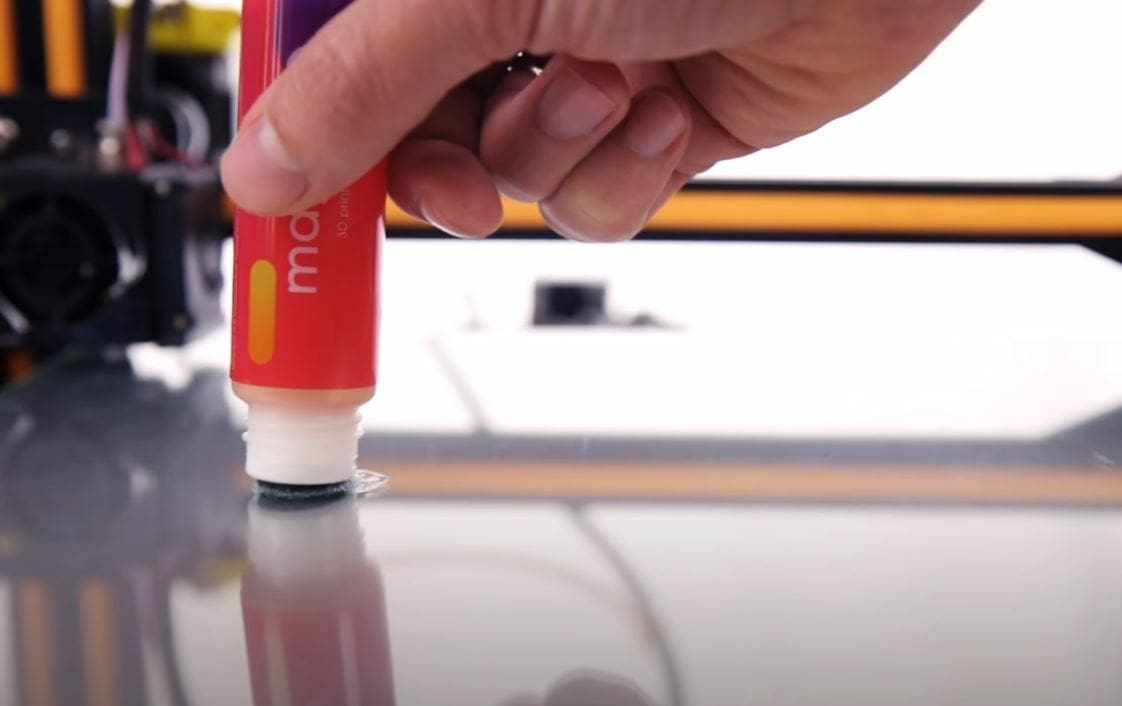
- Use glue or another adhesive: Our first tip is to use glue or another extra adhesive, such as Magigoo, on your build plate. These sticky substances will make it easier for the filament flowing out of your printer’s nozzle to stick to the bed, yielding a better first layer.
- Increase bed temperature: The bed temperature is another factor that impacts how well the first layer adheres to the print surface. Increasing it is a great way to get your first layer to stick better, but don’t raise it too much because the problem with your bed adhesion may lie elsewhere (e.g. an unlevel bed).
- Level the bed: Leveling the bed is easily one of the most important things to do before starting a print. An unlevel bed is a surefire way to have issues with the first layer and, thus, the rest of your print. We advise you to level your bed before every few prints to make sure that the nozzle stays an equal distance above the print surface at all points. Additionally, make sure to set the right Z offset so that the filament is laid out properly.
- Change the build plate: Sometimes, even if you’ve tried everything, you may still be having issues with bed adhesion. If you have an old or heavily-used build plate, replacing it might be your solution. If you plan on replacing, consider getting a glass or PEI-coated build plate, since these are known for providing great first layer adhesion.
- Dry your filament: Lastly, drying your filament can also help with bed adhesion, though in a different way from the other tips we’ve provided. Removing moisture from your filament makes it more easily adhere to the print surface. You can do this by gently heating the filament or using a filament dryer device.
License: The text of "Raft vs Brim vs Skirt: The Differences (incl. Cura settings)" by All3DP is licensed under a Creative Commons Attribution 4.0 International License.