How to Clean a 3D Printer Nozzle: The Easiest Ways

The most important part of your 3D printer is the nozzle. Cleaning it properly is important! Learn how to clean your 3D printer nozzle.
On fused deposition modeling (FDM) 3D printers, many parts contribute to creating a model, but the nozzle is perhaps one of the most important. It’s where melted material exits the hot end. If you’re unfamiliar with this component, it’s usually threaded on one side, connecting it to the hot end, and, on the other side, has a smaller hole where the filament is extruded.
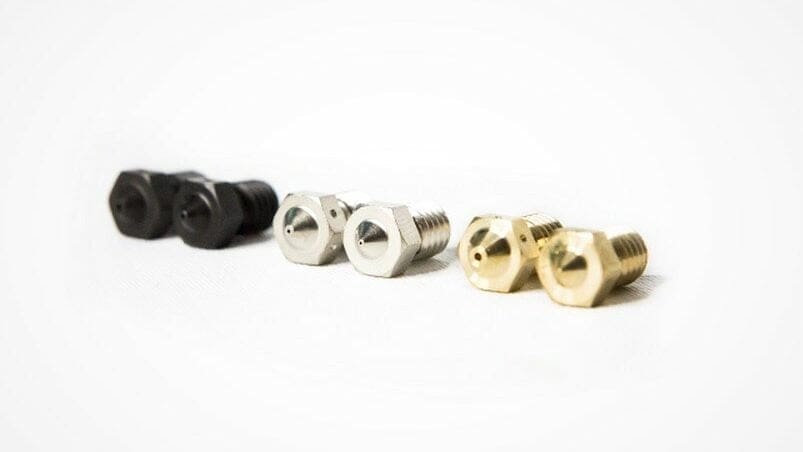
The nozzle is important because it affects a printer’s extrusion, and if it isn’t working properly, it can lead to a host of printing problems. Moreover, not all nozzles are the same. Material, diameter, and other characteristics determine its performance and lifespan.
Nothing lasts forever, and nozzles aren’t the exception. They degrade over time, especially when they are dirty, clogged, or overused. That’s why it’s critical to regularly clean your printer’s nozzle and ensure that it’s working well with the other hot end components on the printhead assembly. Doing so will extend the lifespan of your nozzle.
In this article, we’ll go over how to clean your nozzle and prevent issues from arising as well as how to fix any problems that could take your printer out of commission. We’ll also give you a few ideas to keep in mind if you’re opting for a replacement, so that you can avoid going for a nozzle that won’t be up to the use you want to give to your printer.
Let’s get started.
Identifying the Problem
Before we get into the solutions for cleaning your nozzle, it’s important to ensure that the nozzle is actually the problem. Below, we’ve listed a few problems that may be caused by a dirty nozzle. For each one, we’ve also included other factors to check before determining that the problem is in the nozzle:
- No first layer: If you started a print and see no filament being extruded from the nozzle for the first layer, it could be due to a clogged nozzle. However, it would be worthwhile to check that this problem isn’t caused by the extruder, the Z offset setting, or an unlevel bed.
- Nozzle picks up printed material: This is when your nozzle lays some material down, then accidentally picks it up when it moves across the layer. Usually, the nozzle is the only cause of this problem, but make sure you also have a proper Z offset and a level bed.
- Hot end jam: Hot end jams often look as if filament got stuck or trapped in the middle and lower areas of the hot end. As the nozzle is a component of the hot end, it could be responsible for a jam, but be sure also to check that the hot end path (e.g. PTFE liner) isn’t the cause.
- Inconsistent extrusion: Inconsistent extrusion usually looks like your printer can’t keep up with the extrusion of material. It extrudes material in sudden bursts when it should be extruding an even amount of material consistently. Make sure, however, that this problem isn’t caused by wet filament or the extruder’s stepper motor (specifically, its power).
- Under-extrusion: Under-extrusion is a type of inconsistent extrusion, but it’s characterized by producing a print with obvious missing portions. Make sure to also check that the problem isn’t caused by wet filament, loose extruder tension, or a non-smooth filament path.
- Missing print: If you start a print and come back to a “completed” print with only a few, if any, printed layers, it could be caused by a clogged nozzle. However, make sure to also check that your filament diameter is accurate, that the print temperature is within the filament material’s range, and that the extruder is rotating. (It’s okay if no filament comes out, but make sure that the extruder motor works.)
As we’ve said, it’s imperative to first determine that the nozzle is the source of the problem. While cleaning your nozzle is usually not a bad idea, it may not resolve the issues that you’re experiencing. A good idea to effectively fix a printing issue is to consider each potential cause of the problem. Then, going from the easiest to check to the hardest, examine each possible cause to find the real culprit.
Once you’re confident that the printing problem you’re experiencing is due to a dirty nozzle, move on to the cleaning methods.

Exterior Debris
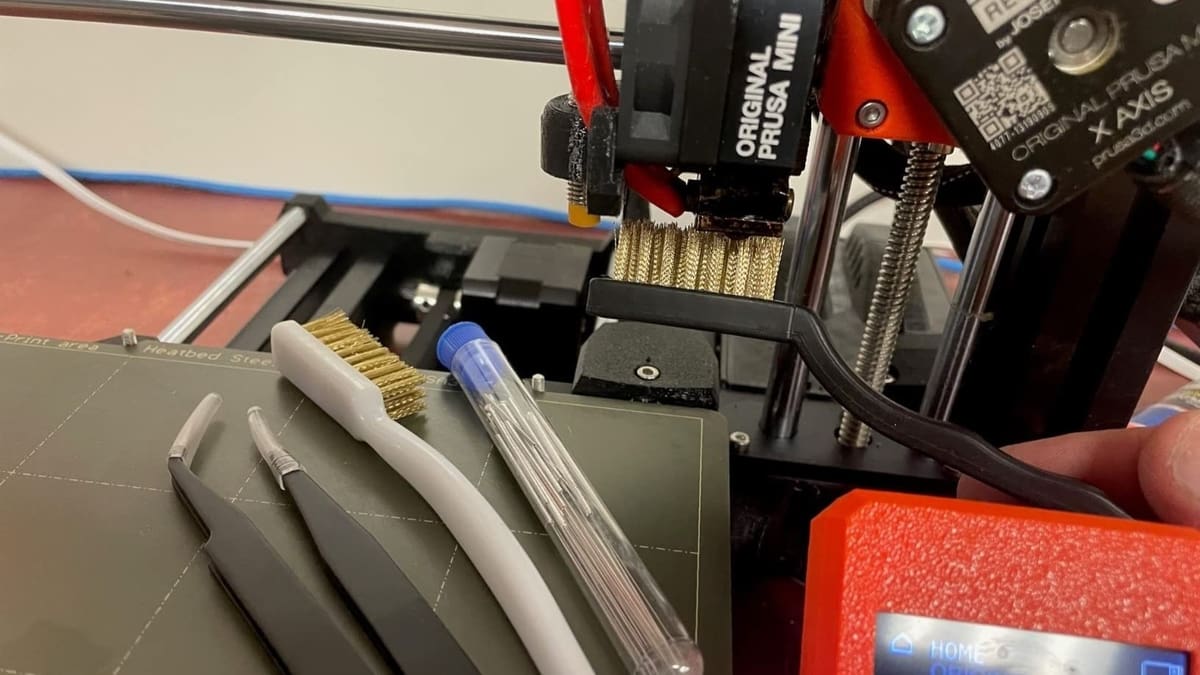
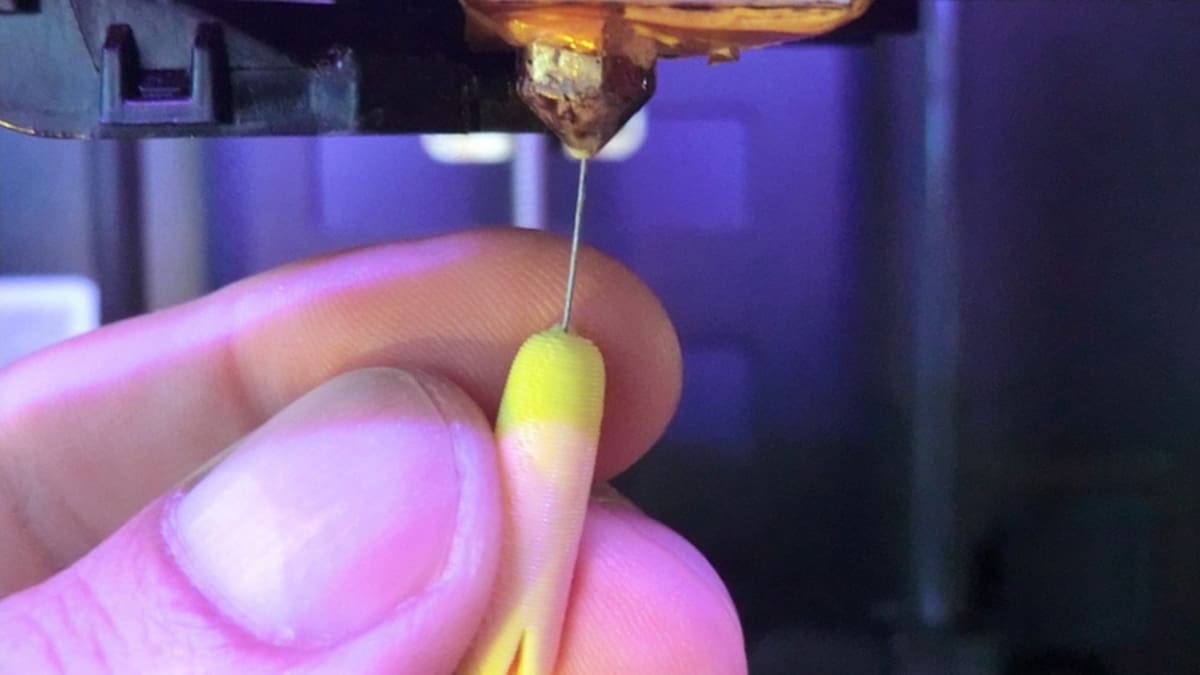
Debris on the nozzle’s exterior is the most visible of all nozzle problems. The debris is usually excess melted material that got stuck to the nozzle during printing.
This problem is almost always a result of the nozzle being too low, often while printing the first layer. The problem is exacerbated by the fact that a material sticks best to itself. Basically, as filament flows out of the nozzle, some of it gets stuck to the side of the nozzle, and as the filament continues to flow out, more catches on the initial material that was stuck to the nozzle’s exterior.
Solutions
First, clean the nozzle using a damp cloth or an alcohol wipe while the nozzle is hot. This may cause some steam but will indeed remove any material clinging to the nozzle. If this doesn’t work, you can also use a wire brush, small blade, or needle to remove any remaining debris from the nozzle.
While this cleans the nozzle’s exterior, it’s best to prevent any material from getting on the nozzle in the first place. So, consider raising the Z offset and leveling the print bed. It also helps to use a silicone sock that covers most of the nozzle and prevents too much material from sticking.
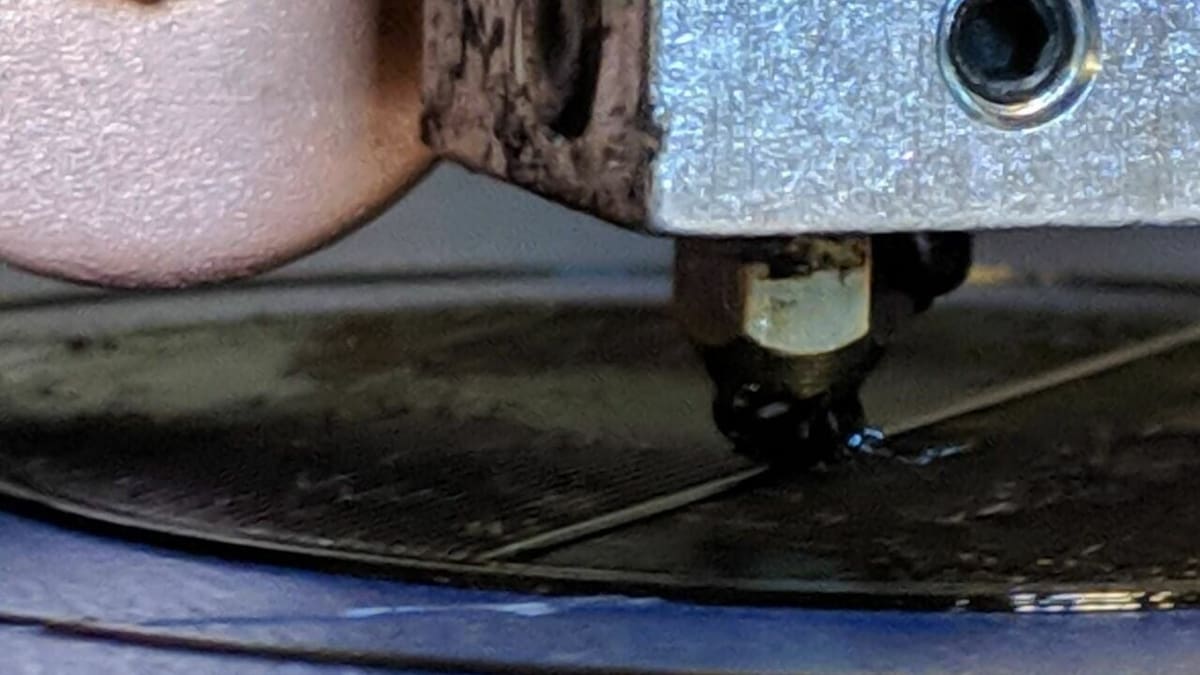
Clogs
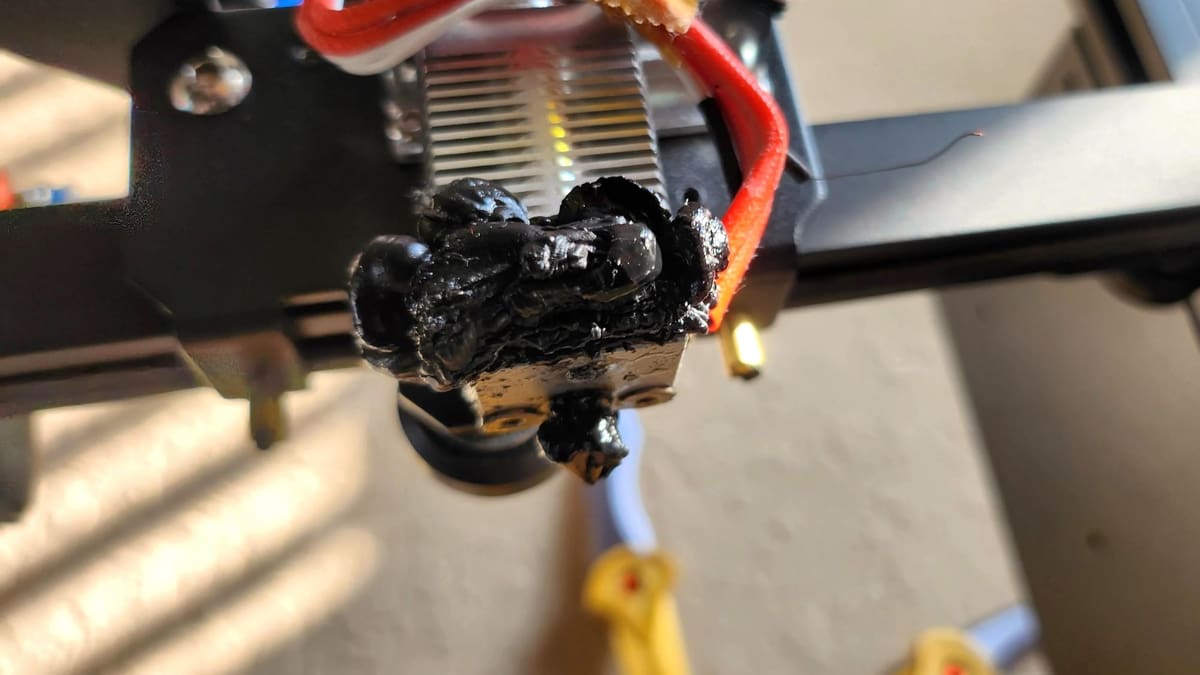
Clogs are perhaps the most common nozzle problem. They occur when debris inside the hot end blocks the output hole of the nozzle, preventing filament from exiting (which results in under-extrusion or worse, missing prints).
There are two types of nozzle clogs: partial and full. As you might guess, full clogs are the worst type. Debris blocks the entire output hole, thus trapping filament in the extruder. Partial clogs occur when debris only blocks a bit of the exit hole. While not as bad as full clogs, you should clean your nozzle if you have either.
Solutions
There are a few methods for removing nozzle clogs, and we’ll go over three of them. The first and easiest is to stick a small needle or a drill bit (e.g. 0.5 mm in a 0.6-mm nozzle or a smaller needle or drill bit for a smaller setup) in the nozzle to break up and push the debris out of the way.
The second method is to perform a cold pull, which removes the debris entirely from the hot end.
The third method is to completely replace your clogged nozzle. If you’re using generic brass nozzles, this method is relatively painless because they’re so cheap. For this method, start by heating the hot end to melt any solidified material stuck in the nozzle. Also, make sure to remove any filament that’s fed into the extruder.
Once the clogged filament has softened due to the heat, unscrew the nozzle from the hot end. Before attaching the new nozzle, make sure to clean the hot end with a small metal rod or pick to remove any excess filament stuck in the assembly.
PTFE Tube Hot End Gap
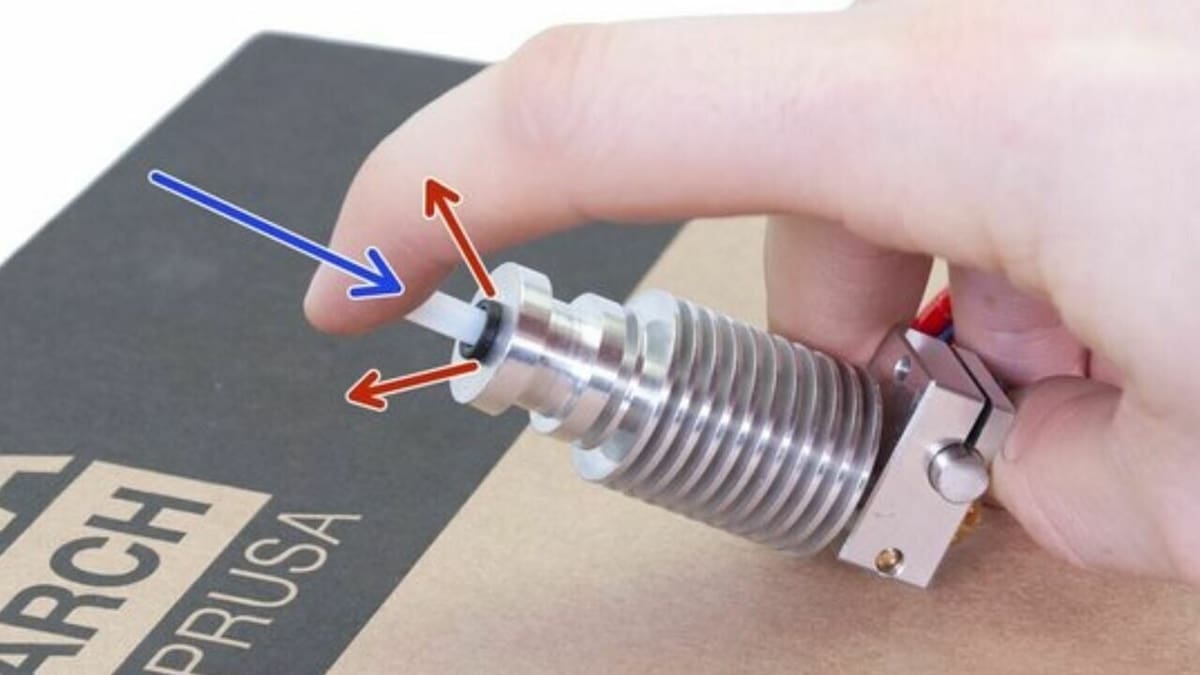
A gap between the PTFE tube and the top part of the nozzle can also cause problems. Gaps can occur due to an uneven PTFE tube end, when the tube isn’t pushed far enough down into the hot end, or when the nozzle isn’t screwed far enough into the hot end to be flush with the tube.
If a gap exists, melted filament will fill this gap. When the material cools, it will completely clog the hot end. This can occur in both PTFE-lined and all-metal hot ends.
Solutions
First, remove the PTFE tube from the hot end (if possible), then screw the nozzle in almost all the way (about 95% in). After checking that the end of the PTFE is flat and that the PTFE coupler (which holds the tube) is screwed tightly into the hot end, insert the tube down the hot end.
Finally, screw the nozzle the last bit into the hot end to achieve a tight seal between it and the PTFE tube.
Replacements & Upgrades
If none of these solutions are working or you simply suspect your nozzle has degraded significantly and no amount of cleaning will help, it may be time to get a new one.
As we mentioned earlier, nozzles vary in material, diameter, and other factors. These characteristics affect what the nozzle can handle printing-wise and how prints will turn out. For example, abrasive materials, such as glow-in-the-dark or wood-filled materials, significantly accelerate the degradation of lower-quality nozzles.
In the next couple of sections, we’ll talk about two important factors you should consider when replacing or upgrading your 3D printer’s nozzle: diameter and material. For a deeper dive into the world of nozzles, check out Best 3D Printer Nozzle: Types, Sizes & Materials.
Nozzle Diameters
While you may be printing a variety of things, if you’re sticking (mostly) to specific models or levels of detail, a defining factor for a new nozzle could be its diameter.
0.2 mm
A 0.2-mm diameter exit hole is on the smaller side of diameters and will allow you to print items with more detail. It’s a great size for printing items like miniatures. It’s important, however, to note that prints will take longer and usually be weaker because they have more print lines.
0.4 mm
The 0.4-mm diameter is the industry standard across consumer 3D printers. This size offers a great mix of detail, strength, and print time.
1.0 mm
This diameter nozzle is on the higher side of nozzle sizes and allows you to print much faster. Prints should also be stronger because they will have fewer print lines, but this comes at the expense of print detail.
Nozzle Materials
And just like the resolution of the models you’re printing can be a defining factor on the new nozzle(s), the materials that you’ll be printing with should also be considered.
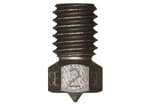
Brass
Brass is the most popular material for nozzles and is the cheapest too. They’re so cheap that you can purchase 25 generic ones for under $10.
As you might expect, this nozzle material typically has the shortest lifespan, as it degrades the fastest. Brass nozzles are most appropriate for printing non-abrasive materials, such as PLA, ABS, and PETG. However, this nozzle material will degrade significantly faster when used with abrasive materials.

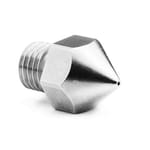
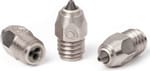
Steel
Steel nozzles (including hardened and stainless steel) are one step above brass options. Nozzles in this material cost more than the brass equivalent but have a longer lifetime and a higher maximum temperature. On top of non-abrasive materials, steel nozzles can also handle light use of abrasive materials before significantly degrading.
- Approximate price per nozzle: $0.70-$20
- Popular brands: E3D, Creality, Micro Swiss, Afunta
Copper Alloy
Copper offers three times the thermal conductivity of brass, and Slice Engineering’s BridgeMaster is a nozzle that includes a copper alloy core. As noted by Slice Engineering, it’s a good option for filaments that include wood, glow, or glitter components, although given its price and intended use, the investment may be wasted if you’re 3D printing miniatures.
- Approximate price per nozzle: $30
- Popular brands: Slice Engineering, E3D (copper plated)
BiMetal
Bondtech’s CHT BiMetal nozzle is meant for abrasive materials, although the company warns that cold changes of such nozzles should be avoided. With a copper body, hardened steel inserts, and a nickel coating, you should be able to print carbon fiber and glass fiber filaments with no issue, yet when it comes to nozzle diameter, Bondtech notes that for these materials, 0.6, 0.8, and 1.0 mm should be chosen sizes. Less abrasive filaments should work with the 0.4 mm nozzle.
- Approximate price per nozzle: $55
- Popular brands: Bondtech
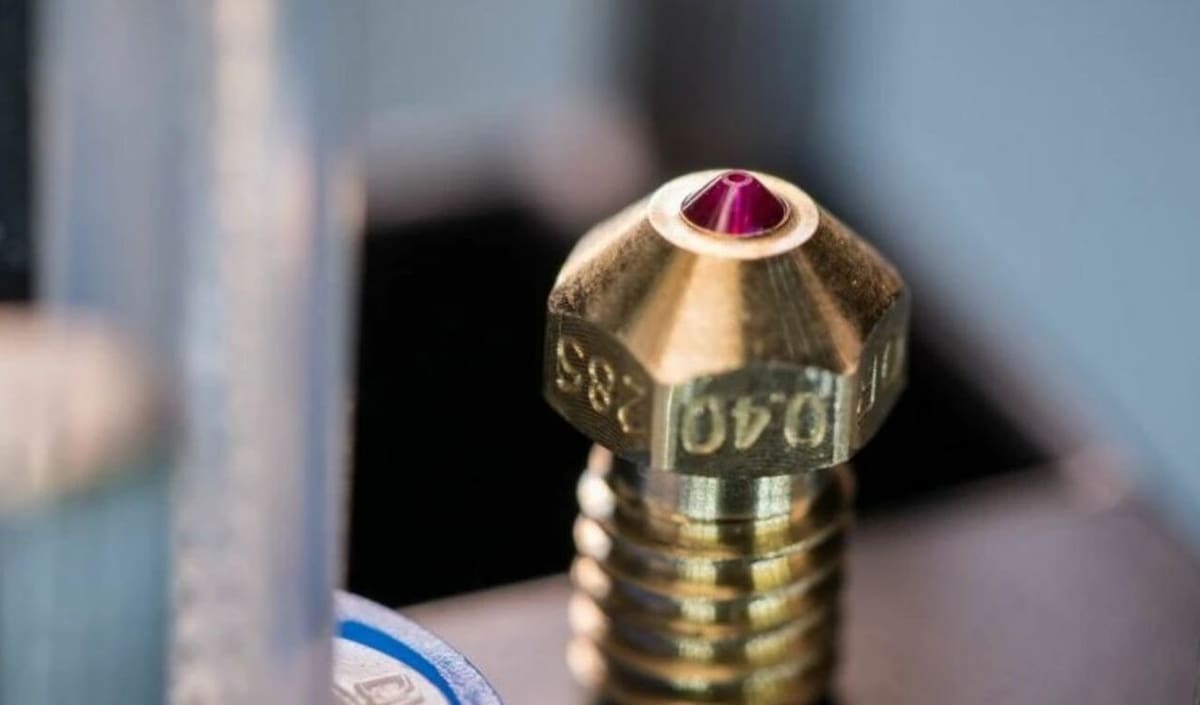
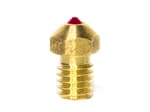
Ruby-tipped
Ruby nozzles are the crème de la crème of nozzles and are made of a conductive material for the base (usually brass) with a ruby tip. As ruby is a gemstone that’s extremely durable and resistant to abrasion, ruby-tipped nozzles can handle basically all materials and last for years. The downside, however, is how expensive they can get, costing around $100 per piece.
- Approximate price per nozzle: $90-$100
- Popular brands: Olsson Ruby
License: The text of "How to Clean a 3D Printer Nozzle: The Easiest Ways" by All3DP is licensed under a Creative Commons Attribution 4.0 International License.
CERTAIN CONTENT THAT APPEARS ON THIS SITE COMES FROM AMAZON. THIS CONTENT IS PROVIDED ‘AS IS’ AND IS SUBJECT TO CHANGE OR REMOVAL AT ANY TIME.