3D Printing Layer Height: How Much Does It Matter?

Layer height in 3D printing is a simple setting that affects print speed and detail. Keep reading to find out more!
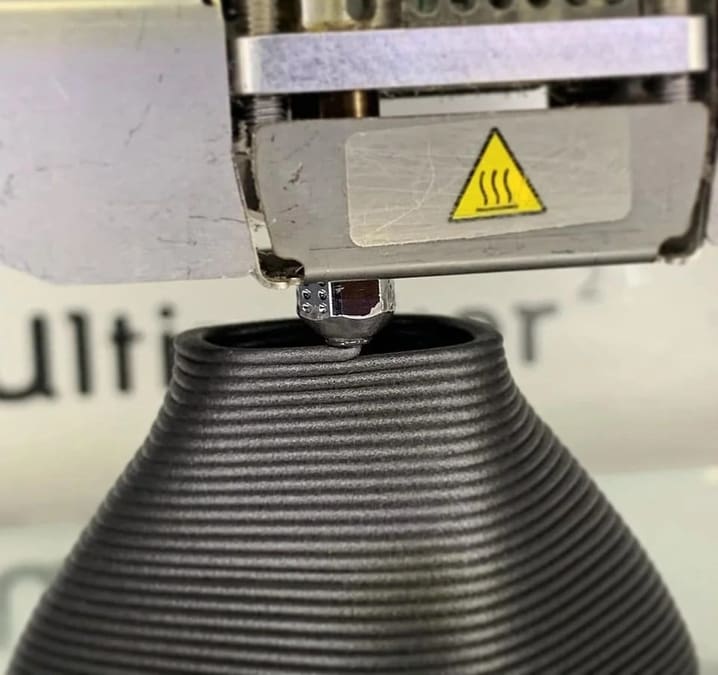
As the name suggests, layer height refers to the exact height of each layer of plastic extruded, cured, or sintered by a 3D printer. This setting is adjusted with a slicer program and has a significant effect on the final print. Used properly, this setting can increase your print’s speed, resolution, and smoothness.
Note that 3D printer layer height is typically measured in microns, with one micron being equivalent to 0.001 mm. An important thing when playing with layer height on fused deposition modeling (FDM) printers is that a shorter vertical layer results in a thicker horizontal line, and a taller vertical layer results in a thinner horizontal line. This can throw off precision in the horizontal plane, especially in small moving parts sometimes used by print-in-place mechanisms.
Now that we know a bit more about what layer height is, we’ll look at how to dial your setting in just right with respect to speed, resolution, and smoothness. Let’s dive in!
Optimizing Print Speed
One of the most common reasons for changing 3D printer layer height settings is to increase print speed. A larger layer height means that the printer doesn’t have to print as many layers to achieve the same total height, resulting in a faster print.
Generally, increasing layer height will decrease the resolution and quality of your print. This “hack” is therefore better for large prints, where close-up details will either be ignored or touched up during any post-processing.
Layer height can be optimized for each print in order to attain the fastest print speed while maintaining a certain amount of resolution. However, this is something that should be assessed on an individual printer-by-printer basis, as a lot of fine-tuning is required to print efficiently.
Some makers swear by the “magic number” theory, where magic numbers are the layer heights that work best on a specific printer. You set your layer height as a multiple of your stepper motor’s defined step distance. So, on the Ender 3, which has a step distance of 0.04 mm, layer heights of 0.16, 0.2, and 0.24 mm would result in balanced and detailed prints with a fast print time.
It should also be noted that, if speed is what you’re prioritizing, the maximum layer height you should set is 80% of your nozzle’s bore diameter. So, for example, if you’ve got a nozzle with a diameter of 0.4 mm, the recommended maximum layer height is 0.32 mm.
Raising the Resolution
A little-known fact within the 3D printing community is that most 3D printers have a higher vertical resolution than horizontal. Why? The lead screws take longer to move, offering the printer a much more accurate vertical position than the timing belts used for the other axes. As such, the printer can create a higher level of detail on a vertical surface than on a horizontal one.
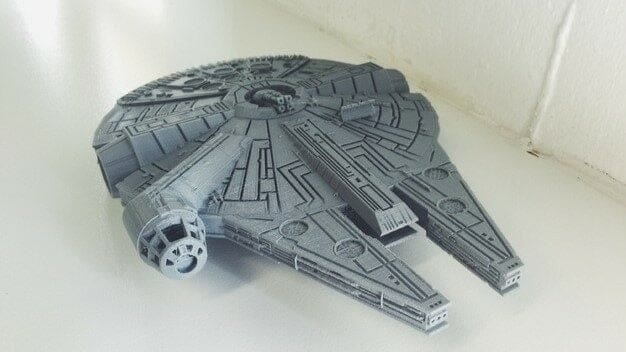
This is one of the reasons that the “Fillenium Malcon” design from aaskedall is so popular among Star Wars enthusiasts. It maintains amazing detail when printed across a wide variety of machines. A lower 3D printer layer height will of course slow your print down, but the printer will be putting down more layers for a given height, allowing for higher detail.
Keep in mind that different printers have different maximum resolutions for layer height. The standard smallest height is generally between 50 and 100 microns (0.05 and 0.1 mm). Lower-cost printers usually do not have as much precision, with the Ender 3 V2 having great results with a minimum layer height of 0.1 mm, but it’s not advisable to go lower.
One should therefore consider minimum layer height when buying a 3D printer. Resin- and laser-based printers typically have a much smaller minimum compared to FDM printers, which is what accounts for the insanely detailed prints they can create.
Smoothing the Surface
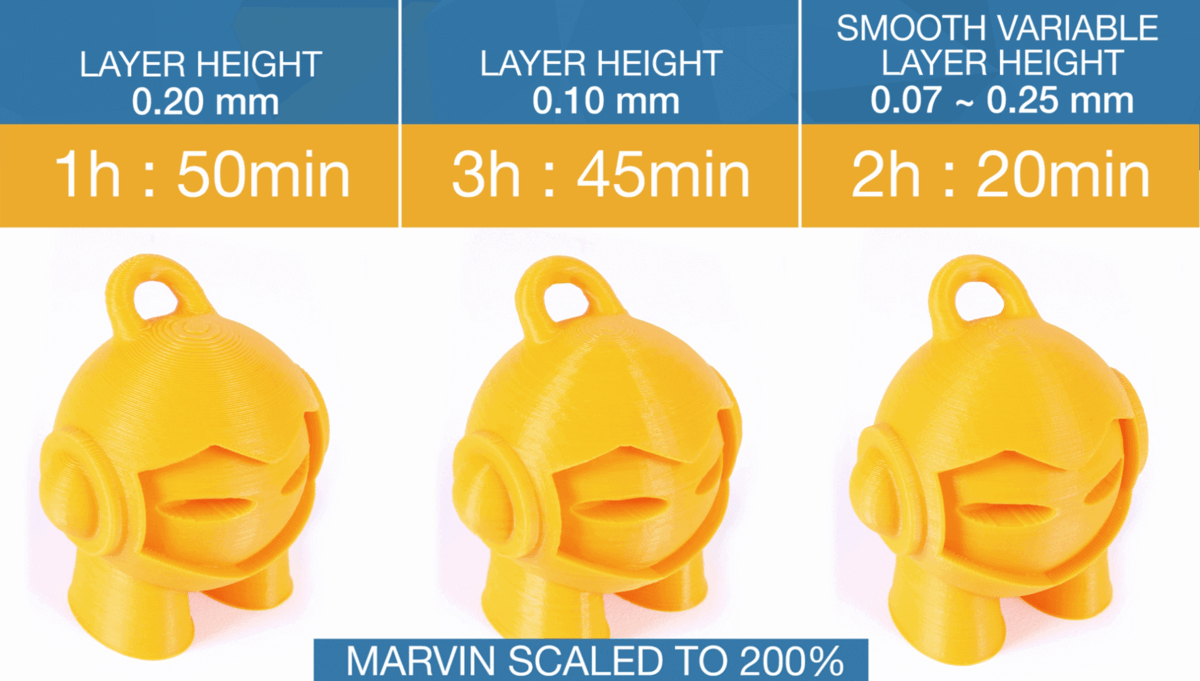
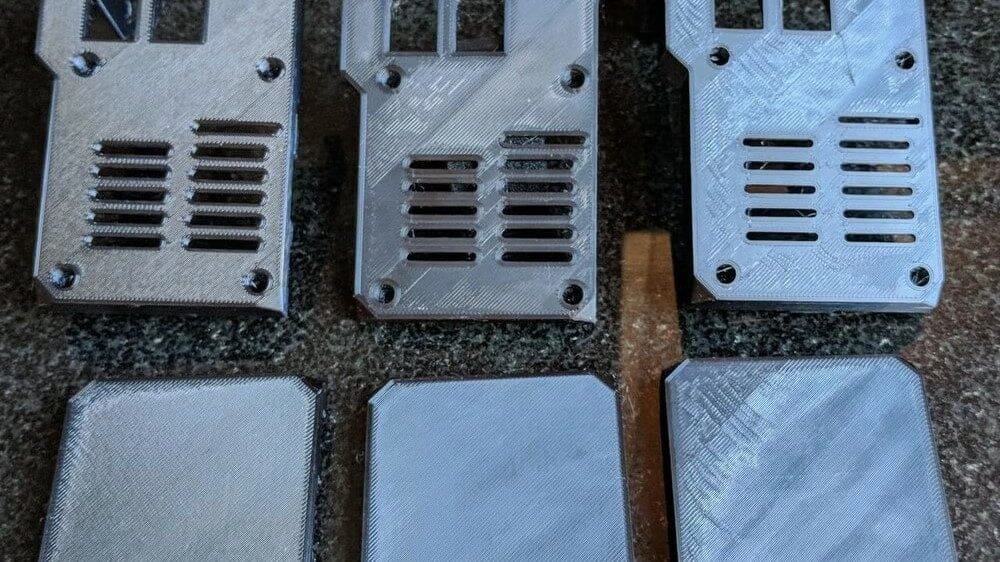
Another use of the extreme detail available with smaller layer heights is to smooth out prints. With a lower layer height, the layers become less obvious and prints become smoother. With a larger layer height, the surface of a print becomes rough and the layers clearly visible.
With this knowledge, you can ensure that prints requiring a very smooth finish, i.e. axles or print-in-place mechanisms, are as smooth as possible by reducing 3D printer layer height. This, as you can probably guess, increases detail, but decreases print speed, so be wary of long print times on large parts.
If time and smoothness are both of the essence, then some post-processing may be the best best, with special options for PLA, PETG, and ABS. There are also a couple more tricks you could try…
Other Settings
Adjusting some specific slicer settings can fine-tune your layer height even more. We will touch on a couple of layer height settings in Cura, arguably the most popular FDM slicer, to help you get the best possible print.
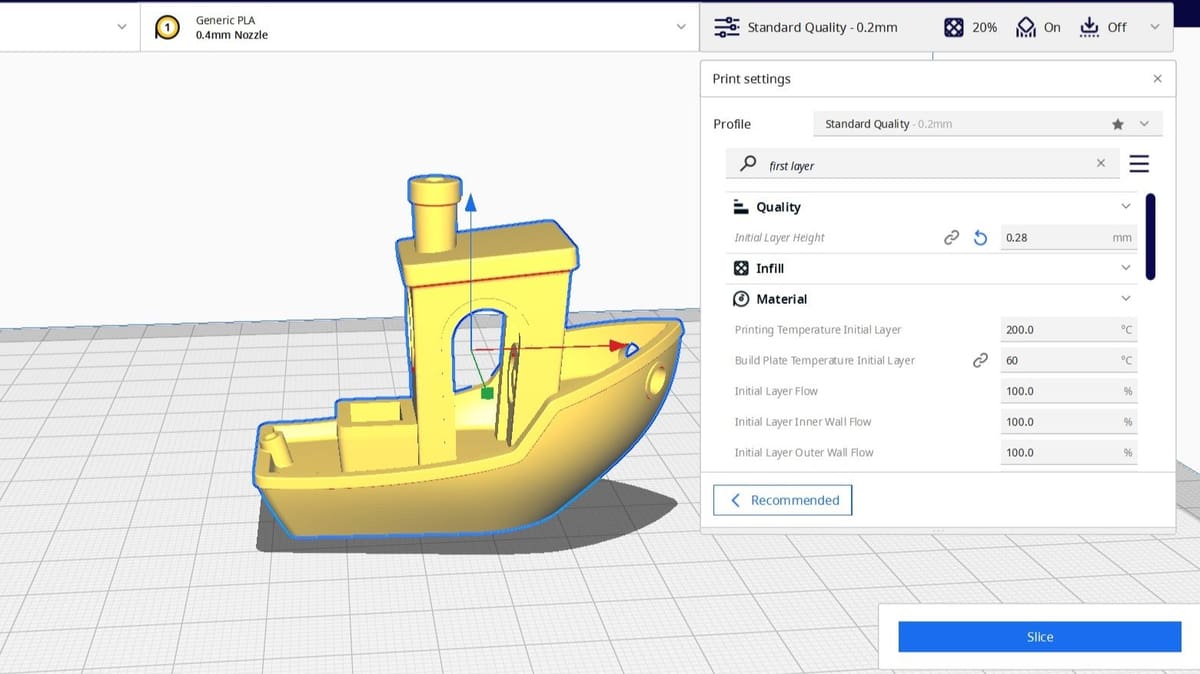
Initial Layer Height
First up, fittingly, is the initial layer height setting. As the foundation of your print, it’s important to ensure that the first layer adheres to the print bed properly. You can adjust the initial layer height setting in Cura to improve adhesion and reduce any irregularities. If the setting is too low, it can result in squishing, otherwise known as elephant’s foot.
For the best results, set the initial layer height slightly higher than the rest of your print. For example, if you’re printing with a standard 0.2-mm layer height, set the first layer height to 0.24 mm or 0.28 mm.
Adaptive Layer Height
Cura’s adaptive layer height is another useful setting that allows you to vary the layer height throughout a print. This results in increased accuracy for the Z-axis height, as the slicer doesn’t have to round the layers up or down to be divisible by the defined layer height. Instead, the setting will apply a smaller or larger layer height, depending on the features of the model. For example, the layer height will get smaller for more detailed parts and larger for featureless sections. Smoother curves and reduced post-processing are a couple of other benefits.
To use this, activate the “Use Adaptive Layers” option under the print settings. You can adjust the related parameters, including Maximum Variation, Variation Step Size, and Topography Size, to control how the feature is applied to your print.
License: The text of "3D Printing Layer Height: How Much Does It Matter?" by All3DP is licensed under a Creative Commons Attribution 4.0 International License.