Stop 3D Print Stringing: 5 Pro Settings You’re Probably Missing

3D printer stringing is a common problem, especially with flexible materials. Overcome this issue with these five simple solutions!
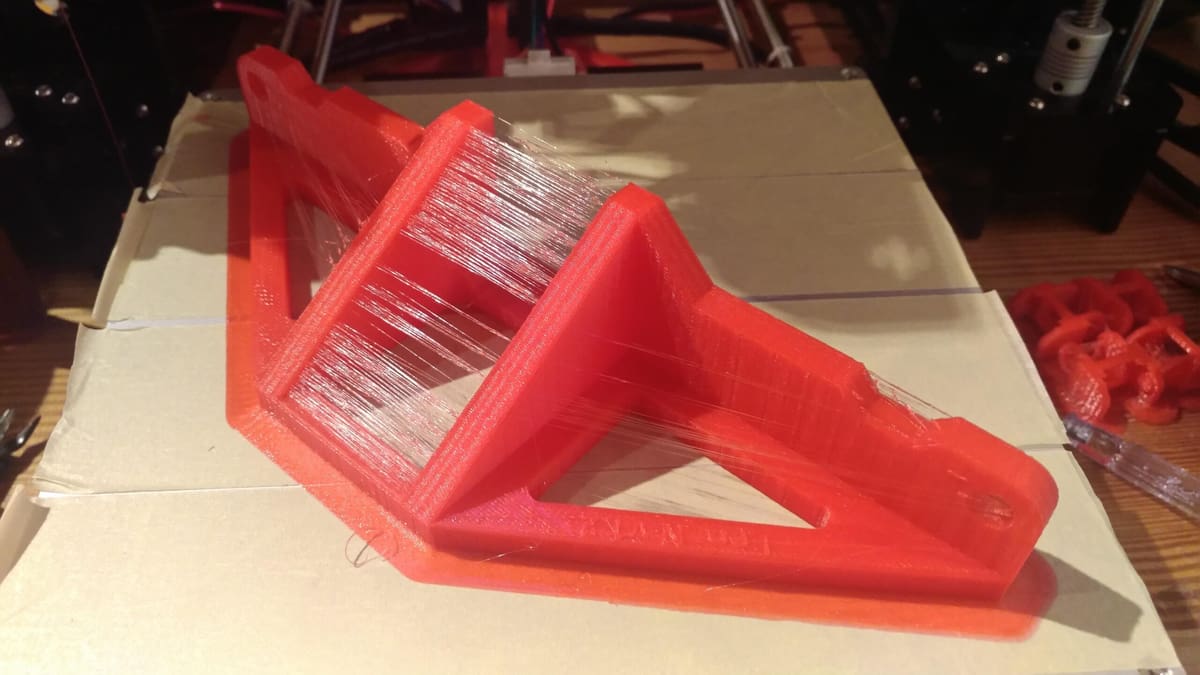
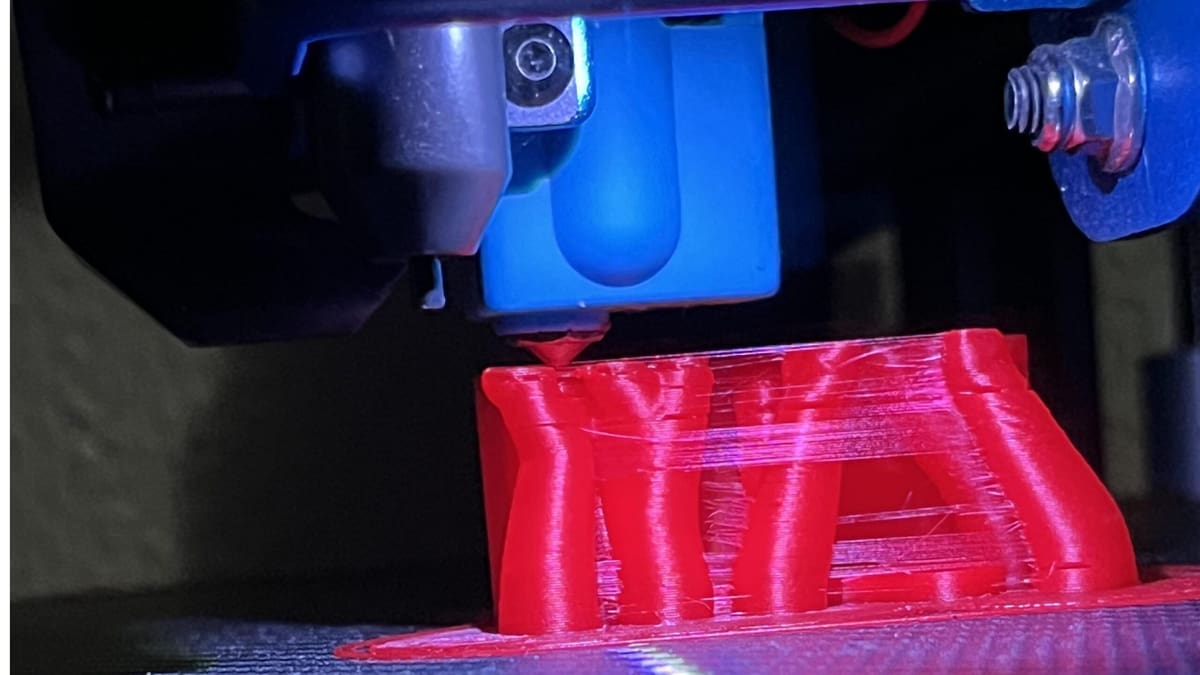
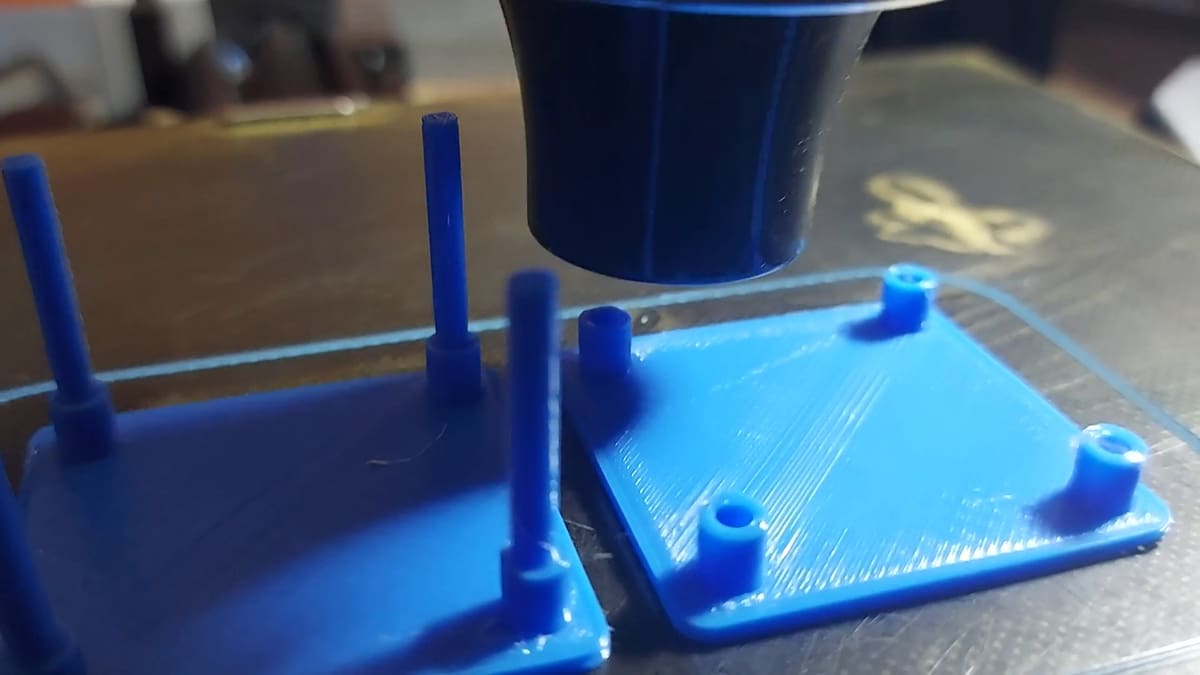
There is nothing more frustrating than watching a perfect 12-hour print finish, only to find it covered in “cobwebs”. 3D printer stringing, those annoying, hair-like whiskers that can appear as your FDM printer’s nozzle travels, can turn a high-detail masterpiece into a messy cleanup project.
While it’s technically just molten plastic oozing where it shouldn’t, the “why” is often a hidden tug-of-war between your temperature and retraction settings. Whether you are battling the notorious stickiness of PETG or trying to get a cleaner finish on PLA and ABS, the solution isn’t just one setting—it’s a balance.
We’ve tested the most common culprits across various slicers and filaments. Here are the five solutions to stop the ooze and finally achieve those clean, “whisker-free” results.
Stringing Issues at a Glance
Dial in Retraction to Pull Plastic Back
The Goal: To pull the filament away from the nozzle tip during travel moves so no plastic is left to leak.
Enabling retraction is the most common and effective method to combat 3D printer stringing. Essentially, when the printhead prepares to cross an open space, the feeder pulls the filament back just a small amount. This “pulling back” action serves as a vital countermeasure against oozing, preventing molten plastic from trailing behind during travel moves. Once the printhead arrives at its next location, the filament is pushed back out and printing resumes. While most slicing applications like Cura enable this by default, you should always confirm the setting is active when stringing occurs. If the problem persists, it’s time to dive into the finer details of distance and speed.
Retraction Distance: The Critical Variable
The retraction distance is arguably the most critical setting because it determines exactly how much filament is removed from the melt zone. Generally, a higher retraction distance reduces the likelihood of stringing, but there is a delicate balance to maintain. If you retract too much, the filament may not be available in the hot end when printing needs to resume, leading to gaps or under-extrusion.
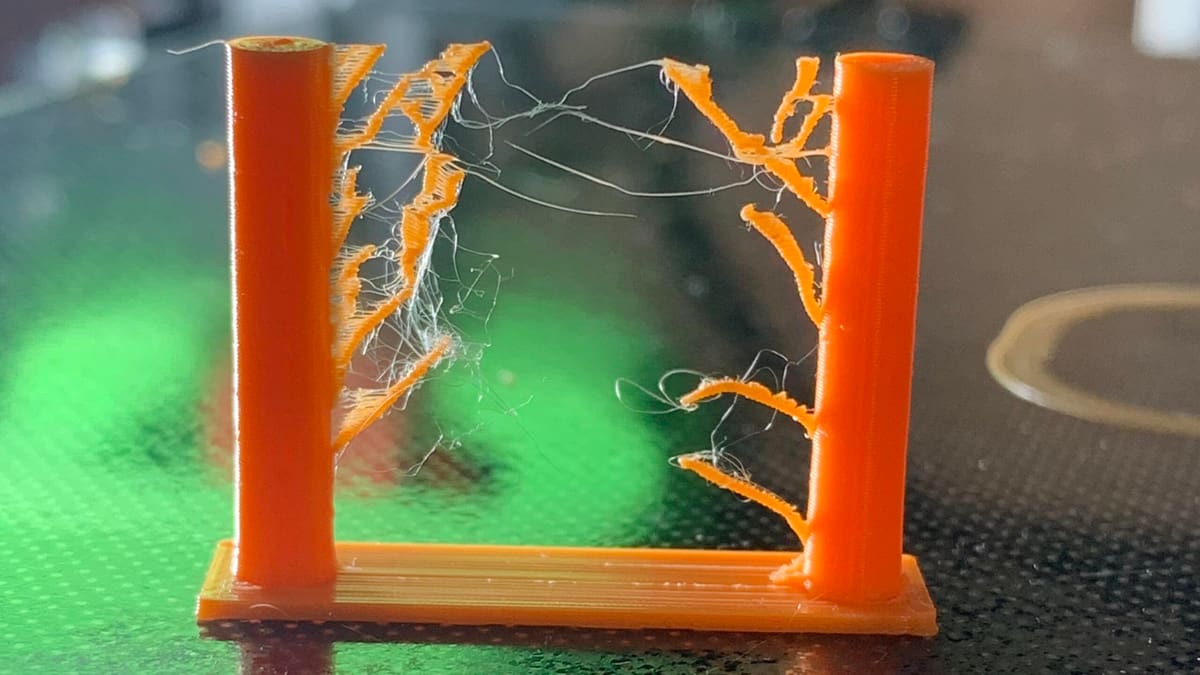
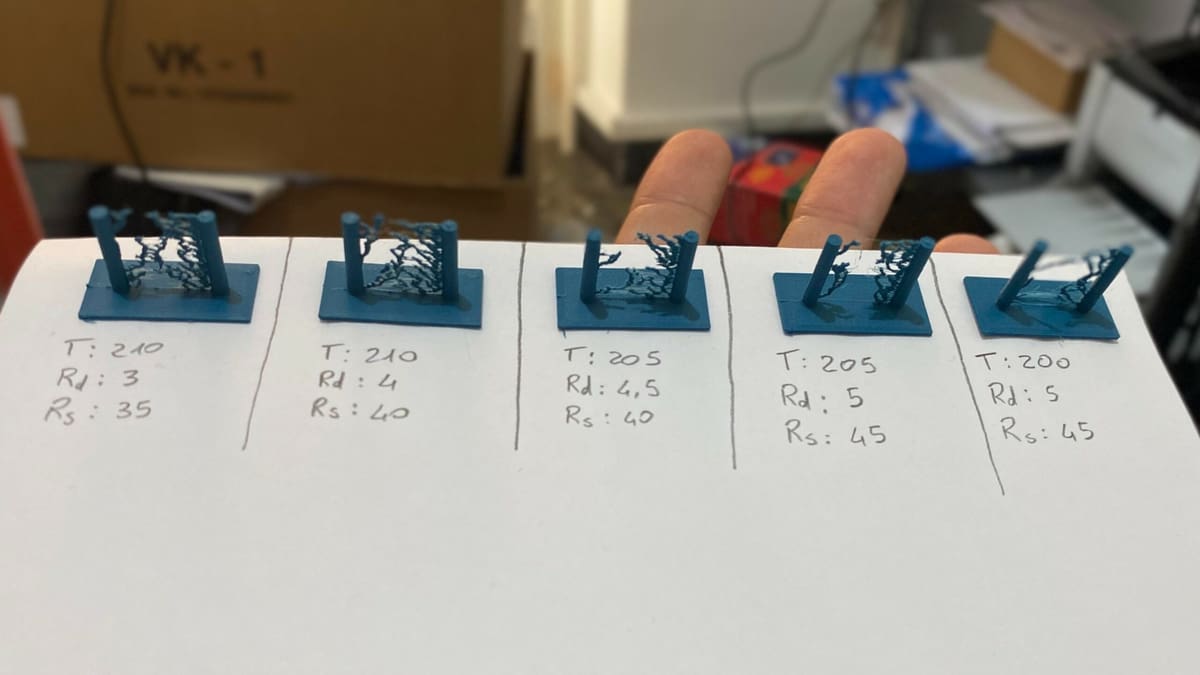
The ideal distance depends heavily on your hardware. For instance, direct extruders typically perform best with a short distance of 0.5 to 1 mm, as the motor is located directly above the nozzle. In contrast, Bowden extruders require a significantly higher distance, often around 2 mm or more, to compensate for the “slop” and extra space inside the long delivery tube. To find your specific sweet spot, it is best to use a quick retraction test print; these are small, fast, and let you visually identify where the stringing stops without wasting material.
Retraction Speed: Finding the ‘Sweet Spot’
Once your distance is set, you must calibrate the speed at which that pull occurs. A faster retraction speed helps snap the molten thread before it has a chance to stretch across an open gap. However, if the speed is too high, the drive gear may grind the filament or cause the molten plastic to disconnect from the main pool inside the nozzle. This can lead to intermittent jams or areas where the filament fails to deposit correctly upon resumption.
To find the “sweet spot,” you should aim for a range that balances quick action with mechanical stability. For standard materials like ABS and PLA, a speed of 40 to 60 mm/s is a reliable starting point for direct extruders, while Bowden setups typically thrive in the 30 to 50 mm/s range. Keep in mind that these figures aren’t set in stone. Flexible materials or high-temperature filaments like PETG often require slower, more deliberate speeds to prevent the filament from deforming under the pressure of the drive gear.
Specific slicers may be helpful in fine-tuning your settings. For example, Simplify3D comes with pre-configured profiles that are a great place to start if you’re looking for a retraction speed that works best.
Leveraging Advanced Slicer Settings
When distance and speed adjustments aren’t enough, modern slicers offer specialized tools to eliminate the final remnants of stringing. Features like Simplify3D’s “Coast” and “Wipe” tools are powerful countermeasures against pressure buildup. Wiping essentially brushes the nozzle against the outer wall of the print to “clean off” any leftover plastic before a travel move begins. Coasting, on the other hand, stops the extruder a few millimeters before a line ends, allowing the remaining pressure in the nozzle to finish the segment naturally.
Cura users have access to similarly effective parameters, such as “Combing Mode” and “Retraction Minimum Travel.” Combing reroutes the printhead so that travel moves stay within the interior of the print whenever possible, meaning that even if the nozzle oozes, it happens where it won’t be seen. Meanwhile, the minimum travel setting ensures the printer doesn’t perform unnecessary retractions on very short hops, which protects the filament from being ground down by the extruder motor. By syncing these software tools with your hardware calibrations, you can achieve a level of finish that requires almost zero post-processing.
Optimize Temperature to Prevent Oozing
The Goal: To reduce the fluidity of the plastic so it stays inside the nozzle during travel moves.
Temperature and stringing are inextricably linked. As your nozzle temperature increases, the filament becomes more liquefied. The more liquid the plastic, the more likely it is to drip from the nozzle, even with perfect retraction settings. Lowering the temperature increases the viscosity of the plastic, making it “thicker” and less prone to leaking.
However, heat management is a balancing act. If you drop the temperature too far, the filament won’t melt consistently, leading to under-extrusion, poor layer adhesion, or even a total jam. The objective is to find the lowest possible temperature that still allows for smooth, reliable flow.
How to Dial in Your Heat Settings
When you encounter persistent stringing, your first move should be to lower the nozzle temperature in small, controlled steps.
- Work in Increments: Reduce your temperature by 5°C to 10°C at a time. This allows you to observe the impact on stringing without risking a sudden clog.
- Respect the Floor: Never drop below the manufacturer’s minimum recommended temperature. Doing so can cause “cold extrusions” that might damage your extruder gears.
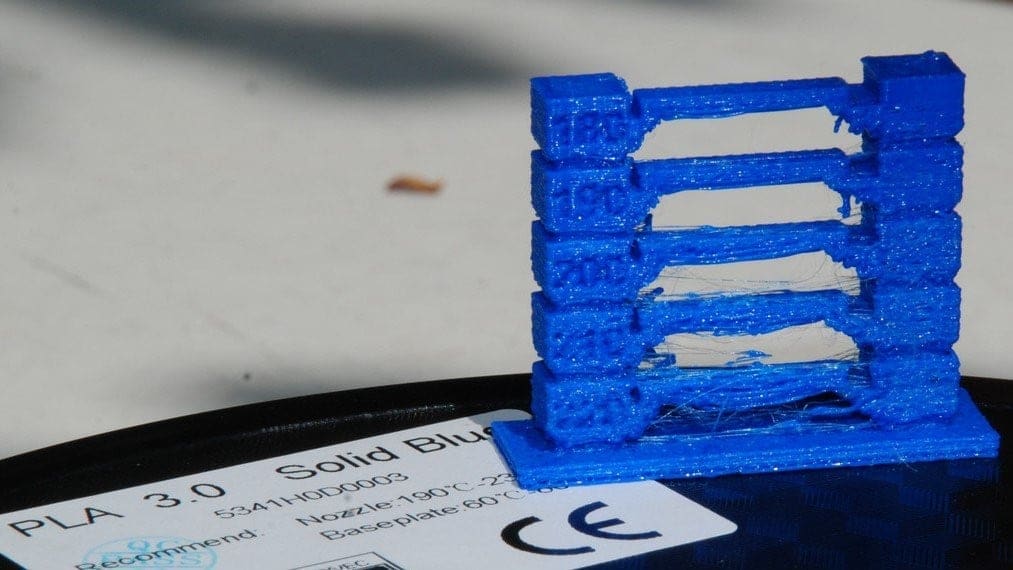
- Use a Temperature Tower: Instead of guessing with multiple full-sized prints, run a Temperature Calibration Tower. This single print changes the heat at different heights, allowing you to see exactly where the stringing stops and the print quality is strongest.
Recommended Temperature Ranges by Material
Every filament has its own “melt profile.” Use these standard ranges as your starting point for troubleshooting:
- PLA: 180–220 °C (Usually stops stringing near the 190 °C mark)
- ABS: 210–250 °C (Requires a stable 90–110 °C bed to prevent warping)
- PETG: 220–250 °C (Notorious for stringing; often needs very precise cooling)
- TPU/TPE: 210–230 °C (Flexible materials are sensitive to heat-creep)
- PVA: 160–215 °C (Often used for supports; very heat-sensitive)
Increase Travel Speed to Minimize Leaks
The Goal: To move the nozzle between points so quickly that the molten plastic doesn’t have the opportunity to escape.
While retraction and temperature are internal fixes, travel speed is about the physics of time. If your nozzle moves too slowly across an open gap, gravity and internal pressure have a larger window to pull molten plastic out. By increasing the velocity of these non-print moves, you can often “outrun” the ooze.
Finding the Speed Limit for Your Setup
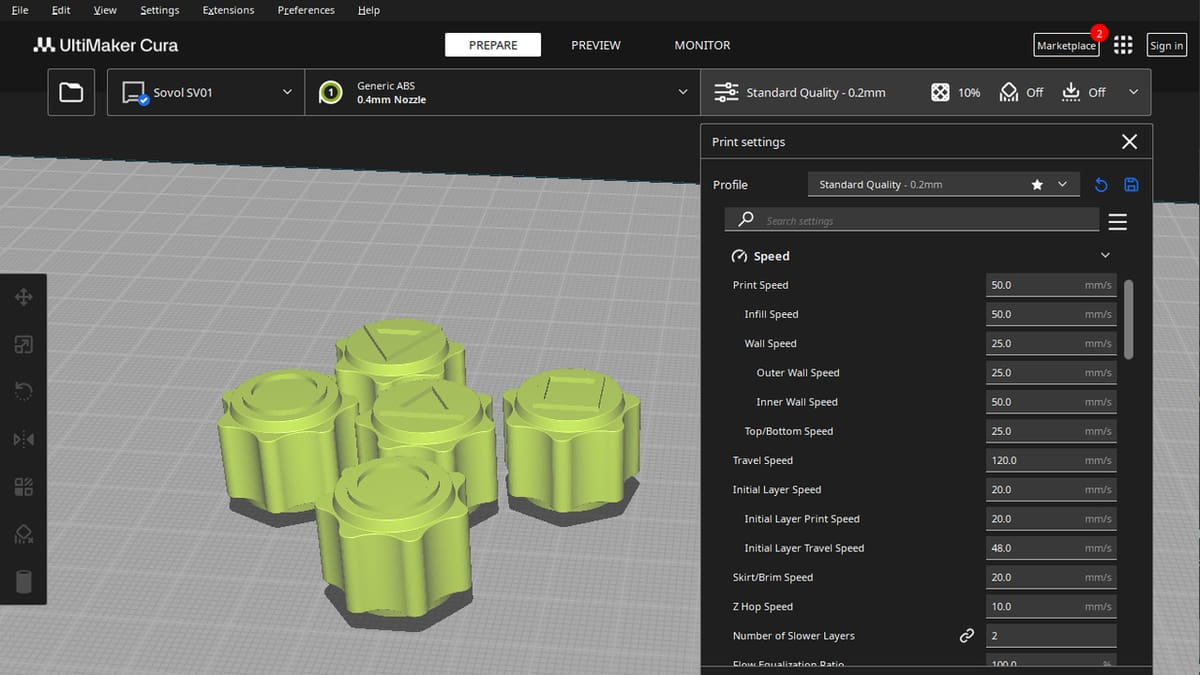
Adjusting your travel speed (known as “Travel Speed” in Cura or “X/Y Axis Movement Speed” in Simplify3D) is a highly effective way to sharpen your print quality.
- The Pro Standard: A travel speed of 150 mm/s to 200 mm/s is generally the “sweet spot” for most modern FDM printers.
- The Trade-off: Be cautious. If your temperature is set low and your travel speed is too high, you risk causing under-extrusion or “skipped steps” because the hardware can’t keep up with the mechanical demands.
- The Path of Least Resistance: Some slicers can actually reroute the nozzle to avoid long open-air jumps.
For example, Simplify3D’s “Avoid crossing outline for travel movement” keeps the nozzle path tight within the print’s perimeter, significantly reducing the chance of external whiskers.
By combining a fast travel move with a shorter, smarter path, you ensure that any minor oozing happens inside the infill, rather than on the surface of your model.

Keep Your Nozzle Clean and Free of Debris
The Goal: To remove burnt residue and filament buildup that can catch on the print and drag “whiskers” across your model.
Over time, filament, especially sticky materials like PETG, leaves a thin layer of residue both inside and on the exterior of the nozzle. This buildup acts like a magnet, catching molten plastic as it exits and causing it to “string” onto the surface of your parts. Maintaining a pristine nozzle is a simple but often overlooked step in the troubleshooting process.
Steps for a Professional Clean
A clean nozzle ensures that plastic flows straight down rather than curling upward and sticking to the heater block.
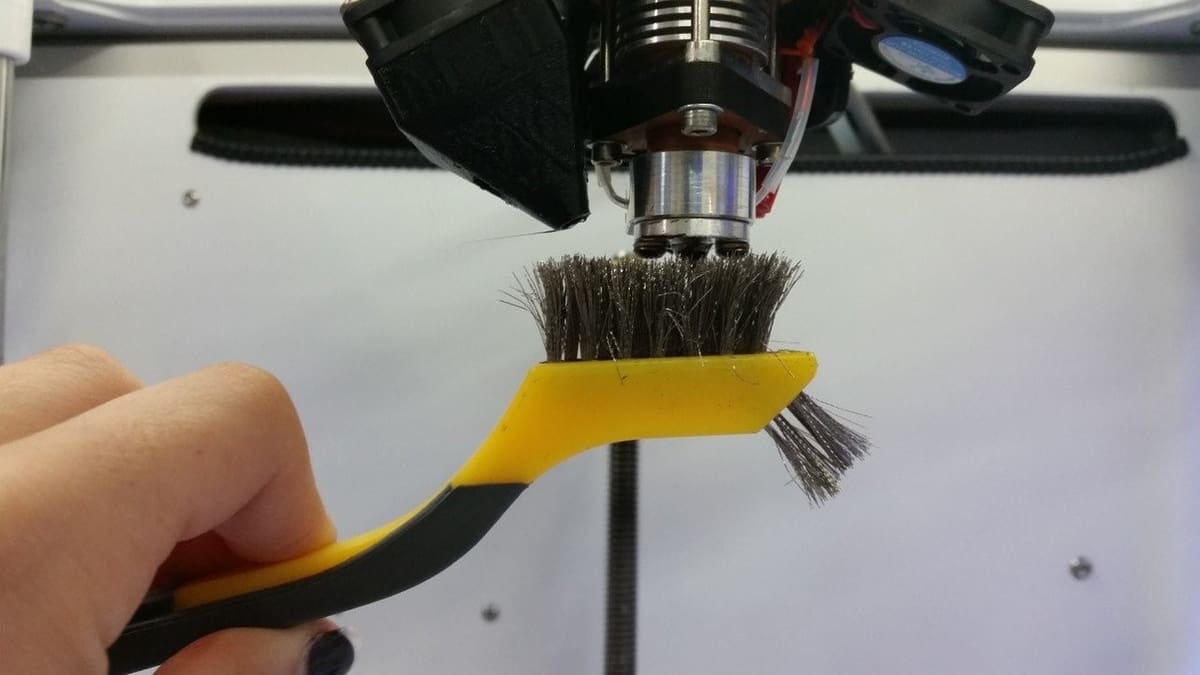
- Exterior Maintenance: While the nozzle is still hot, wipe the exterior with a damp, thick cloth or a specialized silicone sock. For stubborn, carbonized buildup, a brass wire brush or a small blade can safely scrape the surface clean without damaging the metal.
- Internal Clearing: To clear the output hole, insert a fine acupuncture needle or a dedicated nozzle drill bit while the hot end is at printing temperature. This breaks up internal clogs and keeps the flow consistent.
- The “Cold Pull” Technique: If a needle isn’t enough, perform a cold pull (or “Atomic Pull”) using a piece of nylon or PLA. This involves heating the filament, letting it cool slightly, and then pulling it out quickly to lift away burnt debris from the internal cavity.
If your nozzle remains problematic after these steps, it may be internally scarred or worn out. In this case, replacing the nozzle is the most reliable fix. Always heat the hot end before removal to liquefy any trapped plastic, and use a metal pick to clear the heat block threads before installing your fresh nozzle for a perfect seal.
For more detailed guidance, check out our nozzle cleaning guide.
Dry Your Filament to Remove Hidden Moisture
The Goal: To eliminate trapped water that turns into steam inside the nozzle, forcing plastic to ooze out regardless of your settings.
Even the most perfect retraction settings cannot compensate for wet filament. Most 3D printing materials are hygroscopic, meaning they actively absorb moisture from the surrounding air. When this damp filament hits the hot end, the water trapped inside flashes into steam. This creates internal pressure that forces molten plastic out of the nozzle during travel moves, a phenomenon often accompanied by distinct popping or crackling sounds during printing. While PLA is a frequent culprit, almost all materials, including PETG and Nylon, are susceptible to this “invisible” cause of stringing.
How to Restore and Protect Your Filament
If you suspect your filament has absorbed moisture, you can often save the spool by thoroughly drying it before your next project.
- Dedicated Filament Dryers: The most reliable method is using a specialized filament dryer. These devices maintain a constant, low-temperature environment to evaporate moisture safely. For a deep dive into the top-rated models and DIY alternatives, check out our guide to the best filament dryers.
- Oven Drying: You can use a household oven, but proceed with caution. You must set the temperature below the filament’s glass transition temperature to avoid melting the entire spool into a solid block. Generally, leaving the filament in a preheated oven for four to six hours is sufficient.
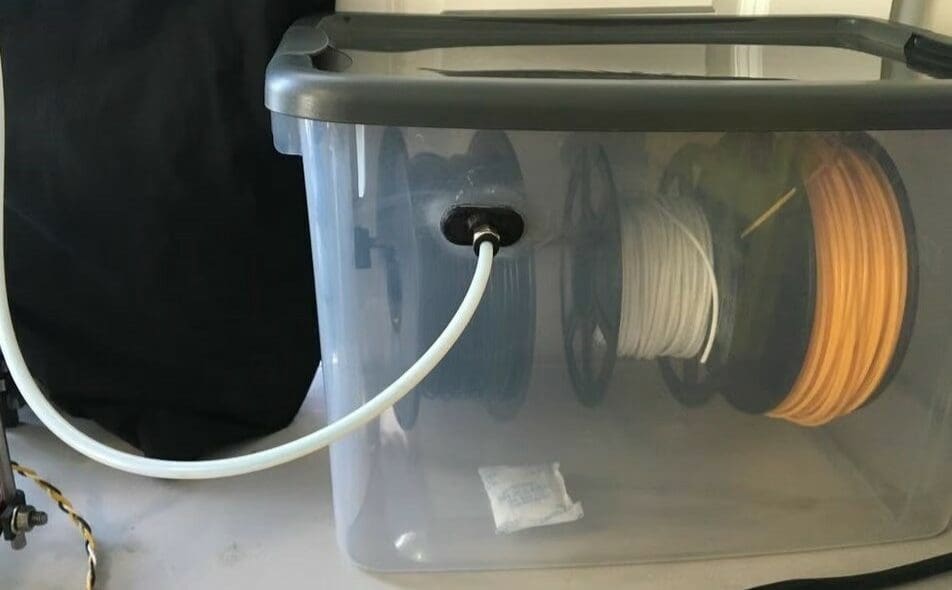
- Smart Storage Solutions: Once dried, prevent the problem from returning by storing your spools in a moisture-free environment. Airtight containers, vacuum storage bags, and dry boxes, like the Polymaker PolyBox, paired with desiccant packs are essential for maintaining filament quality in humid climates. You can also opt for a DIY option, such as a Rubbermaid storage container.
By addressing moisture, you tackle the root cause of “unexplainable” stringing that software settings alone cannot fix.
The Final Polish: Achieving a Professional, String-Free Finish
The Goal: To safely clear away any remaining “whisker” artifacts without damaging the surface of your 3D print.
If you have followed the calibration steps above, your future prints should be crystal clear. However, for existing models, or those printed in notoriously “hairy” materials like PETG, you’ll need a few post-processing tricks to get that injection-molded look.
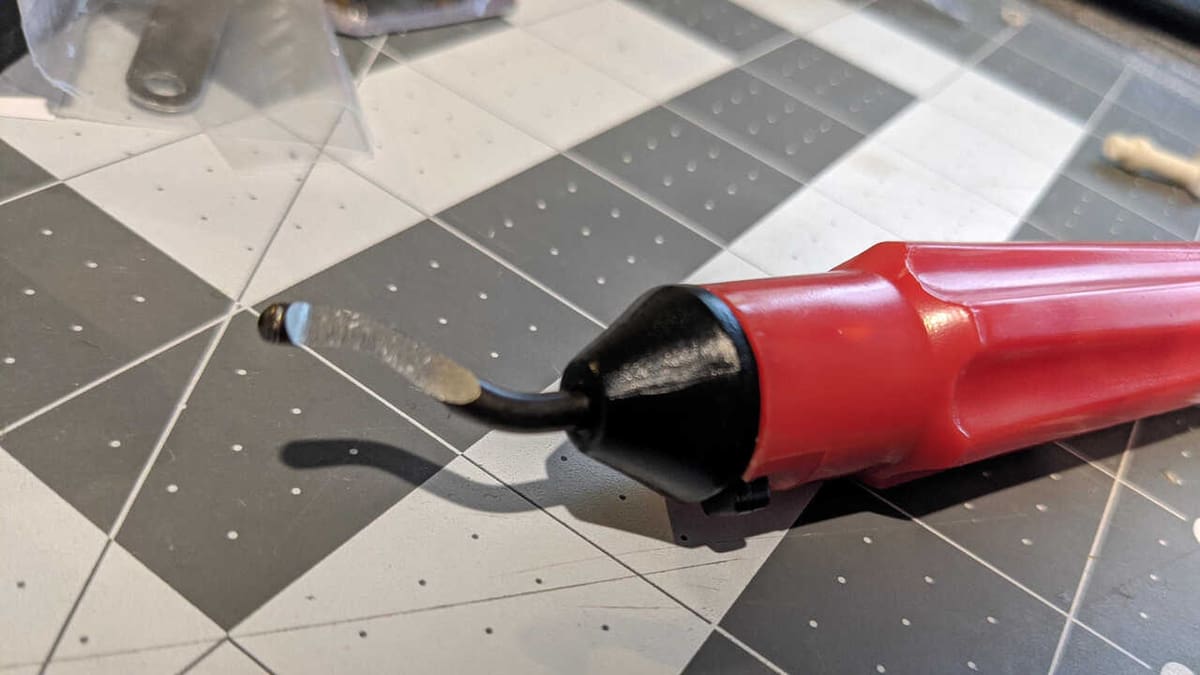
Mechanical Removal: Tools for Precision
Physical removal is often the safest way to clean a print without risking heat deformation.
- Fingers: The most accessible method is simply rubbing the wisps away. While effective for 90% of light stringing, ensure your hands are clean to avoid trapping oils in the layer lines.
- Safety Warning: Never use your bare hands on fiber-filled filaments (Carbon or Glass Fiber), as the microscopic fibers can be highly irritating to the skin.
- Deburring Tools: Originally for metalwork, deburring tools are perfect for shaving away stringing along sharp edges and vertical gaps. They provide a much cleaner finish than pulling, which can leave white stress marks on the plastic.
- Stiff Bristle Brushes: A stiff-bristled toothbrush is excellent for delicate areas where fingers can’t reach. Avoid brass nozzle brushes, as they will permanently scratch your print’s surface.
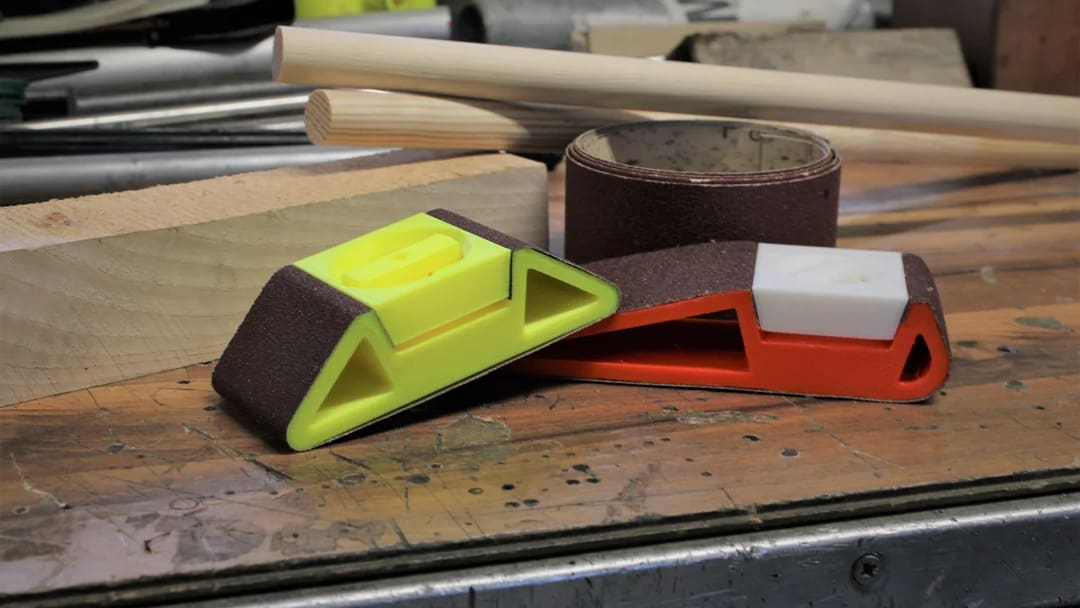
Sandpaper: While effective for reaching into tight crevices by folding the paper, sanding will leave visible scratches. This is best reserved for TPU (which resists scratching better) or models you plan to prime and paint. - Plastic Cards and Spudgers: A guitar pick or a plastic prying tool (like those in an iFixit kit) is excellent for scraping sharp corners. You can even cut an old credit card to a specific angle to reach deep into complex geometries.
Heat-Aided Removal: The High-Speed Shortcut
Using heat is often the fastest way to make “cobwebs” vanish, though it requires a steady hand to avoid melting the model itself.
- Open Flame: A long-nosed barbecue lighter is safer and cleaner than a “Zippo” style lighter, which can leave black soot. Briefly waving a flame near the strings will cause them to shrivel into tiny beads. These beads are loosely attached and can be easily flicked away afterward.
- Heat Guns & Hair Dryers: This is the preferred method for many pros. A hair dryer is often enough for low-temp PLA, but ABS and PETG require the higher intensity of a dedicated heat gun.
Note, however, that whatever heat source you decide to use, be sure to always keep it moving. Never linger on one spot for more than a second, or you risk deforming the structural walls of your print.
License: The text of "Stop 3D Print Stringing: 5 Pro Settings You’re Probably Missing" by All3DP is licensed under a Creative Commons Attribution 4.0 International License.