Prusa’s MMU3 for Core One Keeps a Good Thing Going

Prusa's MMU3 material-changer has come to its latest 3D printer – and there's a twist. The company also released a DIY Community Version, one of the "development versions" for its upcoming "next-gen" MMU. We take both iterations out for a spin.
Prusa Research’s MMU3 “multi-material unit” gained compatibility with the company’s Prusa Core One 3D printer back in May. This marks a surprisingly quick turnaround for a new machine from a company with a reputation for drawn-out releases buffeted by shifting lead times.
Designed originally to sit on top of the Prusa MK4 – a markedly different design of printer from the Core One – the MMU3 for Core One adaptation is pretty straightforward. It only requires a couple of new mounting parts and a raised top enclosure to accommodate the new device. Ultimately, the MMU3 for Core One is exactly the same hardware as when we reviewed its initial release for the MK4.
Prusa is working on an all-new MMU, and has already warned that this “next-gen” unit will break the company’s usual hardware upgradeability. I expect this upcoming material changer will be tailor-made for the Core One. Given the simultaneous release of the MMU3 “Community Version”, which was described as one of many possible designs, it will probably focus on conveniently storing loaded materials.
Here, we’ll take a look at what’s different in this release, how well it fits with the Core One, and look a little closer at the Community Version release. With that said, if you’d like a detailed review of the MMU3 hardware itself check out our previous coverage with the MK4.
What's Different?
The MMU3 for Core One is almost entirely the same basic hardware as released for the MK4. The differences are in the peripheral equipment needed to make the MMU3 unit fit on the Core One: a bracket to sit on and a larger top cover that accommodates the added height.
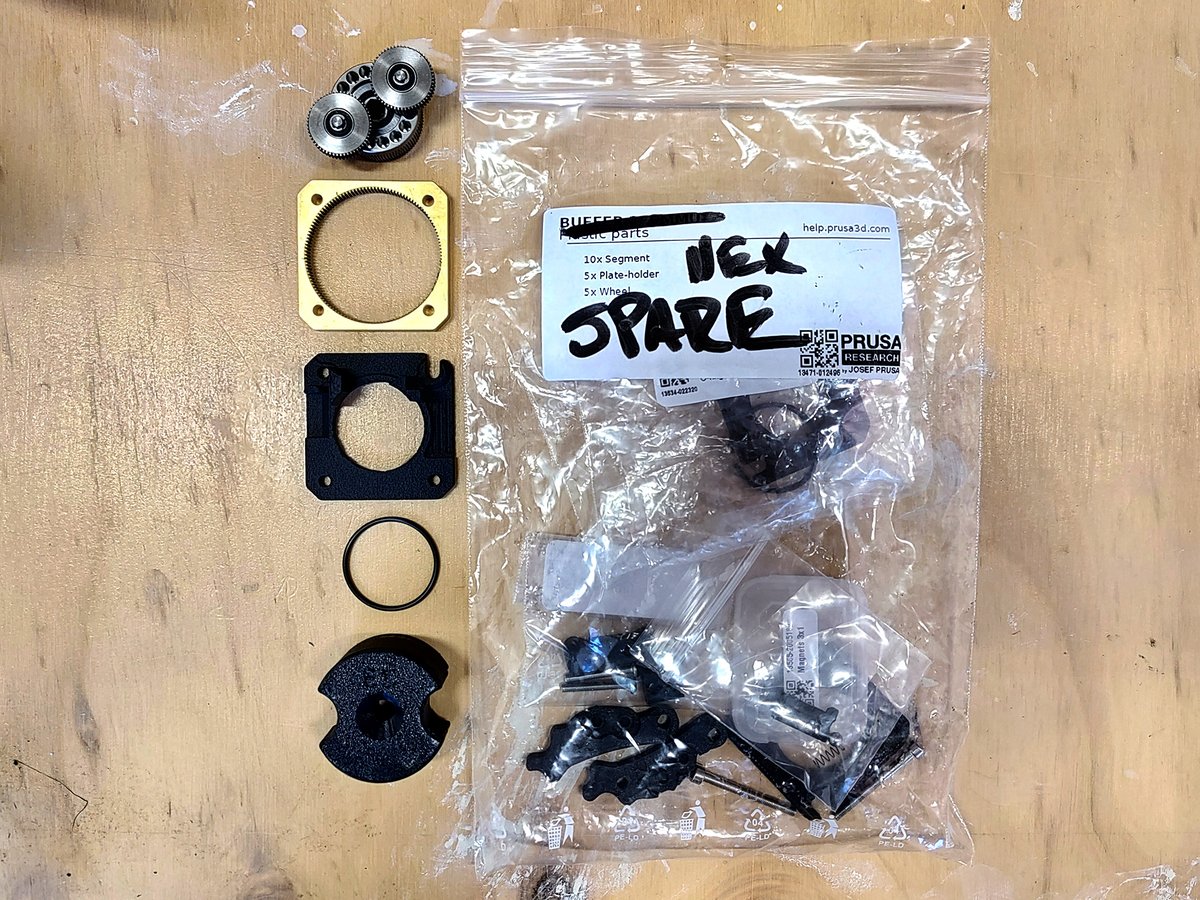
In typical Prusa fashion, there are a few different flavors of the MMU3 you can choose between. Principally, there’s the pre-assembled version for $409, or the kit for $369. The kit will see you assembling the nuts and bolts of the MMU3 hardware, in addition to a few other assembly tasks. For this review, Prusa sent us a pre-assembled unit.
For those who already have an MMU3 from its MK4 release – and don’t care to enclose their system (or plan to DIY a solution) – the MMU3 Lite conversion kit is available for just $9, adding just a new PTFE tube, magnets, and some screws. You’ll need to print a few parts for this option, too. Or, if you want the top enclosure, you can grab the full conversion kit with a top for $39.90.
If you don’t already have an MMU3, you could pick up an MK4 MMU3 kit for as little as $299 (again, it’s the same basic hardware) and Lite conversion kit. That doesn’t seem worth it unless you know you’ll be DIYing a solution, but there’s definitely an appetite for just that with this release.
For now, let’s focus on the enclosed MMU3 for Core One.
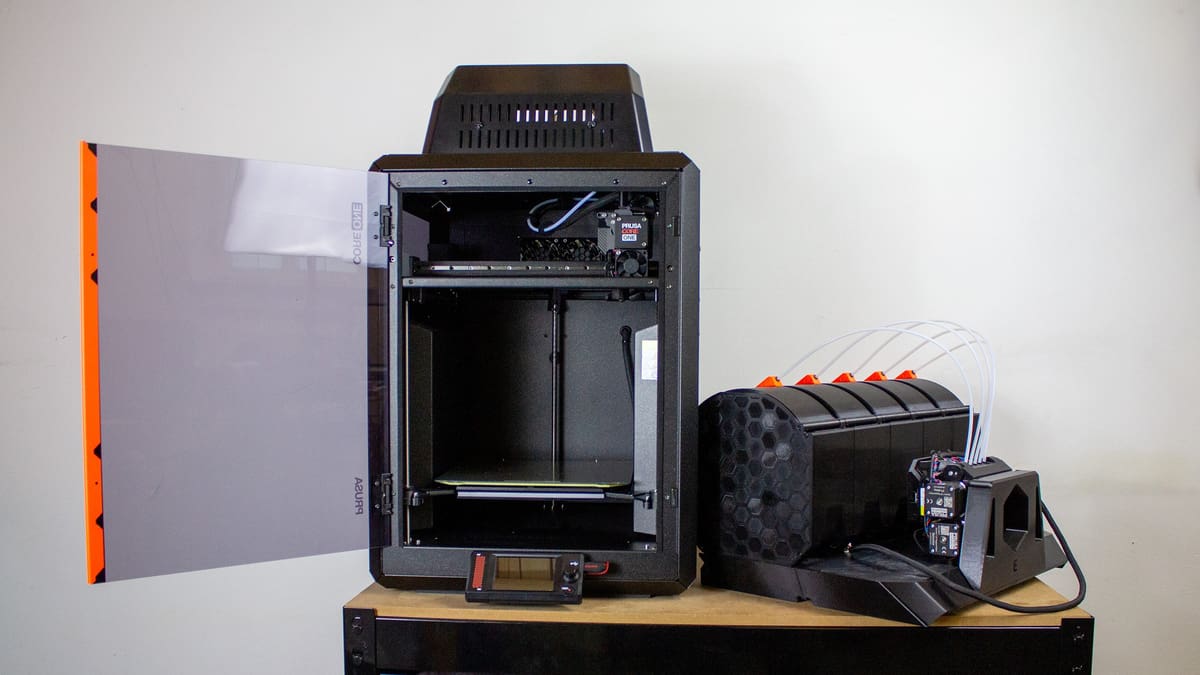
Like the Core One’s standard top cover, the MMU3 enclosure is complete with a vent to help manage the printer’s chamber temperature that can be closed to print with high-temperature materials. Accommodating the MMU3’s mobile selector does mean the back of the cover is now permanently open, which seems like it would act as a vent for the enclosure. Fortunately, our ASA and PC test prints performed well, which suggests the Core One’s chamber temperature management is more or less intact.
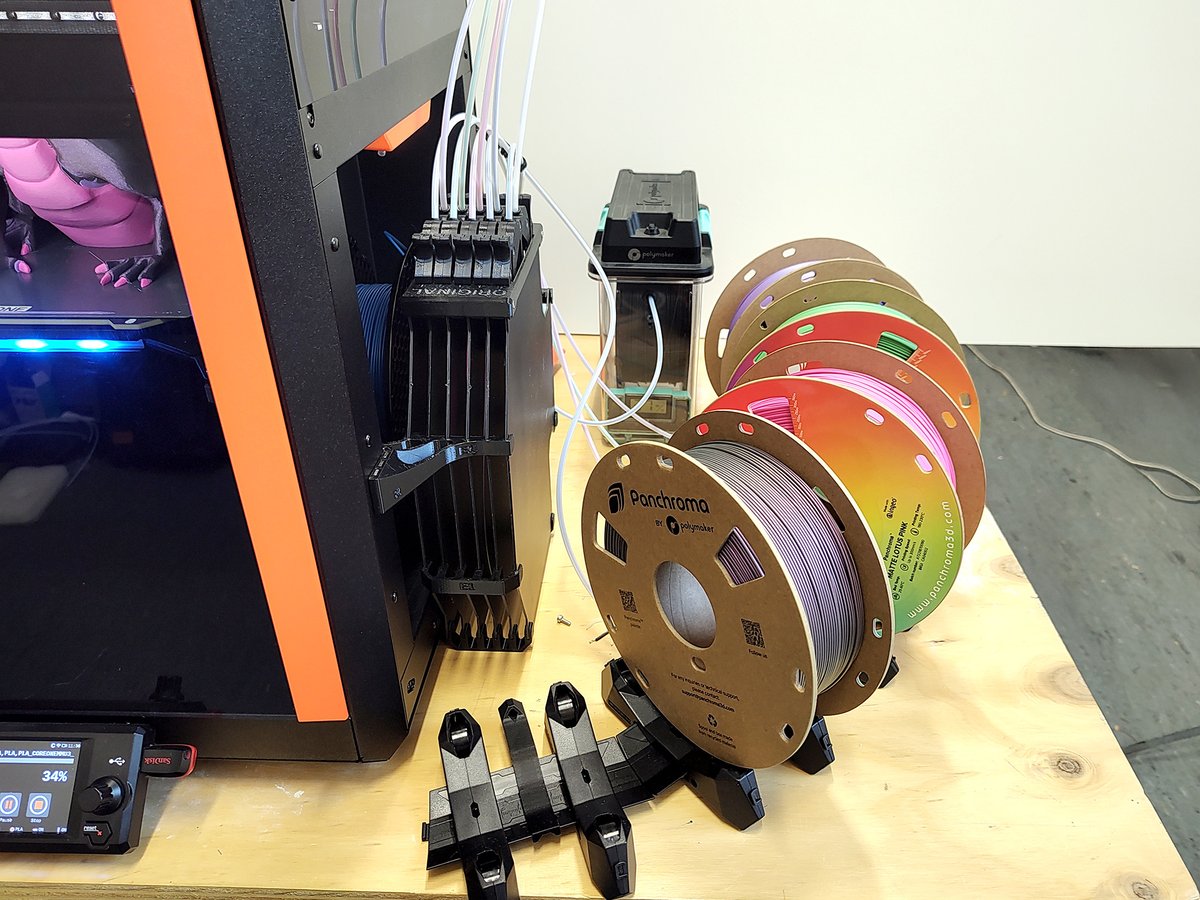
The MMU3’s filament buffer gets the magnet treatment, snapping into place on the Core One’s side recess. It’s not in the recess (which still leaves space for a spool), but sits just outside of it.
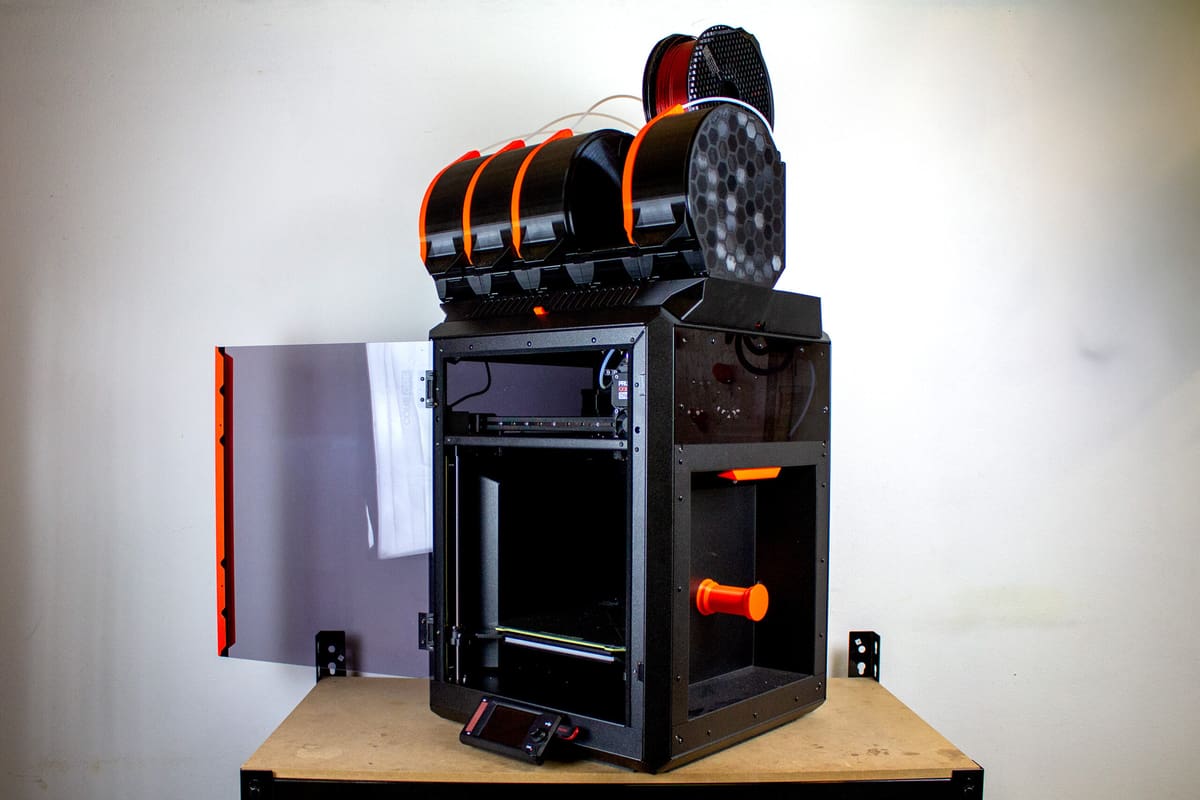
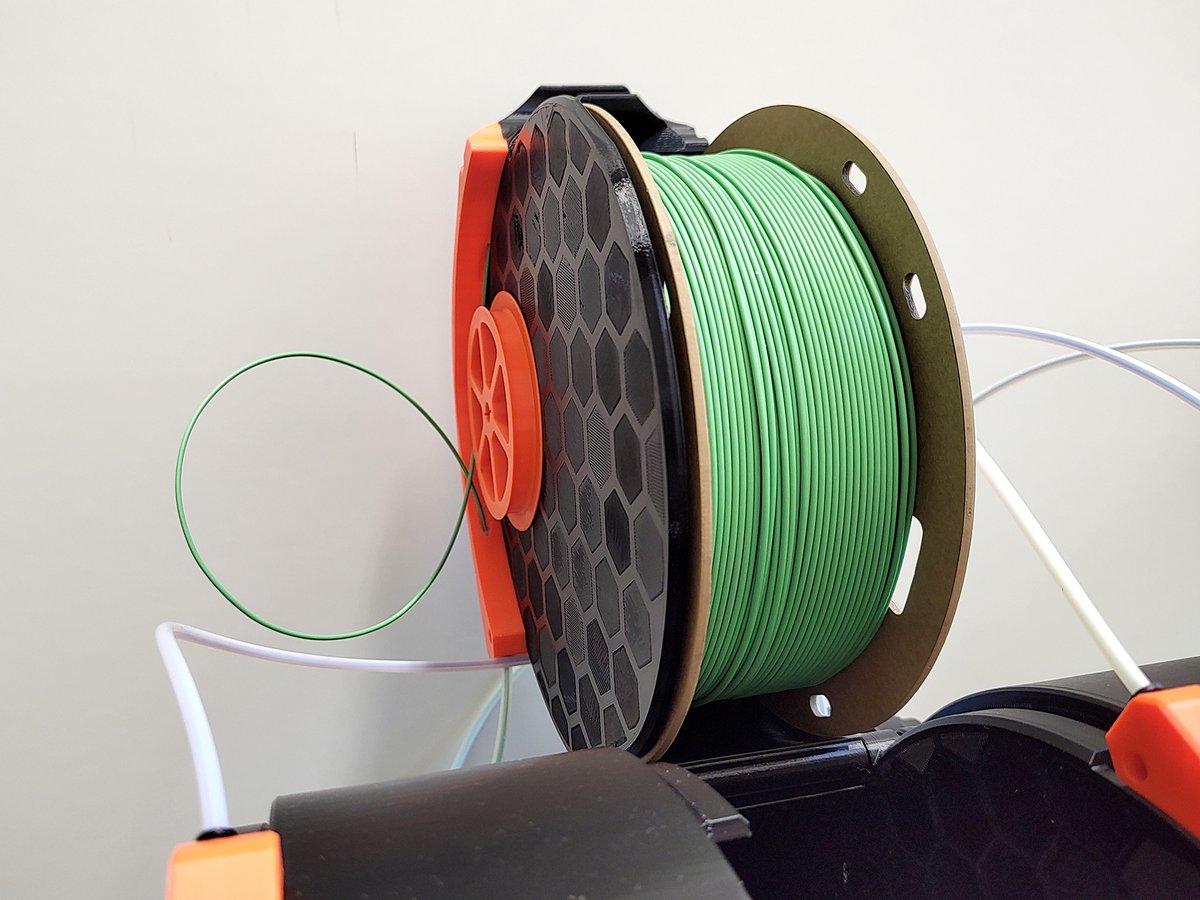
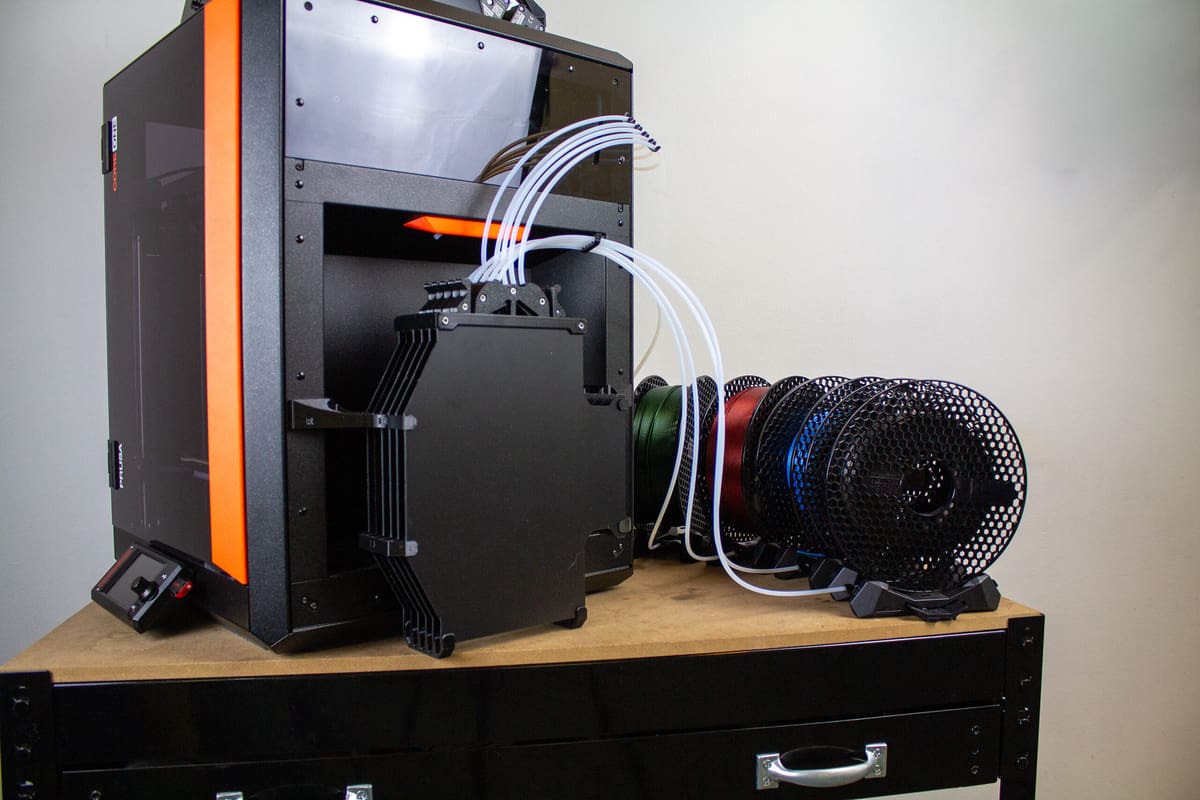
Unfortunately, the splay of spools to feed the MMU3 is the same as ever: unenclosed and spread out beside the printer. Without a DIY storage solution, humidity could be a problem for exposed spools, and you’ll need ample tabletop room to accommodate the footprint – which somewhat diminishes the compact Core One design.
There are merits to this system, to be clear. The MMU3’s spool holders are adjustable, letting you shape them to work with a variety of spool sizes. But, in a market of multi-material systems that have largely followed the enclosed route, I can’t help but wonder if leaving my materials exposed will be a hassle down the road.
That said, I enjoyed the ability to slip a PolyDryer beside the spools after drying a particularly well-aged spool of PLA. You could easily replace the holders provided with the MMU3 with a set of dryboxes, a dryer, or other DIY solutions – but that’s an added expense. Prusa clearly foresaw the issue of space here and has experimented with solutions, releasing one as the MMU3 Community Version, which I look at in more depth below.
A small touch I really appreciate on the MMU3 for Core One implementation is that the Core One’s original single-material PTFE filament guide tube is simply tucked to the side. If you want to circumvent the MMU3 and print with, say, an engineering-grade material mounted in the Core One’s side recess, just swap the tubes, disable the MMU3 in the printer’s settings, and you’re off to the races. It’s not like this was difficult to do on the open-frame MK4, but it could have been a hassle on an enclosed system like this. The thoughtful anticipation of user needs is appreciated.
User Experience
Even if you buy the pre-assembled MMU3 for Core One, installing it is a touch more involved than it was for the MK4 – but not by much. You have the same changes to the printhead, which involves disassembling it to replace the idler and gearbox faceplate, and a couple extra steps to route the MMU3’s cable through easily accessible panels on the machine’s back. Lastly, bolt the MMU3 on and replace the Core One’s stock top cover and that’s all.
Fortunately, it doesn’t have the same intrusive wiring that came with upgrading an unbundled MK4. All that’s required is to remove the xBuddy mainboard’s cover and plug the MMU3 in. It’s simple.
Contextual simplicity aside, it is still a much more involved process compared to Prusa’s multi-material competitors, which are largely plug-and-play with their respective systems.
So, the MMU3 hardware is the same. That doesn’t necessarily mean it will perform the same, but fortunately the new context of an enclosed 3D printer with different kinematics doesn’t appear to hinder the performance of the MMU3 in any meaningful way. It’s still the same quality we found in our previous review, with all the same boons and pitfalls.
That goes for the Core One’s capabilities, too. Some overhangs are slightly weaker than I expect the MK4 could perform (something I previously tested with single-material prints on the Core One), but well within acceptable margins. If you’re used to your Core One’s capabilities when printing with single colors, you’ll know what it can do.
That’s not to say I didn’t run into some problems. The MMU3’s default settings have the filament cutter disabled. A major benefit of the MMU3 against the competition is how little waste it produces, so this makes sense. But, without it, I ran into frequent loading errors while printing larger models. Even when using Prusament, the company’s own material, with which the Core One should perform best, I had frequent alerts from Prusa’s app telling me a material change failed. In our generic material tests using Panchroma PLA material provided by Polymaker, the problem was even worse.
Fortunately, enabling the cutter fixed the problem.
The issue was stringing. When the MMU3 was in the final stages of development, Prusa shared a blog post showing how it reduced filament waste by fine-tuning retraction settings to eject filament cleanly, and pointed to stringy retraction as a problem for reloading.

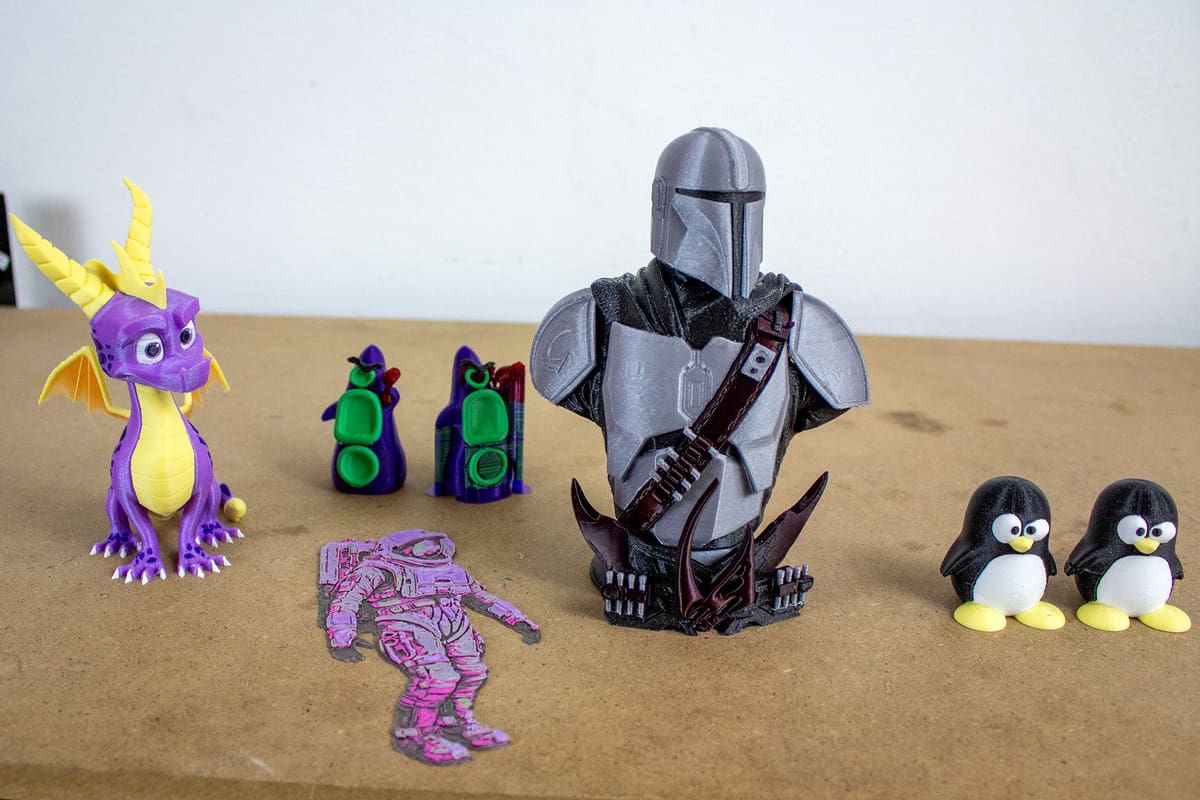
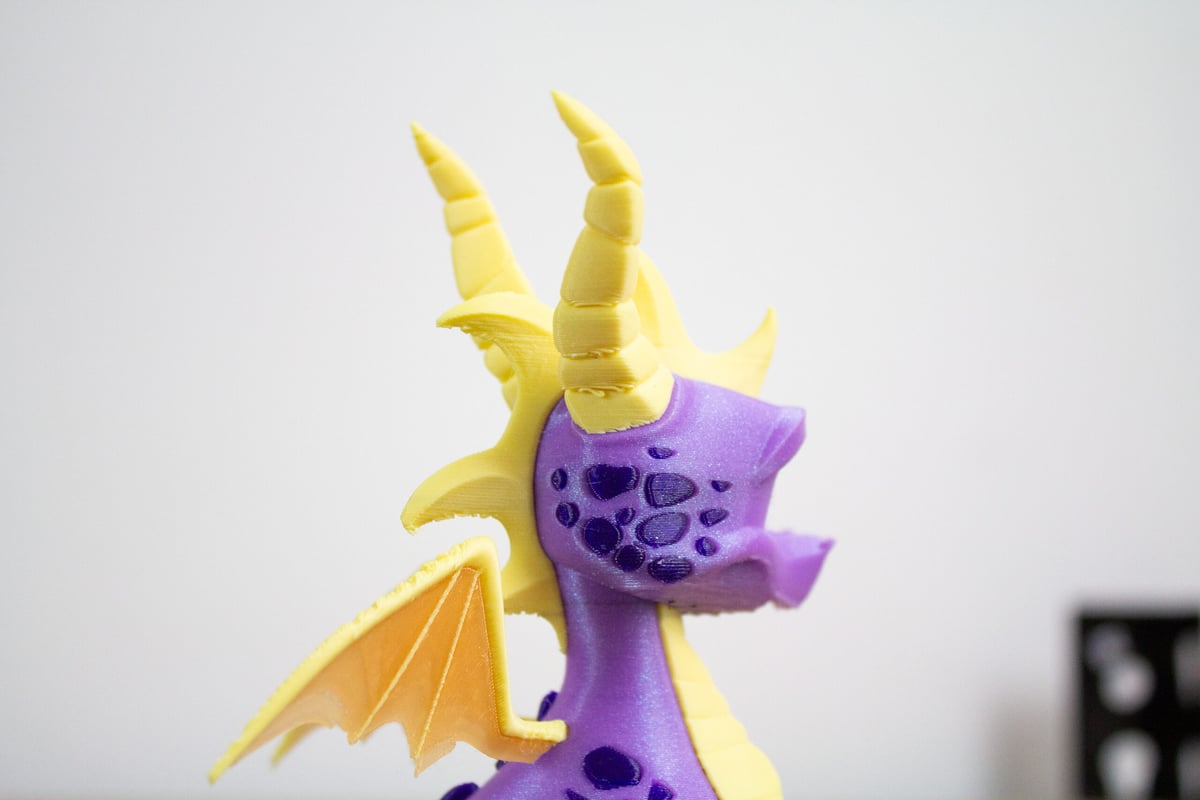
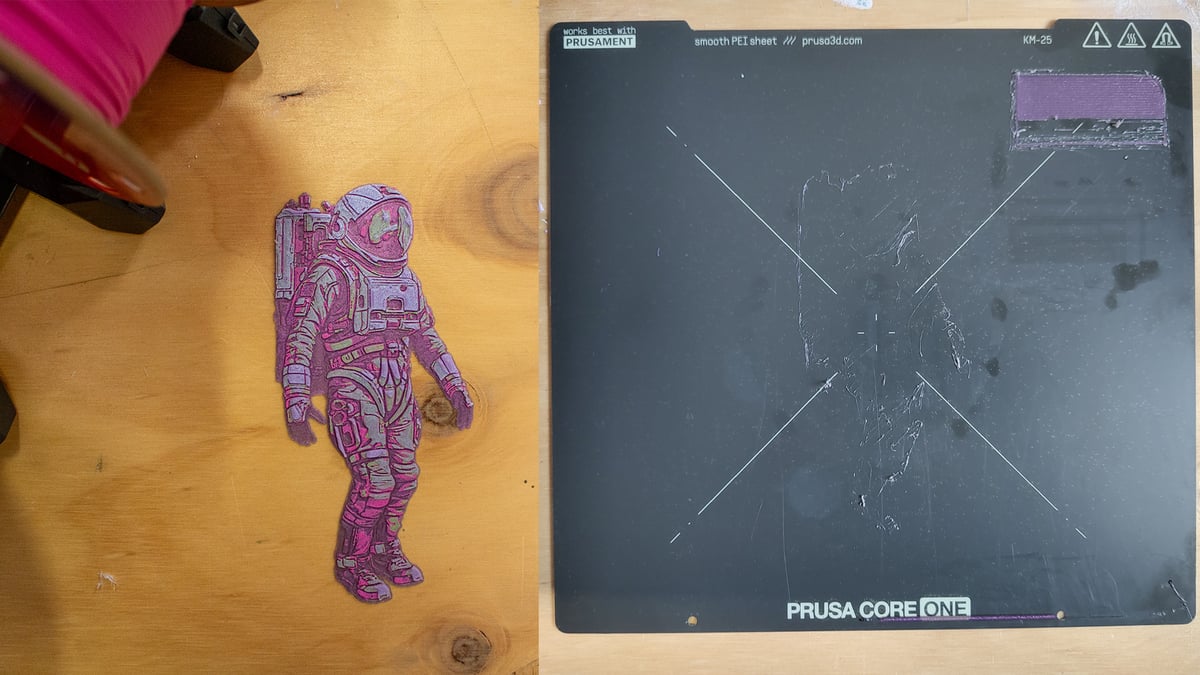
Third-party or “generic” material testing posed more of a problem. Without a filament-specific profile, stringing occurred, and failures that couldn’t be corrected remotely were a problem. This model of Spyro the dragon, which used a mix of Prusament and Panchroma PLA, required a fair bit of intervention. Enabling the cutter remedied this issue entirely.
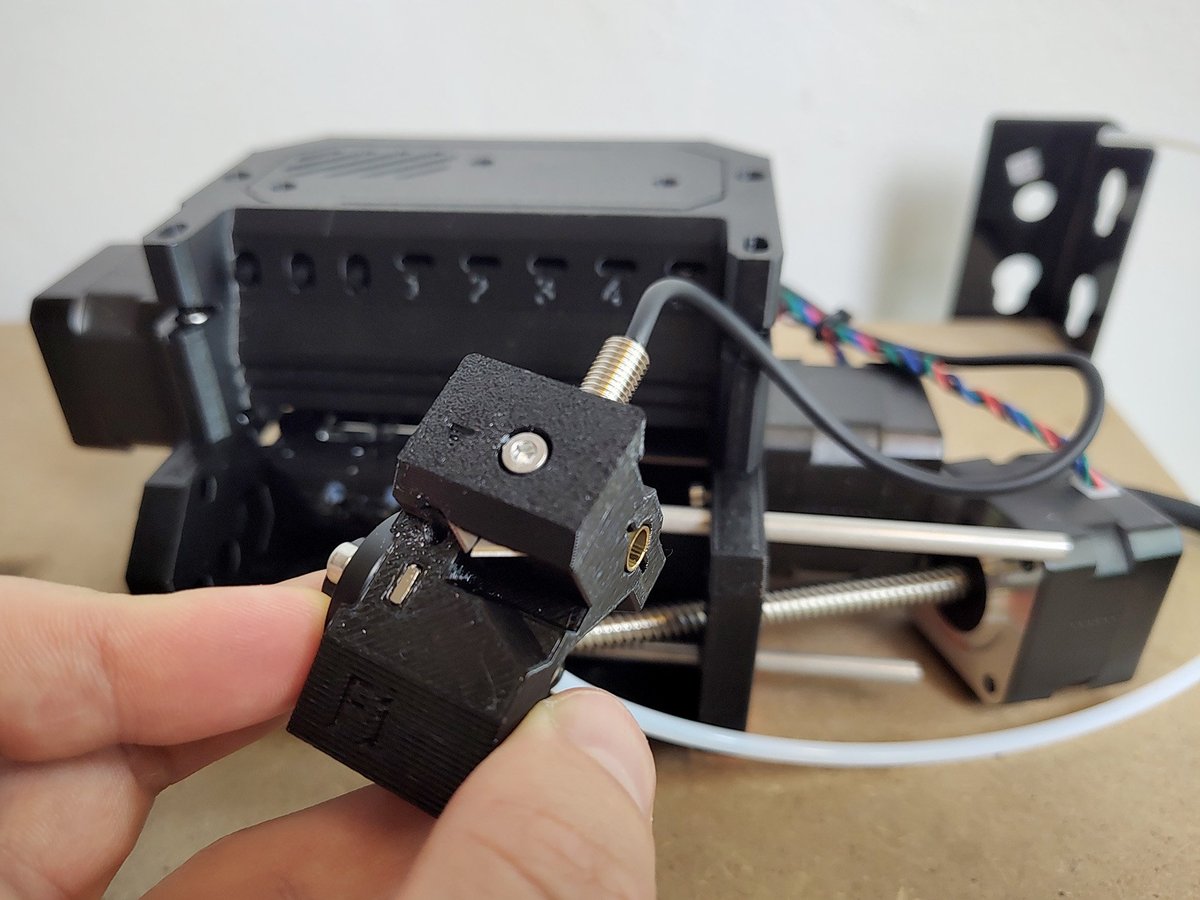
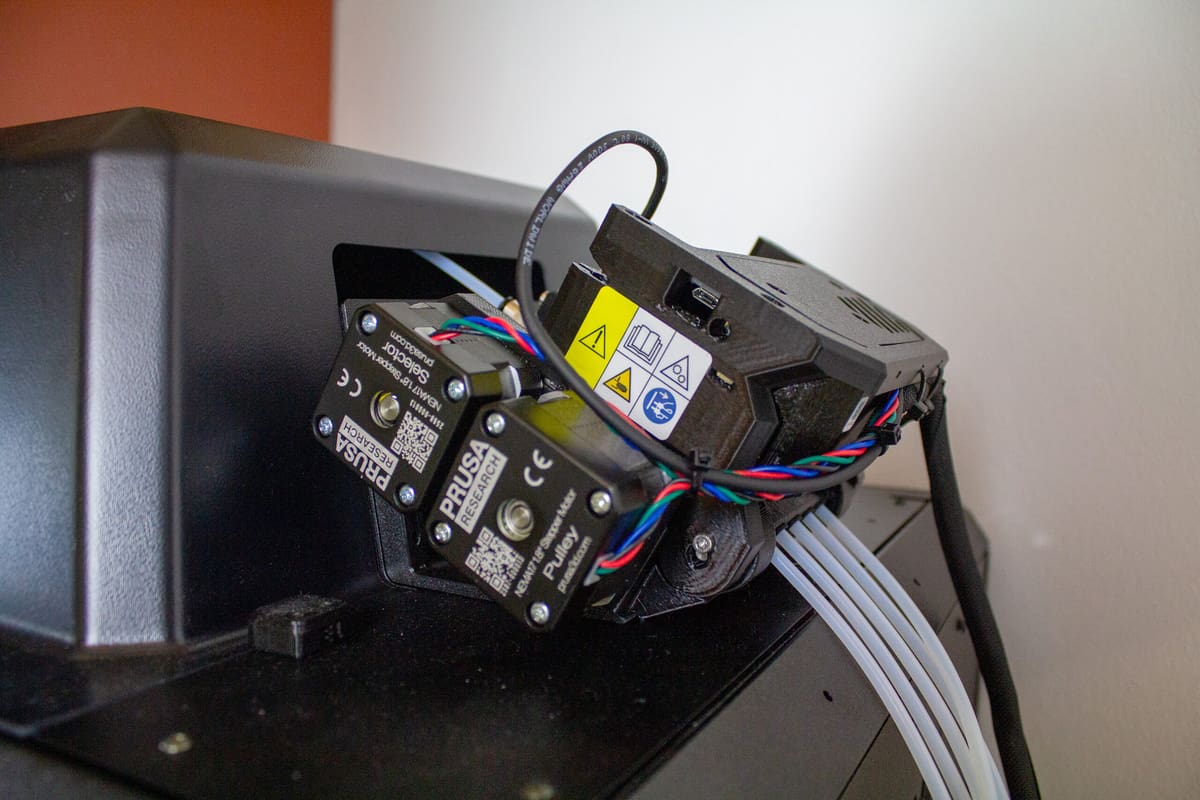
And, fortunately, leaving the cutter on won’t produce more waste than is necessary. The MMU3 uses a static cutter, mounted inside the material-changer’s “selector” toolhead. After three unsuccessful material change events, it extends some 10 mm of excess material for the blade to trim away before retrying. This waste is minor compared to other systems, and won’t happen at all unless the MMU3 repeatedly fails to load.
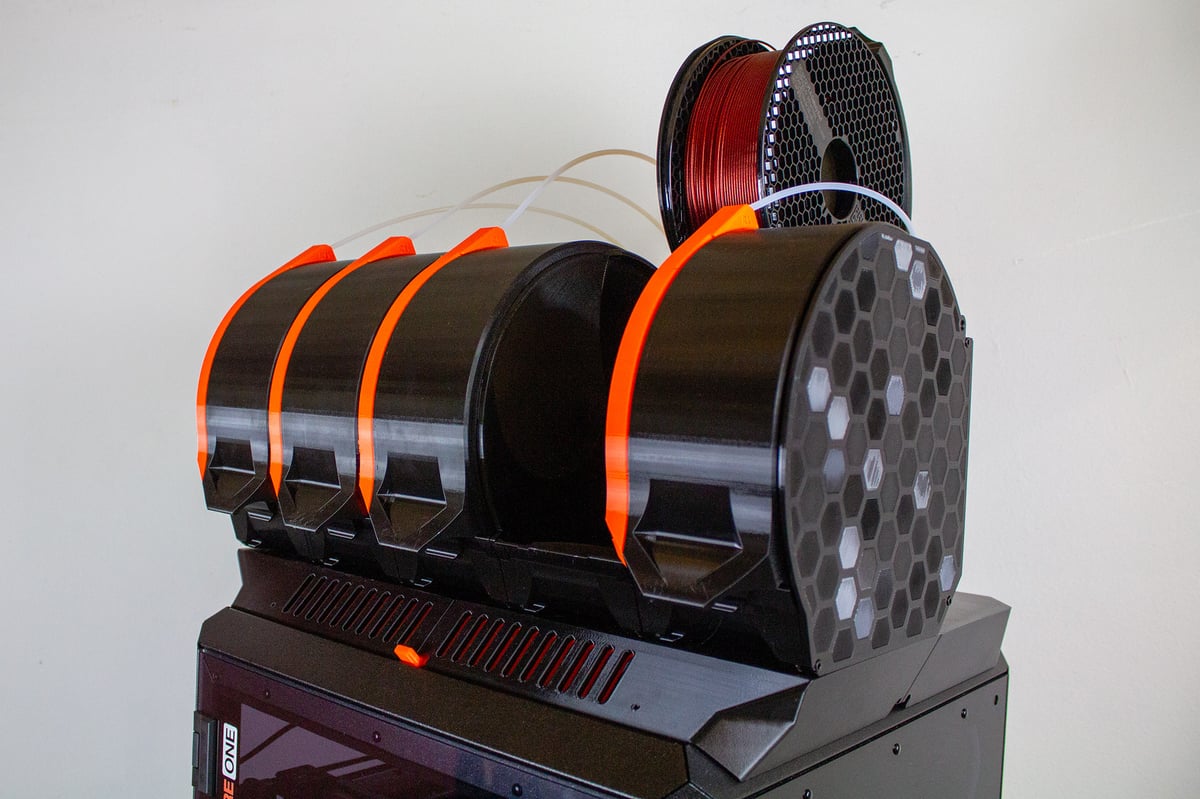
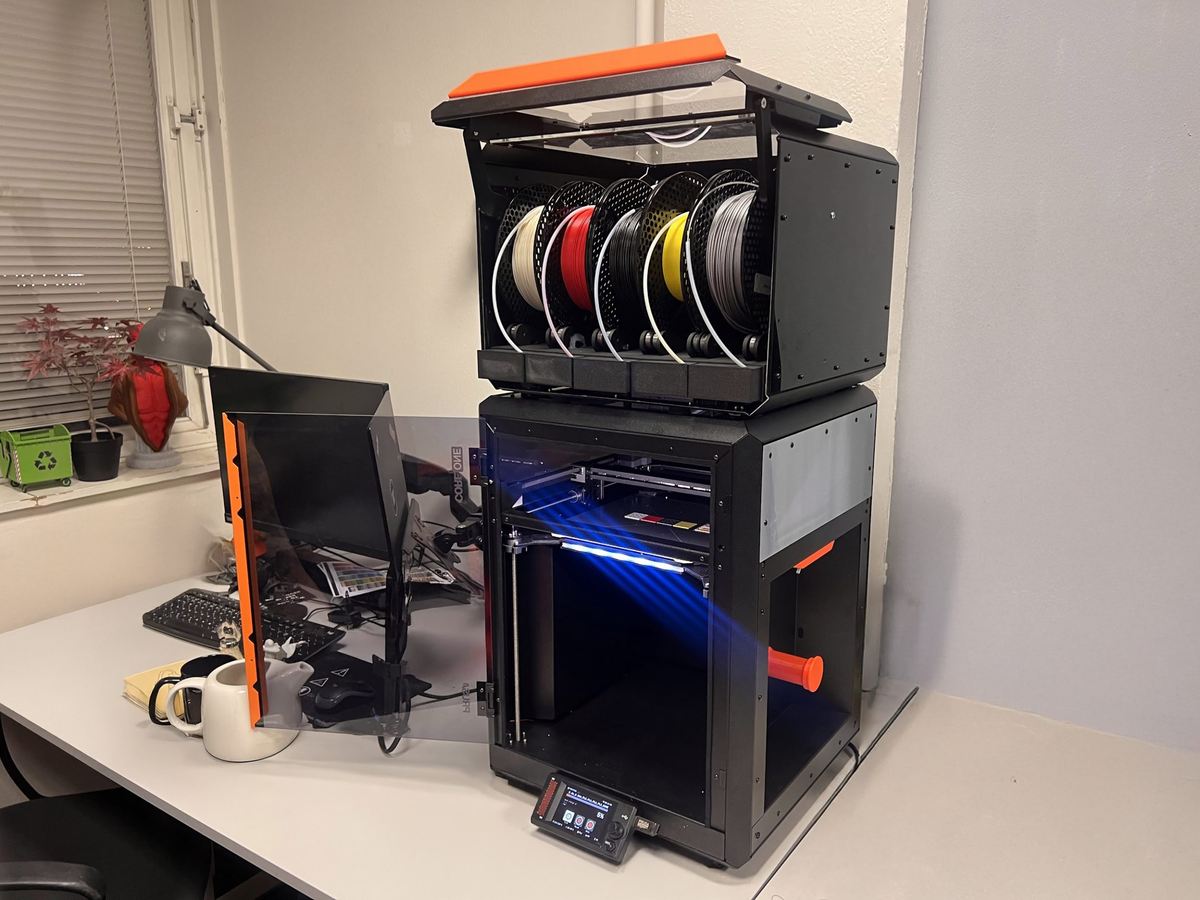
Top-Mounted MMU3 “Community Version”
The MMU3 Community Version is a semi-official, DIY top-mounted configuration for the MMU3 and Core One. Like the Lite, it’s an upgrade path you can take if you already have an MMU3. Only one additional component – a longer cable – is needed to make it work.
While it’s very much not a fully-fledged Prusa product, it’s both interesting and enticing, so I wanted to give it a look.
The MMU3 Community Version was created by David Schwarz (aka Prusa Guy), a member of Prusa’s content team you may have come across if you’ve visited the company’s booths at major events. At release, the Community Version was described as a “development version” for the company’s “next-gen” multi-material solution, but ultimately didn’t make the cut. While a next-gen solution is still in development, Prusa released the Community Version files anyway, giving users a starting point to DIY their own solution.
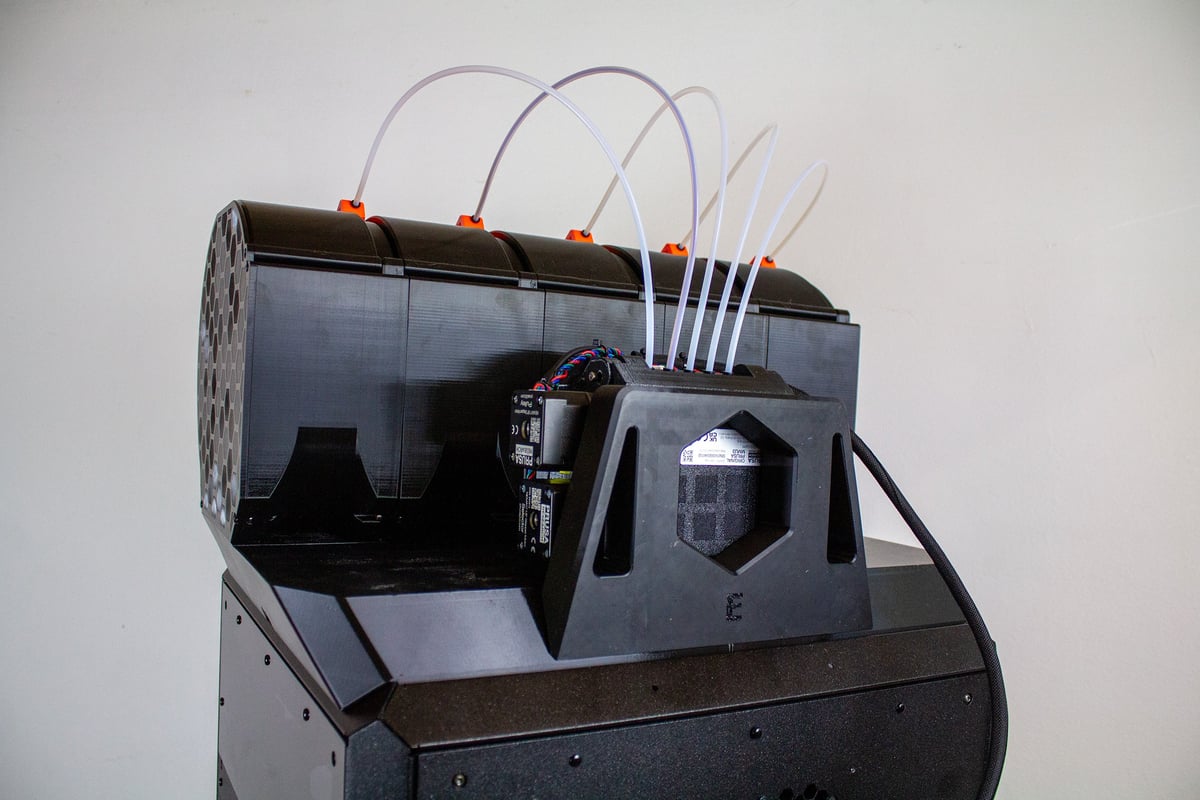
It’s a good thing that it did. The sprawl of filaments, while allowing for many spool sizes and dropping in dryboxes, expands the Core One’s footprint. This can make managing the materials frustrating if you’re tight on space. Conversely, the Community Version tidily integrates with the Core One and stores your five spools above the printer.
The MMU3 Community Version is made up of five spool containers with integrated filament buffers, a base plate enclosure with a vent, and a mounting bracket for the MMU3 hardware.
It takes over 4.5 kg of filament to print the Community Version and a good chunk of printing hours. But after that and some assembly, the process is about the same as the regular MMU3 for Core One.
The Community Version is a great design, but I can see why Prusa opted not to release the concept as a fully-fledged product. Switching over to it from the standard MMU3 for Core One, reliability and compatibility became greater problems. I don’t think it’s anything a few relatively simple changes couldn’t fix, but it’s not up to the standard of a mainline Prusa release.
For example, the fixed spool holders integrated into the inside of the container lids aren’t great for all spools. When I tried Panchroma’s cardboard spools in the MMU3 Community Version, they wouldn’t feed. Filament would get far enough for the Nextruder to detect filament loaded, print a little, then bind and stop. You’d need to stick to plastic spools, or replace these mounting points with either bottom rollers or something like a free-spinning spool holder inside the Community Version’s containers to get around this.
Unfortunately, that wasn’t the only issue I had feeding filament through the MMU3 Community Version. Even when using Prusament, I ran into under-extruded layers. My best guess is that material sometimes binds in the more constrained filament buffer. Enough filament is again loaded for the Nextruder to detect it, but can’t get much further, producing empty layers.
I expect this was the problem because I had a similar issue just once with the regular MMU3 for Core One when a spool came off its roller during a multi-day print. The regular buffer kept enough filament to feed to the Nextruder’s filament sensor, but couldn’t feed from the spool any further. Several layers were missed entirely before I caught the problem, ruining the large print.
Those are the major printing issues, but I was also frustrated by how little access it gives to the MMU3 hardware. There’s not a lot of room to get at the MMU3’s toolhead in this front-down orientation. Depending on the printhead’s position, you may not be able to lift the MMU3 unit out for inspection and maintenance. This is especially true when the Core One’s toolhead is at the front of the print volume – exactly where it goes when there’s a loading issue.
It could be that just making the printhead PTFE a little longer would solve this problem, but that would result in more filament pushed back into the buffer, and given the suspected binding issues I experienced, that could lead to more problems.
Competiton & "Next-Gen" MMU
Schwarz and Prusa know the Community Version isn’t a perfect solution. They’re upfront about this on the Community Version’s Printables page, stating that it’s both a “work in progress” and that there won’t be further development.
So why even talk about it? Because it’s one of those cool DIY solutions that attempts to solve the long-standing issue of spool sprawl with Prusa’s MMU. That’s why. At the cost of some filament, time, and maybe a few extra screws, you get a fun project to work on using the regular MMU3 kit, which you could revert back to the MMU3 Lite should the Community Version irritate you too much.
Since Prusa confirmed this was an ongoing development (a different solution was also shown in a January development blog) it seems a safe bet to expect whatever the next-gen MMU looks like to be like this, and compete more closely with the broader material-changer competition.

Here’s the deal: compared to what we consider the MMU3’s and Core One’s chief competitor, the Bambu Lab X1C Combo, my impression is the same as my impression of the Core One itself. This is a system with great benefits for those who don’t mind putting in a little extra effort.
While Bambu Lab’s offering manages to be an effective plug-and-play system, and largely worry-free throughout its use, it purges, baby. I wanted to compare the difference in waste between these two setups and so reprinted the Mandalorian bust using the same Prusament PLA on the X1C with AMS.
While the Core One for MMU3 produced a wipe tower beside the model, making 140 grams of wasted filament, the X1C, with its prime tower and purged “poop” totaled a whopping 576 grams of waste. That’s over half a spool in total!
Your initial setup and daily use are a bit less convenient if you take the MMU3 in trade. Loading materials into the AMS takes all of two seconds, for example. You nudge a filament into the inlet and the system’s extruder grabs and feeds it for you. Conversely, I found feeding filament through the MMU3’s buffer something of a nuisance. You have to manually feed filament through each filament buffer’s cassette to MMU3 while the device is loading.
It’s a mild nuisance, but one I can see becoming a major frustration if you swap materials often. Until whatever “next-gen” MMU comes along, the decision today is a simple one between potential effort at loading, and big filament savings on material changes.
Is It Worth It?
So, where does that leave the MMU3 for Core One, both in terms of the experience using it and compared to the competition?
In terms of comparison, much like when we last compared solutions from Bambu Lab and Prusa Research personal preference will have to be the deciding factor. Unlike that article, I don’t have a suggestion myself. They’re both great pieces of kit with distinct benefits.

What’s clear, though, is that the MMU3 for Core One continues the experience we highly approved of when it released for the MK4. It’s a low-waste, high-quality solution for multi-color 3D printing that integrates nicely with the already impressive Prusa Core One – so long as you don’t mind losing benchtop space to the spread of filaments. If you do, top-mounted solutions do exist. The Community Version is there, ready to customize to your liking, and there’s a healthy selection of community solutions to be found on Printables, such as the interesting Coreboxx.
It can be a tedious system to work with, though, both in the initial setup and in some nuisance workflows such as loading filament. $409 feels like a lot for that experience next to the well-established and undeniable convenience of the $349 AMS. But given the material savings for that premium running up to half a spool for a relatively small multicolor bust – savings of around $15 per print if you’re buying high-quality filament like Prusament – you might recoup that initial investment quickly.
License: The text of "Prusa’s MMU3 for Core One Keeps a Good Thing Going" by All3DP is licensed under a Creative Commons Attribution 4.0 International License.
CERTAIN CONTENT THAT APPEARS ON THIS SITE COMES FROM AMAZON. THIS CONTENT IS PROVIDED ‘AS IS’ AND IS SUBJECT TO CHANGE OR REMOVAL AT ANY TIME.