3DMakerPro Turtle Review: A Capable, Customizable Scanner with a Satifying Snap
Rating

The Turtle is a versatile modular scanner that handles everyday conditions better than most. Swappable cameras for different tasks are handled well, though the company’s software frustrates at times, marring what would otherwise be a stellar scanner.
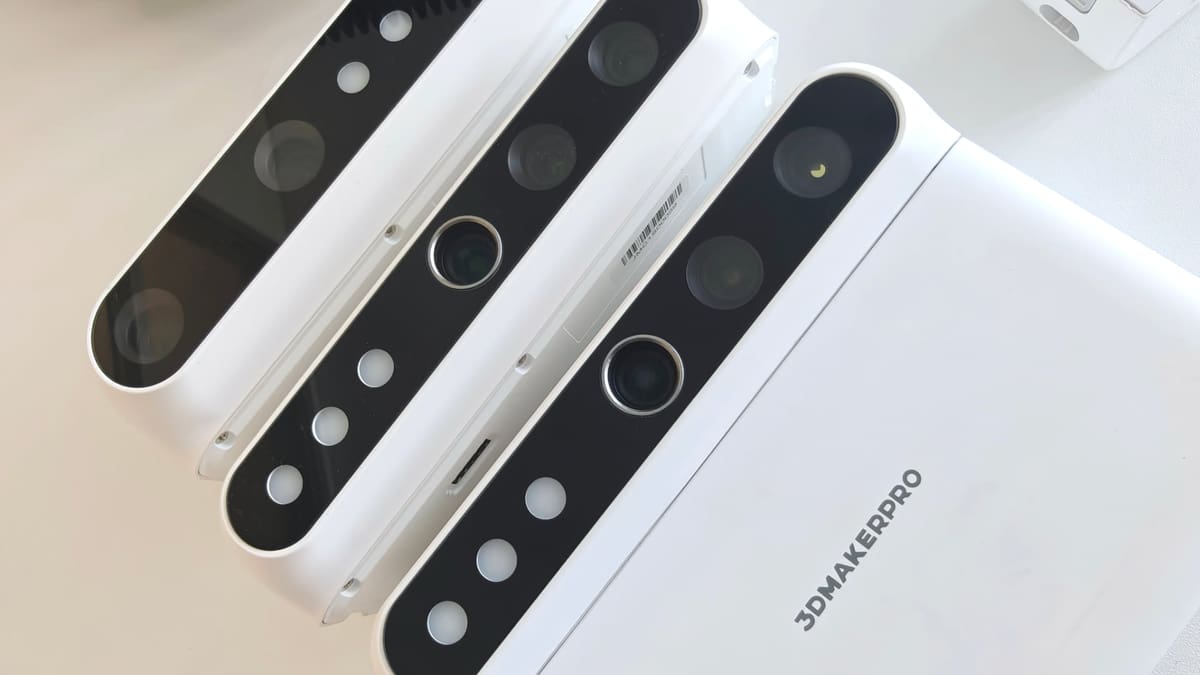
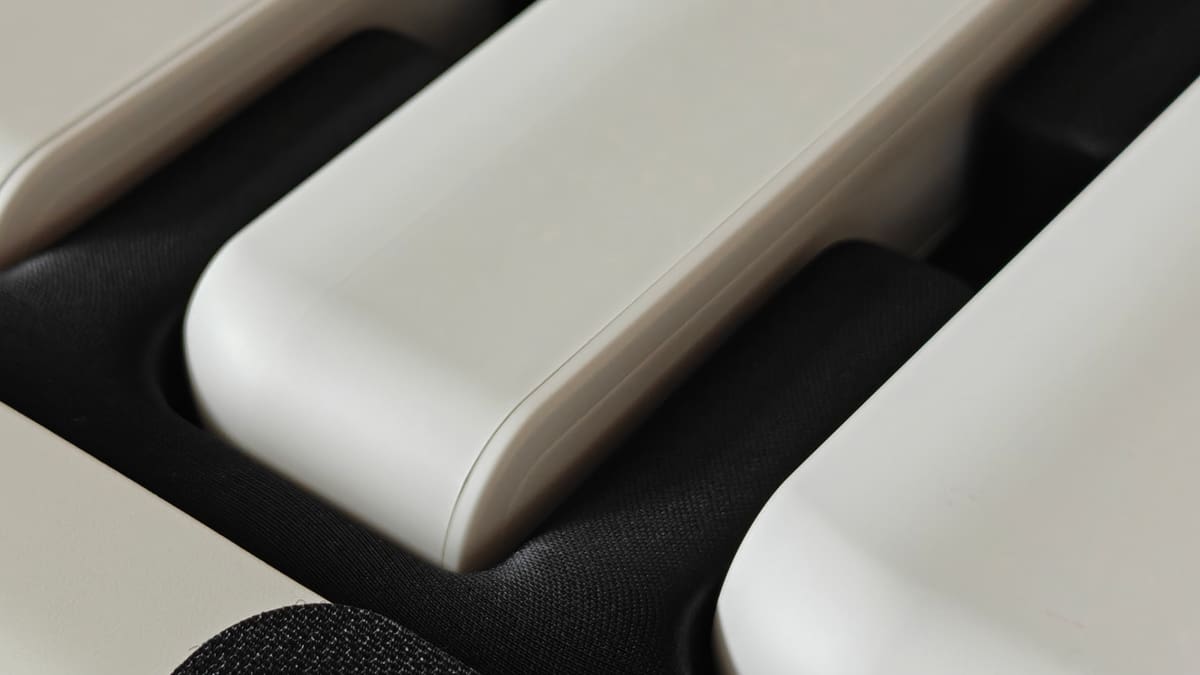
If there’s one thing 3DMakerPro nails with their 3D scanners, it’s how they feel. The shapes, the heft, the weight. They’re cheap, but they never really feel cheap. The company’s latest release, the modular, several-part Turtle, is no exception, with powerful magnets snapping its myriad components into place and seamless pogo pin connectivity between them all.
The Turtle aims to combat all-in-one scanners like Revopoint’s Miraco by offering its capabilities à la carte. Whether you need close-range detail, large-scale coverage, or standalone scanning, you only buy the modules you actually need. Save some money now, and expand your system later if your needs change.
In our time with it, the Turtle has proven to be a capable little scanner that stands up well in everyday conditions. The actual scanning itself builds up without a hitch, even though it relies entirely on feature-based tracking, and is fast enough to keep up with even pretty jerky motions on your part – and there’s a general simplicity to jumping between scanning and editing that feels good. That being said, the control pad UI is lacking, with unlabeled icons and buttons – some simply too tiny for my sausage fingers to reliably tap – leading to mishits, while a fragile software experience detracts from what is otherwise a useful and capable 3D scanner.
3DMakerPro Turtle: At a Glance
- Light source: Blue LED (Structured blue light)
- Single frame accuracy:
- S Module: 0.01 mm
- M Module: 0.03 mm
- L Module: 0.05 mm
- Volumetric accuracy: Not specified by manufacturer
- Max. fused point distance:
- S Module: 0.05 mm
- M Module: 0.07 mm
- L Module: 0.10 mm
- Recommended object size:
- S Module: 10 – 300 mm
- M Module: 15 – 1500 mm
- L Module: 100 – 2000 mm
- Operational range:
- S Module: Working distance 180 – 280 mm | Capture window 160 × 120 mm
- M Module: Working distance 200 – 400 mm | Capture window 240 × 180 mm
- L Module: Working distance 500 – 950 mm | Capture window 600 × 450 mm
- Tracking options: Feature-based tracking – no markers (supports Freehand/Easy scan and Turntable scan modes)
- Texture capture: 24-bit color texture
- Release: 2026
- Price (MSRP):
- Camera Module (S, M, or L with battery grip): $699
- Control Pad: $1,299
- Bundle: $1,899 (camera module + control pad)
- Complete set: $3,299 (all camera modules + control pad)
The Tech
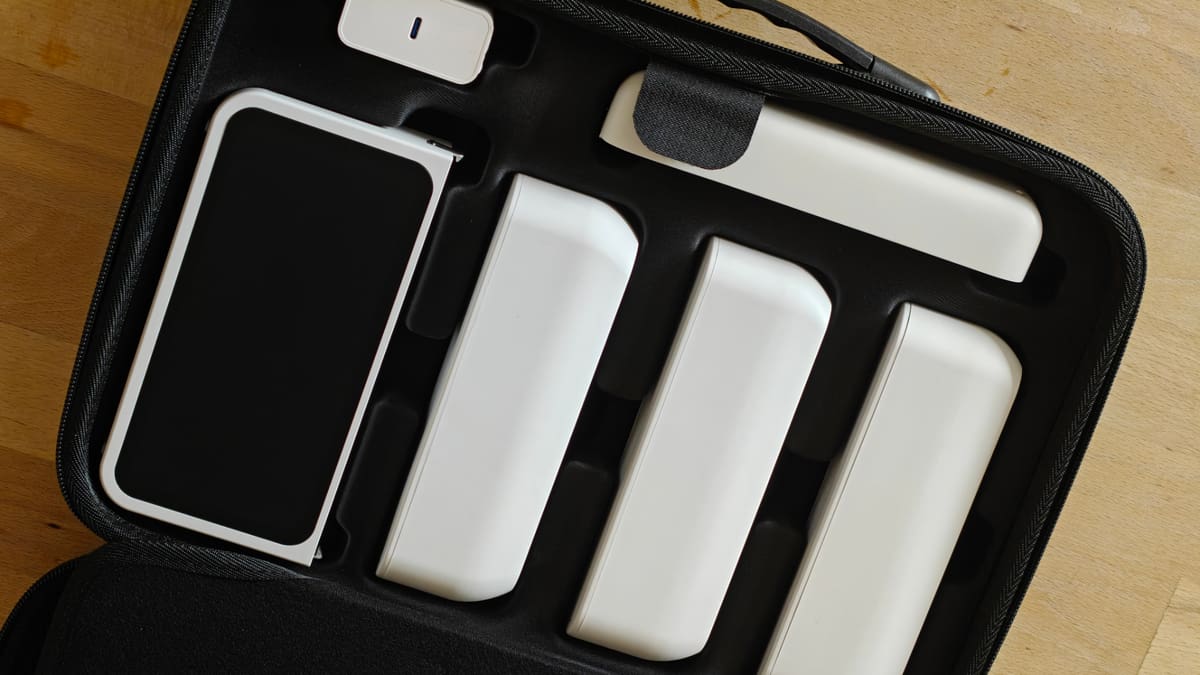
It would have been dull of 3DMakerPro to simply copy Revopoint’s and Einstar’s homework. Instead, they’ve taken the core experience of a standalone scanning system and put a spin on it that expands the usefulness into more situations and setups. The system is well designed with modules snapping together with a satisfying heft, while small locks on each side hold the camera modules in place firmly enough that you can manhandle the system from every part with confidence it will hold, which is useful when scanning.
Other handheld scanners combine cameras and lenses to offer all-in-one devices that can switch capability on the fly – the Turtle feels a little more fleet-footed for not needing to. We’ve not seen any evidence to suggest the Turtle’s camera modules are better for being distinct units, but in terms of the mental flow of swapping them out, it feels right and helps you judge the job better.
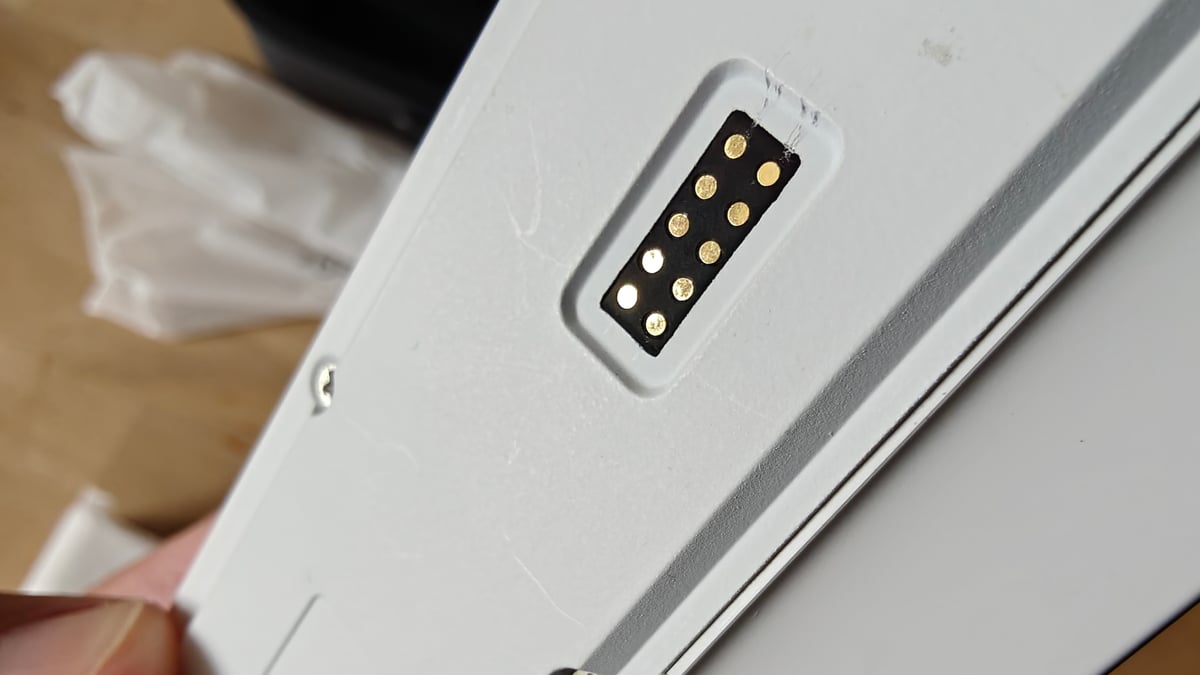
The camera module you swap in is detected by the compute unit, meaning there’s no actual thought process on your side to accommodate the difference. It could’ve been a cumbersome system to juggle, but it really is as easy as snapping modules together, letting you focus on the scanning.
The Turtle’s scanning tech is different from other handheld scanners on the market. Unlike Revopoint’s Miraco and the Einstar Vega, which use structured IR light to illuminate the contours of the scan object, the Turtle uses structured blue LED light.
Why does this matter? This difference in scan projection changes the characteristics of the scanner and situations where the scanner performs best. The Turtle’s blue LED emits light at a narrower wavelength than invisible IR light. This visible blue light interacts differently with materials; in short, it handles shiny and black objects better than infrared. It’s also further away from natural light, meaning it doesn’t get blown out by natural daylight.
The Turtle’s blue light is not suitable for scanning people and animals – the strobing light is uncomfortable for subjects to have in their faces (ask me how I know).
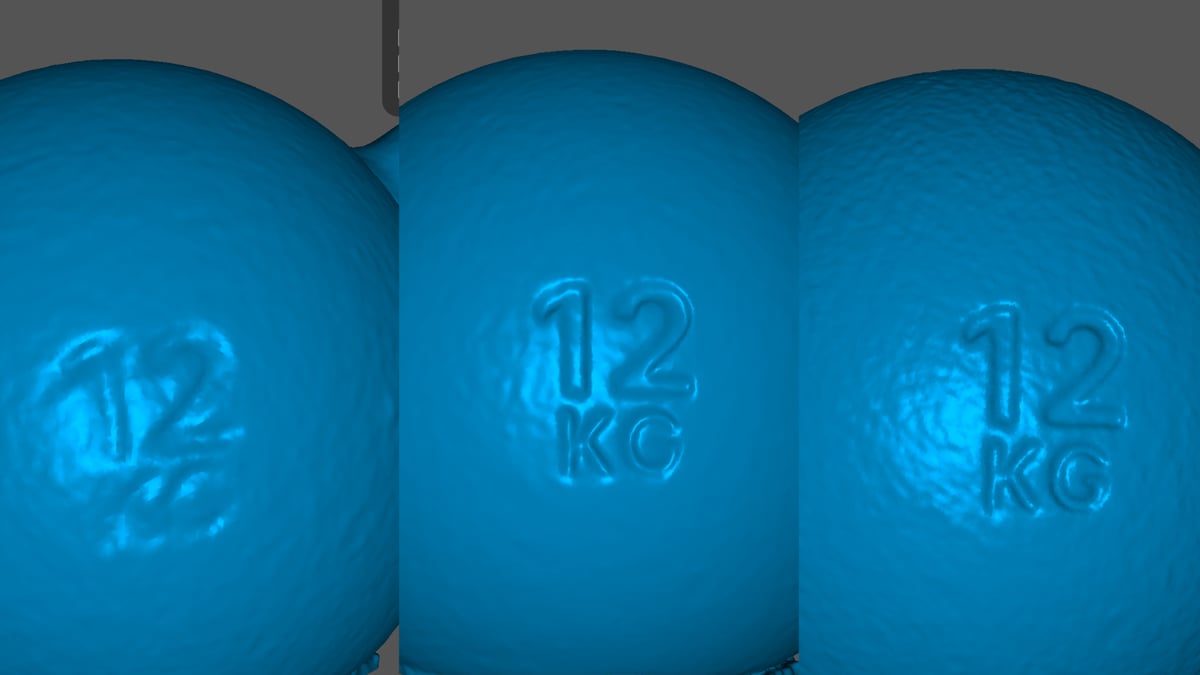
Crucially, the Turtle’s structured blue light is ideal for capturing sharp detail on mechanical objects. I’ve actually been pleasantly surprised at how quickly the Turtle has managed to capture fine detail. You should take the published 0.01 mm accuracy figure with a pinch of salt, though – that’s controlled lab conditions, not unpredictable, variable-ridden real-world usage. Figures are not published for overall volumetric accuracy, but it’s reasonable to expect that the larger the object, the more results drift – typically millimeters versus sub-millimeter amounts.
Each camera module adjusts working distance and capture area accordingly, scaling up from fine-detail closeups on the S module to large-object sweeps on the L.
In total there are five component modules of the Turtle available. The minimum you can buy is a combination of a camera module (your choice of S, M, and L) plus battery grip ($699). This configuration is enough to tether to a computer and start scanning.
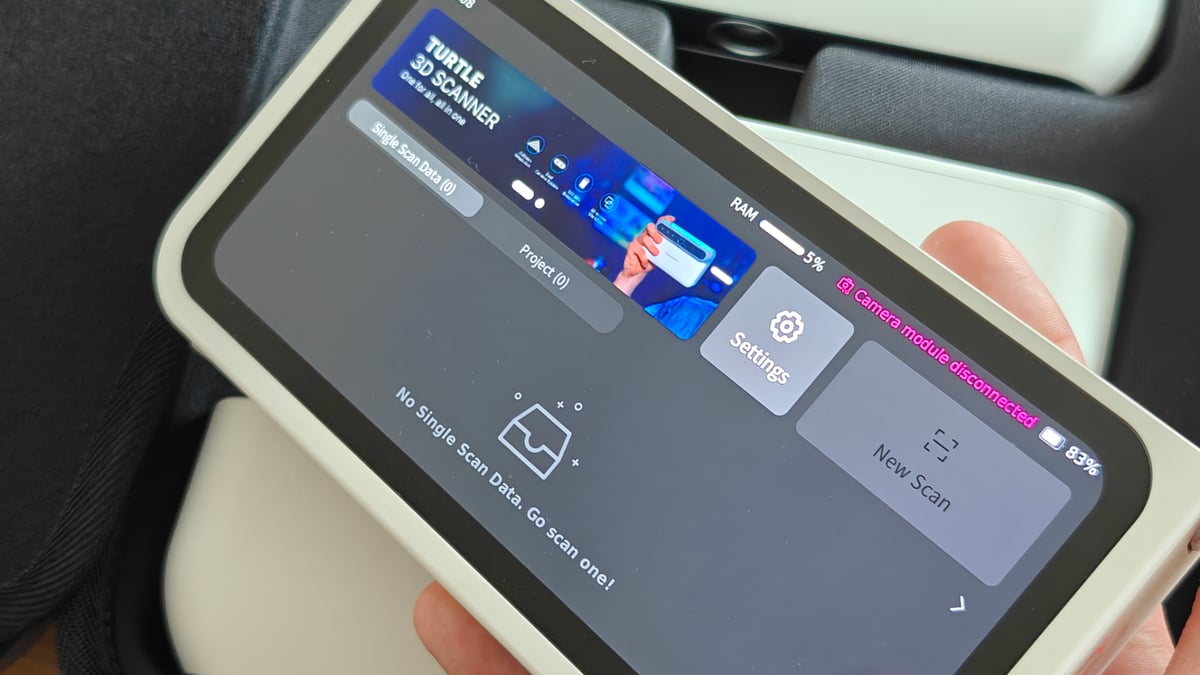
The control pad, sold separately for $1,299, replaces the grip and connection to a computer, adding the processing power for onboard fusion and meshing, plus a bright 6.4-inch 2K AMOLED display through which to do it.
For the full three-camera, compute-capable setup, you’re looking at $3,299, pricier than other all-in-one standalone flagships like the Revopoint Miraco Pro or Einstar Vega. You are getting more equipment and ways to scan, though.
The control pad’s 10,000 mAh battery drains from full with approximately 1-2 hours of use – the processing of the scans can spike this and accelerate the drain.
Something 3DMakerPro does a poor job communicating is that the camera grip module actually has its own internal battery that must be charged for the scanner to work, too. The camera modules draw more power than the USB-C cable alone can provide, meaning you can’t simply connect the scanner to a computer and expect it to work. Jobs performed like this drain the grip’s battery, even though it’s connected via USB, so you need to plan around this and the intermittent charging that will have to happen.
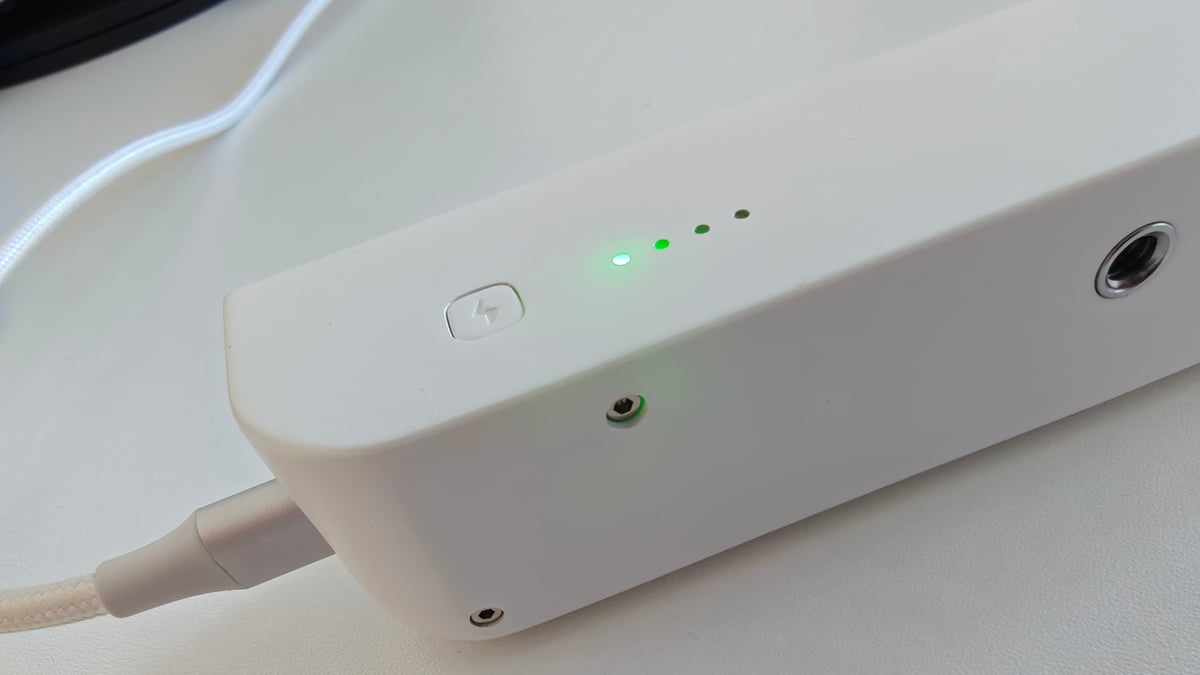
Charging the battery grip from empty takes in excess of two hours, and drains just as quickly when in use. It would make sense for 3DMakerPro to sell standalone battery grips, but as of the time of writing they don’t – you only get one with a camera module. Using a sealed internal battery rather than a system for quick swaps and spares seems like a poor tradeoff for the Turtle.
Lefties take note, too – the Turtle in tethered mode wants you to hold it like a wand. It’s not shaped like a wand, though, and between the in-software preview in portrait orientation and lone left-hand side port for the USB, holding it with your left hand is awkward.
The Scanning
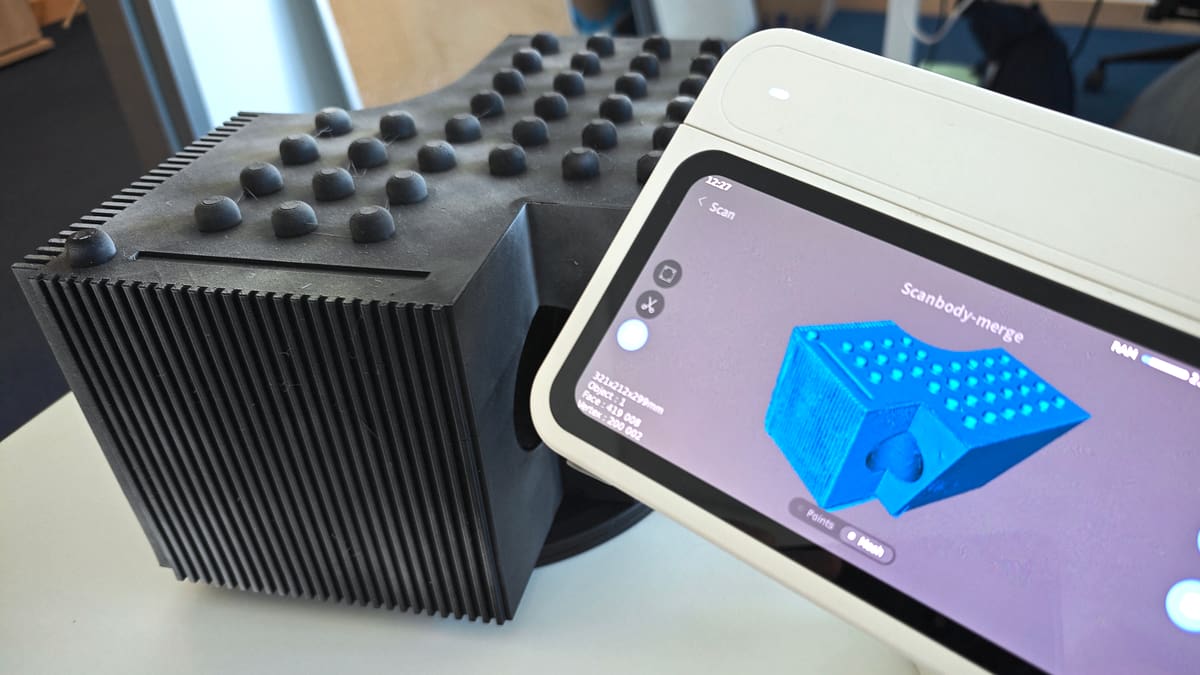
The kinds of objects you can comfortably scan (and how) with the Turtle depend on the modules you have.
If you only have a camera module and the battery grip, then you have to tether the scanner to a computer via USB-C. The provided 1.5-meter long cable is sufficiently long to get decent angles on objects without having to reposition your computer.
Using the control pad gives you the greatest amount of movement freedom, though as with any wireless, self-contained scanner, being able to angle it any which way also means losing sight of the display and the knowledge that the scanner has a tracking lock and is collecting data.
You only have access to “easy scan” mode, which is to say freehand, on the control pad. Here, you have control over the detail level, table removal (useful for shortcutting the post-processing later), brightness adjustment, and whether to capture texture (color.) On our test unit, there appeared to be a reflection or light leak of some kind in the L camera module, resulting in a fixed hotspot in the live preview that wouldn’t go away. Neither of our S nor M modules has this. It doesn’t appear to affect the results of scans, but does ruin the preview while scanning.
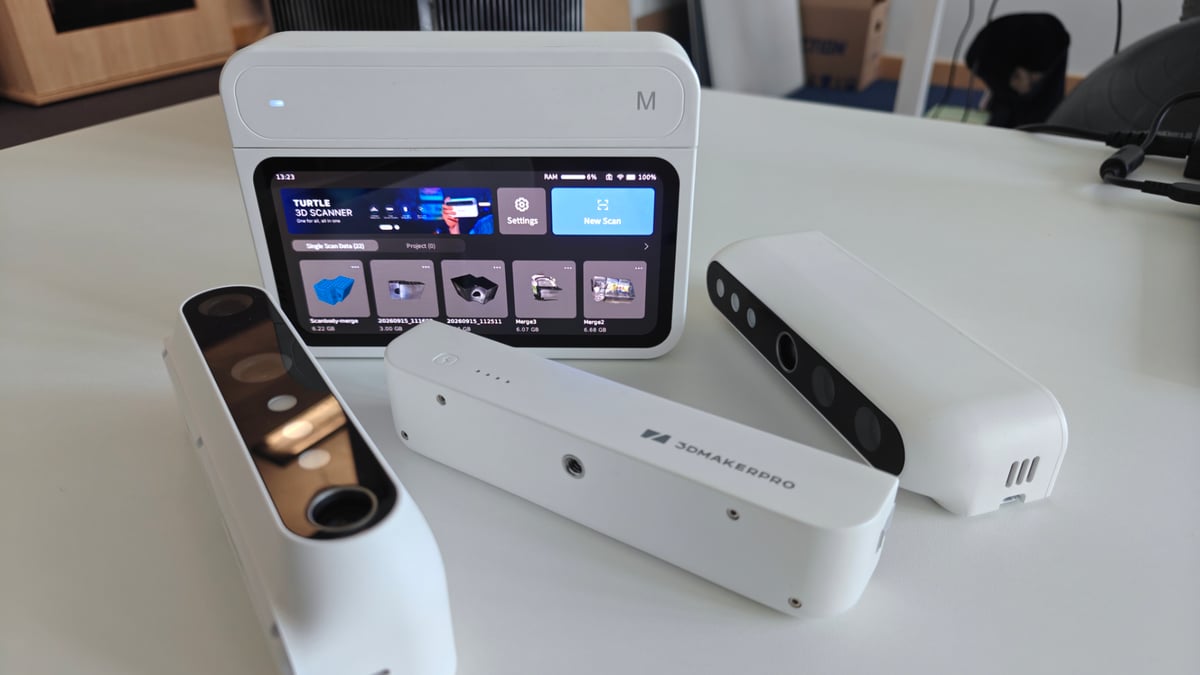
Handily, you can tether a camera module and grip to the control pad, giving you more freedom of movement.
Scanning with the Turtle runs pretty smoothly. I didn’t find the feature tracking lacking, with it quickly snapping back into place after a little backtracking. It handled uniform and patterned surfaces better than similar machines from other brands, avoiding errors from ambiguous features that often trip scanners up.
It took 50% of the control pad battery to capture two 1,300+ frame scans, clean the clouds and prepare for alignment, align, and then fuse them to a watertight mesh, including hole-filling, mesh cleanup and texture mapping. The scan is of a 3D print we designed just for scanning, with one deep hole that most scanners fail to see enough of to accurately capture, plus ambiguous patterns that can confuse feature tracking. The Turtle, using the medium camera module, handled it better than other scanners we’ve tried using only feature-based tracking.
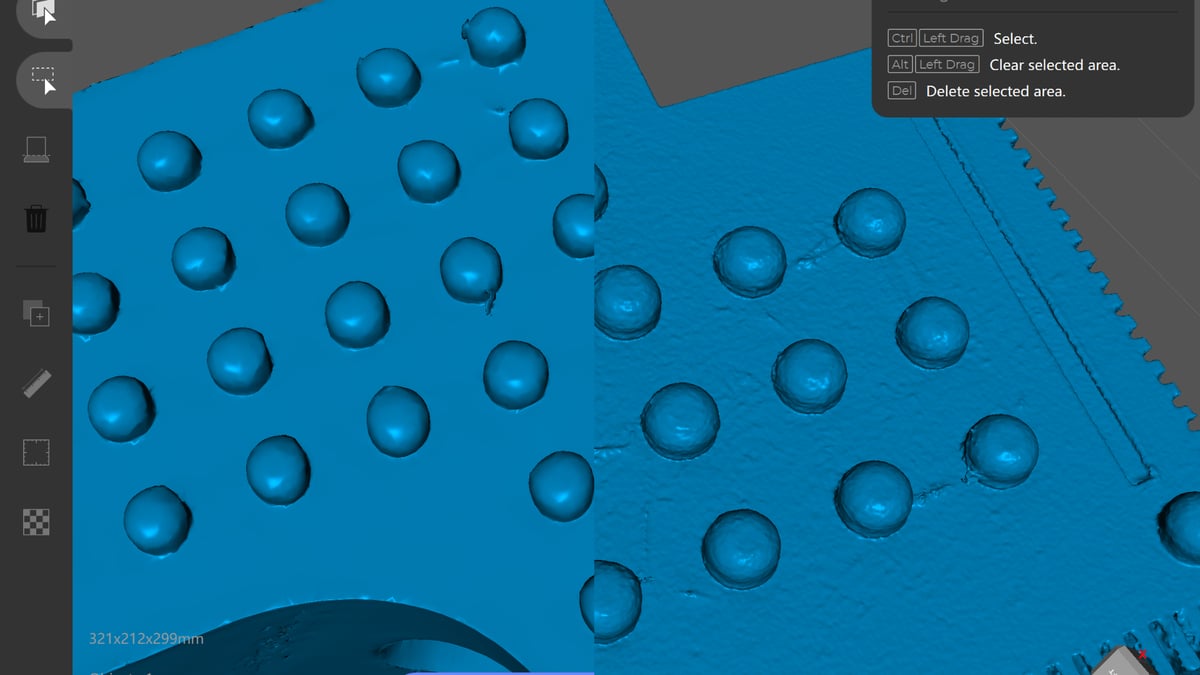
It stands to reason that using the Turtle intensively drains the battery before your eyes. You can hear the internal fan kick in and work hard to move air and keep its processor cool.
The live preview of the scan in progress shows you what you’re capturing, though it would be nice if it gave you a sign of whether enough points are being captured or not. As it is, you just get a scramble of green blocks showing something registering, but they jitter in and out of existence and you’re left without a clear idea of whether an area is covered well or not.
There are limitations on the size of scan you can do handheld with the compute module – up to 2,000 frames in a single scan. This is a sizable stretch of scanning, made to feel particularly generous at the low frame rate the Turtle operates at using the control pad. It is, generally, better to take multiple scans and stitch them together.
When tethered to a computer, that limitation goes up to 3,000 frames. Approach this and the software recommends you chunk the work into pieces and stitch the results together using the align function.
3DMakerPro’s software comes branded under parent company JM Meta as JMStudio and is available on Windows and macOS. We tested the Windows version. You have to log in to a 3DMakerPro account to use the software and no single sign-on options like Google, Microsoft or Apple are given.
Two scan modes are available to you in JMStudio – “Easy scan” (which is, basically, freehand) and table scan (assuming the scanner is fixed to a tripod and pointing at a turntable).
For our testing, we captured a solid dozen or so scans completely wirelessly first, with the intention to complete a mixture of onboard processing and also transfer some scans to a computer for processing, assuming that’d be a trivial thing to do.
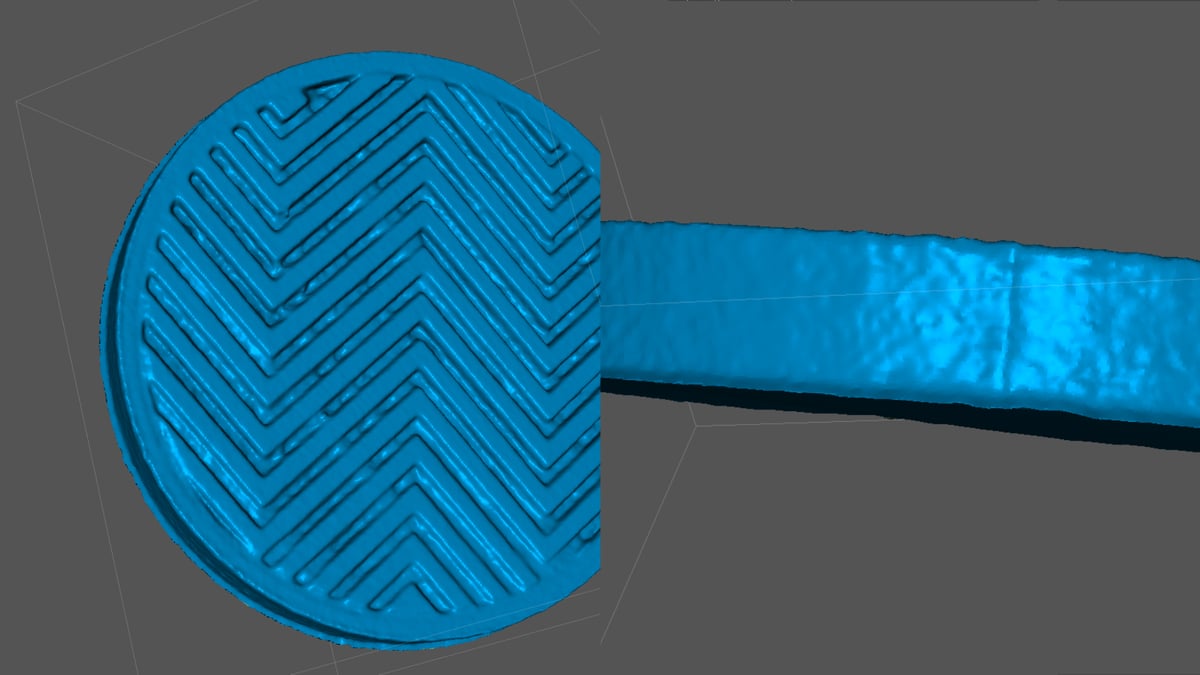
For file transfers, I started big: a batch of eight scans totaling 22 GB. The scanner spent 15 minutes compressing the folder before hanging mid-transfer for over an hour and failing. Lesson learned – start smaller. A single scan compressed and sent quickly. It’s important to note that issues with JMStudio almost always stem from the software not having the necessary permissions to write files to your system. Transfers would simply fail silently until we realized during our testing what the problem was. Even then, some still failed or hung long enough for us to decide to cut our losses and try again.
You can’t simply plug in a cable to access the control pad’s storage like rival scanners allow. Instead, your options are inserting a USB-C thumb drive, connecting your PC to the scanner using its hotspot (forcing your computer offline), or transferring via local Wi-Fi by manually typing in your PC’s IP address. It’s recommended that you use a 5Ghz Wi-Fi network for transferring files, with 3DMakerPro stating a 3 GB file can transfer in 35 seconds. Maybe that’s right, but we didn’t see anything approaching this.
I suspect the reality is that 3DMakerPro’s connectivity system is fragile and trips up on anything other than perfect conditions.
Defenders of 3DMakerPro’s software may argue it’s just a workflow learning curve and question of experience, but there is a cumulative effect from things like the lack of basic signposting and silent failure modes that lie outside simply knowing which buttons to push in the software.
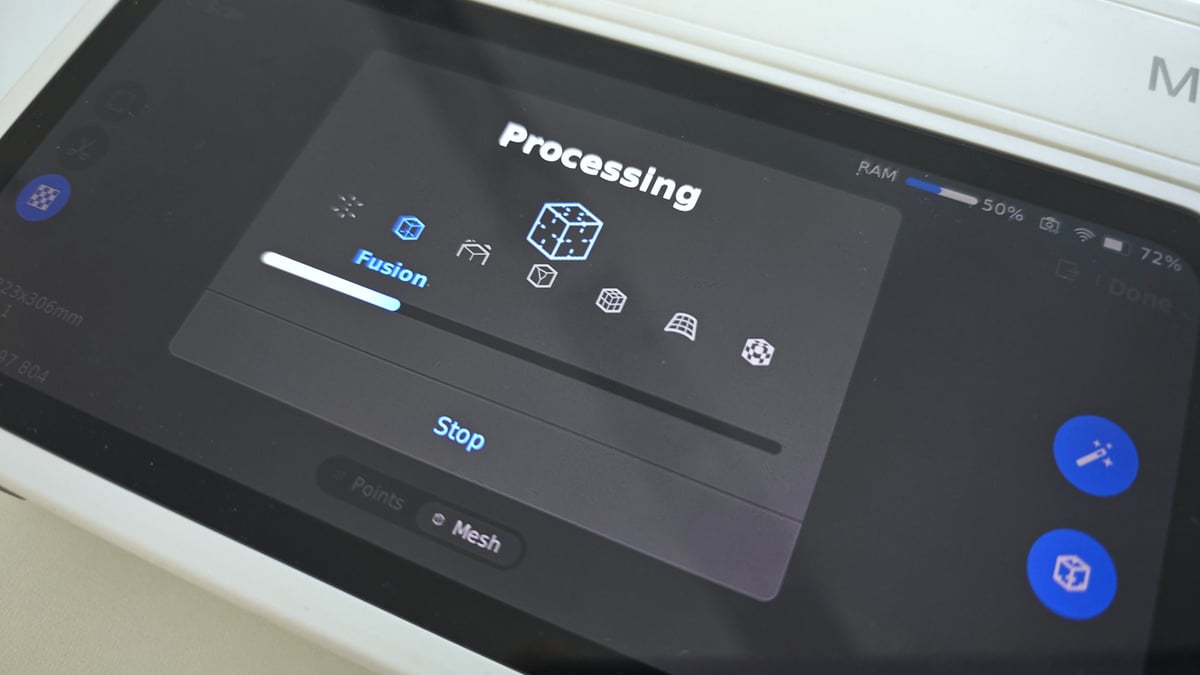
If you can find a happy spot somewhere in the middle where it works for you, terrific. Our feeling is that this is not the place every user of the Turtle will land.
Merging scans is a pretty hands-off affair, with the automatic alignment usually doing a decent job, provided there’s enough overlap between the chosen clouds. If you find yourself with an ambitious project that’s dependent on multiple scans coming together, better to push them over to the desktop software where a manual alignment mode, plus bigger display and a mouse or trackpad, helps you to place points more accurately.
Once you do get your data where it needs to go, the mesh generation itself produces solid 24-bit color scans and clean exports across standard OBJ, STL, PLY, and ASC formats. Mesh resolution can reach 0.05 mm on the S module down to 0.10 mm on the L module, though whether you can reduce noise enough to make those resolutions count is more a matter of object preparation and care scanning than the scanner’s ability to render it. Working handheld, as the system is set up for, introduces noise.
Be prepared to plug the Turtle in if you’re trying to stitch high detail or large models. It takes a long time. The processors on such handheld scanners are typically 8-core mobile processors – not earth-shakingly powerful – and 3D scanning is a graphically intensive application. All of these kinds of devices will chug to a slow with large scans, and particularly when you apply the many steps of processing that can follow a scan such as hole filling, noise reduction, mesh simplification, and texturing.
There is a standard tripod thread on the battery grip, but not the control pad. No tripod is included in any of the sets of the Turtle currently available.
Is It Worth It?
I like the Turtle hardware a lot. It feels good in the hand and it doesn’t take much effort to quickly capture a lot of detailed scan data. The structured blue light is a country-mile ahead of IR-based scanners in everyday conditions, and for that reason I’d actually take it over most of them. That, added to the flexibility of choosing what you need from the scanner and its variety of modules is a terrific combination.
To really enjoy the Turtle though, you have to put up with a software experience that’s inconsistent across all of the control pad, desktop, and the connections between. Arbitrary frustrations like forcing the user to log in simply to use the software, hoops to jump through to transfer massive files, failing silently and inadequate signposting of what’s happening, in aggregate, can be quite annoying.
There are, I’m sure, perfect conditions of network and computer where the Turtle’s files flutter effortlessly into the software for processing, but I haven’t seen it, and I think this unpredictability is something you should keep in mind before buying the Turtle, particularly if you intend to scan wirelessly and process files on your computer later.
Without the control pad, the scanning tech is great and, provided the software behaves for you, you’ll be able to conjure up fast, detailed scans in short order. The biggest consideration in that arrangement is that the battery grip empties quickly. With the control pad, and the Turtle’s great scanning ability goes authentically mobile in a capable way – but again, be ready to have to charge it frequently.
Ultimately, it’s a fine scanning companion and worth persisting with. The limitations have nothing to do with the actual scanning, which is really quite good.
License: The text of "3DMakerPro Turtle Review: A Capable, Customizable Scanner with a Satifying Snap" by All3DP is licensed under a Creative Commons Attribution 4.0 International License.
CERTAIN CONTENT THAT APPEARS ON THIS SITE COMES FROM AMAZON. THIS CONTENT IS PROVIDED ‘AS IS’ AND IS SUBJECT TO CHANGE OR REMOVAL AT ANY TIME.