One key program you’ll need for 3D printing is a 3D slicer. 3D slicers enable you to turn downloaded 3D models (e.g. STL files) into 3D printable G-code files. Thanks to community efforts and open-source development, 3D slicers are significantly more useful and powerful than they were in the early days of the RepRap project.
The most popular 3D slicer today is UltiMaker Cura, an open-source program that’s backed by the team at UltiMaker, a popular 3D printer manufacturer. Cura is known for having tons of adjustable slicer settings and many other features.
PrusaSlicer is another very popular 3D slicer program, and, similar to Cura, it’s open source with a strong company behind it. Backed by Prusa Research, PrusaSlicer offers many innovative slicing features for both Prusa and non-Prusa 3D printers. PrusaSlicer is actually a fork of Slic3r and used to be called Slic3r PE, but the platform has since differentiated itself and adopted its own set of features and audience.
Both UltiMaker and Prusa Research are among the top companies in the desktop 3D printing space, which makes it somewhat significant that they both maintain and develop dedicated open-source slicers.
If you’re wondering which one may suit your needs better, read along to take a deeper look into what these slicer software options have to offer!
System Requirements & Cost

Since viewing and rendering 3D models can take a lot of processing power and even higher-end graphics capabilities, it’s better to know what your system is capable of before diving in. Below, we’ve gone over the minimum system requirements, as outlined by UltiMaker and PrusaSlicer. Remember that these guidelines are simply the minimum, and it’s recommended to have specs above them.
Minimum for Cura
- Graphics: Open GL 2.0 or newer (OpenGL 4.1 for 3D layer view)
- CPU: Intel Core 2 or AMD Athlon 64
- RAM: 4 GB (8 GB or more is preferred)
- Compatible OS: Windows, MacOS, Linux (see the full list here)
Minimum for PrusaSlicer
- Graphics: Open GL 2.0 or newer
- CPU: Multi-core and multi-threaded CPU
- RAM: 4 GB (8 GB or more is preferred)
- Compatible OS: Windows, Linux, OSX, Chrome OS (see the full list here)
Prices & Licensing
There isn’t much to say here: Both slicers are free to use and also open source, which means the source code is available for you to modify. Speaking of the slicer scene at large, this has resulted in many improvements originating from external developers; integrating the most popular of these into official releases has greatly sped up development.
User Interface
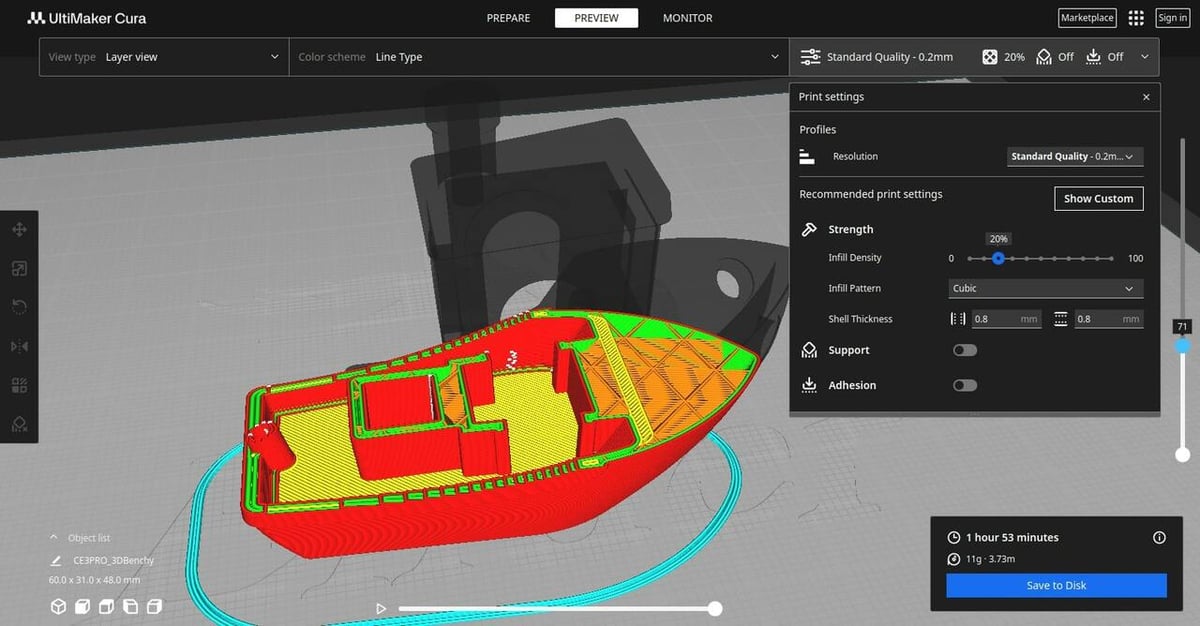
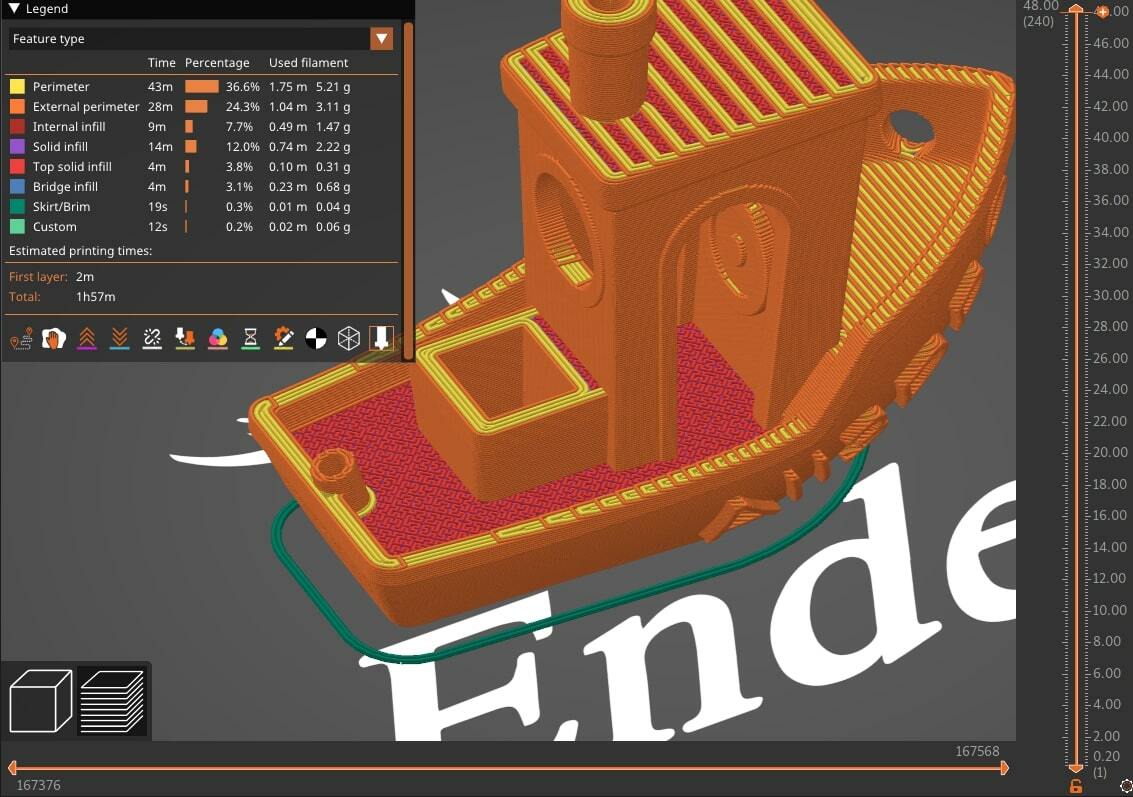
The user interface is a key part of any software’s design, as it can make or break the user’s experience. Both slicers contain all the typical elements of a modern slicer interface. For example, estimated print times are shown after a model has been sliced, which allows the user to tune and optimize their settings further based on which part of the print consumes the maximum time. They both include a dark theme that makes using the programs easier on the eyes, and have different levels of settings visibility, from beginner to expert. This helps clear the clutter for newbies until they want to dive deeper and improves the overall user experience.
Cura
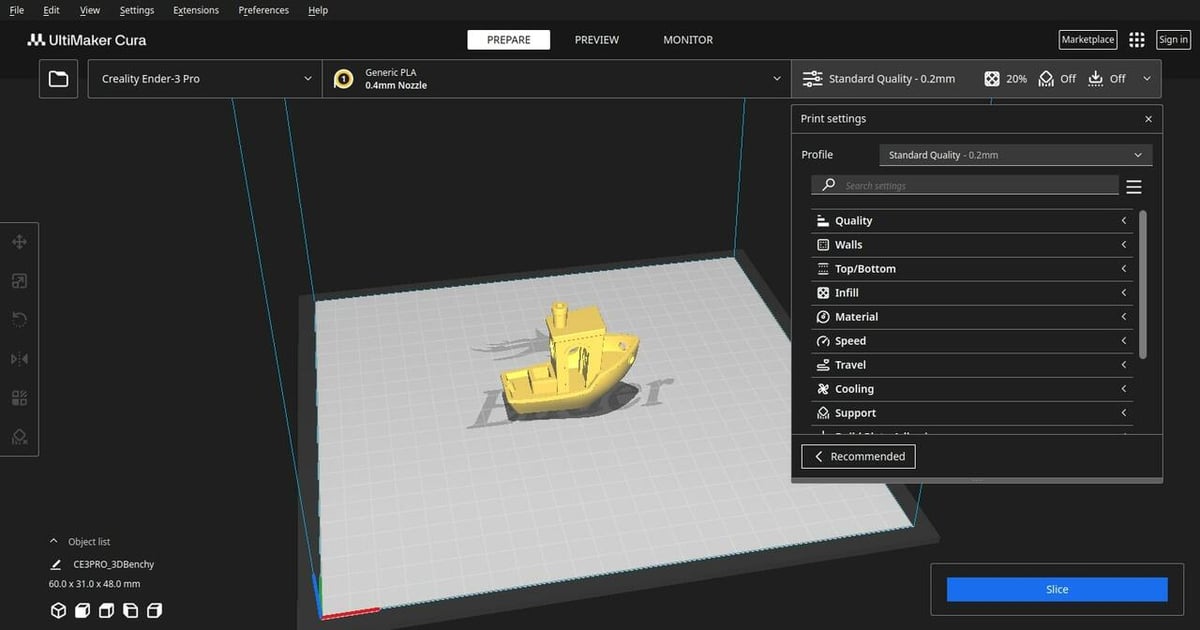
Overall, the Cura user interface and user experience are very positive. It’s easy to learn and users can start out slow before heading to advanced and customized operation.
- Intuitive interface: Cura maintains a clean and neat layout with the majority of the space dedicated to viewing the build area and the model. The settings are tucked away in drop-down style menus with further subheadings that logically divide them.
- Visual queues: The settings panel on the left lights up when the model is selected, giving you a very subtle hint to check out the movement settings.
- Preview animation: The animation under the preview option helps you check if you forgot anything before starting a print, like activating support structures.
- Workflow extensions: There are many extensions that can be added, including one to help save file names systematically, or you can add an SBC or OctoPi to upload prints directly.
PrusaSlicer
PrusaSlicer’s interface is simple yet effective. Its organization, which employs modes, categories, and views, is centered around intuitive access and adjustment of settings and profiles.
- Setting groups: Prusa’s strategy of having their settings in three distinct buckets and then further subdividing keeps things a bit more organized.
- Smart manipulation: PrusaSlicer has an arrange command that automatically arranges models on the build plate in an optimized position. This is very useful when you’re printing multiple parts at the same time.
- Easy G-code insertion: The sliding bars on the side of the preview view is an intuitive way to add a pause or other custom G-code commands.
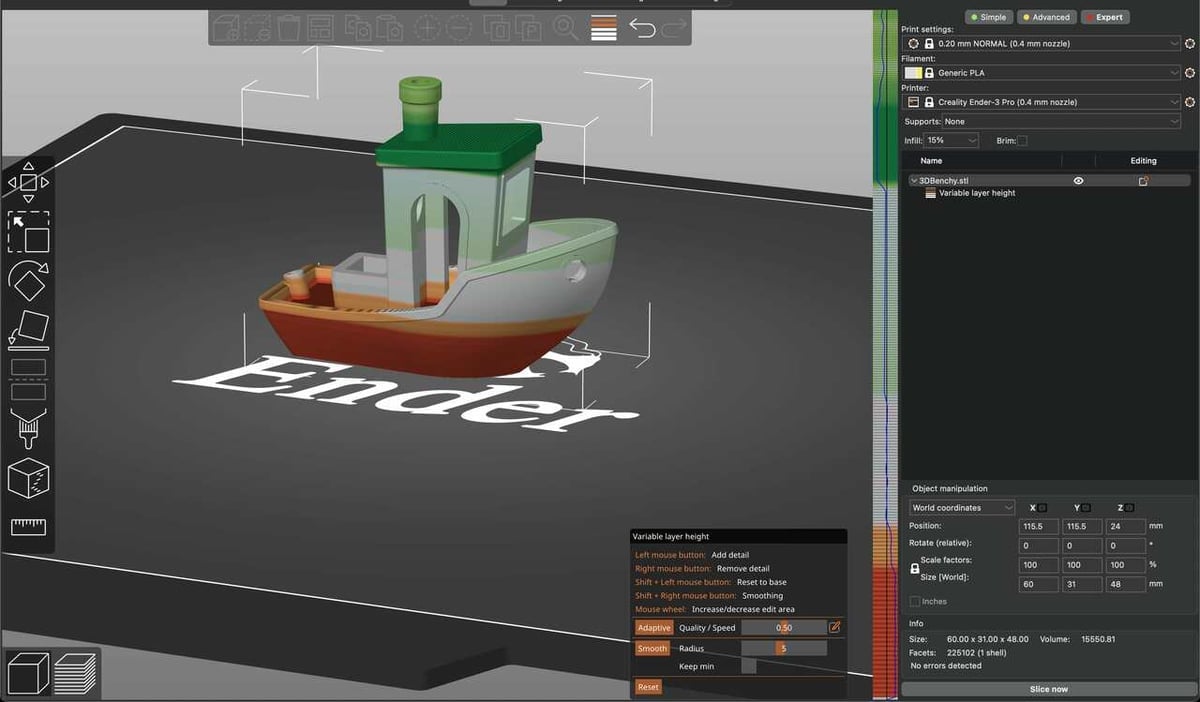
- Simple layer adjustment: The variable layer height feature has a neat sliding bar as well, which makes it simple to set your layer heights.
While both slicers have worked to make their UI as intuitive as possible, there is still a small learning curve for either. Rest assured that the best experience can be after a few failed prints!
Features & Functions
Cura and PrusaSlicer have amassed a great number of features over the years. We’ve taken a look at the latest versions, Cura 5.6.0 and PrusaSlicer 2.7.1, to show you what they offer. While both slicers come with a variety of features, the ones we cover below are some that stand out for each program. (Note that not all of the following features are unique to the program under which they appear.)
Both Cura and PrusaSlicer excel in their ability to provide unique and useful features to their users, such as organic supports, support for custom post-processing scripts, and variable layer height functionality.
Cura
- 3rd-party support: A unique and incredibly helpful functionality of Cura is its huge number of 3rd party printers. Although these machines represent direct competition for UltiMaker, hundreds of manufacturers use Cura to sell their products to customers. Chances are, if you have a printer, Cura will support it. If not, you can add a custom machine to Cura. While PrusaSlicer also offers some 3rd-party support, it’s not quite as wide as Cura’s, so if you don’t have a Prusa printer, you might have to add your machine’s profile manually.
- Cura Marketplace: Cura’s Marketplace essentially acts like an app store featuring many plug-ins that are created and added by users. With extended functionality, Cura continues to improve and the marketplace continues to grow. PrusaSlicer doesn’t have such a marketplace or the same variety of plug-ins; you need to request changes on GitHub or tweak the code yourself if you’re up to the task.
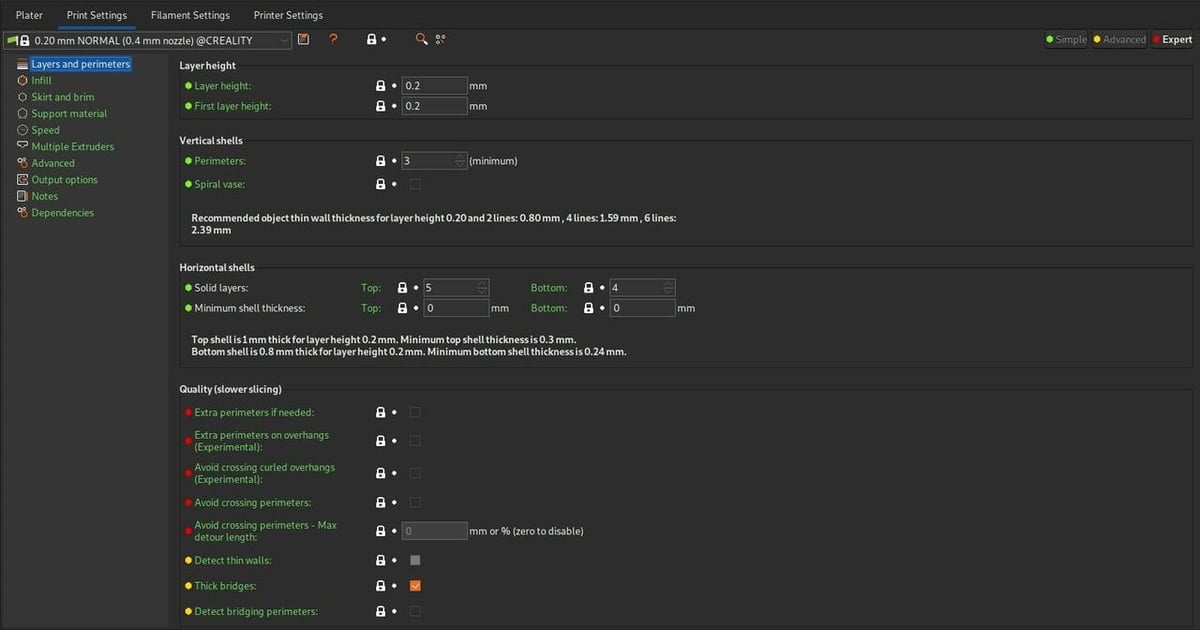
- Custom scripts: This community favorite, found under “Post Processing” in the “Extensions” menu, gives users the additional ability to pause prints midway to insert components such as magnets, fasteners, or even electronic boards into your 3D prints.
- Connectivity: Cura has the ability to connect with wireless boards such as the Duet Wi-Fi and Raspberry Pi. This handy feature makes it easier to upload files directly to your browser rather than having to do it manually each time.
- Special modes and experimental settings: Another unique aspect of Cura is the experimental settings, which are fun to play around with. A few examples are the draft shield, fuzzy skin, and adaptive layers, all of which can be quite useful to get certain effects and textures.
- Modifier geometry: This function allows one to add unique settings to different parts of the same STL. Thinner sections can be made to have denser infill without affecting the overall part, both saving time and improving part strength. PrusaSlicer has a similar function, dubbed “modifier meshes”.
PrusaSlicer
- Conditional G-code: The ability to add conditional “if” statements to control and insert additional functions, such as a pause or color change, can be quite the game changer.
- SLA and LCD supported: PrusaSlicer can slice models for printing on either FDM or LCD in the same program. That said, as of right now, the resin slicing functionality is only meant to be used with the Prusa SL1 and SL1S Speed.
- Connectivity: While Cura can connect with a few SBCs, Prusa has built-in support for common printer hosts such as OctoPrint, Klipper, PrusaLink, and more.
- Print host upload queue: With this feature, sliced files can be pushed to an OctoPrint setup and then printed one after another. Essentially, you can slice all your files at once and then keep them queued up until you’re ready to print.
- Shape Gallery: This is Prusa’s default set of 3D models that you can import straight from the 3D slicer. Some of the shapes include a box, bunny, recycling sign, and M3 hex nut. You can also add in your own 3D models to your personal gallery, which might be useful for having calibration models, so they’re more readily available.
- Compare presets: This tool allows you to compare different profiles of preset slicer settings. For example, you can use the tool to see what differences there are between the profile for the Ender 3 printing Generic PLA with a 0.08-mm layer height and the profile for the Ender 3 printing Generic ABS with a 0.2-mm layer height.
- Configuration Wizard: PrusaSlicer offers an easy-to-use configuration wizard that can get the entire slicer set up within minutes. It allows you to choose from many community-made and tested printer and filament profiles, make your own custom profile, and choose your setting level, as mentioned earlier.
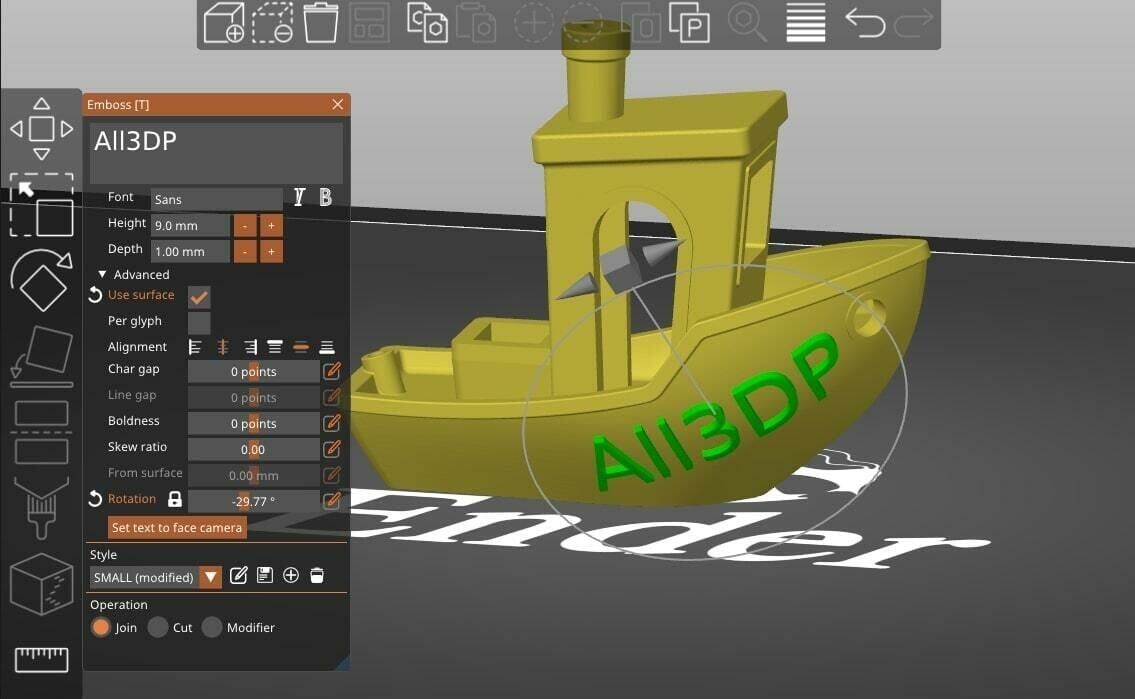
- SVG/text embossing: To add some flair to your models, you can emboss or deboss text and SVGs directly onto your model.
- Press-fit connectors: If you need to join two parts together but without the need for glue, PrusaSlicer has you covered! You can specify locations for connectors to be fitted, and the slicer will automatically generate them on your parts, with a hole on one and a pin on the other.
- One-click download: On Printables, you can click one button to automatically import the model(s) into your build plate, no downloading or unzipping files needed!
Slicer Settings
Slicer settings are perhaps the most important aspect of any 3D slicer program. These are the settings, like layer height and infill, that you use to adjust how your imported 3D model will be printed. The more settings a 3D slicer offers, the more versatile the program.
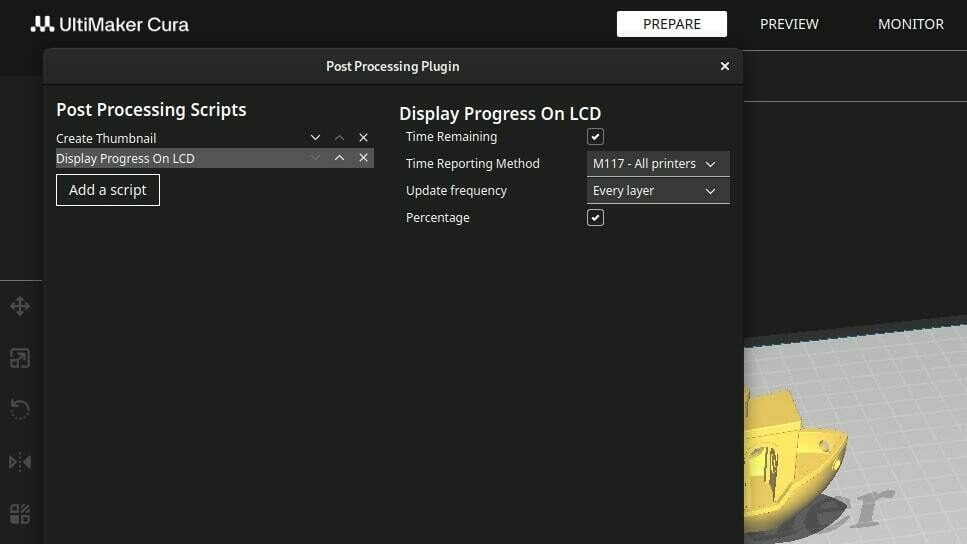
Both Cura and PrusaSlicer carry hundreds of different slicer settings that you can adjust. However, in a strict numbers comparison, Cura definitely takes the cake as it has some more nitty-gritty settings that PrusaSlicer doesn’t make available. This doesn’t necessarily mean that Cura is simply better for slicer settings, as the two slicers don’t have all of the exact same options.
Of course, both slicers have all of the “basic” and general 3D printing settings, such as layer height, nozzle temperature, infill density, and more. But, when you get to the more advanced and experimental settings, there’s some variation.
That said, there are still some similarities, like “Wall Ordering” in Cura, which lets you select whether you want to print first the infill or perimeter, and selecting “External perimeters first” in PrusaSlicer. You can also enable linear advance in both programs. This is an innovative 3D printing function that can help make the extrusion process more accurate, so prints have sharper corners and fewer artifacts (e.g. blobs). When activated in Cura, a few other settings appear, such as “Linear Advance Factor”, which allows you to control the degree of linear advance.
Below, we’ve gone over some of the settings that are unique to each platform.
Cura
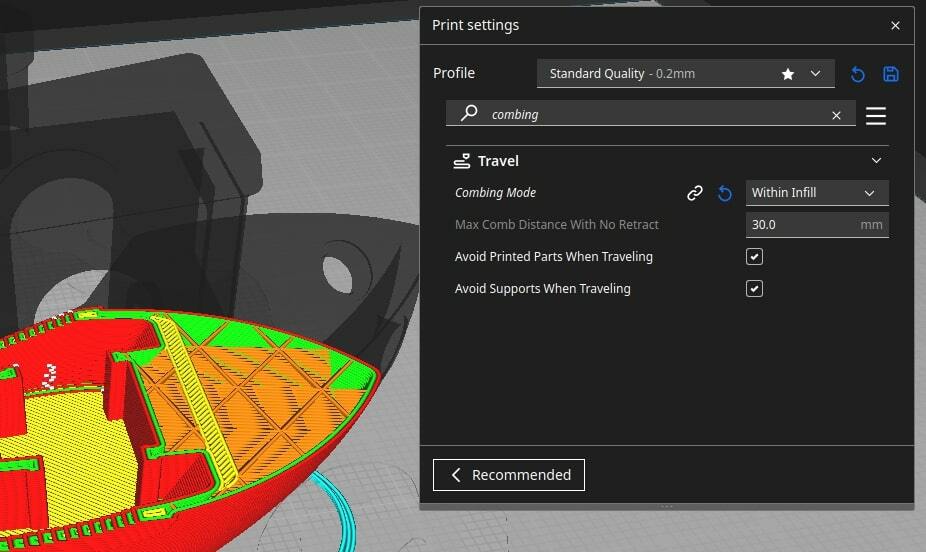
- Combing Mode: This unique setting to Cura allows you to control how the printhead moves across the print area. Different options include “Within Infill”, “Not in Skin”, “Not on Outer Surface”, “None”, and “All”. One of the most common ones is “Within Infill”, which tells the printhead to try to make travel moves through the infill of the print to reduce stringing on prints. While PrusaSlicer does offer a similar feature named “Avoid crossing parameters“, it produces different results and isn’t as customizable as combing within Cura.
- Randomize Infill Start: This setting, when turned on, will start printing the infill section of your print at a random point. This can help stop a Z seam or other repetitive print defects from appearing on your print.
- Mesh Fixes: In the “Mesh Fixes” section in Cura, you’ll find a handful of slicer settings that aren’t in PrusaSlicer. These, such as “Remove All Holes” and “Extensive Stitching”, perform different actions to your imported mesh if activated, and you can use them to slice an STL file that has an error in the mesh.
- Coasting: If “Enable Coasting” is selected, your printer will shut off the extrusion for the last bit of an extrusion method to “coast” off of the built-up pressure in the hot end. The ideal result is fewer artifacts on the surface of your 3D print due to less over-extrusion. PrusaSlicer also offers a “wipe” feature, which produces similar results.
PrusaSlicer
- Top/bottom fill pattern: The “Top fill pattern” and “Bottom fill pattern” settings allow you to control the pattern for the top and bottom layers, kind of how you can control the pattern for the infill. The options for these settings include monotonic, concentric, rectilinear, aligned rectilinear, Hilbert curve, and more. These are available for Cura under “Top/Bottom Pattern”, although there are only three options: Lines, Concentric, and Zig Zag.
- Pressure equalizer: Pressure equalizer is one of the latest settings in PrusaSlicer, only released as of the 2.5 version. It can be used to limit how fast the extrusion rate changes when going from low speed to high speed or vice versa.
- Multiple extruders: In the “Multiple Extruders” section in PrusaSlicer, you can see and adjust settings for printing with more than one extruder. While Cura has a similar option, it’s not accessible without configuring Cura for a multi-extruder printer.
- Options for the perimeter generator: There are two options for the algorithm used to generate a perimeter for 3D prints. The Arachne algorithm is now the new default option, and it can generate perimeters with variable extrusion width. On the other hand, the classic option uses a constant extrusion width to generate perimeters. Using Arachne can improve the accuracy and strength of 3D printed parts.
Community & Company Support
Cura and PrusaSlicer have amassed a great following because they’re arguably the two best open-source slicers that can work on any 3D printer. The primary discussion grounds are community forums, where people talk about issues, tips, and tricks. Both slicers also support strong open-source communities on GitHub that submit bug reports and contribute code.
For both slicers, the majority of company support comes in the form of guides, manuals, FAQs, and the like. Direct communication isn’t officially provided, but one can learn a lot through forums, tutorials, and videos.
Cura
Cura has never had a dedicated support team to help users with issues when using their slicer. What they have provided, though, is a platform for users to discuss issues and problems that they face.
Moderators from the Cura team do get back to issues raised. Often, these bugs get fixed in newer updates and, thus, the software keeps improving over time. Additionally, forum members try to help one another out with any issues that pop up.
PrusaSlicer
PrusaSicer also doesn’t have a dedicated support team, but its large user base and community post tons of videos on fixes and upgrades. In addition, the Prusa team does post videos from time to time on different upgrades and applications as well. You can find discussions on Prusa’s community forum.
Final Thoughts
We’ve seen the use of desktop 3D printers go from a hobby in a garage to a full-blown industrial manufacturing aid over a decade, and a lot of this development has been due to free and open-source slicing software.
Both Cura and PrusaSlicer have evolved to become some of the most powerful and commonly used slicing programs available. Each team keeps coming up with new features that push the boundaries of what we thought was possible. The user interfaces are also beginner-friendly, and tutorials on how to get started are plenty.
So which is better for you? The answer is, as you might have guessed, “It depends”.
Cura’s major advantage comes from its longer presence in development and community involvement. Its wide use within the community, vast printer support, and boatloads of features are a testament to that. Meanwhile, UltiMaker has been working towards partnering with industry leaders and becoming a reliable solution for professionals. Cura might therefore be the choice for those looking for a complete, streamlined experience.
On the other hand, thanks to Prusa Research’s apparent drive to grow in all directions, their slicer has become a major contender, and we expect that it will go on catering to community requests. PrusaSlicer is also unique in the sense that it comes up with innovative offerings, such as mesh modifiers, conditional G-code, model embossing, and so on.
License: The text of "PrusaSlicer vs Cura: The Differences" by All3DP is licensed under a Creative Commons Attribution 4.0 International License.