Orca Slicer Tutorial: Your First Steps with the Slicer

Whether you're a newbie or pro, Orca Slicer has something for you. Read on for an Orca Slicer tutorial to help you get started!
Orca Slicer has taken the fused deposition modeling (FDM) 3D printing world by storm. It has gained rapid popularity thanks to its user-friendly interface, advanced features, and seamless integration with a wide range of printers – from the classic Creality Ender 3 to the latest Bambu Lab machines. It also supports DIY kits such as Voron and RatRig.
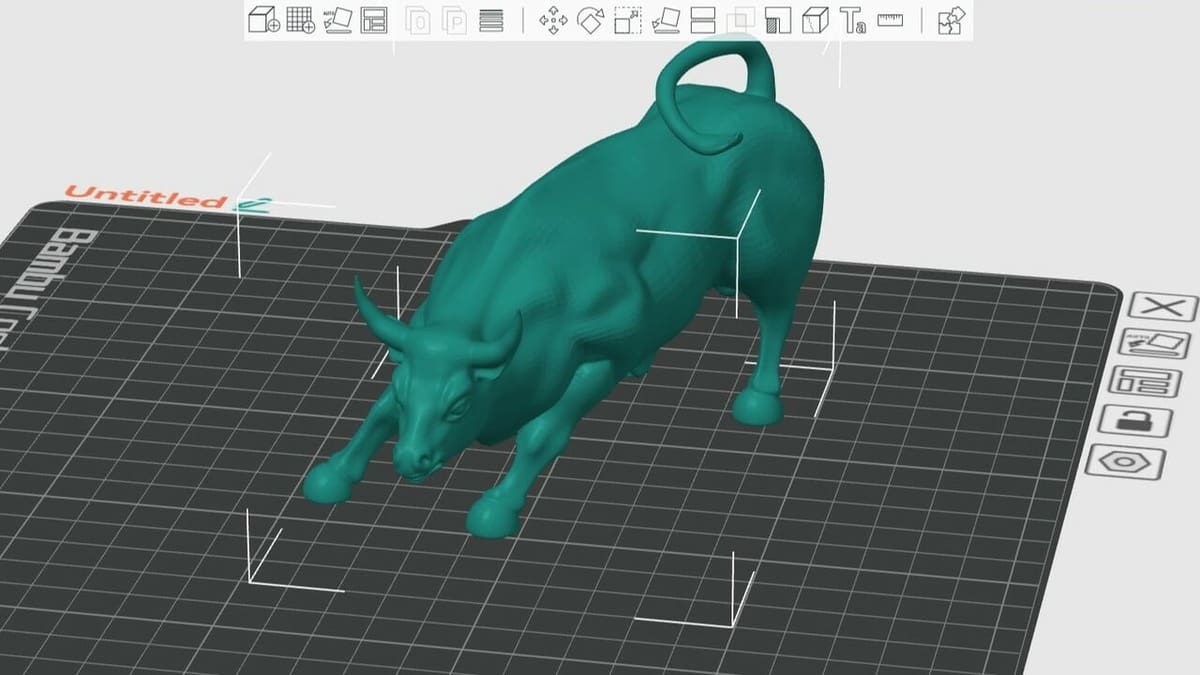
We’ve already introduced the most noteworthy features of the software in our article Orca Slicer: All You Need to Know to Get Started. Here, we’ll walk you through your first steps in the software, showing you how to prepare a model for printing and providing guidance along the way. To illustrate some points, we’ll use the Wall street bull 3D model from Thingiverse user dreyfusduke.
If you don’t already have Orca Slicer, you can download it from its official or GitHub pages. You can choose between the latest stable version for reliability or nightly builds for the newest features. When it comes to installation, Windows users should run the downloaded installer and follow its steps, possibly installing additional runtimes if needed. For Mac, simply download the DMG file and move OrcaSlicer.app to the Applications folder. Linux (Ubuntu) users might need to allow execution permissions using the terminal.
With download and installation out of the way, let’s get started!
Step 1: Setup

Setting up Orca slicer is a fairly easy and straightforward process. After installation, users will be prompted to enter the following:
- Login region: Users begin by selecting the region they’re from. Options include Asia-Pacific, China, Europe, North America, and others.
- Printer selection: This is one of the most important parts of the setup process, especially for beginners who have selected Orca as their first slicer experience. As we mentioned before, most of the common printers are supported. Users also need to select the nozzle that’s fitted on their printer. If your printer doesn’t appear in the displayed options, you can go for a generic Klipper or Marlin printer and adjust the parameters such as build volume and extruder type, among others, to fine-tune the profile.
- Filament selection: The next step is the filament section. Users can select the filament they often use, and a wide range is available, including the basic filaments – PLA, PETG, and ABS – to the more advanced ones, such as ASA, PVA, and PA-CF. You’ll also have the option to change filament parameters, such as color, temperature, density, flow ratio, diameter, and many others.
- Bambu network plug-in: This feature is essential for those with a Bambu Lab printer. It enables you to send jobs over the internet, control the printer, access the camera to monitor the print, and also syncs user data. It essentially gives the same features that Bambu Studio provides for Bambu Lab printers.
- Log in page: Lastly, you can log in to an existing Bambu Lab account or create one to enable syncing across other devices.
Step 2: File Preparation
Once the printer and filament are selected, a file needs to be imported to begin slicing. After the slicer has been opened for the second time, click on the “New Project” button, which will bring you to the Prepare View of the slicer.
You can import a model by clicking the cube with the + icon on the Toolbar at the top of the viewport. Alternatively, you can also use a shortcut “Ctrl + I”. Supported file formats include .stl, .obj, .3mf, .step, .stp, .svg, and .amf.
Orca Slicer also features some built-in models. Right clicking in the viewport brings up a context menu with two options: “Add Primitive” and “Add Handy Models”. The first one allows you to add primitive shapes such as cube, cylinder, sphere, cone, disc, and torus, as well as text and .svg files. The second menu includes several iconic or test models, such as the Stanford Bunny and the beloved 3DBenchy, among others.
Model Manipulations
After your model is loaded, Orca Slicer offers you quite a few options to manipulate it. Of course, there are basic tools to translate or transform objects. These options are used to print or orient the model in the desired or optimal orientation for printing. The tools include the following:
- Move tool: You can click the Move icon (the four arrows) or type ‘M’ to move and place your model on a desired location on the build plate.
- Rotate and Lay on Face tools: Sometimes, it’s helpful to rotate the model in order to minimize supports. You can click the Rotate icon, which is just right of the Move icon, or press ‘R’ on the keyboard. Alternatively, the Lay on Face tool will help you save time if you already know which face you’d like to place the model for printing purposes. Type ‘F’ for the shortcut, or click the icon just to the right of the Scale icon.
- Scale tool: It’s common to lose the original scale of your designs after exporting files. Also, it may be necessary to scale up or down a model for various reasons. In such cases, this is where the Scale tool comes into play. The icon is sandwiched between the Rotate and Lay on Face tools, or you can simply press ‘S’ as a shortcut.
These tools, however, are just the tip of the iceberg when it comes to Orca Slicer’s model manipulation features. Below, we briefly discuss all of the other tools.
Basic Tools

These tools are among the most commonly used tools, and they aid in file and build preparation:
- Add Plate: This tool (a grid with a + icon) allows users to add one or more build plates in the workspace. This is a very helpful feature to plan prints in advance or to print large objects in various parts. Some users have even added 30+ build plates.
- Auto Orient: The Auto Orient feature (a square with an arrow pointing to a base) allows users to automatically orient the part for the best printing orientation. Having tried multiple parts with this feature, the part ends up in the same orientation no matter how it’s rotated. Auto Orient can be used independently for each plate or globally for all plates in which plates will be added or deleted.
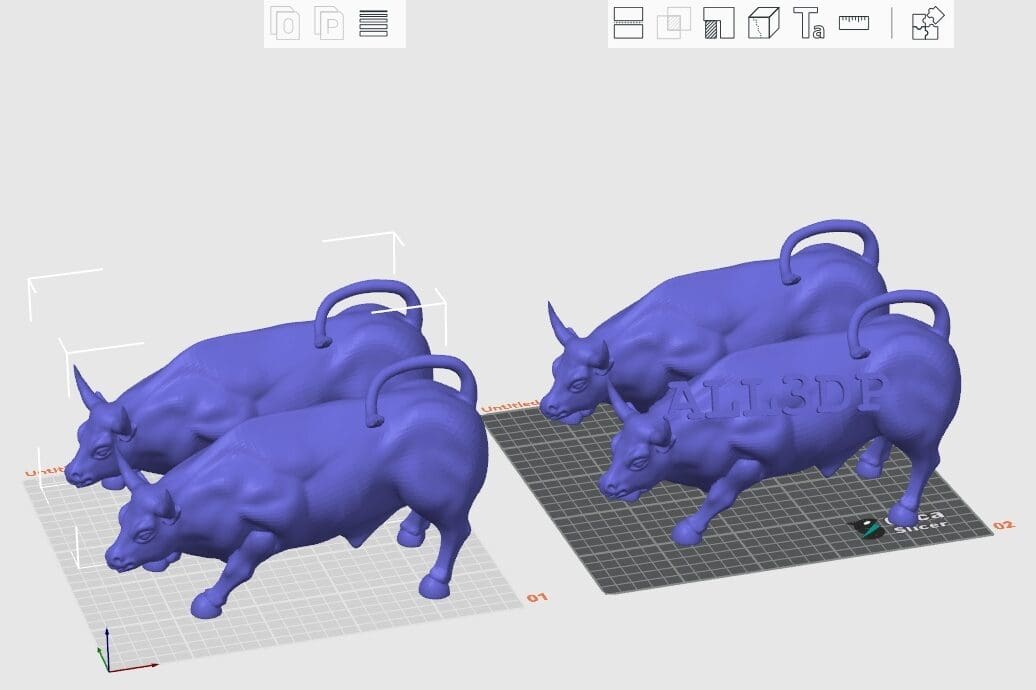
- Arrange all objects: The slicer will arrange all the objects in a way in which they all fit on the build plate. One thing that distinguishes this feature from those found in slicers based on Cura is the spacing parameter, which allows you to decide the distance between the objects. At least 1.5 to 2 mm should be left between the models. A smaller spacing than that could result in the models being merged. (The tool is the plate composed of various organized rectangles in the toolbar.)
Advanced Features
Besides the basics, Orca Slicer includes some advanced tools that may help you to avoid having to jump back and forth between 3D modeling software and the slicer.
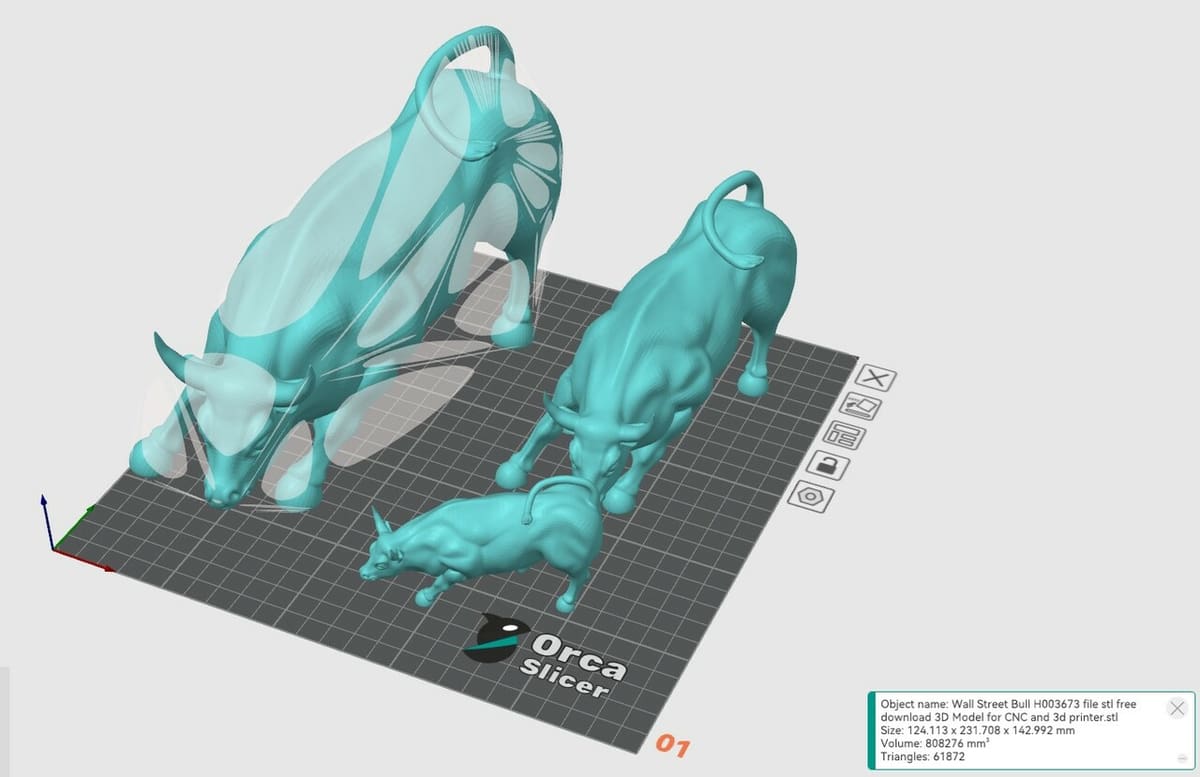
- Split to Objects: An STL file can consist of multiple parts when imported into the slicer. Sometimes, the model needs to be split to be easily and economically printed. Other times, it’s split so it can be printed in different colors. The Split to Object tool (two superimposed rectangles with an ‘O’) splits the object into individual parts and separates them from the original model, allowing for different placements for each part.
- Split to Part: The Split to Parts tool (two superimposed rectangles with an ‘P’) is essentially the same thing as Split to Objects, but instead of splitting and separating the model into different parts, they’re kept together in their original positions. This is usually done when the user wants to print a the model in multiple colors. It also eliminates the need for assembly.
- Variable layer height: A very useful and often overlooked tool is the Variable layer height tool (layers of varying height on top of each other). As the name suggests, it allows users to print certain parts of the object with variable layer heights. This is particularly useful for models with a mix of straight and curved contours. The straighter parts can be printed at higher layer heights, while the curved parts of the model can be printed at lower layer heights to increase the quality of that region.
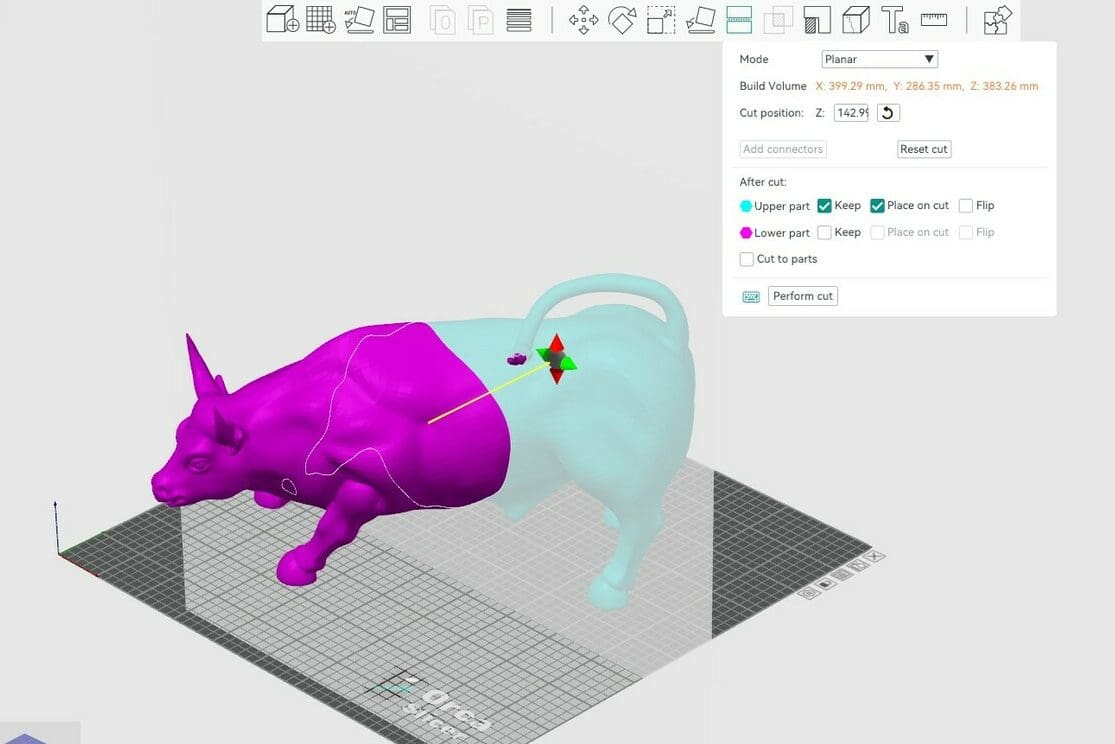
- Cut: This tool is often used either to cut relatively large parts so they fit the build plate or to make complex parts easier to print. Two types of cuts can be made: a simple cut or a cut with connectors. The cut with connectors is basically keying a model; the connectors help align the parts with one another. Orca Slicer allows you to select the type, style, and shape of the connectors as well as their dimensions. Especially helpful is the ability to add tolerance to the depth and size settings. Depending on the dimensional tolerance of your printer, this may come in handy. If you can’t find the tool in the top toolbar (there’s a reported issue in a version of Orca Slicer, although you should see it if you toggle the “Advanced” settings from the panel to the left of the viewport), you can use the shortcut “Shift + C”.
- Mesh Boolean: This tool (‘B’) is used to form a new part based on the union, difference, or intersection of two parts. “Union” is used to combine the parts into one, “Difference” keeps the selected part but removes geometry based on the other part, and “Intersection” keeps the common areas between both the parts. To add a Mesh Boolean, right-click on the main object, select “Add Modifier”, load the model or select one of the defaults, click on the tool, and select the type of operation and the parts, then confirm the task.
- Support Painting: Usually, this tool (‘L’) is used on parts that require supports in only a specific area but not in any other area, as detected by the slicer. Support Painting adds custom supports or avoids supports in a particular area. While the overhang angles on the model can be varied to attain a similar result, this tool is a simpler option.
- Seam Painting: A 3D printing seam refers to the point where a printer starts and ends the extrusion of the filament during the creation of a layer. These seams can show up as small zits, blobs, or slight lines on the surface of the print. Sometimes, the seam position determined by the slicer may not be the most ideal one and may still lead to the seam being exposed. With the Seam Painting tool (‘P’), you can place the seam as desired.
- Emboss: Sometimes, users want to customize models with text. Orca Slicer allows users to do this directly in the slicer with the Emboss tool (‘T’). If you want the text to appear on the model, make sure to select the model before clicking the Emboss icon. Otherwise, the text will simply be added to the build plate.
- Assembly View: The view is useful for seeing the models together as an assembly with the different colors. This feature is only available, however, when the original import model is an assembled one, like an .stp file.
Step 3: Settings Configuration
After you’ve manipulated the model to your heart’s content, it’s time to play with your settings. All of this happens in the panel to the left of your viewport.
For basic prints, the standard profile that comes with Orca Slicer produces a good quality print at a decent speed. Printing with the standard profile usually doesn’t require more time or consume a lot of material – depending on the model, of course – because the settings include a standard 0.2-mm layer height and 15% infill with a Grid pattern. New users can basically use this profile by selecting “0.20mm Standard…” in the drop-down menu under the Process section. If necessary, check “Enable support” under the Support tab (see below), then proceed to slicing.
Everyone else, however, may want to get a little more hands-on with the settings configuration. The next level up from using the default profile would be using one of the presets. Orca Slicer organizes presets based on printers, filaments, and print quality, and they can be found listed in the drop-down menus for each of the sections on the left panel.
- Printers: As mentioned above, many 3D printers are supported in Orca Slicer, so users will see many built-in presets. These include not only popular, well-known brands such as Creality, Bambu Lab, Elegoo, Prusa, and the like, but also lesser known manufacturers such as TwoTrees, InfiMech, and Folgertech. Presets for DIY favorites Voron and RatRig are also baked in. If your vendor isn’t listed, you can create a printer profile of your own and customize its parameters. Click the gear-like icon to the “Printer” section of the panel, then select your printer or create your own.
- Filaments: Orca Slicer includes a wide range of filament type presets, although the list of vendors is quite limited: Bambu Lab, Polymaker, eSun, Overture, and generic. Clicking the gear-like icon next to “Filament” gives you access to the presets as well as the ability to create your own, and clicking the notepad icon allows you to see and change filament-related settings, such as temperature. Be aware that the list of available filament presets depends on the printer selected in the Printer section’s drop-down menu.
- Print Quality: Once the printer and filament are selected, you have to select a profile in the Process section. All of the presets are defined by layer height and quality, ranging generally from 0.08 mm to 0.28 mm. Usually, only the layer height and line width varies among the print quality presets. A neat feature is the ability to compare all of the settings based on the presets you’ve selected. Click on the green icon on the far right of the Process line, then select the presets you want to compare in the drop-down menus. The results will be display just below.
Noteworthy Settings
Even though you’ve selected a number of presets, you’re able to change the individual settings. Below, we’ll discuss the most changed settings in the Process section.
Quality
As the name implies, the settings under this tab affect print quality. The most notable settings in the section include layer height, first layer height, and on a slightly advanced side of things, the seam position. A seam is unavoidable in FDM 3D printing, but Orca Slicer offers various options for its placement: near the edge of the layer, aligned, at the back of the model, or randomly.
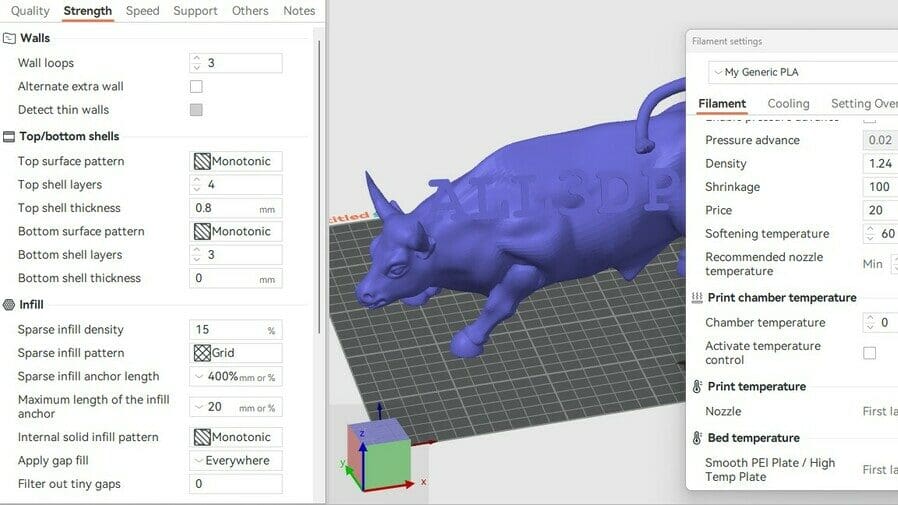
Strength
This tab includes some of the most crucial settings, and the values that you select will contribute to print times, part strength, and material consumption. The settings that have the greatest effect on strength are the wall loops, infill density, and infill pattern. The latter two are pretty well known. Wall loops, however, determine the number of walls the model will have before the infill starts.
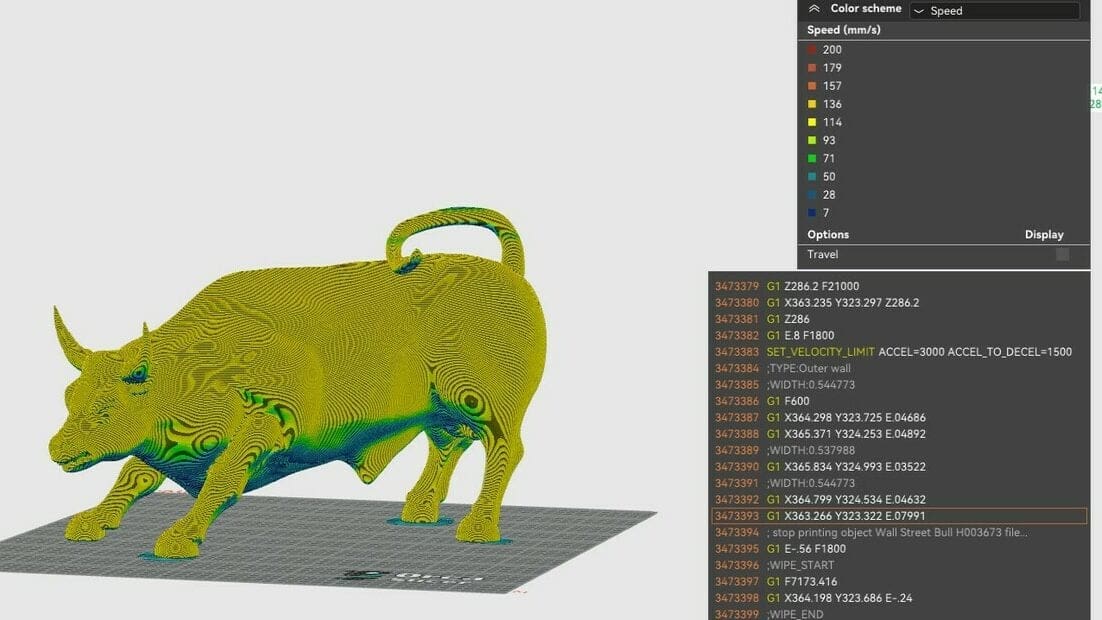
Speed
The settings here usually influence the print time but can have an affect on print quality as well. The most changed parameters include first layer speed, number of slow layers, and both outer and inner wall speed.
The outer wall speed is a crucial parameter because it’s the part of the print that’s going to be visible. Therefore, the outer wall speed should be kept at a value that produces decent print quality and a good print time. The inner wall speed, on the other hand, can improve part strength if the value is set only a little higher than the outer wall speed.
It’s important to also keep in mind that print speed depends on the hardware installed on the printer, especially the hot end. Increasing the print speed doesn’t automatically mean increased flow through the hot end. There might be instances in which the user may end up moving the printhead at a faster rate than the printer is able to deposit material. Therefore, it’s essential to consider the chain reaction involved in adjusting speed settings; flow and temperature settings may need to be adjusted as well.
Support
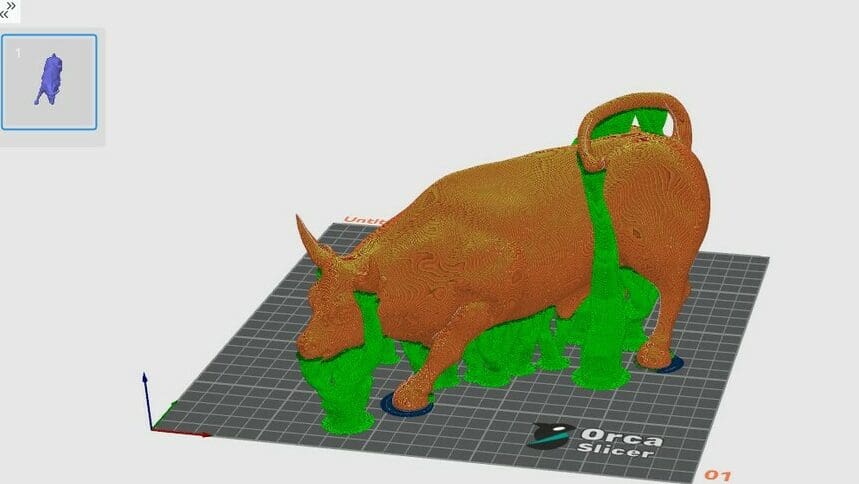
This tab allows you to enable or disable supports. The most important settings include the support type, style, and threshold angle. The available support types are normal and tree supports. The support style can be the normal grid like or snug supports – the major difference between them being the leaking of support beyond the required area.
The threshold angle is a value that can vary from printer to printer. Usually, the higher the cooling, the higher the threshold value gets. Beyond 60 degrees, though, support is usually required regardless of the printer.
The raft setting under this tab is pretty notable. It lifts the model up and provides extra layers to avoid warping; therefore, it’s commonly used with higher temperature filaments such as ABS. Orca Slicer implements rafts by allowing users to select the number of raft layers, with ‘0’ meaning no raft. The more raft layers, the lesser the chance of the part getting warped. However, increased raft layers leads to increased print time and material consumption.
Other
These are usually settings that cannot be categorized under another tab, and some of them are extremely important to get good prints. The skirt settings are a good example.
When users increase the number of skirt loops, the printer lays down a couple of loops before printing the main object. The loops are an indicator of whether the bed is leveled and the Z offset is appropriate, both of which are crucial for a good first layer and a successful print.
Other commonly used settings under this tab include fuzzy skin and spiral vase. Fuzzy skin is a surface effect that helps mask layer lines, and the spiral vase setting prints the part with just one wall layer. This process is continuous and has no retraction in the process.
A Note on Print Time
The infill percentage, layer height, nozzle diameter, and print speed settings play a pivotal role in print time. To demonstrate, we’ll compare tweaks to a couple of these settings for the Bambu Lab X1 Carbon’s “0.20mm Standard” preset. Without any tweaks to the preset, a 100 mm x 100 mm x 100 mm cube takes 3.5 hours and 241 g to print.
Say we increase the layer height to 0.24 mm and reduce the infill to 5%, the print time drops to 1 hour and 54 mins with 128 g of material consumed. This is roughly half the time and weight of the default print settings. Depending on the end use of your print, you may be able to save time and filament by tweaking the settings mentioned above.
Step 4: Slice & Print
After you’ve configured the settings as desired, you can slice the file by selecting either “Slice all” or “Slice plate” on the top right side, above the toolbar.
The next step will depend on whether your printer is connected to the local area network (LAN). Printing with machines that aren’t connected to the LAN is fairly straightforward. Click the arrow just next to the “Print” button on the App Menu Bar, then select “Export G-code file”. Save the file to an SD card or USB stick, then insert into your machine and print it.
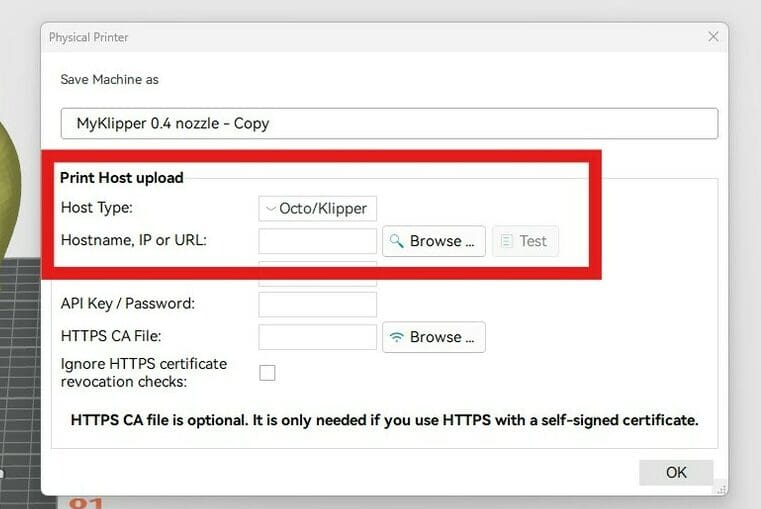
For printers connected to your LAN, you can send prints directly from the slicer. There’s a small setup process, however:
- In the Printer section on the left panel, click the Wi-Fi icon shown next to the selected printer.
- Enter the host name for the printer in the pop-up window. Options include Octo/Klipper, Repetier, PrusaLink, among others.
- Add the IP address of the printer and fill in the password if there is any.
Once the printer is connected, the similar web interface will appear in the slicer. Now, you can send files to your printer directly from the slicer.
License: The text of "Orca Slicer Tutorial: Your First Steps with the Slicer" by All3DP is licensed under a Creative Commons Attribution 4.0 International License.