Orca Slicer: All You Need to Know to Get Started

Feature-packed and a fork of Bambu Studio, Orca Slicer has been gaining ground in the slicer world. Read on to learn all about it!
The first version of Orca Slicer, developed by SoftFever, was released in July of 2022. Originally called “Bambu Studio SoftFever”, this open-source slicer is a fork of Bambu Studio, which is based on PrusaSlicer.
Orca Slicer is one of the most convenient slicers you can use if you’re working on big projects with lots of parts. One of its standout features is the possibility to add multiple build plates to get a complete overview of the filament and time required for a project when various parts need to be printed. This allows you to organize your design in the best possible way.
Thousands of makers have already chosen Orca Slicer as their go-to slicing software. It’s become popular thanks to all the features it shares with PrusaSlicer and Bambu Studio, together with many improvements and additions. Orca Slicer is packed with tools that you won’t find anywhere else, so let’s dive into it!

Accessibility
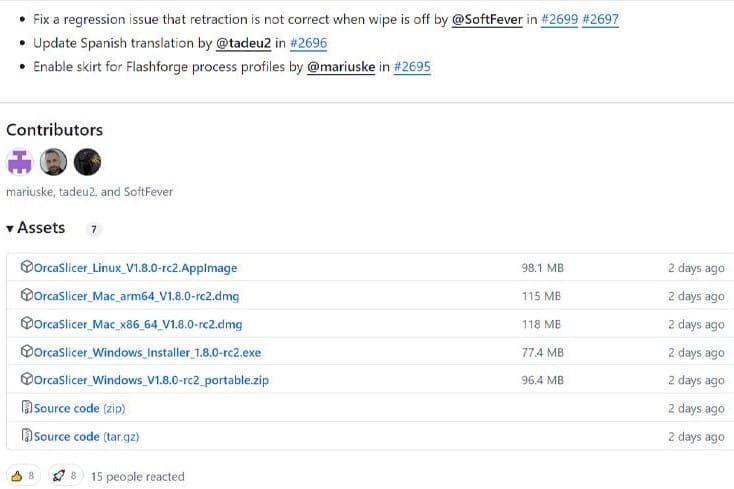
Orca Slicer is available from the official site and from GitHub for the most popular operating systems: Windows, MacOS, and Linux, although technical requirements aren’t specified. The installation procedure will differ based on your OS, but you can find each method described in detail on GitHub. You can download the right folder for your device and follow SoftFever’s instructions.
Once installed, you can open and start using Orca Slicer. There are lots of pre-installed profiles for printers, and with every release, new ones are added thanks to the active community. To begin using it, choose your printer profile and add the filaments that you like to print with. Now you’re set up and can start slicing models.
When you open the slicer for the first time, the default mode will be the basic one. If you’re already an intermediate or advanced user, you can enable the “Advanced” view to use sophisticated features. You’ll simply toggle the switch with the same name that you can find in all the profiles sections (which we’ll go over below).
UI & Layout
Now that it’s installed, it’s ready to be used. Let’s take a look at the Orca Slicer interface to understand how it works.
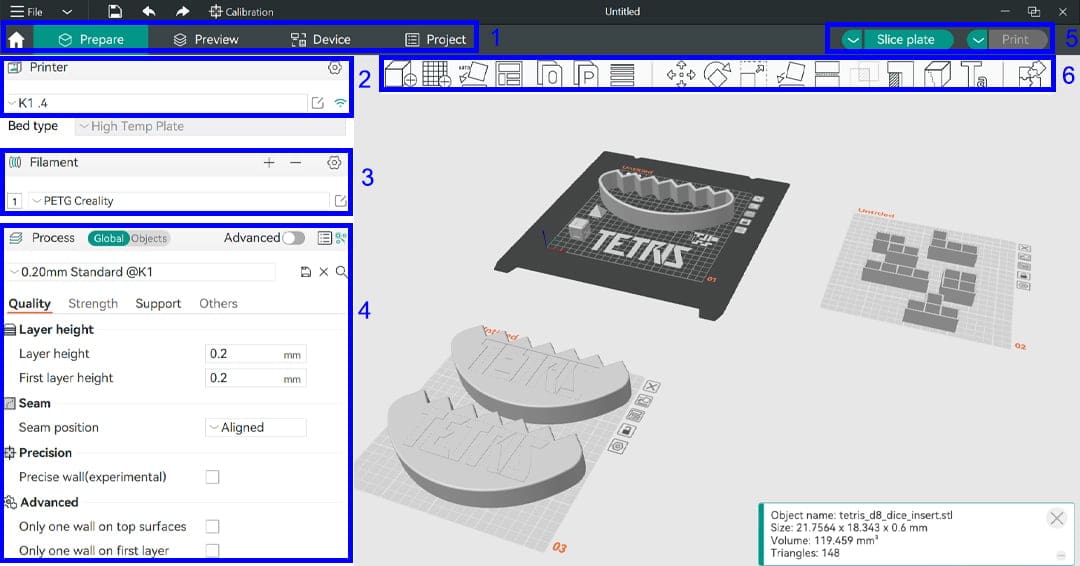
(1) App Menu Bar
In this bar, you’ll find the main sections of the slicer:
- The home icon is used to create a new project or open an existing one.
- Prepare View is the window where you can tweak and customize all the settings to print your part exactly how you want it.
- Preview opens after you slice your models. Here, you can see an estimate of how much filament you’ll need for the project and how much time the print will take. Furthermore, if there are errors or warnings that you need to pay attention to, the slicer will point them out here.
- Device is a handy tab that will show you the interface of your printer. To visualize it, you’ll need a machine that’s connected via Wi-Fi. From this page, you can monitor your machine and prints.
- Project is a tab that only Bambu Studio and Orca Slicer offer. It’s really useful for big projects because you can attach images and documents, together with a list of materials to have a complete overview of your project.
(2) Printer
Here, you can select the printer you want to slice your parts for. Additionally, via the Wi-Fi icon, you’ll be able to connect your machine (to check on the “Device” tab). If you use a Bambu Lab printer, you can even choose the type of build plate, for example an Engineering Plate or Cool Plate.
(3) Filament
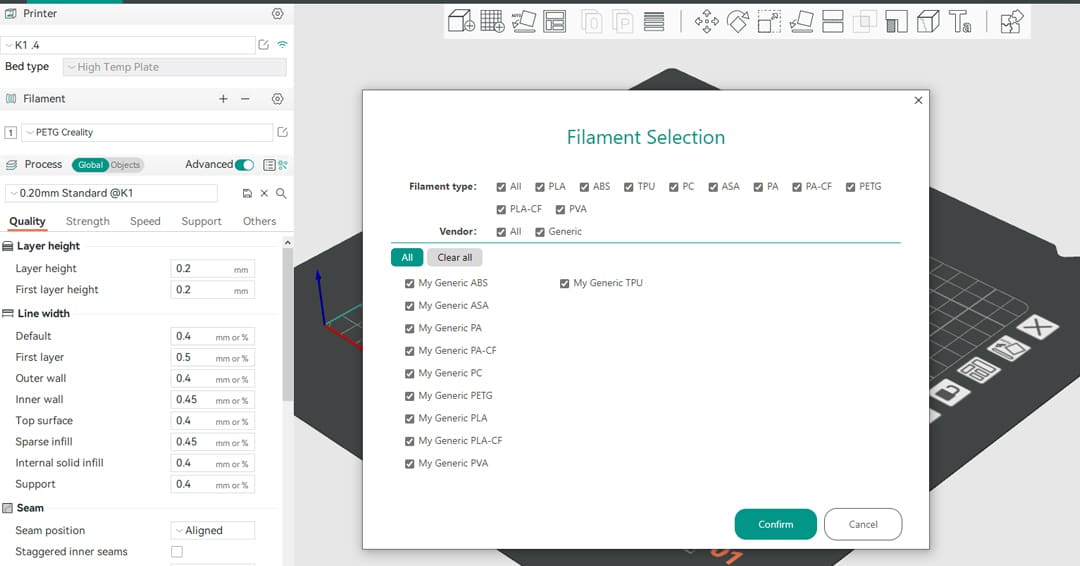
In this section, you can select the filament you want to use and tweak its settings. Orca Slicer offers some handy generic presets that can be used to start with and refine later for better results. By default, there’s only one filament enabled under this section, but if you use a multicolor unit, such as the Bambu Lab Automated Material System (AMS), or a printer with multiple extruders, you can add filaments by clicking on the plus symbol.
If you have a Bambu Lab AMS, the software will automatically display all the detected filaments. As with Bambu Studio, you can visualize the purge filament for every color change. You can tweak this value if you’re not satisfied with the software results.
(4) Process
This area has two tabs and five common sections that organize the settings in categories based on their main function. The sections are the following:
- Quality lets you tweak line height and width, together with the seam position.
- Strength is a section dedicated to walls and shells, as well as to infill.
- Speed, as the name states, lets you control the speed values but also the accelerations and the jerk values. These settings will determine how fast printing will be.
- Support is the section that you’ll use when your print presents steep overhangs. Here, you can tweak all the settings for the supports. Note that the raft options are included there.
- Others is a section with mixed settings. Here you’ll find the “Bed Adhesion” tab, as well as options for multicolor prints, such as the prime tower and flush options. Finally, you’ll be able to tweak your G-code output, for example customizing the name of the file.
All these aspects can be defined by selecting the corresponding tab, either for everything that’s on the build plate (“Global”) or for individual parts (“Objects”).
(5) Slice & Print
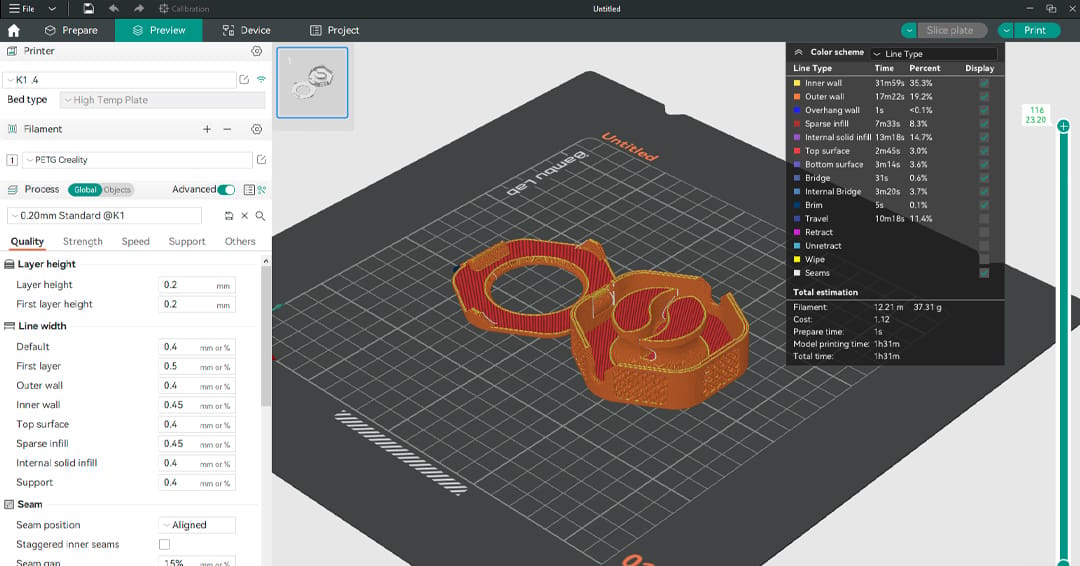
Just like in most slicers, the “Slice” button will run the slicing. After it’s done, the software will automatically open the “Preview” tab for you. Now the “Print” button will turn green. With it, you can send the file directly to the connected machine to start printing. You can also choose from the drop-down menu the option “Export G-code file” to save the file on your device.
(6) Tool Bar
Some of these icons are common ones, and they’re present in all kinds of slicers. For example, the “Add” option (the cube with a plus symbol near it) is used to add parts to the plate. There are also standard commands such as “Move” and “Rotate”, but Orca Slicer offers some new tools too.
One of the handiest tools is the “Add Plate”. As said before, Orca Slicer presents a project-oriented workflow, and this function is one of the main tools. In fact, with it, you can add multiple plates to organize the parts for a big project.
If you’re using multicolor printing, another handy tool is the paint bucket, which allows you to paint the objects with different colors that represent the different filaments you want to use. Finally, another unique feature that Orca Slicer shares only with Bambu Studio is the puzzle icon. This tool is called “Assembly View” and it allows you to check that every part can be assembled smoothly in your project. It can be a lifesaver, particularly for the most articulated designs.
Features & Functions
Orca Slicer has inherited useful tools from Bambu Studio, and it also offers unique features that no other software does. Let’s check out the most noteworthy tools that the community has developed:
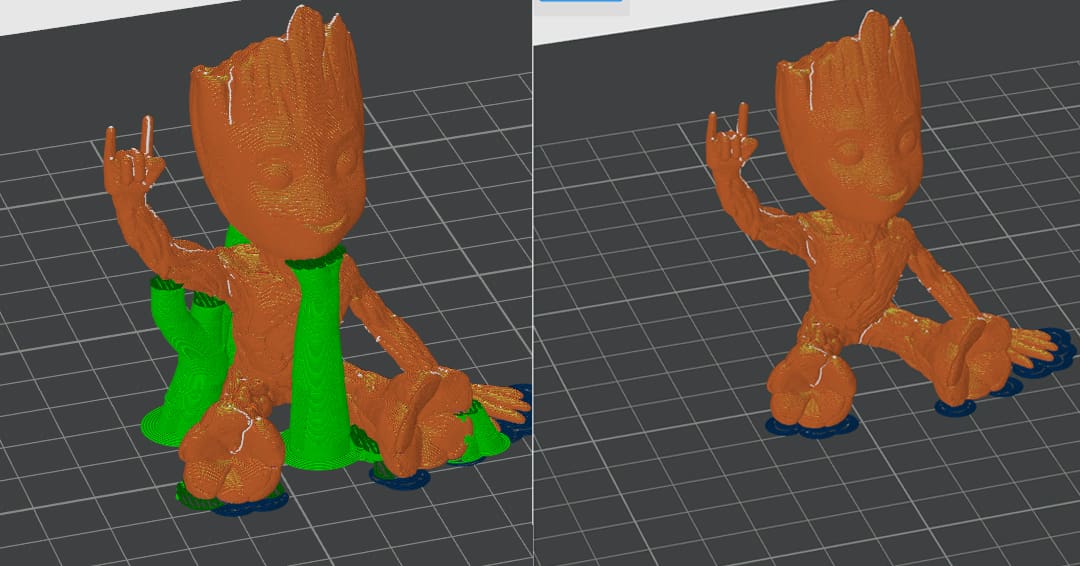
Make Overhang Printable
This is one of the most unique features, and you can find it in “Process > Quality”. By enabling it, the slicer will reduce or completely delete the supports needed for your part. In fact, with this function, Orca Slicer will slightly modify the geometry of your object to make the overhangs printable without supports, based on the value you set as the “Make overhang printable maximum angle”.
This can be the most important feature, particularly if you’re printing an aesthetic model such as a miniature. On the other hand, if you’re working with functional parts, you need to pay close attention to the modified areas to check if all the key features of your parts are preserved.
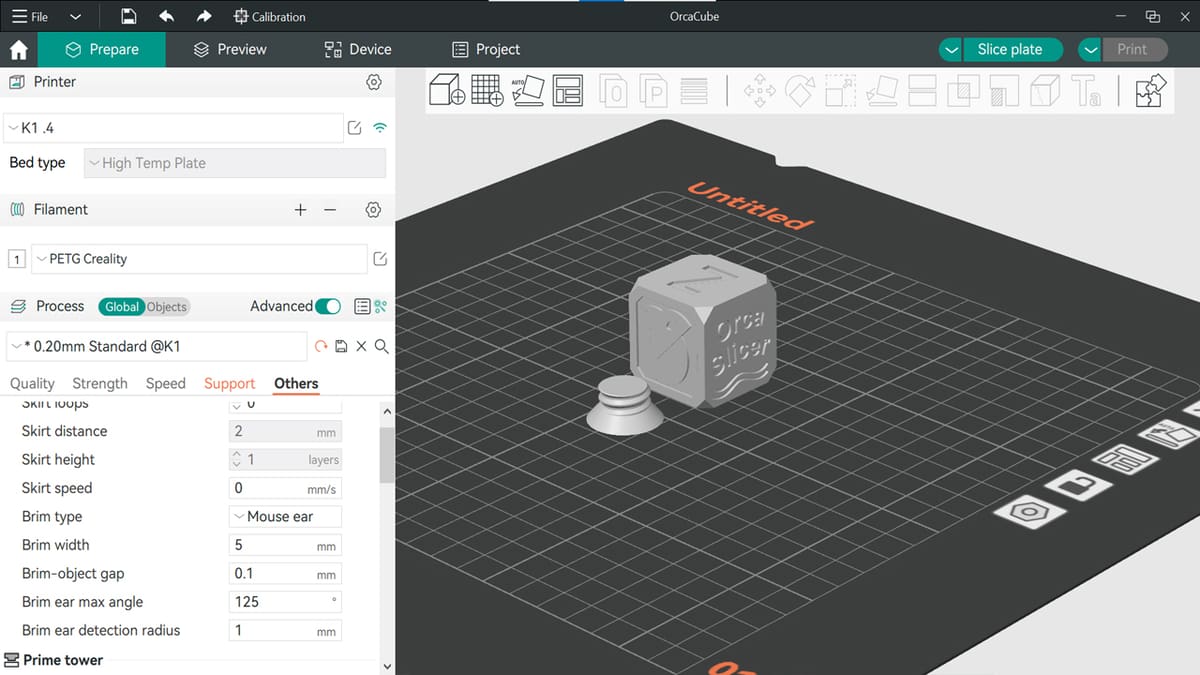
Mouse Ears
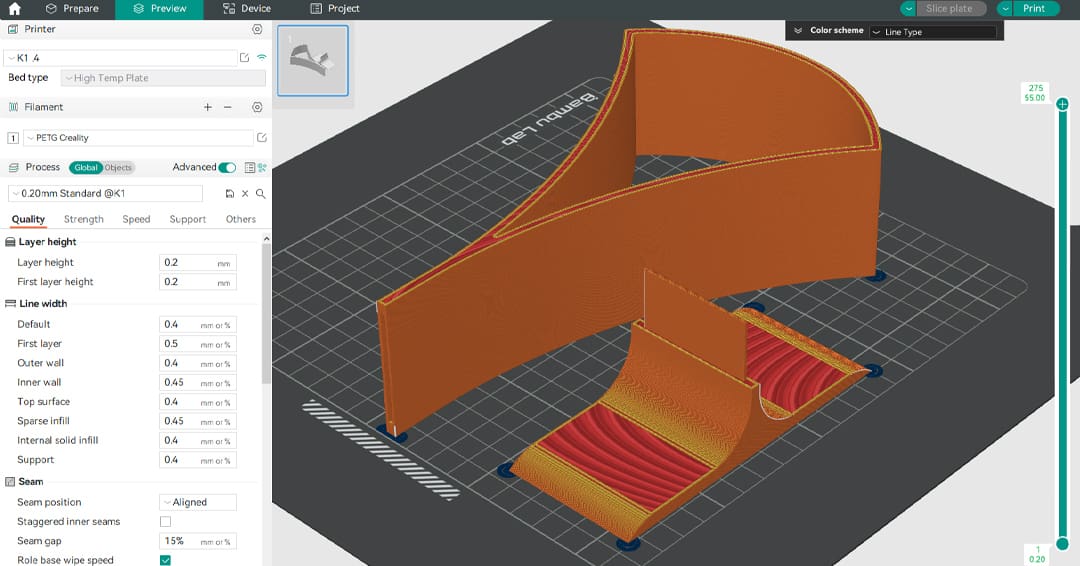
Mouse ears are a cool trick that you can use to avoid warping on tough angles without adding much time and filament to the print. Before this option was added in Orca Slicer, you had to manually create and place them. No more! Orca Slicer now automatically generates this kind of brim. You can simply activate it by searching under the “Process > Others” section and selecting it from the list of “Brim Type”. You have a few options that you can tweak to make your mouse ears as functional as possible.
Playing with the “Brim ear max angle” and “Brim ear detection radius” will allow you to have this special brim only where you need it. The default values work pretty well.
Calibration
One of the reasons users transferred from PrusaSlicer to SuperSlicer at the time was the calibration section. Orca Slicer takes this to another level. There is a long list of built-in tests to optimize your profiles and obtain the best prints possible. All the tests you need to create a perfect slicer profile are included, together with a comprehensive tutorial that will guide you through the process of tweaking your settings.
User Experience

Although Orca Slicer is packed with useful features, it’s organized in a clean and beginner-friendly way. The calibration section, with its detailed guide, is one of the most appreciated characteristics of this software. Together with the increasing number of printer profiles, it expands the accessibility to new users who aren’t yet familiar with machine and filament settings.
Every setting can be delved into by hovering with the mouse on the corresponding line. A brief description of the option will appear, saving a ton of time for research. Together with that, the software will show you suggestions based on your print geometry by popping up a little window at the bottom right corner.
To stay up to date, every time you open the software, it will check for updates and let you know if there are any new versions that you can install by simply clicking on the “Install” button. As explained before, with every update new printer profiles are added, so more and more users will find their machines with default settings on this slicer in the future, making it an accessible and convenient choice.
Community Support
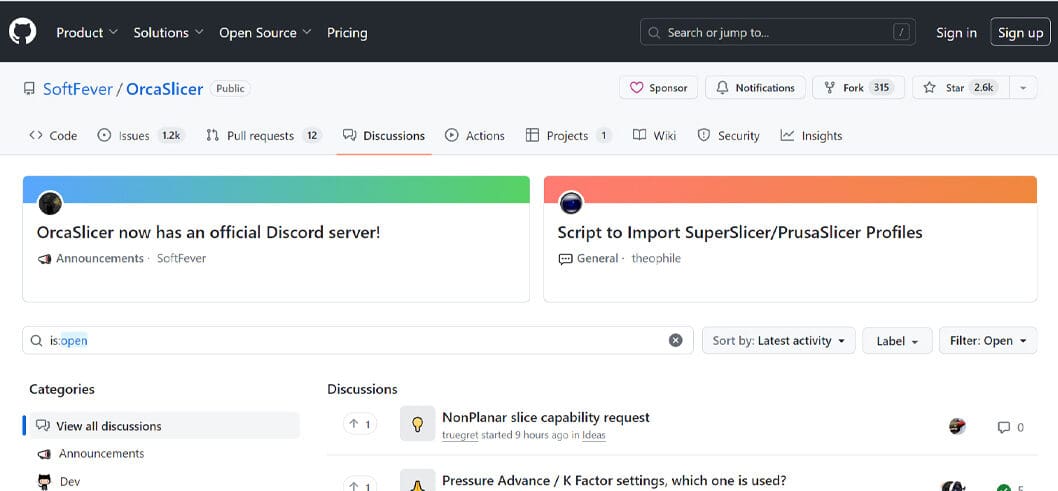
Orca Slicer is becoming one of the most popular and appreciated slicers of the moment. The community is constantly increasing, and there are lots of tutorials on YouTube. Furthermore, you can join the Discord group to receive additional help from almost 6,000 members!
On the GitHub page, you can also use the “Discussions” section, a forum where you can interact with other users by helping them or asking for help. Or, if you’re more familiar with Reddit, you can check out the Orca Slicer subreddit.
Alternatives
While Orca Slicer has some interesting features, you might be looking for a different approach to slicing. Here are some interesting alternatives to this software that are free and open source:
- UltiMaker Cura: As the name states, Cura, an open-source and free slicer, is developed by UltiMaker. It offers lots of premade profiles for a long list of machines; being relatively new, Orca Slicer doesn’t offer as many presets. Cura also presents a simpler interface that can be better for beginners, and the more experienced you are, the more plug-ins you can add to the slicer for more versatility.
- PrusaSlicer: PrusaSlicer is a free and open-source slicer from Prusa. It’s one of the most appreciated slicers thanks to the unique features that it introduces with every release. Being developed by a large company, you can be sure that it’ll be always updated, compared to Orca Slicer, which is a work of enthusiasts. On the other hand, PrusaSlicer can seem a little bit overwhelming to a beginner compared to Orca Slicer.
- ideaMaker: Developed by 3D printer manufacturer Raise3D, ideaMaker is a slicer that offers a beginner-friendly interface. It includes profiles for Raise3D machines, as well as lots of other brand printer presets. This slicer is also handy when it comes to complex projects because it can separate parts in assemblies. It’s also one of the handful of programs that you can use for belt printing since it allows you to set custom gantry angles for your “infinite” machines.
License: The text of "Orca Slicer: All You Need to Know to Get Started" by All3DP is licensed under a Creative Commons Attribution 4.0 International License.