Lost-PLA Casting: All You Need to Know

In our step-by-step guide about the amazing art of lost-PLA casting, learn how 3D printing meets traditional casting to create metal objects.
While the 3D printing scene continues to progress and evolve, one of the remaining limitations is also one of the most frustrating: It’s difficult and expensive to 3D print in metal.
Metal 3D printers like the Markforged X can cost hundreds of thousands of dollars and are roughly the size of a compact car, putting them outside the budget and floor space of most hobbyists. Luckily, you don’t have to print in metal to get metal prints.
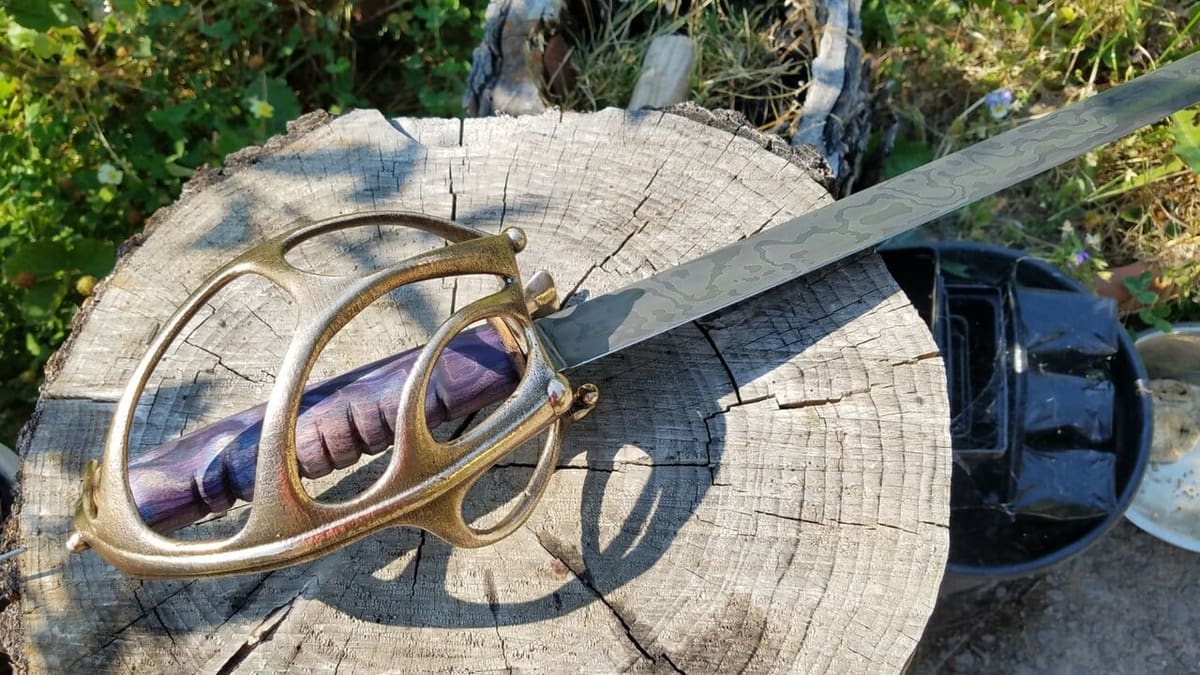
A metalworking technique called lost-wax casting has been used to make jewelry for hundreds of years. Combined with 3D printing, it’s been used to make metal printer parts and even Academy Awards.
If you don’t have wax modeling skills, just substitute the wax for 3D printed PLA to get lost-PLA casting! You’ll also need some DIY skills and a bunch of materials (including a spool of PLA filament), but the reward is being able to turn your own PLA prints into solid metal pieces of aluminum, bronze, or even gold!
This article will give you guidance on all the main steps involved in lost-PLA casting, including safety tips, how to make your own equipment, where to source supplies, how to cast your first metal object, and where to go from there.
When possible, in addition to items that you can purchase, we’ll give you DIY alternatives to keep costs down. That said, sometimes there’s no substitute for professional-grade equipment or consumables.

Casting Overview
In order to better understand what lost-PLA casting is, it may be helpful to first review the more familiar lost-wax casting.
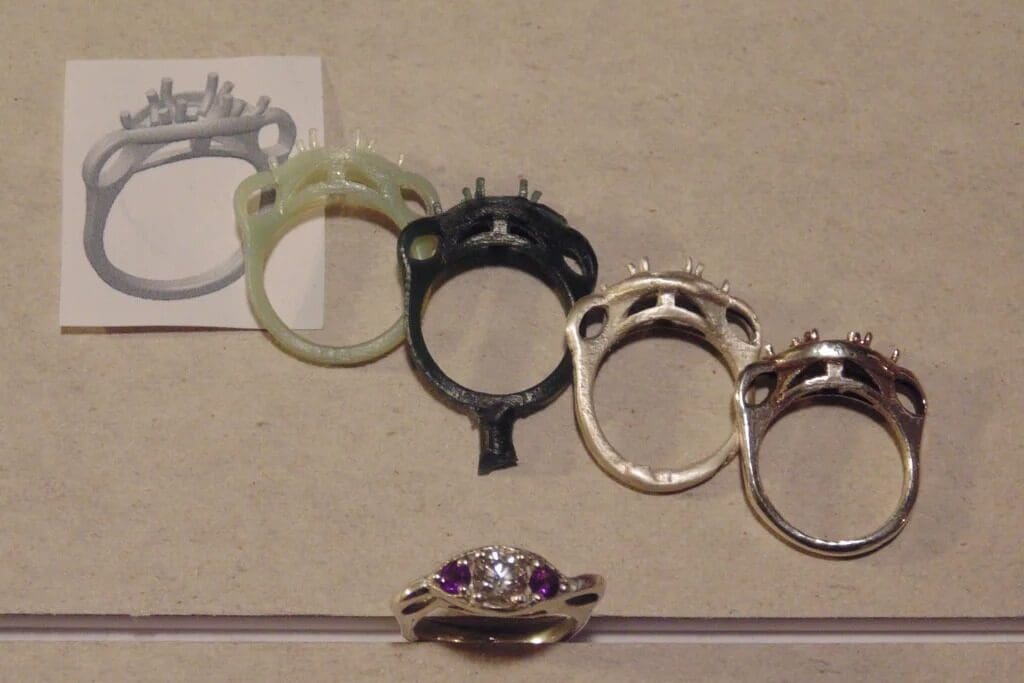
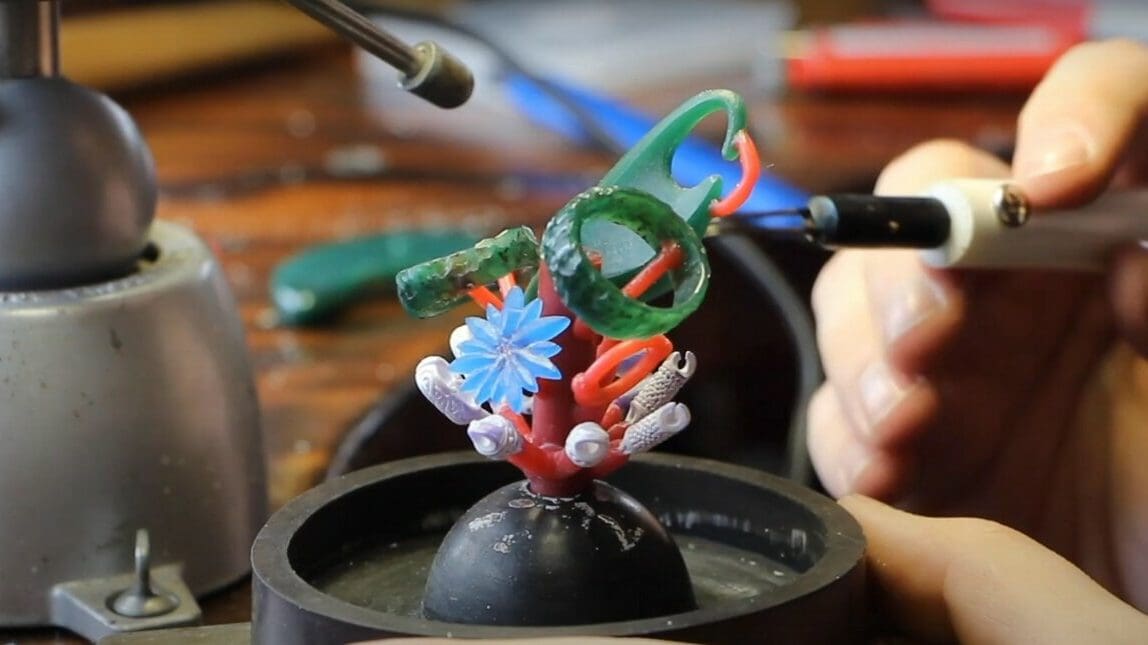
Lost-wax casting starts with a model, usually sculpted from wax. Historically, the models prepared using this method can range from large statues, figurines, or intricate jewelry. The process is still commonly used today to make custom pieces like rings or tooth crowns.
A modern approach to making wax models is by using a resin printer with castable resins. This takes advantage of the intricate details achievable with resin printing to eliminate the need for creating fragile features by hand. The printed models can function exactly the same as a sculpted wax model.
From there, the wax model gets placed in a plaster mold and heated until the wax liquefies and flows out of a hole in the bottom. (This is why it’s called “lost-wax” casting.) The melted wax and resulting smoke, water vapor, and carbon dioxide escape out of the hole, which is at the top of the mold.
The negative space left behind in the baked plaster can then be filled with molten metal. After cooling, cleaning, and a fair bit of polishing, the original wax model is now a shiny metal piece.
Lost-Wax vs. Lost-PLA
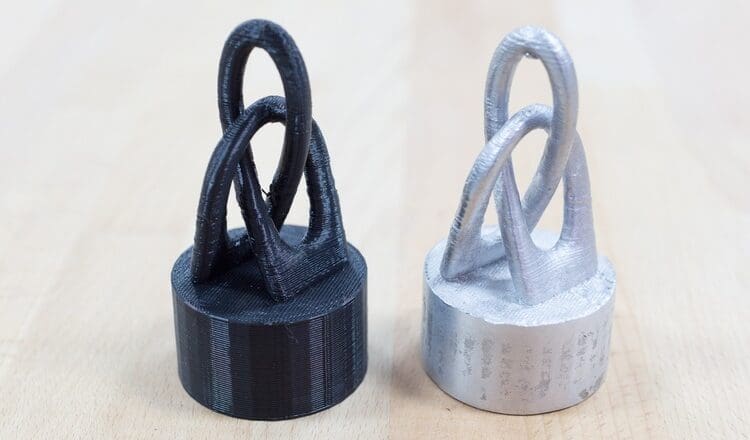
Ultimately, the difference between the lost-wax casting process and the lost-PLA casting process is nearly identical. There’s only one major difference: Rather than sculpting the model from wax, the model is 3D printed in PLA. Like wax, PLA can combust completely, allowing a PLA object to be burned out of a mold.
Choosing between lost-wax and lost-PLA really comes down to the equipment you have and the kinds of designs you want to make. Printing your model with PLA is the easiest way to make your model, but you’ll be limited by the resolution of your FDM printer. It’ll be suitable if you want to create bulky jewelry, pendants, or figurines.
If you’re looking to make jewelry or other intricate metal pieces and don’t have a steady enough hand for wax sculpting, resin printing with castable wax may be the best casting option for you.
Once you have a wax model, regardless of how it was produced, the casting process follows the same steps. However, the correct temperatures to use will depend on your exact material, so always refer to the manufacturer’s instructions.
We’re going to describe in detail each step of the lost-PLA casting process in a bit, but let’s start with a brief overview of the process and go over the list of equipment and consumables that you’ll need.
The Lost-PLA Process
A model is printed with PLA. We ultimately want to create a blank mold of this model that metal can be poured into. For this, the model must be encased in investment (plaster). However, it obviously can’t be fully encased in investment as there would be no way for the PLA to escape and the metal to fill its place.
Therefore, additional combustible material called sprues is added to the model. Once melted, these will form a tunnel from the outside of the investment to every nook and cranny of the model.
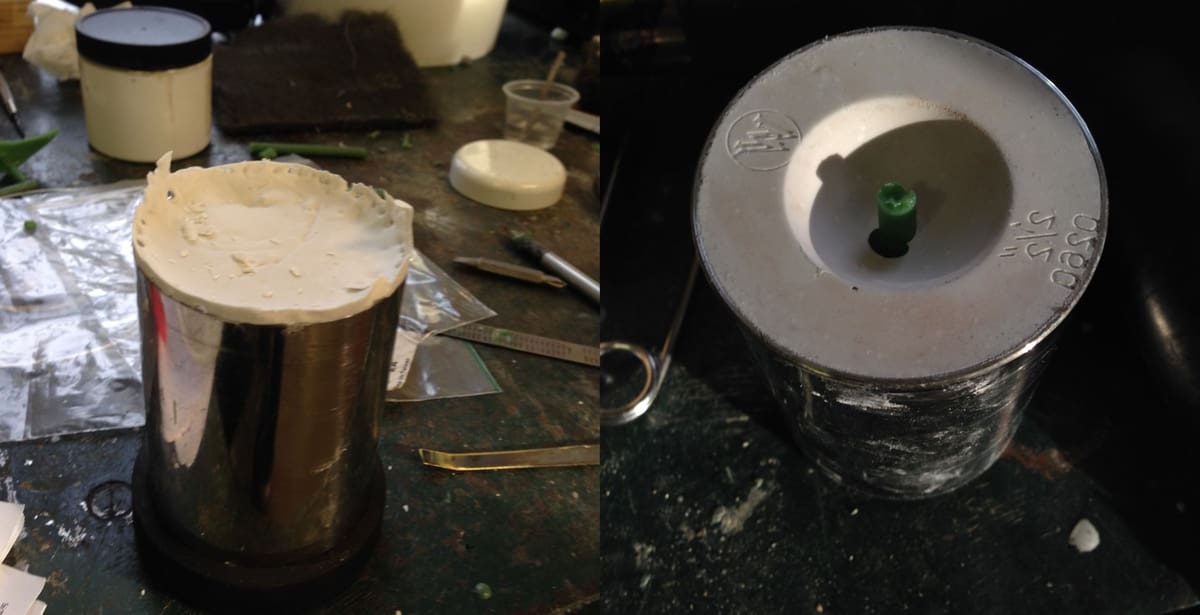
The sprued model is placed in a flask that is then filled with investment and dried. This flask can then be transferred to a kiln to bake the investment and melt the PLA model and sprues, leaving us with a perfect imprint of the design.
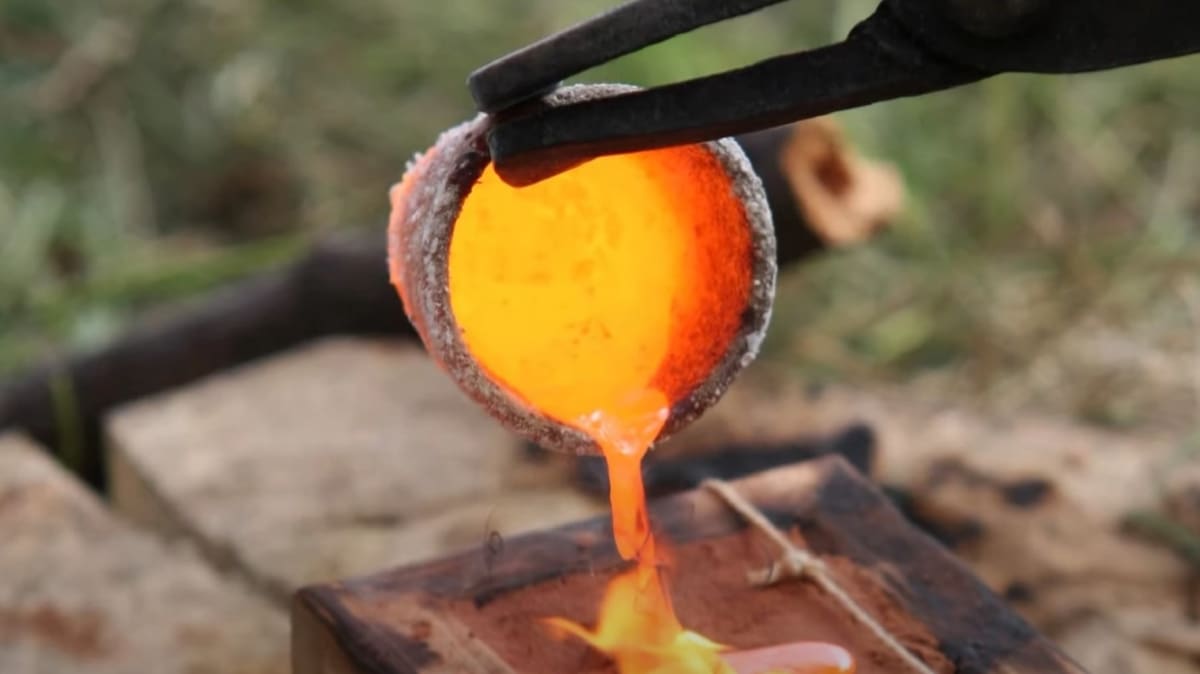
From there, molten metal is poured into the opening of the investment mold. You can ensure that the molten metal completely fills the mold using either gravity and faith, a vacuum system that will suck the flowing metal quickly into the mold, or a centrifuge that uses centripetal force to pull metal where it needs to go.
After a bit of cooling, the filled flask is dunked in water to dissolve the investment and release the metal part. Now all that’s left to do is post-processing to give your design the shine it deserves.
With all that said, let’s now check out exactly what you’ll need to complete this process.
Equipment
While consumables are what you’ll use up, equipment is the opposite. Here, we’ll take a look at the specialized tools you’ll need that can be used again and again for many casts. For most, acquiring this equipment will require an initial investment of time and money.
- 3D printer: A critical part of lost-PLA casting is the PLA print, which means you’ll need an FDM 3D printer.
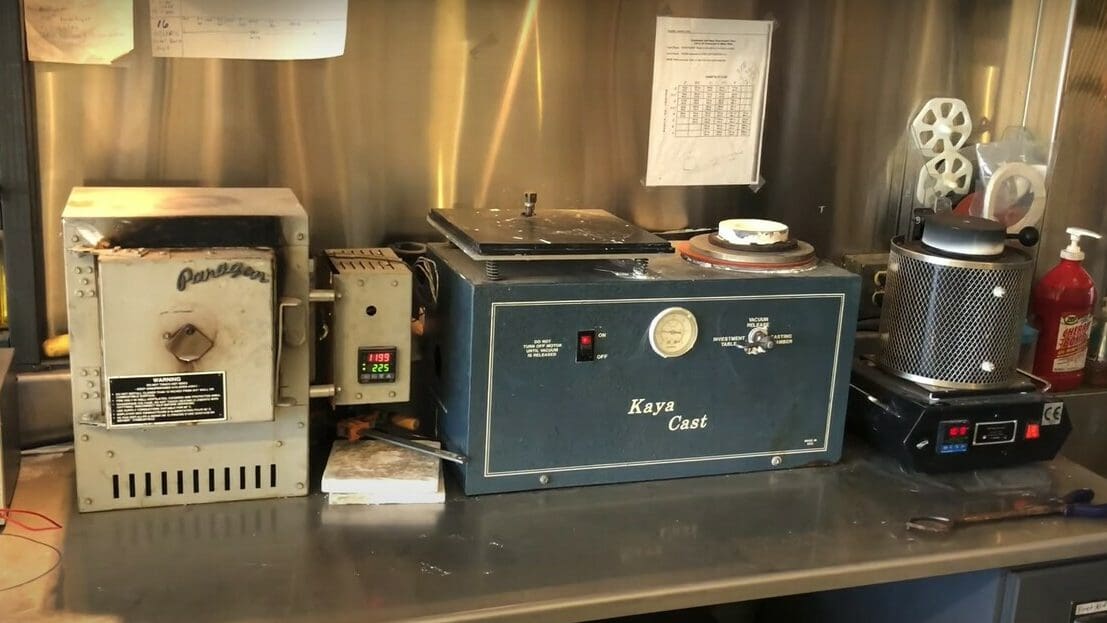
- Vacuum chamber: Using a vacuum chamber is essential for the preparation of investment. It removes bubbles from the liquid mixture, which would otherwise interfere with the casting or even split the mold once it’s exposed to heat. Some vacuum chambers, such as a KayaCast vacuum table, also have a specific chamber to use while pouring metal which can greatly improve the detail achievable with your casts. For a cheaper option, you can make your own vacuum chamber, but you’ll still need to purchase the pump, and it likely won’t be quite as effective.
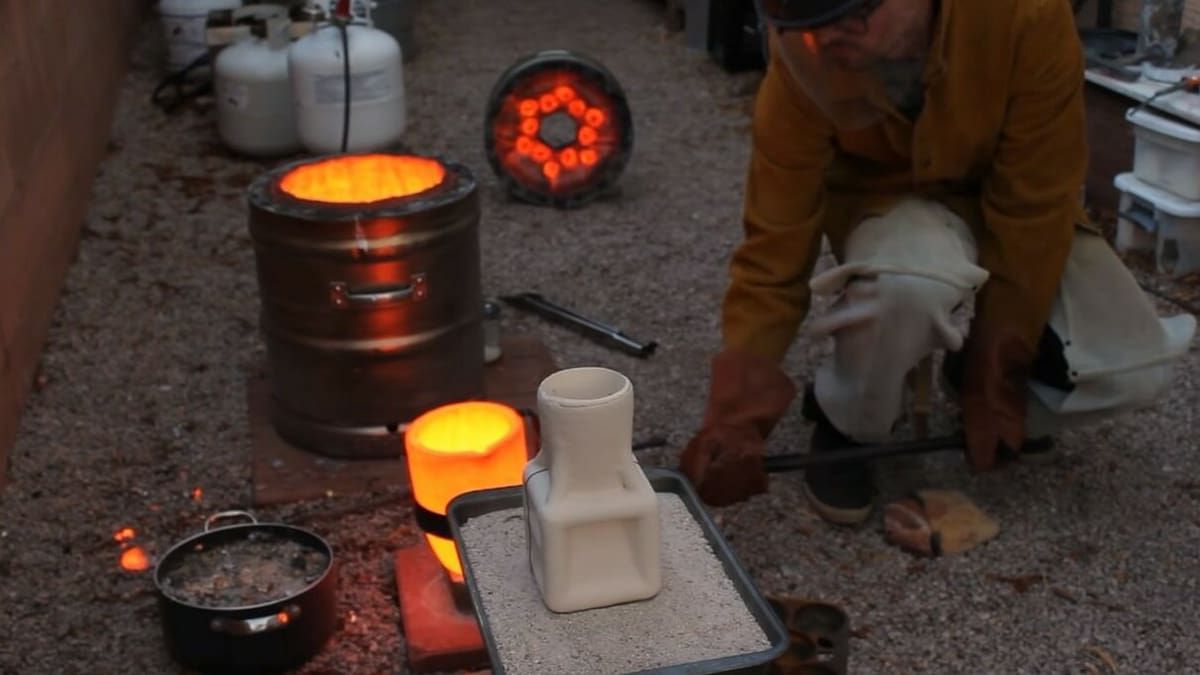
- Kiln: A furnace and an electric kiln is generally the most expensive piece of equipment. It’s used to melt or burn the PLA and bake the mold, preparing it for the metal pour. A kiln can be bought new, used, or made at home. You could also forego the furnace entirely and use a hot coal fire for the same process, but you’ll run a huge risk of cracking the mold by heating it up too fast.
- Furnace: A furnace (also called a foundry) is needed to melt the metal, whether it comes in the form of soda cans or ingots. Setups that use electric or propane fuel sources are readily available online. You can also make a charcoal or coal furnace yourself using, among other things, a steel bucket. Alternatively, you can purchase a propane or electric foundry to have something that works out of the box. An oxy-acetylene torch can also be used to melt metal.
- Flask: Inside a flask is where the investment is poured over and around the model. Make sure your flask is big enough to completely cover your model in investment but still fit in your furnace with the recommended tolerances. If you’re looking for a more affordable option, a cardboard mold box will also work, but it will need to be removed once the investment dries to avoid accidental fire.
- Crucible: A crucible is a bowl-shaped object, usually made of graphite or clay-infused metal, within which the metal is melted. Crucibles come in a variety of sizes from various vendors. Make sure to confirm that your crucible will be able to hold enough metal to finish your cast! Otherwise, you risk losing a lot of time and money creating only part of an object.
- Tongs: To handle your cast object, you’ll want both crucible and flask tongs. Note that, while crucible tongs can pick up flasks, flask tongs should not be used for crucibles.
- Centrifuge (optional): A centrifuge improves the quality of a cast object by forcing the metal into the mold with extreme force. If you opt for a centrifuge, you won’t need an electric kiln, but you will need an oxy-acetylene torch, as a centrifuge requires that the metal be melted in its dedicated crucible. Try to opt for a centrifuge with a shield, or it’ll be necessary to construct your own to protect yourself from metal splatter. This can be as simple as a large wooden box or a metal washtub.
- Tumbler (optional): After your object has been cast and removed from the mold, it can be placed in a tumbler for polishing. Filled with a medium such as walnut shells or steel shot, the chamber rotates, polishing the cast object through abrasion.
Now that the equipment is sorted, let’s take a look at the supplies you’ll need.
Consumables
The following items will be entirely or partially used up to make the final product, whether they become part of the cast object, burnt up into a gas, or discarded. Some are specifically meant for lost-wax or lost-PLA casting and can typically only be purchased from online vendors. However, most can be found at a local hardware store.
PLA Filament
Polylactic acid (PLA) is probably the most widely available and used filament type in 3D printing. Its low cost (generally around $25/kg) and melting point (392 °F/200 °C) make it ideal for this project.
That being said, generic PLA can leave ash behind after it’s burned out of the mold, which can end up tarnishing your final object. You may want to splurge on a dedicated casting filament, like Polycast, that’s specially formulated and leaves almost no ash behind.
There are even castable wax filaments for a more traditional wax casting process. However, some manufacturers warns that your 3D printer may need to be modified in order to print with it.
Sprue Wax
Sprues are wax supports used to connect multiple small objects to a central rod, the runner, so they can all be cast at once. This is particularly useful if you want to cast multiple rings at the same time: Simply attach the plastic model to the runner with more sprue wax! Note that candle wax is not recommended for this task.
Of course, if this feels like an unnecessary expense, it’s definitely possible to model the wax tree with CAD software and print it already attached to the object.
Investment
As the mold is the centerpiece of investment casting, the quality of investment is of utmost importance here. Investment is also commonly referred to as “plaster”. Note that PLA expands under intense heat, while traditional wax does not. If you’re casting aluminum, it may be worth seeking out a specialty compound that takes this behavior into account, such as Plasticast or Ultravest.
An N95 mask should be used when working with dry investment or plaster, as it contains cristobalite, which can cause lung damage.
Metal
An important part of the finished product is choosing what metal will be cast. Here are some metals that are typically used in lost-wax casting:
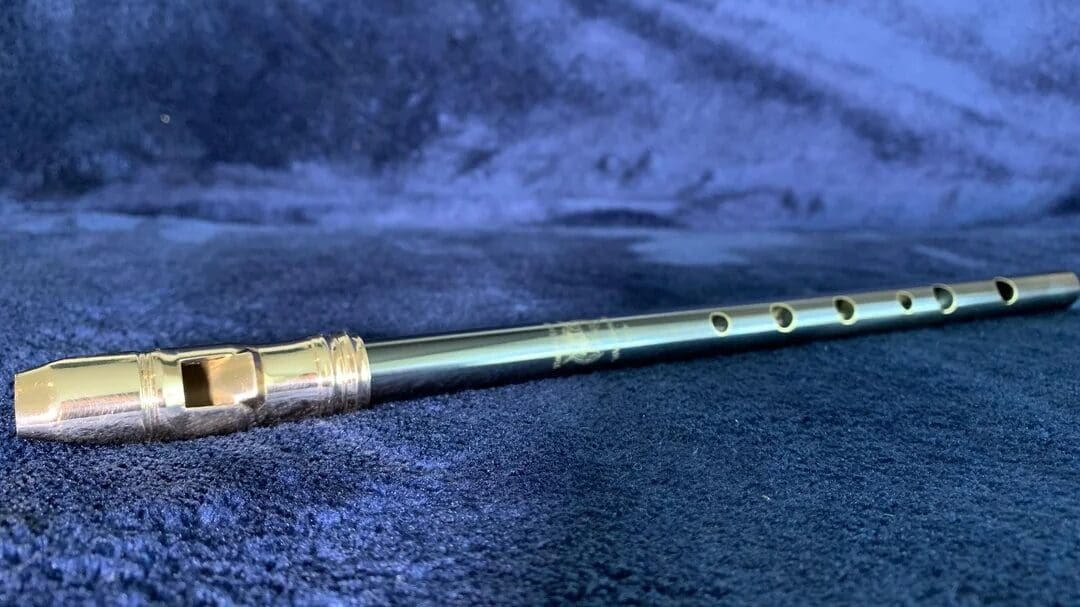
- Brass: Brass is a metal with a moderately low melting point that’s used in bullet casings and musical instruments.
- Aluminum: Aluminum is readily available and can be purchased in ingots or recycled from household items made of aluminum.
- Bronze: Bronze is often used to cast statues, both big and small.
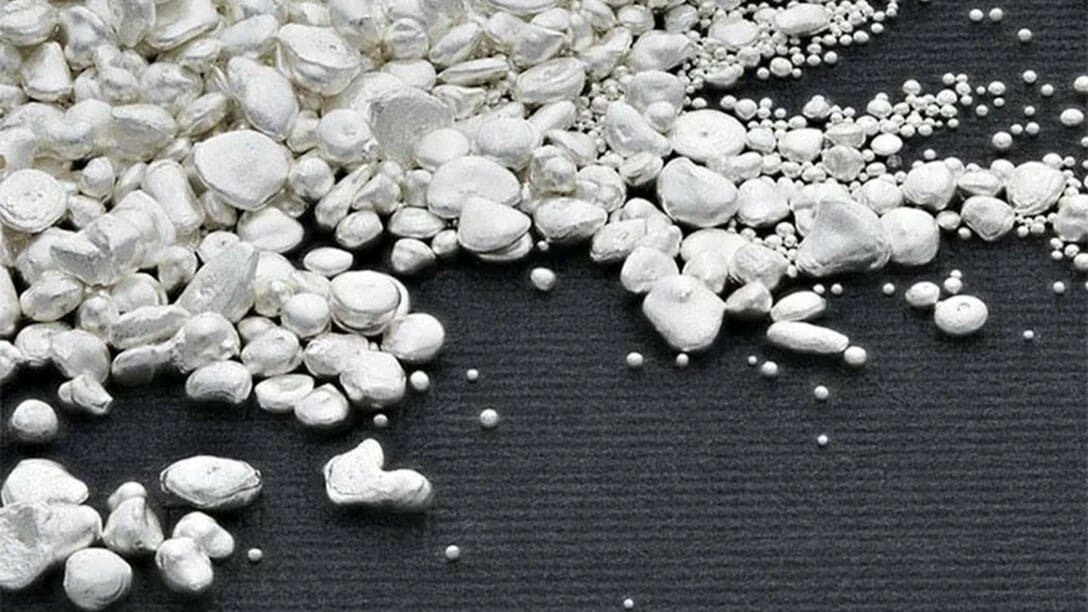
- Silver: While silver is still a precious metal, it’s much more readily available than gold and can be purchased as sterling silver (92.5% silver, 7.5% copper) casting grain. Sterling silver is ideal for cast objects because it’s much stronger than pure (.999) silver.
- Copper: Copper, a common material for ancient metalsmiths to make just about anything, is now found in wires and automobile components.
- Gold: Gold is very expensive and used for fine jewelry projects.
- Pewter: Pewter is a tin alloy that is used to make inexpensive jewelry. Always try and opt for lead-free pewter to minimize health risks.
These metals have a melting point below 1150 °C, which means that they can be melted by a gas flame and can be poured into a mold before solidifying (if heated correctly). They can be bought as casting grain or – in the cases of aluminum, brass, and copper – made by melting down household objects such as aluminum cans and copper wire.
Alternatively, you can purchase ingots (blocks of metal) online that are specifically made for backyard casting. Prices and sizes vary, meaning you can find something to fit your project and your budget.
Fuel
This project will require about 20 kilowatt-hours (kWh) of electricity to complete. Most of the consumption is due to the electric kiln that’s used to bake the investment and melt out the PLA.
The fuel source (or sources) used to melt the metal in this project depends on the equipment that you’ll be using to melt the metal.
- Oxy-acetylene torch: You’ll need to have oxygen and acetylene on-hand as well as relevant know-how and safety precautions.
- Propane foundry: You’ll need a propane source and to heat the metal for at least 15 minutes to thoroughly melt it.
- Electric heating furnace: It’ll take 2-3 hours to melt the metal, which means that it will take 2-4.5 kWh during the cast.
Now, before making a mold, it’s important to take certain safety precautions. This helps ensure that a new metalsmithing venture doesn’t end in a house fire or a serious burn.
Health & Safety
In the following, we’ll consider lost-PLA casting using aluminum as the metal. The first thing to know, then, is that aluminum has a melting point of 660 °C (1,220 °F)! That’s more than hot enough to cause permanent damage to unprotected skin in less than a second. Furthermore, molten aluminum can off-gas and splatter.
Needless to say, establishing safe practices and acquiring appropriate safety equipment should be your first priority. Ultimately, it’s up to your own good judgment and decision-making to keep yourself safe while performing this very dangerous method of metalworking. Nevertheless, the following should tell you the basics of how to be safe.
General Guidelines
It’s very important to keep your work area clear of debris and the furnace away from flammable objects, walls, and refuse.
Put your heavy equipment, like your furnace, on brick slabs, raising them from the floor and minimizing your need to bend or stoop to pour. It’s best if they’re at or just below chest height.
It’s also good to have an evacuation plan as well as to know where your safety exits are and the appropriate emergency numbers to call if anything gets out of hand.
As a tip, check online communities, like Reddit’s metal foundry thread for tips, tricks, and advice for avoiding costly (and painful) mistakes.
Work Area
A special work area for doing lost-PLA casting is essential. A workshop with a stone floor, vacuum ventilation (where the air is sucked up and out through an exchanger), and protection from the weather is ideal.
If that’s not possible, a sandy or gravel floor outside is fine, but make sure to keep it dry. Molten metal is so hot that it will instantly vaporize any water that it comes into contact with, causing a rapid expansion of the water, which splatters metal everywhere. For this same reason, you should never cast over cement. A molten metal spill can cause moisture pockets in the cement to rapidly expand and explode, spewing molten metal everywhere.
Personal Protective Equipment (PPE)
One of the easiest ways to outfit yourself is to get a set of welder’s clothes. Along with a mask, gloves, boots, and an apron, you should wear only thick cotton or other natural-fiber clothes underneath your PPE, as artificial materials like polyester can melt to your skin under high heat.
Items to acquire:
- Face shield
- Welder’s gloves
- Welder’s apron
- Leather work boots or metatarsal guards
- Respirator face mask
Local Laws & Ordinances
Many municipalities restrict or outright prohibit metalworking or having open fires on personal property. Make sure to check for these laws before you begin acquiring equipment. You may have to rent a workspace in a community workshop or even find out what areas are zoned for industrial use, such as a warehouse or factory district.
Fire Extinguishers
Fires are classed based on their fuel source. Class A fires result from wood, paper, cloth, and so on, while Class D fires result from combustible metals like magnesium or aluminum. You should have fire extinguishers for both on hand.
Tutorial
In the following sections, we’ll walk you step by step through the process.
Preparing the Model
If you don’t already have a 3D file picked out, you can make it yourself or find it on 3D file repositories such as Thingiverse.
But what makes a model suitable for casting? There are a few things to look out for.
- Details: When considering a model to use, it’s important to consider the 3D printer that will be printing it. In other words, if your setup consists of a 3D printer with a 0.4-mm nozzle printing a non-premium filament at a 0.2-mm layer height, a piece of jewelry with 0.1-mm details will not be a good model to cast.
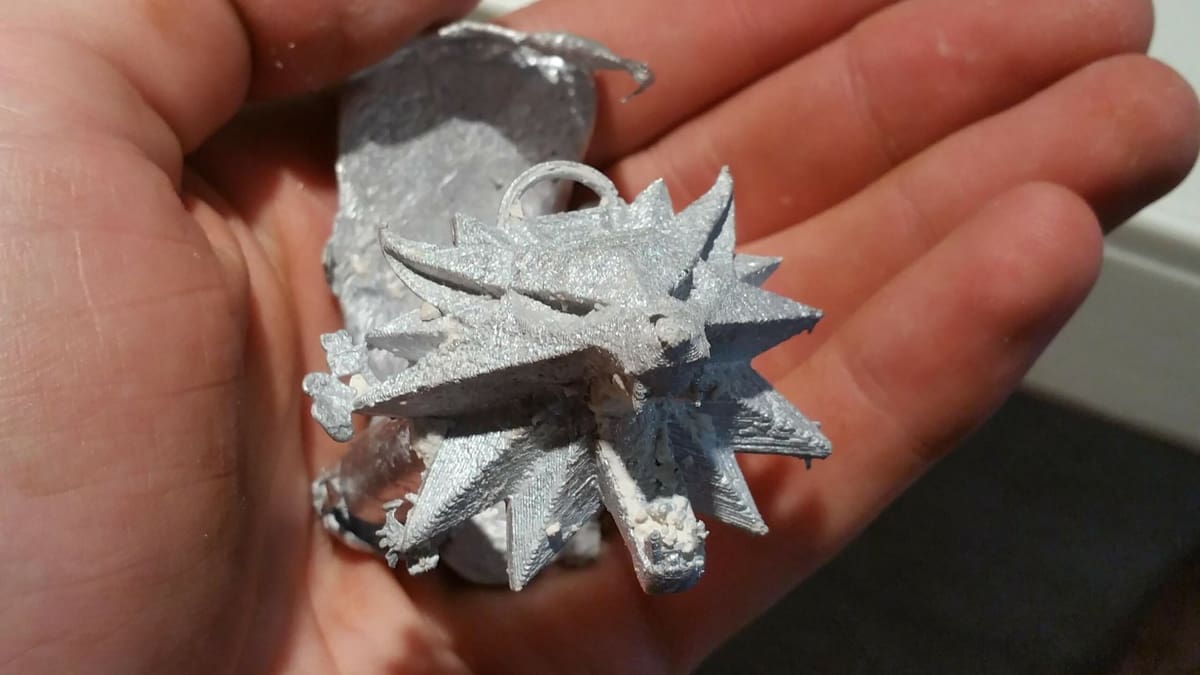
- Shape: Investment casting is used primarily when small, intricate details are key, such as in jewelry or fine art. Although achieving these same features takes some practice. To get started, something like this Witcher pendant is a fair level of complexity.
- Size: The size of the model is limited by the size of the casting flask. Make sure that the model isn’t taller or wider than the casting flask. Additionally, it’s important to check that the total volume of the design is less than the total volume of metal that you’re able to melt and pour at once.
If you decide to cast multiple small items like rings or pendants, you can create a casting tree using sprue wax or by printing it directly with your models. This will allow you to cast several items or copies at the same time. VegOilGuy on Thingiverse has posted an STL model of a casting tree, so you’re already a step in the right direction!
3D Printing

If you’re new to the scene or have gotten your first 3D printer just for this project, there are a few things that are good to know:
- Read up on the basics of 3D printing, from start to finish.
- Learn how to calibrate your 3D printer for getting the best results. The temperature settings are especially important, as being even a little off can cause a print failure.
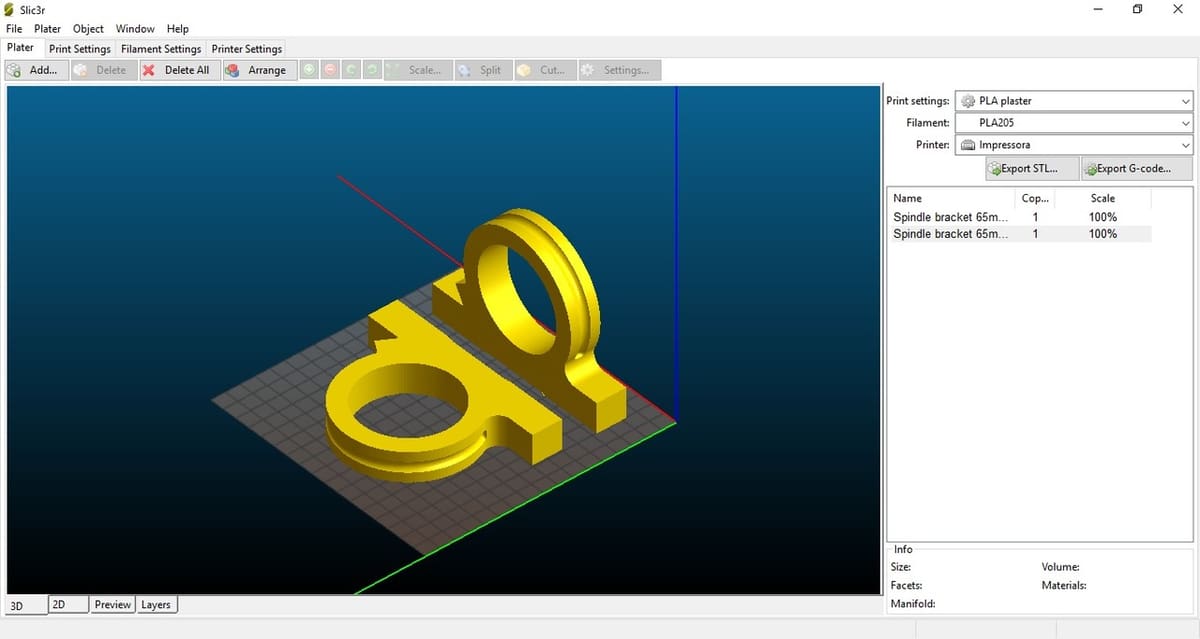
- Optimize your slicer program to work with your specific model of printer, such as the Cura slicer with Creality’s Ender 3 printer.
- Try out your printer and filament of choice with a few test prints.
For printing lost-PLA castable models, it’s important that the 3D print be watertight. Otherwise, investment will seep into the PLA model while making the mold, which could have devastating consequences on the quality of your final object. One sure, although wasteful, way to ensure a print will be watertight is to use 100% infill.
After printing, unless you’d like your final metal object to have layer lines, it’s best to do some sanding of the PLA model. Trust us, it’s easier to smooth plastic than it is metal.
If this all sounds like a lot of work, you may want to consider using a 3D printer service. Craftcloud, a 3D printing service marketplace can help you identify the best price and most convenient service based on your needs and location. Upload your digital model, then choose your desired material, manufacturing technology, and surface finish (like polishing). Whether you’re looking for a highly-detailed plastic model or the final casted metal design, Craftcloud can connect you with one of their many professional service providers that can get the job done.
Once you have a 3D printed model that has been post-processed to your liking, it’s time to set up your (safe) workspace and get casting!
Making the Mold
With a printed PLA piece that you’d like to turn into metal, you can now move on to creating the lost-PLA casting mold. If you already have a dedicated flask for casting, great! This step will be much easier. If not, then you’ll have to fashion one from some cardboard or styrofoam, although this is much less sturdy.
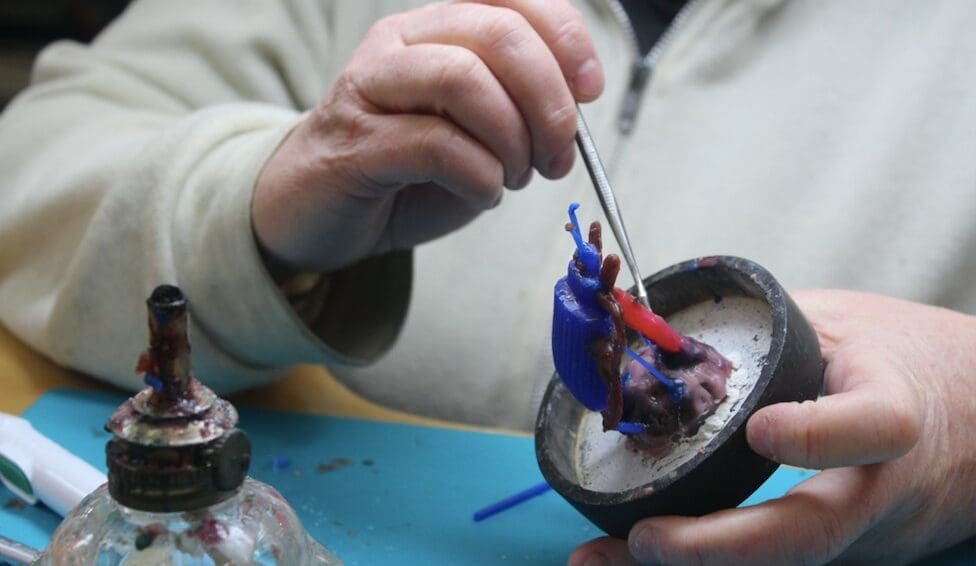
- Apply sprue wax to connect your PLA model to the central runner or casting tree base. The goal here is to form the tunnel into which molten metal will be poured so that it can reach every corner of your model.
- Place your flask onto your spruced-up model. Make sure that the widest parts of your model or sprue tree don’t get closer than a quarter-inch from the wall of the flask.
- Mix the investment thoroughly in a bucket according to the packaging directions. Ensure there are no dry patches in the mix, which could ruin your cast. If you have a vacuum chamber, quickly perform the degassing procedure as soon as it’s mixed, as it’ll begin to harden quickly.
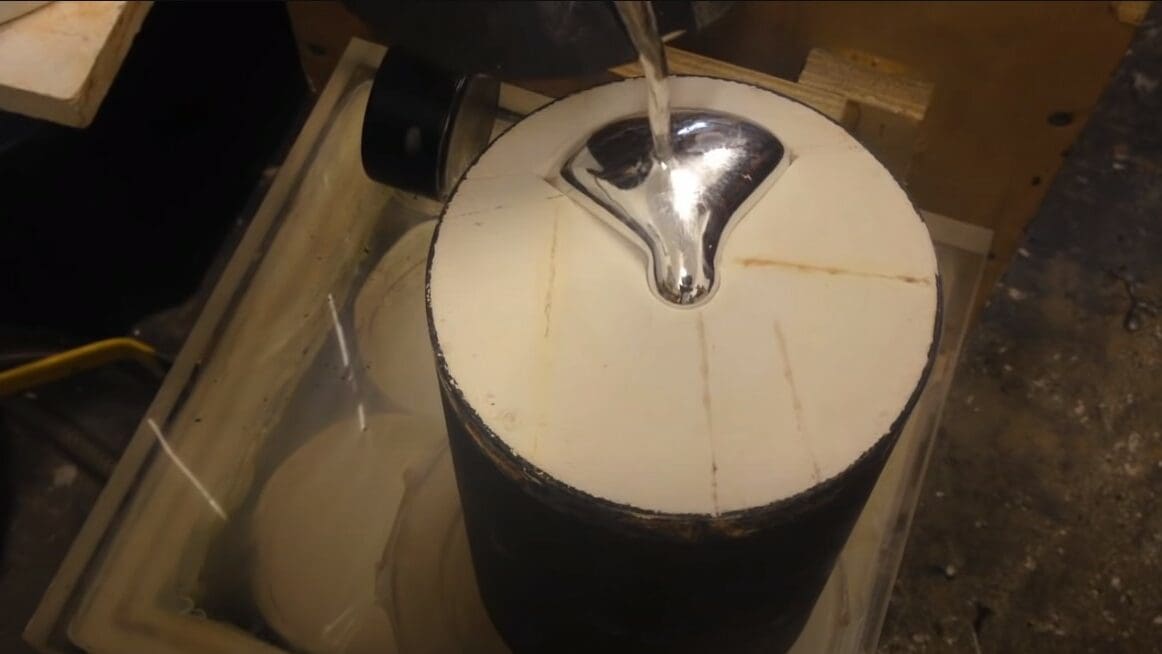
- Pour the investment mixture into the top of your flask and let it set according to the directions on the investment packaging. If there weren’t any with your investment, we’d recommend waiting 24 hours.
- Remove any cardboard and excess investment from the mold once the investment is fully dry. Note that you’ll need to be able to see the base of the model or casting tree, roughly in the center, in order to move on to the next step.
Tip
If you’re casting a statue or other large objects, ensure that you attach the sprues to large overhangs, such as outstretched arms or wings. As a rule of thumb, if it needed supports while printing, it needs some sprues. Clear Mind Jewelry on YouTube has a nice video detailing the thought process behind building a sprue tree for casting.
Burnout
Now comes perhaps the longest part of the lost-PLA process: the burnout, which is the process of melting the PLA within the mold and letting it drain from a hole in the bottom. The hole in the investment mold comes from the central runner or sprue that should not be blocked by any investment. It’s vital that you can see the sprue of the model before you continue.
If using a centrifuge or vacuum casting device, take time immediately before melting to prepare the device for casting, using the manufacturer’s instructions to do so. For a centrifugal device, make sure that you have adequate cover in case of a spill, which can send molten metal flying. The cover and your surroundings should not be flammable.
Now, let’s get burning. It’s important to keep in mind that PLA burnout will need at least 400 °C, but you should very slowly (over the course of a few hours) ramp up to that temperature because the investment is still moist. Heating investment too fast can cause cracks in your mold or an explosion.
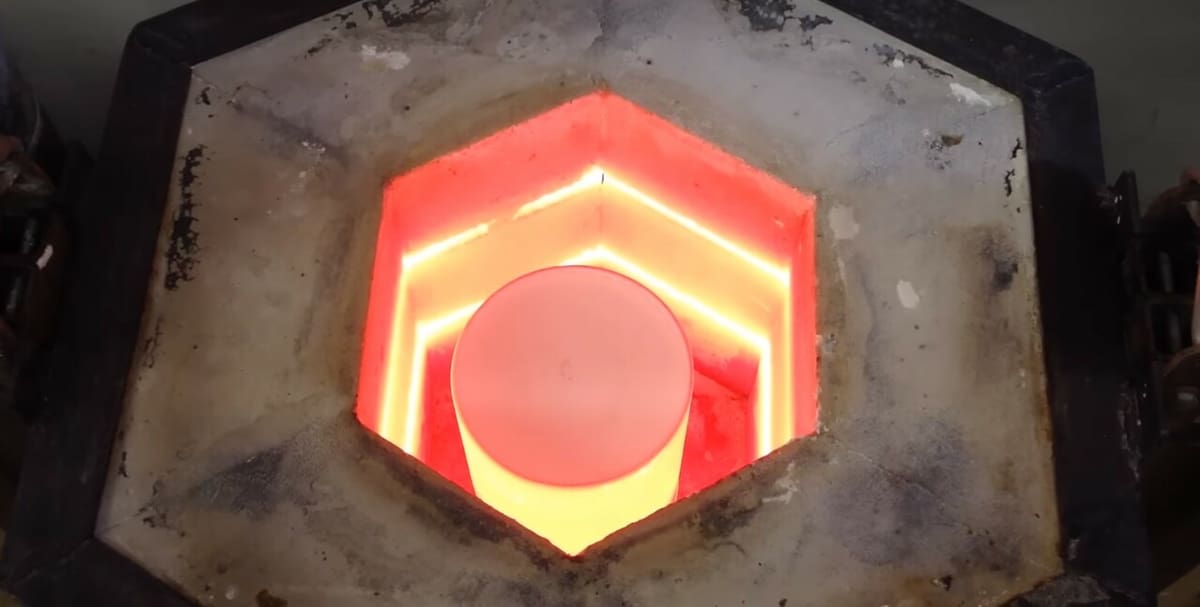
- Start your furnace following the manufacturer’s directions. For electric kilns, set the kiln to follow the “burnout cycle” recommended by your investment manufacturer, such as this one by Prestige Oro. If you’ve built the kiln yourself, safely start your chosen fuel source and wait until the furnace gets to a yellow-red glow.
- Place the flask into the furnace using tongs so that the opening of the mold is facing down.
- Wait for the PLA to completely melt and drain from the hole in the bottom. Depending on the temperature, it’ll take at least three hours.
- Turn the flask over using crucible tongs about two-thirds into the melt time or, for an electric kiln, before reaching maximum temperature. This will allow gases made from the burnt PLA to escape.
- Hold the temperature at the appropriate casting temperature for the metal that you’re using once PLA removal is complete. Let the flask equilibrate for at least 30 minutes.
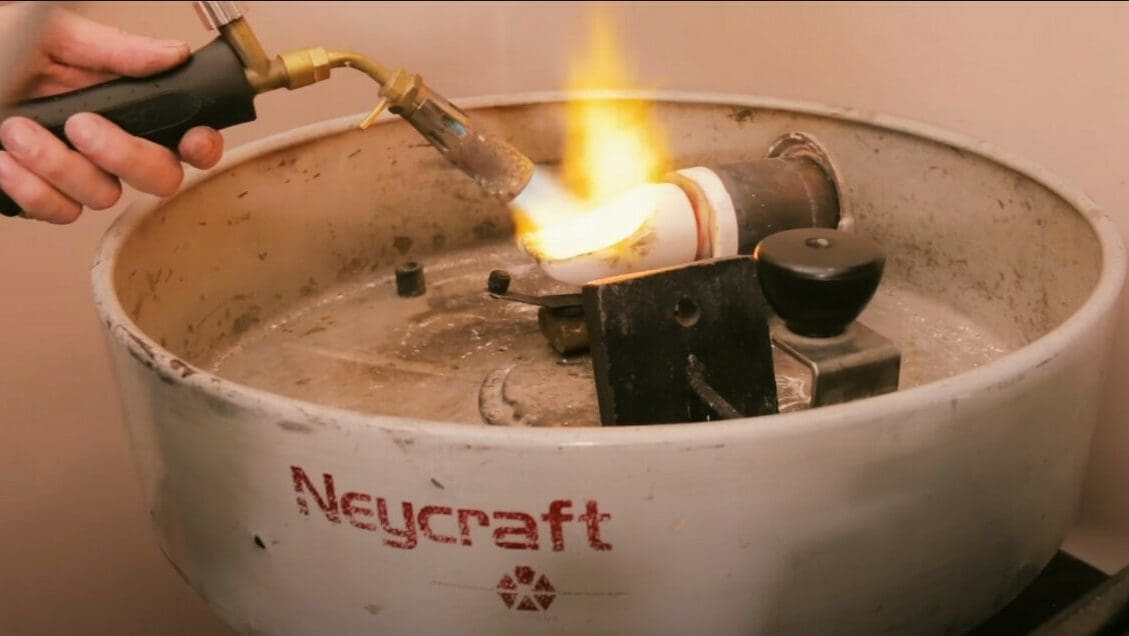
While this is happening, periodically ensure components that should be insulated from the heat are not getting warm or hot, also known as “heat creep”. This includes the fuel pipe (if using propane or similar gas) or the outside of the fuel container (such as the coal hutch or charcoal kiln).
If heat creep does occur, safely shut off or cover the fuel source, remove the mold, and wait for everything to cool down. Check the furnace for cracks or other places where the heat could have escaped, then make the necessary repairs. Unfortunately, the mold may be ruined, but it’s preferable to starting an accidental fire.
Once you’ve made it through the burn, it’s time for the most crucial step: the pour!
Melting the Metal
The melting and casting steps are the most crucial and the most dangerous of lost-PLA casting. Keep alert and aware of both your surroundings and what you’re doing! Remember not to pour molten metal over a concrete floor or other materials that could burn.
The most important thing is to avoid a catastrophic fire or a burn from molten metal. Don’t hesitate to use your fire extinguisher or to call emergency services if you think it’s warranted. You can always try again another time.
With a safety plan established, you’re ready to move on to the casting process. Continuing where we left off, the burnout has been completed and there’s no PLA left, but the investment flask remains in the heat source at the casting temperature.
- Place your metal into a crucible, making sure that no solid piece of metal sticks up past the lip of the crucible.
- Melt the metal using a furnace or oxy-acetylene torch until it flows almost like water and the edges of the metal shy away from the wall of the crucible, forming a convex meniscus. If any part of the metal’s edge seems like it’s sticking to the crucible, then the metal isn’t fully melted yet.
- Scoop off any “slag” with a steel or graphite rod. Sometimes, metal will have impurities – known as “slag” or “dross” – that will float to the top of the liquid. This can simply be scoop away.
- Remove the flask from the furnace using tongs. Keep the metal melted while doing so.
Tip
If you have a centrifugal casting setup, you may use the oxy-acetylene torch to melt the metal in the crucible that already sits inside the centrifuge, as demonstrated in 66aks66’s video.
Casting the Metal
The next steps will depend on how you plan to fill the investment mold with the metal. As we mentioned above, you can rely on gravity or use either a vacuum system or centrifuge to draw the metal into the mold. We’ll outline each of the methods below.
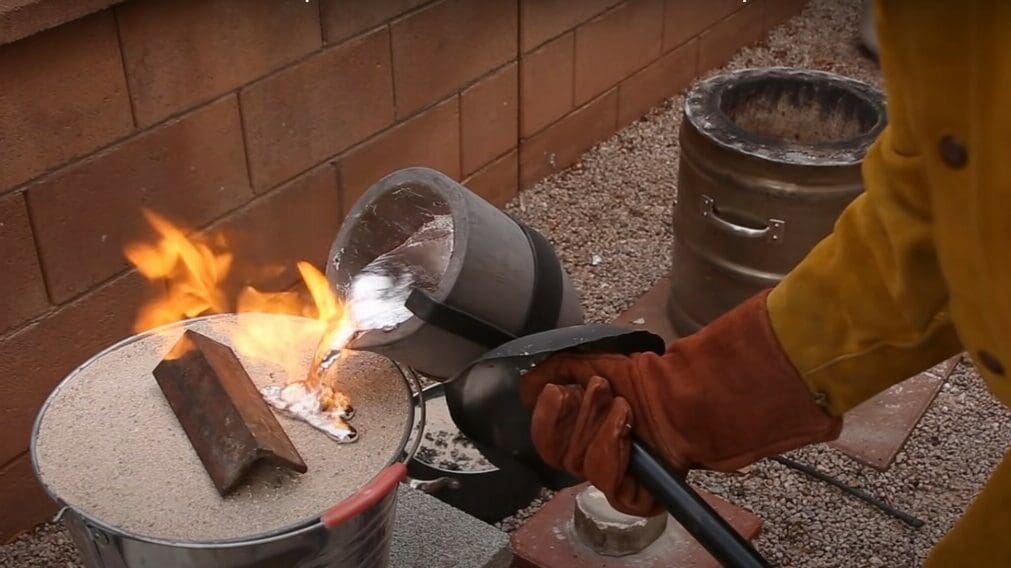
Gravity Casting
- Set the flask down carefully with the opening facing upwards.
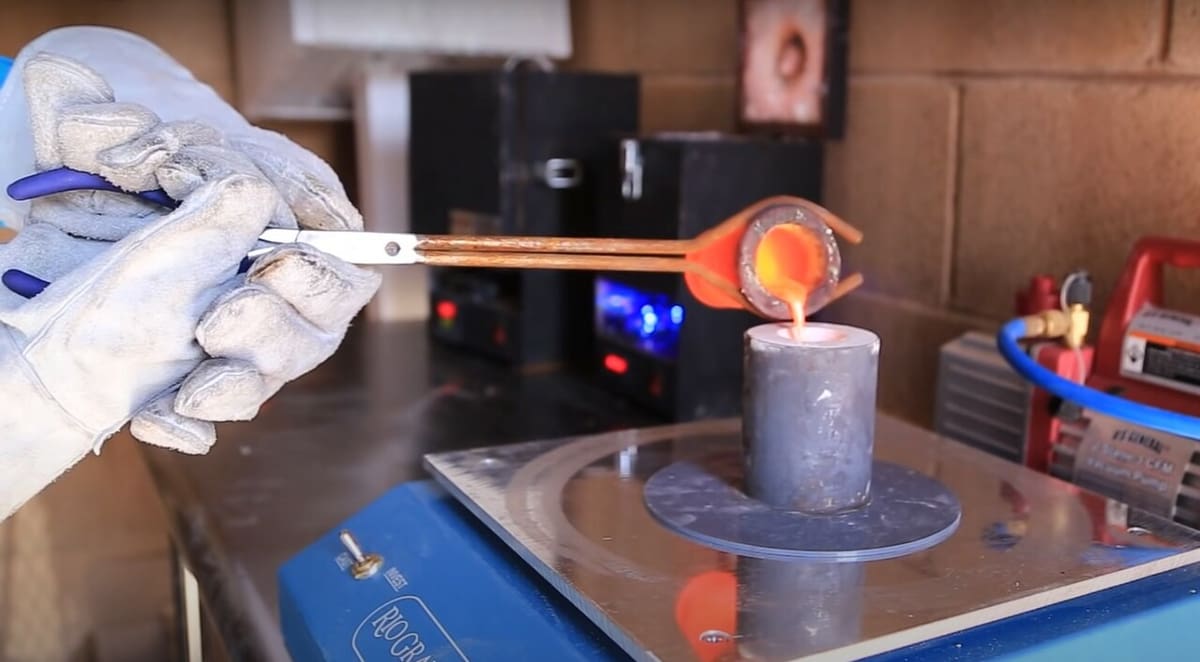
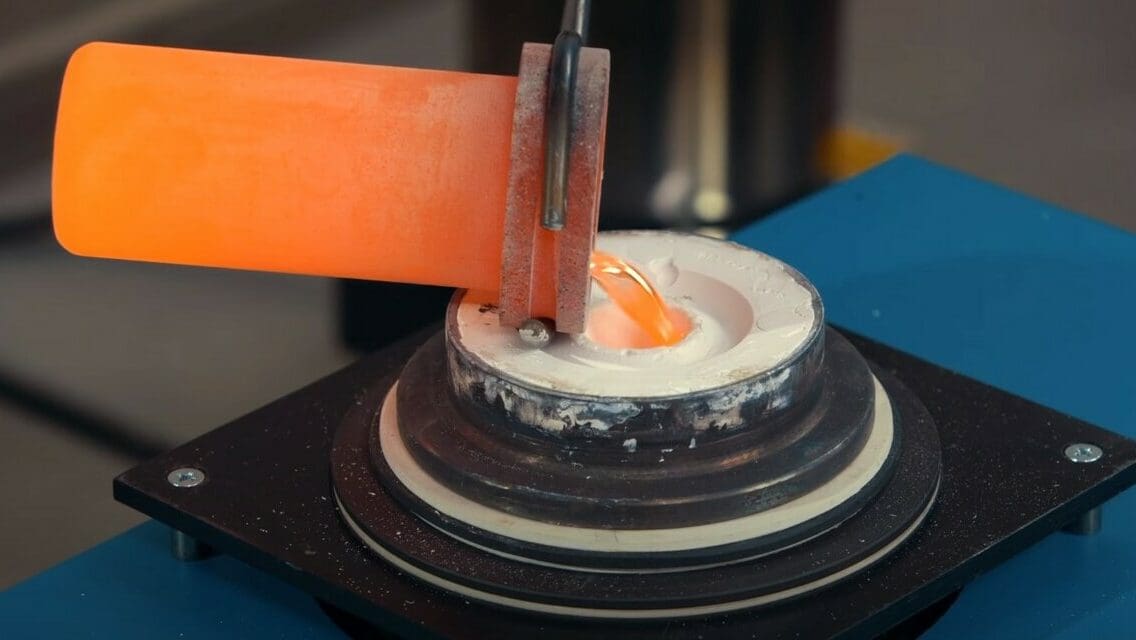
- Remove the metal from the heat source using crucible tongs and pour the liquid metal into the mold until full.
- Let it cool for 20 minutes.
Vacuum Casting
- Set the flask down on the vacuum casting chamber (different from the regular vacuum chamber) with the opening facing upwards.
- Turn on the vacuum according to the manufacturer’s instructions.
- Remove the metal from the heat source using crucible tongs and pour the liquid metal into the mold until full. You can turn off the vacuum shortly (~10 seconds) after you have finished pouring.
- Let it cool for 20 minutes.
Centrifuge Casting
- Set the flask down inside the centrifuge with the cavity facing toward the center. If your metal crucible is in a separate furnace, use the crucible tongs to place it in the dedicated holder in the centrifuge and slide it flush with the flask opening.
- Ensure that the metal is thoroughly melted, using a torch if necessary.
- Release the centrifuge by pulling back on the centrifuge handle within a second of the torch being pulled away. Extinguish your torch.
- Let it cool for 20 minutes.
Extracting
After the mold has cooled down for at least 20 minutes, it’s time to remove its contents. The metal should not be red hot for this step. While it may be tempting to rush, it’s important to wait for the metal to solidify completely before quenching it. Otherwise, it could lose its shape.
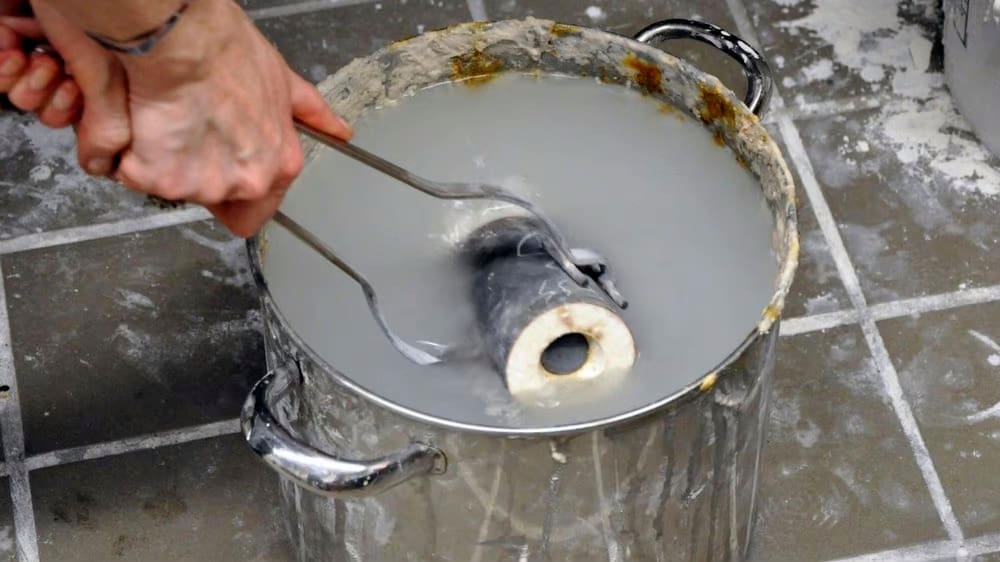
- Fill a large bucket with enough water to submerge the flask entirely.
- Submerge the flask in water – it will hiss and spit bubbles of air, as investment is porous. This will cool the metal and dissolve the investment around the object.
- Remove as much investment as you can from the model once it is cool enough to touch. A metal brush or a toothbrush can be useful with this step. Wear an N95 mask or equivalent because the investment is still harmful to breathe in.
Once all is said and done, make sure you properly dispose of your waste. The investment that remains in the water bucket should be dried, then disposed of as household waste. Do not dump it down the drain.
Straight from the mold, you’ll probably notice that your metal piece is not as shiny as you’d like. Unfortunately, completing the casting isn’t the final step toward making a beautiful and functional metal object. We’ll need some post-processing first.
Post Processing
The exact clean-up and polishing will depend on the metal you’re working with. For example, sterling silver has a reputation for coming out of most homemade investments with a dark layer of firescale that must be removed with a wire brush or tumbler.
Regardless of how much post-processing is needed from your metal, there are three main components in the finishing process:
- Cleaning is the removal of pieces that were necessary for the production of the piece but are undesirable in the final product, such as sprues and leftover investment. Wire clippers, like those you may use to remove 3D printing supports, are ideal for removing sprues. A vinegar bath can help remove oxides on the surface of metal (making it appear dull).
- Buffing consists of scraping off the soot and sprue marks left from the heat of the furnace. This is done with fine-grit sandpaper and patience.
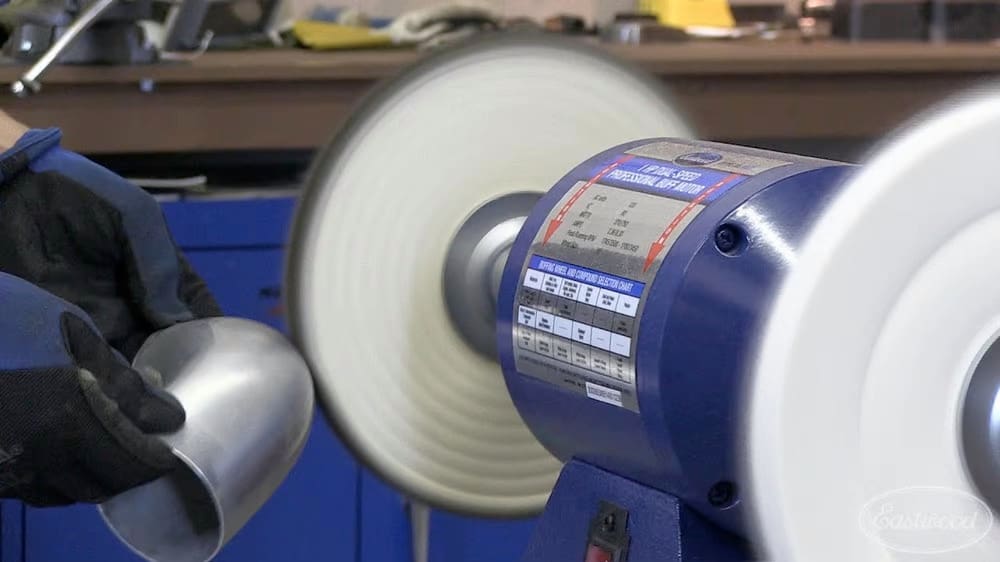
- Polishing can be performed either by hand with polishing wax and special cloths, or by placing the object in a tumbler.
And there you have it – the process to make your own metal objects using nothing but your ingenuity, a 3D printer, and the ability to work around obstacles.
Community Resources
Thankfully, there are several places online that can provide you with support as you learn the ropes and perfect your process.
YouTube Channels
- MyFordboy has excellent step-by-step series on building a home foundry.
- Tobho Mott explores pattern-making and upgrades to equipment.
- VogMan works with lost-PLA and resin casting, as well as build-it-yourself equipment.
Websites
- Backyard Metal Casting posts lots of backyard-level projects for your foundry, including building a “coffee-can furnace”.
- Instructables hosts hundreds of projects with step-by-step directions for you to recreate, like these Yoda pendants by David Flowers.
- The University of Babylon has an in-depth file about lost-wax casting defects and their causes, which is helpful for troubleshooting and refining your process.
- Yoshida Cast Industry Co., Ltd. has a nice article detailing the possible causes of a rough surface finish on investment cast pieces.
Forums
- Metal foundry subreddit contains endless discussions on metal casting of all sorts.
- Metal cast subreddit has discussions with a stronger focus on the process of casting.
Eventually, metal 3D printing will be affordable and easy. Like the inkjet printer before it, it’ll also become unremarkable. Until then, it’s exciting to be in the workshop with tongs, a furnace, and goggles as if you were a medieval blacksmith or a steampunk inventor, using your ingenuity and homemade equipment to forge something new.
License: The text of "Lost-PLA Casting: All You Need to Know" by All3DP is licensed under a Creative Commons Attribution 4.0 International License.