The Best Ender 3 (V2/Pro) Enclosures: 8 Simple Solutions

Expand the printing options of your Ender 3 (V2/Pro)! Whether you build or buy, read on to see the best Ender 3 enclosures.
The Creality Ender 3 is a hugely popular budget 3D printer with widespread community support and a whole lot of possible upgrades. The Ender 3’s success has led to newer models like the Ender 3 Pro and the Ender 3 V2, and though there are some differences between the Ender 3s, they all have roughly the same dimensions. With that said, Creality’s S1 models are slightly larger than the Ender 3s.
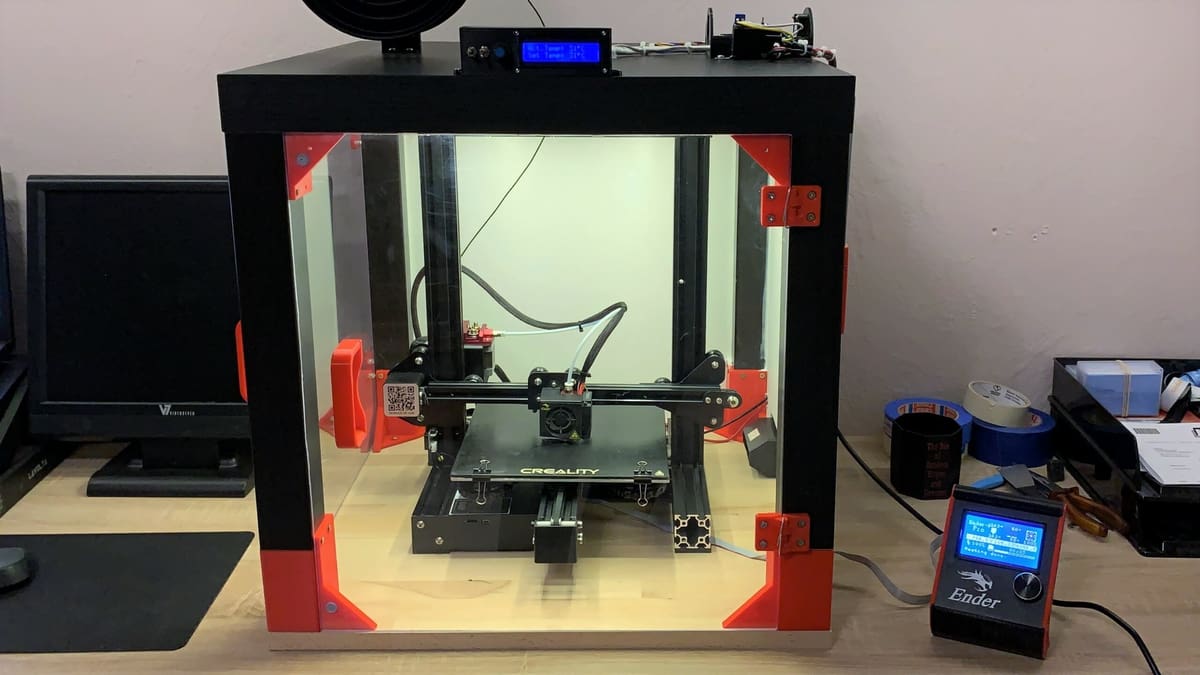
Despite its success, the fact that the Ender 3 is a low-cost printer means limited features in a few areas. One such area is an enclosure, which the Ender 3, along with many other Creality printers, lack. An enclosure is a casing or surrounding structure that prevents air drafts, traps heat to insulate the printer’s environment, and even filters emitted fumes.
Although it can be done without one, printing ABS, ASA, or similar filaments with an enclosure is highly advisable, as it greatly helps prevent cracking, warping, and other heat-related problems.
Besides the insulation properties of enclosures, other factors also matter, including visibility, accessibility, assembly, and cost. Let’s take a look at a few different enclosures, which can you can either build or buy for the Ender 3 family. While most of these options are compatible with the S1 models, others require a larger enclosure size or further customization. We’ve noted the specific compatibility for each enclosure.
Now, without further ado, let’s dive in!
To Buy
If you want the convenience of an enclosure that comes ready to use, there are several purchasable types available, including Creality’s own enclosure and a repurposed photography tent!
Creality
Creality has an official enclosure sized to fit the Ender 3s. It uses a minimalistic pipe frame with an aluminum-like fabric material to enclose your Ender 3 and trap heat. In addition to insulating your printer, Creality also states that their enclosure should reduce printing noise.
The enclosure’s front has a zipper door and a fabric-like, transparent plastic sheet so you can see through. It’s also tall enough, meaning that you can fit the filament spool inside. Additionally, the enclosure has pouches for storing tools, which customers have mentioned are super useful. It’s even foldable for transportation if necessary.
The official Creality enclosure comes mostly pre-assembled, and there are a few different designs.
- Cost: $80-$90
- Visibility: One side
- Accessibility: Zipper door
- Compatibility: Ender 3, V2, Pro, S1 (with large enclosure size)
- Assembly: Easy
HotBox V2
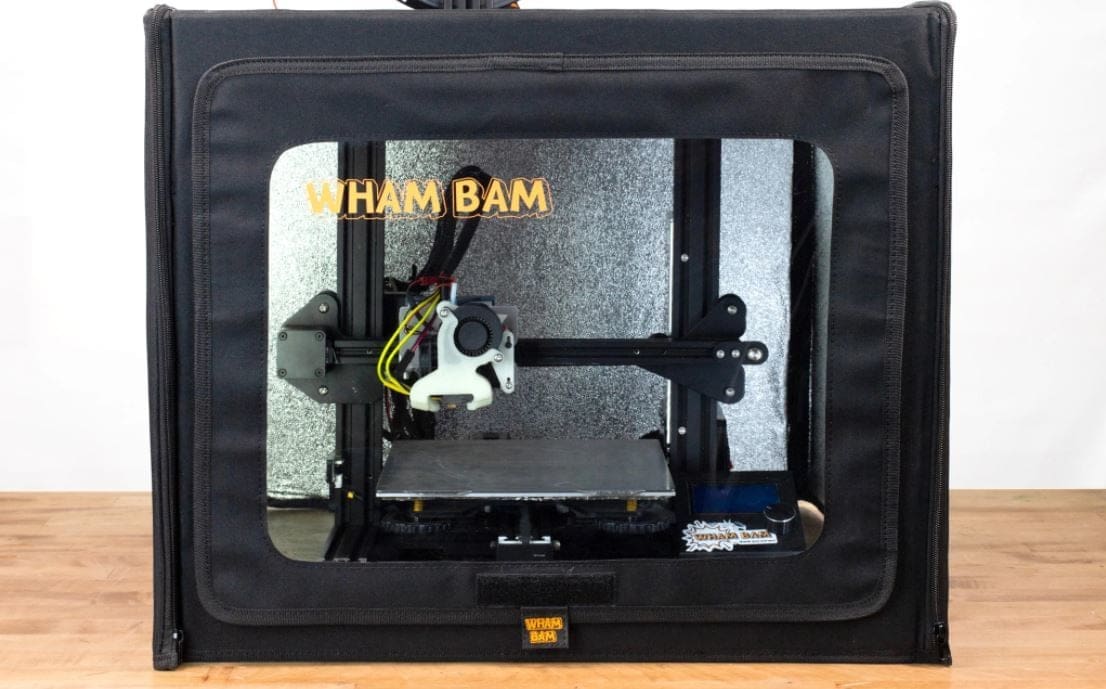
The HotBox V2 is from Wham Bam Systems, a company that makes build plates and enclosures for 3D printers. The enclosure is another excellent option for the Ender 3, providing good visibility, mobility, and more.
The HotBox uses nylon 600D fabric to insulate the enclosure, which is also coated with a fire-resistant substance to improve safety. It has a large front window, a sturdy frame, but only five sides (the “ground” is the sixth). The top and front panels can be unzipped and folded backward for accessing your Ender 3.
The HotBox has more small features, too, such as pouches for storing tools, loops for lights, holes for filament passage and cables, and even a built-in thermometer to show you the temperature inside the enclosure. This insulative and lightweight enclosure can also fold up for easy transportation. You can even affix a filament spool on top.
Similar in design to the official Creality option, this enclosure is a bit more expensive but potentially sturdier. Thankfully, not much assembly is required.
- Cost: $120-$160
- Visibility: One side
- Accessibility: Zipper door for the top and front panel
- Compatibility: Ender 3, V2, Pro
- Assembly: Easy
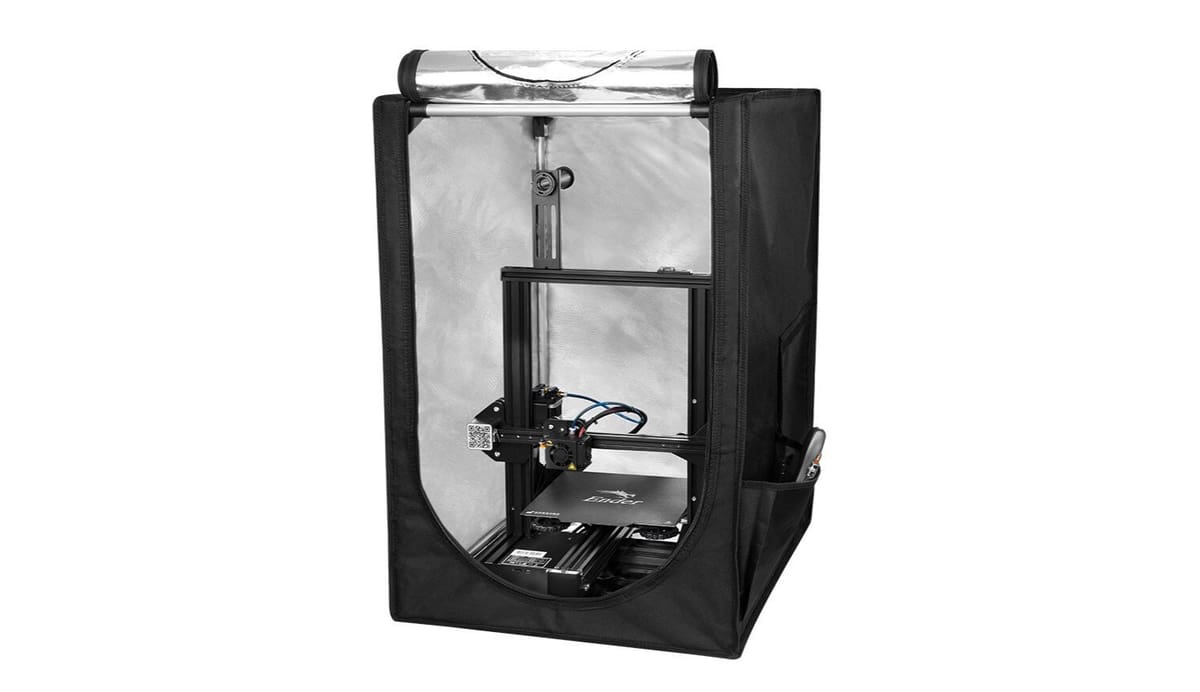
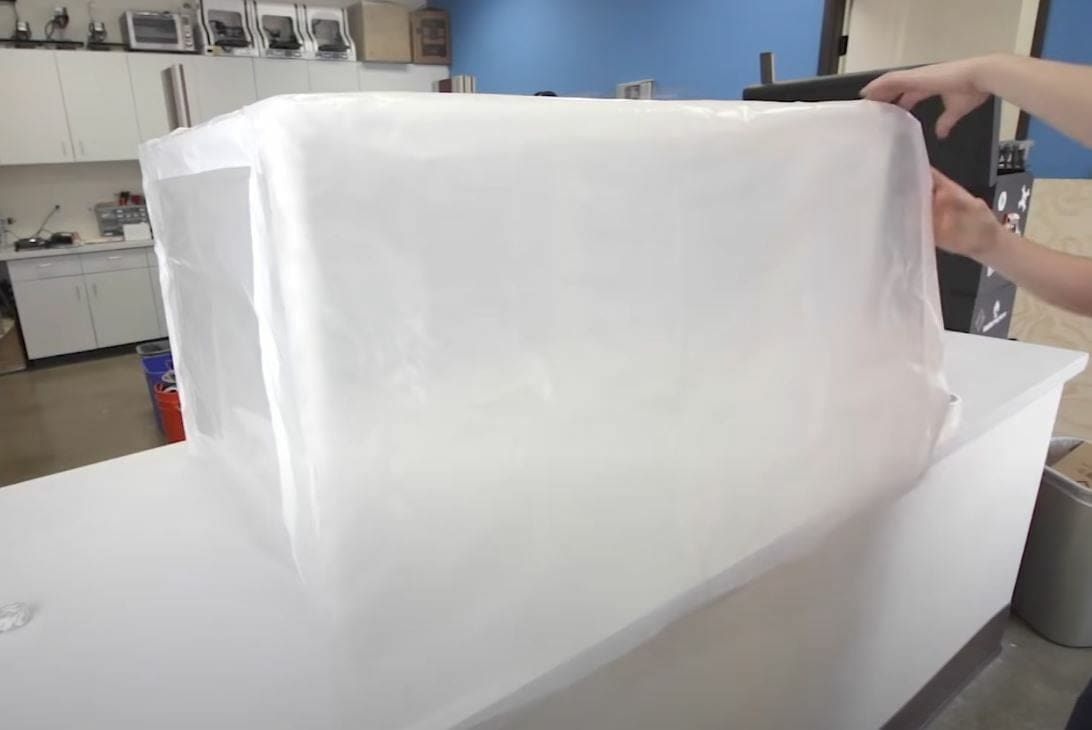
Photography Tent
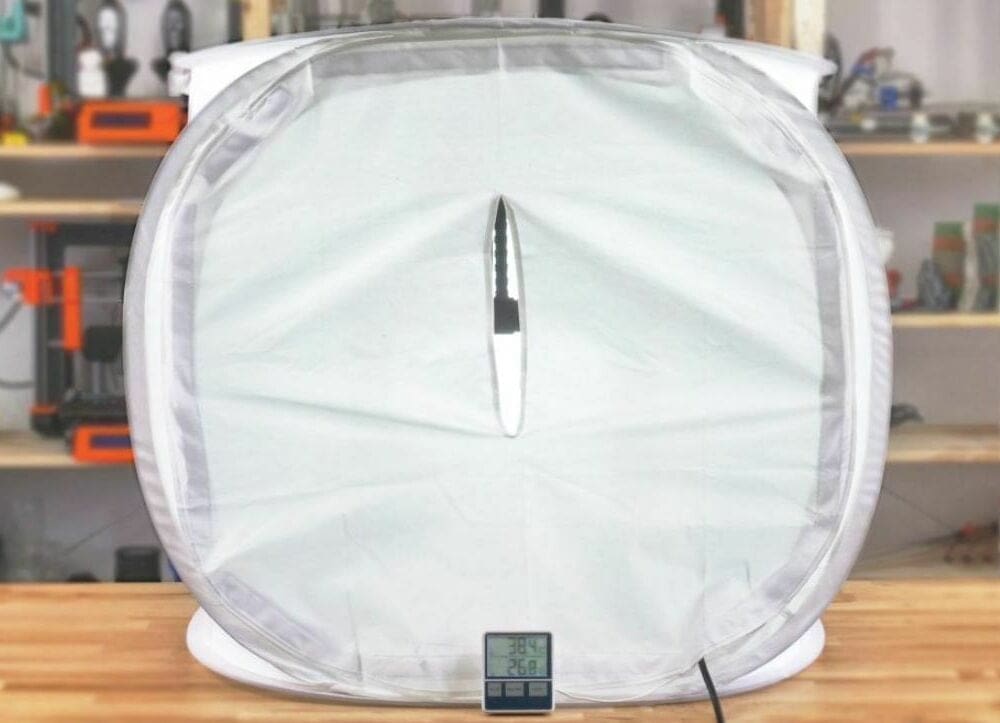
A photography studio tent enclosure is one of the easiest ways to enclose your Ender 3, using a thin plastic (or plastic-like material) liner to keep in the heat. All you have to do for setup is take the product out of the box and place your printer inside.
If you choose to go with this type of enclosure, it’s important to pick out one that fits your Ender 3. As most desktop studio tents won’t be that tall, you should consider using an external filament spool holder that’s to the side of your printer rather than above it on its frame.
As for accessibility, photo studio tents usually have a zipper door on the front or a flap, but these aren’t transparent because that would defeat the purpose of the tent for photography. You should also think about making a small hole or two in the enclosure to feed your filament through as well as the power cables.
While its insulation isn’t ideal and visibility is nonexistent, a photography tent offers a decent visual appearance and will still allow you to print high-temperature and temperature-sensitive materials like ABS and ASA. You can buy your own tent enclosure for your Ender 3 for between $25 and $40 online, which is a significantly lower price than most other purchasable enclosures.
- Cost: $25-$40
- Visibility: None
- Accessibility: Zipper door (or a flap)
- Compatibility: Ender 3, V2, Pro, S1 (with dimensions of 600 x 600 x 600 mm)
- Assembly: Easy
3D Upfitters

3D Upfitters is a company that makes and sells enclosures and enclosure accessories for 3D printers, including the Ender 3. Their Ender 3 enclosure is made from acrylic panels and framing brackets, which increase the enclosure’s structural integrity.
This enclosure has a hinged door for easy accessibility, and since it’s mostly made from acrylic, you’ll get a nice 360° view of your Ender 3. You also have the option to add accessories like a spool holder, a fan for your electronics, filters, sensors, and lights. You can keep the cost down by 3D printing some of the components yourself, or add them to your purchase.
The enclosure is a kit, so you’ll have to do some assembly, but it shouldn’t be too hard because you’ll have all the parts you’ll need. There is also a special S1-compatible enclosure available.
- Cost: ~$330, accessories and printed parts are extra
- Visibility: All-around
- Accessibility: Hinged door
- Compatibility: Ender 3, V2, Pro
- Assembly: Medium
To DIY
Building your own enclosure gives you the flexibility to choose what features to add and often keeps the price down. DIY enclosures can take the form of anything from an Ikea table to some gym mats!
Ikea Lack
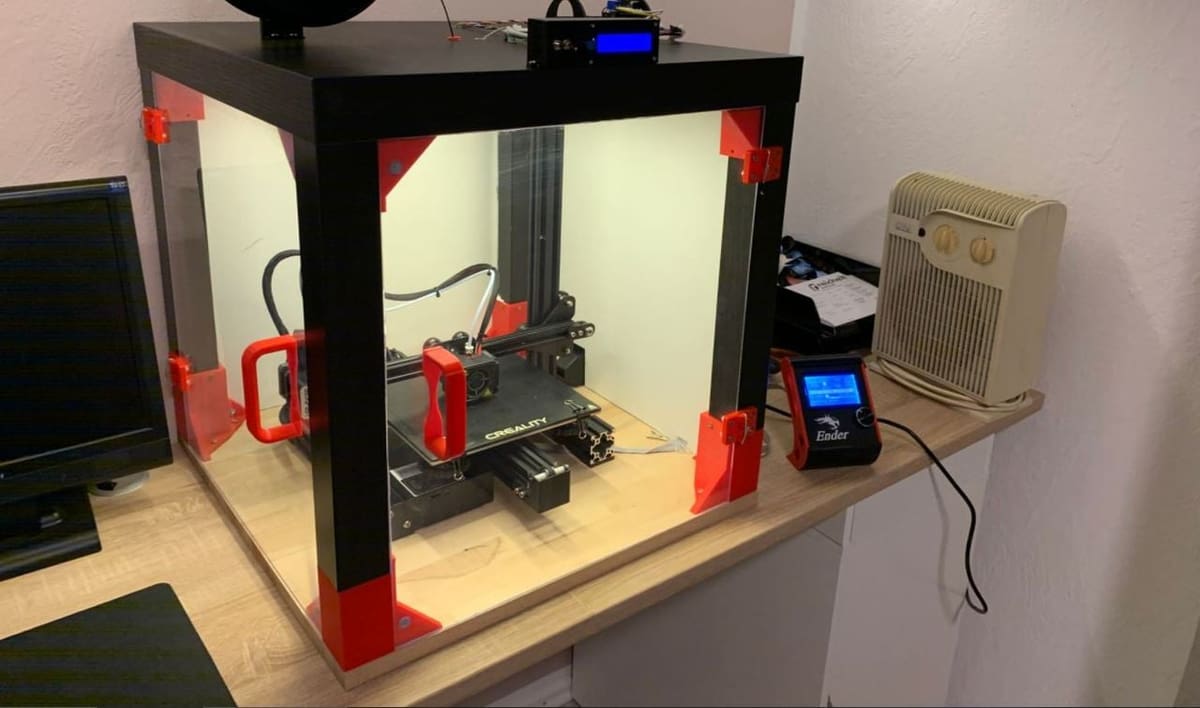
The Lack enclosure has been a common design choice for a few years now and involves upcycling an Ikea Lack table. This type of enclosure seems to be very popular for Prusa i3 printers but works for all similarly-sized printers.
The specifics of this enclosure vary depending on which of the many guides you choose to follow or if you design your own. However, they all usually use a Lack table (or two), acrylic panels, 3D printed parts, and other hardware.
Typically, the acrylic panels go on the sides of the table for four-sided visibility, and, depending on the project, you can access your printer through a door or a removable top panel. You can also modify the project and make it compatible with the Ender S1 by adding printable inserts. This enclosure design can look very nice, and if you use multiple tables, you’ll also have a space to store spare filament, tools, or whatever you’d like. Many people also add lights, cable passages, a filament holder, or other accessories.
For an average build, this enclosure should cost around $80 to assemble. But, if you’re able to find cheap acrylic panels, the price could be as low as $50.
- Cost: $50-$80
- Visibility: Four sides
- Accessibility: Door or removable panel
- Compatibility: Ender 3, V2, Pro, S1 (with modification)
- Assembly: Hard
Plastic Sheet
If you’re looking for a fairly bare-bones enclosure that gets the job of keeping the heat in done but doesn’t cost much, a simple plastic sheet is perfect. This type of enclosure uses a plastic sheet around a frame, which, according to MatterHackers’ guide, you can make using PVC pipes and joints. Alternatively, you can try 3D printing your own frame. You’ll also need some tape and maybe even a staple gun.
For the plastic sheet, a transparent tarp works best to provide visibility; however, a translucent or opaque tarp still works. Remember that the inner side of this sheet will face some heat, so, if available, choose a heat-resistant material. Using a thicker sheet will also be better for trapping heat.
With this type of enclosure, you can access your printer by lifting up a section of the sheet, or you can cut a “door” into your construction. Unfortunately, you can’t really mount a hinged door or other attachments to the frame as they will be covered by the sheet. The best part of this type of enclosure is that it will only set you back around $20 to $30 while still allowing you to print ABS and other high-temperature materials on your Ender 3.
- Cost: $20-$30
- Visibility: Depends on material used
- Accessibility: Removable sheet
- Compatibility: Ender 3, V2, Pro, S1
- Assembly: Medium
Exercise Mats
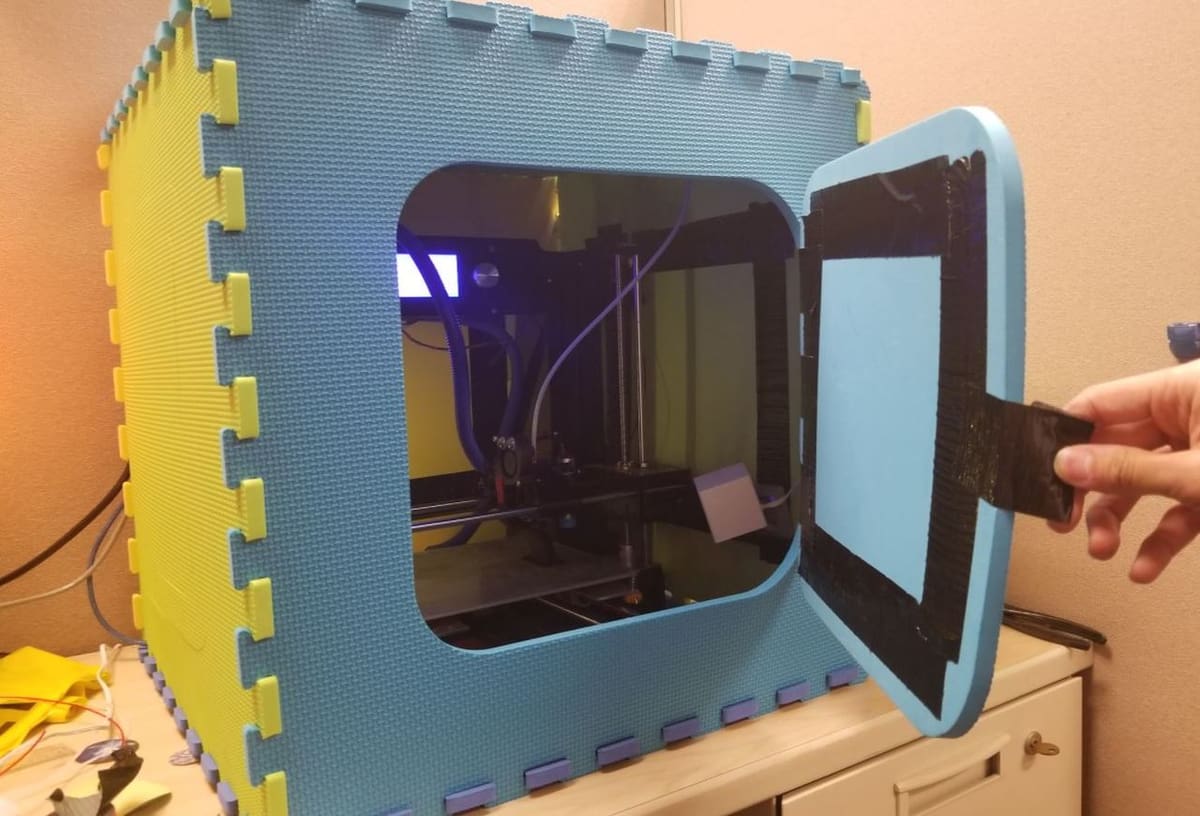
If you have some exercise mats lying around, they can make for a decent 3D printer enclosure. Although this isn’t the most aesthetically pleasing option, it’s one of the cheapest and it definitely works. All you need for this type of enclosure is a set of five (or more) interlocking exercise mats for surrounding coverage and insulation.
Exercise mats are usually made from a rubbery material, which actually serves as a very effective insulator. A mat enclosure will most likely have small gaps and holes, which can let air drafts in, though it should still be able to produce nice ABS prints.
One downside to this enclosure is you’ll be limited in the upgrades you can add. Plus, there won’t be much visibility unless you cut out parts of the mats and cover the holes with a transparent plate or sheet. Accessibility is a simpler fix: detach a panel to access your printer.
This budget-friendly option is super easy to assemble, and you can usually buy mats for around $35.
- Cost: ~$35
- Visibility: None
- Accessibility: Removable panels
- Compatibility: Ender 3, V2, Pro, S1
- Assembly: Easy
Wood
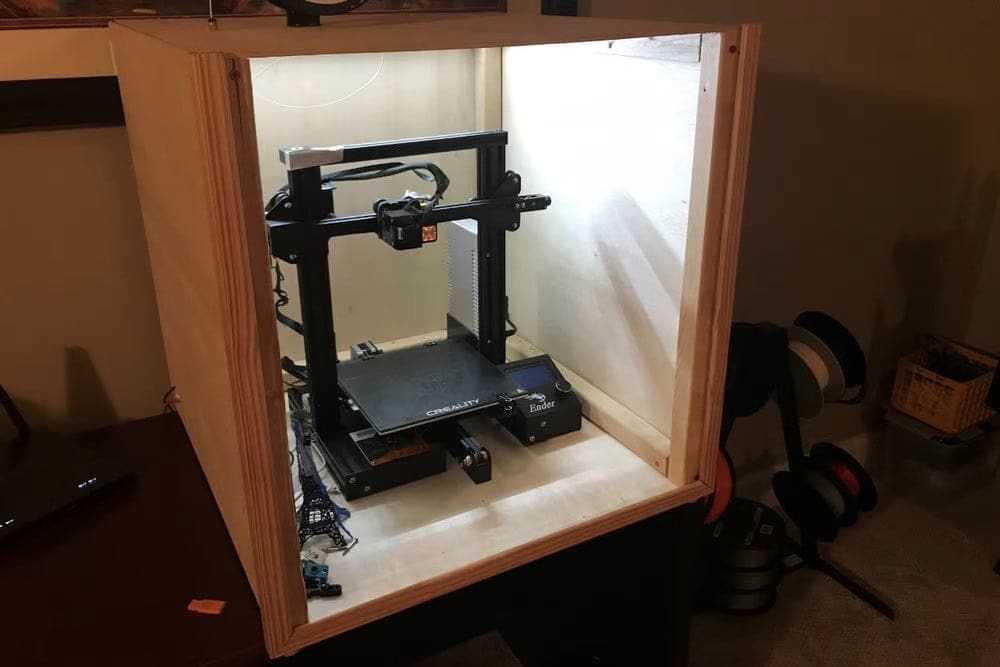
A wooden enclosure is another great option to insulate your Ender 3. This DIY option typically uses wooden panels, maybe an acrylic panel or two, and some basic hardware.
While wood might not be known for its insulative properties, it still works great for printing ABS. Also, depending on how tightly you bind the panels, a wooden enclosure should block air drafts pretty well.
You’ll need some wooden panels and screws, plus some woodworking tools to make holes in the enclosure for wires and cords. If you’re building this type of enclosure on your own, having an acrylic panel in the front or a removable panel as a door is a good idea for accessibility and visibility.
While there aren’t a large number of guides on building a wooden 3D printer enclosure, wood is pretty easy to work with: simply cut and drill. You can probably find all the parts needed for this enclosure at a local hardware store or online. This type of enclosure will set you back around $100.
- Cost: ~$100
- Visibility: One side
- Accessibility: Door or removable panel
- Compatibility: Ender 3, V2, Pro, S1
- Assembly: Medium
License: The text of "The Best Ender 3 (V2/Pro) Enclosures: 8 Simple Solutions" by All3DP is licensed under a Creative Commons Attribution 4.0 International License.
CERTAIN CONTENT THAT APPEARS ON THIS SITE COMES FROM AMAZON. THIS CONTENT IS PROVIDED ‘AS IS’ AND IS SUBJECT TO CHANGE OR REMOVAL AT ANY TIME.