Cura: Support Z Distance – Simply Explained

Support Z Distance in Cura can make removing supports a breeze! Read on to learn about this setting and how to tune it for your prints.
Unless you’re lucky enough to have a multi-material printer to use water-soluble supports, dealing with the removal of support structures has probably been a source of frustration at some point in your maker career.
While the usual default for these distances is the layer height, 3D slicers are providing more and more options that allow you to customize supports in an effort to make them easier to remove. With the right settings, you can not only minimize support marks on the surface but also avoid situations where you have to have to apply a lot of force to remove support structures and potentially damage your model.
In the popular Cura slicer from UltiMaker, a very important parameter to help you find the right amount of support is the Support Z Distance. With this setting, you can change the distance between the support structure and the model, something that can substantially alter the quality of the model surface and the ease of removing supports.
In this article, we’ll go over the basics of the setting, when to use it, how to use it, and most importantly, how to dial it in for perfect results. Read on to be on the road to becoming a support expert!
Why Is Support Z Distance Useful?
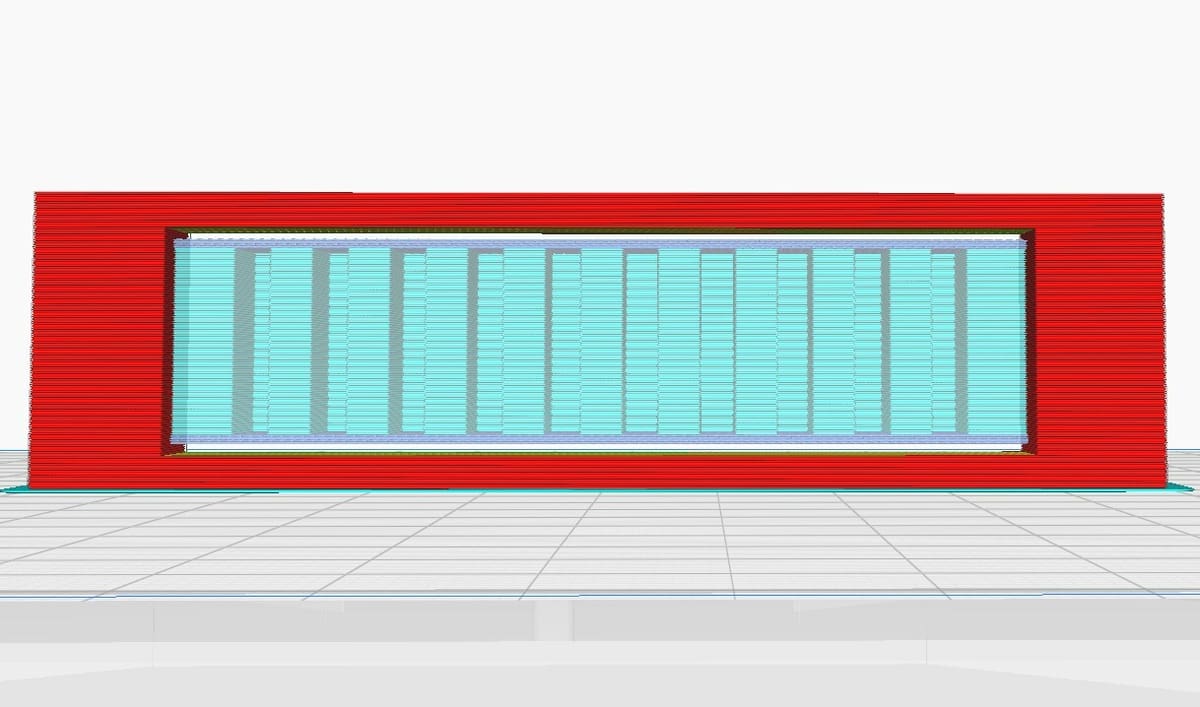
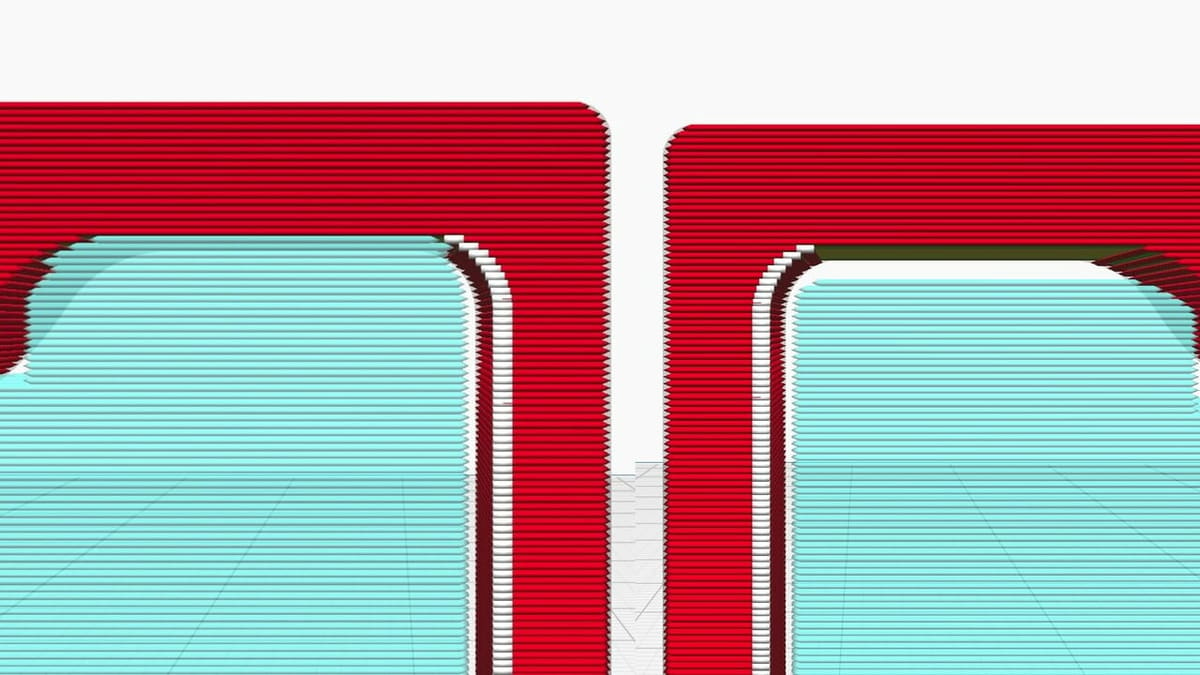
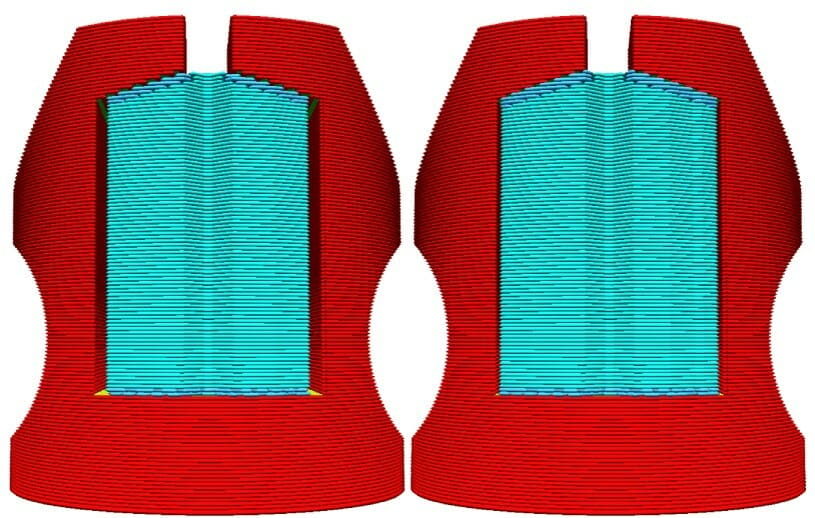
Changing the Support Z Distance can take two forms: top and bottom. The Support Top Distance is the space between the bottom of the model and the top of the support. The Support Bottom Distance is used for supports that start from the model’s surface and refers to the space between the top of the model and the bottom of the support.
Adjusting the Support Z Distance can help you simplify the removal of supports and improve the model surface quality. Larger distances will make the supports easier to remove due to weaker contact points. Smaller distances have the opposite effect, making the support structure more difficult to remove but helping to prevent other defects that may arise from overhangs or bridges.
Finding a balance between the right amount of contact points and the ease of support removal is important to achieve the best possible surface finish for your model. The contact points can leave rough marks on the surface, but there must be enough points to support the model and prevent the hot plastic from drooping.
So now that you’re surely convinced of the importance of Support Z Distance, we can get into where you can find this setting and how to use it.
Cura Setup & Calibration
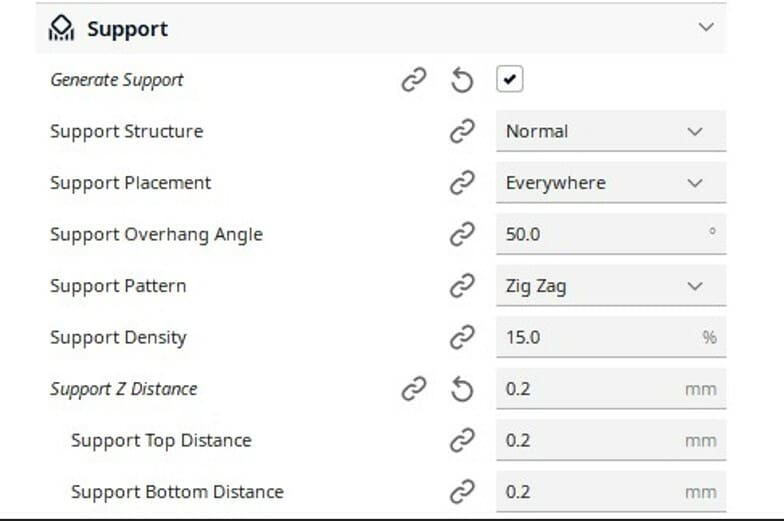
The Support Z Distance setting is hidden by default in Cura, so you’ll have to enable it first.
To enable the setting, click on the gear icon in the support section on the right-hand side, and search for Support Z Distance. This will bring up the setting and allow you to check the box next to its name. After exiting the pop-up menu, the setting will now appear under the Support settings.
Next comes identifying the ideal values, which requires trial and error, much like anything else in 3D printing. Start by slicing and printing a model without changing the default distance. If the resulting support isn’t easy to remove, increase the Support Z Distance to a multiple of the layer height of your print.
For example, if your layer height is 0.2 mm, and the default Support Z Distance is 0.2 mm, try now a distance of 0.4 mm. If the support is easy to remove, but the model surface looks bad, decrease the distance, again going in intervals of your layer height.
The goal is to find a balance between ease of support removal and good model surface quality. This adjustment will take some time, but once the ideal setting is dialed in, the high quality of your prints will reflect the time you invested.
Common Use Cases
Having a standard Support Z Distance is useful for every supported model and can save you lots of post-processing work. However, there are some use cases where you’ll have to adjust the distance to account for special features on your model.
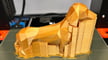
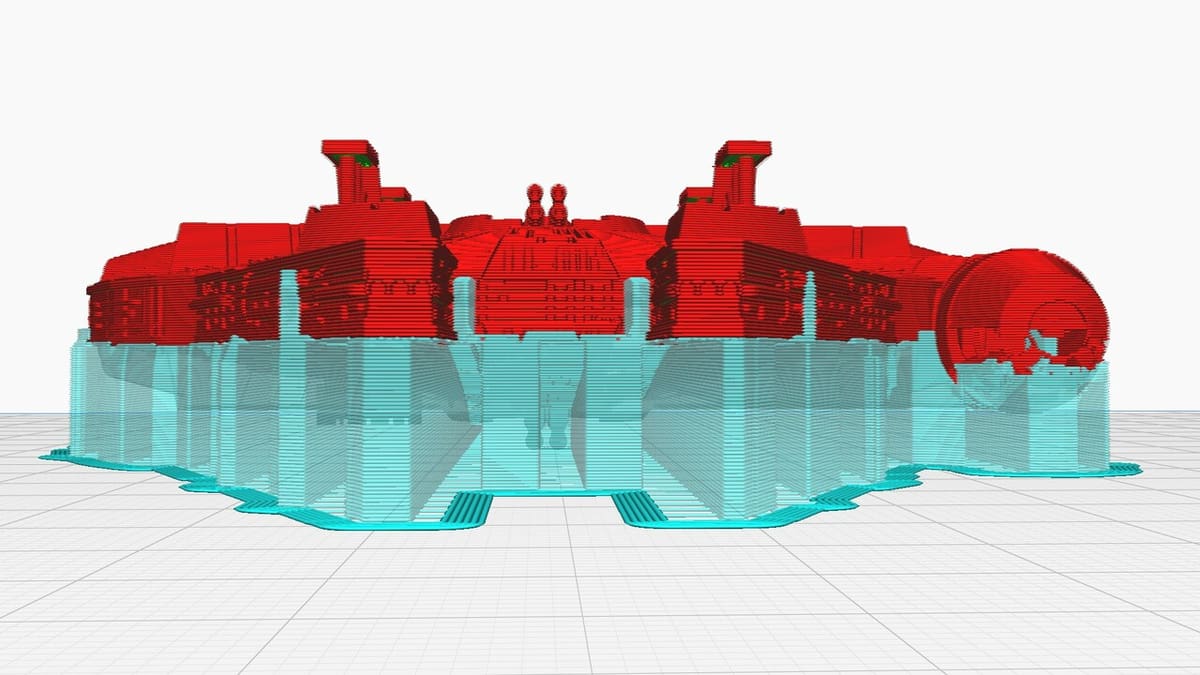
One example of a model that would benefit from an adjusted support distance is the Millennium Falcon from Star Wars, pictured above. Because the underside of the spaceship has texture and lots of tiny details and odd shapes, it will need a smaller Support Z Distance. This smaller distance will provide more contact points for the increased number of edges and overhangs that protrude at various heights off the model surface, ensuring the print retains all these small details.
A simpler model with a smooth and straight overhang, like a bridge, would not benefit from the same kind of support structure as the Millennium Falcon. For more gradual slopes, a larger distance will still offer sufficient support and make support removal much easier, potentially negating any need to sand the final print.
Risks & Drawbacks
For a setting with so many advantages, it’s easy to overuse and end up with a worse print quality than you started with.
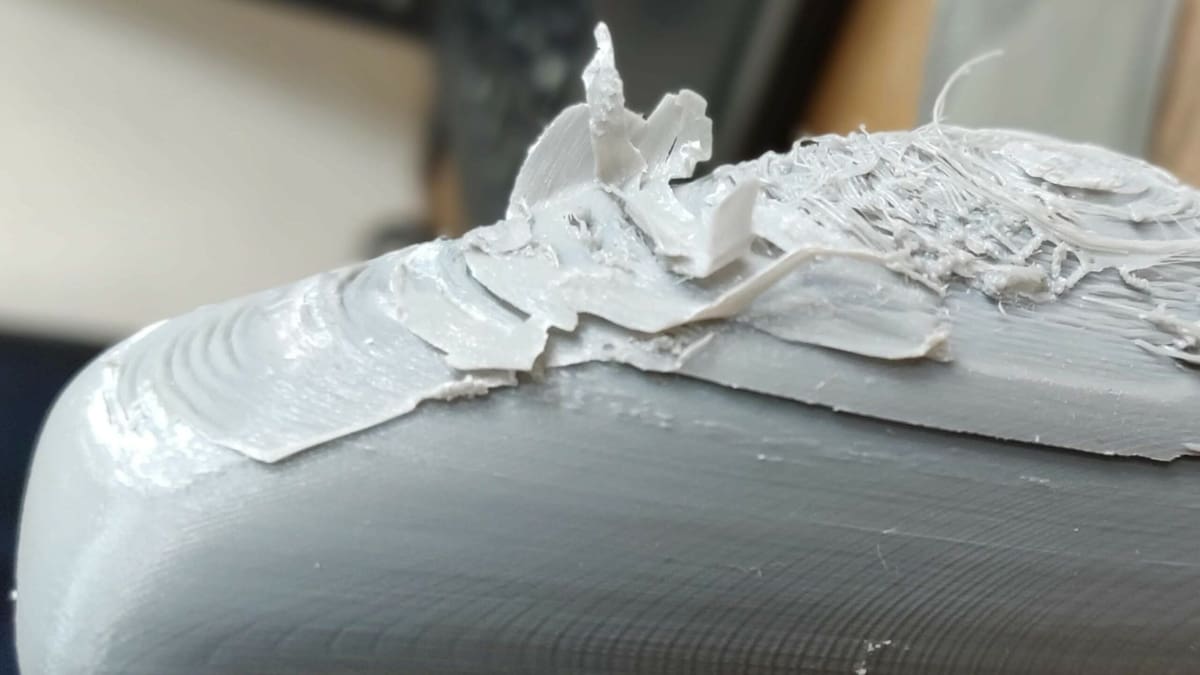
The most crucial detail to remember is to gradually increase the Z distance while calibrating to prevent too large of an interval that will also ruin your print’s surface. You can tell when the gap is too large because the supports won’t be able to sufficiently hold the increasing weight of the deposited filament, giving a drooping effect.
When supports that start on the model have too large of a Support Bottom Distance, the base will have nothing to bond to, rendering it ineffective. This will also affect all the above layers that relied on this support and could lead to large defects or even failed prints.
On the other hand, having either Support Z Distances set too small or having no gap at all could result in the model fusing to the support structure. You’ll end up with a rough surface to the model, if you can even manage to remove the supports without further damaging the model in the first place. If your model calls for a small distance, in the case of a very complex model, for example, other settings should be adjusted to make the supports removable, such as decreasing the support density.
You should also keep in mind that Cura will round Support Z Distance values to be multiples of your layer height. So, if the layer height of your print is 0.2 mm, the Support Z Distance has to be 0.2 mm, 0.4 mm, or some other multiple of 0.2 mm. If you type in a value of 0.15 mm, Cura will round that up to 0.2 mm in your print settings.
Additional Support Settings
Support Z Distance is, of course, only one of many settings that will improve your support structures. Another support option that compliments Support Z Distance is the Support Interface. This setting adds a bottom and top layer to the support structure to increase the contact area between it, the bed, and your print.
The most essential parameter within Support Interface is the density. The higher the density, the better adhesion of the supports but the more effort you’ll have to put in to carefully remove them. This setting takes some time to dial in, but once it’s right, your prints will have almost no signs that they ever even needed a support structure.
The last related support setting that we’ll mention here is the Support X/Y Distance. This setting adjusts the distance between the model and supports in the X and Y directions. Larger gaps between the support structures and vertical regions of the model can prevent damage, but the risk is having poorly supported overhangs. Reducing this gap will lead to a more robust support structure, naturally accompanied by the potential surface defects that come with having more supports.
Dialing all of these support settings will take time, but hopefully, this article provided the basics to get you started. Once you master these settings, your supports will be the talk of the town, and printing will be a breeze!
License: The text of "Cura: Support Z Distance – Simply Explained" by All3DP is licensed under a Creative Commons Attribution 4.0 International License.