
How to Optimize Cura Support Settings

Cura offers a powerful range of settings to play with. Learn about the main Cura support settings and how to best support your prints.
All fused deposition modeling (FDM) 3D printers create objects by extruding layer upon layer of thermoplastic material. Consequently, each layer has to be held up by the layer beneath it. When there’s no layer beneath it (as is the case with overhangs and bridges), the model might just need support structures. These are printed with the model and come off during post-processing.
“That doesn’t sound too terrible”, you might think. However, the word “support” horrifies many makers; some even consider it to be almost profanity. After all, not only do support structures require more material, but they’re also known for negatively impacting a print’s surface finish and for being a pain to remove.
Unfortunately, it’s a fact of 3D printing that some models just need supports. But that doesn’t mean we can’t optimize them by adjusting the appropriate settings.
In this article, we’ll first talk about when you do and don’t need supports. Then, we’ll dive into some important Cura support settings to adjust for the best results. Even though we’re focusing on Cura, the basic principles behind the settings can be applied to various other slicers. So, let’s get to it!

Do You Need Support?
There are a couple of things to consider in order to determine whether you need support structures or not:
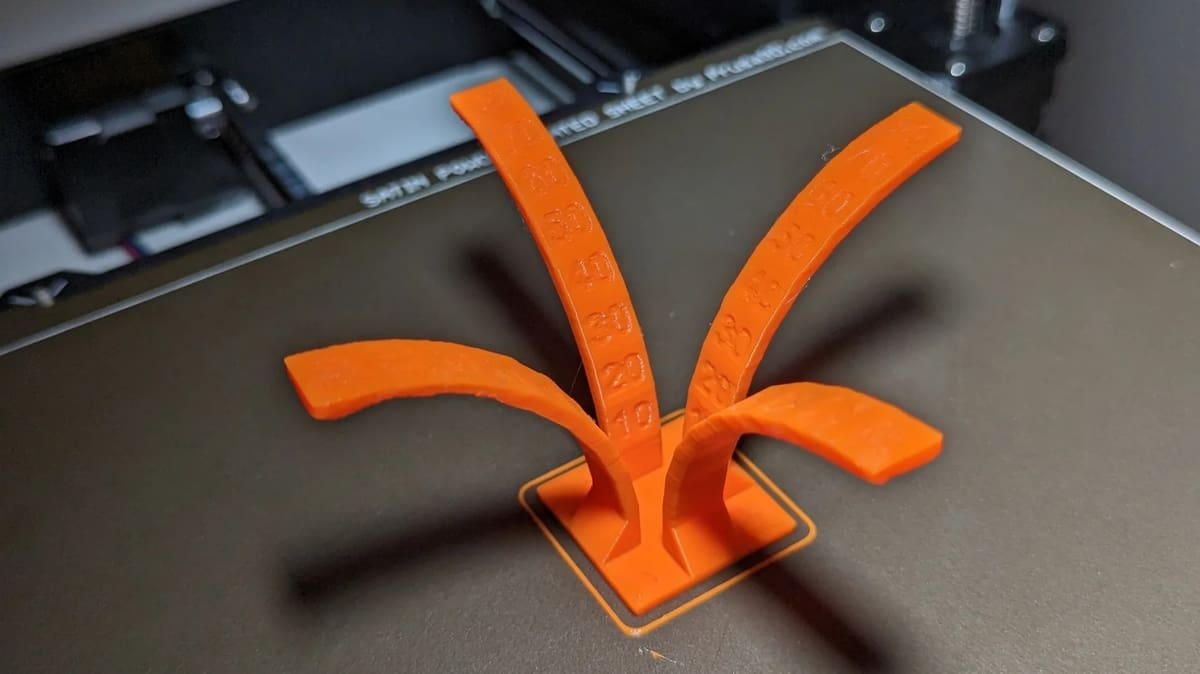
- 45°-rule (overhangs): If the overhangs are greater than 45° (with respect to the vertical), they will need support. To test the overhang capabilities of your printer, try printing this overhang test. When your printer fails at a certain overhang, you know to use supports at or beyond that angle.
- 5-mm rule (bridges): If bridges are wider than 5 mm, they may need support. Granted, not all 3D printers are the same. Some can print wider distances, while others can barely print any span at all. Try printing a bridging test to determine when your printer needs supports. You’ll know the threshold once you find the distance at which your printer’s bridges droop.
Next, let’s dive into the settings to perfect the supports, in case you’ve determined that you do need them.

Settings
Cura has several settings to help you optimize your models’ supports. Here’s how to get started:
- When you first open Cura, click “Show Custom” under “Print settings”. Here, you can adjust settings that are otherwise hidden under the “Recommended” settings.
- Left-click on the menu (three lines to the right of the Search bar) and select “Manage Setting Visibility…”
- Select “Check all”.
Alternatively, you can click on the Settings tab (top left), select “Configure setting visibility…”, and opt for “Check all”.
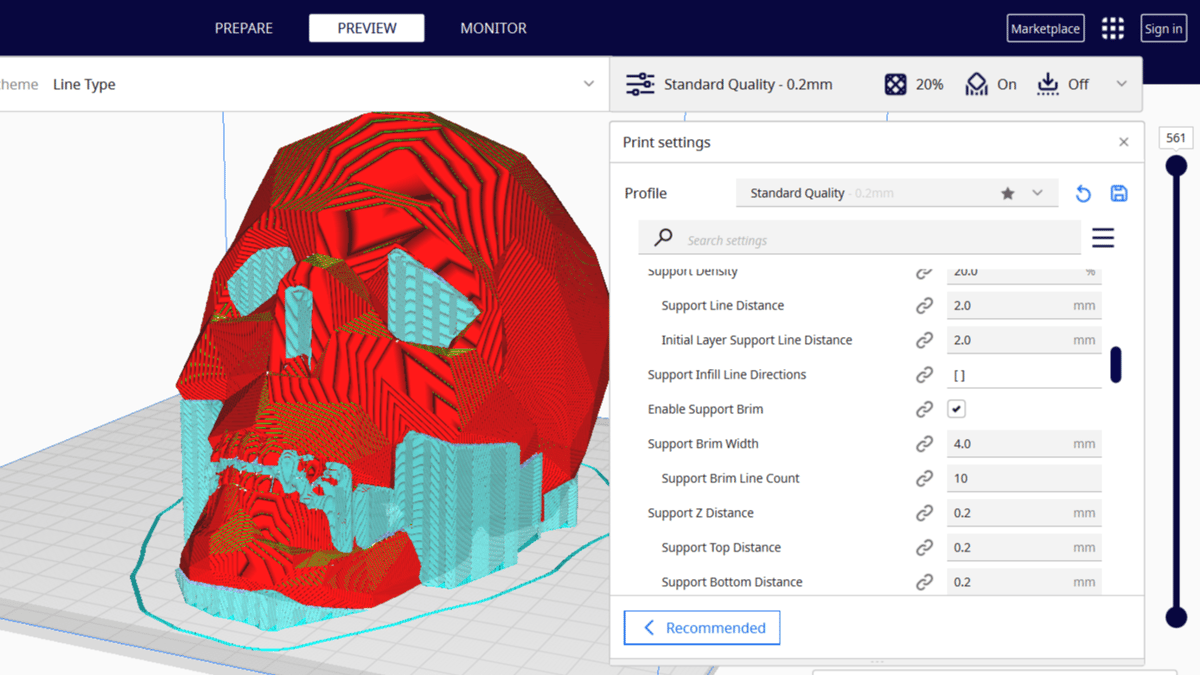
Custom Supports
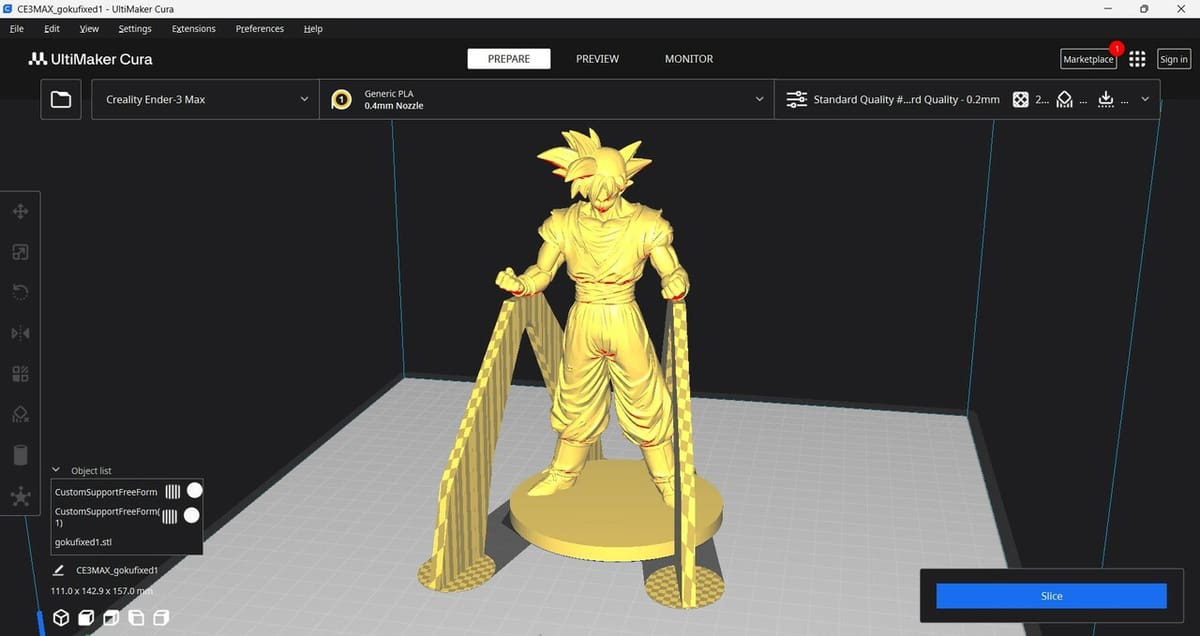
Despite the many parameters from Cura’s default settings to tweak supports and meet your specific printing needs, there’s still a chance that you won’t get the type you’re looking for. Many people have found themselves facing this challenge, and luckily, some of them were committed enough to the task that they created plug-ins that allow to improve the process. These allow you to not only create different supports, but also allow you to have more control when it comes to placing and positioning them.
If you’re not willing to install additional plug-ins, another option consists of creating supports using additional STL files that can be modified to behave as supports. However, we won’t dig into these additional options here. Instead, we recommend you take a look at this article about Custom Supports.
Now, you can see all the settings UltiMaker provides in Cura and might’ve even added some more. Scroll down to the Support Settings, click “Generate Support”, and let’s begin!
Support Extruder
With the rise of dual extruder 3D printers comes the possibility to print main parts in one material and use the other extruder to print soluble (often PVA) supports. After printing, simply soak your part in the proper solution and forget about the extreme tedium of support material removal previously required.
In the latest Cura release, you can select which extruder you want to print which section of your support structures, so you can print with a combination of PVA (or other soluble material) and your filament of choice.
You can define the extruder for the following support sections:
- Support infill
- First layer support
- Support interface
- Support roof
- Support floor
You can optimize your extruder and section matchup to decrease filament cost and post-processing times. For example, for some parts, it’s smart to use soluble material for support roofs and floors to quicken support removal and to use normal material for the support infill to eliminate PVA waste.
Type/Style
To start, let’s look at the basic settings regarding the supports’ structural aspects.
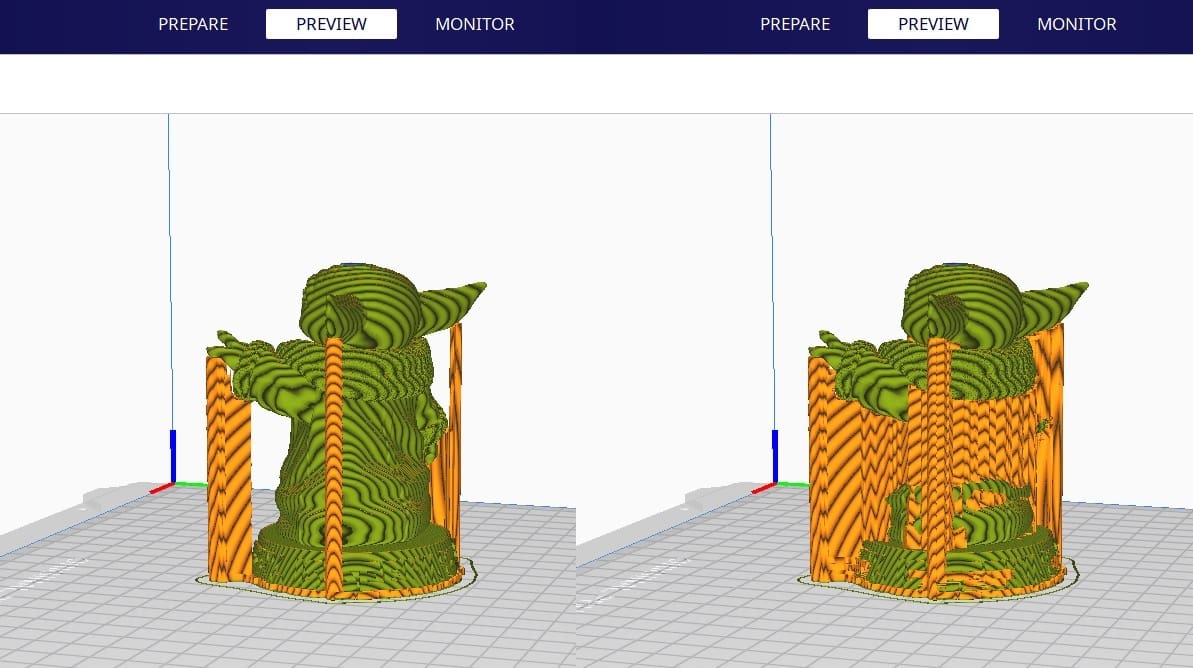
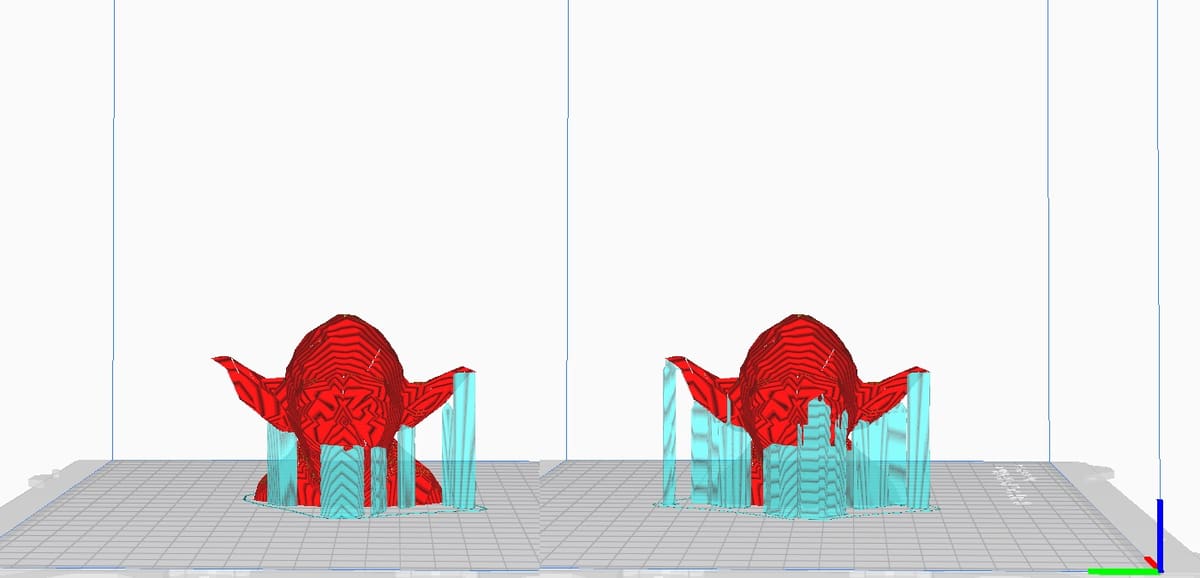
Tree
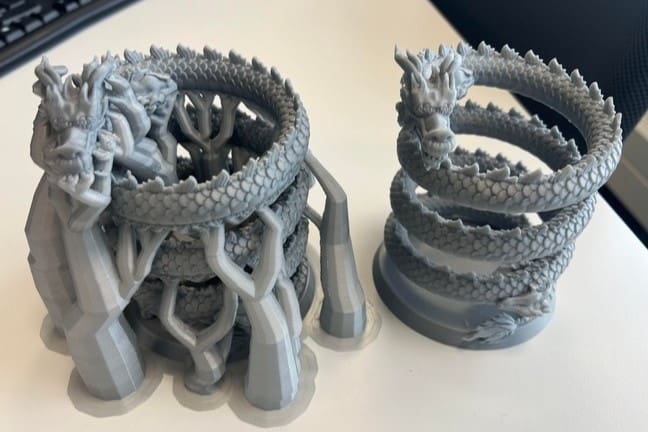
Tree support is an alternative to the typically straight and vertical option. To activate tree supports, select “Tree” in the Support Structure drop-down menu.
As the name implies, tree support is a hollow, tree-like structure that supports models with “branches”. These wind with varying angles, sizes, and paths determined by certain parameters within Cura.
Since the release of Cura 5.4, tree supports settings have been updated to use more smaller branches instead of fewer, larger ones. This cuts down on print time and the amount of filament used. Plus, the new supports break off easily.
The default settings are pretty reliable, but here are the main settings that can be adjusted:
- Maximum Branch Angle: Maximum branch split angle.
- Branch Diameter: Diameter of the thinnest branches in the support.
- Trunk Diameter: Diameter of the thickest branches in the support.
- Branch Diameter Angle: Increasing the angle increases the diameter of the branches’ bottom.
- Tip Diameter: Diameter of top of the tip of the branches in the support.
- Support Placement: Whether the supports will be printed from the build plate only or also from the model (everywhere).
- Branch Density: Increasing the branch density increases the contact area between the tips of the branches and the model, delivering better overhangs, but harder-to-remove supports.
These settings are fairly straightforward, just keep in mind the tradeoff between tree strength and removability.
Pattern
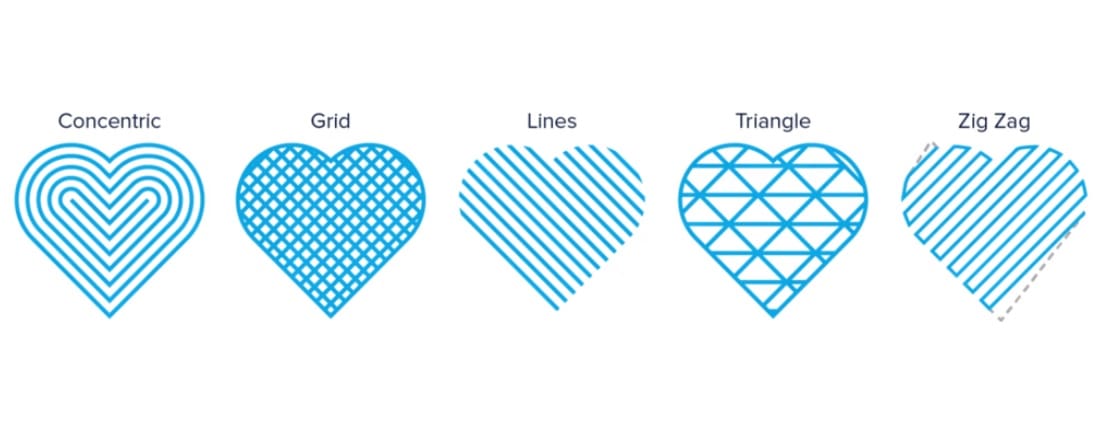
Cura offers various support structure patterns for normal support structures. Each exhibits a balance between strength and ease of removal, and some are more suitable for certain shapes. Here’s a list of the most used patterns:
Fast & Easy
- Zig Zag is the fastest to print and simplest to remove.
- Lines is the next step up. It still makes for great, easy-to-remove supports, but it’s slightly stronger than zig-zag and doesn’t usually pop off in one piece.
- Concentric is best for models with shapes similar to spheres or cylinders. It tends to be slightly stronger than zig-zag and lines.
- Cross is the last pattern falling under this category. While it takes longer than the previous patterns, it is still easy to flex and remove.
Note that, because of the constant geometry layer after layer of the above four patterns, they tend to be more vulnerable. Vibrations and skinny support structures, for example, can result in the nozzle not perfectly lining up with previous layers, which could cause problems in the long run.
Furthermore, if these patterns are caught even slightly by a traveling nozzle, they might detach from the surface below and collapse – sort of like an accordion. A pattern that consists of an interlocking geometry will provide a sturdier structure.
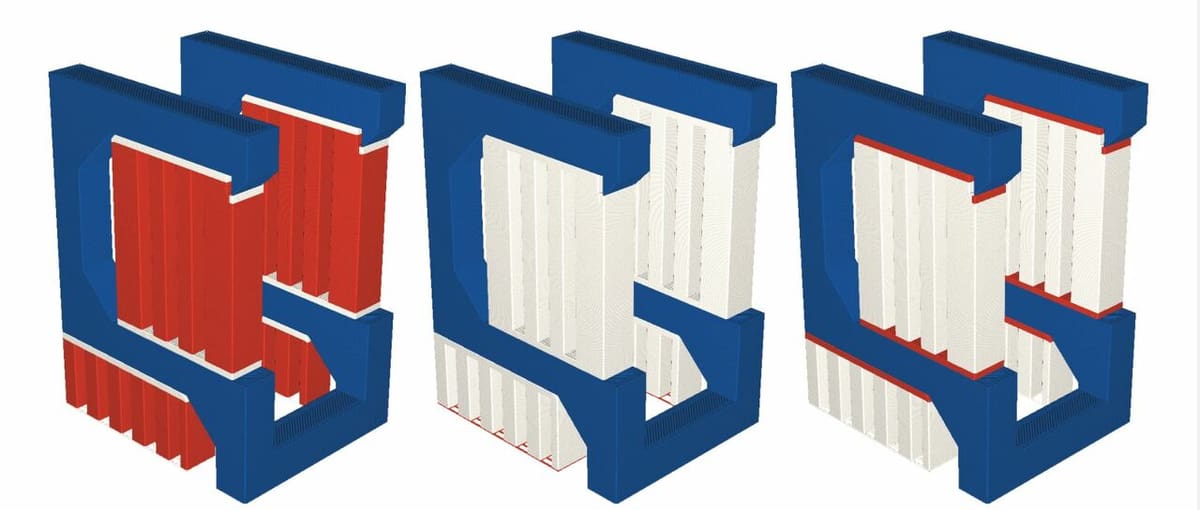
Strong
Both Grids and Triangles are great patterns to achieve sturdy supports. They’re more resilient against vibrations; however, they increase print time and generally exhibit more contact with the support areas. This may lead to more difficult post-processing. Gyroid presents a layer-changing geometry that provides a structure that does not create air pockets. This is attractive when using soluble materials for supports, allowing for faster dissolving times.
Density
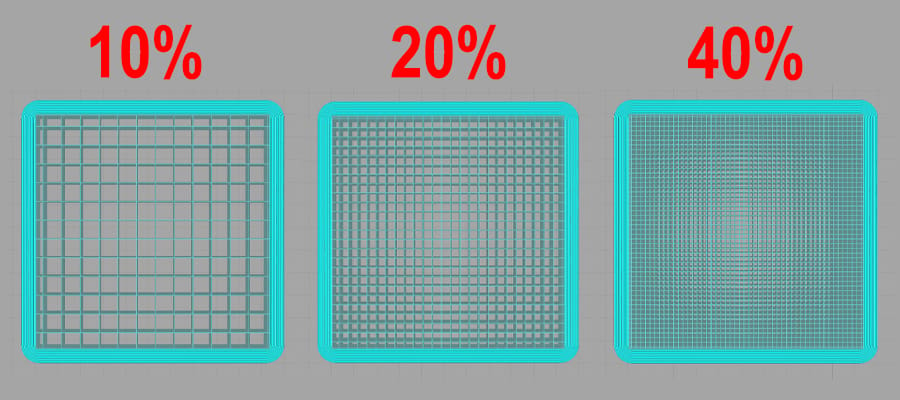
Support Density is similar to infill density in that you’re making a trade-off between strength, speed, and ease of removal.
High-density support structures are generally more rigid and can withstand vibrations. Also, the increased contact with overhangs makes high-density supports ideal for complex or detailed support areas. With high-density supports, expect more reliable support but also increased filament usage, longer print times, and more difficult post-processing.
Low-density supports are ideal for normal support areas that don’t require many contact points. They’re more likely to respond to vibrations while printing, but they reduce filament cost, print time, and difficulty of support removal.
20% support density is a great place to start, but adjust this value according to the needs of your model.
Infill Layer Thickness

To decrease support print time, you can print support infill layers at a lower resolution. Supports don’t have to look pretty, they just have to, well, support your main model. If you decide to print with large support layer heights, remember to make your Support Infill Layer Thickness an exact multiple of your model’s resolution. Otherwise, Cura will round it up to the next multiple, which may be more than you planned.
Gradual Support Infill Steps
This next setting determines the number of times Cura will decrease the support’s infill density the further it is from the support roof layer. This setting can help you save on support material and print time by only using high support density when you’re in contact with, or close to, the model you want to support.
You can also determine the gradual infill step height to set how close the density steps are.
Towers
Finally, for very small overhang areas, Cura allows you to print supports as towers that taper at the top in order to support areas smaller than your set minimum diameter. (Other support areas will use normal support structures.)
So that these support towers aren’t too weak, they have a larger diameter than the area that they support. You can always change this diameter in Cura. You can also adjust the angle at which your towers ascend to a point, making the towers flatter or pointier.

Location & Position
Next, these settings define where and when support structures will be created.
Placement
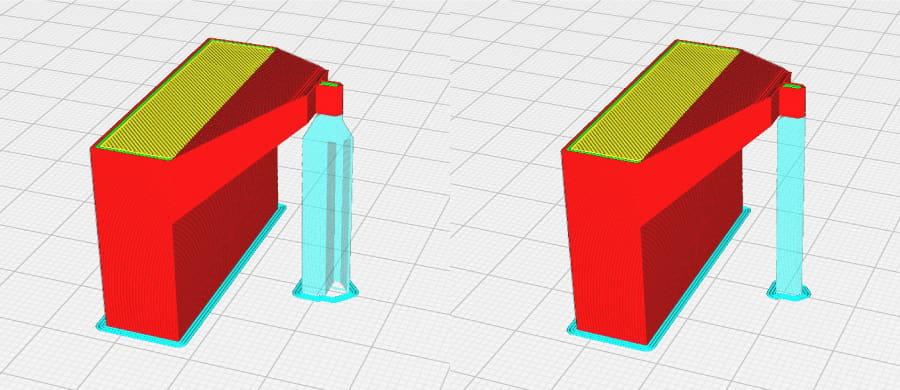
After you decide the type of support structure you want, the next setting is Support Placement. Here, you can select “Everywhere” or “Touching Buildplate”. As you can probably guess, this determines whether supports are printed everywhere (where needed) or only originating from the build plate.
In most cases, Touching Buildplate is best because building support everywhere can cause some nasty imperfections on your print’s surface. Just keep in mind that this option can mean slightly longer print times and use more filament.
Sometimes, however, you simply need supports everywhere. This is the case with particularly complex models that would be impossible to print without supporting structures.
Overhang Angle
With this setting, you can specify the overhang angle beyond which you want to generate supports. As mentioned earlier, the default angle is typically 45°. However, this may be different for your specific machine. Play around with an overhang test to determine how well your machine handles different angles.
The Support Overhang Angle might also differ per print. If you only want to support bridges in a specific model, you can select 90°. If you want support for every overhang, select 0°.
Minimum Support Area
This setting simply defines the minimum area to support, filtering out places where you don’t want support. This setting can save you unnecessary material consumption and print time.
Additions
These are additional features or material that’s added or created for the support structures.
Support Brim
Just like model brims, support brims are concentric lines of material printed on the inside of your support structures to improve build plate adhesion on your initial layer. Enabling them in Cura will improve the reliability of support structures, making sure the supports don’t pop off the build plate or fall over.
Support brims are perfect if you have adhesion issues or are using support structures with a small base. Therefore, increase the support brim settings for a stronger build plate grip.
Join Distance
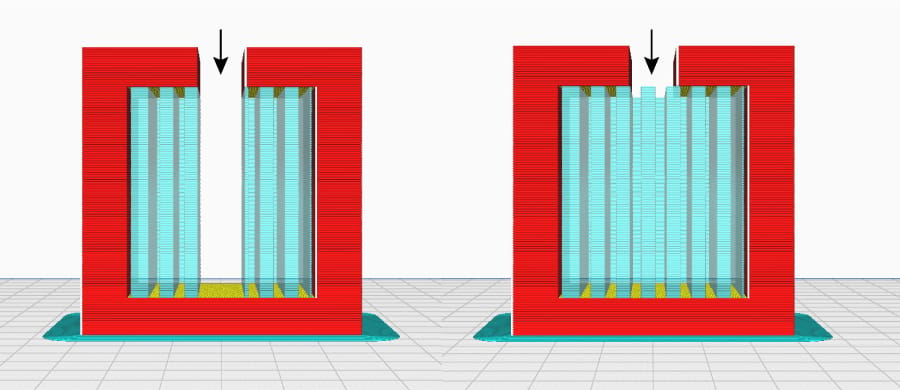
Support Join Distance adjusts the maximum horizontal distance between support structures. When two support structures are closer together than this value, they will be printed as one structure. The higher the value for this distance, the quicker supports will merge. If support structures are especially thin, a higher join distance can help to provide stronger support for the model.
If you set this value too high, however, support structures may become dense and difficult to remove.
Support Interface
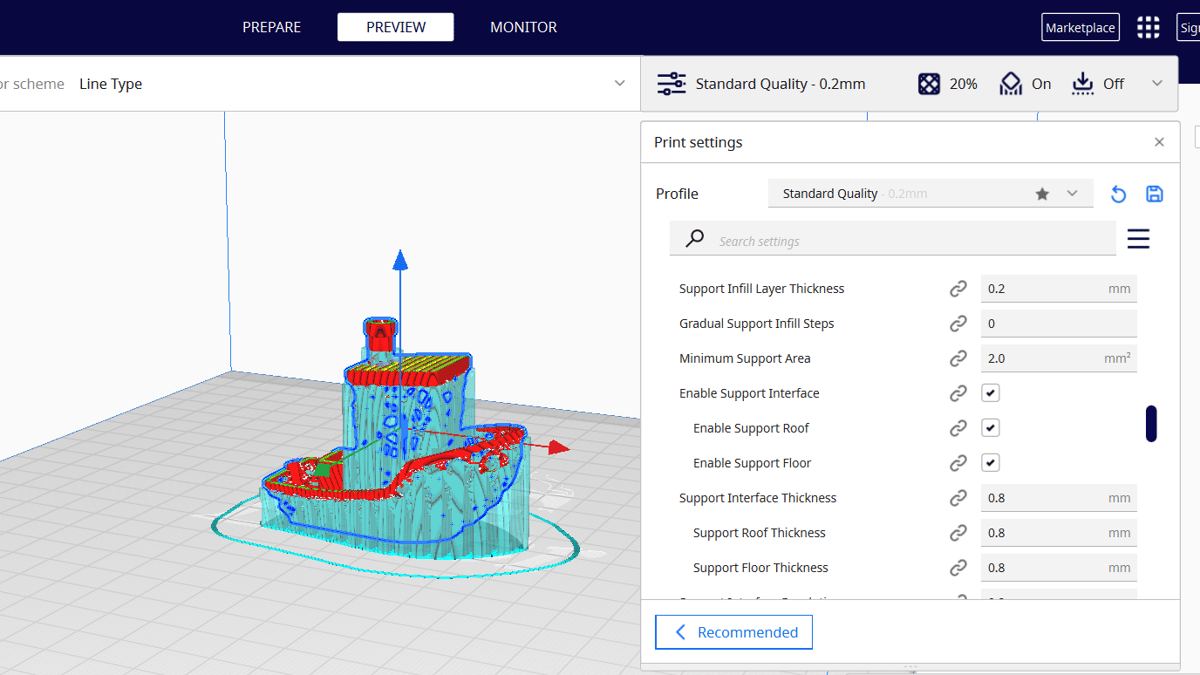
If you need a smoother connection between your model and support structures, you can enable Support Interface. This is a dense skin on the roof and floor of your support that provides a tight contact surface with the model. When enabled, Support Interface makes support removal more difficult, so be aware of the tradeoff.
Under this setting within Cura, you can adjust support interface thickness, resolution, density, pattern, area, horizontal expansion, and line directions.
Sizing
Last but definitely not least, the following settings are related to the overall size of the support structures (and can mean enlarging or reducing them, for example).
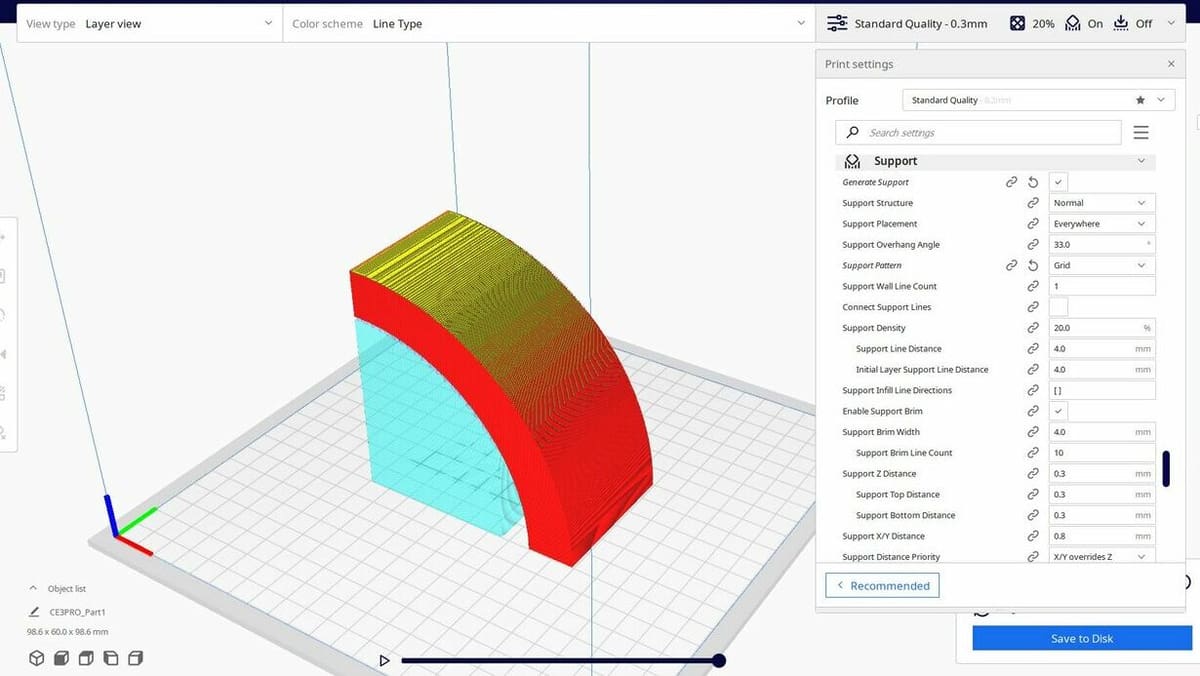
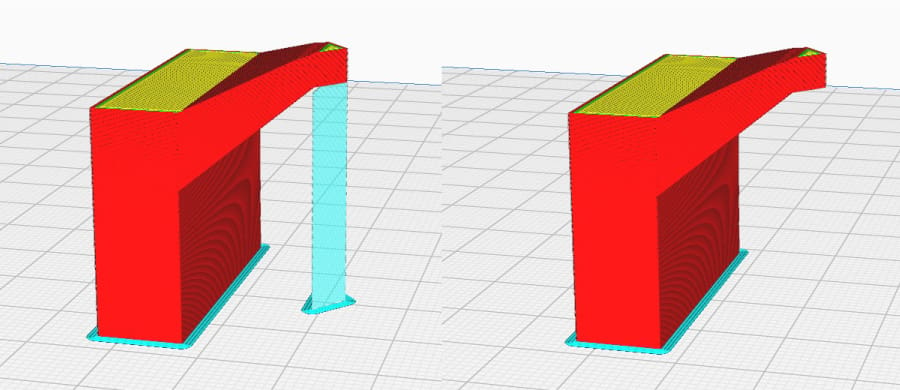
Z Distance
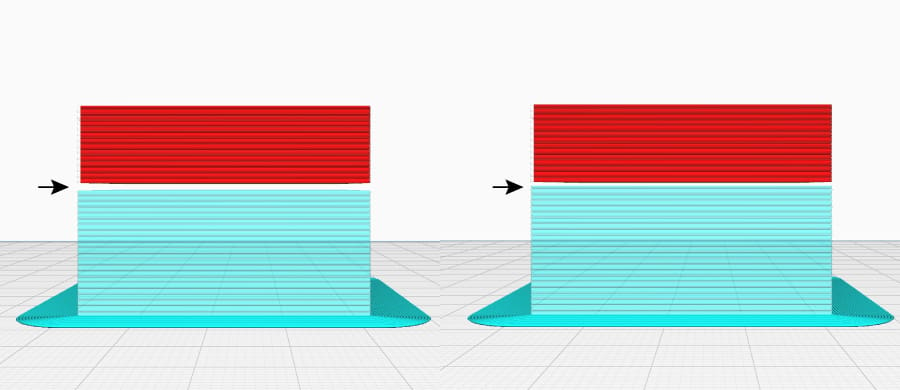
This important setting defines the distance from the model to the top and bottom of the support. This setting has two sections: Top Distance and Bottom Distance.
A high value for these distances creates a bigger gap between the model and support, meaning easier post-processing. It creates a smoother model surface due to the reduced number of contact points. A low value is useful when you’re trying to support complex overhangs that require high detail. However, a low value makes supports harder to remove.
As always, play around with some distances to find the perfect value for your printer. Just make sure that your Z distance is a multiple of your layer height so that your printer can accurately achieve that distance.
X/Y Distance
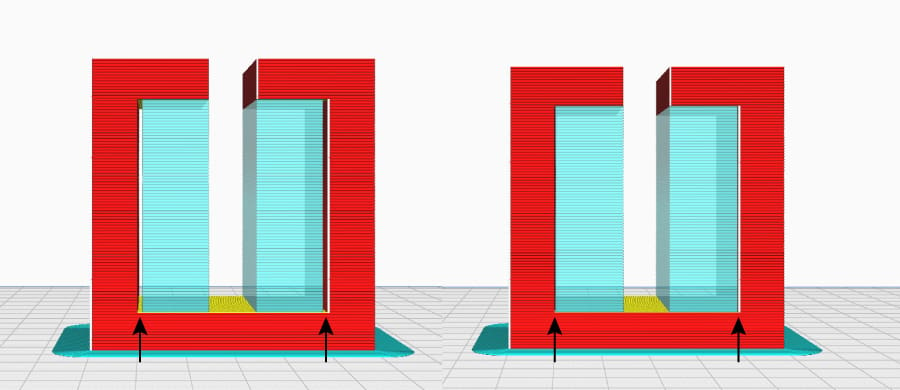
X/Y distance is similar to Z distance. It adjusts the horizontal distance between a model and its support. Again, the further the distance, the easier the support removal process is. The shorter the distance, the stronger the support structure is.
Typically, a larger X/Y distance will mean better surface finishes on vertical sections. If vertical parts in your prints are roughed up by the adjacent supports, try increasing the X/Y distance.
A lower X/Y distance will lead to better support for overhangs, namely those next to vertical surfaces (around the “armpits”). However, they may cause surface imperfections to vertical surfaces and can make post-processing a pain.
Distance Priority
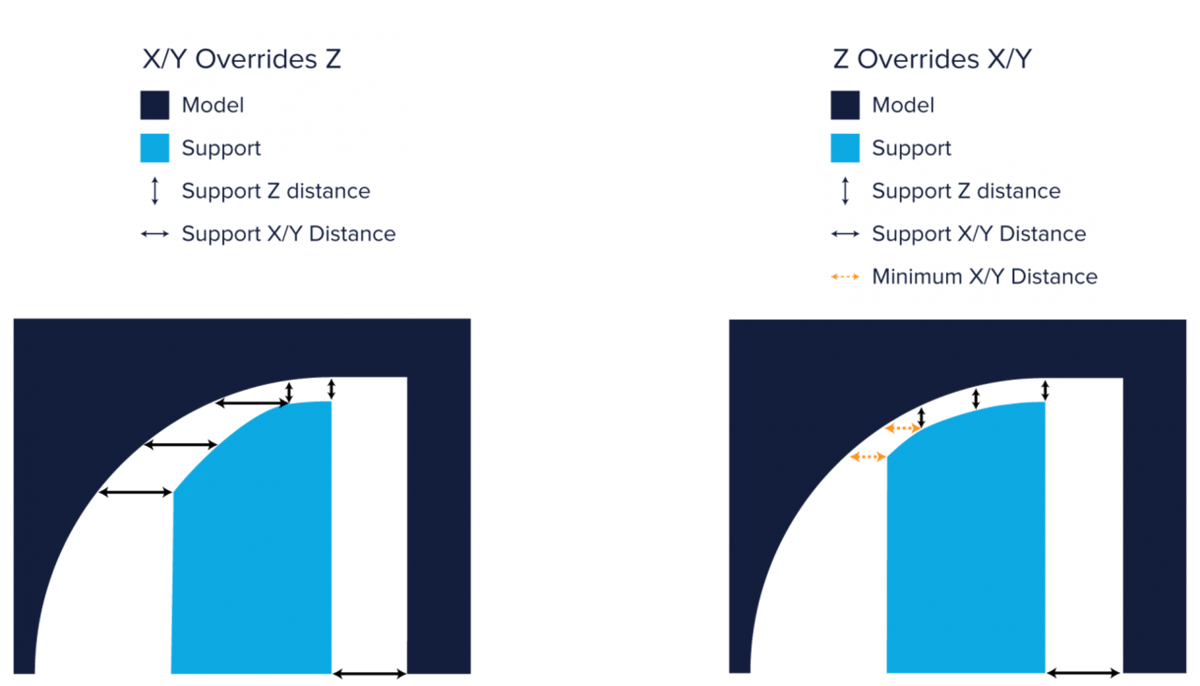
Depending on the type of overhang you’re attempting to print, the Z distance may contradict the X/Y distance. In Cura, however, you can assign priorities to these distances, so that, in case of contradiction, the most important distance is maintained.
Typically, it’s best to have Z override X/Y, because the Z distance is what really holds up the model. However, you can change this override setting if a certain model requires it.
You can also set a minimum X/Y distance. Then, even when the Z distance takes priority, a minimum X/Y distance is still maintained.
Stair Step Height
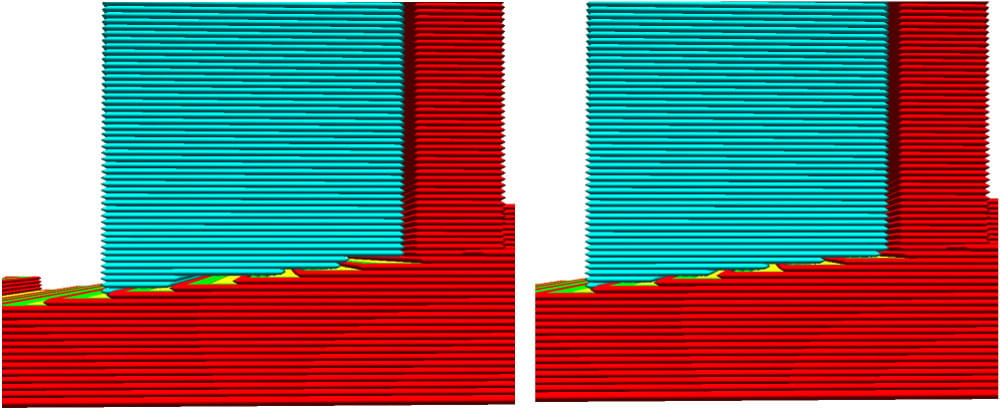
If you’ve selected “Everywhere” for support placement, stair step height is an important parameter to consider. This setting determines how closely the support material follows the contours of your model. The lower the stair step height, the closer and smoother the connection, making support interface surfaces smoother. The higher the stair step height, the rougher the connection, making support removal a breeze.
Horizontal Expansion
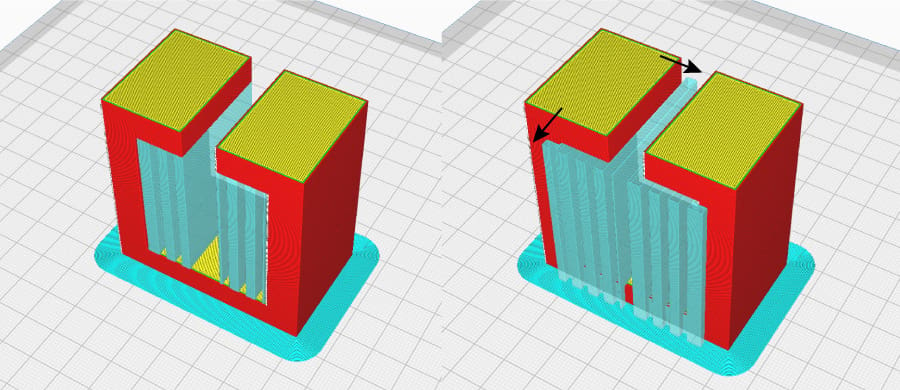
When areas requiring support are very thin, it’s difficult for your printer to create sturdy structures to support such a small area. This setting allows you to set a horizontal expansion so that even small support areas are adequately supported.
Inputting a large value for this setting will always result in sturdier supports, but this setting does require more filament.
License: The text of "How to Optimize Cura Support Settings" by All3DP is licensed under a Creative Commons Attribution 4.0 International License.